See through 3d printing
Guide to Transparent 3D Printing
Clear materials, such as glass or acrylic, have a wide variety of applications in consumer products, industrial uses, healthcare, and more. However, prototyping or producing low volumes of clear parts can be expensive and inefficient with traditional methods, which raises the question: can you 3D print transparent parts? The answer is yes, with the right technology and materials.
Stereolithography (SLA) 3D printing can create transparent objects that, with some post-processing, can be made optically clear. Formlabs' latest SLA 3D printers, the compact Form 3+ and the large format Form 3L, take clarity one step further by using a flexible resin tank that reduces peel forces, resulting in clearer parts with smooth surface finish.
There are multiple materials for producing translucent and transparent 3D printed parts:
- Clear Resin is a rigid material that polishes to near optical transparency, making it ideal for fluidics, moldmaking, optics, lighting, showcasing internal features, and any parts requiring translucency.
- BioMed Clear Resin is a rigid, transparent material for biocompatible applications requiring long-term skin or mucosal membrane contact.
- Elastic 50A Resin is a soft and stretchy material that is semi-translucent. It is ideal for prototyping parts normally produced with silicone.
- Flexible 80A Resin is a more stiff soft-touch material that is also semi-translucent. It is ideal for simulating the flexibility of rubber or TPU.
In this guide, we walk you through various finishing methods to create transparent 3D printed parts for a variety of applications, from optics to light pipes to fluidics. Methods range from quick solutions for adequate transparency, to niche techniques for creating optically clear parts.
Clear and transparent 3D prints are ideal for creating clear prototype parts, showing internal cavities and details, housing LEDs, creating windows, or printing see though anatomical models and medical devices. Formlabs and our customers have used Clear Resin to create a completely optically clear lens for a fully 3D printed camera, tiles for a Fresnel lens installation in Times Square, light pipes, prisms, millifluidic devices, and more.
Formlabs applications engineer Amos Dudley designed and 3D printed a lens for a fully 3D printed camera.
Sample part
Curious to see how transparent 3D prints SLA 3D printing is capable of? We’ll ship a free clear 3D printed part to your office.
Request a Free Sample Part
Yes, but with caveats. Polymethylmethacrylate (PMMA), commonly known as acrylic, is a transparent thermoplastic that is commonly used as a more durable alternative to glass. While 3D printing acrylic is possible with fused deposition modeling (FDM) 3D printers, it's not really user-friendly as the material itself is toxic and prone to warping, while the 3D printed parts are only semi-translucent due to the lower resolution of FDM printers.
For a 3D printing acrylic-like fully transparent parts, we recommend printing on an SLA 3D printer with Clear Resin and then post-processing the 3D printed parts for full transparency using one of the methods mentioned in this article.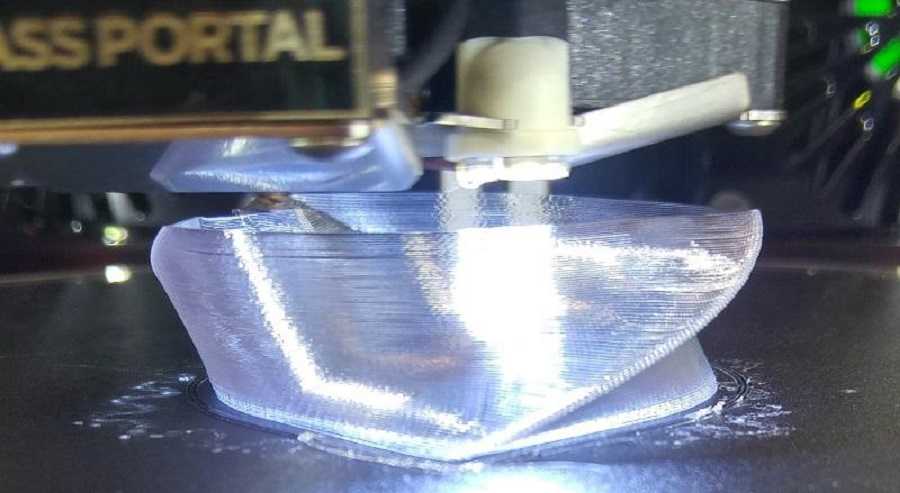 Using an acrylic spray is one of the methods to ensure clarity.
We’ve tested several techniques for post-processing parts 3D printed in Clear Resin. In this post, we’ll cover manual sanding, clear coating, and resin dipping. Each finishing option requires varying levels of effort, depending on the degree of transparency and surface finish your part requires.
Applications: Manual sanding and polishing can be effective for simple shapes with few details, but are less suited to finishing complex models. It is very difficult to reach total optical transparency with this method.
You’ll have to sand to extremely fine grits to manually finish a transparent part, but with some effort, you can sand and polish parts to be as clear as a magnifying glass. It is, however, very challenging to completely eliminate all layer lines via manual finishing—you may notice micro-scratches when holding the part at a shallow angle to the light.
Instructions: Use a range of incremental sandpaper grits to smooth your surface, then polish the part with acrylic cleaner and a microfiber cloth.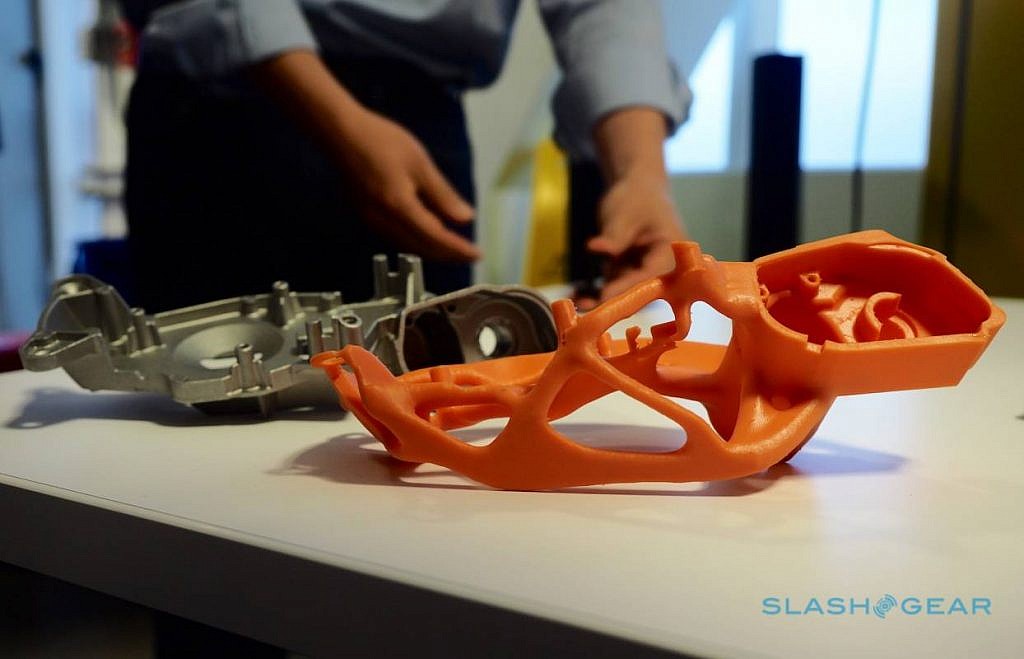
At around 3000 grit, transparent 3D printed parts become glossy and very smooth to the touch. By 12000 grit, they are reflective. Try using a range of sandpaper and micromesh pads with grits from 400 to 12000, in increments of 200, slowly and carefully to clean the parts between grit levels and to eliminate scratches from the previous level before moving on to the next.
Our support site offers a simple visual step-by-step guide for manual sanding, including an optional finish with acrylic spray.
Tip: If you only need semi-transparency, simply use mineral oil to create an even finish and hide any light spots on your part.
We’ve tested a variety of methods of polishing clear 3D prints, from hand sanding and spray coating to resin dipping.
Applications: Spray coating is an easy, fast way to improve the clarity of parts without much reduction in detail. This method is effective for all kinds of models, as it's able to coat complex details that may be hard to reach with regular sanding and polishing.
Clear coating alone helps to conceal layer lines and protect parts from UV exposure, which can cause yellowing and unintended post-curing. If you’re looking for a smooth, glass-like surface finish, perform the manual sanding and polishing technique prior to coating; the more sanding that comes before clear coating, the better the clarity. This additional step is great for post-processing prototypes that look like fully transparent plastic, e.g., packaging, bottles, and microfluidics.
Instructions: There are several options for clear coating 3D prints, from inexpensive sprays to products that require a dedicated room and tools.
- General purpose clear coat spray paints: There is a wide variety of high quality and affordable sprays. We recommend using a 2K clear coat.
- Automotive sprays: High-solids acrylic urethane clearcoats offer very high gloss and are designed for air-dry and baking conditions, but require a spray gun and dedicated space for spraying, as well as a base coat.

For spray coating, start with a clean, dry part already washed in isopropyl alcohol (IPA). Do not post-cure the part ahead of spraying, as this can cause yellowing. Let the part air dry. Once it’s completely dry, apply two to three spray coats in a dust-free environment.
Tip: For a fee, auto body shops may do the coating for you with a spray like Lesonal Universal Clear. In most cases, these shops will use a light solvent, like naptha to clean and prepare the part’s surface prior to painting.
For an installation in Times Square, Window to the Heart, the Formlabs and Aranda/Lasch teams worked with an auto body shop to spray coat each tile in Lesonal Universal Clear.
Applications: This method is best for when you need very transparent parts, and only works on flat or near-flat surfaces, such as a lens or a window into the interior of a part.
Resin dipping results in parts that are extremely smooth, with clear and sharp surface reflections.
This technique can be used to create an even smoother finish for parts printed in other SLA materials, although it can reduce detail.
Instructions: Apply Clear Resin to the part with drops from a syringe, or by dipping the part as as desired. The viscous resin will fill layers and scratches on the part, forming a completely smooth surface.
The layer of resin should be as thin as possible, while still eliminating layer lines. Pull off any bubbles with a syringe. Completely post-cure the part using the appropriate settings, then repeat the process for the other side, both dipping and post-curing.
Three stages of resin-dipped lenses, with the final lens on the left.
Note: The dipping process alters focal length slightly for lenses. For our 3D printed camera lens, Formlabs applications engineer Amos Dudley designed and printed a lens testing device.
With the Form 3+ SLA 3D printer, you can create clear and fully transparent 3D prints affordably and with minimal post-processing.
Download our white paper for a detailed overview of SLA ecosystems and the step-by-step 3D printing workflow.
Curious to see the quality and clarity firsthand? Request a free transparent 3D printed sample part.
Request a Sample Printed in Clear Resin
How to 3D Print Clear Plastic & Transparent Objects – 3D Printerly
Many people wonder whether you can actually 3D print clear/transparent objects that you can see through. I decided to write an article about this to answer this in a little detail, so you have a better understanding.
Keep on reading through this article for useful information about this topic, as well as other tips you can make use of.
Can You 3D Print a Clear Object?
Yes, you can 3D print clear objects with FDM filament printing and resin SLA printing. There are clear filaments such as PETG or natural PLA, as well as clear and transparent resins that can create see-through 3D prints. You need to post-process the exterior of the print so it is very smooth, without scratches.
There are different levels of transparency that you can achieve, with most people only settling for translucent, or semi-transparent 3D prints.
With the right technique and amount of work, you can produce 3D prints that are very see-through, mainly through post-processing such as sanding, polishing, or resin dipping.
Many people are okay with clear 3D prints that are somewhat see-through which still looks cool, but you can achieve a great degree of transparency or semi-transparency with the help of sanding and coating.
There are different reasons why someone might want to 3D print a transparent object, such as a decorative piece for your home like a vase for flowers, or even a phone case that shows the mobile off.
Transparency and the ability to see through the objects is controlled by the way light passes through them. If light can easily pass through the object without any disturbance or being redirected, the object will be seen as transparent.
Basically, the way the light is reflected needs to be as straight as possible, so if there are scratches and bumps, the light will change directions, meaning it will be translucent (semi-transparent) rather than transparent as you want it.
Well, the first thing you’ll need 3D print a clear object is of course some good quality clear filament.
Then you’ll want to optimize your print settings to account for getting the best results in seeing through the filament.
Finally, you want to do some serious post-processing to get the most smooth and clear outer surface finish that you can get.
Let’s get into how the process looks with both filament 3D printing and resin 3D printing.
How Do You Make a Filament (FDM) 3D Print Clear or Transparent?
There are a few different methods that users have produced transparent and clear 3D prints using a filament 3D printer.
To make filament 3D prints clear and transparent, you can use a filament which can be smoothed with a solvent such as ABS and acetone, or PolySmooth filament with isopropyl alcohol. Using a large layer height is important, as well as doing post-processing like sanding and spraying a clear coat.
Using PolySmooth Filament with Isopropyl Alcohol
One method to do this is by using a specialized filament called the PolySmooth by PolyMaker, then use a high strength of isopropyl alcohol to gradually smooth and dissolve the outer surface, leading to a very clear 3D print.
The 3D Print General made a great video on the process of how he found one 3D printer user do this method successfully, which he then tried himself and got great results.
You can see how clear and transparent he got the 3D prints, though the method does take some time to get it to a good level.
He mentions that using a larger layer height works best for producing these transparent 3D prints, where 0.5mm was a great balance of being able to print at relatively steep angles while still being a good-sized layer height.
The 0.5mm layer height was coupled with a 0.8mm nozzle.
He makes sure to use vase mode so that there is only 1 wall that gets 3D printed, leading to less possible imperfections that can negatively affect the light passing through straight and direct, which is needed for that transparency.
You may also choose to do some sanding with some fine grit sandpaper, around the 300 grit mark to smoothen out those layer lines, but it’s not necessary since the alcohol is acting as a solvent anyway.
A mixture of the PolySmooth filament, and spraying isopropyl alcohol is likely to produce some really clear and transparent 3D prints.
3D Printing With Good Settings & Post Processing
3D printing transparent objects is easiest to do with flat objects because they are much easier to post-process. With curved objects or 3D prints with more details, it’s hard to sand and smooth those crevices.
If you want to 3D print a clear object, you’ll be better off with a flat block shape.
FennecLabs have a great article which details their tried and tested method of creating transparent 3D prints, ranging from clear lenses to “glass block” looking objects where you can see another model within.
They recommend that you use the following settings:
- 100% infill
- Maximize the temperature in the filament manufacturer’s range
- Keep your flow rate above 100%, somewhere around the 110% mark
- Disable your cooling fans
- Reduce your printing speed by around half of what your normal speed is – around 25mm/s
On top of getting the 3D print right in terms of settings, you also want to post-process the print to the best ability. If you want to 3D print transparent objects rather than translucent, using a range of low and high sandpaper grits is important.
I’d recommend getting a set such as the Miady 120 to 3,000 Assorted Grit Sandpaper from Amazon which provides 36 9″ x 3.6″ sheets.
You want to start off with the low grit sandpaper to get rid of the deeper scratches, then slow work your way up to higher grits as the surfaces get smoother.
It’s a good idea to dry, as well as wet sand as you do this to get the best results, so you can really get that clean, polished look on the outer model. This gives you a better opportunity to see through the 3D print clearer.
Once you have used a variety of sandpapers for your print, you can polish your model with a small soft piece of cloth along with polishing paste. Another option is to spray your clear model with a clear coating.
Do keep this fact in mind that the surface can easily be damaged if sprayed, so make sure that the coat of spray has been dried up completely before moving forward.
How Do You Make a Resin 3D Print Clear or Transparent?
To make a clear resin 3D print, you can use the resin dipping technique after your 3D print comes off the build plate. Rather than wash & cure your 3D print, you want to have a thin, smooth coat of clear resin on the outer surface. After curing, it provides a smooth surface with little scratches or layer lines.
When you 3D print normal transparent resin, although the layer lines are really small (10-100 microns), the outer surface is still rough enough to not provide a direct light to the other side. This leads to a translucent resin 3D print rather than a transparent one.
We want to get rid of all the layer lines and scratches on the 3D print to be able to see through.
Using the resin dipping technique is really effective to do this, as we can carefully apply a thin coat of resin and cure it as normal.
Some people choose to use the sanding post-processing method, similar to filament printing which can work really well, although not for complex shapes.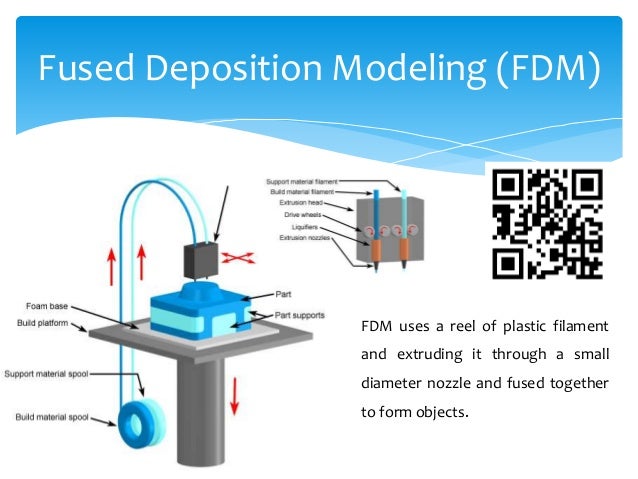 If you have a flat shape or one that can be sanded fairly easily, this should be okay.
Another method as previously mentioned is by spraying a clear coat after 3D printing the object.
The Rust-Oleum Clear Painter’s Touch 2X Ultra Cover Can from Amazon is a product that many 3D printers use as a base for their 3D prints. Many users have used it as a way to provide a smooth surface without having to sand.
This smooth surface is what works well for creating that improved transparency. It’s quick-drying, even-spraying, and perfect for giving your 3D prints a more professional finish.
It’s said that you avoid washing clear resin 3D prints with isopropyl alcohol because it is known to lead to slightly cloudy translucent 3D prints, though as long as your post-processing is done well, it should be okay.
An ultrasonic cleaner is a great solution for cleaning clear resin 3D prints, along with a good detergent. Check out my article – 6 Best Ultrasonic Cleaner for Your Resin 3D Prints for cleaning your prints like a pro.
You shouldn’t over cure/over exposure your clear resin 3D prints because it can lead to yellowing, as well as curing it for too long after washing it.
Some people have recommended submerging the clear 3D print in a clear glass of water, then curing it after you have cleaned and dried it. You can check out my article on How to Cure Resin 3D Prints in Water.
Another user recommends using Rust-Oleum Polyurethane Gloss Finish Spray from Amazon. It’s described as a crystal clear finish that never yellows.
You also want to remember to either hollow your resin 3D print or have 100% infill because anything that doesn’t provide a clear direction of light through the object is going to contribute to less transparency.
Best Transparent Filament for 3D Printing Clear Objects
You can find transparent filament for 3D printing in almost all types of printing materials. PLA, PETG, and ABS are the most common printing material but when it comes to printing transparent models you need to choose the best one.
Users’ feedback and experiences say that ABS and PETG can get better and almost the same results in terms of transparency while PLA usually results in foggy prints and may be hard to print as well if you are not much experienced.
It may be difficult for beginners to print clear objects with ABS but you can get the job done using PLA & PETG. Some of the best transparent filament for 3D printing clear objects includes:
GEEETECH Clear PLA Filament
This is a really popular filament which have many users praising its quality and features. You’re getting an easy-to-use, clog-free and bubble-free filament that works with all your standard 1.75mm FDM 3D printers.
You have a 100% satisfaction guarantee as well. Many users mention how much they like the level of transparency they get in their 3D prints even without post-processing, but to get that high level, you’ll need to follow the right steps.
You can find a spool of GEEETECH Clear PLA Filament from Amazon today.
Octave Transparent ABS Filament
This is a lesser known brand of filament, but still looks like it performs really well in terms of producing transparent 3D prints. It’s a clear ABS filament of high quality that users mention produce amazing 3D printing results.
The tolerances are pretty tight and it has a fairly wide printing temperature range. Some users said how it doesn’t have the typical smell of ABS compared to filaments like HATCHBOX ABS, which is great.
It is known to have a pretty nice flow through the nozzle, as well as having great layer adhesion.
A user of this filament said it was his first time 3D printing with ABS, and a 30-hour 3D print later, described it as the best quality they have achieved so far. They also have a heated build chamber at a temperature of around 55°C.
You can get some Octave Transparent ABS Filament from Amazon.
OVERTURE Clear PETG Filament with Build Surface
OVERTURE is a very popular brand of filament that many thousands of users have grown to love, especially their transparent PETG.
They guarantee a bubble-free and clog-free experience.
It’s important for your filament to be dry so they give each filament a 24-hour drying process before they package it up in their vacuum aluminum foil packaging along with desiccants to absorb moisture.
With the proper print settings and post-processing, you’ll be able to get some pretty great transparent 3D prints with this filament.
Get yourself a spool of OVERTURE Clear PETG from Amazon.
Best Transparent Resin for 3D Printing Clear Objects
Anycubic Clear Plant-Based Resin
Anycubic Plant-Based Resin is one of my favorite resins out there, and their clear color works great. It has a rating of 4.6/5.0 on Amazon at time of writing and has countless positive reviews of just how well it produces high quality resin 3D prints.
You don’t get that high level of shrinkage in this resin. There is a shorter curing time compared to other resins, as well as great precision and smoothness.
It’s environmentally-friendly since it uses soybean oil as the raw material, also leading to a low odor.
Many users have created flawless 3D prints without needing to do all sorts of tweaking a trial and error with the settings. This one works really well right out of the box.
With the resin dipping method, as well as the post-processing method with sanding, you can get some awesome transparent 3D prints.
Elegoo ABS-Like Translucent Resin
This Elegoo ABS-Like Resin is probably the most popular brand of resin out there, having around 2,000 customer reviews and a rating of 4.7/5.0 at time of writing.
Similar to the Anycubic resin, this one has a shorter curing time than usual so you can save time on your 3D prints. It has high precision, low shrinkage, fast curing and great stability.
There are many features that you’ll love when you get a bottle of this resin for yourself for your transparent 3D prints.
Siraya Tech Simple Clear Resin
Siraya Tech Simply Clear Resin is a great product for you to create transparent resin 3D prints.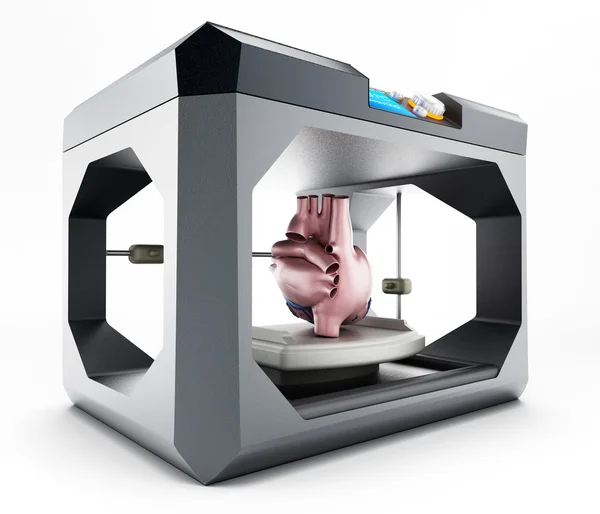 One of the main highlights of this is how easy it is to clean and handle after printing.
Usually, resin manufacturers recommend cleaning with high strength alcohol like 70%+, but this one can be easily cleaned with 15% alcohol. You also get a resin that is fast to print and has a low smell.
On top of this, it has high strength so it can hold up to more force than other resin out there.
As many users have described, once you use a coat of clear gloss varnish after you cure it, you can create some lovely crystal clear parts.
Another user mentioned how he’s tried four different brands of clear resin and none of them were as easy to handle as this one.
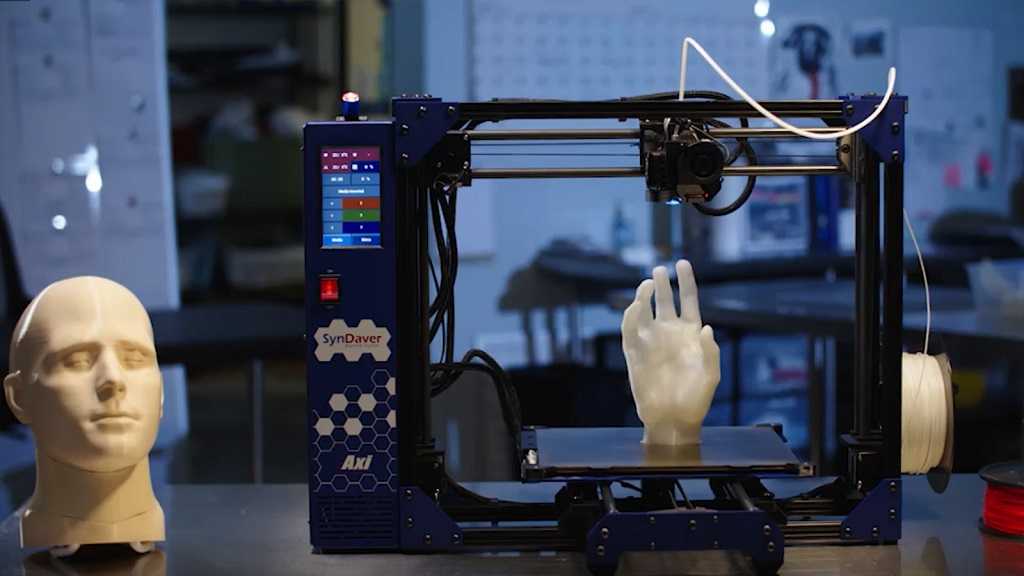
Technological process: 3D printing | Sobaka.ru
We visited a laboratory that specializes in teaching 3D printing and found out what else can be translated from the virtual world into the real and three-dimensional.
The culture of 3D printing began to emerge in fablabs, personal digital production laboratories in the style of the Soviet Young Technician club with only high-tech equipment. The world's first FabLab appeared at the end of the 20th century in Massachusetts. In St. Petersburg, they started working in 2013 - in the Polytech and the cluster on Medikov, 5. Several commercial firms, selling printers and printing to order, are trying to popularize this direction. The Garage Lab we visited specializes in teaching 3D printing technology. nine0007
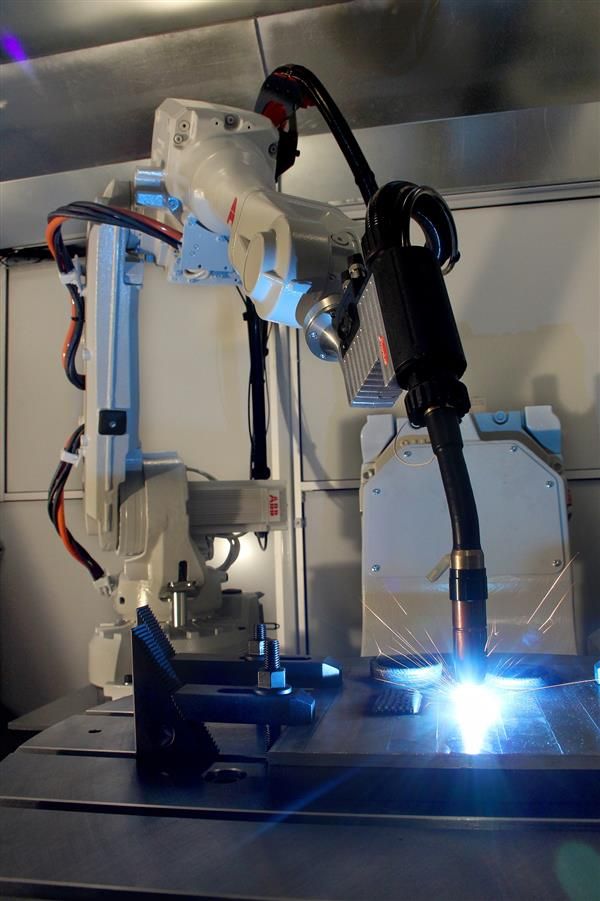
There are several 3D printing technologies, the most affordable of which are plastic extrusion and laser sintering. So, in the case of laser 3D printing, the printer uses a liquid photopolymer, which is illuminated by a special ultraviolet lamp. Then it all turns into a solid material. Portable 3D printers most often work with plastic. Although models using titanium, sugar and even chocolate have already been created in Europe and America.
The most popular and affordable technology - FDM (plastic extrusion) is quite simple. A special device - an extruder - melts plastic, which is then placed in thin layers, no more than 0. 3 mm thick. nine0007
The whole process looks like this: first, in any 3D editor (for example, Thinkercad), a 3D model of the object is created. If you're not artistic, popular models can be found on stock sites like Thingiverse.com. The famous torrent tracker The Pirate bay has also opened a section for storing models for printing on a 3D printer called Physibles. There is also 3Dmarket - the first Russian catalog of 3D models for home 3D printers. All laid out samples are ready for printing.
Then the model is sent to the 3D printer via a USB cable or a simple memory card. After that, the object is printed by the printer in layers, superimposing them one on top of the other. The whole process takes from half an hour to 12 hours, depending on the required dimensions. nine0007
Theoretically, with the help of a 3D printer, you can print any object that is in the house: from a tablespoon to a floor rug with a complex texture. 3D printing is also good for industry: it can be used to “cast” body parts that are difficult or time-consuming to obtain by other methods, such as milling.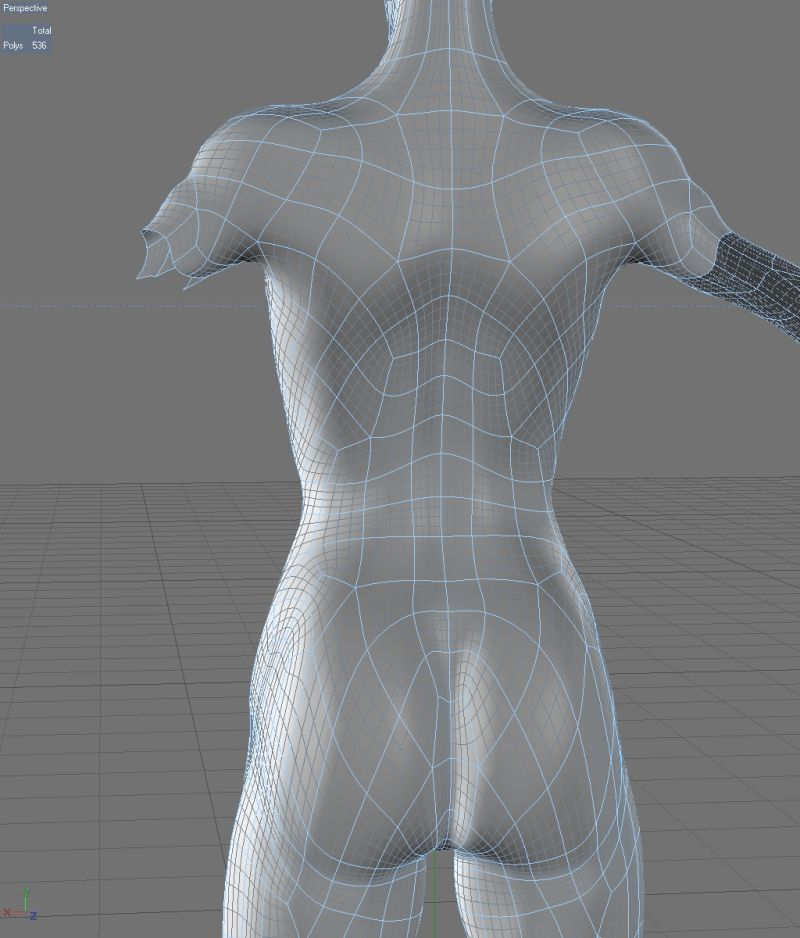 Three-dimensional plastic printing, paradoxically, can become a new word in budget medicine. In November, Youtube literally “blew up” a video about Paul McCarthy from Massachusetts, who made an inexpensive but functional prosthesis for his 12-year-old son Leon, who was born without fingers on one of his hands, using a 3D printer. The prosthesis is attached to the forearm at the hand, the movement of the wrist controls the fingers: they can be squeezed and unclenched. The cost of plastic for printing one prosthesis is about 10 dollars, the smile of the boy in the video, as usual, is priceless. nine0007
Follow our news on Telegram
Author:
Alexandra Kozlova,
Heading:
Technological process
Questions and answers about 3D printers and 3D printing
This section contains all the most frequently asked questions and answers about 3D printers and 3D printing. If you did not find the answer to your question in this section or using the portal search, ask it on blogs and get answers from community members: /questions/
- 1 FAQ
- 1.1 Bought a 3D printer - what's next?
- 1.2 3D printer does not see/print STL file
- 1.3 Which program is used to prepare an STL file for printing?
- 1.4 What is a 3D printer and how does it work?
- 1.5 What is the kinematics of a 3D printer?
- 1.6 What are stepper motors and drivers?
- 1.7 What is 3D printer firmware and where is it uploaded? nine0040
- 2 Defects and 3D printing questions
- 2.1 Related Articles
- 2.2 PLA does not choke and the extruder clicks
- 2.3 Waves appear on the walls when printed.
- 2.4 At the start of printing, the table/carriage begins to knock against the wall.

- 3 Questions about adhesion (sticking the model to the table)
- 3.1 Plastic does not stick to the table. nine0039 3.2 The part is very stuck during printing and cannot be removed from the table.
- 3.3 Bends corners when printing.
- 4 Consumable questions
- 4.1 How to print with PLA
- 4.2 How to print with ABS
- 4.3 Plastic has uneven diameter
- 4.4 Foreign inclusions are observed in the plastic.
- 4.5 Plastic tangle occurs when printing
- 4.6 Is ABS plastic harmful?
- 4.7 Why does the bar feed stop after several layers when printing with soft plastics (Flex)?
- 5 3D printer assembly and calibration questions
- 5.1 Axle moves in the wrong direction
- 5.2 When replacing stepper motor drivers from A4988 to DRV8825, do I need to change something in the firmware?
- 5.
 3 After installing the TMC2100/2208/2130, layer shifts occur during printing. nine0040
 - 6 Firmware questions for 3D printer
- 6.1 Can't understand Marlin
- 7 Preparing the model for printing. Slicers
- 7.1 CURA program - how to use it
- 7.2 KISSlicer - how to use it
- 7.3 Repetier-Host program - how to use it
- 7.4 Simplify3D - how to use it
- 7.5 Slic3r - how to use it
- 7.6 Craftware - how to use it
- 8 Questions about G-CODE
- 8.1 What is G-CODE?
- 9 3Dtoday Help
- 9.1 how to use the portal and what is there?
- 9.2 Where can I read information about 3D printers and 3D printing?
- 10 Search for questions and answers on the portal nine0056
FAQ
Bought a 3D printer - what's next?
answer: read the article - For the smallest: how to start printing
3D printer does not see / print STL file
answer: almost all 3D printers should not see or print STL files (although there are exceptions) as this file type contains model geometry in the form of a mesh, obtained as a result of polygonal modeling or export from CAD programs.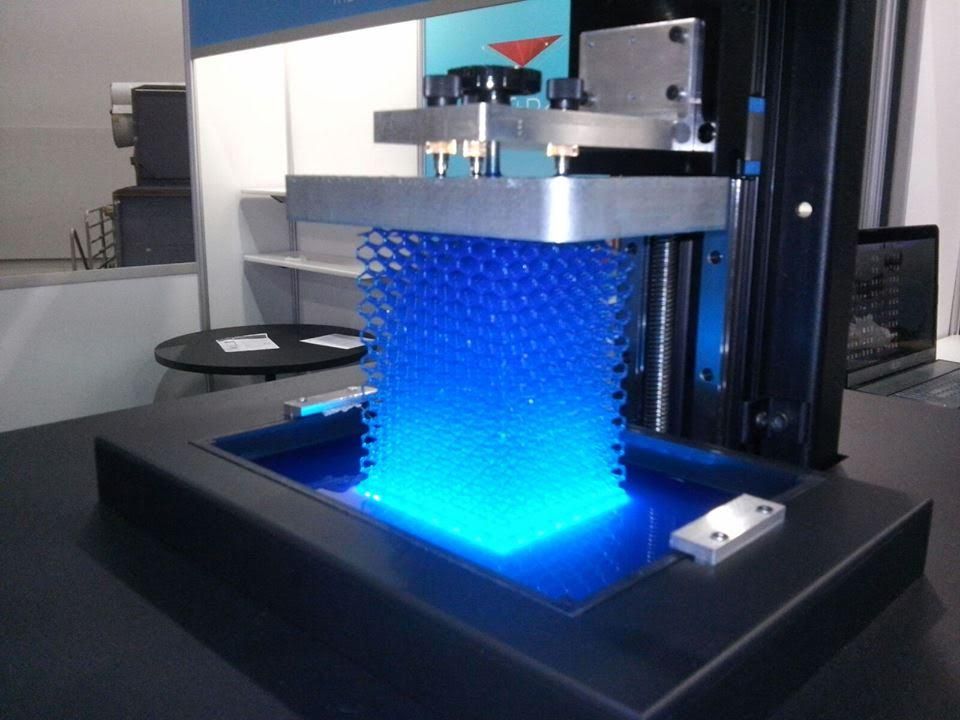 STL files are loaded into the program for preparing the model for printing (slicer) and converted into a control code (g-code) for the printer. The resulting "slicing" file is what the 3D printer sees. Details here
What program is used to prepare the STL file for printing?
answer: To prepare an STL file for printing, you need to use a slicer - a program with which you set the print settings of the model for the printer. Such a program (slicer) can be either common and not tied to a specific printer, for example, Cura, slic3r, KISSlicer, etc., or individual for a specific 3D printer (supplied with the printer). In this program, many parameters are set - print speed, layer thickness, temperature, and many others. Information on slicers here
What is a 3D printer and how does it work?
answer: read the article - what is a 3D printer
What is the kinematics of a 3D printer?
answer: read the article - 3D printing for the newest. From A to Z. Kinematics.
What are stepper motors and drivers?
answer: read the article - 3D printing for the newest. From A to Z. Steppers, drivers and some magnetic field.
What is 3D printer firmware and where is it uploaded? nine0006
answer: read the article - 3D printing for beginners. From A to Z. Boards and firmware.
Questions about defects and 3D printing issues
Related articles
Most questions and answers are given in the articles. Please read:
- 3D printing defects - Let's try to classify
- 20 most common 3D printing problems (Part 1)
- The 20 Most Common 3D Printing Problems (Part 2)
PLA does not choke and the extruder clicks answer: The problem is insufficient cooling of the thermal barrier of the extruder.
Waves appear on the walls when printed.
 answer : waves on the walls, so-called. wobbles (from wobble (eng.) fluctuations) are associated with the presence of backlash in the mechanisms for moving the printer. In Prusa-type kinematics, wobble is associated with a non-rigid connection of the Z-axis screws to the motors. To solve this problem, it is necessary to put balls from ball bearings in the couplings connecting the screws and the motor shafts, and install the split coupling into an interference fit. nine0146
 At the start of printing, the table/carriage begins to knock against the wall.
answer: To fix the problem, you need to check the limit switch, whether it is pressed by the carriage / table and the integrity of the switch wires.
Adhesion questions (sticking the model to the table)
Plastic does not stick to the table.
answer: when printing on glass surfaces, to improve adhesion, it is necessary to use various adhesives (for example, glue from The 3D or Picaso, you can use glue stick or BF-2). Printing is recommended on glass surfaces (preferably mirrors) due to their flat surface, which ensures an even first layer. nine0007
A part is very stuck during printing and cannot be removed from the table.
answer: the problem is related to a very small gap when printing the first layer, and it "smeared" into the glass surface. You need to increase the clearance. And to remove the part from the glass, it can be placed in the freezer of the refrigerator.
The part is bent at the corners when printing.
answer: when printing, it was necessary to close it from drafts. The bending of the corners is associated with a strong shrinkage of the material when it is cooled. For uniform shrinkage, which all plastics have, it is necessary to maintain a stable temperature using a heat chamber. A box with which you can cover the printer, as well as installing a door in the printer can serve as a thermal chamber.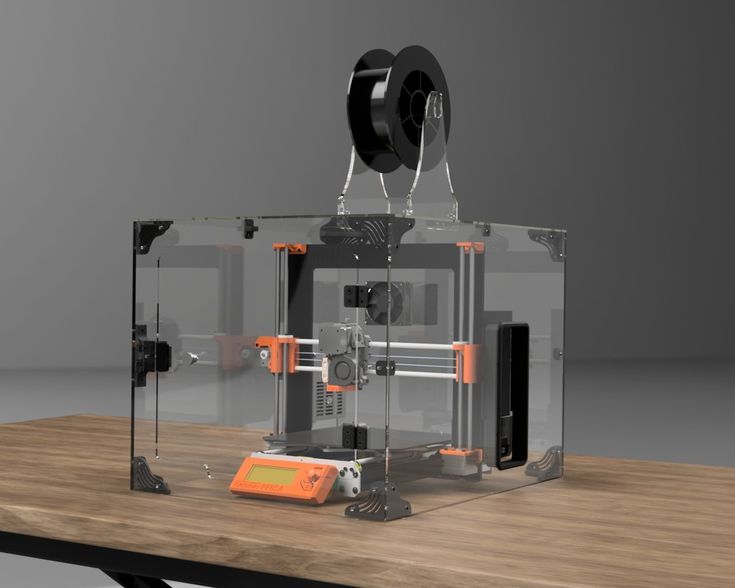 nine0007
Questions about consumables
How to print with PLA
Answer: PLA has operating temperatures ranging from 200 to 230 degrees (depending on the composition of the material used by the manufacturer). If your 3D printer has a heated table, then no additional funds are required to stick the model to the table. If your table is not heated or the model does not stick to the table, then check the table calibration and use adhesion agents (varnish / glue for printing, etc.). nine0007
How to print with ABS plastic
answer: ABS plastic has printing temperatures from 230 to 250 degrees (depending on the composition of the material used by the manufacturer). Printing with ABS plastic implies the presence of a heated table and means for adhesion (varnish / glue for printing, ABS juice, etc.).
Plastic has an uneven diameter
answer: Diameter fluctuations of more than 0. 05 mm are considered defective. In this case, it is necessary to contact the manufacturer with a request to replace the coil with a quality one. nine0007
There are foreign inclusions in the plastic.
answer: this is a defect, you must contact the manufacturer with this defect. Such defects can lead to clogging of the printer nozzle.
When printing, plastic entanglement is observed
answer: the so-called overlap is due to the fact that you relaxed the coil winding during operation, and the upper turns fell under the lower ones. We recommend unwinding part of the coil to a place with even winding and carefully winding it back, observing the tension. nine0007
Is ABS plastic harmful?
Answer: When printed, ABS emits an unpleasant odor and the room must be ventilated. There is no harm, the discharge does not exceed the MPC (maximum permissible concentration).
Why does the bar feed stop after several layers when printing with soft plastics (Flex)?
Answer: If your printer has a Bowden bar feed system, the soft plastics are experiencing too much resistance as they pass through the tube to the print head. Try increasing the nozzle temperature to keep the resistance to a minimum. nine0007
3D printer assembly and calibration questions
The axis moves in the wrong direction
answer: if the movement occurs in the wrong direction, then you need to turn the stepper motor connector 180 degrees.
When replacing stepper motor drivers from A4988 to DRV8825, do I need to change something in the firmware?
answer: If you want to use them with the same divisor (1/16), then nothing is needed. If you want to use it with a 1/32 divider, then in the firmware you need to double the number of steps on those axes where these drivers are installed.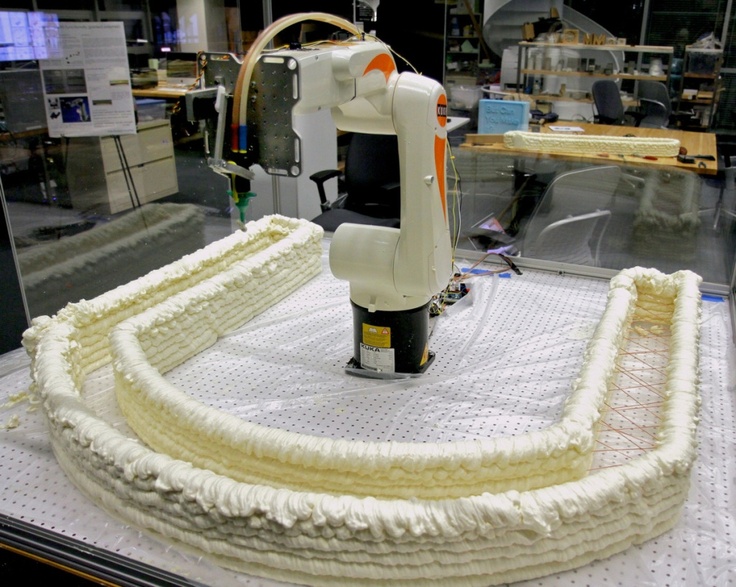 Also, do not forget about the correct adjustment of the driver current. nine0007
After installing the TMC2100/2208/2130, layer shifts occur during printing.
Reply: This type of driver requires good cooling and fairly accurate Vref regulation.
Questions about 3D printer firmware
I can’t understand Marlin
answer: read articles about firmware:
- Set up Marlin firmware and upload it to the 3D printer
- Firmware and printer setup0147 Preparing the model for printing. Slicers
CURA program - how to work with it
answer: read articles written especially for you. List:
- What is Cura, how to prepare it and what it is eaten with.
- "CURA" is your caring assistant in the world of printing.
- The path to excellence. Cura
KISSlicer program - how to use it
answer: read articles written especially for you. List:
List:
- KISSlicer - learning to work. Part 1.
- KISSlicer - learning to work. Part 2.
- KISSlicer - learning to work. Part 3.
- KISSlicer (user manual) Part 1
- KISSlicer (user manual) Part 2
Repetier-Host program - how to use it
answer: read the articles written especially for you. List:
- Let's help beginners: Repetier-Host - first steps.
- Let's help beginners: Repetier-Host - first steps. Slic3r settings. Part 2
- Let's help beginners: Repetier-Host - first steps. Cura settings. Part 3
Simplify3D - how to use it
answer: read the articles written especially for you. List:
- Simplify3D “For Dummies”. Part 1. “Program interface”
- Simplify3D “For Dummies”. Part 2 “Creating a workflow”
- Getting started with Simplify3d or I learned what a slicer is, and what's next?
- Using different print settings for different parts of the model in Simplify3D, print acceleration
Slic3r - how to use it
answer: read articles written especially for you.