Rpi 3d printer
OctoPrint.org - Download & Setup OctoPrint
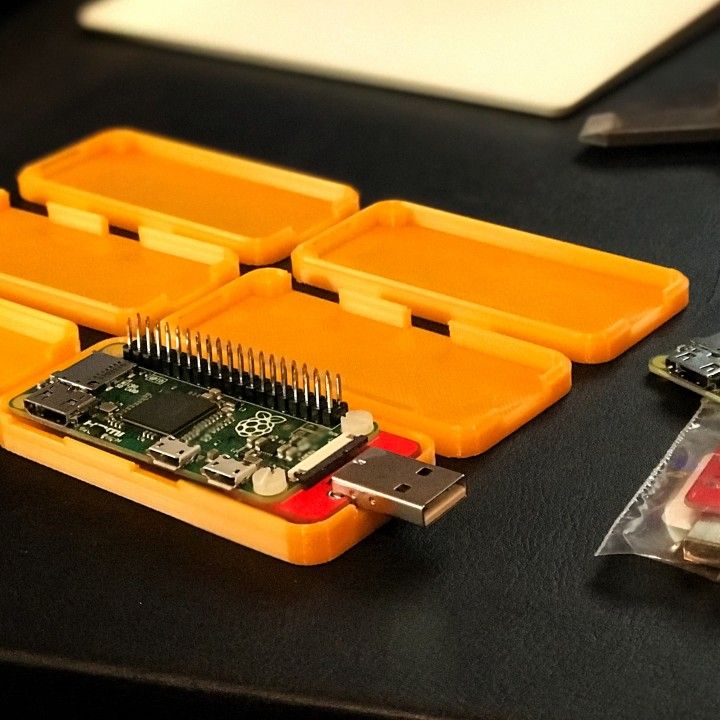
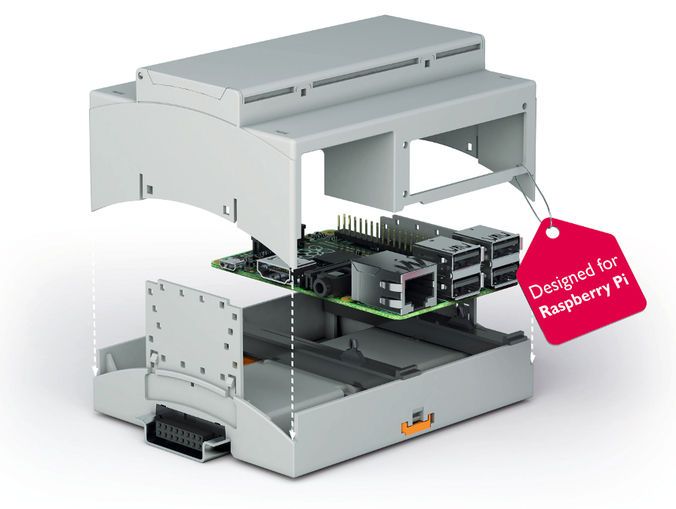
Guy Sheffer maintains “OctoPi”, a Raspbian (and thus Debian) based SD card image for the Raspberry Pi that already includes OctoPrint plus everything you need to run it:
- OctoPrint plus its dependencies
- MJPG-Streamer for live viewing of prints and timelapse video creation, compatible with various USB webcams and the Raspberry Pi camera
Recommended hardware: Raspberry Pi 3B, 3B+, 4B or Zero 2. Expect print artifacts and long loading times with other options, especially when adding a webcam or installing third party plugins. Setups not using recommended hardware are not officially supported.
Please note that the Raspberry Pi Zero and Zero W are not recommended explicitly since severe performance issues were observed, caused by the WiFi interface when bandwidth is utilized (e. g. the webcam is streamed), negatively impacting printing quality. See also here. The Zero 2 however is recommended.
Installing OctoPi
OctoPi is available through the Raspberry Pi Imager, which you can use to download and setup OctoPi. You can install it yourself, or alternatively simply buy one of the available
All-in-one OctoPrint Kits
Installing OctoPi using the Raspberry Pi Imager
🤚 Before you begin
Read and follow these instructions precisely. Most importantly, leave the system username as “pi”, do not change it to anything else or OctoPrint won’t work!
-
If you haven’t already, download and install Raspberry Pi Imager on your computer
-
Find the OctoPi image under “Choose OS”, by selecting “Other Specific Purpose OS” > “3D printing” > “OctoPi” and then the “stable” version.

-
Open advanced options by clicking on the button with the gear, or by using the keyboard shortcut
ctrl+shift+xand then:-
Configure your wifi options: Set your SSID, password and WiFi country:
-
Change the system password in “Set username and password” by entering a new password to use for the system user “pi”. This is not the password you’ll use for logging into OctoPrint but one that you’ll have to use to log into your Pi via SSH should you ever need to. Leave the username as “pi”, do not change it to anything else!
-
Optionally: Change the configured timezone in “Set locale settings”
-
Optionally: Change the hostname in “Set hostname”
-
-
Install the image to your SD card, then plug everything in to your Raspberry Pi and boot it up.
 Do not format the SD card after installing, even if prompted to do so. This will break the installation and you will have to start over!
 -
Access OctoPrint from your browser via
http://octopi.localor the hostname you chose (if your computer supports bonjour) orhttp://<your pi's ip address>.httpsis available too, with a self-signed certificate (which means your browser will warn you about it being invalid - it isn’t, it’s just not recognized by your browser).
Please also refer to OctoPi’s README, especially the “How to use it” section.
Alternative Initial Setup
If you decide against using the Raspberry Pi Imager, here are some alternative steps to get started:
-
Flash the image to your SD card through whatever alternative means you’ve chosen.
-
With the SD card still attached to your computer, set up the Wifi connection using the
octopi-wpa-supplicant.file on the root of the installed card when using it like a thumb drive. Important: Do not use WordPad (Windows) or TextEdit (MacOS X) for this, those editors are known to mangle the file, making configuration fail. Use something like Notepad++, Atom or VSCode instead or at the very least heed the warnings in the file. If your computer doesn’t see the card right away after flashing, try ejecting and inserting it again. Do not format the SD card after installing, even if prompted to do so. This will break the installation and you will have to start over! txt
txtPlease also refer take a look at the full WiFi setup guide in the FAQ that also includes troubleshooting tips.
-
Plug everything into your Raspberry Pi and boot it up
-
Log into your Pi via SSH (it is located at
octopi.localif your computer supports bonjour or the IP address assigned by your router), default username ispi, default password israspberry. Run
Run sudo raspi-config. Once that is open:- Change the password via “Change User Password”
- Optionally: Change the configured timezone via “Localization Options” > “Timezone”.
- Optionally: Change the hostname via “Network Options” > “Hostname”. Your OctoPi instance will then no longer be reachable under
octopi.localbut rather the hostname you chose postfixed with.local, so keep that in mind.
You can navigate in the menus using the arrow keys and Enter. To switch to selecting the buttons at the bottom use Tab.
You do not need to expand the filesystem, current versions of OctoPi do this automatically.
You also do not need to manually enable the RaspiCam if you have one, that is already taken care of on the image as well.
-
Access OctoPrint through
http://octopi.local(if your computer supports bonjour) orhttp://<your pi's ip address>.
httpsis available too, with a self-signed certificate (which means your browser will warn you about it being invalid - it isn’t, it’s just not recognized by your browser).
Please also refer to OctoPi’s README, especially the “How to use it” section.
Image Downloads
Raspberry Pi Imager will download the latest version of OctoPi for you, but if you want to download the images yourself you can do so here.
Stable OctoPi
OctoPi 0.18.0 & OctoPrint 1.8.4 SHA256: cbfed6287b209cdefb48d76443d4f42778c2e5033c3697ca235e48143a17a7c1
Raspberry Pi 3B, 3B+, 4B or Zero 2 strongly recommended, Raspberry Pi Zero/Zero W not officially supported!
Image compatible with Raspberry Pi A, B, A+, B+, 2B, 3A+, 3B, 3B+, 4B 1/2/4/8GB, 400, Zero, Zero W and Zero 2.
OctoPi Release Candidate
The current OctoPi Release Candidate 1. 0.0rc2 can be found here:
OctoPi 1.0.0rc2 & OctoPrint 1.8.1 Raspberry Pi 3B, 3B+, 4B or Zero 2 strongly recommended, Raspberry Pi Zero/Zero W not officially supported!
Image compatible with Raspberry Pi A, B, A+, B+, 2B, 3A+, 3B, 3B+, 4B 1/2/4/8GB, 400, Zero, Zero W and Zero 2.
OctoPi Nightlies
You can also get the 32bit nightlies here or the highly experimental 64bit nightlies here.
Further resources
- For customizing OctoPi, take a look at CustoPiZer.
- Scripts to build the image yourself can be found in OctoPi’s Github repository.
Filip Grzywok maintains “Octo4a”, an Android app that allows you to use an Android based smart phone as an OctoPrint host. Root is not required!
Check out the Octo4a README for information on how to obtain the app, install and run it.
Video
There’s also a video guide on how to get Octo4a up and running by Thomas Sanladerer.
There’s also an official OctoPrint Docker image, octoprint/octoprint. It is maintained by Brian Vanderbush and team on GitHub.
Please refer to its entry on dockerhub for more details on usage and configuration.
octoprint_deploy is a guided script for creating multiple OctoPrint instances. This enables control of multiple printers on a single piece of hardware. It is compatible with OctoPi and also functions as a general Linux installer for OctoPrint, video streamers, haproxy, etc.
The related octoprint_install serves as a single instance Linux installer.
Both are maintained by Paul Paukstelis.
The generic setup instructions boil down to
- Installing Python 3, including pip.
- Creating a virtual environment somewhere:
python -m venv OctoPrint - Installing OctoPrint into that virtual environment:
OctoPrint/bin/pip install OctoPrint - OctoPrint may then be started through
.or with an absolute path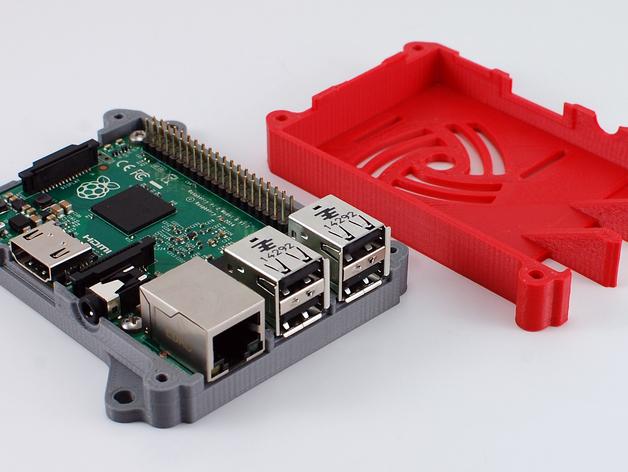 /OctoPrint/bin/octoprint serve
/path/to/OctoPrint/bin/octoprint serve
More specific setup instructions for the most common runtime environments can be found below.
Linux
For installing OctoPrint on Linux, please take a look at the setup instructions for Raspbian on the forum. They should be pretty much identical on other Linux distributions.
Windows
For installing the OctoPrint server on a Windows system, please take a look at the setup instructions for Windows on the forum.
Mac
For installing the OctoPrint server on a Mac, please take a look at the setup instructions for MacOS on the forum.
Top 3D Printing Projects With Your Raspberry Pi
Published on February 18, 2021 by Amelia H.
A Raspberry Pi is a credit card sized computer that can be bought for as a little as $30. The device was invented in an endeavor to encourage people to learn how to program computers. A Raspberry Pi can run on an SD card like those used by cameras and can be charged using a USB phone charger. By combining the accessibility and freedom of manufacturing with 3D printing and programming with Raspberry Pi, the maker community has come up with several innovative projects that you can try out at home! From ventilators, to tablets and telescopes, we’ve compiled a list of some of our favorite 3D printing x Raspberry Pi projects.
Covid-19 Ventilator
In response to the prospective, and later confirmed, shortage of ventilators in countries across the world stemming from the pandemic, MakAir developed a mass-producible open-source Covid-19 ARDS ventilator. The ventilator itself can be 3D printed with either an SLS, SLA, or FDM 3D printer. MakAir recommend using an SLS 3D printer such as the HP Multi Jet Fusion. The ventilator’s control unit comprises a Raspberry Pi 4 computer, plugged to a Raspberry Pi Touch Display. You can find the full instructions HERE.
ExoMy, the Mars Rover for AmateursWouldn’t it be amazing if there was a robot meant for space that could be built with a simple 3D printer? Well that’s exactly what Maximilian Ehrhardt and Miro Voellmy from the Planetary Robotics Laboratory of the European Space Agency wanted to create. Named ExoMy, the Martian rover can be 3D printed for only $250. It is composed of 3D printable parts, servomotors, screws as well as a Raspberry Pi 4 and a v2 camera module. Thanks to the affordability and accessibility of 3D printing technology and Raspberry Pi, this project makes space robotics more widely available.
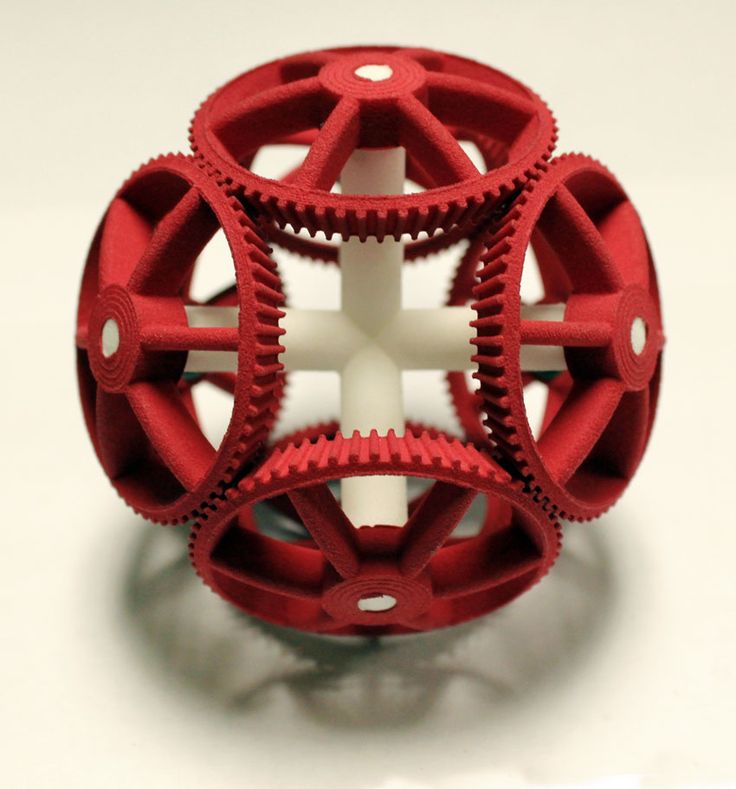
The speaker, named The Wave because of its shape, was first designed as part of an engineering and design course at the Technical University of Denmark. The course offers students the opportunity to develop and design new prototypes, such as this speaker with its unusual geometry, using additive manufacturing. Printed in 3D, The Wave is powered by a Raspberry PI and connects WIFI, allowing music to be played on the speaker directly from the user’s phone. For those who wish to use additive manufacturing to create their own speaker you can find the instructions on Thingiverse!
PiKon, the 3D printed telescopeThis telescope is a fusion of Raspberry Pi and Icon. The PiKon is the result of a collaboration between the University of Sheffield and Alternative Photonics. Designed for the Festival of the Mind, PiKon aims to demonstrate what citizens are able to do with new, low-cost technologies (3D printing and a Raspberry Pi). Apart from the primary and secondary mirrors, all the components of the telescope were 3D printed. The telescope prototype is connected to a Raspberry Pi with a 3D printed adapter. The Raspberry Pi is equipped with an infrared camera, making it possible to photograph the night sky, but also to record the shots. If you are passionate about astrophotography and new technologies, do not hesitate to find all the information necessary to build your own PiKon HERE.
If you have a Raspberry Pi and a 3D printer, you can create your own laptop with this Thingiverse file. As you can imagine, this is not an easy project and basic knowledge in electronics is needed. You’ll also need screwdrivers, wire cutters and a soldering iron in order to build the laptop. After you get all the tools, you will need to follow the instructions to assemble the laptop step by step. To achieve this, the author specifies that he used the Prusa Steel 3D printer to create the parts, with a resolution of 0.2 and a filling of 20%.
Similarly, our next project is complex but equally impressive. In order to build this tablet, you will of course need a 3D printer and a Raspberry Pi as main elements. The project requires a few other parts which the author details on the website. If you want to get started with this printing project, keep in mind that the commitment is fairly long term. Nonetheless, we encourage you to try to create your own tablet and share the result with us! You can find the website with all the assembly instructions, as well as a video explaining all the steps you need to follow HERE.
Dual Redundant CubeSat Flight Computer
Our next model is a dual redundant CubeSat flight computer. Redundancy increases the reliability of hardware in space so the idea is that if one system breaks down or no longer responds, another can take over and continue its task. Student Alex Pirie has been working on this project since 2014, and decided to turn to the Raspberry Pi for its low cost and compact size. You can find more information HERE.
Video Glasses
With this project you can turn any pair of glasses into a wearable mounted computer powered by Raspberry Pi. You’ll need a few things to get you started: NTSC/PAL video glasses; a Raspberry Pi; miniature wireless usb keyboard with touchpad; 3d printer; flat pliers; 30awg wire wrap; a heat shrink pack; screwdriver set; and a composite video cable. For the 3D printing aspect, there are just eight parts that can be printed and assembled in about two hours. The final part acts as a snap-fit enclosure that houses the components inside the NTSC/PAL video glasses. You can download the STL files and instructions HERE.
Build your own 3D Scanner
This project is a little different in that it does not necessarily need to be made with a 3D printer (though it can be!) but it will definitely come in handy for any 3D printing projects. In this step-by-step guide, users can learn how to make their own 3D scanner, with the updated versions even large enough to scan an entire adult person (up to 2m tall). To get started you’ll just need Raspberry Pis, PI cameras, SD cards, Led Strips and powerful power supplies, though the mounts, tripods and other parts could be 3D printed. There is assembly required and some coding (the owner provides python script that can be downloaded), but once you’re done you can make your own 3D scans of your loved ones which you can then 3D print! If you’re interested, the guide and the files can be found HERE.
DIY desktop laser cutter and engraver
According to the page on Thingiverse, FABOOL Laser Mini is an open-source, ready-to-assemble desktop laser cutter and engraver. You will need a hex wrench and spanner, but assembly itself will only take about two hours. The end product has a work area of 300x230mm. Raspberry Pi is one of the compatible software, though others are also supported, including Windows, Mac OS X, and Linux. This updated version has improved usability, a stylish design and about ¼ of the previous assembly time. You can find the files HERE.
What do you think of these 3D printing and Raspberry Pi projects? Let us know in a comment below or on our Linkedin, Facebook and Twitter pages! Sign up for our free weekly Newsletter here, the latest 3D printing news straight to your inbox!
Clarity, Accuracy & Tolerances in 3D Printing
Just because your 3D printer says it has "high resolution" does not mean it will produce accurate or sharp prints.
Understanding the meaning of the terms precision, clarity, and tolerance is a prerequisite for achieving quality 3D printing results, regardless of industry. In this article, we will analyze what these terms mean in the context of 3D printing.
Webinar
Want to learn how to use 3D printing for design? Watch our webinar and learn about the stereolithography (SLA) 3D printing process, different types of materials, and tips from experts on how to optimize your printing process to make it as efficient as possible.
Watch the webinar now
Let's start with some definitions: what is the difference between precision, clarity and tolerance? For each term, we will use a target - a common example for understanding these concepts, helping to visualize them.
Precision determines how close the measured value is to the true value. In the target example, the true value is the bullseye. The closer you are to the bullseye, the more accurate your throw. In the world of 3D printing, the true value is the dimensions of your CAD model. To what extent does a product made on a 3D printer correspond to a digital model?
Clarity corresponds to measurement reproducibility - how consistent are your hits on the target? Clarity only measures this reproducibility. You can always hit the same spot, but it doesn't have to be the bullseye. In 3D printing, this ultimately leads to reliability. Are you sure that you will get the expected results for each model produced by your printer?
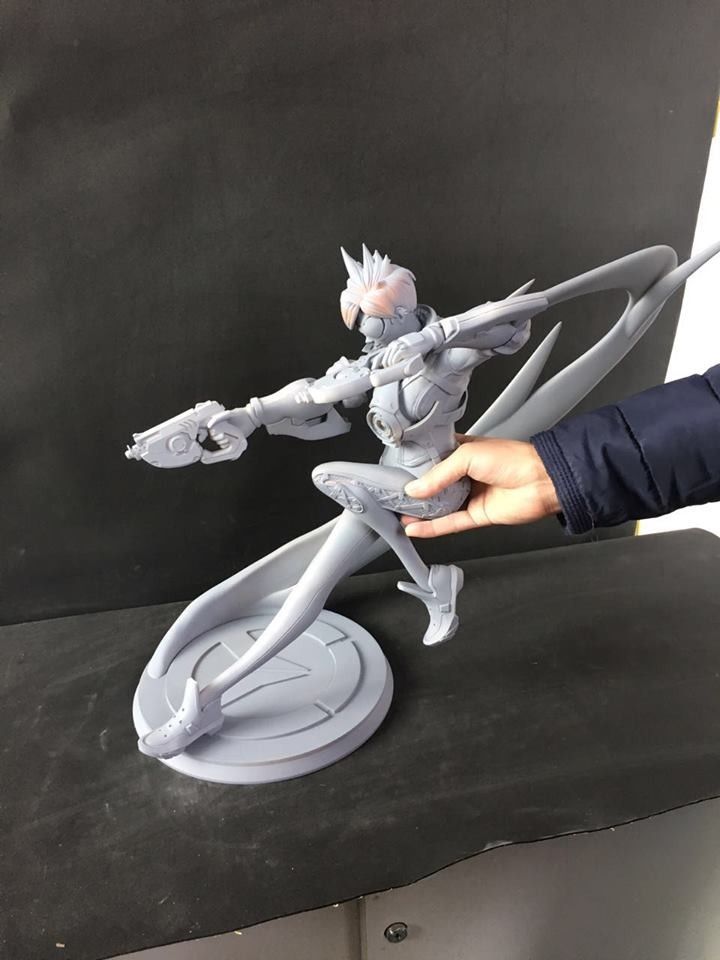
In engineering terms, "clarity" is used to measure the reproducibility of results. Applied to materials for 3D printing, “clear” can mean the ability to manufacture complex geometries. For example, Formlabs Gray Pro Resin and Rigid Resin resins have a high "green modulus", or modulus of elasticity, that can successfully print thin and intricate details.
What accuracy is required in this case? This is determined by tolerances , which you define. How much wiggle room do you have based on the purpose of the model? What is the allowable variability in the closeness of the measurements to the exact ones? It depends on the specifics of your project. For example, a component with a dynamic mechanical assembly needs tighter tolerances than a conventional plastic housing.
If you're specifying tolerance, you'll probably need precision as well, so let's assume we're measuring bullseye accuracy. Earlier we called the shots in the picture with the target on the right fuzzy.
But if you have wide tolerances, this may not be a problem. The shots are not as close to each other as they are on the target on the left, but if the acceptable range of sharpness is ±2.5 hoops, then you are not out of range.
As a rule, achieving and maintaining tighter tolerances entails higher production and quality control costs.
White Paper
Tolerance and fit are important concepts that engineers use to optimize mechanical functionality and manufacturing cost. Use this white paper when designing 3D printed workpieces or as a starting point when designing a fit between parts printed with Formlabs Tough Resin or Durable Resin.
Download white paper
There are many factors to consider when thinking about precision and clarity in 3D printing, but it's also important to get your needs right.
For example, a sharp but inaccurate 3D printer may be optimal for some applications. An inexpensive Fused Deposition Modeling (FDM) machine will produce less accurate parts, but for a teacher teaching students 3D printing for the first time, the exact fit of the student's CAD model doesn't matter as much.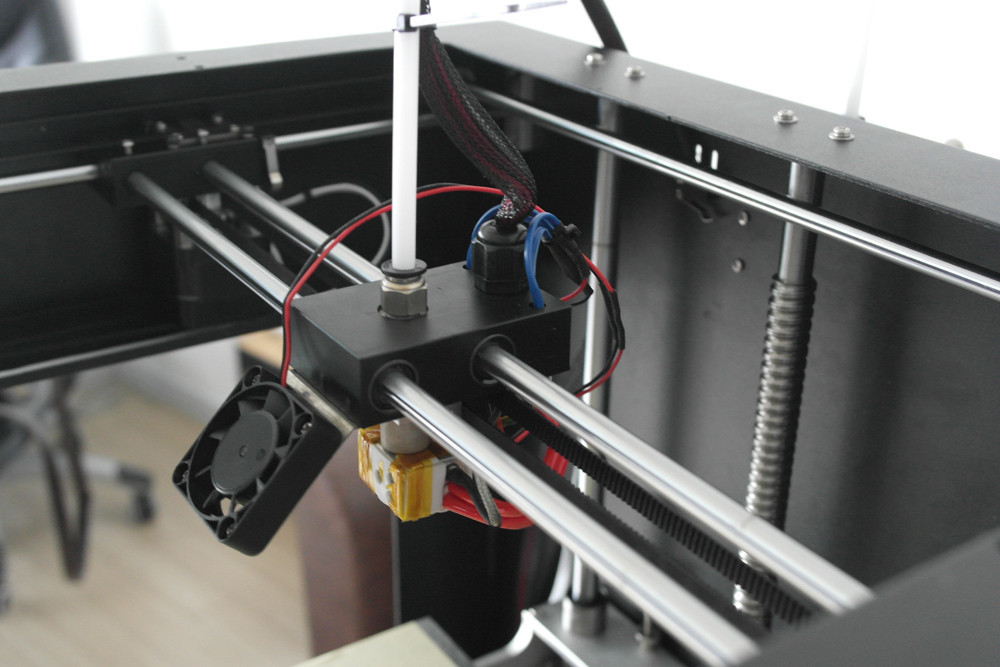
But if the printer performs to specifications and delivers the quality expected of it within the tolerances the user is accustomed to, this may be sufficient for successful operation.
Check out our detailed guide comparing FDM vs. SLA 3D printers to see how they differ in terms of print quality, materials, application, workflow, speed, cost, and more.
There are four main factors that affect the accuracy and clarity of a 3D printer:
3D printing is a type of additive manufacturing where models are made layer by layer. Violations can potentially occur in every layer. The layering process affects the level of clarity (or reproducibility) of each layer's accuracy. For example, when printing on an FDM printer, layers are formed using a nozzle, which cannot provide the same accuracy for obtaining complex parts as other 3D printing technologies.
Because layers are extruded, FDM models often show layer lines and inaccuracies around complex features.![]() (Left is an FDM printed part, right is a SLA printed part.)
(Left is an FDM printed part, right is a SLA printed part.)
In stereolithography (SLA) 3D printing, each layer is formed by curing a liquid polymer with a high-precision laser, resulting in more detailed models and achieve high quality on a consistent basis.
Selective Laser Sintering (SLS) also uses a laser to accurately convert nylon powder into lightweight, durable parts.
The specifications of a 3D printer alone do not give an idea of the accuracy of the models produced. One of the common misconceptions about the accuracy of various 3D printing technologies is describing XY resolution as dimensional accuracy.
For digital light processing (DLP) printers, the XY resolution corresponds to the projected pixel size. Many 3D printer systems use this projected pixel size, or XY resolution, as a general measure of accuracy, such as stating that with a projected pixel size of 75 µm, the accuracy of the device is ±75 µm.
Check out our guide to SLA and DLP 3D printing, where we talk about the features of the two processes and how they differ.
But this data does not affect the accuracy of the printed model. There are many other sources of error that affect accuracy, from components and calibration to materials and post-processing. We will consider the last two factors in more detail.
The best way to evaluate a 3D printer is to study the models printed on it.
Accuracy may also vary depending on the media you are printing on and the mechanical properties of those media, which can also affect the likelihood of model warping.
Formlabs Rigid Resin has a high "green modulus", or modulus of elasticity before final polymerization, which allows you to print very thin models with high definition and reliability.
But, again, it all depends on your goals. For example, in dentistry, the accuracy of 3D printed models is critical. But if you're printing a concept model, chances are you just want to get a general idea of the physical product, and accuracy won't be that important.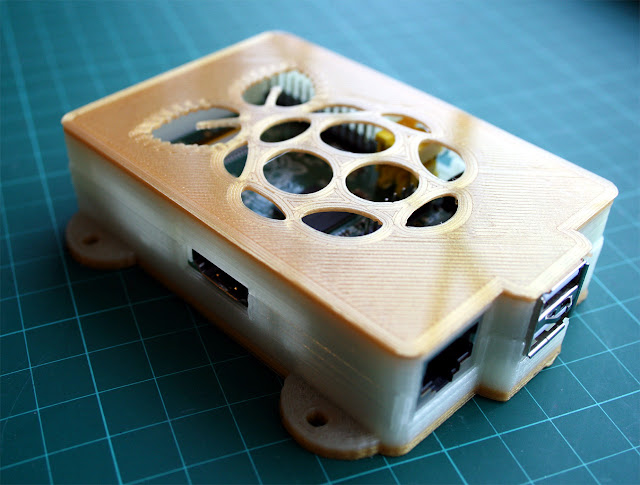
Margins, mold surfaces, and contact surfaces printed with Formlabs Model Resin are accurate to within ±35 µm of the digital model at over 80% of surface points when printed at 25 µm settings. The overall accuracy across the entire arc is within ±100 µm on 80% of surfaces when printed with settings of 25 or 50 µm.
3D printed models often need to be cured, which in turn often leads to shrinkage. This is normal for any part made using SLA or DLP 3D printing. Depending on the printer, this phenomenon may need to be considered in the design. PreForm, Formlabs' free file preparation software, automatically compensates for this shrinkage, ensuring that the final cured models are the same dimensions as the original CAD model.
How does the final polymerization work? Learn more about the theory behind the process and see efficient ways to successfully finish curing models made with stereolithographic 3D printers.
Producing quality models on a 3D printer requires attention not only to the printer itself, but to the entire production process.
The final result may be affected by the print preparation software, post-processing materials and tools used. In general, integrated systems designed to work together produce more reliable results.
Unlike machining, where parts are progressively improved to tighter tolerances, 3D printing has only one automated manufacturing step. While complex coating adds cost to processes such as CNC milling, creating complex features with 3D printing is essentially free, although the tolerances of a 3D printed model cannot be automatically improved beyond the capabilities of the printer. without resorting to subtractive methods.
3D printing is a great option if you have rough, complex features such as undercuts and complex surfaces, and don't necessarily need surface accuracy better than ±0.125mm (standard machining). Tolerances beyond standard machining must be achieved using subtractive methods, either through manual or machine processing, for both 3D printed and CNC models.
SLA has the highest tolerance compared to other commercial 3D printing technologies. The tolerances for stereolithographic 3D printing are somewhere between standard and precision machining.
In general, more malleable stereolithography materials will have a wider tolerance zone than more rigid materials. Designing subassembly parts for tolerance and fit reduces post-processing time and simplifies assembly, as well as reduces material costs per iteration.
There are many other factors to consider when evaluating 3D printers. Should your models be isotropic? What mechanical properties should your models (and, accordingly, the materials from which they are made) have? The best place to start is to get familiar with the physical models printed on a 3D printer. Order a free material sample from Formlabs of your choice and see for yourself the quality of your stereolithography print.
Request a sample 3D model
Offset (shift) of layers when printing on a 3D printer.
 Reasons and solutions.
 3D printer layer shift is not the most discussed printing error, but it is certainly one of the most annoying. Check out three easy ways to avoid this.
Layer misalignment is when the layers of your 3D print are not properly aligned, leaving behind a stepped "staircase" appearance. This often only happens in a few places, but usually renders the entire print useless. And it's frustrating that the rest of the model can be perfect.
If the layers are slightly shifted, "knocked", shifted layers will occur, as in the case of Benchy above. At a significant value, this can cause your printer to extrude in the air, leaving a plastic bird's nest.
Driver current too low
Reducing the current reduces the motor torque. Rapid starts and stops may exceed motor torque. Note that the torque decreases rapidly at speed
Solution
Before increasing the driver current, first make sure it is not too high.
Increase current.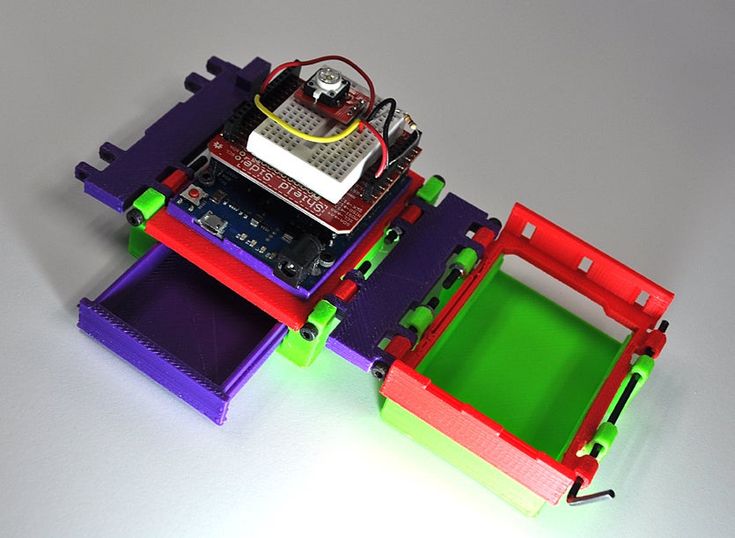
Driver current too high
- Driver chip is hot.
- The motor can also be very hot.
- When the stepper motor is running, you may hear repeated knocking sounds.
Solution
- Reduce motor current.
- add a fan to cool the drivers. Perhaps the fan needs to be powerful so that it is always on.
- Add heatsinks to the stepper and if possible a fan.
Loose drive belt
- Belt rubbing
- Loose belt
Solution
Tighten the belt.
Use a tension spring for the belt.
Poor quality pulleys
Pulleys have a shallower depth that cannot hold the belt while driving at high speed, causing slippage
Solution
Replace it with a good one.
Pulley rotates on motor shaft
Drive pulley rotates on shaft under load.
For diagnosis: draw a line on the stepper shaft and the end of the drive pulley. See if the pulley has moved relative to the control line after the layer has been moved.
Solution
Two things must be done to ensure that the drive pulleys do not come loose:
Tighten the set screw on the pulley.
- Add a drop of nail polish to the set screw threads before tightening.
Kinematics bearing sticking
Dirt on rails/guides
- Move the axles by hand with power off to feel for sticking.
- You may need to temporarily remove the belt to make it easier to feel the movement without engine vibration.
- Hairspray or other contaminants on the rails or rails can cause them to bind and jam.
Solution
- Remove all dirt.
- Remove lacquer residue from guides or guides with Windex.
- Remove other residues with alcohol or acetone. Be careful not to get acetone on the ABS parts.
- Lubricate bearings or guides.
Speed too high
- High travel speeds create large forces that must be overcome by the motors. This, combined with acceleration, can cause the layer to shift.
- 8-bit controllers have a limited overall step rate that varies depending on their overall computational load. Exceeding this step can result in uneven steps and skipped steps.
Solution
- Reduce the travel and print speed of your slicer.
- Default speed, jerk and acceleration in firmware are often too high.
Acceleration too high
- Motor torque at given speed must be greater than inertia.
- If the required torque is higher than the motor can deliver at that speed, the layers will be shifted.
- Please note that the stepper motor cannot instantly go from stop to high speed, it must be increased, otherwise it will squeal and vibrate without moving.
Solution
Reduce firmware acceleration.
Y-Axis Offset Layers
(Any Heavy-Axis Offset Layers)
- For printers that move the build plate in the Y-axis, the Y-axis motor needs more force.
- Too much acceleration in this direction causes displacement.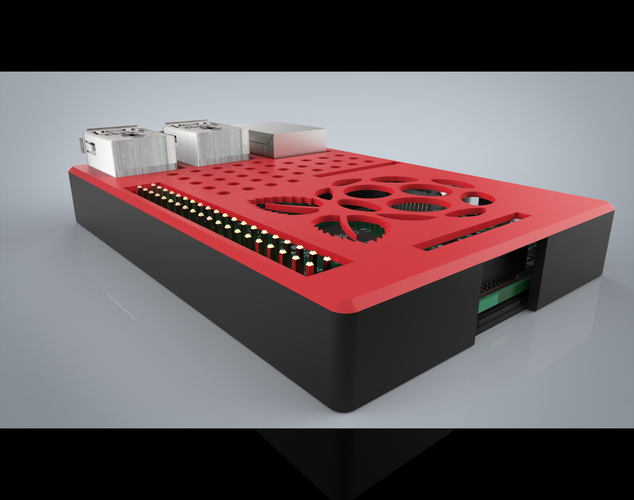
Solution
Decrease Y axis acceleration/jerk settings in firmware.
If the bed is spring-loaded, it may wobble - use springs with whiter springs or another way to secure it (for example, one fixed point on the table).
Play
Play can be caused by loose belts, excessive friction, etc.
This can manifest itself in many ways, such as uneven perimeters or circles that are not round.
Solution
- Make sure the straps are tight but not too tight.
- Try to move the axle back and forth by hand while keeping the motor shaft stationary, there should be no play.
- Move the axis back and forth with the stepper motor disconnected from the drive (turn off the power when the wires are connected or disconnected!). This will allow you to feel the binding and extra friction without significant interference from the engine.
- Check that the belt and pulley are correctly aligned.
- Check that the belts do not rub against the guide bearing flanges.
- Lubricate bearings and guides.
- Use a low backlash belt and pulley, such as GT2.
- Use a pulley large enough so that at least 6 teeth are in contact.
Acceleration settings too high
The jerk setting is mainly used at the very beginning and at the end of the movement.
Solution
Change acceleration settings (lower)
Mid Frequency Resonance
Stepper motors have resonant frequencies where they are difficult to control - they lose torque and may not accelerate causing skipped steps.
Solution
- Use lower speeds
- Use larger pulleys if resolution allows
- Use external DSP based stepper motor drivers. This allows the motor to be driven faster and quieter, as well as to use higher voltage.
- Note that more powerful motors like the Nema-23 are more prone to midband resonance in the RPM ranges used for 3D printers (and are louder), so a DSP based motor driver is recommended.