3D printer with auto leveling bed
6 Affordable Auto Leveling 3D Printers To Save You Time & Hassle
Manual leveling is tedious, repetitive, and exposes you to the more underrated component of failed prints — human error. Wouldn’t it be great to automate all the boring stuff away, and get to printing? It’s good news for you then, as auto-leveling 3D printers have become more and more affordable.
BUDGET PICK
Anycubic Kobra
One of the cheapest self-leveling printers around.
Performed well in our review.
Available at:
Anycubic hereAmazon hereMID-RANGE PICK
Creality Ender 3 S1
Builds on Ender 3’s success with extra power and auto-leveling
Improved direct drive extruder
Available at:
Creality hereAmazon herePREMIUM PICK
Prusa i3 MK3S+
One of the best 3D printers for $1000 with great auto-leveling
Durable, accurate, it’s perfect
Available at:
Prusa hereWhat is an auto-leveling 3D printer?
An auto-leveling 3D printer is one that comes equipped with the necessary kit (sensors) to automatically detect the distance between the nozzle and the print bed.
Prior to auto-leveling, makers worldwide had to manually adjust their 3D printer’s bed so it was at the correct distance away from the nozzle. This was time-consuming, annoying, and put beginners off. Moreover, you’d have to re-level your 3D printer every few prints as the bed began to fall out of alignment over time.
Having a self-leveling 3D printer saves you time and hassle, so you can get to doing the fun things like printing your favorite models.
These auto-leveling printers have proximity sensors near the tip of the nozzle and detect where the print bed is across various points on the print bed. For example, the Creality CR-10 Smart has 16 points spaced evenly across the print bed that the nozzle probes to get distance data.
With this data, the 3D printer’s firmware can make adjustments on the distance the nozzle comes to the print bed during the 3D printing process.
For example, if one side of the print bed is slightly uneven, the printer adjusts to this and ensures that the nozzle and bed remain the same distance apart throughout the print, improving bed adhesion and print quality.
Generally, the ideal distance between the printer nozzle and bed is around 0.1mm, but this can vary.
Problems that can occur if the nozzle is too close to the print bed include:
- Scratch marks on the print bed
- Filament will be unable to extrude, especially in the first few layers
- Can clog your nozzle
Problems that can occur if the nozzle is too far away from the print bed include:
- Bad adhesion
- Filament will curve and twist around the nozzle rather than being deposited
- Poor print quality
Either way, badly optimized bed leveling causes bad adhesion and worse print quality, so it’s key to do this properly. Even with an auto-leveling 3D printer, it can be worth manually calibrating everything every once in a while to ensure your settings are spot on.
What are the advantages of a 3D printer with automatic bed leveling?
- Better print quality and bed adhesion
- More accessible for less experienced beginners
- Saves you time and hassle manually leveling the 3D printer
- Human error can affect manual leveling
Therefore, a level print bed is crucial for high-quality prints. If you’re trying to avoid constantly ruined, sloppy-looking prints caused by poor layer adhesion, go for a self-leveling 3D printer.
Can you upgrade a 3D printer to auto level?
Yes, you can, and many makers opt to upgrade their printer so that it can auto level. Many 3D printer auto-leveling kits are available, but check the kit you’re interested in is compatible with your printer.
Some popular 3D printer auto-leveling kits include:
- BLTouch — kits Available on Amazon here
- CRTouch — Creality’s version — Available at Creality here / Amazon here
- EZABL
These kits come with firmware, such as Marlin, which when placed where your printer’s z-stop is, learns the height of the build plate, and makes adjustments based on these measurements.
TOP PICKS
Best XYZ Reviews – Full Round-Up
- Anycubic Kobra: Best budget pick
- Flashforge Adventurer 3 Lite: Best enclosed low-cost option
- Anycubic Vyper: Similar to Kobra but slightly upgraded (but costs extra)
- Ender 3 S1: Best auto-leveling 3D printer under $500
- Prusa i3 MK3S+: Best for $1,000
- Ultimaker S3: Best for professional use, or if budget is no issue for you
The best auto-leveling 3D printers
3DSourced is reader-supported. When you buy through links on our site, we may earn an affiliate commission. Learn more
Anycubic Kobra – cheapest auto-leveling 3D printer
- Price — Check latest price at Anycubic here / Amazon here
- Automatic Bed Leveling: Anycubic LeviQ
- Leveling Points: 25 points
- Build Volume: 220 x 220 x 250 mm
- Minimum Layer Height: 50 microns
The Anycubic Kobra is the cheapest 3D printer with a self-leveling bed around and a thrifty way to get all the time-saving benefits at a price that won’t scare away 3D printing novices. Launched in early 2022, it’s a machine designed to make 3D printing easier for newcomers by removing the more hands-on aspect of setup and tinkering.
Anycubic has equipped the Kobra with its in-house developed mesh point ABL 3D printing system, the LeviQ. It measures the bed at 25 distinct points, stores the data, and adapts the printing process to mitigate surface inconsistencies.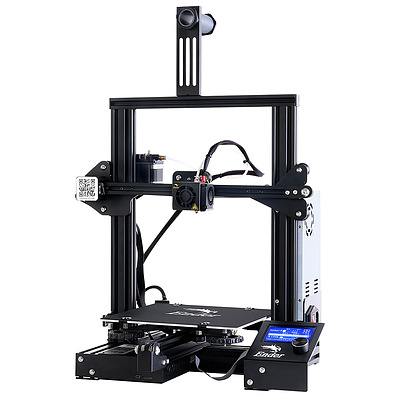
We had the chance to spend some quality time with the Kobra, and we couldn’t have been more impressed with the Levi Q system. The probe automatically levels the bed in just a few minutes with a single click. You can also fine-tune Z offset on the fly to get those flawless layers, thanks to an easily accessible setting in the intuitive display UI.
Elsewhere, the Anycubic Kobra has features we’ve rarely seen at this price. There’s a smart direct drive extruder, Anycubic excellent coarse PEI-coated removable magnetic bed, and a well-sized 220 x 220 x 250 mm build volume, all housed in a compact machine that won’t take up too much space.
Specifications are one thing, but the Anycubic backs them up with solid quality prints out-of-the-box. As with most budget printers, there’s some software tinkering involved to get the very best results, but once there, the Anycubic positively sings when fed PLA, TPU, and PETG.
In many ways, the Anycubic Kobra has redefined what we should expect from low-cost printers and, for our money, is hands down the best 3D printer under $300 currently on the market.-350x435.jpg)
Flashforge Adventurer 3 Lite
- Price: $339 — Available at Flashforge Official store here / Available on Amazon here
- Build volume: 150 x 150 x 150
If you’ve got younger kids that you want to get involved in 3D printing, the Adventurer 3 Lite is perfect. It’s enclosed, so it keeps any curious child’s hands safely locked away from the nozzle while printing, with this enclosure also benefiting your prints as you can more effectively control the temperature, and reduce warping.
The Flashforge Adventurer 3 Lite is one of the cheapest 3D printers with auto-leveling, another feature that makes it ideal for beginners or kids, letting you skip all the hassle and get straight to the fun printing. The removable heated bed makes it easier to remove prints after printing, and despite its appeal as a basic, easy-to-use printer, it can still print tougher filaments like PETG.
It also comes with a filament run-out sensor, switching off automatically in the event of a power cut or similar failure, pausing your print so you can resume without ruining your model, and it’s very quiet, so it won’t disturb you too much if you’re working or relaxing in the same room.
Anycubic Vyper
- Price: $429 — Available on Anycubic Store here / Available on Amazon here
- Build volume: 245 x 245 x 260 mm
Another low-priced self-leveling 3D printer, the Anycubic Vyper’s 1-click auto-leveling system automatically adjusts based on the data gained from each of 16 different points across the print bed to optimize printing.
Despite the large build volume, it’s a compact printer that doesn’t take up too much space, and when we recently tested it out we were impressed with the print quality. Though we didn’t run it too fast, Anycubic say that with the Vyper’s new fan cooling system you can print faster without a noticeable loss in print quality — at up to 100mm/s.
The new 32-bit motherboard and control chip makes it more powerful than previous Anycubic 3D printers, making for better precision and quieter printing. The large 4.3-inch touchscreen is a nice bonus, and the UI is easy to use to get printing and change each setting. Another great feature is the new and improved double gear extrusion system within the extruder, making flexible filaments like TPU easier to print and prevents tangling, and also makes standard PLA printing more reliable.
Overall, we were impressed when we tested the Anycubic Vyper, and if you’re looking for a high-quality 3D printer that auto levels for a good price, this could be the one for you.
You can read more in our full Anycubic Vyper test here.
Ender 3 S1 / S1 Pro
- Price — Check price at Creality store here / Amazon here
- Automatic Bed Leveling: Creality CR Touch Auto Leveling
- Leveling Points: 16 points
- Build Volume: 220 x 220 x 270 mm
- Minimum Layer Height: 50 microns
Emerging from one of the longest-running and best-selling 3D printing legacies, the Ender 3 S1 is the new, more sophisticated version of the Ender 3 – with two versions, the Ender 3 S1, and S1 Pro, with subtle differences.
In our review of the Ender 3 S1 Pro, we noted how Creality has gone to considerable lengths to make the printer a tinker-free, set-and-forget incredibly welcoming to beginners, and improved a number of key areas.
Both the Ender 3 S1 and S1 Pro have key upgrades, such as automatic bed leveling – a first for the Ender 3 family. Creality has used its self-developed BLTouch look-alike, the CR Touch.
It measures 16 points across the bed to provide the printer with all the data needed to compensate for different surface heights and deliver optimal printing. Unlike some automatic bed leveling systems, the CR Touch keeps its calibration sharp and trim even after multiple prints.
Of course, you could always buy an Ender 3 for dirt cheap and install a CR Touch yourself. It would be a viable option if it weren’t for the stacks of extra features found on the S1.
The Sprite dual-gear direct drive extruder is worth mentioning, as is the fantastic PC spring steel sheet, sleek LCD, extremely quiet 32-bit motherboard, and a larger 270mm maximum print height (vs 250mm on the Ender 3).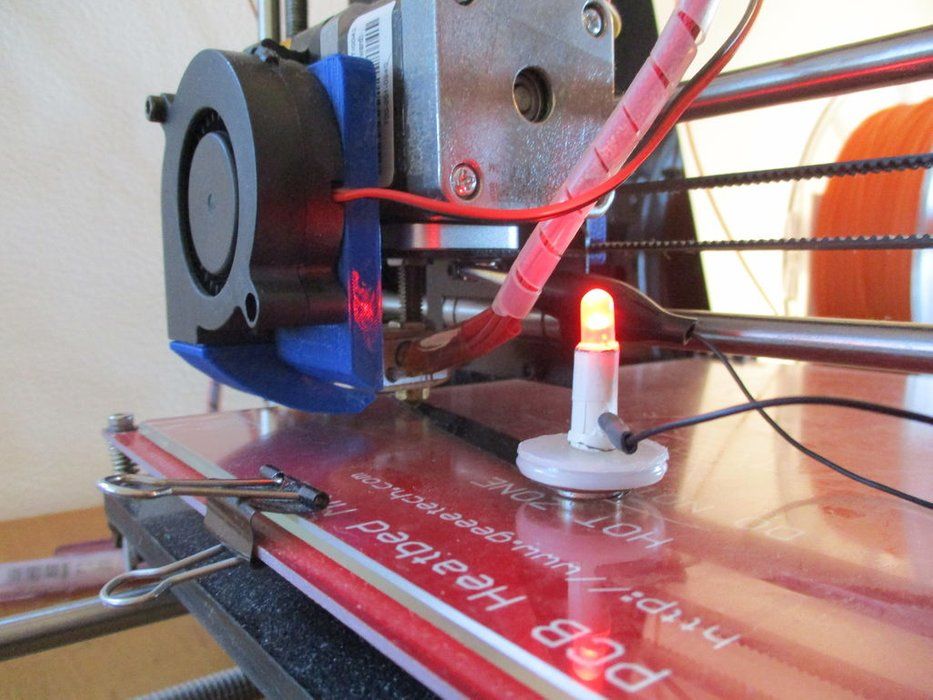 Not only does it feature auto bed leveling, it’s also very accurate and precise (example print of a cat on the right), and very quiet (we measured it to be 36dB in our test on the left).
The Ender 3 S1 does cost more for all these upgrades, so whether the extra features are worth the additional spend comes down to budget and convenience. The Ender 3 is still one of the top budget picks, but you’ll have to invest time, effort, and money to spruce up to anything comparable to the Ender 3 S1.
And if you’re deciding between the S1 and S1 Pro for an auto-leveling 3D printer under $500, this really depends on what you want to print. The S1 Pro has an all-metal direct drive extruder that can reach 300°C, so if you want to print high-temp filaments like Nylon or PC, absolutely go for the S1 Pro. If not, you might be fine with the standard S1.
It’s also worth noting that the brand-new Ender 3 Neo range also now come with auto-bed leveling, so it’s more a question of whether you want the other upgrades on the S1 range.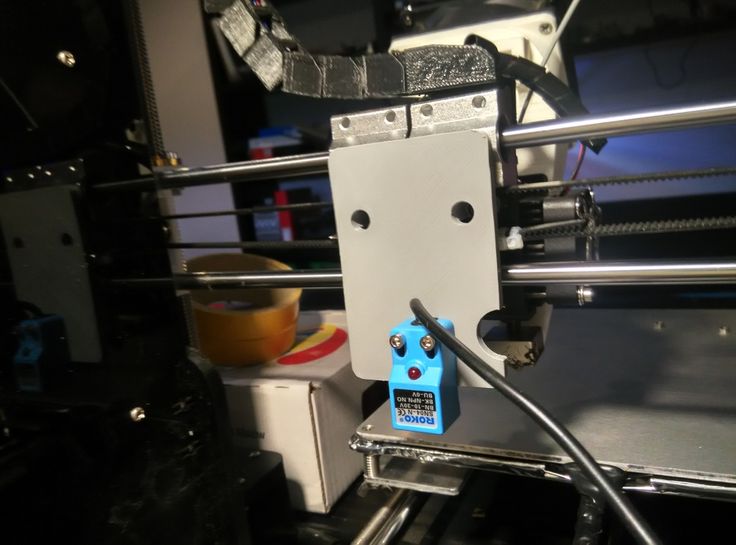
Prusa i3 MK3S+ — reliable auto-leveling 3D printer
- Price: $749 as a kit / $999 assembled — Available on Prusa Store here
- Build volume: 250 x 210 x 210 mm
Prusa printers have been known as the most reliable, hassle-free, and high-quality 3D printers around for years, winning boatloads of awards and selling hundreds of thousands of 3D printers.
The latest version, the i3 MK3S+, comes with improved first layer calibration via the new SuperPINDA probe, and a range of other key design improvements. The automatic mesh bed leveling is flawless and keeps everything optimized, and the print platform’s removable PEI spring steel sheets make it easy to remove your finished prints without having to strain and risk damaging your print while scraping it off the bed in an awkward position.
Other quality-of-life features include the filament runout sensor, power loss recovery to save where you are in your print, key safety features, and it’s very quiet while printing.
Prusa printers are also open source, so you can use third-party filaments, and the i3 MK3S+ is powerful enough and can reach high enough nozzle temperatures to print filaments like ASA, Polypropylene, Polycarbonate, HIPS, Nylon, and carbon filled filaments, beyond the standard ABS and PLA.
Overall, if you’ve got the extra money to spend, go for the Prusa and you won’t be disappointed.
Ultimaker S3 – premium auto-leveling option
- Price: $4,080 — Available on Dynamism here / Available on Matterhackers here
- Build volume: 230 x 190 x 200 mm
The premium, high-quality auto-leveling 3D printer option, the Ultimaker S3 guarantees a hassle-free printing experience. Designed for prototyping and for business use, the S3 features advanced auto bed leveling via automated calibration settings. These settings measure the build platform’s coordinates and automatically adjust without you needing to manually intervene — it’ll just stay level and optimized.
It’s also a dual extruder auto-leveling 3D printer, so you can print with PVA and PLA for dissolving filaments, as with HIPS and ABS, and a range of other filaments.
The Ultimaker S3 is also incredibly accurate, able to print precise parts of up to 20-micron resolutions. At this level of precision, it’ll be slow, but the results will be fantastic. It’s expensive and usually reserved for more professional use, but functions fantastically as an auto-leveling printer for a range of uses.
For premium machines, read our buyer’s guide for commercial 3D printers.
Do 3D Printers Need Auto Leveling?
No, 3D printers don’t strictly need auto bed leveling, but it’s a helpful feature to have because it removes the need to manually level the bed, which can be both time-consuming and frustrating for beginners.
What is the best auto-leveling 3D printer?
The best cheapest auto-leveling 3D printers for ABL 3D printing include the Anycubic Kobra, Creality Ender 3 S1, and Flashforge Advenurer 3 Lite, but if you’re willing to spend a little more, the Prusa i3 MK3S+ is a fantastic self-leveling 3D printer.
What are the best self-leveling bed sensor kits?
The BLTouch auto-leveling sensor probe is a widely used and highly-rated self-leveling 3D printer kit, which is compatible with many different printers and brands. Creality also sell their own version, the CRTouch, and there are other options also.
Best 3D Printers with Auto Leveling
3D printers are complex machines, with all the parts having to work coherently to provide high-quality results. So, precise adjustment of the distance between the print nozzle and the build plate is extremely important, unless you want your prints to be ruined by poor first layer adhesion.
This is Top 3D Shop, and in this article, we will touch upon the feature of automatic bed leveling, as well as look at some of the best 3D printers offering this function.
How does auto bed leveling work?
Manual print bed leveling can be pretty tiresome and time-consuming, especially for those who are new to 3D printing.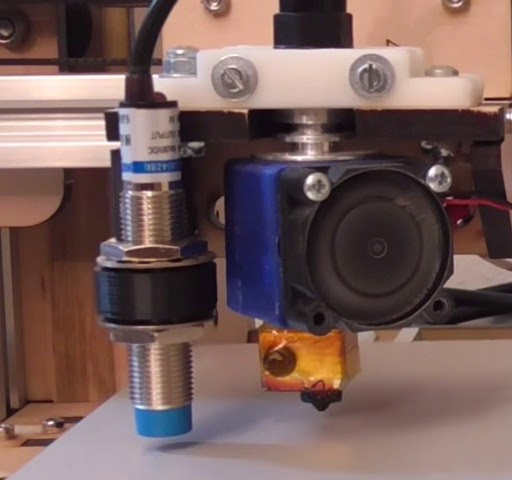 Besides, the process should be repeated after a few prints, as the bed’s position can slightly change. Fortunately, a lot of 3D printers today, including entry-level consumer models, come with an automated bed leveling function that makes the process easy and quick.
The auto bed leveling function implies using a built-in proximity sensor near the tip of the nozzle. When activated, the sensor measures the distance between the nozzle and the print bed at several points on the print bed. Based on these calculations, the firmware adjusts the position of the print head right on the go, to keep the even distance between the nozzle and the bed over the entire build area during printing.
If you want to learn more about this function, read our Auto Bed Leveling Guide.
Do you need a 3D printer with auto bed leveling?
In short — yes, auto bed leveling is worth its money, as it saves a lot of time, and allows the user to avoid print failures caused by a poorly leveled print bed.
Credit: instructables.com
On the other hand, if you are an experienced user, and you don’t mind spending time on manual bed leveling (and know pretty well how to do it properly), you can, probably, do without this useful feature.
If you are new to 3D printing, the auto bed leveling function will help you avoid such troubles, as poor first layer adhesion, nozzle clogging caused by too close position of the nozzle to the print bed, or scratching the print bed.
Can you upgrade a 3D printer to employ auto leveling?
If your 3D printer is not equipped with this function, you can upgrade it with an optional auto bed leveling (ABL) sensor available in the market.
There are various types of ABL sensors, the BLTouch being the most popular. It’s a mechanical sensor, consisting of a microcontroller, a Hall sensor, a magnetic switch, and a pin probe used for measuring the distance between the nozzle and the print bed. Since the sensor uses physical contact for calculating the distance, there are no restrictions for the print bed material. You are free to use the BLTouch sensor with glass, metal, or any other print bed type. The sensor is mounted near the nozzle tip and connected to the motherboard. When the pin touches the print surface, it immediately retracts, causing changes in the electromagnetic field and triggering the magnetic switch. In such a way the sensor checks several points on the print bed, and its position is calculated from the values obtained. It’s important that your print bed is absolutely clean when using BLTouch, as any material residues, for example, may lead to inaccurate calculations.
The BLTouch sensor can be used with most of the 3D printers in the market, but it is recommended to check your printer compatibility just to make sure.
Best budget 3D printers with auto bed leveling
Artillery Genius Pro
The Artillery Genius Pro is a compact FDM 3D printer featuring the build volume of 220 x 220 x 250 mm and the Titan direct drive extruder with a 0.4 mm Volcano nozzle, that enables uniform filament extrusion and provides decent print quality with the minimum layer height of 100 microns. The extruder of the Genius Pro, unlike the original Genius model, is equipped with a touch sensor enabling the auto bed leveling function. The maximum nozzle temperature is 240 °C. The print bed, made of tempered glass, can heat up to 120 °C in 3 minutes. The printer is compatible with PLA, ABS, wood composites, PVA, HIPS, and flexible materials. The filament runout sensor and the resume printing function prevent possible print failures. The Genius Pro is compatible with Cura, Simplify3D, and Slic3r software and is operated via a 2.8" color touchscreen. The device comes as a kit, requiring self-assembly.
Credit: reddit.com
Pros
- Auto bed leveling
- Low-noise printing due to quiet stepper-drivers
- Heated build plate
- Filament runout sensor
- Resume printing function
- Wide materials compatibility
Cons
- Lack of enclosure
- No wireless connection
- Needs self-assembly
Creality Ender-3 S1 Pro
The Ender-3 S1 Pro is a compact FDM 3D printer capable of working with high-temp materials, like Nylon and Polycarbonate, alongside other popular filaments, such as PLA, ABS, wood composites, TPU, and PETG. The full-metal dual-gear direct extruder is equipped with a brass nozzle that can reach the temperature of 300 °C. The PEI-coated flexible magnetic build plate, made of spring steel, ensures proper first layer adhesion and easy removal of the printed part. The printer has a build volume of 220 x 220 x 270 mm and provides the minimum layer height of 50 microns, which is good for an entry-level FDM machine. The auto bed leveling function uses CR Touch probe to measure 16 points on the print bed and adjust the print head. The machine also features the filament runout sensor and resume printing function.
Credit: thetechnologyman.com
Pros
- Auto bed leveling
- High-temperature materials compatibility
- Heated print bed
- Decent print quality
- Flexible magnetic build plate
Cons
- No enclosure
Anycubic Vyper
The Anycubic Vyper is another entry-level FDM printer that comes semi-assembled and features a modular design, allowing for easy upgrades.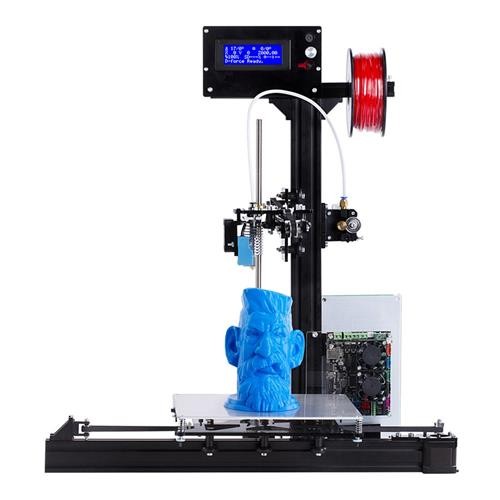 Like all the models in our list, the Vyper sports the auto bed leveling system, which uses a pressure sensor, activated when the nozzle hits the print bed, providing 16-points precise bed leveling. The build volume of 245 x 245 x 260 mm is quite decent for a compact desktop device. The printer is equipped with a dual-gear extrusion system with two cooling fans that allow printing with PLA-like materials. The maximum nozzle temperature is 260 °C. The heated spring steel magnetic build plate with a scratch-resistant coating ensures good adhesion and easy removal of the prints. The Anycubic Vyper is operated via a 4.3" touchscreen; the recommended software is Cura slicer.
Credit: 3dprintingmedia.network
Pros
- Auto bed leveling
- Decent build volume
- Heated print bed
- Easy operation
- Modular design for easy upgrades
Cons
- No enclosure
Best mid-range 3D printers with auto bed leveling
FlashForge Guider 2
The FlashForge Guider 2 is an FDM 3D printer featuring professional-grade quality, yet affordable price. The Guider 2 has the auto bed leveling function but, unlike the other printers in this article, it’s an assisted automatic process. That means the printer gives the user instructions during the calibration process, rather than automatically adjusts the position of the print head while printing. A removable heated print bed and an enclosed build chamber allow printing with ABS-like filaments. The device features a spacious build volume of 280 x 250 x 300 mm. The filament runout sensor and resume printing function stand for the reliability of the printing process. The printer comes with the FlashPrint proprietary slicer.
Credit: @matisboerodisign / instagram
Pros
- Affordable price
- High quality of printing
- Wide range of compatible materials
- Removable heated print bed
- Resume printing function
- Filament runout sensor
Cons
- The printer is quite heavy
- The prints are difficult to remove from the bed
Creality CR-5 Pro HT
Due to the maximum nozzle temperature of 300 °C and the fully-enclosed build chamber, the Creality CR-5 Pro High-Temp version can print with high-temperature materials, like PLA, TPU, ABS, and others. The carbon glass-coated print bed can heat up to 110 °C and features a BLTouch auto leveling function. The build chamber dimensions of 300 x 225 x 380 mm allow printing large models or multiple smaller parts at a time. Consistent failure-proof printing is provided by the filament runout sensor, resume printing function, and cloud printing support. The CR-5 Pro HT can be operated via a 4.3" touchscreen, or remotely with the Creality Cloud application.
Pros
- Auto bed leveling
- Large build volume
- Heated carbon glass-coated print bed
- Wide range of compatible materials, including high-temp filaments
- Cloud printing support
- Filament runout sensor
- Wide connectivity options
Cons
- 100 microns minimum layer height
Credit: @Just Vlad / youtube
Best professional 3D printers with auto bed leveling
Raise3D E2
The Raise3D E2 is a professional FDM 3D printer, boasting a great number of advanced functions that stand for industrial-grade quality and consistency of the printing process.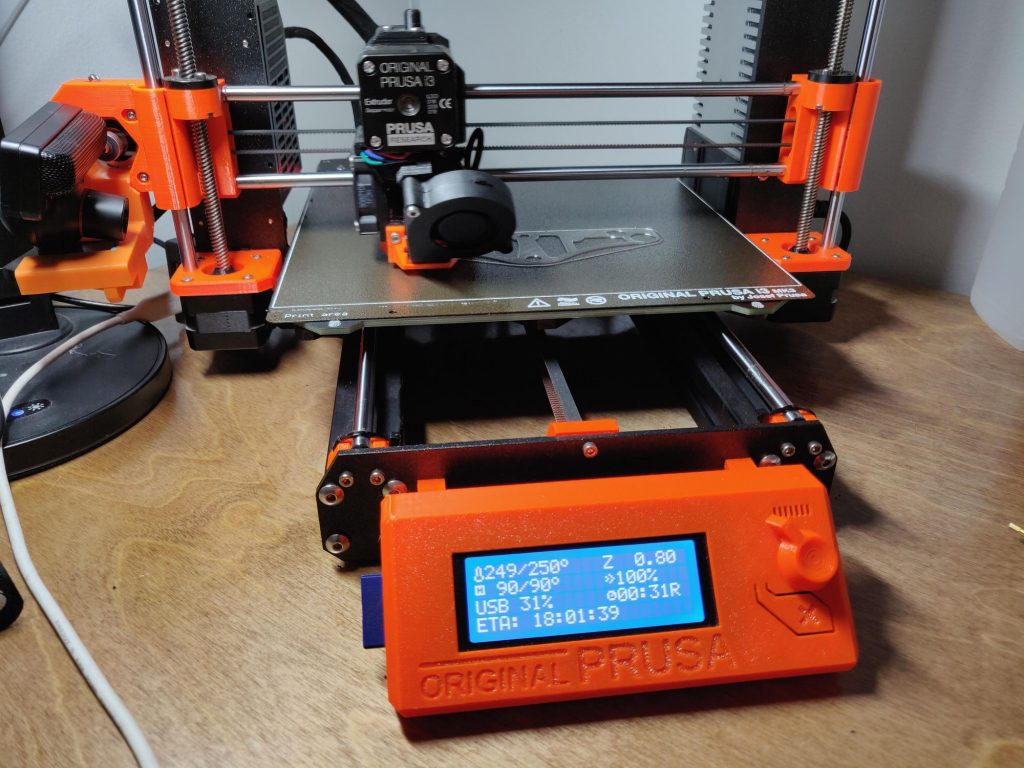 The device is equipped with the IDEX dual extrusion system with two independent extruders, that allow printing the same model in mirror or duplication mode, or printing dual color or dual material parts. The maximum nozzle temperature of 300 °C gives the possibility to print with a great number of filaments, like PLA, ABS, HIPS, PC, TPU, TPE, NYLON, PETG, ASA, PP, PVA, carbon and glass-filled, and others.The standard 0.4 mm nozzle can be replaced with optional 0.2–1.0 mm nozzles, if needed. The printer sports an automatic multi-zone bed leveling system with a BLTouch sensor. Other smart features include a built-in camera and a filament runout sensor.
Credit: @3deltaworkshop / Instagram
Pros
- Auto bed leveling
- IDEX dual extrusion system
- 20 microns minimum layer height
- Built-in camera
- Wide material compatibility
- Enclosed chamber with a HEPA filter
- Door opening detection
Cons
- Auto bed leveling takes quite a while
Raise3D Pro3
The Raise3D Pro 3 professional FDM 3D printer features a sizable build volume of 300 x 300 x 300 mm.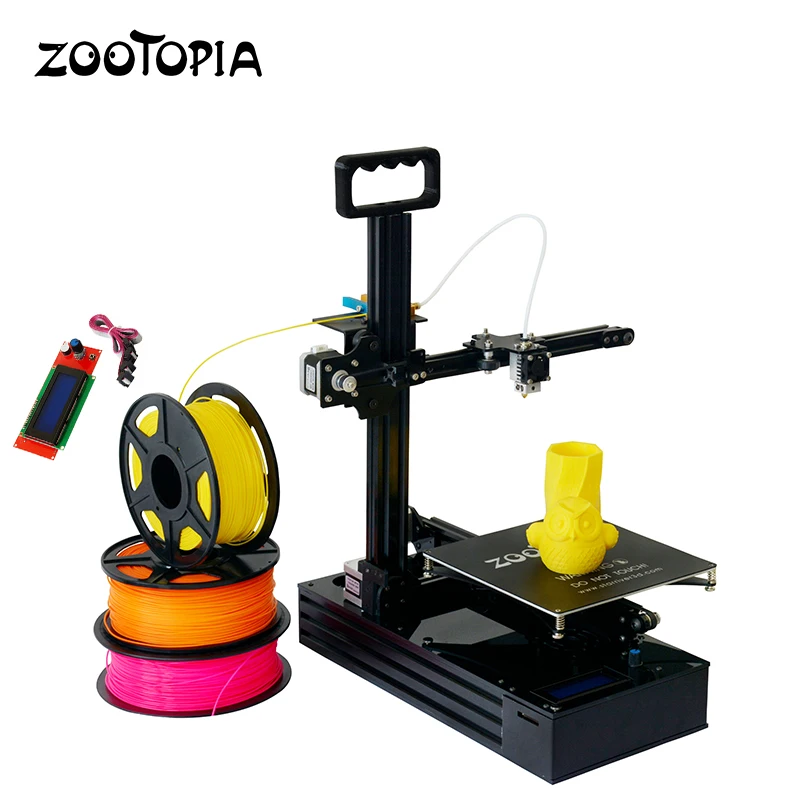 The bed auto leveling function ensures a perfectly even print area which improves the first layer adhesion, and the flexible steel build plate makes for the convenient removal of the printed parts. The Pro 3 is a dual extrusion system with two independent extruders and interchangeable nozzles with available diameters of 0.2–1.0 mm. The printer is an open-material system, allowing for the use of third-party materials alongside the proprietary filaments. A set of smart features, like built-in camera and door opening detection, provide a smooth printing experience.
Credit: @okada_ss / Instagram
Pros
- Auto bed leveling
- 10 mm minimum layer height
- High print quality
- Dual extrusion system
- Large build volume
- HEPA air filter
- Wide range of compatible materials
Cons
- Requires nozzle upgrades for printing with carbon fiber
Fusion3 Edge
The Fusion3 EDGE is a fast professional FDM 3D printer with a large build volume of 368 x 368 x 343 mm and the minimum layer height of 20 microns.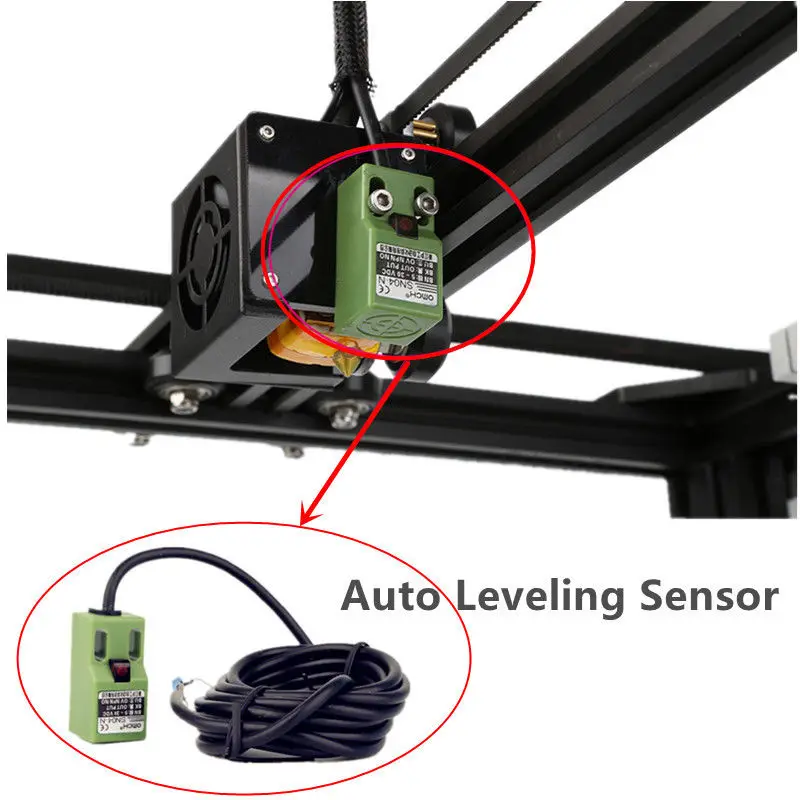 Due to the proprietary ANVIL print head with the maximum temperature of 320 °C, and wear-resistant surgical steel print tubes, the EDGE can print with high-temp and abrasive materials. The printer is equipped with a 1/4" aluminum print bed with standard glass surface and can be upgraded with an optional magnetic build plate. The flat surface combined with the mesh probe bed leveling system ensure perfect first layer adhesion. The multi-zone print bed can heat up to 145 °C, and the temperature in the passively heated build chamber reaches 70 °C.
Pros
- Precise auto bed leveling system
- Extremely high print speed
- Exceptional print quality
- Fully enclosed heated build chamber
- Heated print bed
- Wide range of compatible filaments, including third-party materials
- Affordable price
Cons
- Bowden extruder (may require upgrades and profile management when working with flexible materials)
Best large-format 3D printers with auto bed leveling
Modix Big 60 V3
The Modix Big 60 V3 is an affordable large-format FDM 3D printer.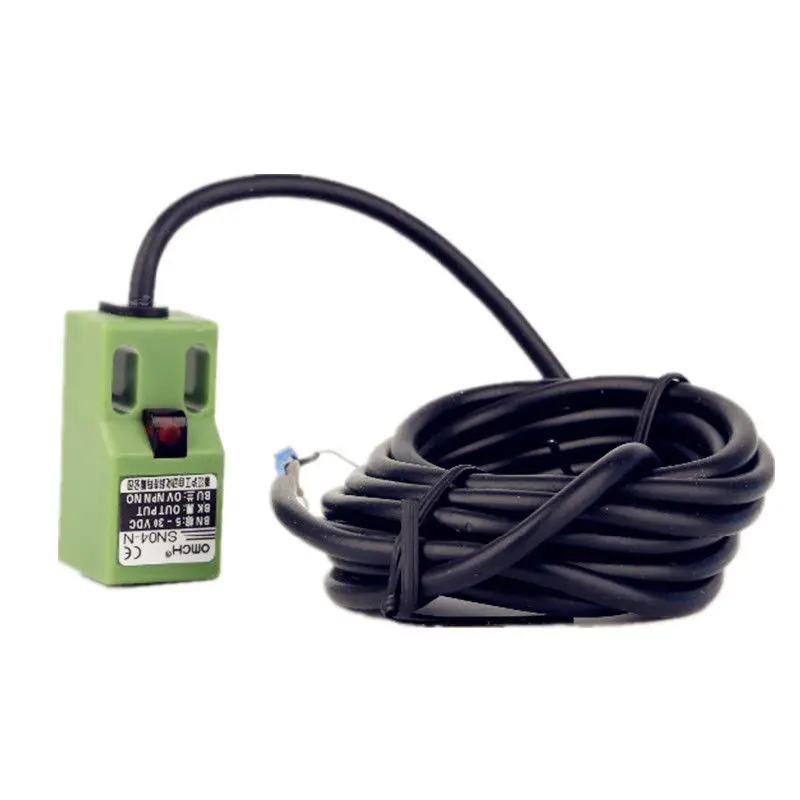 Like all the Modix printers, the Big 60 V3 comes as an assembly kit and features modular design allowing for easy upgrades. The V3 version is based on the previous Big 60 V2 model; the improvements include a 10% larger build volume of 600 x 600 x 660 mm and the new Duet 2 powerful controller unit, which offers a lot of enhancements, like Wi-Fi connectivity, remote control option, or dual extrusion support on the main board (and up to five more extruders on the optional expansion board). The automatic bed leveling function, using BLTouch probe with 100 points probing mesh, is activated before each print. The machine is capable of working with high-temp materials, and can print at 40-micron minimum layer height, providing industrial-grade print quality and consistency.
Credit: @hwangjoonha_ / Instagram
Pros
- Auto bed leveling
- Modular design allowing for easy upgrades
- Large build volume
- Industrial-grade print quality and speed
- Wide range of compatible materials
- 7" operating touchscreen
- Affordable price
Cons
- Self-assembly is time-consuming
- Many features, like an enclosure, come as an option only
Modix Big 120X V3
The Modix Big 120X V3 is another large FDM printer from the BIG family, featuring an impressive build volume of 1,200 x 600 x 640 mm, which allows you to print parts of almost any size. The machine is a self-assembly kit with the same open modular structure, as the other Modix Big printers. The enclosure comes as an option and should be bought separately. The Big 120X V3 is equipped with the new Griffin print head with the maximum hotend temperature of 285 °C, which can be further converted to 500 °C. The aluminum heated build plate features auto leveling function with the 200-point probing mesh. Modix offers a variety of components you can buy in addition to the basic package, like DUEX expansion board, E3D V6 and Super Volcano hotends, a magnetic print bed, and more.
Credit: @rebeca_gi_sa / Instagram
Pros
- Auto bed leveling
- Huge build volume
- Modular system
- Heated print bed
- Wide range of compatible filaments
- Compatibility with any slicing software
Cons
- Enclosure should be bought separately
- Takes a lot of time to assemble
Creatbot D600 Pro
The Creatbot D600 Pro is a large-scale FDM 3D printer featuring a build volume of 600 x 600 x 600 mm and a dual extrusion system with the maximum nozzle temperature of 420 °C. Combined with the heated ceramic-glass print bed and the hot air chamber, maintaining the constant temperature of up to 70 °C, this allows the D600 Pro to print with high-performance materials, like high-temp nylons, carbon fiber-filled thermoplastics and PC. The precise auto bed leveling system using BLTouch sensor greatly adds to print quality, ensuring proper first layer adhesion. The printer comes with free CreatWare software based on the popular Cura slicer.
Credit: @3dprimade / Instagram
Pros
- Auto bed leveling
- Huge build volume
- Heated build chamber
- Printing with engineering-grade materials
- Filament drying room
Cons
- Small build chamber door
Anycubic Vyper 3D Printer Review • Best* First Printer
Anycubic's new device promises to be the perfect first printer for beginner makers. Is it so? Find out in this article!
The Anycubic Vyper is a simple and cost effective FDM 3D printer.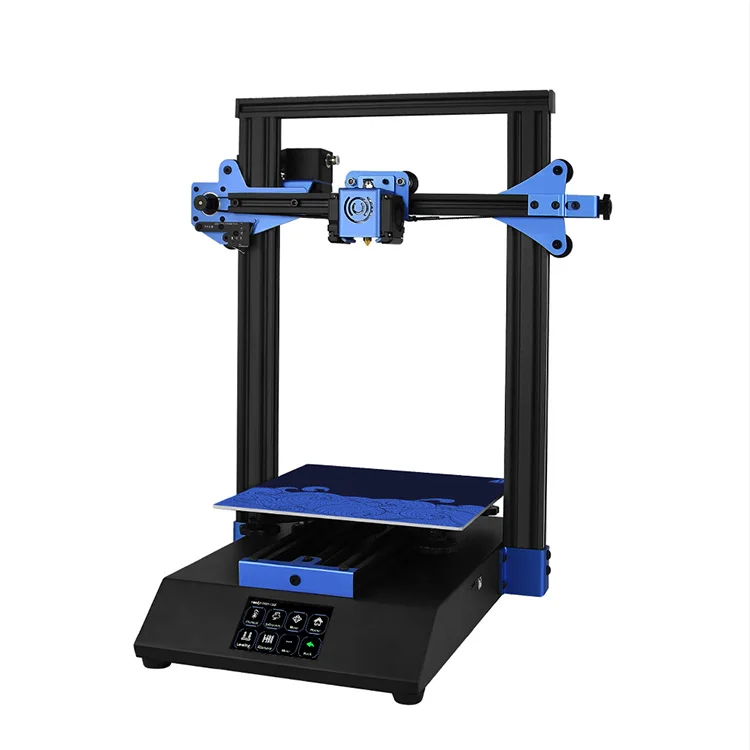 Today we will take a closer look at this device from Anycubic and figure out who it suits best and what you should pay attention to.
Contents:
- First look
- Assembly
- Features and design
- Equipment
- First seal
- Video Review
- Summary
First Look
3D printing has been around for many years, but despite this, it still seems like a kind of “hobby for the elite”. But, there are 3D printers that are suitable for the most beginner makers. The Anycubic Vyper is just one of those printers.
Anycubic's new Vyper printer is a new generation 3D printer. It has many features needed to provide a comfortable and easy operation, features that are sorely lacking in other 3D printers.
Example: automatic platform leveling at the touch of a button. A great feature that will save you the frustration of manually sizing, which can be a huge hassle if you're new to 3D printing.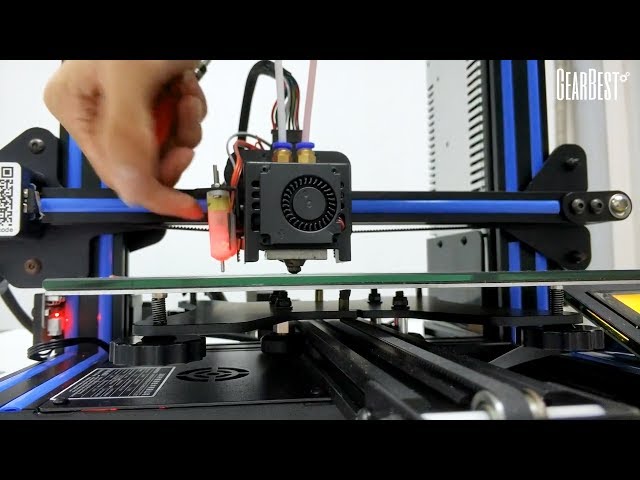 It is worth mentioning that in the first versions of this printer there was a problem with tensor sensors. But Anycubic, after feedback from customers, solved this problem. However, if you still have a problem with auto alignment, you can contact LIDER-3D customer service.
Vyper also has a touch screen. Most budget 3D printers don't have it. They are equipped with round switches and often, navigation using such switches is quite a laborious process. The touch screen is certainly easier and more enjoyable on all fronts. The interface is simple and not overloaded.
The options are sensibly grouped, which means quick access to the settings you need most often, such as changing media or adjusting desktop and hotend temperatures.
The Anycubic Vyper electronics includes a 32-bit motherboard and ARM Cortex-M3 chip, as well as silent TMC2209 stepper motor drivers. All this ensures fast, accurate and quiet operation of the printer.
The icing on the cake can be considered the possibility of an independent upgrade of this device. There are already various guides on the Internet to improve the printer.
But before we get into the details, the Vyper is the perfect “first” 3D printer. It prints reliably, is very quiet and not too expensive.
Build
The Anycubic Vyper is a DIY printer, but DIY is too strong a word for it. The fact is that the assembly of the device is the simplest, it is very far in complexity from other common DIY kits, which take several hours to assemble. You just need to tighten seven bolts and connect seven wires. All this will take no more than 15 minutes.
The assembly manual is located on an SD card in one of the plastic bags: you need to insert it (or the included USB reader) into your computer and open the instruction PDF file.
This file explains step by step how to get started, which basically involves screwing the vertical part of the frame to the base, then attaching the touch screen with three more screws. The tools come in a small tray that sits at the base of the printer, and after a total of seven bolts and screws, plus five cable connections, you're ready to go.
An owl test pattern is already on the SD card, so you can start printing immediately after the platform is automatically calibrated. Just note that the SD card must be inserted into the slot on the front of the printer upside down, with the label facing the floor.
Design and design
- Printing platform: 245x245x260 mm
- 4.3-inch touch screen
- Double screws of the Z
- PRODUCAL PRODUMS
Vyper is very similar SE and undoubtedly this popular model was the inspiration for Vyper.
But that's not bad, Vyper is not a clone. Although it has quite a few similar features, such as dual z-axis screws. This means there are two screw rods, one on each side of the vertical frame, rather than just one on one side like many budget 3D printers have.
Two rods are better, as this means that the horizontal bar that holds the print head can be kept perfectly level as it moves up during printing, and helps avoid errors when printing very tall models.
Another nice addition is the dual z-axis sensors that help compensate for height changes, which also ensures that the first layer prints correctly.
The platform itself is heated, which is to be expected at this price. The heated platform helps the models stick better, but the Vyper kit includes a special flexible backing that further increases adhesion and makes life easier for the user. It is a sheet of springy steel that is held in place by a magnet. When the print is finished, you simply remove the sheet and fold it: the model simply peels off.
The substrate has a textured surface, which contributes to the adhesion of the first layer, and a special deposition on the magnetic substrates ensures their durability.
There are a few other nice touches, such as the extruder mechanism, which uses two gears to move the filament instead of the usual one. Next to it is a filament sensor that will stop printing and allow you to feed a new spool of filament, avoiding a lot of problems.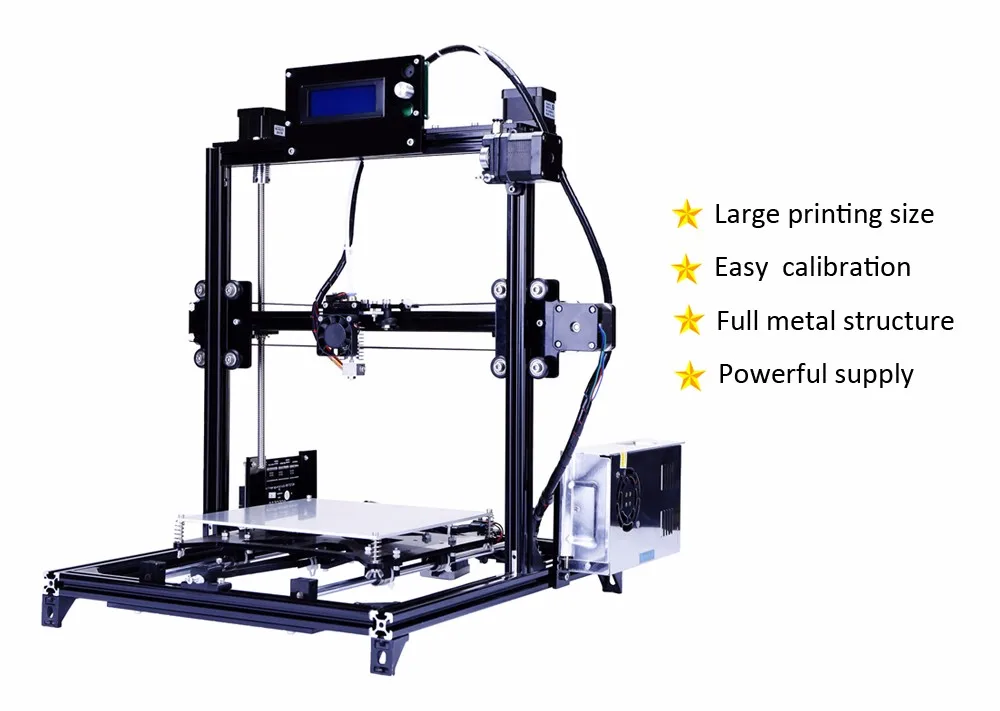
The hot end itself is an all-metal V6 E3DV-6 VULKANO with a diameter of 0.4 mm. This allows Vyper to print faster without losing accuracy or compromising the strength of the printed model.
There are three fans around it, and the whole assembly is covered with a plastic case, which makes it look nice and neat.
A selection of articles from the "Knowledge Base" section from the LIDER-3D website: 1) What is HIPS and how to print it • 2) Post-processing of models after 3D printing • 3) PLA plastic: what is it and how to print PLA
Contents
The tool tray contains thread cutters, hex keys, wrenches and nozzle cleaner. The kit also includes two spare nozzles.
The Ultimaker Cura version is supplied on an SD card with the Vyper profile. Cura is almost universal slicing software.
First print
After leveling the platform, you can print a test model, a small owl figurine, which is included as a .gcode file on the SD card. This does not require a lot of filament and allows you to check that everything is working correctly.
We printed several models, specifically for the jaw model, the following settings were used: table temperature 60°C, nozzle temperature 225°C, print speed 100 mm/s, infill density 20%, material LIDER-3D Premium PLA white. The result is impressively clean. Aside from a few minor issues, this is one of the best results we've seen in a budget printer.
Vyper's touch screen allows you to adjust print speed and temperature on the fly, including while printing, which can be helpful if you notice something is wrong in the middle of printing. Information and settings are kept to a minimum, which is quite suitable for beginners, but may seem a little limited for advanced users.
The auto-resume feature works as advertised, but requires placing the model near the back of the bed and printing from an SD card to use it.
The material of the next model LIDER-3D Premium PLA is blue.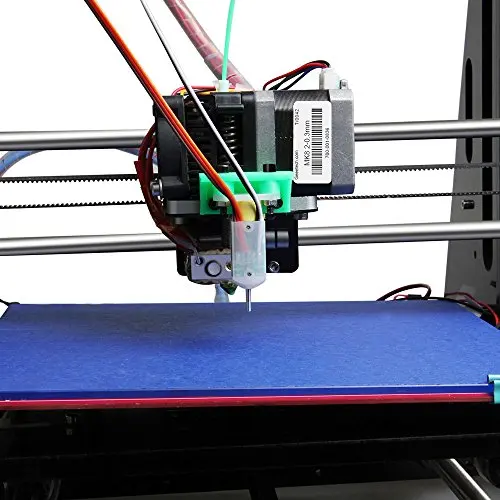 Printing parameters: table temperature 60°C, nozzle temperature 225°C, print speed 100 mm/s, infill density 20%.
Prints generally adhere well to the flexible bed and are easy to remove after printing.
The material of the next model LIDER-3D Premium PLA is brown. Printing parameters: table temperature 60°C, nozzle temperature 225°C, print speed 100 mm/s, infill density 20%.
The real plus is that the Vyper doesn't make too much noise when printing. The only thing you will hear is the cooling fans that cool the filament right after it is extruded.
This is important for long hours of printing, such as when you'll be typing all night long. People are usually asleep at night, and the noise from the Vyper is unlikely to keep you awake.
Video review
Bottom line
If you're looking for a budget 3D printer and are willing to pay a little more than the cheapest, then the Vyper is very much worth the money. The automatic platform calibration, great touch screen and solid build quality make it a great choice and an ideal first 3D printer, and for true hardcore pros, feel free to add it to their surely extensive collection of devices as a great entry-level 3D printer.
Thank you all, the material was prepared by a team of LIDER-3D specialists, we will be glad to hear your questions in the comments.
If you are interested in the Anycubic Vyper 3D printer, you can place an order on our LIDER-3D website, with free shipping throughout Russia and a guarantee.
Follow us on social networks: VKontakte, Telegram, Instagram, YouTube, Ya.Zen, Twitter, Facebook to be the first to receive the most interesting materials!
* - according to LIDER-3D
Best 3D printers of 2014
Which 3D printer to buy in 2015? This question is asked by those who have just decided to discover the world of three-dimensional modeling. One of the largest online services that unites users of this equipment around the world - 3dhubs has compiled a kind of rating of the best devices for 3D printing. It is based on more than 2,200 reviews from owners of a wide variety of printer configurations.
The most important aspects that most users care about were evaluated: print quality, ease of use, build quality, reliability, failure rate, operating costs, software openness and hardware cost. As a result, the best models were divided into nominations.
3D printers for beginners
The main condition for equipment in this category is compliance with the “Plug’n’Play” principle, that is, the ability to work with the device literally out of the box, without time-consuming setup. At the same time, print quality, the minimum number of equipment failures, technical customer support and service are equally important.
Being able to quickly learn 3D modeling and get satisfying results are the main tasks that 3D printers for beginners should solve.
One of the clear leaders in this nomination was UP Plus 2. A compact and lightweight printer with a working area of 140×140 mm, heated platform and the ability to print with ABS plastic and PLA plastic.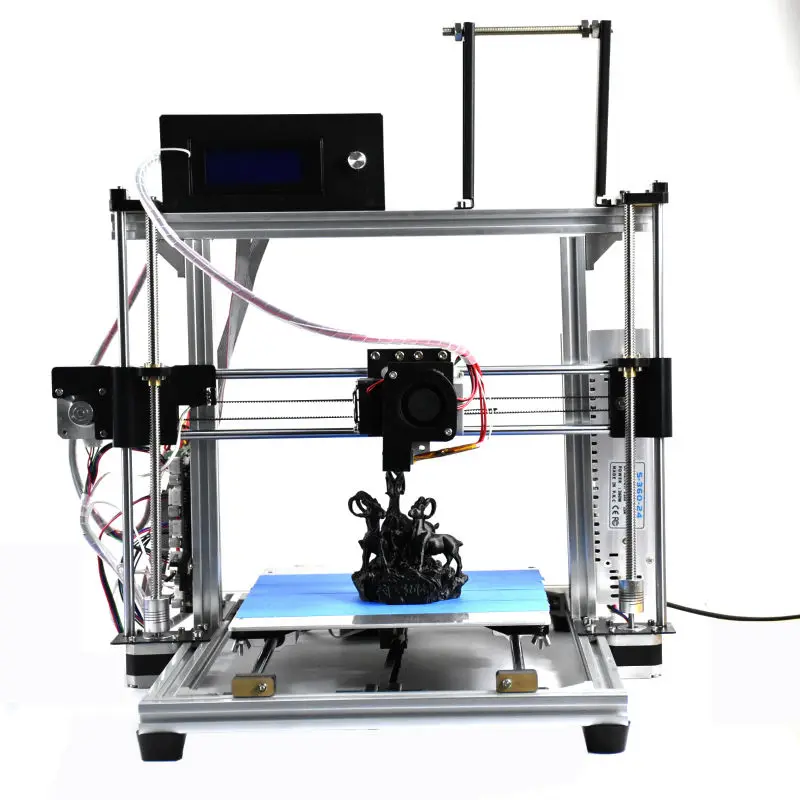 It compares favorably with models of a similar level with automatic platform leveling and height calibration, which is especially important for inexperienced users.
To do this, UP Plus 2 has an original system of magnetic sensors and components that greatly simplifies printer setup and achieves good printing results. According to the test results - at least 91% of inexperienced users were immediately able to get quality results when working with this printer.
The simple software with an intuitive set of tools contributes a lot to this. As disadvantages, a limited set of settings for adjusting the temperature and print speed can be noted, however, the program accurately calculates the necessary support elements. The printer is not designed using open source code and is not suitable for further upgrades. Also, some users may not be satisfied with the print speed and print resolution of the UP Plus 2 - they are really less than some counterparts from other manufacturers, but these are all compromises that everyone must decide individually.
Enthusiast 3D printers
This category is for those who are looking for a reliable machine with consistently high print quality, an easy to use 3D printer that can be easily upgraded or upgraded. Such models are best suited for hobbyists, designers, some small businesses.
The bq Witbox printer took the leading place in this nomination. The entry of the Spanish company bq into a large market has become one of the most notable and highly successful in the past year. Her Witbox printer turned out to be thoughtful and high-quality, quickly gaining popularity. Ergonomic design, fully closed construction, the ability to assemble a whole complex of 3D printers and a large print area, compared to most similar models from other manufacturers, are the main advantages of this model.
Additional and significant advantages of bq Witbox are open source code, good detailing up to 50 microns, the ability to work with several different programs for editing three-dimensional layouts.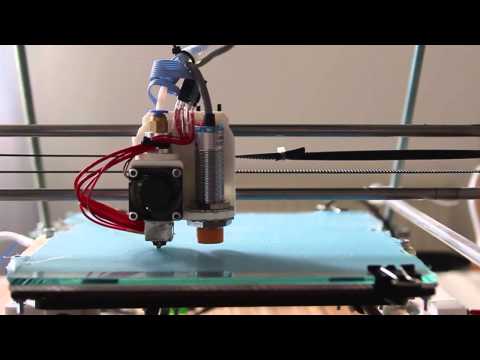
The limitations are that the printer does not have a heated bed, and only PLA plastic can be used as a consumable, the dual extruder is also not yet available. Nevertheless, according to the results of surveys, absolutely all owners of bq Witbox advised it to those who are just considering buying a 3D printer.
3D printers for DIYers
Do It Yourself is one of the pillars of the 3D printer industry. Almost half of the market belongs to original home-made developments that are freely available and open for further modernization. Many talented technicians, engineers and simply enthusiastic people are attracted by the opportunity to work independently and improve both the equipment itself and the software. Especially for them, some manufacturers offer printer configurations with an eye to further improvement. The purchase of such equipment is a long-term investment that can pay off over time, as new 3D printing functionality will appear on the basis of one platform.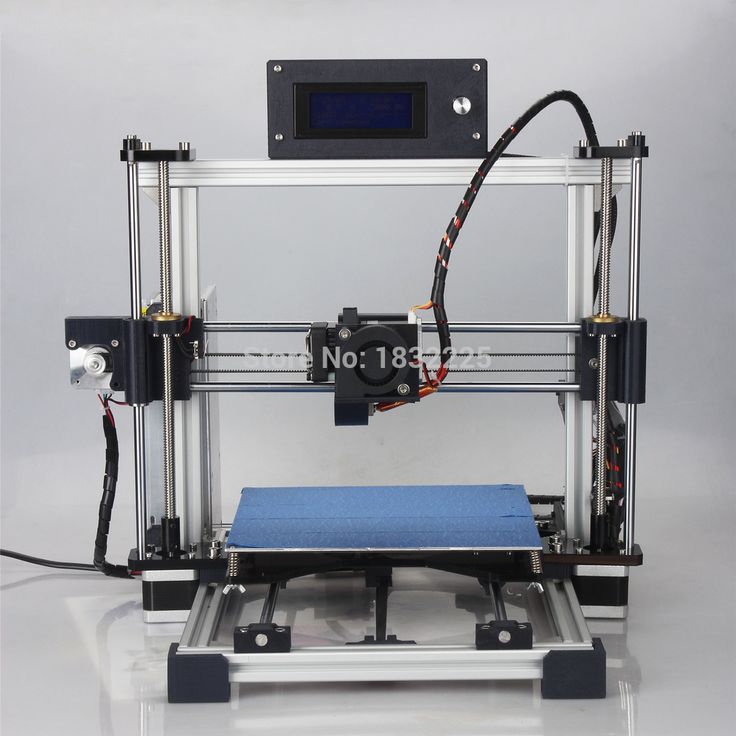
It should be noted that this category is replenished with new models from year to year, and their number has already reached several dozen. However, one of the clear favorites since 2011 are Ultimaker 3D printers. At the moment, the second generation of equipment is on the market, which continues to delight those who like to be technically savvy.
Ultimaker 2 can compete with new printers, including those from other categories. A large working area of 210×210×205 mm, excellent detail with a print resolution of up to 20 microns and, of course, the possibility of upgrading are the main advantages of this model. Ultimaker 2 will require self-assembly, it will be necessary to properly understand the technical aspects of the printer and the intricacies of its possible improvement. But the community of users of this printer is one of the largest, so there will be no difficulties in finding the right information and exchanging experience.
For all their merits, the Ultimaker series printers have only one negative point - they are noisier than their closest competitors. But this is not at all critical for the vast majority of users of this equipment.
Inexpensive 3D printers
A phrase that was unimaginable just a few years ago. From its inception until the early 2000s, 3D printing equipment was not affordable. However, technological progress has done its job - the prices for equipment and consumables are gradually decreasing, and many people can afford to buy a 3D printer these days.
In the category of budget 3D printers that were in demand in the past year, there are several real bestsellers:
- UP Mini - the vast majority of users agreed that this is the best home 3D printer. It also holds the leading position as one of the cheapest 3D printers;
- Shining 3D - printers from a young but very promising company that began its activities with the production of budget universal models;
- ShareBot Kiwi 3D is a printer that is just gaining popularity outside its country of origin (Italy), but has already received a lot of rave reviews.
Learn more