Reverse 3d printer
4 Steps To Reverse Engineering with 3D Printing Technology
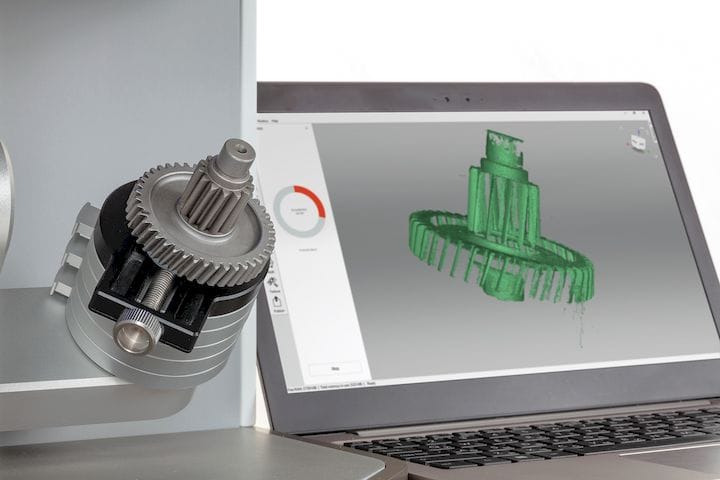
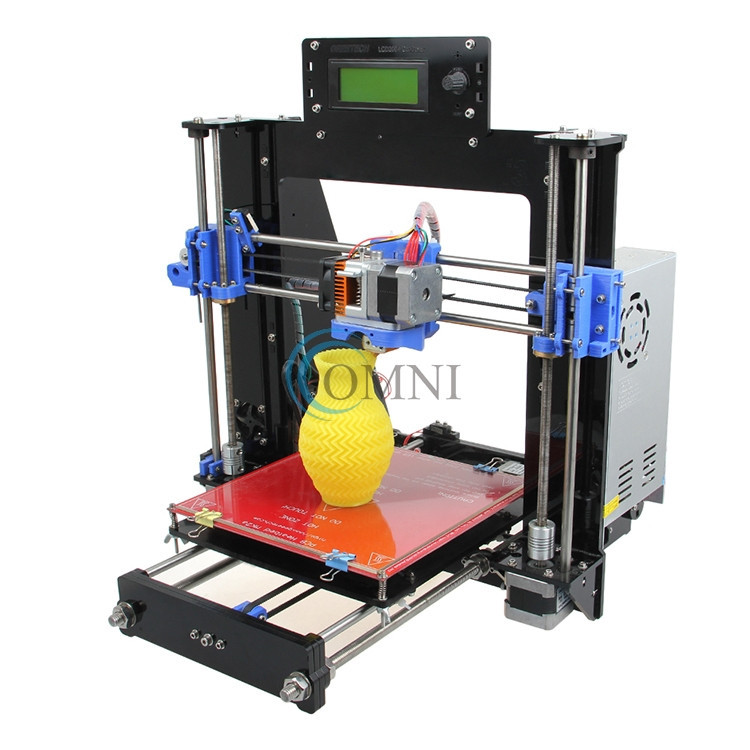
Reverse engineering is a method which enables users to replicate an object or a part with the help of 3D printing. With this technology, a user can scan a 3-dimensional object and convert it into a CAD file which can then be printed using a 3D printer to get an exact replica of the object or spare part.
In manufacturing industries, many old machines are idle as some parts have failed and the company couldn’t get them from their original manufacturer. In such cases, the parts can be scanned and 3D printed, which would make the machine functional again.
Reverse engineering has applications in many industries such as Aerospace, Defense, General Engineering, Oil & Gas, Energy, and Automobile spare parts. There are multiple benefits of reverse engineering such as the production of obsolete parts that are no more produced, to produce of complex existing parts without having to design them in CAD software, reduction in machine downtime, improve efficiency of existing parts and cost savings.
Steps for reverse engineering:
1. Determine units & take part dimensions
In reverse engineering, the first step is to determine units. Gather some information on where the part was made, and more specifically where it was designed, this will help you to understand that the part is in Metric or Imperial unit. Once you have a hunch about the units being used, capture the data from the existing part. Start with taking measurements on some key features like the length, width, and diameter of the main body.
2. Plan for your Design & Understand the object thoroughly
The next step is to start planning out your design for 3D metal printing. Some products have complex shapes so it is important to get a complete understanding of the object. If the part is of assembly, you need to check the critical areas of part application so that the functionality of the part doesn’t disturb the interrelationship between the various parts. When disassembling the object, be sure to keep an eye on fit and feel of the parts. If you have a strong understanding at the start, it will make the planning and design of your product much easier.
3. Laser-Scan & Start CAD designing:
Now physical part or object has to be scanned using 3D scanning technologies like Laser scanners, structured light digitizers, or Industrial CT scanning. The CAD software programs turn the point cloud or mesh that was received from the scanner into a polygonal model. The resulting mesh is cleaned up, smoothed, and sculpted to its required shape and accuracy.
Then you need identify the design flaws in the CAD model and also work on the design modifications if required. Also, you need to detect the areas where some modifications for the purpose of printing are required, for instance adding support structures where there is risk of breakage. The CAD model is then converted to an STL file and the object is sliced into 2D layers stacked on top of one another. The STL file is then transferred to the printer using custom machine software.
4. 3D Print the CAD file:
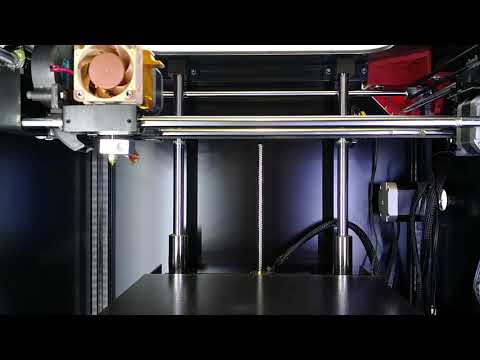
The last step is the simplest step as you just have to 3D print the STL file and wait for the output i.e. replicated 3D object. After the file and material are loaded into the printer, the printer is set-up with printing parameters. The 3D printer builds the model by depositing the material layer-by-layer. After the first layer of the physical model is done, the 3D printing machine builds another layer of powder on top of the first layer. This process is repeated until the object is completed. The completed object is then sent for post-processing where it is finished and completed for dispatch.
Conclusion:
3D technologies are enhancing not only because of ability to create something new but also because they can reverse engineer those products that already exist. Reverse engineering gives way for design improvement, reuse of old objects and increase productivity at lower costs.
Summary
Extruder REVERSING at specific spots in print? : 3Dprinting
Alright, this is a weird one. I'll start by explaining the problem, then the steps I've taken to troubleshoot it already.
So randomly during my print, i'll start to get severe under-extrusion in SPECIFIC spots. While trying to figure out what was going on, I pinched the filament in my fingers as the printer ran to feel the movement. At the specific spot where under extrusion occurred, the filament started stepping BACKWARDS. And it wasn't like a retraction step either, it was very jerky and probably moved about 1mm reverse per step. There were approx. 4 'steps' from the motor in the reverse direction as the extruder head moved past the problematic spot, then the extruder motor goes back to normal direction and the other areas of the print look fantastic.
Using Slic3r (latest version) to slice currently. However, I've had alot of problems with this model in the past. In fact, I typically used Cura but had so many random under extrusion problems with this model being sliced by Cura that I moved to slic3r. Used to work fine, but now this random issue with the Gcode (?) i'm assuming...
Image of problem: https://imgur.com/a/gfQgr6x
notice how the print looks good except for that one corner after some z-height. It was at that corner I could feel the extruder stepping backwards (NOT overpressure reversing, it was STEPPING backwards)
Before realizing the motor was stepping backwards at the problem spot, I did alot of other things to fix other under extrusion problems (closing PTFE tube, not enough tension on drive wheel, etc). 99% of the model prints perfectly now, it's just this one random spot. Started happening after about 70% of the z-height was printed, and occurs on every layer after that in the same spot.
This model does have some complex curves that have seemed to be problematic for slicers in the past. Not sure why the Gcode is telling the extruder to reverse in this one corner though... like I said, it's different than when it retracts.
What are your thoughts? Slic3r glitch, firmware issue? I'm using a Rigidbot, it's about 6 years old now. I guess i'll try Cura tomorrow and re-export an STL at 'medium' resolution instead of 'high' polygon count, maybe that's giving errors. Geometry was created in Fusion360 and exported using the built in STL creator.
[UPDATE 4/3/19]
Okay well shortly after posting this (print was still running) the extruder stopped pushing filament in ALL areas of the print... like it wasn't even trying. Even stopping the print and manually moving the extruder axis through the firmware wouldn't make the extruder budge (filament moved freely by hand, it was jammed).
Restarting the printer made the extruder work again... failing stepper / driver possibly? I guess we will have to run the same print again tomorrow and see what happens... unfortunately the problem started happening 9hrs into a 10hr print
TL/DR; My extruder is REVERSING direction at a SPECIFIC point in the print, after a certain z-height, while printing perfectly everywhere else
Free STL file Check valve for 1/4" OD pipe・3D printer design to download・Cults
Rock Climbing Stick Clip with painter pole threads
Free
Climbing ear
Free
Coral Skeleton Brain Bowl/Planter
Free
Castle front, planter/saucer
Free of charge
Fat Cat bowl/planter
Free
US milk jug with screw spout
Free
US Milk jug to hose connector
Free
Coral hand hook
Free
Best 3D Printer Files in Home Category
Bookmarks and lines
0. 86 €
86 €
Planter - pot (model: Clover)
1,50 €
Suspension hook
Free
Star LED light
Free
motorbike cutter
1.88 €
Toilet Roll Holder 'Clear & Clean'
Free
Felted boots - matera, matera.
€3.50
Skull pen hole
Free
Bestsellers in the Home category
Spider in a pumpkin
1.61 €
Christmas gnome decor COMBO PACK - Crex
4,94 €
Modular storage box system with quick print
5. 82 €
82 €
Wall shelf "Tinder Fungus"
2.40 €
CHRISTMAS BALLS
1.24 €
Egg cracker
1.02 €
Wall shelf "Oyster mushroom"
2,40 €
HANGER WITH PARROT BEAK
2.01 €
Super cute paw pen cup
1.36 €
Snowman - Crex
3.20 €
Another quick-change toilet roll holder
1 €
Bordeaux, Octopus
2.40 €
Candlestick - Arbre de vie
1,20 €
Notepad
2. 60 €
60 €
Wallet card holder (universal package)
1.31 €
Clothes hanger "Wolf"
2.17 €
Do you want to support Cults?
Do you like Cults and want to help us continue our journey on our own ? Please note that we are a small team of 3 people, so support us in maintaining the activities of and creating future developments is very simple. Here are 4 solutions available to everyone:
-
AD: Disable your AdBlock banner blocker and click on our banner ads.
-
AFFILIATION: Shop online with our affiliate links here Amazon.
-
DONATIONS: If you want, you can donate via PayPal here.
-
* INVITE FRIENDS: * Invite your friends, discover the platform and great 3D files shared by the community!
3D printing technologies for water treatment
St. Petersburg, Grazhdansky pr. 111 office. 408
+ 7 (812) 507-89-05
[email protected]
+ 7 (812) 507-89-05
Home / Articles Instructions Video / Technologies and methods of water purification / 3D printing technologies in water treatment
START PLUS LLC began to successfully use 3D modeling and 3D printing technologies in its production process.
3D printing is an additive technology for layer-by-layer manufacturing of an object from a 3D model. In this case, the technology of layer-by-layer application of molten thermoplastic (ABS plastic) was used.
The reason was the situation at the start of the water purification system, which included filters with Magnum IT, 764 L, SN, NHWB control valves, which allow organizing the operation of several filters with simultaneous regeneration prohibited. It was necessary to configure the operation of filters in the twin alternating mode. The standard configuration of the Magnum valve ("Logix Single Tank Magnum Camshaft, L-types" shaft) does not imply its use in twin alternating mode. The difference in configuration is the configuration of the camshaft (required the shaft "Logix Multi Tank Camshaft, A, P or L-types"), namely one of its sectors (see photo 1).
Photo 1
1 - Shaft "Logix Single Tank Magnum Camshaft, L-types"
2 - Shaft "Logix Multi Tank Camshaft, A, P or L-types"
6
6
For this task, we used a 3D printer, which appeared in the arsenal of equipment of START PLUS LLC.
Shaft cam printed (see photo 2) within an hour. Thus, there was no need to supply the shaft with the required configuration, and thus the start-up period of the water purification system was reduced.
Photo 2
1 - Shaft cam 2
2 - Mg control valve shaft cam 3D printed
3 - Shaft cam This example is not unique. The use of 3D printing technology, combined with engineering, provides ample opportunities at any stage from design to operation of water treatment systems.
LLC "Company" START PLUS "offers its services in this area and invites you to cooperate.
Special offers
Turnkey water treatment system
Our company provides services for the entire range of water treatment: from preparatory design work to putting the equipment into operation.
SOFTNOR chemical-free softening
The unique SOFTNOR technology for chemical-free water softening, developed by specialists from the German company Watch GmbH.
Made by NINSIS
© LLC “Company “START PLUS” (2013-2022) [e-mail]All materials on this site are subject to copyright. Copying and distribution of information and objects of the site without the prior consent of the copyright holder is prohibited.
Made by NINSIS
2013 - 2022 © www.