Prusa 3d scanner
Photogrammetry 2 - 3D Scanning simpler, better than ever!
Creating a 3D model just by taking lots of pictures of a real object? Yes! Photogrammetry is back – and it’s easier to use, gives better results and it is still completely free!
You’ve read our first article about Photogrammetry, right? A quick recap – using many pictures taken from all possible directions, photogrammetry software tries to find the same features present on multiple pictures. You end up with a so-called point cloud, a bunch of 3D points that resemble the object. To get a printable mesh we have to triangulate the data. This can be tricky because we have to discard points that belong to the background and other objects in the scene. We clean the model a bit, patch all the holes, slice it and we are ready to print!
Well, all of this sounds nice and simple, but in reality, our original tutorial was quite complex. Luckily for us, things have changed and a new player has entered the photogrammetry ring: meet Meshroom!
Meshroom/AliceVision
Meshroom is free, open-source photogrammetry software with a beautiful UI. It’s built on top of an underlying framework called AliceVision, which is the result of cooperation between multiple Universities & Labs (Czech Technical University, IMAGINE, INPT, Simula Research Laboratory, and Quine) and Mikros Image, a French post-production company.
Meshroom UI
The basic interaction is about as simple as it gets. Drag and drop pictures into the Meshroom window, hit START and wait for the finished model. However, with Meshroom you can also peform Augmented reconstruction. That means you can add more pictures to a half-finished solution in case you notice (in the preview) that some areas could use more detail.
And even better, with Meshroom you can do Live Reconstruction! In this mode, you repeatedly take sets of pictures, upload them to a folder and they are automatically processed. A preview is displayed and you can decide which part of the model needs more detail. Then, you take more pictures and the whole process repeats until you’ve captured the model from all angles.
You can download the latest version of Meshroom here. It’s available for both Windows and OSX/Linux (but you have to compile it for OSX/Linux). Check the wiki or the documentation google doc for installation instructions. You will need CUDA enabled GPU, so NVIDIA cards only 🙁
But before we get to play with Meshroom, let’s go over several important steps that you should follow when taking pictures for photogrammetry.
How to take pictures for photogrammetry
Camera & settings
A smartphone camera will work just fine, but if you have a DSLR, it’s even better. If you’ll be using DSLR, crank the aperture to at least 5-6 so that the whole model you’re trying to capture is in focus.
Consider shooting in RAW if your camera supports it. JPEGs are usually perfectly fine, but the RAW file format brings some better options for tweaking image settings – such as brightness. If you’re developing RAW pictures or editing JPGs, make sure you do not apply lens correction effects or similar filters.
Taking the pictures
You’ll want to capture at least 30 pictures. During our testing, we often shot 50, 100 or even more pictures to capture every detail. It doesn’t take nearly as long as you’d expect. Keep in mind, that some pictures might be discarded if the program doesn’t find enough similarities with other pictures or if they are blurry.
- Move around the target object in circles. Do not move the object or its surroundings between pictures.
- Overlap! You want to have each part of the model captured by at least 2 pictures. Ideally, you’d have about 60-80% overlap in succeeding pictures.
- Avoid hard shadows, use diffuse lighting or take the pictures outside on a semi-cloudy day.

- The object should occupy a significant portion of each image.
- Avoid very glossy or transparent targets.
Anontin Dvorak’s statue – STL link
You can use camera zoom or even mix pictures from totally different cameras, Meshroom is really great in this regard. However, don’t change the zoom unnecessarily after each picture just because you can. It is good to have a lot of images taken with the same camera and the same zoom (focal length), since this creates needed limits for the internal camera calibration process – which is what we want.
Can you make a video instead? Yes… but don’t do it. Although, technically, it’s possible to use video rendered into individual images as an input for Meshroom, but the quality is much lower compared to a standard still image. The camera’s metadata will be missing (sensor size, lens) and you’ll be importing hundreds of images. Which means the processing will take forever to complete.
What if you took the pictures in front of a perfectly white background and rotated the model between the pictures? This works… sort of. The results will inferior. We will only have points on the object which represent a small sub-part of the image, so the camera parameters are less constrained which leads to less precise results.
Ideal targets for photogrammetry are textured or rough items (e.g. statues). If it’s an option, you can cover glossy or transparent objects with powder (flour/chalk spray) to avoid reflections. Or cover the glossy surface with a painters tape.
Standard reconstruction
You’re most likely going to use the standard reconstruction when processing photos previously taken outside and you can’t simply take more of them. We assume you already took all of the required pictures, got home and now you want to reconstruct the 3D model. The workflow is really simple:
- Copy all of the pictures to a folder on your hard drive
- Drag and drop the folder (or the individual images) into Meshroom window
- Save the project using File – Save to a destination of your liking (otherwise the reconstruction will be stored in a temporary folder)
- Hit Start or Right-click the Structure from motion (SFM) node and hit Compute
- It’s better to compute the SFM because you’ll see the preview within minutes
- Grab a coffee and wait – this make take some time 🙂
- The nodes at the bottom will turn green one by one as they complete
- You may hit Stop at any time and resume the reconstruction later
As soon as the Structure from motion node completes, you’ll be presented with a preview (double-click the node to load the preview if it doesn’t load automatically).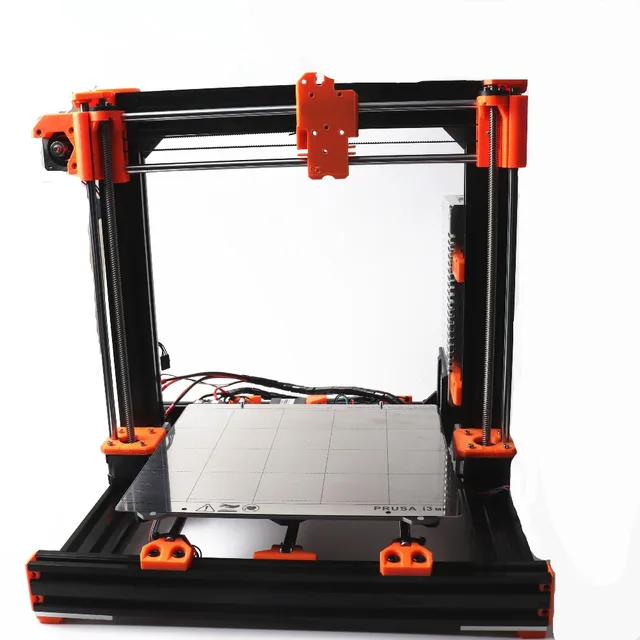 All pictures successfully used in the reconstruction will have a green tick next to them.
Discarded photos are marked with a red minus sign
If you notice that a significant number of pictures was discarded and the preview has just a few cameras in it, there is little to no point in continuing the reconstruction. You’ll either have to take better pictures, augment the reconstruction with more pictures (explained in next chapter), or play with the settings.
Once the full reconstruction finishes you can double-click the Texturing node to preview the final mesh.
You can right-click any of the completed nodes and select Open folder. Open the Texturing or MeshFiltering folder to find the output file in a commonly used Wavefront .obj format.
The real Spinx statue and a finished print, download the model here
Even though the output file can be imported directly to Slic3r PE, you’ll most likely want to do at least some very basic clean-up of the model before printing it.
Are you looking for sample photos, so that you can try photogrammetry without too much effort? Creators of 3DF Zephyr, which is another great photogrammetry software, have sample photos on their web page, check them out here.
Augmented reconstruction
Let’s say you’re scanning something at home – a cute clay dinosaur created by your kid, your favorite action figure or your guitar. You took about 60 pictures and the reconstruction is going well. Except for one area, which you didn’t capture well, some pictures got discarded and that part of the model is now missing many details.
With Meshroom, you can simply take more pictures and add them to existing reconstruction! We can’t emphasize enough how useful this feature is. It saved us a great amount of time during our testing.
It’s essential that you have not moved the object between the individual series of pictures. If you have moved it, you can’t augment the reconstruction anymore.
When you need to take pictures in order to fill a poorly captured area, we suggest taking about 5 to 10 photos. And you can try to fill multiple areas at once. New pictures are matched with the original set of photos. This means that adding new pictures may even cause previously discarded images to be matched successfully with the new series.
Whenever you add a series of pictures to an existing reconstruction, a new branch will appear in the Graph editor. You only need to compute everything up to the StructureFromMotion node (right click on it and select Compute), which is usually pretty fast. As soon as it turns green, you can double-click the node to update the preview in the 3D Viewer window.
When you think you have enough pictures for the final reconstruction, right-click the bottom rightmost node (Texturing) and hit Compute. This can be very time consuming, so it’s really beneficial to only run the full reconstruction on the final branch with all of the pictures included.
An action figure re-created with Augmented reconstruction
Live Reconstruction
The most fun way to work with photogrammetry! You set up a folder, which will be monitored by Meshroom. Whenever you copy images into this folder, they will be automatically processed and added to the reconstruction. Keep taking more pictures progressively and watch how the model improves. In the end, you can finally let Meshroom compute the full textured model.
The first series of pictures should include at least 10-20 images and should focus on the general shape of the object. If you capture the whole front side of the object and then the whole back side of it, it’s likely you’ll have to create a bridge between these series of pictures. You can do that by taking pictures that transition from the front to the back with small increments.
Setup
- Select View – Live Reconstruction
- Set the Image folder and the minimum number of images that will be processed during each step (keep this above 4)
- Hit Start in the Live Reconstruction panel
- Start copying pictures into the image folder
The minimum number of images is set to 4 by default, but we suggest to take even more pictures in each series.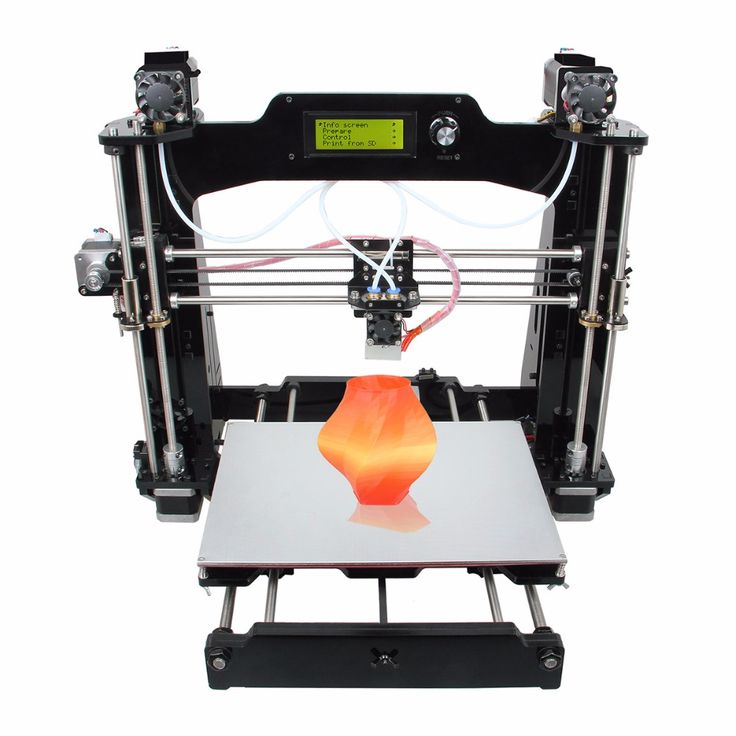
There is a small catch at the end. To generate the textured model, you’ll have re-link the last StructureFromMotion node to the PrepareDenseScene node.
- Right-click the link between the first StructureFromMotion and PrepareDenseScene node
- Choose Remove
- Drag a new link from the bottom-most StructureFromMotion output to the PrepareDenseScene input
- Right-click Texturing and hit Compute
Hydrant – Live reconstruction
Preparing models for print – closing holes & repairing
Almost all meshes created by 3D scanning or photogrammetry have a hole at the bottom. Luckily for us, we need a flat base that could be easily placed on the print bed anyway, so a simple plane cut in Meshmixer, Blender, 3D builder (or any other program that you prefer) will do.
Also, the scale of the model will be pretty much random, so don’t be surprised when the model is really tiny after import. Just scale it up.
There is one technique in particular that makes a perfect combo with photogrammetry and that’s sculpting. We will write a separate article about it in the future, but in the meantime feel free to check existing tutorials, like this one.
We strongly recommend to check the Meshroom wiki. There’s a lot of information about how to solve some errors you might encounter and what parameters are worth playing with. And if you want to contribute, that’s even better, submit a pull request or contact the developers via email.
Photogrammetry print gallery
Conclusion
Thanks to Meshroom, photogrammetry is now easier than ever. The output meshes are not ready to print straight away, but with some minor edits, you can get absolutely stunning results for both 3D printing or game/animation industry. And the whole thing is open-source! So we can expect updates or even 3D printing-specific improvements. Especially if we, as a community, support the development in even the smallest ways – such as documenting errors or by sharing good settings.
So are you convinced it’s time to give photogrammetry another chance? What are you waiting for, go and scan the world! 🙂
Photogrammetry - 3D scanning with just your phone/camera
Have you ever wished that you could easily transfer a real object into a digital file? The technology is here, but most of us simply do not have access to high-end 3D scanners that can reconstruct the digital geometry of a physical model. Not to mention that some objects can be way too big for any traditional 3D scanner. However, there is another, much cheaper way to create 3D models corresponding to real-world objects.
What is photogrammetry?
Photogrammetry (or SFM – Structure From Motion) is a process that estimates the three-dimensional coordinates of surface points using pictures of a single physical object taken from different angles. At least that’s the oversimplified one-line explanation. You take a bunch of pictures of the object from all possible directions, then you use these photos as an input for a specialized software. This software will look for features that are visible in multiple pictures and try to guess from which point was the picture taken. Knowing the camera positions and orientations, it creates a 3D point that corresponds to the 2D feature on the photo (basically a pixel). Ideally, you’d get a finished 3D mesh as an output. But often it might be better to process the reconstructed points into a mesh manually for much better results.
Software
The list of available photogrammetry software is pretty long. The problem is that most of the programs are either very expensive or limited in features in the free version. Some programs even offer cloud-based computation, which is handy, but further increases the cost.
We tried to pick the best free software:
- Colmap (Win/Mac/Linux) – will be used in this article
- 3DF Zephyr (Win) – Free with the limitation of max 50 photos
- Visual SFM (Win/Mac/Linux)
We will also need some kind of software for post-processing of the output data.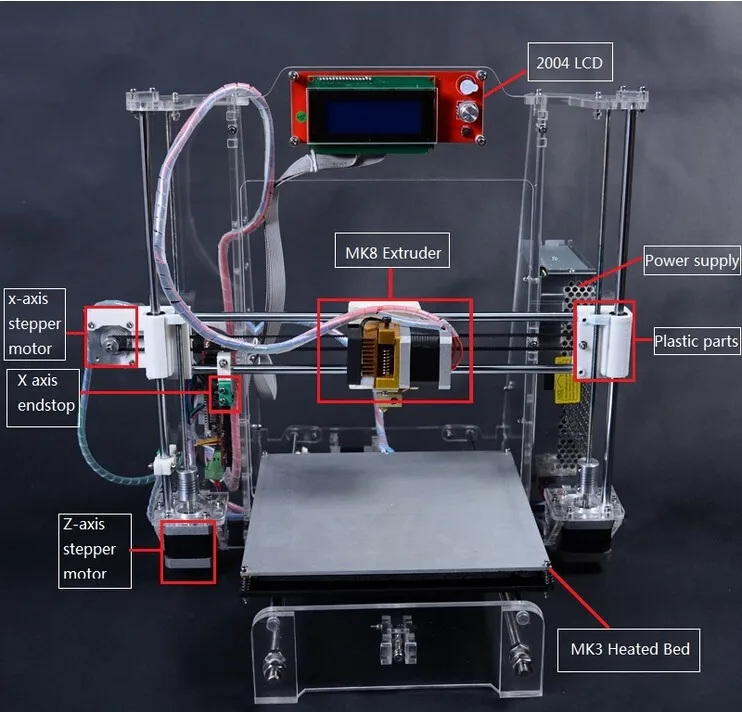 The choice is pretty easy here – Meshlab.
The computation is fairly demanding on the hardware. Running it on an old laptop might not be feasible as the computation times would get extremely long. Many applications also depend on the NVIDIA CUDA interface (Colmap), which does not run on AMD graphics cards.
Taking pictures for photogrammetry
Obviously, you’ll need a camera. A smartphone camera will work just fine, but if you have a DSLR, it’s even better. If you’ll be using DSLR, crank the aperture to at least 7-8 to increase sharpness and to avoid shallow depth of field.
You’ll want to capture at least 20 pictures. During our testing, we often shot 50-80 pictures to capture every detail. Keep in mind, that some pictures might get discarded if the program doesn’t find enough similarities with other pictures.
- Move around the target object in circles. Do not move the object or its surroundings between pictures.
- Overlap! You want to have each part of the model captured by at least 2 pictures. Ideally, you’d have about 60-80% overlap in succeeding pictures.
- Avoid hard shadows, use diffuse lighting or take the pictures outside on a semi-cloudy day.
- The object should make a significant portion of each image.
- Avoid moving targets (e.g. pets, unless they are sleeping).
- Avoid very glossy or transparent targets. (More on this later)
Ideal targets for photogrammetry are textured or rough items (statues). If it’s an option, you can cover glossy or transparent objects with powder (flour) to avoid reflections. Or cover the glossy surface with a painters tape.
Advanced users can also capture a video of the target and then convert it into individual frames. In this case, keep the shutter speed high (e.g. 1/80) to avoid blurry frames.
Reconstructing geometry from photos
We suggest creating a folder that will hold all the files for a single reconstruction. Inside that folder create another folder called “Photos” and place all your pictures here. Quickly go through the photos and delete any blurry ones. We’ll be using Colmap on Windows 10 for the reconstruction.
- Launch Colmap using Colmap.bat
- From the top menu choose Reconstruction – Automatic reconstruction
- Set the Workspace folder, this folder will be used for storing reconstruction calculations and the output mesh
- Create another directory next to the Photos folder for this purpose
- Set the Image folder the Photos folder containing all your pictures
- You can leave the Vocabulary tree empty, alternatively, you can download and use one from this download page
- Keep the Data type as Individual images or change it to Video frames if you created the pictures from video
- Change the quality to Medium
- You can try High quality, but in our experience, Colmap crashes very often with this setting
- Leave other settings with default values and hit Run
- This process may take anywhere from 5 minutes to seemingly eternity depending on the number of photos and specs of your PC
When Colmap finishes the reconstruction, you’ll be presented with a reconstructed view of the scene and estimated positions of the camera.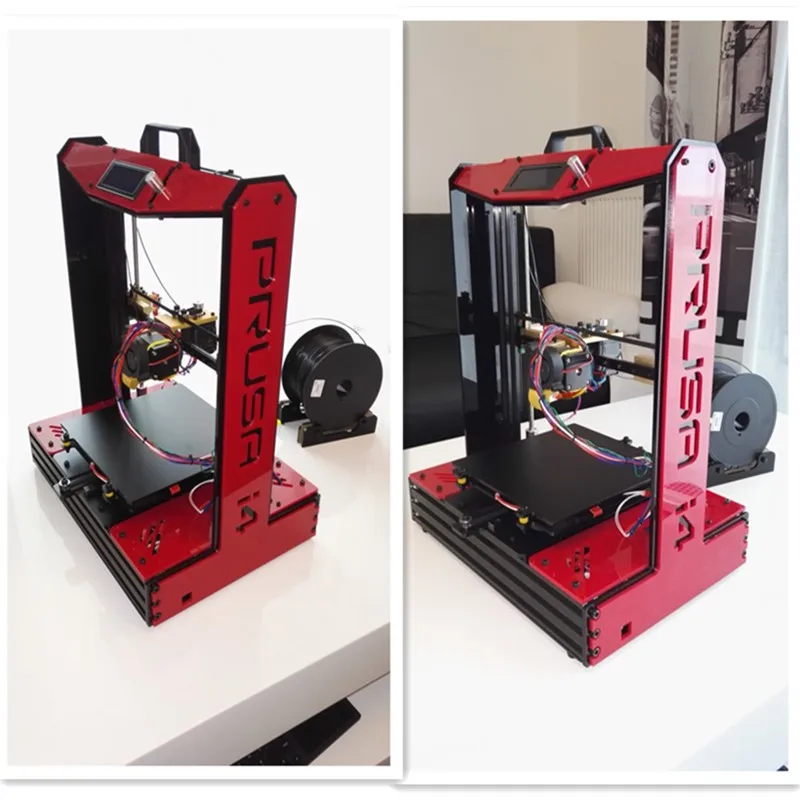
Colmap set-up and finished view of the reconstructed scene
Colmap output
As an output Colmap creates 2 files that we’re interested in, fused.ply and meshed.ply. You’ll find them in a subfolder in the workspace folder you created before (Workspace folder/dense/0/). Meshed.ply is, as the name suggests, an already triangulated mesh. Colmap isn’t the greatest at creating meshes from the tracked data, but if you want to save yourself some work, the mesh is definitely usable. PLY can be easily converted to STL in Meshmixer or Meshlab, for example. However, it’s not a good idea to try printing this mesh directly. All meshes created by 3D scanning or photogrammetry usually contain a lot of errors and lack the flat base that could be easily placed on the print bed. Follow our guide on repairing corrupted 3D models and cutting models to learn how to fix these problems.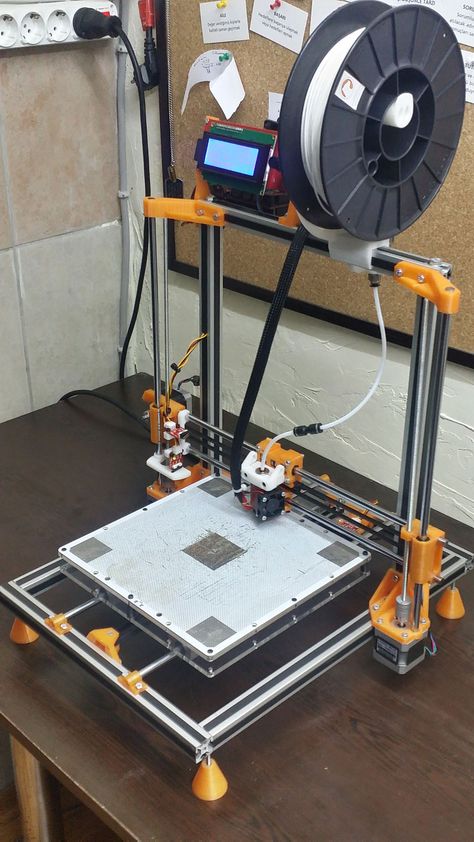 Also, keep in mind that the scale of the scanned object will be pretty much random, so adjust it accordingly.
The second file is the more interesting one. The fused.ply file contains a so-called point cloud. It’s just a set of points in space, no triangles and therefore no mesh. We’ll have to create the mesh ourselves, it’s an extra work, but the result is usually much better.
Creating mesh from point cloud data
- Open Meshlab, Select File – Import Mesh and choose the fused.ply file
- You’ll be presented with the captured scene made from 3D points
- Pick the Select vertexes tool from the main toolbar (top) and use it to select all points you wish to delete
- The tool works as a box selection, hold down the left mouse button to create a selection
- You can hold Ctrl to add more vertexes to already selected ones
- Click on the Delete vertices button in the main toolbar.
Selected vertices will disappear
- Repeat steps 3-4 until you’re left with just the points you want to use for creating the mesh of the scanned object
- Select Filters – Remeshing, Simplification and Reconstruction – Screened Poisson Surface Reconstruction
- The Reconstruction Depth has a major effect on the final result. Values between 13-15 usually look the best and take a reasonable time to compute
- Other settings usually work best at default values, but feel free to experiment with them
- Hit Apply to create a Mesh
- The edges of your model will usually end as a weird shape or even curl up and create a huge blob.
- Similarly to selecting and deleting vertices, you can do the same with triangles using the Select in triangular region and Delete faces tools from the main toolbar
- Select File – Export Mesh
- If you want to be able to share the scan in digital form with the texture, use formats such as PLY, 3DS or OBJ
- For 3D printing pick STL
Tips for improving your reconstructed model
Here are some more tips to get rid of some imperfections and to improve your reconstructed model in Meshlab:
- Smooth your model from the menu Filters – Smoothing, Fairing and Deformation – Laplacian Smooth
- Try increasing the Smoothing steps value to 8-15
- You can repeat this process as many times as you like, however smoothing your model too much will get rid of valuable detail
- To get rid of extra faces often generated by reconstruction, you can choose Filters – Selection – Select Faces with edges longer than…
- Tick preview
- Change the Edge threshold value so the vast majority of the faces you want to delete are selected, but all faces you want to keep are still unselected
- If your model has a huge number of vertices and faces, it can be hard to work with, not to mention slicing, which would take forever.
 Decrease their amount using Filters – Smoothing, Fairing and Deformation – Quadric Edge Collapse Decimation
 - Set the desired number of faces
- Anything above 1 million faces is definitely overkill. Even 100k faces are usually more than enough
Examples
Statues
Statues are perfect for photogrammetry. Their surface is rough, unable to cast any reflections. There are lots of details and features to be tracked by the software. Statues are usually too big for traditional 3D scanners not to mention the inconvenience of carrying a 3D scanner outside and trying to set it up there. But with photogrammetry it’s easy, just grab your camera and start taking pictures. However, as they are usually placed outside, there are a few things to keep in mind. Try to avoid having moving targets in your picture. If there are people walking by, let them pass and in the meantime take pictures from the directions where people are not visible. If possible, wait for a cloud to block the sun, so that there are no hard shadows.
The Sitting Woman statue by Václav Bejček from 1967, the reconstructed 3D model (check the 3D view on Sketchfab), and the printed version
Baby Groot
Scanning a 3D print might seem stupid, using the original STL file is obviously much better. But it’s a good benchmark of this technique, we can easily compare the reconstructed model to the original STL used for print. Another legit reason to use photogrammetry to digitize 3D print is if you hand painted it and want to share the model with the hand painted texture.
As you can see in the 3D view below, in terms of geometry, there is an obvious loss of quality. That said, most of the features were successfully reconstructed and with a couple of small touch-ups, the model would look pretty good. And the texture is a nice touch as well.
Press I and select Matcap to hide the texture and compare just the geometry of the models
Ping Pong Paddle – dealing with glossy surfaces
Reconstructing a ping pong paddle was pretty easy with one exception.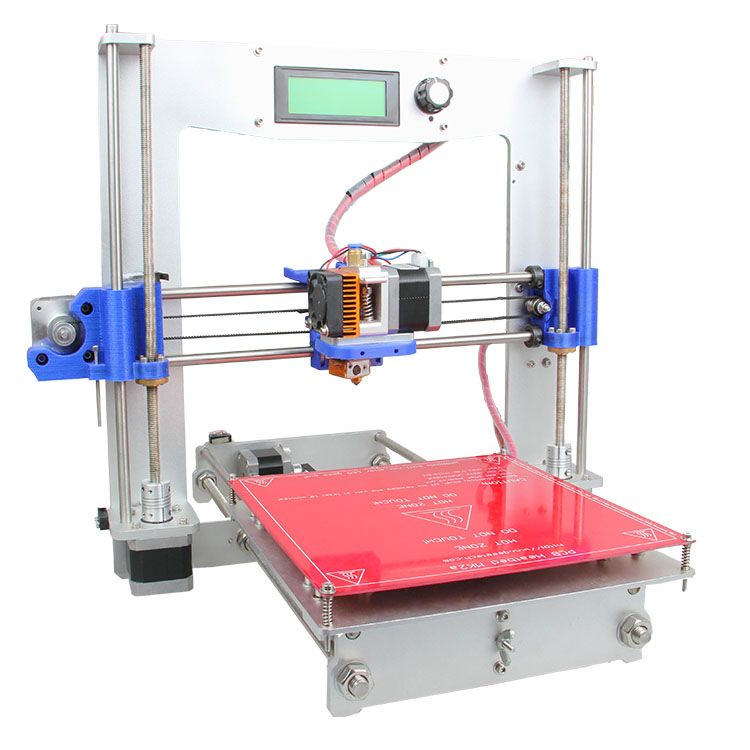 The two big surfaces (the ones that hit the ball) have no details to be recognized by the software and to make matters worse, they are glossy. As the camera circles around the paddle, the glossy surface changes in appearance and reflects surrounding light sources. This results in barely any points being reconstructed on this surface. This will ultimately lead to incorrect mesh shape. To prevent this from happening, some detail has to be added to these surfaces. That can be easily done with for example painters tape. Stick a few stripes of it over glossy surfaces to avoid reflections and create a matte textured look. In the 3D view, you can see the difference this quick hack made.
Glass – transparent surfaces
Similarly to glossy surfaces, transparent objects are a problem. Sharp edges may be captured by the photogrammetry software, but smooth transparent areas will be completely ignored, which will lead to incomplete data for mesh reconstruction.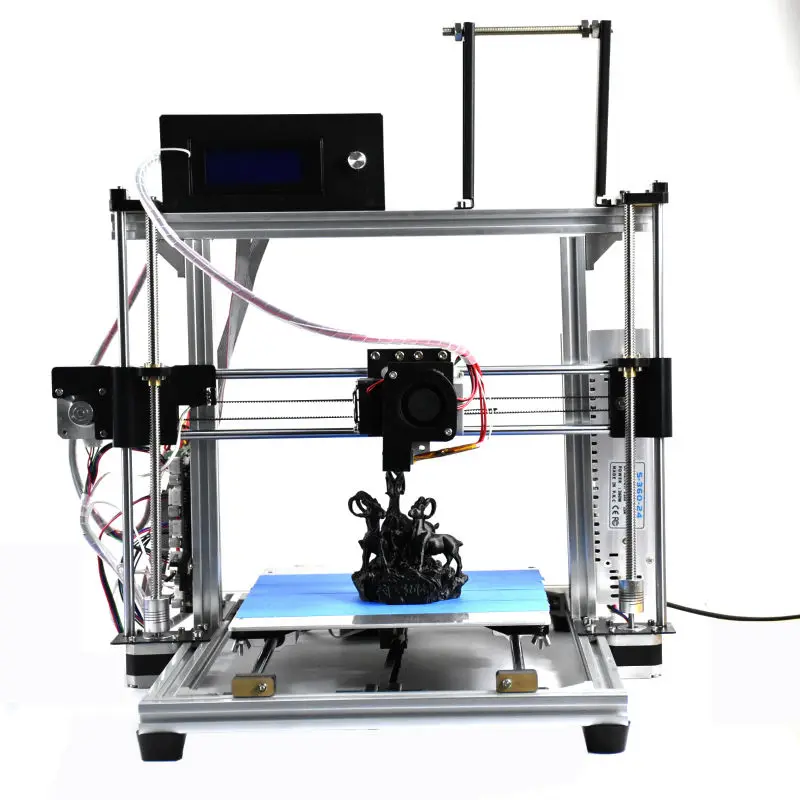 Again, you can use painters tape to cover these surfaces. Alternatively, you can use water dissolvable colors with a sprayer and dirty up the glass.
Conclusion
Meshes created by photogrammetry can easily outperform cheap 3D scanners. You can recreate huge objects that would be nearly impossible to capture with traditional 3D scanning tools. It’s extremely affordable and chances are that you already have everything you need for photogrammetry – a camera (smartphone) and somewhat powerful PC. And it doesn’t have to end with reconstructing a statue. Do you own a drone? Take a few pictures, reconstruct, and print your house. So…
Is photogrammetry a viable 3D scanning tool? Definitely YES. Should you print reconstructed models without any touch-ups? Probably not.
Just like any other 3D scanning technique, the final mesh won’t be perfect. Some areas might be missing details, flat surfaces may not turn out completely flat, the mesh may contain holes, non-manifold edges or other errors. However, if you’re able to fix these problems, the final result will be well worth the time.
Sources
Schonberger, Johannes Lutz and Frahm, Jan-Michael, Structure-from-Motion Revisited. University of North Carolina at Chapel Hill, Eidgenossische Technische Hochschule Zurich.
All3DP – Autodesk 123D Catch Review
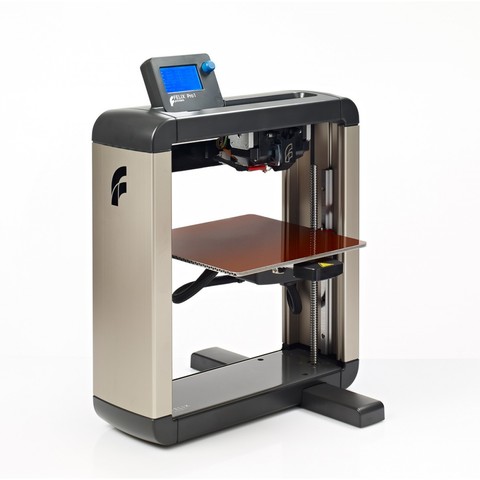
Prusa i3 Hephestos / Articles
Share:
Source: - modern 3D printer from the Spanish company bq. It is worth noting that this printer model was created on the basis of RepRap Prusa Mendel technology, or rather in the DIY format - assemble it yourself.
In order to learn more about the new technology in the printing market, we invite you to view its features and capabilities in more detail.
EXTERIOR
Externally, the model is decorated in a rather colorful design, which includes several primary colors, namely black, yellow and a little white, which not only look perfect together, but also complement each other.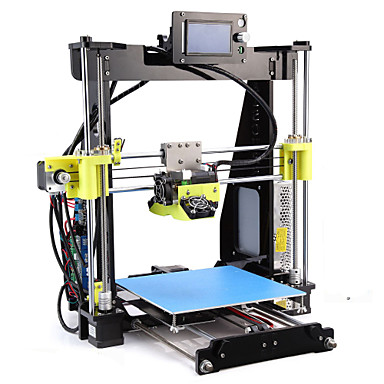 As for the assembly material, the device is also not uniform, as well as with the color scheme, so not only plastic, glass, but also metal were used to build it, which gave the device a fairly solid weight of 8.4 kg. It is also worth saying that the Prusa i3 Hephestos, although a 3D printer, does not have huge dimensions. Therefore, the size in the ratio of 460x370x510 is considered quite tolerable and acceptable, as for this type of device.
But, we will not limit our description to the appearance, so we move on.
TECHNICAL SPECIFICATIONS
The technical parameters are based on a feature that is very unique for today - directional modeling, better known under the code name "FDM/FFF". It is this function that will allow you to choose the angle of inclination or the length of the edge yourself, since you will control the printing process, not your computer. By the way, since we already remembered the computer, it is worth noting that our Prusa i3 Hephestos will only work on two operating systems, namely Windows and MacOSX, so trying to install the printer on Linux will be simply useless. In addition, in order for the printer to work properly, you will have to install a certain type of software on your assistant, namely Repetier, Kisslicer, CuraSoftware and Slic3r, which should come with the printer.
Well, now in more detail about the technical characteristics, which we have already begun to talk about a little. As already mentioned, the printer works on the basis of a unique printing method, in addition, its functionality is limited to one print head. It is also worth noting that the model does not require heating before starting its work, so you can safely take your PLA plastic, HIPS or FilaFlex and start printing.
It is also important to note that the model supports printing from third-party media such as CardRader and USB flash drives, so the model is very versatile.
USERS' OPINION
But what do users who have already bought this novelty say about this? Many of them indicate that the model is very difficult to assemble even using a special video review, so we decided to check it out and came to the same conclusion.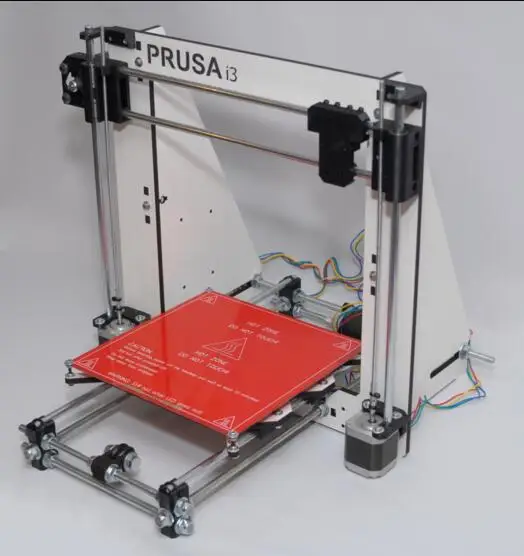 In addition, this 3d printer is not very suitable for large companies or offices, so it is better to use it at home, but this is just our opinion, so it's up to you.
ABOUT THE PLUSES AND MINUSES
It is also worth paying attention to the positive and not so good points, since they are inherent in this device.
Cons.
1. Big cost, but little opportunity.
2. Complicated assembly.
Pros.
1. Small size.
2. Ideal for making unique items.
Conclusion: Prusa i3 Hephestos - although it did not pass many criteria inherent in ideal 3D devices, it still deserves the attention of designers who love to create cool and most importantly unique things with their own hands.
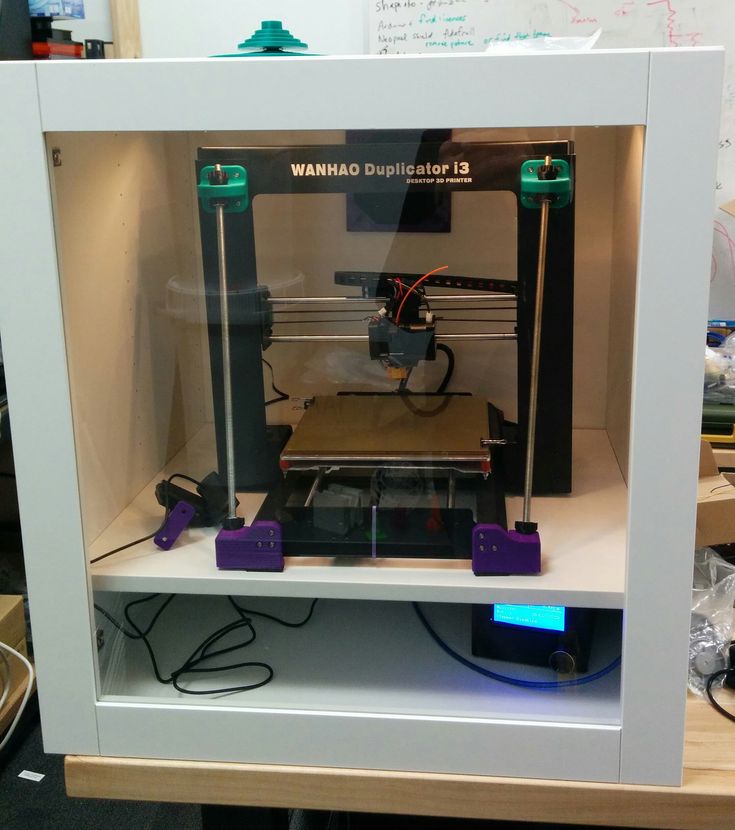
Prusa i3 Steel V2 3D printer assembly
Prusa i3 Steel - based on Prusa Mendel's RepRap. One of the most successful and popular models available for self-assembly.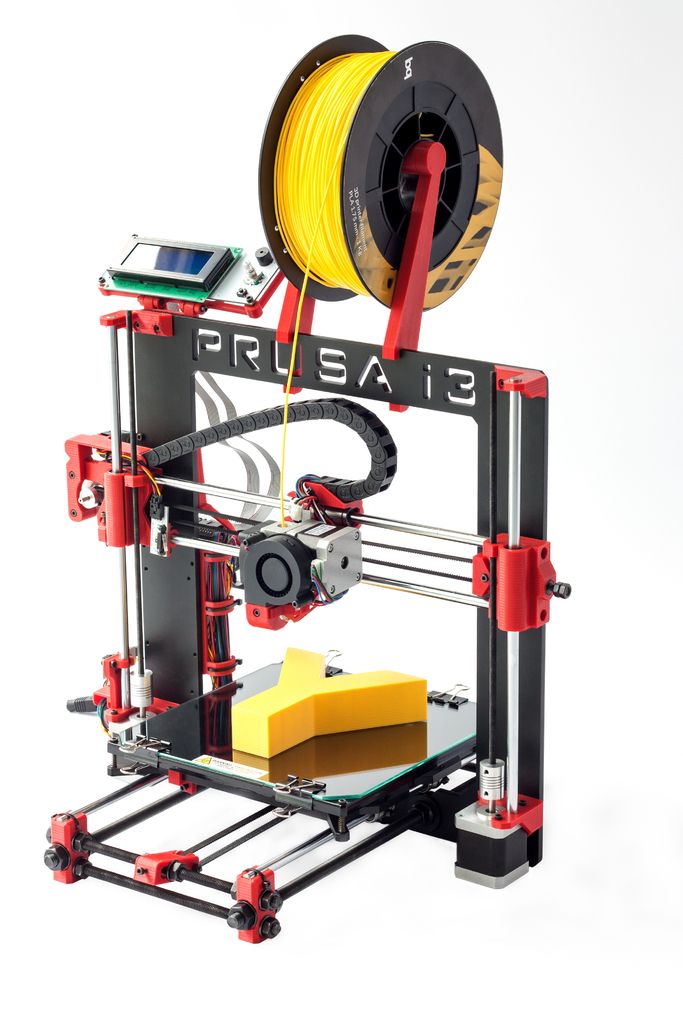 This 3D printer differs from its predecessors from the Prusa family by a RIGID STEEL BODY, an increased print area, the ability to print with various materials - ABS, PLA, HIPS, FLEX, PVA. The housing for the Prusa i3 steel 3D printer is made of 3 mm steel. The design does not use any studs or plastic parts - everything is made of steel. During the operation of a 3D printer, you will understand that this factor plays an important role. Key parameters: Print technology: FDM (Fused Deposition Modeling) Print area: 200x200x220 mm Layer height: 50 microns Print speed: recommended 50 mm/s, maximum recommended 120 mm/s Material used: ABS, PLA, HIPS, FLEX, PVA ( filament diameter 1.75 mm) Heated platform: maximum temperature 120 0C Electronics: Arduino mega 2560 RAMPS 1.4 LCD display with SD card reader and control button Power supply 350 W, 12 V Heating table MK2A Software: Repetier-Host, Slic3r, Cura Firmware: Marlin OS Compatibility: Windows, Mac OS, Linux Extruder Parameters: Nozzle diameter: 0.