Replicatorg 3d printer
ReplicatorG is a simple, open source 3D printing program
This is the software that will drive your MakerBot Replicator, Thing-O-Matic, CupCake CNC, RepRap machine, or generic CNC machine. You can give it a GCode or STL file to process, and it takes it from there. It's cross platform, easily installed, and is based on the familiar Arduino / Processing environments. ReplicatorG is used by thousands of MakerBot Operators, and has printed tens of thousands of 3D objects and counting.
(RepRap5D users, please use ReplicatorG 34 for 5D when using 5D)
New Features:
* supports all firmware versions for The Replicator and Replicator 2
* Added Replicator 2 Machine profile
* supports Sailfish firmware for Cupcake, TOM (Download Sailfish firmware directly from ReplicatorG)
* Support for selecting between s3g, x3g file formats (x3g is makerbot's new file format, which supports Sailfish)
* Minor profile updates
* Onboard preferences bug fix
* Warning when printing with accelerated speeds to ensure bot has acceleration turned on
* Added Profiles for Thing-o-matic with Skeinforge-50 and volumetric printing
* bugfix for setting preheat on commit
* bugfix for commiting onboard preferences to Replicator(Single Extruder)
* bugfix for commiting oboard preferences to Thing-O-Matic
(RepRap5D users, please use ReplicatorG 34 for 5D when using 5D)
New Features:
- Bugfix for comb in skeinforge
- Lowered The Replicator:Accelerated temperature
- Changed start gcode to handle Firmware 5.
5 stepper power bugfix
- Updated for acceleration behaviour
- Updated to have temperature as part of PrintOMatic settings
- Updated for smarter acceleration related configuration
- Added Slic3r and Miracle Grue engines, engine editors, etc
- Updated to handle accleration for The Replicator
- Updated t0 to t1 tolerance code
- Other Firmware 5.5 compatiblity updates
(This version is not working with RepRap5D, please use ReplicatorG 34 for 5D when using 5D)
New Features:
* Updated toolhead offset t0 to t1 code to store offset of out of tolerance
* Tools directory location sourcing updated to fix avr-dude on mac problems.
* Toolhead start heating gcode updates for faster heating-up on slow HBP's
* Fixes and updates to alternative preferences system.
* Ant run command line commands support
* Expected Toolhead offset stored as part of machine settings
* Spelling mistake fixes
* Updated print anchor code
New Features:
- Added a Windows and Mac installer.

- Added initial microsoft professional support for The Replicator (from MakerBot Industries)
- Updated start and end gcode
- Fixed dual extrusion bugs
- Support for skeinforge 47 with The Replicator.
- Updated Support for skeinforge 35 for Cupcake CNC and Thing-O-Matic
- Extensive Rewrite of RepG to support The Replicator
- Post Processing of Skeinforge changes added
- Start and end gcode can now be specified from machines/*.xml
- Dualstrusion refactored, Wipes are not currently supported
- Estimator and safety checks pulled into different thread
- Improved UI for safety checker
- Machine Onboard Parameters and Toolhead Onboard Parameters merged
- New GCode for new Replicator FUNctionality! M70-M73
- Improved temperature polling
- GCode now prepended with some meta-info
ReplicatorG 0029 Released Dec 11, 2011
New Features:
- Added 'Reset Defaults' for Print-O-Matic settings
- Added Mk6 and Mk7 defaults for Print-O-Matic
- Updated and simplified some number parsing
- Updated Onboard Parameters dialog
- Added data to start.
 gcode and wipe to help users modify
 - Changed handling of JFormattedTextField
ReplicatorG 0028 Released Nov 28, 2011
New features:
- Fixed toolhead setting function to work with new and old firmware
- Improvements to localization of decimal numbers
- Fixed preferences window, only one can be open at any time
- Fixed description of wipes in Dualstrusion window
- Disabled 'swap toolhead' while build in progress
- Removed 'Print to SD' button because it was slow, buggy, and rarely used
- Removed various bits of old, unused code from the top bar
- Added 'Generate GCode' button to top bar
- Changed functionality of 'Build' button, it can now genrate gcode and build in one click
- Improved temperature monitoring
- Added machine info to the machine status bar (green/red info bar)
- Added 'Preheat' function to bring bot up to temperature,
- Added preheat temperature settings to preferences
- Extensive cleanup of some DualStrusion code
- Fixed 'move' tool layout
- Minor improvements to ConfirmationDialog code
- Updates to Dualstrusion HBP behavior
- Clarification of several text panels
- Added Warnings on Extruder Dialogs that have side effects in Dualstrusion
- Fixed pre-heat temperature not setting in preferences panel
- Added heat range warnings to pre-heat temperature setting
- Fixed bug from Alpha that prevented print-from-stl use in some cases
- Fixed bug in extruder and mobo preferences that caused float num errors
- Updated so locale formats work in Java 5
Download it today!
Screenshots
Cannot fetch Flickr photo (id: 4816221018). The photo either does not exist, or is private
Model manipulation in ReplicatorG 0018
Cannot fetch Flickr photo (id: 4710345086). The photo either does not exist, or is private
STL preview in ReplicatorG 0017
The temperature graph in ReplicatorG 0016
How to Use ReplicatorG - ReplicatorG
Start ReplicatorG
First, start ReplicatorG!
Configuring your machine
If it's your first time using ReplicatorG, you'll need to configure it to connect to your machine. Select "Machine Type (Driver) from the Machine menu.
Select the entry that best describes your machine. If you have an unusual machine or one that does not appear in this menu, you may need to add a profile for it yourself. For detailed configuration information, please see the machines.xml configuration page. (If you've created a working profile for a common machine type, drop us a line and let us know so we can include it in the next release!)
If (like most users) you're connecting to your machine via a serial port (like a USB-TTL cable), you'll need to tell ReplicatorG which serial port to use. Select the appropriate entry from the "Machine>Serial Port" submenu:
The naming of serial ports varies from platform to platform, so it may not be obvious which one to select at first. On most platforms, the phrase "usb" will appear somewhere in the port name; on Windows, you'll probably want to select the highest-numbered COM port.
Once you've selected a port, click the connect button at the right of the top bar and ReplicatorG will attempt to connect to the machine. If it's having trouble, it will time out after about fifteen seconds or so. If it's successful, the status bar will turn green, and the window will look like this:
Take a look at the row of buttons at the top of the ReplicatorG window. The arrow pointing to the bean-shaped object is the Build button, which will start a print via USB.
The Build from SD button, just to the right, will pull up a list of the files currently on the SD card in your machine and will allow you to print one of them.
The third button in the row is Build to File, which will convert your Gcode file to an s3g file and save it.
The fourth button, with the arrow pointing to a piece of paper with the letter "g," opens up the Generate Gcode window.
The Pause and Stop buttons near the center of the row will pause and stop a print, respectively.
The button with the four arrows will open up ReplicatorG's Control Panel, from which you can control different parts of your machine.
You can restart your machine by clicking the next button, the one with two arrows forming a circle. And the final two buttons allow you to connect to and disconnect from your machine.
Printing from an STL file
With ReplicatorG 0017 and later, you can load STL files and print them from within ReplicatorG. To start, find an STL file! There are plenty on Thingiverse which are appropriate for printing.
Open the STL file
You can open the STL file by selecting the "File>Open…" menu option.
This will bring up an open file dialog. Select the STL file that you want to print.
Now you'll see the 3D model you've selected:
The model will be enclosed in a box representing the size of your machine's build envelope.![]() You can use this to judge how large your final print will be, and whether your machine is capable of printing it at its current size.
You can use this to judge how large your final print will be, and whether your machine is capable of printing it at its current size.
You can use the mouse to rotate and zoom your view by following the instructions on the toolbar at the right:
Keep in mind that you're only changing your viewpoint— you're not actually changing the orientation or size of your object!
Manipulating the object
(Note: if you're happy with how the object looks right now, you can skip ahead to "Generate the toolpath".)
Warning: ReplicatorG by default saves modified objects on top of original files! If it's important to you to keep an original, unmodified copy of your model around, consider making a copy of the file before you begin.
This pair of pliers is nice, but we'd like to make it a little larger. First, we'll click on the "XY" view button in the View panel to see what the object looks like from above:
Next, we need to scale the object up a bit. Click on the "Scale" button at the bottom of the toolbar. Then click and drag in the preview window until the object is the desired size. You can also scale by a multiplier — .5 will halve the object's size and 2 will double it — or use the "Fill Build Space!" button to make your object as large as your machine can print it.
As placed, this object is too big to fit on the build platform, so we'll want to rotate it. First, we'll click on the "Rotate" button in the toolbar. Then check the "Rotate around Z" checkbox, as shown.
This will ensure that the object only rotates around the Z axis. Now you can click and drag your mouse in the preview window to rotate the object to the correct angle.
You can also uncheck "Rotate around Z" and rotate your object along all three axes, or use the individual axis buttons to rotate your object in 90° increments. For example, if the bottom of your object isn't the flattest side, you can rotate it to rest on a different side. Get it pretty close to the orientation you want and then use the "Lay flat" button to make sure it's oriented correctly in relation to the platform.
Sometimes an object won't be centered on the build platform, or it can rest above or below the platform. In the image below, the pliers are at an angle and the handles are poking through the platform.
Go to the "Move" view, and click the "Center" and "Put on platform" buttons. This will move the object to the center of the platform and place it so its bottom rests on the build platform. You can also use the axis buttons move your object around in the build envelope in specified increments.
You can save your object by selecting "Save" from the menu before you generate the toolpath, but if you forget, clicking the "Generate toolpath" button will prompt you to save.
Generate the toolpath
Next, you'll need to generate the toolpath — the directions that explain how to the extruder needs to move to print the object. These instructions are currently written in a format called gcode. The model must be converted to gcode before it can be printed.
We usually use a tool called Skeinforge to convert a model into gcode. Skeinforge is very powerful, but can be difficult to use. To make it a bit easier, we've integrated Skeinforge into ReplicatorG. All you need to do to generate a toolpath is click the Generate GCode button at the lower right.
Choose a profile from the dropdown menu. Try to find the one that best describes your machine and material. Then you can either click the "Generate Gcode" button right away, or you can change some settings first, like whether you need a raft or support, or if you want to use Print-O-Matic to override some of the settings in your chosen profile. The Print-O-Matic settings are described in more detail further down on this page.
Keep in mind that Skeinforge is a very computationally intensive program, and generating a toolpath may take several minutes for complex models. If it's taking too long, you can always hit the "Cancel" button to abort.
When toolpath generation is complete, the dialog will disappear and you'll see a "gcode" tab appear above your model:
You're ready to start printing! If you like, you can click on the gcode tab to review the generated gcode before you print:
Print!
Now you can click the Build button, and let your machine make you something! Check your machine's documentation before you start to print — sometimes you'll have to do some calibration to get your machine set up.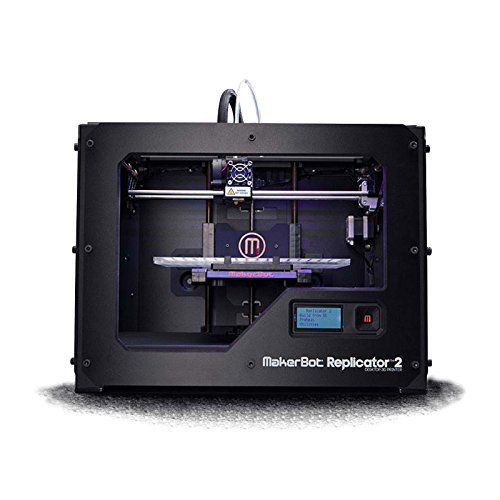
Printing from a GCode file
If you already have a gcode file you want to print, just load it directly and click Build to print.
Editing profiles
Some users will want to tune Skeinforge for their specific machines, or create new profiles. You can do this by selecting "Edit Slicing profiles" from the Gcode menu.
This will bring up the Edit Profiles dialog. You can create edit existing profiles by selecting them and hitting the "Edit…" button. You can also use the "Duplicate…" button to create a copy of an existing profile so you can edit it without losing the original.
When you edit a Skeinforge profile, you'll see the Skeinforge configuration interface appear. Change whatever you like — the settings are stored in different directories for different profiles, and won't interfere with any other Skeinforge profile you may already have on your computer. If you come up with a good profile for any machine, let us know so we can include it in the next release!
(Windows users: sometimes the Skeinforge process fails to report that you've finished editing a profile and, after closing the Skeinforge profile editor, ReplicatorG becomes unresponsive. If you find that this happens sometimes, there is a setting in File->Preferences (Ctrl+,) called "Skeinforge timeout." It specifies the number of seconds to wait before assuming that Skeinforge has failed to return. Setting it to 60, for example, will cause ReplicatorG to unblock after one minute. Any changes made in Skeinforge can still be saved and will be used when generating gcode if they have been saved.)
www.bugth.com
Profile Location
Skeinforge profiles are located in various locations; the ones shipped with ReplicatorG can be found in:
replicatorg/skein_engines/skeinforge-[VER]/skeinforge_application/profiles
replicatorg/skein_engines/skeinforge-[VER]/skeinforge_application/profiles-experimental
Duplicated profiles are saved to your home directory and will show up between different versions of ReplicatorG. This location varies depending on your operating system:
Windows - /Users/[USERNAME]/. replicatorg/sf_[VER]_profiles/
About Print-O-Matic
Print-O-Matic is a streamlined interface for Skeinforge, integrated into recent versions of ReplicatorG. It offers a limited number of configuration options and relies on the currently selected profile for the others.
Using Print-O-Matic
Using Print-O-Matic is straightforward. First, select an appropriate Skeinforge profile. If you don't see an appropriate profile for your 3D printer, check the GCode->GCode Generator menu. If you're using a MakerBot Replicator, this should be set to 'Skeinforge (50).' On older printers it should be set to 'Skeinforge (35).' This page deals with the settings for Skeinforge 47 and 50, but the Skeinforge 35 settings are substantially similar.
The Print-O-Matic settings are the ones in the lower half of the "Generate Gcode" window. You can deactivate Print-O-Matic and hide these settings by unchecking "Use Print-O-Matic," but using Print-O-Matic is the simplest way for you to customize your print settings.
The Print-O-Matic Menu
The Print-O-Matic menu consists of four tabs: Settings, Plastic, Extruder and Defaults. The default extruder settings should be correct. You'll want to check that you have the right plastic type and diameter entered, although those defaults will likely be correct, too.
The Settings tab is where you can experiment with different configurations.
Object Infill dictates the density of your print. 100% infill will make your object completely solid, while 0% will make it hollow.
Layer Height is exactly what it sounds like: it determines how flat each layer of your print is going to be. The default is around .3 mm, but you can experiment with layer heights as low as .1 mm if you're looking for finer detail.
Number of shells refers to the outer structure — the thickness of the perimeter your bot prints on each layer before it starts on the infill. Every model is going to start with one shell, so the number of shells you set in Print-O-Matic is actually the number you're adding. If you enter 2 here, your object will be printed with three concentric perimeters. These build in towards the center, so they make your object more sturdy without changing the modelled surface.
Feedrate is the speed at which your bot moves while extruding plastic, and "Travel Feedrate" is how fast it moves when it's not. Again, the defaults are a good place to start, but you might want to experiment with setting them a little bit lower.
Set infill and shells based on how strong you need your printed object to be. Then you can start experimenting with layer height and feedrate. These two settings will have huge effects on print quality, so you'll want to try out different combinations. Experiment as much as you like: you can always revert the settings to the original base profile by going to the Defaults tab — you can choose between accelerated and regular defaults.
When you’re done entering your settings, click “Generate Gcode” and the automagic will begin.
What Did Print-O-Matic Do?
Print-O-Matic works by overriding a number of settings in Skeinforge. Some of these settings, like layer thickness and infill solidity, come straight from the values you entered into Print-O-Matic. Others, like flow rate, are computed using the numbers you entered. Print-O-Matic's basic approach is based on the idea that the axes should move at the same speed as the plastic leaves the nozzle. This method yields the highest rate of successful prints and works wonders on challenging geometry like bridging large gaps. Print-O-Matic doesn't allow for as much fine-tuning as entering settings into Skeinforge directly, but it's much simpler and easier to use.
To see the Skeinforge values that Print-O-Matic created according to your settings, you can turn on logging in ReplicatorG Preferences.
Check the box to “Log to File” and type in a preferred name in the field to the right. This file is stored in the same folder as your ReplicatorG application. Set the level of logging detail to INFO. Now when you generate gCode, the debugging section located at the bottom of the ReplicatorG application window will show the values generated by Print-O-Matic.
For more information on Print-O-Matic, take a look at this helper doc by Nick Starno on Thingiverse.com! http://www.thingiverse.com/thing:7308
Conclusion
Thats about it! You should probably read up on the various generators that will create GCode for you. If you want to write your own GCode or generator, you should start with the GCode Primer.
MakerBot Replicator 3D printer from the manufacturer MakerBot Industries, LLC The Makerbot Replicator is one of the most popular desktop 3D printers and has spawned many imitations around the world. Since its inception, the design of the printer has been constantly improved: the fifth generation of the popular device is currently being released. The printer is designed to print with polylactide (PLA) using a single extruder.
 The maximum size of manufactured models reaches 252x199x150mm with a minimum applied layer thickness of 100µm. The printer is equipped with a control module with LCD screen, USB port, wireless connection (Wi-Fi) and Ethernet interface.
 About the MakerBot Replicator
MakerBot welcomed 2014 with a new range officially classified as "5th Generation". This includes the new compact MakerBot Mini printer, its exact opposite of the MakerBot Z18 (the name directly refers to the height of the working area of 18 inches, i.e. 455mm) for printing large objects and, of course, the updated flagship and golden mean - MakerBot Replicator.
Here it is, handsome
Don't be confused by the name of the model - the new Replicator is the development of the Replicator 2 printer. The company deliberately did not call it Replicator 3, but instead introduced the concept of generations. Thus, the Replicator 2 belongs to the fourth generation, and the new printer - to the fifth.
This option has a lot of interesting and quite rational ideas, although the result can hardly be called ideal. So:
Design
The appearance of the printer gives the impression of a high-tech gadget, which is what the Replicator is. While maintaining the black, matte severity of the Replicator 2, the new device was “licked” - the panels disappeared, the supporting steel frame was hidden in a smoothed plastic lining. The first optimization is visible to the naked eye: the control module has moved from its usual place in the lower right corner to the top, which makes its use much more convenient. Despite rumors about the touch screen, the display remained just liquid crystal, but color. But the large rotary knob is very convenient, reminiscent of the smoothness of the volume controls on expensive stereos.
Smart extruder mounted on magnets
The new version of the extruder has become "smart": built-in electronic components allow the printer to detect when the consumable is running out and warn the user about it. This moment alone deserves huge praise for the designers. No printing "over the air" and decommissioned semi-finished models - received a warning, changed the coil, continued printing. Wonderful.
The “jumping nozzle” is also interesting: when changing the horizontal position without printing (for example, when layering individual fragments on the same level), the platform movement is no longer required to distance the layer from the nozzle and prevent smearing of freshly applied plastic. Instead of a platform, the nozzle itself comes into motion. The extrusion stops, the nozzle rises, separating from the applied plastic, the print head moves to a new position, the nozzle lowers and printing continues. This approach theoretically allows for higher Z-axis accuracy and higher print speeds. As for the mechanism of movement of the nozzle, it is extremely simple: the feed mechanism simply turns on the “reverse speed”, and the plastic thread pulls the nozzle up with it.
The third interesting element was the Hall sensor built into the print head. The platform calibration procedure has become much easier. Now tilt adjustment is carried out using two large, comfortable handles. The sensor in the head tells you when one or another edge of the platform reaches the optimal position. The light came on - it means that the slope is eliminated. The same for the perpendicular axis, and the calibration is complete. But why not put two servomotors instead of handles and make the process fully automatic?
The downside of the new extruder is its relative complexity. In fact, it is not designed to be repaired on its own. If the nozzle becomes clogged, then the entire extruder will most likely have to be replaced with a new one or the old one should be sent to a service center, which is a problem in Russia. The good news is that detaching the assembly is exceptionally simple: the extruder is held in place with fairly powerful magnets. You just need to apply enough force, and the whole assembly separates. I stuck a new extruder in its place, threaded the thread, continued working.
Glass platform covered with blue masking tape. An illuminated light near the nozzle indicates that the stage is properly calibrated. MakerBot deliberately sticks to the flagship concept of printing with one filament and one extruder. On the one hand, this allows you to slightly increase the size of the working area while maintaining the dimensions of the printer - after all, the more extruders, the larger the printed assembly. On the other hand, polylactide is one of the easiest materials to print, does not suffer from high shrinkage and does not emit harmful fumes due to its organic origin. Since PLA plastic is almost not subject to deformation during curing, the Replicator is not equipped with a heated platform. On the other hand, fans of "replicators" often misuse these printers, printing with ABS plastic, polystyrene, nylon and other alternative materials. Many of them require platform heating. Fortunately, purchasing such an upgrade from a third-party manufacturer is quite simple. The previous model used an acrylic worktop, but on the new version, the designers decided to use glass. In principle, both options are excellent for printing with polylactide.
Built-in camera allows you to transfer images of the printing process to remote computers and mobile devices
Finally, for the first time, the "replicator" was equipped with a camera. The idea is to be able to control the printing process remotely. What if there's a crash? To receive images and control using a mobile device, you will have to connect the printer to the network, for which an Ethernet interface was provided. The USB port remained in place and became multifunctional, as the developers abandoned the use of memory cards in favor of flash drives. By the way, branded flash drives, as in the case of CubeX, are not required. Any drive with standard formatting will do. True, the drive is not supplied in the kit. Remote control is carried out using the MakerBot Mobile mobile application or the standard MakerBot Desktop software, and within the office, you can also use a Wi-Fi connection.
Plastic filament spools have been resized. All fifth generation MakerBot printers use thinner, larger diameter spools. This was done so that the coils fit more ergonomically into the dimensions of the devices themselves, because they are stored inside. You don't have to turn the entire printer around to change the spool: the spool slides into a drawer at the back of the printer with the mount facing forward. After installing the spool, the section drops down and the printer looks neat.
Spools of filament are inserted into the drawer
Of course, no one else, except MakerBot, produces such spools. But! The company does not break the hands of users by forcing them to use branded cartridges, as 3D Systems did. Those who wish can use standard coils, they just have to be installed outside the printer. And the drawer section, with the guide tube attached, has a latch that holds it in the raised position. It will not look particularly attractive, but the functionality is provided. Branded thread is sold at a price of about $40 per kilogram, which is about 20% more expensive than consumer goods. But the quality is guaranteed - no dust or oval profile. Unfortunately, a rather complicated filament feed path, coupled with a narrow nozzle, creates an additional load on the pulling mechanism of the extruder. Although the designers have spring-loaded the roller, there are times when the printer simply cannot grab onto the filament. As a rule, such problems do not appear immediately.
Despite all the tricks, such as optimizing algorithms, using an ARM9 processor and a jumping nozzle, the new printer is noticeably slower than the Replicator 2. In one of the comparative tests, the task was to print a Lego brick. The Replicator 2 completed the task in 18 minutes, while the 5th generation "replicator" took 25! Even the inclusion process is quite long - the download takes about three minutes.
Not practical, but glamorous!
And yet, if everything works as expected, the Replicator is pleased with the good quality of the models. The printer allows you to print with a resolution of 100 microns vertically, although the thickness of the applied layer can be increased to speed up the process. Back at the office, the MakerBot team prints mostly in 200-micron layers, which is enough for most tasks, according to CEO Bree Pettis. Positioning accuracy has remained at the level of the fourth generation printers, which is good in itself: 11 microns in the X and Y axes, 2.5 microns in the Z axis.
And yes, the new Replicator informs you about the progress of the print and estimates the remaining time. This feature has been enabled due to persistent user requests. As Pettis explained, there was simply no room for it on the old hardware.
The platform has undergone significant changes. The dimensions have changed: the area of the table has slightly increased and become “square”: 252x199mm versus 285x153mm for the Replicator 2. The material of the table has been replaced with more and more popular glass, and the table itself is now attached to the platform using skids instead of clips. So it's safer and more convenient. For better adhesion of plastic to the table, a time-tested solution is used - masking tape.
Software
MakerBot Desktop software. The status bar at the bottom indicates that the model being printed is 98 percent complete.
The software used is the MakerBot Desktop software package. This includes MakerWare, which made its debut on the Replicator 2 and is responsible for model processing, slicing, and other functions and settings related directly to printing. In addition, networking features have been added, including access to the Thingiverse website, which features many digital models, including free ones, uploading your own digital designs for the benefit of the community, the ability to order additional consumables, and more and more. With it, you can also receive pictures from the built-in camera or remotely control the printer. To use the software, you will have to open an account on Thingiverse, but it is not at all difficult and completely free.
The MakerBot Digitizer Desktop 3D Scanner and MakerBot Replicator Printer is a Chinese engineer's dream. Copy, copy!
It's worth noting that MakerBot is seriously aiming to create a 3D "ecosystem" tested by 3D Systems. This means the integration of hardware, software and networking into a single whole. If in the case of 3D Systems the ecosystem consists of Cube 3D printers, Sense 3D scanner and Cubify online service, then in the case of MakerBot we have Replicator, Digitizer and Thingiverse, respectively. Adding to the intrigue is the fact that MakerBot is actually an independent division of 3D Systems' main competitor, Stratasys.
Summary
The new "replicator" has become friendlier due to an optimized design and user-friendly software. It's still a favorite of seasoned 3D enthusiasts, but the new version is easy enough to use for inexperienced users. A lot of convenient innovations and improvements pleasantly surprises. Unfortunately, the first batches of delivered printers clearly showed the dampness of the design: there were problems with the extruder, bugs in the firmware, and a surprisingly slow print speed, which, on the contrary, should have increased. If the designers bring this wonderful machine to mind, then it will have every right to the title of "best among equals." The cost of the device is high, although this printer is primarily intended for serious users and design companies, for which the manufacturer's selling price of almost three thousand dollars will not be prohibitive.
Benefits
- Stylish, ergonomic design
- Convenient control module and software
- High print quality
- MakerBot 3D Ecosystem Integration
Shortcomings
- Fairly large number of shortcomings
- Slow print speed
- High price
MakerBot Replicator 2 3D printer
Out of production
Add to compare
Product added to compare Go
Free shipping within Russia
Official distributor
We work directly with manufacturers.
Any form of payment
An opportunity to see the 3D printer in action in our demo room.
Own warranty service
Warranty and post-warranty service for equipment purchased from us.
Permanent 10% discount on consumables
When you buy a 3D printer from us,
, you get a 10% discount on all consumables.
MakerBot Replicator 2
MakerBot has unveiled one of the best 3D printers ever, the desktop Replicator 2. The objects the device creates can be as large as 28.44 x 15.49x 15.24 cm. The design of the printer is designed to withstand heavy loads. The body material of the device has high impact resistance and wear resistance, due to which the equipment is rightfully considered reliable. When printing, MAKERBOT REPLICATOR 2 uses environmentally friendly PLA plastic, which has excellent adhesion to the materials used.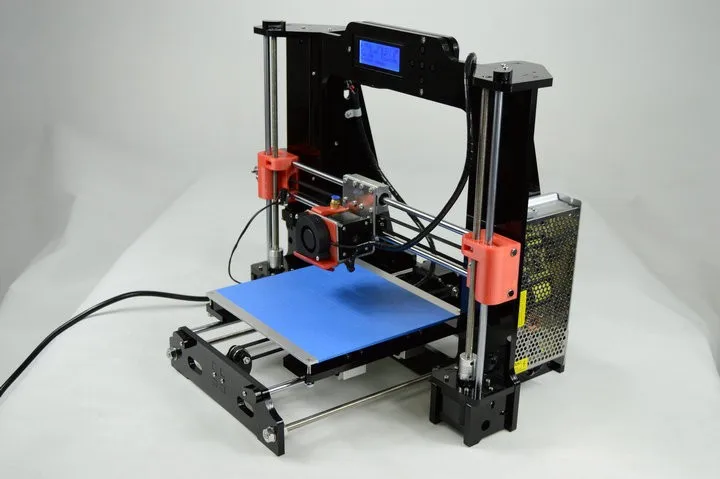 It allows you to print even on fairly flexible products.
The MAKERBOT REPLICATOR 2 3D printer allows you to achieve the highest quality of the product. In a technique designed for printing three-dimensional objects, the quality and accuracy is determined by the thickness of the coating layer. More specifically, the thinner the layer, the better the result. This is due to the high resolution used for the best print quality. For MAKERBOT REPLICATOR 2, the following modes are defined: 340 microns - fast printing, 270 microns - normal, 100 microns - high. In the latter case, the thickness of the plastic applied to the product is comparable to the thickness of a standard sheet of paper. Environmentally friendly PLA plastic perfectly fits on a perfectly smooth surface, while there is no need for its processing. The products that are obtained at the output have a realistic bright appearance and are quite pleasant to the touch. Thanks to the use of high technology, the printer is able to work even incredibly small parts, while achieving the highest quality of the finished product.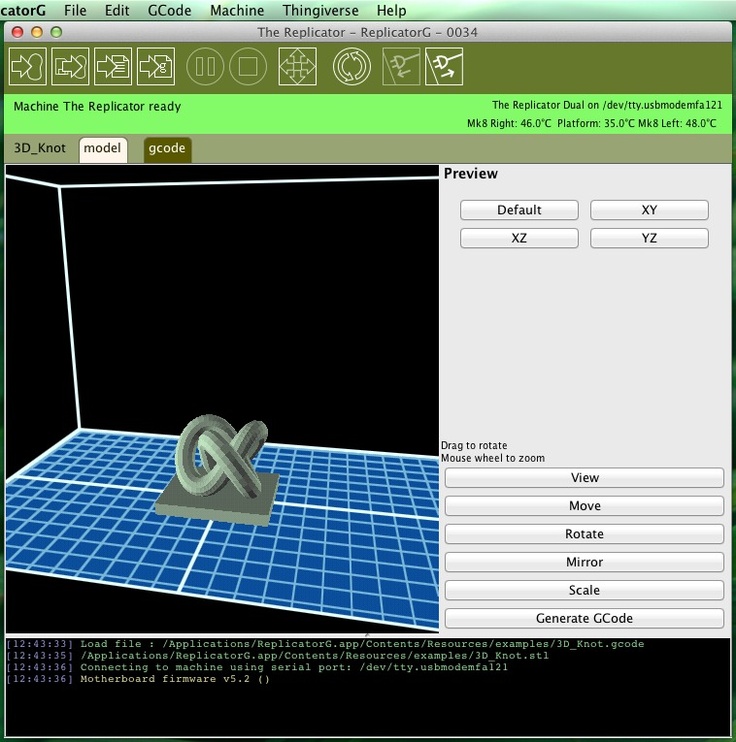
In order to know how high a quality product you get, you need to understand what PLA plastic is. This material is widely used due to its physical and chemical properties. Plastic is applied to the product in a heated molten state. Firstly, it absolutely does not emit any odor or vapors - it is harmless to health and the environment. Thanks to this, MAKERBOT REPLICATOR 2 can be used in any room, even at home. Secondly, PLA plastic is economical in processing and has perfect adhesion to the material being processed. When compared to ABS plastic, energy costs are reduced by 32%. This is a significant indicator for maximizing profits. Thirdly, the finished product is perfectly smooth and pleasant to the touch, and the range of plastic colors is constantly expanding.
The MAKERBOT REPLICATOR 2 has significantly increased the volume of the working chamber. In comparison with its predecessor - by 37%. The camera is now 410 cubic inches in size, which allows you to work with objects up to 28. 44 x 15.49 x 15.24 cm. With this improvement, the 3D printer is able to create quite large objects, as well as process many small objects in one pass. By doing this, you can save time that was used to perform tasks one by one.
The printer is controlled by proprietary MakerWare software. Thanks to a simple and understandable shell of the program, everyone can work with the device - you do not need additional training. The developers managed to reduce the printing time by software optimization of the process. Using this software, you will speed up your work by 30%. The program can run on various operating systems such as Linux, Windows and Mac. Object details are considered in the most common formats - .stl and .obj.
MakerBot Replicator 2 Key Features:
- Handles objects up to 28.44 x 15.49 x 15.24 cm.
- Printing material - environmentally friendly PLA-plastic.
- Specialized software - MakerWare.
- High resolution printing - 100 micron layer thickness.