3D printer aio
All-in-one 3D printer 2022 - Laser engraving, CNC milling & more
All-in-one 3D printers are 3D printers with additional functionalities like CNC milling or laser engraving and cutting. There are very few options available on the market today- find out which ones in this guide. If you make a purchase through one of our affiliate links, we may earn a small commission to support our content and site.
Last update March 19, 2020
In our Fall update, we removed discontinued products (XYZprinting, FLUX, …), added new brands (Hyrel 3D, Diabase) and models (Snapmaker 2.0), and did some minor adjustments here and there. We also added the E3D ASMBL Tool Changer as s special mention.
Table of contents
What’s an all-in-one 3D printer?
Top all-in-one 3D printers in 2022
CNC milling
Paste extrusion (syringe extruder)
Laser cutting and laser engraving
Other functionalities
VX
System 30M
Snapmaker 2.0 A150
Snapmaker Original
Stepcraft-2/840 (Kit)
Optimus C1
5AXISMAKER CNC machine
H-Series
Special mention: ASMBL Tool Changer
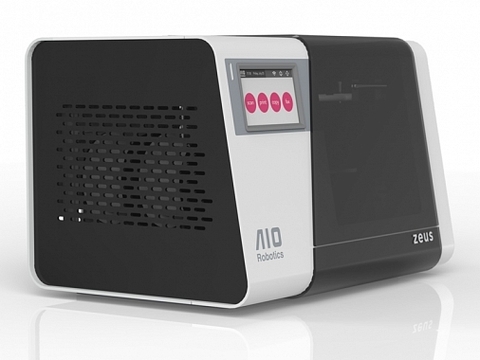
AIO Robotics Zeus 3D printer and scanner combo
ATOM Atom 2. 5 EX 3D Printer Kit
FABtotum Core PRO
FLUX Delta
MAG iCreatum
MakerArm, the ultimate 4-in-1 3D printer for fablabs?
XYZprinting Da Vinci 1.0 Pro 3-in-1
What’s an all-in-one 3D printer?
Like a modern Swiss Army knife, all-in-one 3D printers (a.k.a. AIO 3D printers, multifunctional 3D printers, or multitool 3D printers) boast features such as laser engraving and cutting, vinyl cutting, drawing, and more.
AIO 3D printers can be multi-purpose fabrication tools for makers, professionals, businesses, and hobbyists alike. However, there aren’t that many desktop options available today. We decided to take a closer look at the multitool 3D printer market and list the best all-in-one 3D printers currently available.
We only included multifunctional 3D printers that cost less than $9,000, excluding industrial all-in-one 3D printers that require advanced knowledge (and budget).
Top all-in-one 3D printers in 2022
| Brand | Product | Build size | Country | Price Approximate starting prices based on supplier-provided information and public data. | |
|---|---|---|---|---|---|
| Snapmaker | Snapmaker Original | 125 × 125 × 125 mm4.92 × 4.92 × 4.92 in | – | $ 799812 €709 £119,096 ¥ | Contact |
| Snapmaker | Snapmaker 2.0 A150 | 160 × 160 × 90 mm6.3 × 6.3 × 3.54 in | – | $ 1,1991 219 €1,064 £178,718 ¥ | Contact |
| Stepcraft | Stepcraft-2/840 (Kit) | 600 × 840 × 140 mm23.62 × 33.07 × 5.51 in | – | $ 1,6991 479 €1,507 £253,246 ¥ | Contact |
| Febtop Tech | Optimus C1 | 280 × 280 × 280 mm11.02 × 11.02 × 11.02 in | – | $ 2,4992 540 €2,217 £372,491 ¥ | Quote |
| ZMorph | VX | 250 × 235 × 165 mm9.84 × 9.25 × 6.5 in | – | $ 2,7992 845 €2,483 £417,208 ¥ | Quote |
| Diabase | H-Series | 400 × 180 × 180 mm15. 75 × 7.09 × 7.09 in 75 × 7.09 × 7.09 in | – | $ 8,5008 500 €7,540 £1,266,976 ¥ | Quote |
| 5AXISWORKS | 5AXISMAKER CNC machine | 400 × 400 × 400 mm15.75 × 15.75 × 15.75 in | United Kingdom | upon request | Quote |
| Hyrel 3D | System 30M | 225 × 200 × 200 mm8.86 × 7.87 × 7.87 in | United States | upon request | Quote |
 Prices may vary by region, over time and do not include additional products or services (taxes, shipping, accessories, training, installation, …).
Expand to see more specs
The products in the table are ranked by price (low to high).
| Product | Brand | Country | Price Approximate starting prices based on supplier-provided information and public data. Prices may vary by region, over time and do not include additional products or services (taxes, shipping, accessories, training, installation, …). | |
|---|---|---|---|---|
| Snapmaker Original | Snapmaker | – | $ 799812 €709 £119,096 ¥ | Contact manufacturer |
| Snapmaker 2.0 A150 | Snapmaker | – | $ 1,1991 219 €1,064 £178,718 ¥ | Contact manufacturer |
| Stepcraft-2/840 (Kit) | Stepcraft | – | $ 1,6991 479 €1,507 £253,246 ¥ | Contact manufacturer |
| Optimus C1 | Febtop Tech | – | $ 2,4992 540 €2,217 £372,491 ¥ | Get a quote |
| VX | ZMorph | – | $ 2,7992 845 €2,483 £417,208 ¥ | Get a quote |
| H-Series | Diabase | – | $ 8,5008 500 €7,540 £1,266,976 ¥ | Get a quote |
| 5AXISMAKER CNC machine | 5AXISWORKS | United Kingdom | upon request | Get a quote |
| System 30M | Hyrel 3D | United States | upon request | Get a quote |
All-in-one 3D printer functionalities
A range of functionalities can be included in all-in-one 3D printers: CNC milling, laser cutting and engraving, paste extrusion, and more.
CNC milling
Computer numerical control (CNC) milling is the removal of material through a specific process that uses rotary cutters, performed by computer-controlled machines that are also known as machining centers or stations. CNC milling, a process similar to drilling and/or cutting, is considered subtractive manufacturing in contrast to 3D printing which is an additive method.
Paste extrusion (syringe extruder)
Paste extrusion is the process of simply pushing any paste-type filament such as PVC foil, EVA foam, machining wax, and even chocolate (food 3D printing!) through a special tube and nozzle. Paste extruders are also known as syringe extruders.
Laser cutting and laser engraving
Laser cutting is quite simple; a computer-controlled machine directs the laser beam onto the material and moves according to the desired shape. Engraving works the same way, but with less laser power. Compatible materials – for non-industrial desktop machines – include different kinds of plastics as well as soft metals and wood. Check out our guide to laser engravers and cutters for further information.
Other functionalities
Some of the all-in-one 3D printers included in this article feature other functionalities besides the ones mentioned above. Some of these functionalities include:
- Drawing: a writing instrument such as a pen or marker can be attached to a 3D printer’s tool head in order to create automated (or CNC) drawings.
- Hot-wire cutting: the 3D printer is equipped with a wire made of stainless steel, ideal for cutting foam and similar materials.
- Vinyl cutting: a technique where a drag knife, also known as a “craft cutter”, is used to cut out shapes or letters from thin, adhesive plastic (ie. for stickers) through adjustable-depth cutting.
Multifunctional 3D printers overview
The ZMorph VX is a powerful all-in-one desktop 3D printer made by ZMorph, a manufacturer based in Poland. Thanks to its interchangeable tool heads, the ZMorph VX enables users to rapidly switch between functionalities: CNC milling, laser engraving/cutting, 3D scanning, and paste extrusion.
The VX comes with Voxelizer software (Voxelizer 2). This software allows users to slice models for 3D printing but also to access the printer’s CNC mill and laser engraving/cutting capacities.
ZMorph’s multitool 3D printer VX is ideal for professionals and enthusiasts in the woodworking business since its CNC mill is capable of cutting several materials such as plywood, beech, oak, maple, walnut, pine, chestnut, machining wax, PCB, plexiglass and PVC foam.
Main functionalities: CNC milling, laser cutting/engraving, paste extrusion
Contact manufacturer Get a quote Add to comparison
The System 30M by American manufacturer Hyrel 3D is an ultra modular 3D printer. It’s compatible with Hyrel’s wide range of nozzles and extruders, thus making it eligible to print high-temperature materials, standard or engineering plastics, clays, hydrogels, and more.
This printer features a sturdy, all-metal chassis with an enclosed build to protect jobs from room drafts or temperature changes. It comes with a table PC and boasts an onboard camera and lighting for remote monitoring.
Main functionalities: CNC milling, laser cutting/engraving, paste extrusion
Contact manufacturer Get a quote Add to comparison
The Snapmaker 2.0 is Snapmaker’s second-generation multifunctional 3D printer. This time, it comes in three different versions – A150, A250, and A350 – each offering varying build volumes.
Through an intuitive and easy user interface, the included software handles all of the machine’s multiple facets: 3D printing, CNC milling, and laser engraving/cutting. Users can control the Snapmaker 2.0 via its removable touchscreen (it looks like a smartphone).
An optional enclosure is available.
Main functionalities: CNC milling, laser cutting/engraving
Contact manufacturer Add to comparison
The Snapmaker 3D printer is an affordable all-in-one 3D printer that started as a Kickstarter project and managed to gather the considerable amount of $2,227,182 from 5,050 backers.
The Snapmaker Original features a heated bed capable of reaching up to 80°C, and a CNC milling work area of 90 x 90 x 50 mm.
Main functionalities: CNC milling, laser cutting/engraving
Contact manufacturer Add to comparison
The Stepcraft-2/840 is a professional AIO 3D printer made by the German manufacturer Stepcraft. In addition to its many functionalities, the Stepcraft-2/D.840 can be equipped with a hot wire cutter, a drag knife and a mini engraving point for faster but less detailed engraving than with the laser.
The original Stepcraft-2 was introduced as a Kickstarter project in 2015 and managed to gather over $500,000 by 211 backers.
Main functionalities: 3D scanning, CNC milling, laser engraving
Contact manufacturer Add to comparison
The Optimus C1 is a three-in-one delta 3D printer made by the Swedish manufacturer Febtop Tech. The original Optimus 3-in-1 3D printer was an Indiegogo project that managed to gather over $360,000, well over its $50,000 goal.
This version, the C1, offers a large 3D printing build volume of 300 x 300 x 300 mm. Its closed frame boasts an air filter and a color touchscreen for an enhanced user experience.
Main functionalities: CNC milling, laser cutting/engraving
Contact manufacturer Get a quote Add to comparison
The 5AXISMAKER is a professional 3D printer CNC mill combo made by 5AXISWORKS, a manufacturer based in the United Kingdom. This 2-in-1 3D printer is also available in a bigger version with a 3D printing build size of 600 x 600 x 600 mm.
Besides CNC milling, the company is working on providing a 3D scanning touch probe extension.
Main functionalities: CNC milling
Contact manufacturer Get a quote Add to comparison
This multifunctional 3D printer offers a wide build volume of 400 x 180 x 180 mm. It can be equipped with up to 5 print heads at a time or 4 spindles, or any combination of the two. The built-in cleaning station helps keep each nozzle clean between switches.
Diabase refers to their H-Series machine as a “Hybrid manufacturing” system for professionals. You first 3D print your part and then use the spindle head to add CNC-level precision (sharper edges, finer details, …).
Main functionalities: CNC milling
Contact manufacturer Get a quote Add to comparison
E3D is a leading extruder and nozzle manufacturer from the United States. They recently launched their ASMBL (Additive and Subtractive Manufacturing by Layer) system, enabling users to use both 3D printing and CNC milling in the same run.
Similarly to Diabase, the goal is to achieve better part tolerance, higher accuracy and obtain sharper edges by combining both technologies (hybrid manufacturing).
Discontinued multitool 3D printers
Various all-in-one 3D printer manufacturers have closed down or stopped manufacturing their products. Other were Kickstarter projects that didn’t make it on the market. We listed them here (below) for those that may be wondering why a certain printer or brand isn’t on our main list.
AIO Robotics Zeus 3D printer and scanner combo
Zeus, a 3D printer and 3D scanner combo made by the US manufacturer AIO Robotics, was one of the most popular AIO 3D printers on the market. However, AIO Robotics no longer manufactures any 3D printers.
ATOM Atom 2.5 EX 3D Printer Kit
The Atom 2.5 EX was a professional delta 3D printer with a laser engraver. ATOM had announced an Atom 3 in 2018, but it isn’t possible to purchase 3D printers on their website anymore.
FABtotum Core PRO
The FABtotum Core PRO was capable of CNC milling, laser cutting cardboard and paper, and laser engraving. This 3D printer is no longer available, as the brand is in liquidation.
FLUX Delta
FLUX was an interesting multifunctional option from Taiwan, but they stopped manufacturing printers and now sell sunglasses!
MAG iCreatum
This multifunctional 3D printer was supposed to feature 3D printing, ink plotting, and other functionalities for only $300.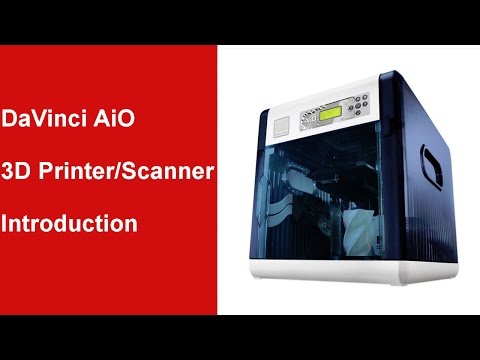 Kickstarter suspended its campaign in 2017 as the project violated its rules.
MakerArm, the ultimate 4-in-1 3D printer for fablabs?
The MakerArm started as a Kickstarter project and managed to gather over $430,000 from 340 backers in November 2015. After unexpected rises in component costs, the MakerArm team decided to refund their backers.
XYZprinting Da Vinci 1.0 Pro 3-in-1
Although it’s still displayed on XYZprinting’s website, this 2-in-1 3D printer and scanner has been out of stock for quite some time.
XYZprinting da Vinci 1.0
This page will help you set up your new XYZprinting da Vinci 3D printer for use with the All-In-One 3D Printing software by Simplify3D. The da Vinci line of 3D printers come at an affordable cost and include features such as a filament cartridge system, integrated LCD panel, and an enclosed printing chamber. If you are setting up a brand new da Vinci 3D printer, make sure to read the User Manual that comes with the printer. This describes the unboxing process, which includes removing plastic harnesses, filament loading, and bed preparation. You can also download an electronic copy of the User Manual directly from XYZprinting’s Support Page. The remainder of this page is written specifically for the da Vinci 1.0, but the same process can be applied to the da Vinci 2.0 and 2.1 plus.
Final Hardware Checks
Before we dive into the software, there are a few final hardware checks you should perform before using your da Vinci 1.0. If you’re confident your printer is ready to go, you can jump directly to the software setup. The da Vinci 1.0 comes with several additional pieces you will need to remove before performing your first print. These are also described in XYZprinting’s documentation as mentioned above. You will want to remove the plastic clips near the extruder or print head that hold onto the rods and secure the printer when being shipped. You will also want to remove the orange clip securing the build plate, this can be done by removing the thumb screw holding down the orange clip.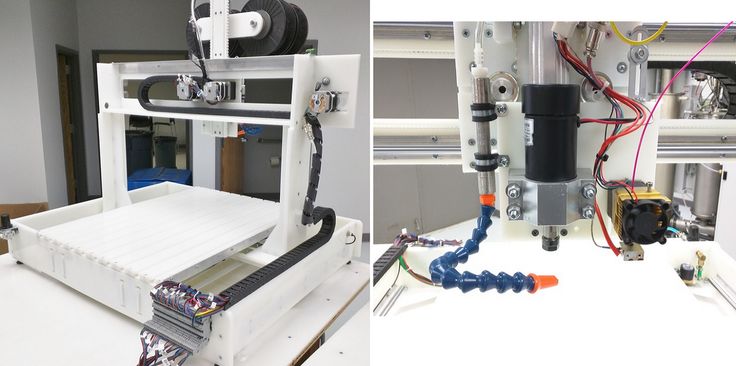
Once you have removed the necessary clips securing the printer, you will want to load filament before starting a print. Power on the da Vinci 1.0 by plugging in the included power cord and flipping the switch on the left side of the unit. You can load filament by following the on-screen instructions. Once this setup process is complete, you’re ready to start printing!
Printing with Simplify3D
Simplify3D Software comes with all of the necessary tools required to start printing on your da Vinci 3D printer. It is an integrated package so it’s the only piece of software you’ll need. The software communicates with your da Vinci 3D printer via the supplied USB Cable. If you’re running Linux or OS X, you can move on to the next step. Windows users may need to install the Arduino and RAMBo inf driver files (found here and here). However, if you have installed or used XYZware previously, you should already have the necessary drivers installed and can move on to the next step.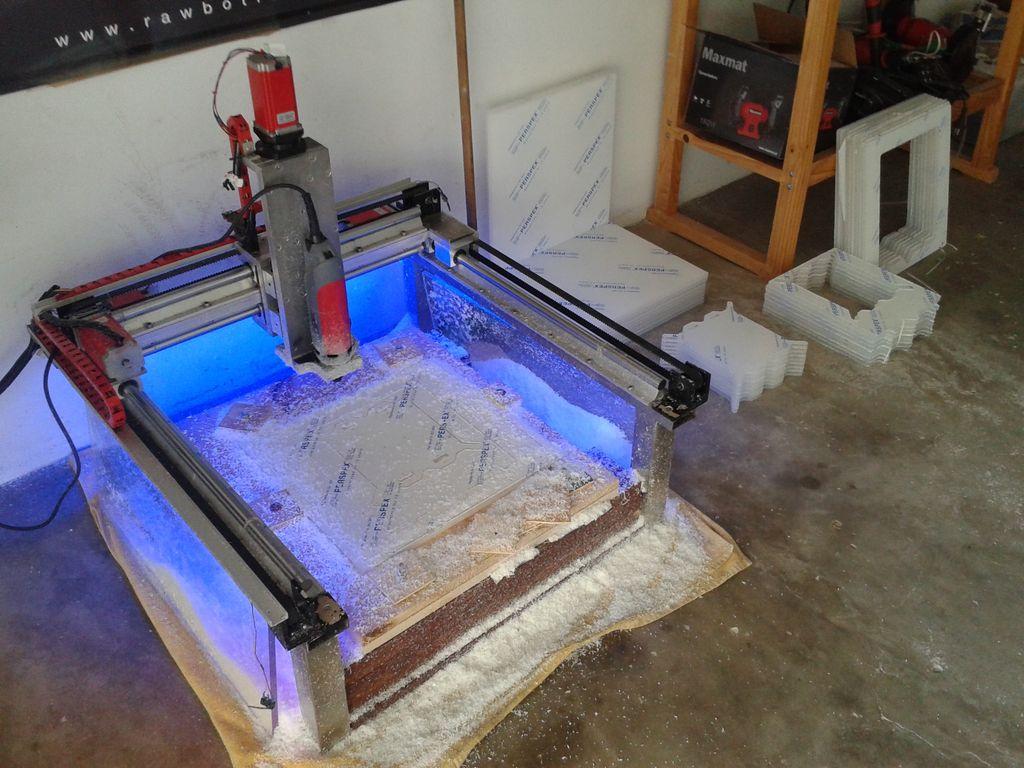
The first time you open Simplify3D Software, the Configuration Assistant will help you choose your printer. Select either the XYZprinting da Vinci 1.0 or 2.0. If this is not your first time opening Simplify3D Software, you can bring up the Configuration Assistant by going to Help > Configuration Assistant.
After completing the Configuration Assistant, import the 3D model you’d like to print. After importing the model, please click “Edit Process Settings”. This will open the FFF Settings window where you can configure a wide variety of slicing options.
In this window, you will find options to select the material for the print, the preferred quality, infill percentage, and whether to use a raft or generate support material. If you’d like to customize your prints further, please click the Show Advanced button. For more information on the options available in the Advanced Settings, please visit our Tutorial Library.
Once you’ve sliced a model with your selected settings, click “Begin Printing Over USB” to start the print job. When the da Vinci 3D printer receives the print job, it will automatically go through its start routine and begin heating up.
You can gather further information about the status of your machine by going to Tools > Machine Control Panel. On this window you can view a plot of the current temperatures, see the communication back and forth with the machine, and issue manual commands such as jogging or preheating. Please note that it may take several minutes for your machine to reach the appropriate temperature before printing can begin.
Troubleshooting
Is my da Vinci 3D Printer supported?
All da Vinci 3D Printers, 1.0, 1.0A, 2.0 Duo, 2.1 Plus, 1.0 AiO are supported by Simplify3D Software. Enjoy fast slicing, highly customizable print settings, and upload files directly to the printer over USB.
Recommended Firmware?
Every firmware version can take full advantage of Simplify3D’s highly customizable slicer and directly upload print jobs over USB. For other features like manual jogging or bed leveling, we recommend the following firmware.
da Vinci 1.0 – Firmware version 1.1J
da Vinci 2.0 – Firmware version 2.0J
My Printer Reboots During Upload
If you experience this, please turn off the da Vinci printer and close the Simplify3D Software. Re-open the software, turn the printer back on, and retry the file transmission. Newer firmware releases by XYZprinting have greatly reduced the likelihood of this problem, so you may also wish to update to the latest version.
How a 3D printer works, what can be printed on a 3D printer
The 3D printer is a technology that allows you to create real objects from a digital model. It all started in the 80s under the name "rapid prototyping", which was the goal of the technology: to create a prototype faster and cheaper. A lot has changed since then, and today 3D printers allow you to create anything you can imagine.
Contents:
- What is 3D printing?
- How does a 3D printer work?
- What can be printed?
The 3D printer allows you to create objects that are almost identical to their virtual models. That is why the scope of these technologies is so wide.
What is 3D printing?
3D printing is an additive manufacturing process because, unlike traditional subtractive manufacturing, 3D printing does not remove material, but adds it, layer by layer—that is, it builds or grows.
- In the first step of printing, the data from the drawing or 3D model is read by the printer.
- Next is the sequential overlay of layers.
- These layers, consisting of sheet material, liquid or powder, are combined with each other, turning into the final form.
With limited production of parts, 3D printing will be faster and cheaper. The world of 3D printing does not stand still and therefore there are more and more different technologies competing with each other on the market.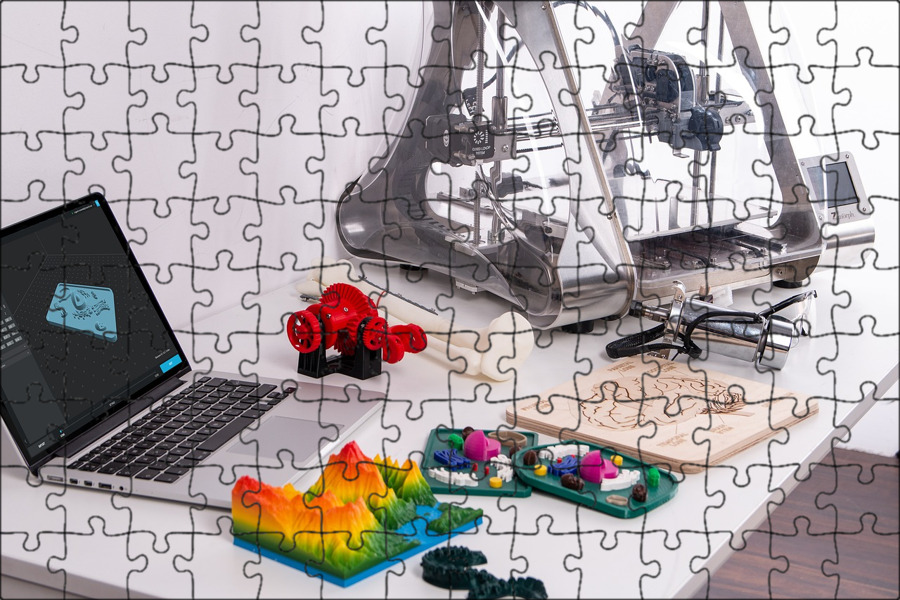 The difference lies in the printing process itself. Some technologies create layers by softening or melting the material, then they provide layer-by-layer application of this same material. Other technologies involve the use of liquid materials, which acquire a solid form in the process under the influence of various factors.
In order to print something , you first need a 3D model of the object, which you can create in a 3D modeling program (CAD - Computer Aided Design), or use a 3D scanner to scan the object you want print. There are also easier options, such as looking for models on the internet that have been created and made available to other people.
Once your design is ready, all you need to do is import it into the Slicer, a program that converts the model into codes and instructions for a 3D printer, most of the programs are open source and free. The slicer will convert your project into a gcode file ready to be printed as a physical object. Simply save the file to the included SD card and insert it into your 3D printer and hit print.
The whole process can take several hours and sometimes several days. It all depends on the size, material and complexity of the model. Some 3D printers use two different materials. One of them is part of the model itself, the other acts as a prop that supports parts of the model hanging in the air. The second material is subsequently removed.
How does a 3D printer work?
Although there are several 3D printing technologies, most create an object by building up many successive thin layers of material. Typically desktop 3D printers use plastic filaments (1) which are fed into the printer by the feeder (2) . The filament melts in the print head (3) which extrudes the material onto the platform (4) creating the object layer by layer. Once the printer starts printing, all you have to do is wait - it's easy.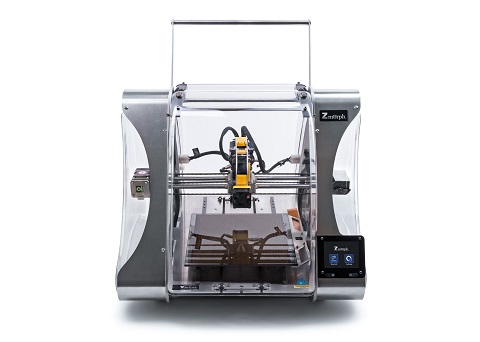
Of course, as you become an advanced user, playing with the settings and tweaking your printer can lead to even better results.
What can be 3D printed?
The possibilities of 3D printers are endless and they are now becoming a common tool in fields such as engineering, industrial design, manufacturing and architecture. Here are some typical usage examples:
Custom Models
Create custom products that perfectly match your needs in terms of size and shape. Do something that would be impossible with any other technology.
Rapid Prototyping
3D printing allows you to quickly create a model or prototype, helping engineers, designers and companies get feedback on their projects in a short time.
Complex geometry
Models that are hard to imagine can be easily created with a 3D printer. These models are good for teaching others about complex geometry in a fun and useful way.
Cost reduction
The cost of 3D printing end-use parts and prototypes is low due to the materials and technology used. Reduced production time and material consumption as you can print models multiple times using only the material you need.
How to choose and buy a 3D printer? →
What is a 3D printer and why is it needed? / Amperka
Additive technologies have been going to the masses for a long time: institutes and research centers have been closely involved in them since the 80s, and now the moment has come when you can touch high-tech and master 3D printing right at home. You don’t even have to break the bank to do this: the prices of 3D printers have caught up with average smartphones. We understand how it works and what opportunities open up for makers and DIY enthusiasts!
Everything for 3D printing ❯
Why you need a 3D printer
The printer is very useful for do-it-yourself engineers. You no longer have to look for a universal case for the project, and then drill additional holes in it. 30 minutes of design, a few hours of printing - and you already have a case that is perfect for your device. Assembly of 5 shields does not fit anywhere? Forget about such problems.
The printer is sure to help you repair gizmos around the house. Everyone has had a situation in life when a thing had to be thrown away, although only one plastic part was broken in it. With the help of 3D printing, you can easily replace rare plastic parts in appliances that are difficult to find separately.
Until you learn how to model plastic parts yourself, you can simply download them on the Internet. There are many sites with millions of ready-made free models that are freely exchanged by users. We devoted a separate article to the search for models.
Types of 3D printers
There are several main types of 3D printers that differ fundamentally in terms of how they work.
FDM (Fused Deposition Modeling)
FDM printers are the most common type. They work due to a movable print head with a heating element. Plastic is fed into it in the form of a rod, which melts and is squeezed out in liquid form onto the printing table. At the same time, the plastic is blown by a fan and instantly freezes, and the head begins to squeeze out a new layer over the frozen one.
SLA technology (Stereolithography Apparatus)
SLA printers work on the basis of stereolithography: instead of plastic, a special photopolymer resin is used, which cures under the influence of ultraviolet rays. For printing, the resin is filled into a tray, below which there is a display with ultraviolet pixels. A drawing of the lower layer of the model is displayed on it for several seconds. In this case, the resin above the display solidifies in the form of a displayed pattern and then sticks to a special movable table from above. After that, the table with the first layer rises, and the next layer polymerizes in the resin.
SLS (Selective Laser Sintering) Technology
SLS printers use selective laser sintering technology, which uses a special plastic powder. During the printing process, a thin layer of powder is poured, and the printer processes it with a laser so that the layer hardens according to the model. Then the next layer of powder is poured and fused with the previous one - and so on in a circle. At the end, it remains only to clean the finished part from the remnants of the powder, which can then be reused.
Technology comparison
Each type of 3D printer has its own advantages and disadvantages.
- SLS printers are large and require expensive raw materials. They are often used in high-tech industries for piece parts.
- SLA printers are much more widespread. The UV display improves accuracy, but working with toxic photopolymer resin at home is difficult.
- FDM printers are the most popular among hobbyists. A plastic rod is much cheaper than a special powder or photopolymer resin. However, to print complex geometry on such a printer, you will have to take care of auxiliary support. And the print speed is on average lower than on other technologies. But FDM printers are the easiest and safest to maintain.
How to prepare a print
The process from the idea to the finished plastic part is simple - a schoolboy can handle it. We've broken it down in a 3D printing guide using the Flying Bear Ghost 5 printer as an example, but here we'll show you the general principle.
Initial model
First you need to create or download a 3D model of the future part. As a rule, sources are stored in the STL format, which describes the polygonal structure of the model as a set of triangles. But it will not be possible to immediately send such a file to the printer: for successful printing, you first need to break a detailed 3D model into layers that the printer can handle.
Slicing
The program for cutting models (slicer) will require you to enter the model of your printer and set the print settings: layer thickness, percentage of internal filling of the part, auxiliary supports and the like. Based on this data, the slicer will automatically prepare a special code for the printer - G-Code, which describes how to move the print head, to what temperature it should be heated, and at what speed to extrude plastic in order to get the desired model layer by layer. Then it remains to load this code into a 3D printer and be patient until the end of printing.
The whole process of model preparation is clearly illustrated by the program and provided with intuitive tips for novice users. In general, slicing is not as scary as it is painted!
Finishing
After the model is ready, it can be further processed with sandpaper or a chemical solution. This will smooth out the unevenness between the layers, and the part will look just like the factory. There are a lot of life hacks on the Internet that will help minimize the flaws of the model and give it an improved look.
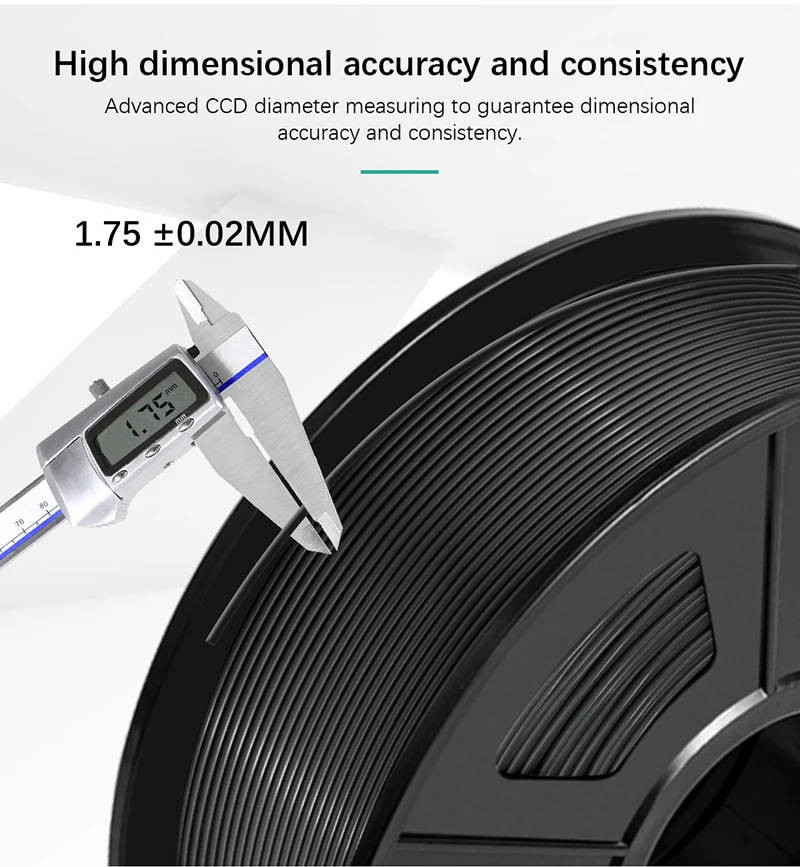
Printing consumables
The properties of the printed item largely depend on the raw material. As we said before, FDM 3D printers use plastic filament as a consumable, and you have a lot of room to experiment with different types of plastic.
- PLA is highly extrudable and allows complex shapes to be printed at relatively low head operating temperatures of 190°C.
 The biodegradability of PLA plays into the hands of the environment, but at the same time, things from it are not very durable.
 - PETG plastic is stronger than PLA, but also well suited for printers with temperatures around 200 °C. Varieties of PET plastic are well known to you from bags and plastic soda bottles.
- ABS is more durable than other types. However, your printer will need an elevated extrusion temperature of around 250°C and a heated bed up to 120°C to print quality ABS plastic, so not every model aims to support it.
- HIPS plastic is close in temperature properties to ABS, but has low caking with it and is easily removed with an organic solvent. Because of this, HIPS plastic is often used for printing composite models and supports for ABS models.
- Wood plastic is produced with the addition of wood dust. Finished models from it imitate wood not only in their appearance, but also in smell.
Plastic spools are available everywhere - it will not be difficult for you to choose the right consumables and combine different properties and colors of parts when printing.