Eora 3d laser scanner
EORA 3D Smartphone Laser Scanner Review
Updated 12 June 2018
This Review has been updated for the public release of Eora Studio. It was previously published using the beta version of the app.
Back in August 2016 I wrote a post about upcoming, crowd-funded 3D scanning hardware for smartphones. One of them was a turntable for photogrammetry: Pixelio, which I’m pretty sure went out of business that same year. The other two are both 3D scanning solutions that use a laser line as the light source and the smartphone camera for capturing.
I reviewed Bevel — a $89 clip-on smartphone accessory aimed at making 3D selfies — last year and concluded that it didn’t work very well. I couldn’t imagine consumers paying that amount of money to carry around an extra device to make 3D selfies that don’t look flattering or sometimes horrifying. And while there is certainly potential in capturing 3D selfies, Sony showed at MWC 2018 that this can now be done without special 3D scanning hardware. I tested it and it works pretty well indeed.
But in this post I’m writing about the third solution on that 2016 list: EORA 3D. It also uses a laser for 3D scanning, but is aimed at scanning objects. And arguably also at a more professional audience.
In this post I’m diving into my experiences with EORA 3D to find out if dedicated 3D scanning hardware is still relevant now that smartphone 3D capture is moving towards software-only solutions.
Hardware and Pricing
Eora3D was crowdfunded through Kickstarter where it pledged almost $600k while the goal was $80k. The device is currently available for purchase at $599.
That’s a lot more than the $89 Bevel I mentioned earlier but that’s hardly a good comparison functionality-wise.
The EORA 3D price point is still half of what you have to pay for the most affordable desktop structured light scanner I’ve tested, which is the $1190 EinScan-SE (Review). It must be said though that that PC-operated structured light scanner comes with a much larger turntable and a pair of embedded cameras so you don’t need to supply your own in the form of an smartphone camera.
But let’s get back to the EORA and see what you will get for the price:
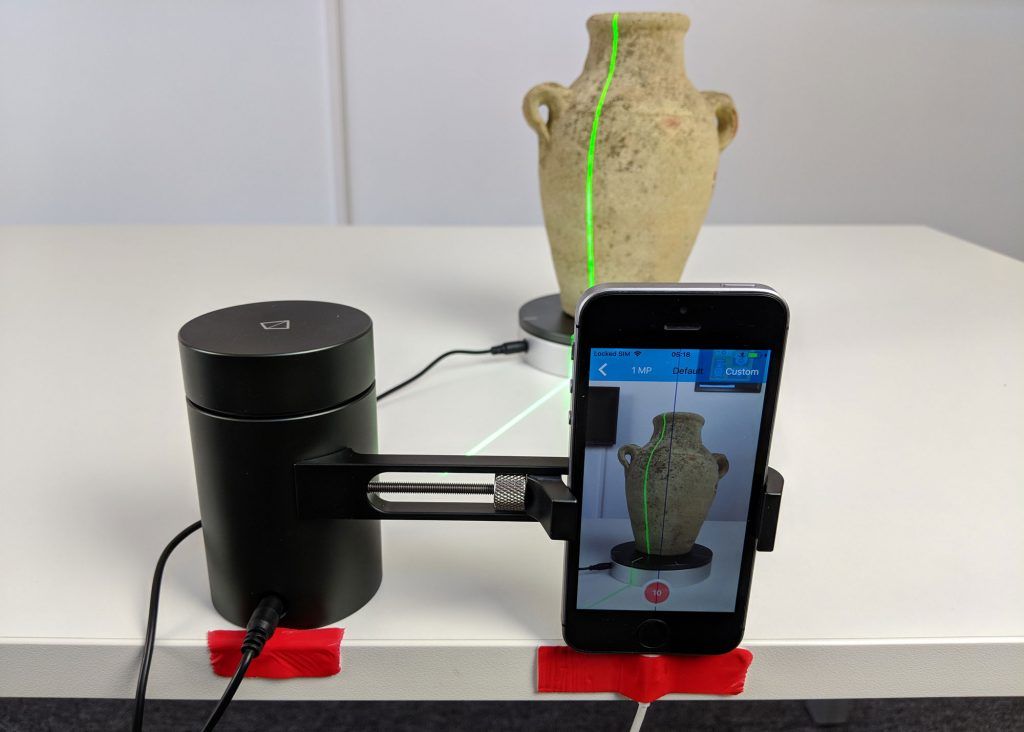
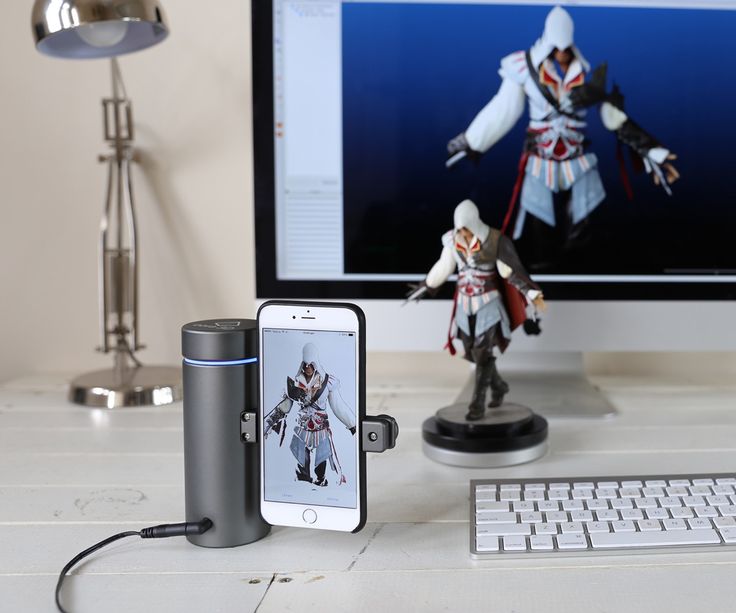
The main device inside the EORA 3D box is the scanner itself. It’s a heavy, milled aluminum cilinder that hoses a green laser light in its movable head. An extending arm will hold your smartphone firmly. Firm enough that it won’t fall out if you put the scanner on a tripod by using the standard tripod thread on the bottom.
Between the body and the head there’s a semi-transparent LED light ring that will change color depending on what the scanner is doing. It looks nice but since you’re looking at your smartphone’s screen its real functionality is questionable. Overall through, the EORA 3D is a great feat of industrial design and engineering. It’s heavy and solid and feels very professional. This is a device that Apple enthusiasts will put on a shelf when not using it to wow their friends and colleagues.
The device comes with a small turntable. With a diameter of just 10 cm it’s actually kind of cute. It’s also made out of milled aluminum although the one I got came in a different colorway than the scanner.
Both the scanner and turntable are powered by a single adapter that uses a separate splitter cable. In my experience these cables are on the short side. And since the aluminum devices don’t have rubber undersides the whole setup easily slides when the power cables touched in any way.
Aside from the sliding issue it’s also unpractical that the smartphone sits flat on the table. It can’t be charged this way and scanning with the EORA 3D drains the phone’s battery quickly because it’s constantly using the screen, the camera, Bluetooth and basically every bit of computing power in the phone.
To be able to make multiple test scans throughout the day without the scanner sliding or the phone losing power I had to make it a lot less elegant:
On the positive side: it worked and the phone I’m using charged fast enough to keep scanning.
Compatible Smartphones
It’s noteworthy that the EORA 3D in itself isn’t a complete 3D scanner. You get a light source in the form of a green laser line but the software uses your phones camera to capture both the distortion of the line and color images for texturing. So the experience and scan quality will partially depend on the specs of your phone.
The manufacturer recommended to use an iPhone 6S or higher for optimal performance and quality. I’m using an iPhone SE for this review, which has similar performance in a smaller iPhone 5-like body. You basically need an ARkit-capable phone. The iOS app, called Eora Studio, can be downloaded from the App Store.
There’s also an Android app, which is available on Google Play, but that one is currently a lot more limited than the iOS app. For example, it doesn’t offer turntable scanning yet. One thing I did like when I tried it on my Pixel 2 was that there’s no need to manually pair the scanner through Bluetooth: it simply detected it automatically and started scanning. I’m not sure what the final system requirements will be but I guess you’ll need a recent handset to get the most out of EORA 3D. I guess an ARCore compatible phone is a safe bet.
Calibration
Like most 3D scanners, the EORA 3D must be calibrated. You have to do this before first use and occasionally to guarantee accuracy. To do this you’ll have to place the included calibration board vertical. Interestingly there’s no stand included to hold it that way and the manufacturer advices to use the box as a stand. Depending on the location of your phone’s camera you might also need to elevate the board upwards so it fits in the on-screen rectangle. I used a stack of business cards to get the right height.
To me this procedure doesn’t really match the sophisticated design of the hardware. But the good news is that calibration has been improved greatly since the beta version of the app and now automatically detects the calibration board and highlights the dots in green when you’ve placed the board at the correct distance.
You’ll have to do this process twice if you want to use both the standard and high quality scan modes, which are labeled 1MP (megapixels) and 8MP. When doing the 8MP calibration it already became apparent that this mode is very slow.
Turntable Placement
I’ve tested quite a lot of desktop-style structured light scanners with included turntables, like the HP S3, EinScan SE/SP and Scan in a Box. All of them have ways to detect where the turntable’s center axis is in relation to the scanner. Either by using a small calibration board or by rotating the object a few degrees back and forth.
Eaerlier versions of the EORA 3D app required the user to place the turntable in a very specific spot manually with the guidance of the laser but the latest Eora Studio app just requires aligning an crosshair in the viewfinder with a cross on the turntable. This is a lot easier.
It’s noteworthy that turntable scanning only works with the scanner placed flat on the same surface as the turntable. This is very limiting because most small objects are better scanned from a slight down-facing angle. EORA 3D can basically only scan the sides of objects in this mode.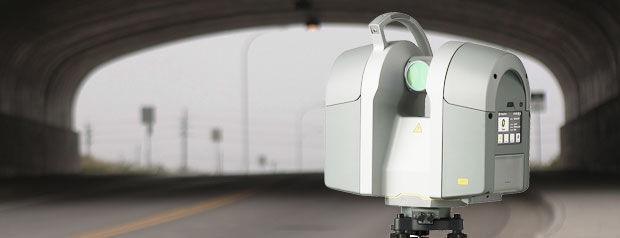
Scanning
You can use the EORA 3D with or without the turntable. If you don’t want to use it, you simply disconnect it and the software will go into single-scan mode. If a turntable is powered and paired, you have the option to set the amount of stops (between 4 and 10) by and execute the turntable alignment mode by long pressing the on-screen shutter button. I’d rather have dedicated buttons for these features.
Single-scan mode does give you more flexibility in object sizes and placement. It might be handy to capture shallow reliefs on flat objects but it’s not very usable for curved objects. The laser moves across the object but since it’s projected at an angle you’ll always end up with holes in the scans.
In single-scan mode it makes more sense to switch to the 8MP (Detail) mode since the time it takes for a single scan is still doable (about a minute). For turntable scans, which requires 10 stops, total scanning time became too long for me to be usable in a a professional workflow.
Unlike the beta versions of the app, the new Eora Studio let me make a 10-stop turntable scan in 8MP (Detail) mode without problems. It dit result in a 200+MB point cloud though.
Scanning with the turntable in 1MP (Fast) mode worked fine and, like the name implies, is reasonably fast. The default amount of stops per rotation is now 10 and I like the fact that the turntable gently accelerates and decelerates. It takes a bit more time but it does prevent delicate or light objects from shifting.
It’s worth noting that
Alignment
It’s good to realize that unlike most PC-based 3D scanning software, the EORA app doesn’t actively align the separate turntable scans.. Earlier beta versions of the app aligned the turntable scans by simply them next to each other. This made the quality of the alignment really dependent on how accurately you have placed the turntable.
The new Eora Studio app has abandoned that feature and instead relies on a alignment algorithm that requires users to define 7 unique points in two separate scans of choice.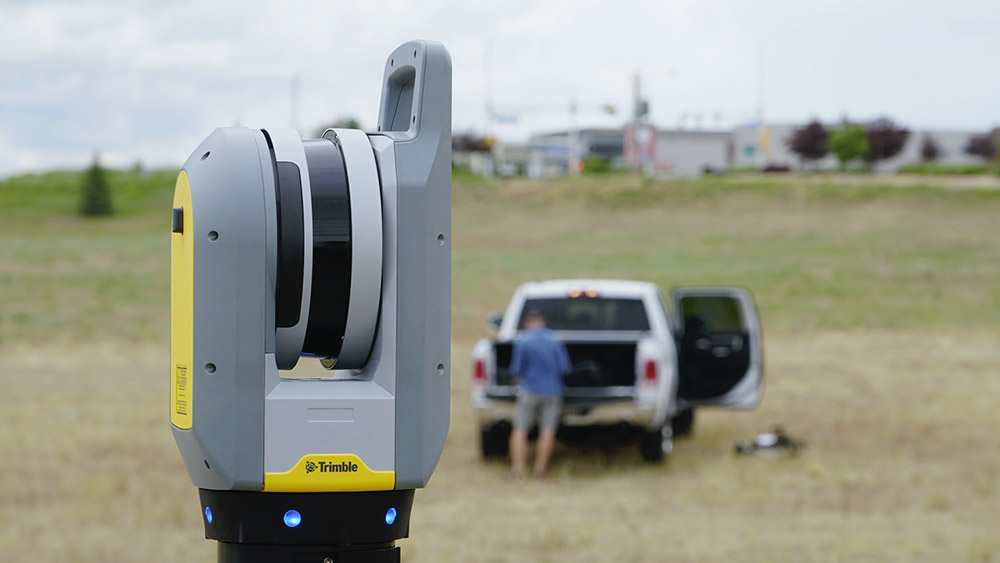 I find the 7 points a lot to begin with and also found it hard to accurately place them. Even when zooming in on the scans using a finger on a touch screen isn’t very accurate for point placement. My 4-inch screen made that even harder and I can imagine that it works a bit better on a 6-inch phone.
Unfortunately the app uses the actual selected points for alignment instead of using a global registration algorithm. This means that alignment is totally depends on the points you select and the ability to set good points will depend on the availability of clear points on the object. Since each partial scan only contains a very small slice of the object it can sometimes be hard to find 7 matching points at all. That said, the available alignment is very fast — even on an iPhone SE — and you can also opt to export the raw point cloud data and align the scans in a desktop 3D program like MeshLab or CloudCompare.
Editing
The app has some basic editing features built-in but the current version is limited to erasing unwanted parts.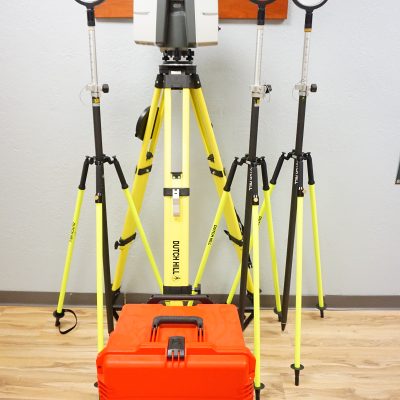 It works reasonably well since you can now use it as a lasso tool to highlight and delete parts of the entire model at once instead of per separate scan. It’s still a bit hard to do precisely on a small smartphone, though, and I’d very much like an automatic turntable or base removal feature.
Exporting
You can export your scans as raw point clouds in PLY format for external alginment and meshing but Eora Studio can now also create watertight, colored meshes in PLY, STL or OBJ meshes. It must be noted though that these are of very low resolution and because the coloring is done per-vertex instead of through UV texture maps the color quality of the meshes is also low as you’ll see in the examples I’ll post in the final part of this review.
EORA 3D’s help pages offer a guide on how to mesh the PLY point cloud using the CloudCompare sofware but this is quite complex and for the purpose of this review and making fair comparisons I wanted to use the EORA app’s native meshing capabilities.
I exported my files to Dropbox but you can also send them to other apps or email them. You can link the EORA 3D app to your Sketchfab account but that only supports exports of the meshes, not the raw point clouds. The point clouds I’ve embedded below have been processed with MeshLab to merge all separate scans into a single point cloud file.
Results
First up is the Toddler Sneaker I scan often. The first two embed are raw point clouds exported from Eora Studio. The export consists of 10 separate PLY files but I’ve merged them into one for display purposes using MeshLab — but alignment was stricly done in-app. The first one is scanned in the 8MP/Detail (and edited within the app to remove the turntable) mode and the second in 1MP/Fast mode. You can switch of the colors off by pressing 3 on your keyboard.
Toddler Sneaker (Point Cloud – Hi) — Eora Studio by Nick Lievendag | 3D Scan Expert on Sketchfab
Toddler Sneaker (Point Cloud) — eora3D Studio by Nick Lievendag | 3D Scan Expert on Sketchfab
The scan in the higher resolution clearly resulted in a denser point cloud (3 million vs. 850 thousand) and while the alignment is not perfect it’s reasonable for a quick phone-based alignment based on manual points. Setting points was also quite easy because of the many details on the sneaker. The high resolution scan does contain a lot more noise though.
The low resolution version is actually quite detailed and a lot smoother. It’s also a lot lighter in memory usage and would be easier to post-process. But if you zoom in on that scan, you’ll quickly see through the points.
For comparison of captured detail I’ve chosen to compare it to the EinScan-SE structured light desktop scanner I mentioned in the intro, which is a meshed model, not a point cloud, so it’s a bit like comparing apples and oranges but bear with me.
Toddler Sneaker — EinScan-SE by Nick Lievendag | 3D Scan Expert on Sketchfab
It’s a bit hard to compare and judge for the untrained eye but in the high resolution mode the Eora 3D captures an impressive amount of details. The thing is that turning that raw material into something as smooth an polished as the EinScan-SE result requires a lot of post-processing in the form of registration, noise filtering, meshing and hole filling. That is a one-click procedure in the EinScan PC software but with the Eora3D that’s currently only possible through complex steps in third party desktop software — not in the Eora Studio mobile app itself. At least if you want the have a high quality end result.
The Eora app does have a feature that performs meshing and hole filling that generates a single, watertight mesh but the result is very low quality:
Toddler Sneaker (PLY) | eora3D Studio by Nick Lievendag | 3D Scan Expert on Sketchfab
To me that’s quite sub-par. And because the coloring is also per-vertex instead of a high-res texture map, the result is not usual for any purpose I can think of.
I was totally surprised by this, because tests I did with the beta version of the app were more promising. That version could only mesh the partial scan and not fuse them into a single mesh. It also wasn’t able to colorize the meshes. But by merging the meshes and colorizing them with the point cloud data in MeshLab (I made a video tutorial of that process). The result is far from perfect but to me it showed a better potential of colored mesh results than the current Eora Studio app is capable of producing.
Toddler Sneaker (1MP) — EORA 3D by Nick Lievendag | 3D Scan Expert on Sketchfab
But then again, I did those operations mainly in desktop PC software. Future versions of Eora Studio will have to prove that this is actually possible on mobile.
Here’s another example scan from the Eora3D. This time a point cloud in the Fast (1MP) mode followed by the in-app meshed version.
Old Jar (Point Cloud) — eora3D Studio by Nick Lievendag | 3D Scan Expert on Sketchfab
Old Jar (Meshed) — eora3D Studio by Nick Lievendag | 3D Scan Expert on Sketchfab
While the point cloud isn’t aligned perfectly, the amount if detail is nice again. I actually like the Fast (1MP) mode results better than the Detail (8MP) scans because they’re detailed enough for me and quite smooth. This point cloud can be turned into a nice mesh externally. As you can see, the in-app mesh, again, isn’t very nice. This is also a model that would work a lot better if I could fuse two 360-degrees scans because it’s quite tall.
Here’s the dog figure from the screenshots. It’s the in-app meshed version, exported directly to Sketchfab and embedded here:
Dog Figure | eora3D Studio by Nick Lievendag | 3D Scan Expert on Sketchfab
Creating a watertight mesh from a multi-scan 360-degrees point cloud that isn’t perfectly aligned has its limits. And that results in artefacts such as the stray geometry. So at this moment Eora 3Dnot the best solution for those who want to make quick scan of their pet figurine collection and export them directly to Sketchfab, or for instance make 3D prints of them. But let’s face it: that target audience won’t spend $599 on a scanner anyway.
More likelly audiences are people that want to make 3D scans of small objects with a portable device and find that an infrared depth sensor doesn’t give the amount of detail they need. This is especially the case for engineering-like use cases that focus on technical objects. So here is a 360 scan of a power drill. I did it with the turntable to save time but because of the height of the object it would have been better to do it manually from a tripod at a slight downwards angle. It scanned at Fast (1MP) resolution and below is the raw point cloud.
Drill — Eora Studio by Nick Lievendag | 3D Scan Expert on Sketchfab
Alignment aside, there’s a lot of detail in that result in terms of both color and geometry. It’s probably good enough for quality assessment use cases. Interestingly the result of dark and black surfaces seems to depend of the angle of the laser and camera. You can almost imagine a line through the label on the side and front of the drill where the black parts disappear from the capture.
To end this review, I wanted to scan something even more technical, and smaller. Below is a raw point cloud of a single scan in Detail (8MP) mode of a laptop RAM module.
RAM (point cloud) — Eora Studio by Nick Lievendag | 3D Scan Expert on Sketchfab
That’s a very small object and the scan is very detailed. Yes there’s noise but that could very well be due to the iPhone SE’s camera that’s not as light sensitive as more recent ones. It’s also interesting that the print on the label has been recognized as depth. But then you can read Made in Korea geometry which says something about the level of detail.
Verdict
As it stands now, I think that using a laser for object scanning on a smartphone is an interesting concept. Especially now that most mobile scanning is moving towards real-time software-only solutions there is a gap for scale-accurate, high-detailed 3D models. And the EORA 3D can capture details of most surfaces that are a lot more detailed than scans made with similarly-priced depth sensors. It’s even comparable to more expensive, PC-based desktop 3D scanners in terms of pure geometric quality.
The industrial design of the EORA 3D is impressive but it has a few practical disadvantages like the absence of rubberized pads on the bottom to prevent accidental movement of the scanner or turntable, and the fact that the phone’s charging port is not reachable when the scanner is put flat on a table. The latter is crucial because 3D scanning and processing drains the battery quickly.
Need tailored advice about 3D capture for your company or product?
Is laser scanning the solution to your problem? Or is structured light a better option? And what about Photogrammetry?
Consider my Consulting Service
Eora Studio is an improvement over the beta version I tested before but still lacks important features. Alignment based on manual feature selection is hard to do accurately on a small touch screen. And selecting 7 distinctive points can be hard on some objects. Since there’s no global registration, the alignment will be a lucky shot.
There’s now a watertight meshing feature but even on a well-aligned 360-scan it gives sub-par results that don’t do justice to the highly detailed raw scans. Meshes have low quality geometry covered by low quality per-vertex colors. There’s a real need for UV texture mapping here.
As it stand snow, if you need more than point clouds, scanning with the EORA 3D requires knowledge of external mesh-editing software like MeshLab or CloudCompare to create usable meshes. And although they’re both open source and free, they’re not very user friendly. And I believe that the user experience is where mobile scanning solutions can offer the most value.
If point clouds are all you need, especially for making single scans, there’s a lot of potential in this scanner. The Fast (1MP) mode is fast indeed so it can be convenient for quality assessment. The Detail (8MP) mode does offer more detailed scans, but is very slow and added significantly more noise in my tests.
Wrapping up, it’s good to realize that this review is based on de first publicly released version of Eora Studio. Quality and workflow will certainly be improved over time as the app itself and the underlying algorithms get better and better.
Follow me on your favorite social network if you want to be the first to know when I’ve updated this post in the future. Also, I’d really appreciate it if you share this post with the whole wide world!
Subscribe to my Monthly Newsletter
Get great contents delivered straight to your inbox everyday, just a click away, Sign Up Now.
Email address
Eora 3D Unveils $199 iPhone-powered 3D Laser Scanner - 3DPrint.com
As they worked to verify some specifications on a parabolic dish solar energy project, the team at Eora 3D began researching what it would cost them to purchase their own 3D scanner. They were stunned when they checked out the price for the type of device they needed, so they decided to confront the problem head on and build their own.
They say the discovery that the cheapest 3D Scanner which would meet their needs was priced around $20,000 pushed them to build their own iPhone-powered 3D laser scanner. The co-founders of Eora 3D, Rahul Koduri, Richard Boers and Asfand Khan, have now completed work on their device, and the result is a $199 3D laser scanner which is powered by any model iPhone 5 or 6. They say support for Android and Windows Phone devices is in the works as well.
It’s a cylindrical scanner which projects a green laser beam across the surface of the object to be scanned, and as the beam sweeps across the object, the smartphone controls the laser and photographs several images per second while it tracks the laser and maps the contours of the object to create a point cloud.
“Our aim is precision because we’ve designed this for use with manufacturing,” Koduri says. “Studying the laser beam as it passes across the surface of an object is much more precise than simply using multiple cameras to create a 3D scan from photographs.”
According to Koduri, the process of analyzing the patter of the laser beam is more accurate than simply combining a series of images. The smartphone directs the path of the laser while photographing the object, and by capturing several images per second as it tracks the path of the laser, the Eora 3D scanner can build highly detailedfiles of the contours of scanned objects.
By using a small Bluetooth-driven turntable, the device scans objects up to 200 millimeters tall in around five minutes. But the real strength of the Eora 3D scanner may be that it can also scan larger objects via a tripod mount.
“Unlike most 3D scanners, ours isn’t completely reliant on the turntable so you can point it at any object.
It scans a one-meter square, and the great thing is that the software can automatically stitch multiple scans together – so you can scan pretty much anything, one section at a time from any angle, and still end up with a perfect 3D model. Just taking photos would be faster, but using a laser creates a much more precise colour 3D model with sub-100 micron accuracy,” Koduri says.
The team at Eora 3D says the development process for their scanner is complete, and they add that they’ve already selected manufacturers in China who can build the devices. The group plans to fund production of the scanners with a Kickstarter campaign set for a September launch, but they also plan to seek additional seed funding and manufacturing partners.
The partners are also finalists in the Seedstars World global startup competition, and that competition will hold finals in Geneva during March 2016.
Koduri says the Eora 3D is already working with a jewelry designer in Sydney and with 3D Printing Studios, an Australian 3D printing service, and that the studio is making the first versions of the scanner available to some customers.
Do you think an iPhone-driven 3D scanner like the Eora 3D would be useful in your 3D printing efforts? Let us know in the Eora 3D forum thread on 3DPB.com.
A video posted by Eora 3D (@eora3d) on May 21, 2015 at 12:22am PDT
Stay up-to-date on all the latest news from the 3D printing industry and receive information and offers from third party vendors.
Tagged with: 3d laser scanner • Asfand Khan • Eora 3D • iPhone 3D scanner • Rahul Koduri • Richard Boers • Seedstars World global startup competition
Please enable JavaScript to view the comments powered by Disqus.
Kuban scientists have developed a laser scanner for geological work
Kuban scientists have developed a laser scanner for geological work
Scientists got on their skis and set off to conquer the Caucasus Mountains not for fun, but for experiment. Kuban researchers on the slopes of Elbrus were distinguished from ordinary snowboarders only by a special device attached to a backpack strap. It weighs only 1.5 kg, and inside is a filling of complex electronics. A special camera captures every point on the ground. The specialists decided to test the technique with low air temperatures and fluctuations in atmospheric pressure.
After a successful test on Elbrus, the researchers descended to the ground and went to the Temryuk region, to the crater of the mud volcano "Hephaestus". A laser scanner on a quadrocopter was sent flying immediately after the eruption. The volcano threw out about 100 cubic meters. m clay. The whole mountain is covered with small craters, and the terrain looks more like a lunar terrain. But it is changing at an incredible rate. After the eruption, the craters either subside or turn into a swamp.
“The gases themselves, which provoke volcanoes, are deep-seated, of mantle origin. They enter the water-resistant layer, where they mix with water and liquefy, begin to quickly lose pressure. Increasing in volume, they break the layers and go out through the cracks,” said geologist Iosif Gusakov.
Kuban researchers obtained interesting results after such tests. The device scanned the terrain at a speed of 300 thousand points per minute and made a 3D model of the volcano, then scientists made it multi-colored on a computer. The points were colored to calculate the area of the eruption and possible changes in the earth's crust.
The laser scanner has high accuracy, the error is only a few centimeters. Such devices used to be produced only by foreign companies, now Kuban developers have also taken up them. They made the device mobile - it can be mounted anywhere (even on a car body) - and reduced its cost several times.
“Usually a scanner is used to create maps, plans, for geodesy. The results we get can be used in different areas,” explained Yuri Mishchenko, the developer of the laser scanner.
Kuban-made laser scanner is a dream of every geology student and professional. Modern technologies do not come into the educational process quickly, so for now they are exploring the area in the old fashioned way - with a total station.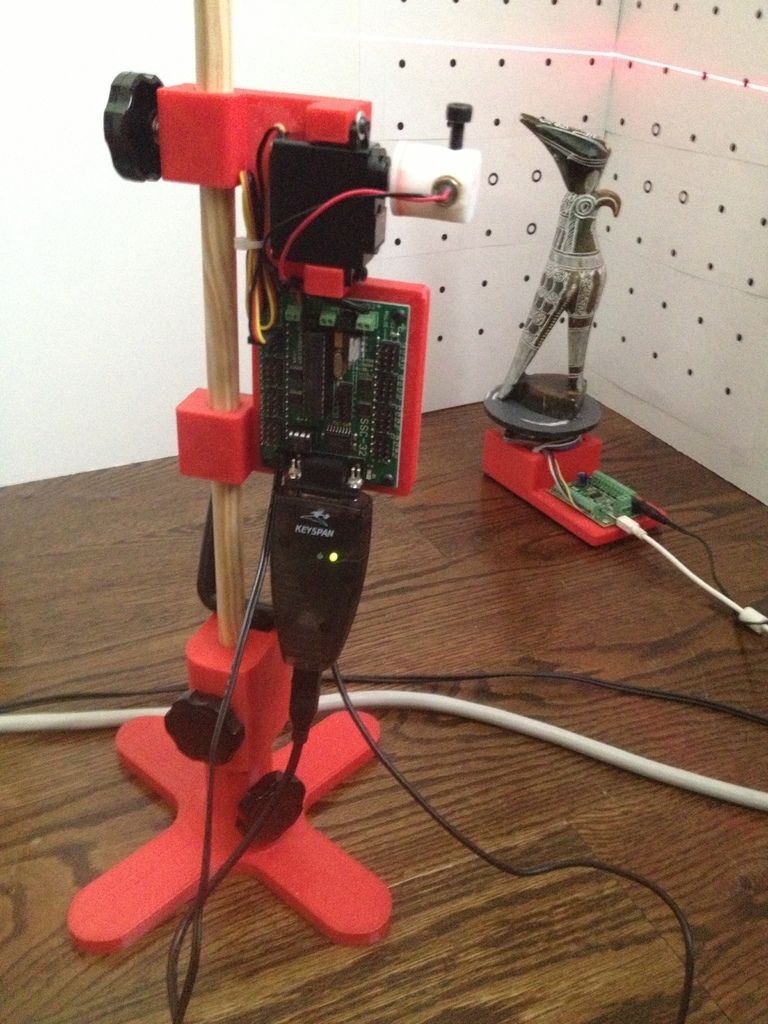 To make measurements, this device must be constantly rearranged. But soon it will be replaced by new developments.
“We need a whole range of technological measures, starting with the provision of satellites, because in order to use laser scanning, you need a system that determines the coordinates. It is provided by satellite systems — GLONASS, GPS,” said Anatoly Pogorelov, head of the Department of Geoinformatics at KubSU.
Not a single building is now complete without site surveys. Such devices are needed in the design of pipelines, power lines and buildings. Already, the developments of Kuban scientists are in demand in large oil companies. And enthusiasts are planning to produce laser scanners in large quantities, and perhaps then it will be possible to completely forget about inaccuracies in the design of houses and communications.
Authors: Kseniya Popova
Leica RTC360 3D laser scanner | Leica Geosystems
- home
- Products/Solutions
- Laser scanners
- Scanners
- Leica RTC360 3D laser scanner
Use automatic on-site pre-registration of point cloud data for real-time quality control, increased productivity and better decision making on site
Document and digitize your environment in 3D with the Leica RTC360 3D reality capture solution. Increase productivity on site and in the office with fast, accurate, portable and easy-to-use hardware and software. With the RTC360 3D Laser Scanner, a skilled technician can overcome any design challenge with accurate and reliable 3D models to unlock the full potential of any site.
- The compact, highly automated, intuitive and user-friendly RTC360 solution includes a high-performance 3D laser scanner, the Leica Cyclone FIELD 360 mobile app for edge computing, such as automatic registration of scanned data in real time, and Leica Cyclone REGISTER 360 software for office work , with which you can easily implement the resulting 3D model into your workflow.
- Capture scans, including stunning HDR images, in less than two minutes.
- Automatic recording of movements between survey points to pre-register scan data in the field without manual intervention.
- Augment your collected data with informative tags with tips for optimal planning and real-world conditions on site to help your colleagues better understand the situation.
- Upload collected data from Cyclone FIELD 360 directly to Leica TruView Cloud to quickly share design data before import and registration.
Fast
The new Leica RTC360 laser scanner captures reality in 3D at a speed never seen before. Capturing up to 2 million points per second and using advanced HDR image capture, the scanner generates colorful 3D point clouds in less than two minutes.
 Automated, labelless data logging in the field based on VIS technology and convenient automatic data transfer from site to office further speed up field work and increase productivity.
Adaptive
Thanks to its portable design and foldable tripod, the compact and lightweight Leica RTC360 fits into a regular backpack. On the object, one click of a button is enough to scan the environment without any additional settings.
Fine
Low noise in the acquired data means better image quality – you get crisp, detailed scans that are ready for a variety of industries. Combined with the Cyclone FIELD 360 automated data logging software in the field, the Leica RTC360 delivers amazing accuracy that can be verified on site.
Pre-registration in the field
The Cyclone FIELD 360 app, part of the RTC360 solution, bridges the gap between on-site 3D data collection and on-site registration of laser scan data in the office with Cyclone REGISTER 360.
 User can automatically capture, register, and control scan and image data on site . The easy-to-learn and user-friendly graphical interface offers visual aids for complex calculations, making it easy for even beginners to master.
 Previous Next
Scanning options
The RTC360 3D Laser Scanner automatically captures movement between survey points to pre-register scanned data on the spot. Juergen Mayer spoke about the latest developments in an interview with The Reporter.
Introduction to the RTC360
The latest Leica RTC360 3D reality capture solution, unveiled at HxGN LIVE 2018, combines a high-performance laser scanner with a mobile application for capturing and pre-logging real-time scan data.
From hardware to software
Geosystems specialists optimize every link of the workflow in both software and hardware solutions to increase the efficiency and productivity of field work and data processing in the office.
Leica RTC360: 3D reality capture solution
Leica Cyclone FIELD 360 mobile-device app
Downloads
Videos
EXPERT ADVICE
Examples of using
Podcasts
Introducing the Leica RTC360 3D Laser Scanner
3D environments in a matter of minutes - an outlook on recent reality capture technology
3D reality capture - new opportunities, greater understanding
Transforming Ayacucho into a digital city
Services
myWorld Customer Portal
Active Customer Care
Customer Support Packages
Related Products
Laser scanners
Leica BLK360 laser scanner
Leica ScanStation P40 / P30
Leica ScanStation P50
Software
Leica Cyclone
Leica Cyclone REGISTER
Leica Cyclone REGISTER 360
Leica CloudWorx
Leica TruView
Leica JetStream
Accessories
Accessories for 3D laser scanners 9003
contact-for-laser-scanning
As of v7.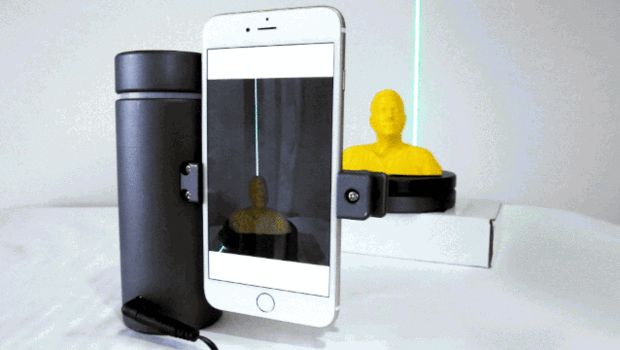 0.1, Safari exhibits a bug in which resizing your browser horizontally causes rendering errors in the justified nav that are cleared upon refreshing.
As of v7.0.1, Safari exhibits a bug in which resizing your browser horizontally causes rendering errors in the justified nav that are cleared upon refreshing.
CONTACT US
The High-Definition Surveyor - Blog
Learn how Leica Geosystems laser scanning solutions are helping professional to shape the future of our world.
Learn how Leica Geosystems laser scanning solutions are helping professional to shape the future of our world.
Read More
Scanning power
Quality is a tradition, built deep within our DNA. We have a commitment to excellence and exceptional attention to detail.
Scanning power
Quality is a tradition, built deep within our DNA. We have a commitment to excellence and exceptional attention to detail.
WATCH NOW
Educational articles and analytics
What is 3D Reality Capture and how is it applied in your industry?
What is 3D Reality Capture and how is it applied in your industry?
learn more
Comparison table of laser scanners
Which laser scanner is right for you?
Which laser scanner is right for you?
download now
Reality Capture Newsletter
Click here to subscribe to our regular newsletter and stay up-to-date on all the latest reality capture news.