Print head 3d printer
3D Printer Extruders | MatterHackers
Finding the best extruder upgrade or replacement for your 3D printer can take the quality of your 3D printed parts to the next level. The extruder is responsible for how much and at what speed your 3D printer pushes filament into the hotend. MatterHackers can help you find the perfect extruder for your 3D printer to help you get the best 3D printed parts possible.
Guides & Articles
How to Succeed with Quantum Dichromatic PLA Filament
Follow this guide for tips and tricks on how to get the best results when 3D printing with Quantum Dichromatic PLA filament.
How To Succeed with LayerLock SLA Build Surfaces
Successfully achieve strong bed adhesion for Laser, DLP, and SLA resin prints using LayerLock SLA Resin 3D Printing Build Surfaces.
How To Build A Successful Makerspace
Find out the necessary components to create an effective space for your maker community.
How to Succeed When 3D Printing with Polypropylene
Successfully produce 3D printed parts out of polypropylene filament with these tips on achieving stronger bed adhesion and minimizing shrinkage.
Tech Breakdown and How to Succeed: Ionic Hybrid Support Material
Supporting engineering-grade filament has been difficult without a support material dedicated to higher temperature 3D printing. Ionic aims to solve that.
How To Succeed with OBC 3D Printing Filament
From Dow Chemical, OBC combines flexible and rigid into one unique material with properties of both.
How To Succeed with LayerLock Garolite Build Surfaces
Successfully achieve strong bed adhesion for NylonX, NylonG, and standard filaments using LayerLock Garolite Build Surfaces.
How to Succeed with LayerLock Powder Coated PEI Build Plates
Powder coated PEI steel sheets are a great alternative build surface for strong bed adhesion. Here's how you can succeed using this durable build plate.
How To Succeed When 3D Printing With Nylon
Learn how to 3D print Nylon like a pro. Nylon is a stronger and more durable alternative to PLA or ABS and easy to 3D print with using these Tips and Tricks.
How To Succeed When 3D Printing With ASA Filament
Follow this step-by-step guide to learn how to print with ASA, the perfect material for any outdoor projects.
How to Succeed when 3D Printing with Polycarbonate Filament
Follow these helpful steps to start successfully printing with this extremely tough, professional grade material.
How to Succeed with NylonX
NylonX has quickly become one of our favorite filaments for strong, durable, and ready-to-use parts. Here's an in-depth look at Nylon X, and some printing tips to get the most out of this great new material.
5 Best 3D Printer Extruders in 2023
Fused deposition modeling (FDM) is a method of 3D printing that uses extruders. In FDM 3D printing, an extruder feeds, melts, and deposits a thermoplastic filament in a prescribed path to build parts layer-by-layer. 3D printer extruders differ based on the placement of the “cold end” and “hot end.” The cold end is the portion of the extruder where the filament is fed into the system. The hot end is where the filament is melted and then extruded by the nozzle. In some printers, the cold and hot ends are near (direct extruder) while in other printers, the ends can be far separated (Bowden extruder).
There are many different types and brands of 3D printer extruders on the market, including the E3D Hemera, the E3D Titan, and the Bondtech BMG. With so many choices, it can be overwhelming to determine which one is best for your project. When purchasing a 3D printer extruder, consider whether print speed or print accuracy is more important for your application. The placement of the cold and hot ends will have a large impact on those two parameters. This article will review the five best 3D printer extruders on the market today.
1. E3D Hemera (Best Direct Extruder)
Slide 1 of 1
E3D Hemera
Image Credit: Amazon.com
The E3D Hemera features a dual-drive, hardened stainless steel drive train. This provides a tremendous boost in grip strength (up to 10 kg of force) on 1.75 mm diameter filaments. This leads to a more constrained filament path since the filament has less of a tendency to bend or buckle while being fed into the hot end of the extruder. Additionally, this enables the printing of highly-flexible filaments. The Hemera costs about $124-140 and has a total weight of 388 g as a direct system (the cold and hot-ends are assembled adjacently) and 327 g as a Bowden system (cold and hot-ends are assembled separately).
2. BIQU h3
Slide 1 of 1
BIQU h3
Image Credit: Amazon.com
The BIQU h3 is a direct extruder that uses 1.75 mm diameter filaments, has a weight of 211 g, and has a gear ratio of 7:1. Extruder can exert up to 7.5 kg of extrusion force, depending on the filament material which enables better print accuracy. It costs $70-$100. Because the BIQU h3 sits right above the print head, the overall print head system is heavier than some of the other extruders and hence, print speeds will be slower.
3. Bondtech BMG (Lightest Extruder)
Slide 1 of 1
Bondtech BMG
Image Credit: Amazon.com
The Bondtech BMG extruder uses 1.75 mm diameter filaments and has a gear ratio of 3:1. Its gear ratio enables it to feed filaments faster and hence, print parts faster compared to the BIQU h3. Additionally, it has an astounding light weight of only 75 g. It can be used either as a direct or Bowden extruder with a suitable adaptor. Coming in at $80-$100, the Bondtech BMG’s dual drive allows for uninterrupted filament feeding. While Bondtech BMG excels at being able to print parts fast due to its lightweight, its dual drive also enables great print accuracy.
4. Micro Swiss Direct Drive Extruder
Slide 1 of 1
Micro Swiss Direct Drive Extruder
Image Credit: Amazon.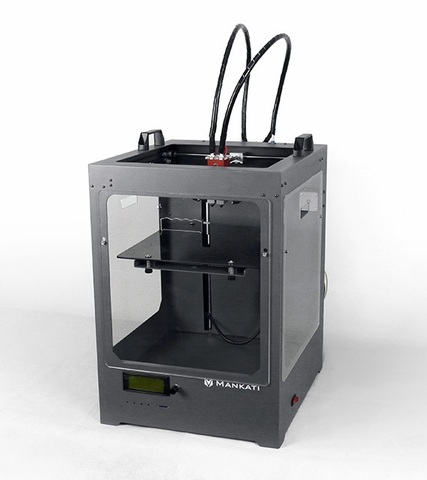 com
com
The Micro Swiss Direct Drive Extruder is a direct-drive extruder. These types of extruders are different from direct extruders in that a toothed gear to feed filaments is directly mounted onto the driveshaft of a stepper motor. What constitutes a direct extruder typically relates to the placement of the cold and hot ends. This particular extruder costs about $100 and uses 1.75 mm diameter filaments. It requires no modifications to existing 3D-printer systems and can simply be plugged in to be used. Being both a direct and a direct drive, Micro Swiss exerts great grip force on filaments - enabling both fast and accurate prints.
5. E3D Titan (Best Geared Extruder)
Slide 1 of 1
E3D Titan
Image Credit: Amazon.com
The E3D Titan is a geared extruder with a 3:1 gear ratio. Geared extruders use a transmission ratio that reduces the rotational speed of the gears that feed the filament. This results in a steady and more powerful flow of print material as opposed to direct-drive extruders like the Micro Swiss that allow fast material flow but can’t control the consistency of the flow. The Titan can be used with 1.75 mm or 2.85 mm diameter filaments. At about $35-54, this is one of the cheapest and most effective extruders on the market today.
What is 3D Printer Extruder?
A 3D printer extruder is the assembly of parts that feeds and processes filaments for printing. A 3D printer extruder has two main sections: the hot end and the cold end. The cold end of the extruder is where filaments are fed from a spool into the system. A sufficient amount of force must be exerted by the extruder’s gears onto the filament to ensure rigidity in the filament during printing. The hot end of the extruder is where the filaments are melted. In passing from the cold end into the hot end, the filament is fed through a “heat break” (a tube that allows filaments to flow freely into the nozzle) and is encapsulated by the “heat block” where it first encounters heightened temperatures. As the filament passes through the heat break and melts, it is finally extruded out of the nozzle to build parts.
For more information, see our 3D printing guide.
Where is the Extruder on a 3D Printer?
The location of the extruder on a 3D printer depends on the type of extruder: direct or Bowden. In direct extruders, the cold and hot ends are immediately adjacent to each other, and the cold end is mounted on top of the hot end. The cold and hot ends are located directly on top of the print head. In Bowden extruders, there is a noticeable distance between the cold and hot ends. The type of extruder has a large impact on the print accuracy and print speed of a job. Direct extruders are generally more accurate, but slower at printing while Bowden extruders are faster at printing but less accurate.
For more information, see our guide on 3D Printer Parts.
How to Select the Best 3D Printer Extruder
Below is a list of steps you can take to select the best 3D printer extruder for your project:
- Consider whether print speed or print accuracy is more important for your project.
- Determine what type of material will be used for your parts (some extruders are only compatible with certain materials and certain sizes of filaments).
- Consider the size of your part and pick an appropriate extruder (Bowden extruders are better for smaller parts).
- Determine your budget for a 3D printer extruder (direct extruders are typically more expensive).
- Choose a 3D printer extruder that is both easy to use and compatible with your 3D printer.
What are the Types of 3D Printer Extruder?
Table 1 below shows an overview of the two types of 3D printer extruders:
Table 1: Two Types of 3D Printer Extruders
| Extruder Type | Description | Feature |
|---|---|---|
Extruder Type Direct Extruder | Description Hot and cold ends are assembled together and mounted onto the print head. | Feature
|
Extruder Type Bowden Extruder | Description Separate hot and cold ends are connected by a PTFE tube through which the filament is fed. | Feature
|
How Many Extruders Can a 3D Printer Have?
While most 3D printers only have a single extruder, there are several dual-extruder and even triple-extruder 3D printers on the market. Additional extruders enable both quicker print times and printing in multiple colors. Multiple extruders (dual, triple, or more) allow automatic switching between filaments. Depending on the system, these multiple extruders can even mix filaments together to create unique colors.
What is the Lifespan of a 3D Printer Extruder?
The lifespan of a 3D printer extruder depends on the filament material used, the frequency of usage, and the quality of the nozzle. Generally, 3D printer extruders can last anywhere between 3-6 months. To ensure maximum life, refer to the extruder’s user manual for proper cleaning and maintenance instructions.
What is the Difference Between Direct and Bowden Extruders?
The difference between direct and Bowden extruders is the placement of the cold and hot ends of the system. In direct extruders, the cold and hot ends are right next to each other. This minimizes the distance between the pinch point of the filament (where it meets the gears of the extruder) and the heated components of the hot end. The short distance reduces the tendency of a filament to bend or buckle as a result of forces experienced during feeding. However, it results in slower print speeds. Bowden extruders, on the other hand, have the cold and hot ends separated. Without a heavy assembly on the print head, 3D printers with Bowden extruders can print much faster than direct extruder printers but will require fine-tuning to minimize the potential movement of the filament.
Summary
This article presented the five best 3D printer extruders, explained what they are, and discussed each of their features to consider when purchasing. To learn more about 3D printer extruders, contact a Xometry representative.
Xometry provides a wide range of manufacturing capabilities, including 3D printing and other value-added services for all of your prototyping and production needs. Visit our website to learn more or to request a free, no-obligation quote.
Disclaimer
The content appearing on this webpage is for informational purposes only. Xometry makes no representation or warranty of any kind, be it expressed or implied, as to the accuracy, completeness, or validity of the information. Any performance parameters, geometric tolerances, specific design features, quality and types of materials, or processes should not be inferred to represent what will be delivered by third-party suppliers or manufacturers through Xometry’s network. Buyers seeking quotes for parts are responsible for defining the specific requirements for those parts. Please refer to our terms and conditions for more information.
Team Xometry
This article was written by various Xometry contributors. Xometry is a leading resource on manufacturing with CNC machining, sheet metal fabrication, 3D printing, injection molding, urethane casting, and more.
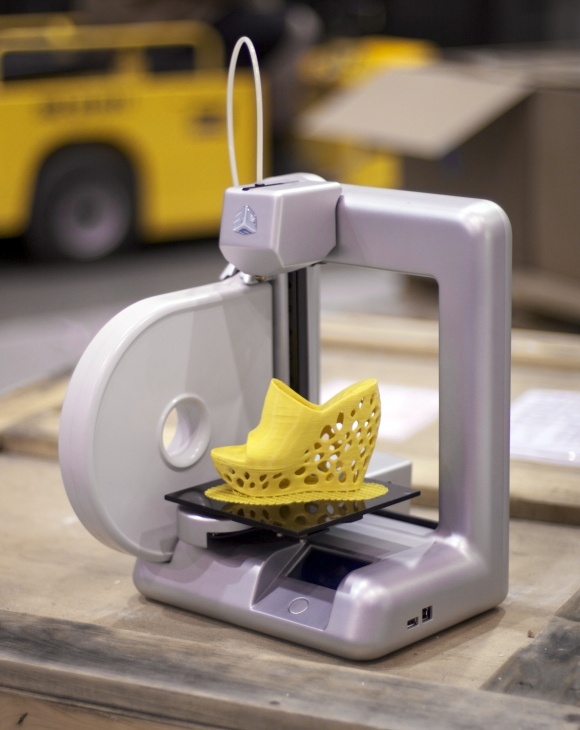
3D printer print head
The 3D printer print head is called an extruder. The name reflects the principle of operation: the print head extrudes the thermoplastic through a special nozzle. Drawing an analogy, glue guns common in everyday life, syringes with sealant, tubes of toothpaste, and finally, operate in the same way.
As a rule, filament (filamentary) thermoplastics such as ABS or PLA are used for 3D printers. What to choose for printing - see the article: Choosing plastic for printing on a 3D printer. nine0007
However, sometimes more exotic plastics are used, for example, you can print with nylon on a 3D printer, in fact, cheap trimming line is used.
Despite the variety of 3D printers, their printheads are made on the same principle and do not differ much from each other. For example, a small Myrwell 3D pen is actually a full-fledged extruder enclosed in a body that is comfortable to hold in your hand.
nine0004
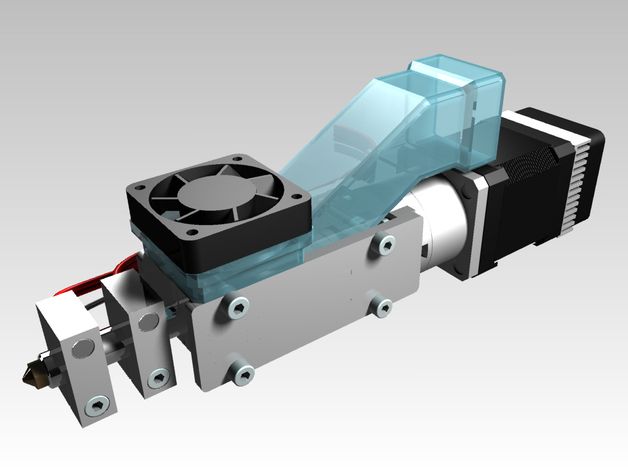
Extruders in general and direct feed extruder in particular can be divided into two main blocks:
- cold-end
- hot-end (literally "hot end") - a nozzle with a heater.
Cold-end , in turn, consists of a gear driven by an electric motor (direct or gear connection) and a clamping mechanism. A rotating gear removes the filament from the spool and passes it into the heater, where the thermoplastic changes its state of aggregation from solid to viscous under the influence of high temperatures, which allows it to be extruded through a nozzle and given the desired shape. nine0007
Hot-end is made of aluminum or brass (due to the high thermal conductivity of these metals).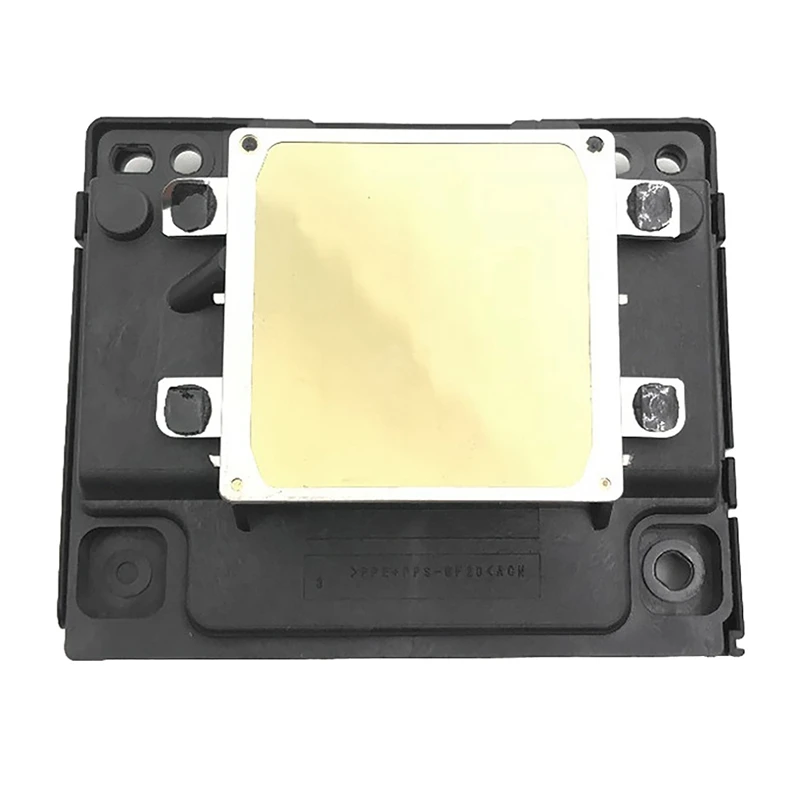 The heater consists of a spiral (nichrome wire) and a pair of resistors, as well as a thermocouple for temperature control.
During operation, the hot-end heats up because the melting temperature of the plastic is high enough. At the same time, the rest of the system must remain cold throughout the entire operation cycle. To prevent premature melting of the thermoplastic, there is a heat insulating insert between the "hot" and "cold" ends. Moreover, the extruder is sometimes equipped with an additional heatsink with a fan. nine0007
Another type of printhead is bowden extruder extruder (English Bowden extruder ). They differ from direct filament extruders in that the hot-end and cold-end components are spatially separated: the heater and nozzle are located on the print head, and the feeder is located on the frame of the 3D printer.
The filament is fed through a long Teflon tube, however, if there is no Teflon, then an ordinary plastic one is also used, but then a more powerful engine must be installed, as there is frictional resistance in the supply tube.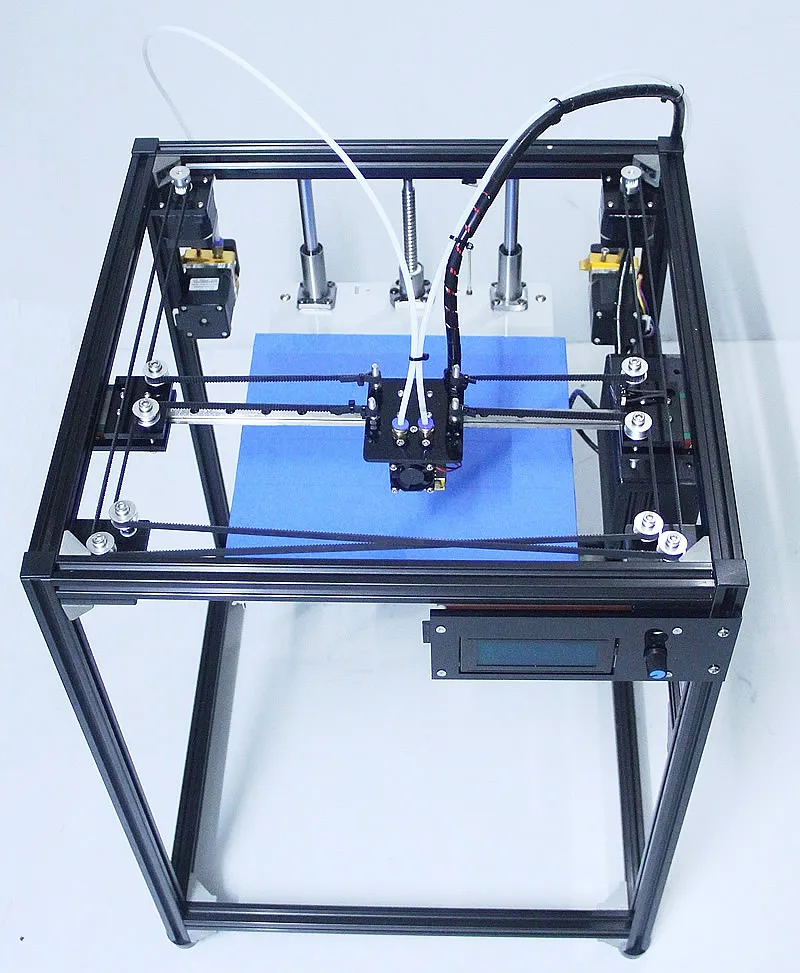 nine0007
The tube is needed so that the plastic thread does not bend and is fed into the hot end with decent pressure and speed.
Here is a small video review of the bowden extruder - the video shows a modified version for a delta 3D printer.
The advantage of such a conceptual solution is the reduction in the dimensions and weight of the print head, the minus is that the supply of thermoplastic to the nozzle becomes not as reliable as in direct feed extruders. nine0007
Important details to consider when choosing a head for your homemade 3D printer.
Material . Extruders can be equipped with either 3D printed or cast components. It should be borne in mind that the cast parts are stronger, which is especially important if we are not talking about the case, but about those parts of the system that are constantly under stress.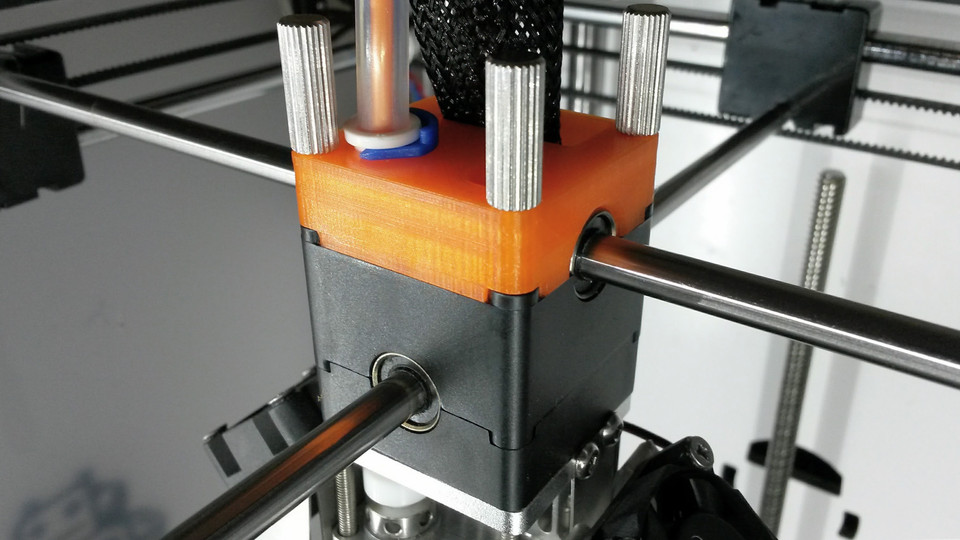 Printed components are cheaper, but their strength is an order of magnitude lower than that of cast ones. On the other hand, you can always print spare parts for the 3D printer extruder yourself. nine0007
Filament supply . The quality of the feed mechanism determines the continuous supply of filament to the heater, which means it ensures uninterrupted printing. The fact is that the plastic for printing on the way to the nozzle can get confused. If the electric motor has sufficient power, then even the presence of small entanglements will not affect the operation of the entire system.
Feed roll type .
Another problem that may occur is thread slippage due to poor grip on the feed roller. This is true when printing with nylon filament on 3D printers designed to use ABS or PLA thermoplastics, since the feed wheels are made with smooth teeth here. In such cases, it makes sense to use a roller with sharp teeth. nine0007
Extruder nozzle size .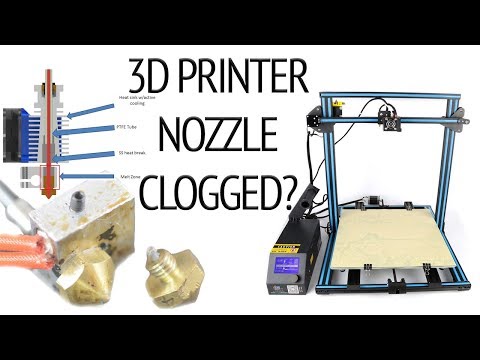 Printheads are equipped with nozzles with a diameter of 0.4 - 0.5 mm, or 0.2 - 0.3 mm. It all depends on the context in which you plan to use the 3D printer. If the detail of the drawn objects and the increased accuracy of their positioning are important, nozzles of smaller diameters should be chosen. Here it should be borne in mind that the smaller the size of the nozzle, the greater the likelihood of clogging, and the more powerful the electric motor is needed to extrude the thermoplastic. In other cases, extruders with a standard nozzle size of 0.5 mm will be the best option. nine0007
Currently, there are several models of 3D printers with two and three extruders (MakerBot Replicator Dial, 2X).
The dual extruder printers are useful for creating support structures and printing two-color objects because they can use two types of plastic. One of them can be dissolved in ordinary water and used to print support parts, and the second extruder is filled with already working PLA or ABS thread.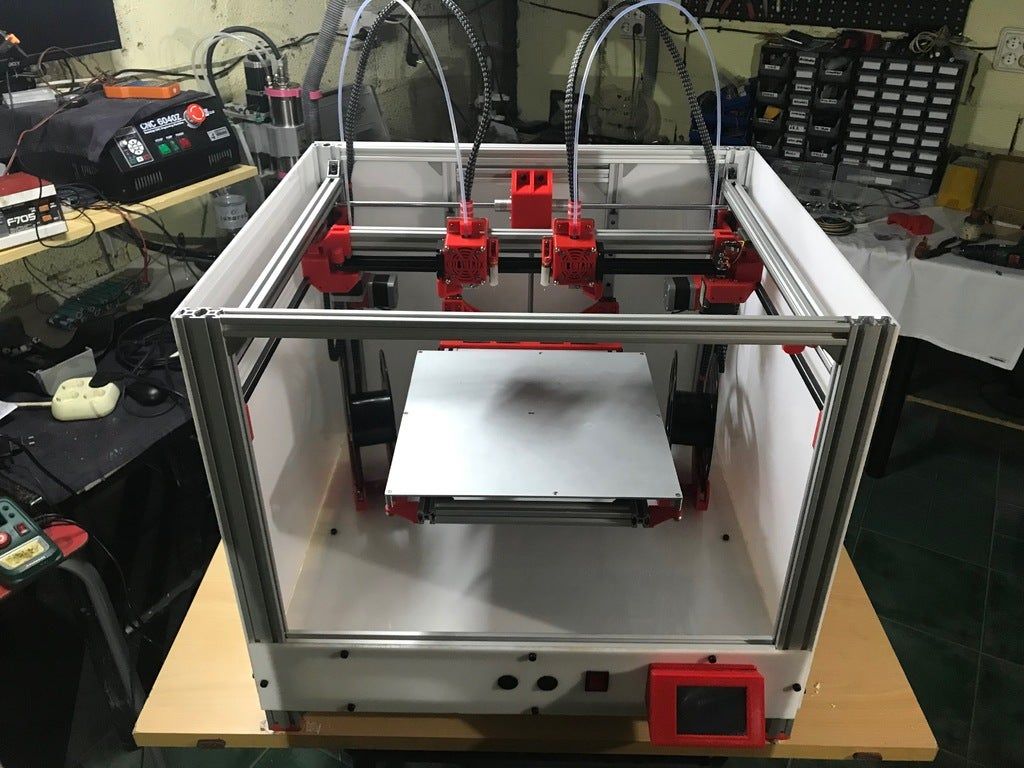
However, there is also a method of simultaneous printing - "Ditto printing". In this case, the extruders work in parallel and create copies of the same object. There are also some downsides here. The technology has a very limited use, since it produces only small one-color objects, or large two-color objects with a repeating pattern. nine0007
In addition to these problems, 3D printers with multiple extruders have two more significant, but standard for new products, disadvantages - price and complexity of setup.
The technology is still "raw", which manifests itself in a decrease in the speed of the device due to an increase in the dimensions and weight of the print head. In addition, during operation, a nozzle that is not involved in printing, at best, leaves traces of the filament on the surface of the drawn object, and at worst, it can deform it.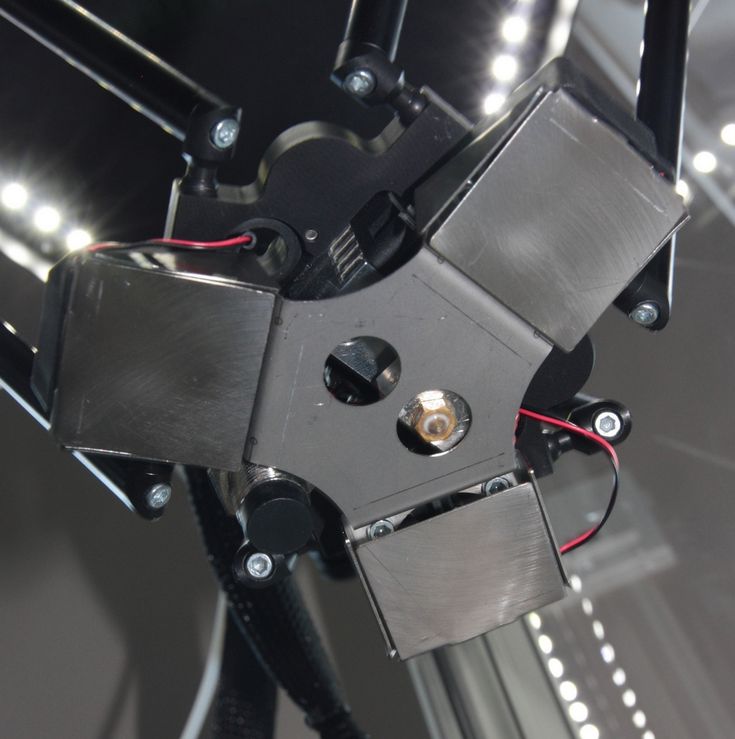 nine0007
The versatility of the 3D printer's print material supply system gives free rein to the imagination in choosing the composition of the printing mass. You can use not only thermoplastics, but also clay, plasticine, melted chocolate, silicone and other pasty materials. The only caveat: extruders in this case are equipped with a special syringe, which is filled with the above substances. The syringe rod is driven either by compressed air or by a stepper motor.
nine0000 Custom 3D printer with ToolChanger (Part 2)Hello everyone.
In one of my previous posts, I talked about my 3D printer with ToolChanger. A year and a half has passed since then (how time flies). Now I would like to share my impressions of the operation of this design, as well as talk about the modifications that have been made during this time, and the results of their implementation.
First of all, there are no complaints during operation. Everything works clearly and without problems. The heads are removed without errors, the positioning of the table does not go astray (even automatic compensation for unevenness of the table is not needed). This is very good, because the calibration of the table is doubly important for a printer with interchangeable print heads (PH). The only thing that was planned to be modified initially was the design of the print head and the type of print head lock mechanism. nine0007
Both of these modifications were made at the same time. I really wanted to try a cable drive as a locking mechanism. More details about this design can be found in the project https://www.thingiverse.com/thing:3805144. I took it as a basis, slightly altered. I posted a video about the operation of this system in the last topic, just in case I will duplicate it.
As for the operation of the cable drive itself, I can say that it is quite working, no failures were noticed. But still, I liked him less than the server. This is due to the massiveness of the drive itself on the frame (motor plus pulleys with limit switches inside), as well as the peculiarity of the operation of this mechanism (Figure 1). The fact is that the force of pressing the head to the carriage in it is regulated by a spring wound on the pulleys, and this spring, as for me, does not provide such a good pressure as a servo. Plus, in a mechanism with a servo, this pressure could be easily adjusted, and in a wide range. If the head is heavier than it is now, it may not be possible to securely attach it to the carriage. nine0007
Figure 1 – Drive of the SG locking cable mechanism.
Also redid the print head. This time, the possibility was considered to abandon the standard E3D hotend, and make the radiator combined with the blocking mechanism in one piece. In principle, such a head also worked perfectly without any complaints.
Picture 2 – Milled part of PG.
As a result, in the Direct modification, I decided to return to the server and the standard E3D hotend. Well, now, in fact, more about this modification. nine0007
ToolChanger: Direct Drive version
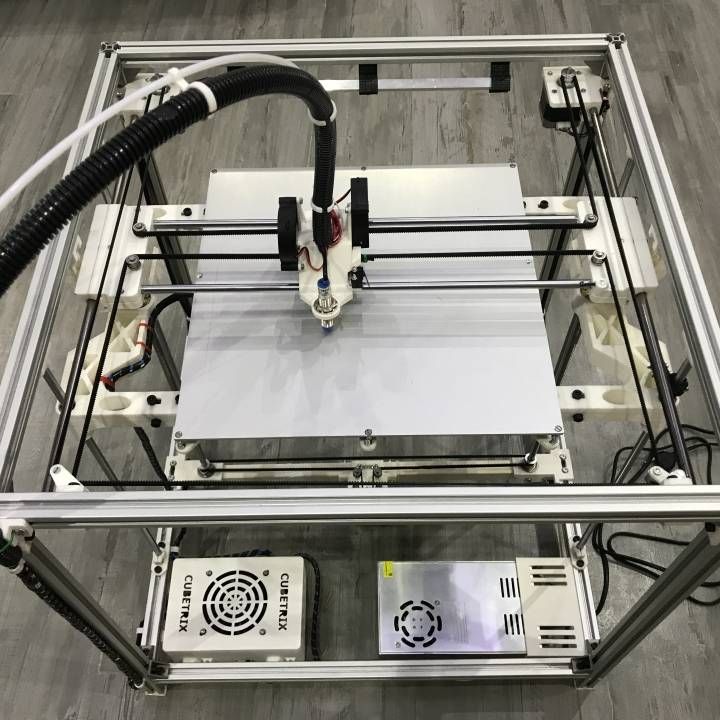
Since the rest of the printer components work fine for me, the modification only affected the X-axis carriage and the print head. They will be discussed.
E3D developed a special head with Direct filament feed for its concept, calling it Hemera (not to be confused with Himera). The bottom line is that the extruder is part of the motor, and for the motor, all this is attached to the head. Personally, I don’t really like the idea of \u200b\u200bfencing the motor on a replaceable head. But in the concept of the E3D multifunctional device, where a replaceable head can have either a PG, or a milling cutter, or a laser, or something else, such a variant of the head is justified. nine0007
Figure 3 - E3D Hemera Direct Drive Hotend
details. I took the rear milled part from the first version, the front one was completely designed from scratch.
Figure 4 - Milled carriage and head parts
Figure 5 - Front and rear X-axis bottom bracket assembly. nine0132
Otherwise, the design of the carriage is the same as in the first version. Except that it now houses the extruder motor. Well, and all the wires going to the carriage are now laid in the cable channel. I took an average NEMA 17 motor in size, its weight is about 250 grams. In principle, you can try the smallest size of the motor, if it does not skip steps.
Figure 6 - X-axis carriage assembly.
As for the design of the PG, now each of them is a standard BMG Extruder and E3D V6 hotend, which were used in the first version of the printer. I redid the milled part, but took a replaceable locker from the first model - a part that engages with a shaft with a pin of the locking mechanism.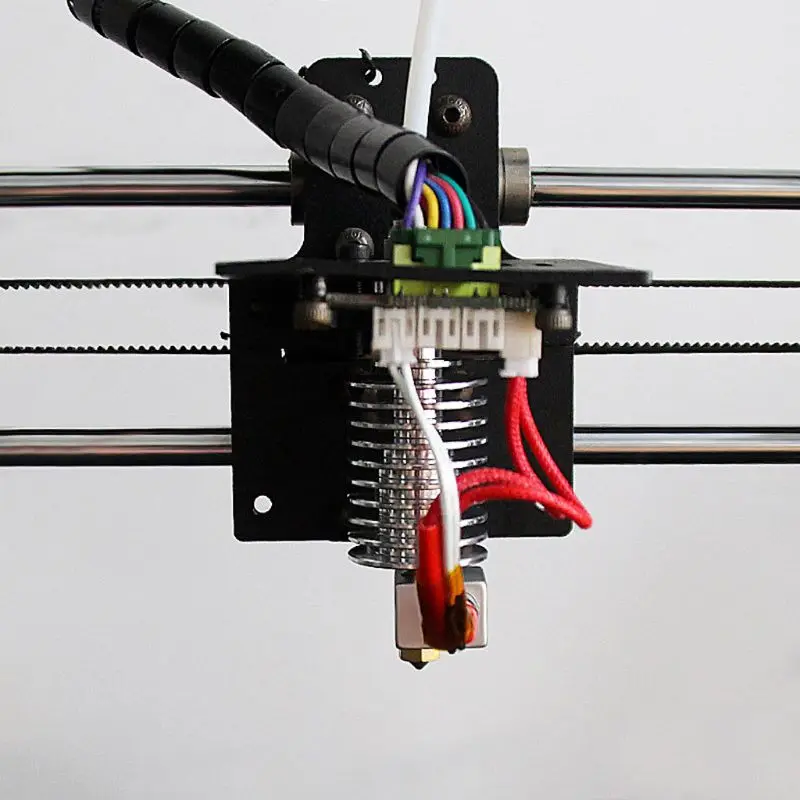 And now, as it turned out, the manufacture of this part separately was a very good decision. And you can change it if it suddenly wears out, and you don’t need to make it every time you change the design of the head. nine0007
Figure 7 - Milled part of the PG assembly and locker.
Fans for blowing hot end and printed model with air ducts are attached to the printed part, as well as a system for fixing the head on the docking station. The weight of the head assembly is 255 grams.
Figure 8 - External view of the print head.
Figure 9 - Print head weighing.
The principle of capturing the head remains the same as in the first version. But there is a peculiarity in the design with Direct drive. Those who assembled the BMG extruder probably know that the gaps in the gears on the shaft of the motor and the driven extruder are minimal and there is no backlash. In the design of the change of heads, which I did, an unpleasant situation can arise when the carriage tries to grab the head.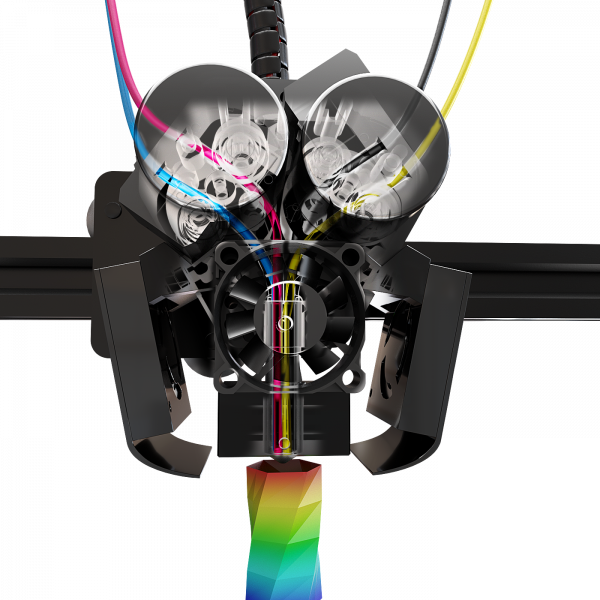 Namely, the gear of the motor shaft can rest against the driven gear of the extruder with all the ensuing consequences - skipping steps along the Y axis, false head capture and, as a result, damaged printing. To avoid such situations, the design of the head seat on the docking station was made in the form of a special profile with a spring-loaded element, and the position of the head on the docking station was 1 mm lower than its design position on the carriage. Thus, when capturing the head, the gears engage with a gap of 1 mm, which excludes their contact, and when the fixing shaft is turned, the head is attracted to the carriage in two directions simultaneously - along the Y axis and along the Z axis. In this case, the gears do not engage in longitudinal direction, but in the transverse direction. nine0007
After all the necessary settings, I naturally started printing. And already on this option I decided to try full-fledged color printing. Prior to that, I had practically never printed anything multicolored. And faced with an unexpected moment. Namely, the Cura slicer in multi-color printing prints a cleaning tower for all extruders that are in the printer, even if the extruder is disabled in the program itself. Because of this, it is not possible to properly clean the nozzle when changing the head with all the consequences. While the head is at the station, plastic leaks a little from it and then this snot gets on the model. Also, due to leaked plastic, there is a local underflow on the model at the start of printing. In general, I will deal with the settings of the slicer, or I will make a system for mechanical cleaning of the nozzle - it has been asking for a long time already, but still my hands do not reach. nine0007
The second problem I encountered was the servo. During multi-color printing, there is a frequent change of tool, respectively, a large load on the servo with frequent switching. So, printing a colored lizard, a cheap serva died. It died gradually - losing power, and as a result, in one of the switching cycles, it simply could not capture its head.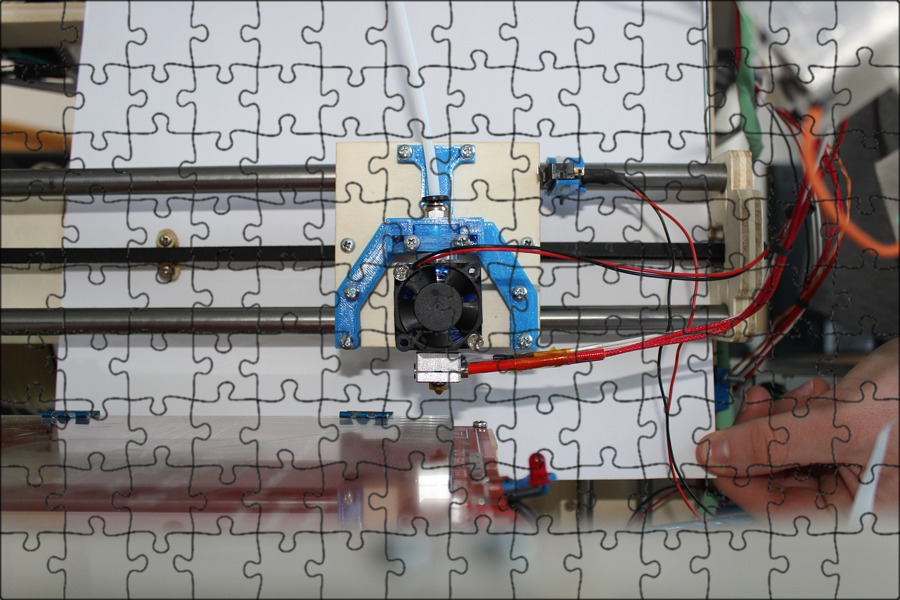 The problem was solved by replacing the servo with a more powerful one. It was not easy to find one in this format. There is also the same one, but for 10 kg, I will take a reserve just in case. nine0007
Figure 10 - New servo.
I immediately filmed the video of the work. The principle of operation remains the same as before.
But now it's a direct extruder. It has become more convenient to replace the filament, the process takes a few seconds. For convenience, I moved the spools of plastic to the top of the printer, making a simple holder for them. It will also be necessary to make some kind of cover for them so that dust does not get in.
Figure 11 - Holder for spools with plastic.
Also, when printing in winter, there were well-known problems with ABS printing. As a result, I had to add camera heating to the printer in the form of a 220V heater with a fan.