Power spec 3d printer
PowerSpec 3D Pro Review 2022
Here's a detailed and comprehensive review of the PowerSpec 3D Pro 3D printer. See if it is something for you!
By Thomas Bardwell
2.6
See Price
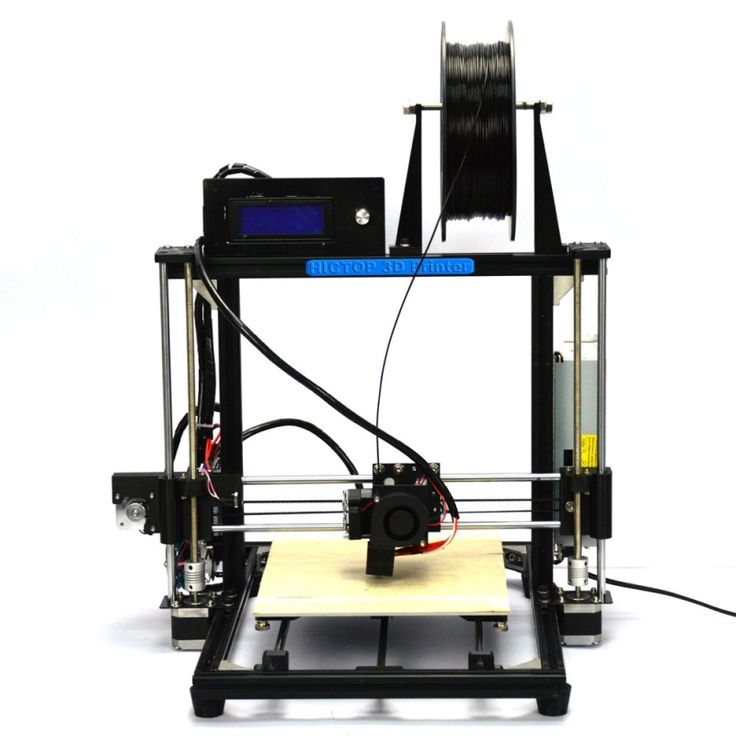
The PowerSpec 3D Pro follows in the company’s tradition of copycatting the massively successful MakerBot range from a design as well as a hardware point of view. Similarly to other models in the PowerSpec range, the 3D Pro is very much a cost-cutting iteration of the MakerBot Replicator 2, and as such, it’s worth approaching it with a degree of skepticism, especially if you are expecting a model on par with MakerBot’s offering.
With that said, it does appear to sport a few improvements on its inspiration and with a significant price cut as well. Today, we investigate the PowerSpec 3D Pro to determine whether its worthy of the cost.
| Printing Area | 226 mm x 144 mm x 149 mm |
| Layer Resolution | 100 to 500 microns |
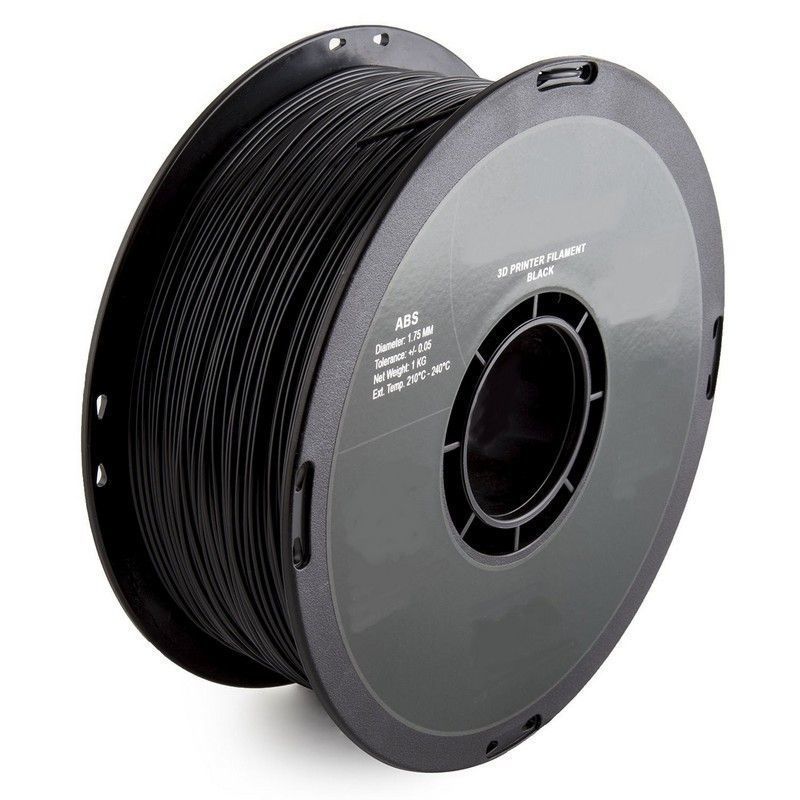
| Supported Filament | PLA, ABS, PVA |
| Filament Diameter | 1. |
| Extruders | 2 |
| Extruder Diameter | 0.4 mm |
Table of ContentsShow
Design & Features
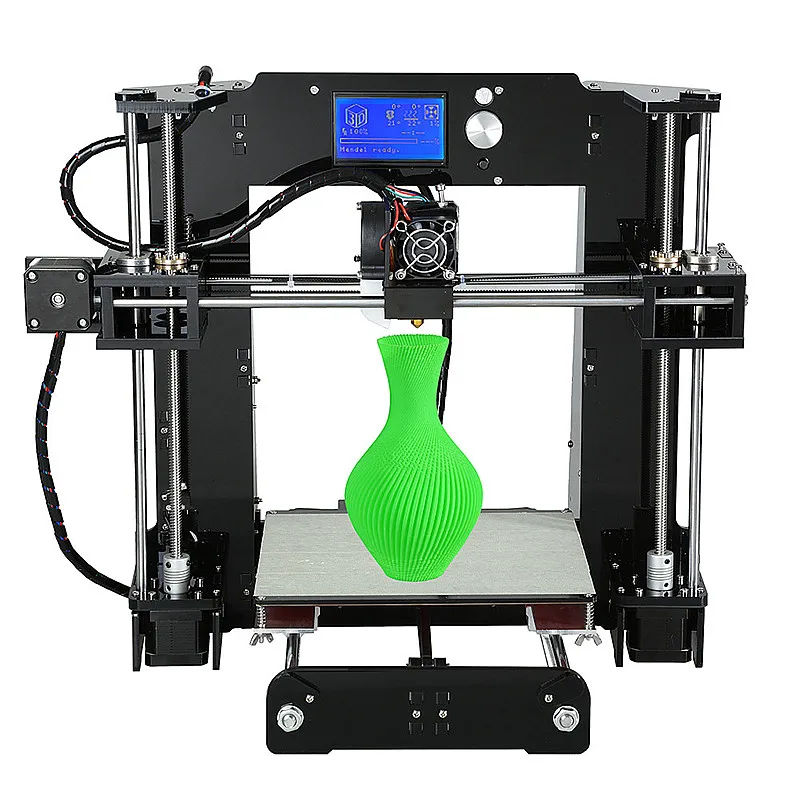
In terms of design, it is definitely a duplicate of the MakerBot Replicator; the metal chassis holds the 3D Pro firmly on its feet coupled with glossy wooden panels on all sides as well as a removable hood that sits atop the printer. Both the left, right, and front panels are fitted acrylic windows, the front of which is hinged upwards for access to the build area.
The enclosed design serves not only to manage internal temperatures for ABS printing (insufficient heat can cause warping) but also to provide a degree of protection and a boxed, all-in-one feel.
The all-black color scheme returns for an ordered look that we are rather fond of for the stripped back, yet stylish, functional appeal. It also weighs a bit more than the Replicator 2 at 32 lbs.
The PowerSpec 3D Pro has a build volume peaking at 226 mm x 144 mm x 149 mm and employs additive FDM technology, which is pretty much standard fare for sub-$1000 printers, alongside the usual internals centered on a belted XYZ configuration powered by stepper motors. The bed is heated linking up with the ABS compatibility of the printer.
The printer is capable of layer resolutions within a range of 100 to 500 microns thanks to a dual direct drive extruder setup fitted with two 0.4mm diameter nozzles. XY precision comes in at a more than respectable 11 microns and print speeds approximating 24cc/h.
The PowerSpec 3D Pro can print in ABS, dissolvable PVA, and PLA in standard 1.75 mm diameter filament with an open source template. The enclosed design is more tuned towards ABS, but removing the hood and opening the door provide sufficient ventilation to allow noxious fumes to escape when using PLA. The PVA is primarily used for support structures with the option to fit one of the extruders with ABS/PLA and the other with PVA.
On printer control is within a monochrome LCD fitted on the bottom right of the front panel with a circular five-button tactile interface to navigate menus.
The PowerSpec 3D Pro is somewhat of a let down with only SD card connectivity with no possibility of linking it to a PC for easier data transfer. The SD card setup does allow for untethered use though.
PowerSpec delivers the 3D Pro with ReplicatorG as a slicing tool, which can convert STL and OBJ files. Due to the SD card configuration, any open source slicer will work such as Slic3r or Cura for example. If you opt for ReplicatorG, note it only works with Windows machines and not Mac or Linux. Additionally, it is slightly outdated having last been updated back in 2012, and in our opinion, other alternatives are a better bet.
Assembly
One of the biggest appeals of buying PowerSpec is getting a fully-assembled printer for the cost of a kit. It means convenience and avoiding a few hours of frustrating from scratch assembly, making the 3D Pro far more attractive to a first timer without the hands-on experience to construct a kit printer.
Alongside the PowerSpec 3D Pro, the package also contains a power cord, USB cable, sensor line, filament tube, two spool holders, the dual extruder mount, 4GB SD card, Hex wrench, screws, bolts, and assembly kits for the acrylic hood and door.
Installation met a roadblock out of the box as we couldn’t spot a quick start guide. We finally figured out that the SD card included all the documentation for the printer. Other connectivity options aren’t necessarily a bad thing, but a least a sheet explaining this would have saved us considerable trouble trawling through the PowerSpec website to figure out what was needed to get the printer up and running.
Calibration is relatively standard for devices without automatic leveling, although we did find that the three wingnut configuration differed from the four wingnut arrangement mentioned in the user guide. More than likely this is an editing oversight from a previous iteration of the 3D Pro documentation but is a cause for concern when it comes to quality control.
Printing
Printing results were unsurprisingly akin to what comes out of a Replicator 2, but with a certain knockoff veneer. The quality was respectable without producing anything worth writing home about. Finding the right settings is somewhat or a rigmarole but once established, the printer is adequately performant and should suit most hobbyist makers.
PLA suffers from a lack of adequate cooling even with the door open and the cover removed. The biggest culprit is the absence of an active cooling fan fit for purpose. The result was invariably a few blotching problems and globule build ups especially at lower resolutions, but nothing that destined prints to the trash can.
ABS printing was sometimes erratic due to a gap that exists between the front door and the frame but overall produced decent results. We’d say the printer is far better suited to ABS models than PLA by a long shot.
Support
When buying a PowerSpec 3D Pro, you are very much buying into a tacit agreement that the company will provide little to no after sales support, and you’ll need to tackle any troubleshooting yourself or seek help from fellow owners. The PowerSpec website is notoriously unhelpful with barebones FAQ sections and a support team that is among the hardest to contact for assistance.
The warranty is an underwhelming 180 day limited deal with very to little leeway from PowerSpec. Buying from a third party is the way to go for extra peace of mind and at least a refund policy for defective models.
Verdict
If you are a fan of the MakerBot Replicator 2, then the PowerSpec 3D Pro will be familiar even down to the looks. For a beginner, the PowerSpec’s low cost is unquestionably attractive, but the variable quality of the prints may be too troublesome.
There’s nothing special or unique – it’s a direct copy – and is as functional as a 3D printer can get. The simplicity is one of the 3D Pro’s greatest assets and negatives, in equal measure.
Monoprice Mini Delta Review
PowerSpec Ultra 3D Printer Review 2022
2.3
See Price
Today, we get our hands on one of PowerSpec’s flagship 3D printers, the PowerSpec Ultra. Sitting in the sub-$1000 price range, the Ultra is geared towards hobbyist and enthusiast who want a fully enclosed ABS capable printer with many of the features we’ve come to expect from 3D printers.
Is it worth the price tag and how does it fare when we get down to the task of printing models?
| Printing Area | 229mm x 150mm x 150mm |
| Layer Resolution | 100 to 500 microns |
| Supported Filament | PLA, ABS, PVA |
| Filament Diameter | 1.75mm |
| Extruders | 2 |
| Extruder Diameter | 0.4 mm |
Table of ContentsShow
Design & Features
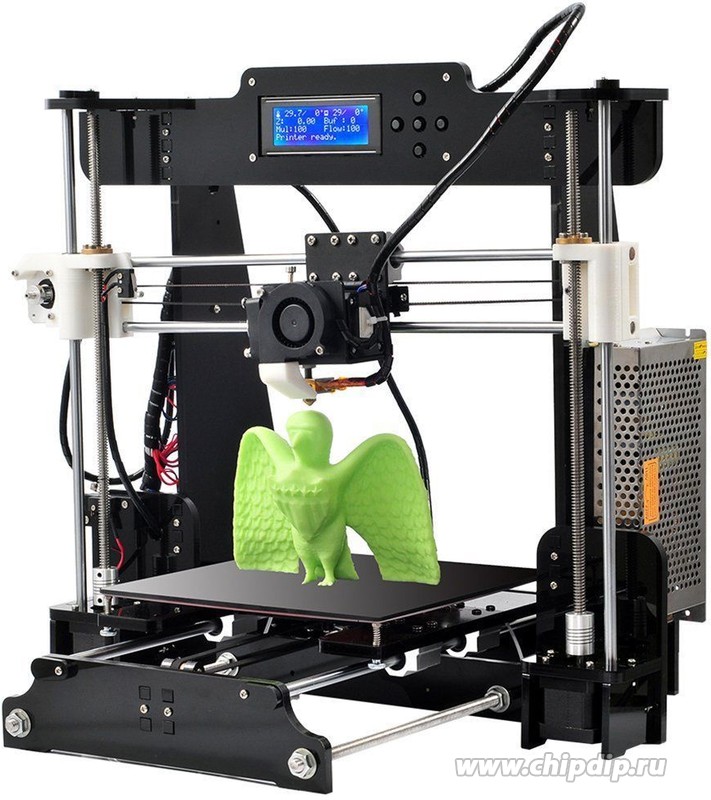
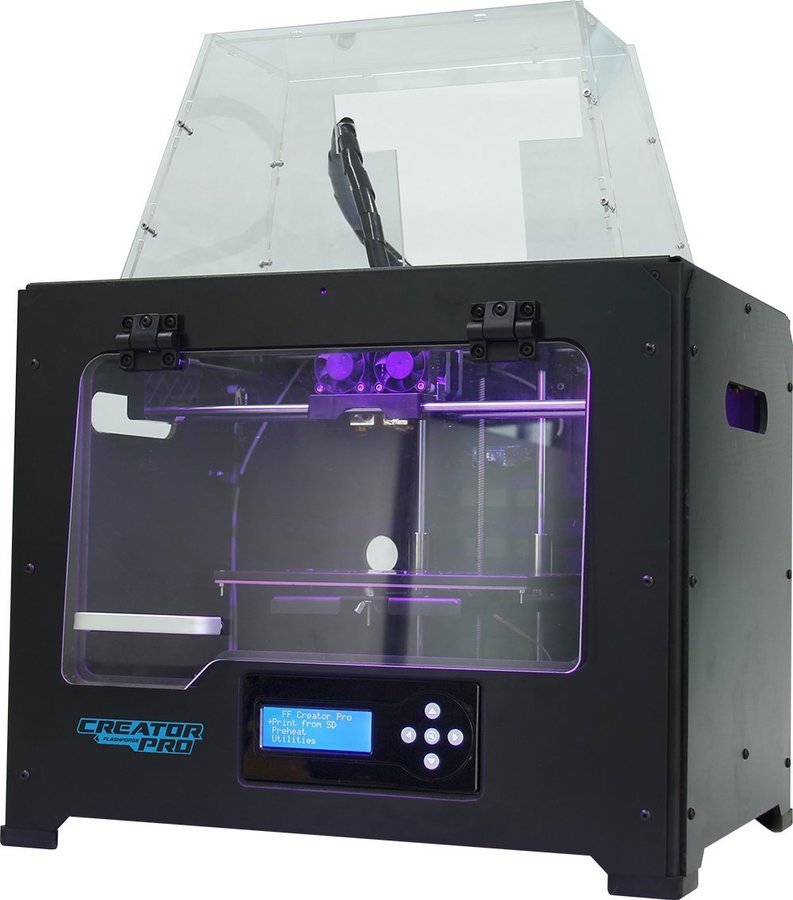
Beating around the bush is entirely redundant, and we’ll, therefore, start by stating that the PowerSpec Ultra is cosmetically a direct clone of the Flashforge Creator Pro with its innards mimicking those of the Flashforge Dreamer. In turn, these two printers are heavily inspired by the MakerBot Replicator 2. We have, therefore, a multiple producer and model copycat printer.
Apart from a different logo, it is very much the same 3D printer with the familiar aluminum frame encased in glossed wooden panels on all sides as well as acrylic panels on the front hinged door and sides with the protruding removable hood.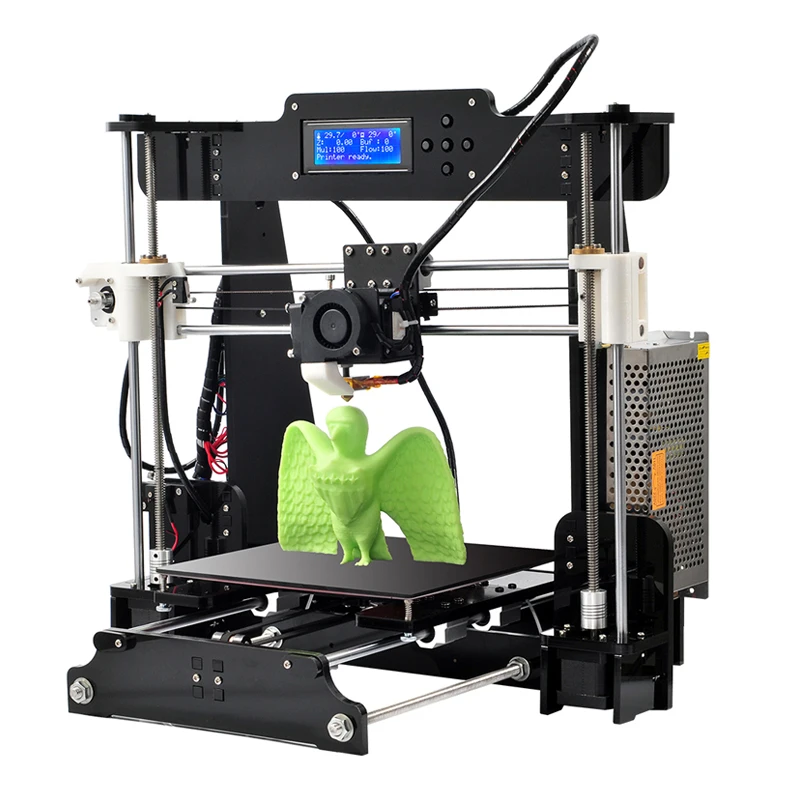 Combined their ensure a stable temperature inside the build chamber — the black color scheme, tidy interior, and off-blue interior lighting return as well.
The PowerSpec Ultra uses additive FDM technology in a standard XYZ cartesian configuration with NEMA stepper motors running a set of belts aided by 8mm lead screws and flush rods. The build area tallies in at 229mm x 150mm x 150mm, which is well within the median volume for printers in the sub $1000 price bracket and is more than appropriate for most hobbyist modeling and prototyping needs.
The printer has a dual extruder setup running on the same extruder mount with each capable of reaching temperatures up to 230 degrees centigrade controlled by dual active cooling fans. The nozzle diameter measures in at a standard 0.4 mm and, in theory, is capable of resolutions from 100 to 500 microns.
In reality, matters aren’t quite as clear cut because the Ultra has a step length of 0.4 mm meaning that the extruder setup is only able to measure up layer resolutions that are a multiple of 0. 4 mm. In real terms, this means you can print as small as 40 microns, then 80 microns, 120 microns, 160 microns, and so on, but not at 100 microns or 500 microns as the machine specifications list. In itself, this isn’t much of an issue, but it does shine a negative light on PowerSpec’s ability to provide accurate information about its products.
The aluminum bed is heated, covered in polyamide film, and capable of up to 100 degrees centigrade making it theoretically ideal for ABS printing especially in unison with the enclosed chamber. The quality of the bed isn’t anything exceptional and as we’ll see below invariably requires the use of adhesive aids or replacing it entirely.
The PowerSpec Ultra can handle 1.75 mm diameter filament including PLA, ABS, and dissolvable PVA for support structures. The system is open source and consequently functions with any third-party material.
The Ultra is laden with a welcome spread of connectivity options that include SD card and USB to PC. A Wi-Fi option is available on the 2.0 version of the Ultra, but this comes with a significant premium.
The front left of the Ultra is fitted with a color touch screen LCD that is a nice feature with somewhat limited functionality. It allows the user to navigate through the different media connected to the printer and select a model for printing, preheating the extruder and platform, as well as a selection of tools designed to help with feeding filament, leveling the build platform, monitoring details, and tinkering with general printer settings.
As for supported software, the PowerSpec Ultra ships with PowerPrint, which is all round an awful excuse for a slicing program and produces more issues than it helps create models fit for printing. Fortunately, the Ultra is compatible with STL, OBJ, and Gcode file types alongside open source slicers like Cura and Simplify3D. We can’t stress how fundamental it is to forget PowerPrint in favor of a more robust alternative to avoid day one issues.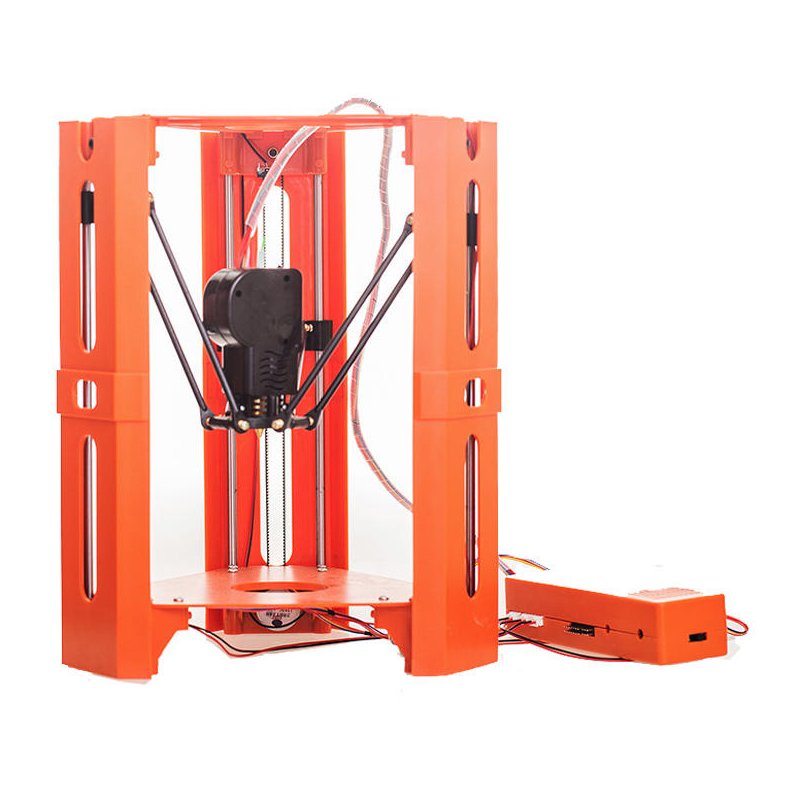
Assembly
The PowerSpec Ultra is a fully assembled 3D printer and arrives as such in thick bubble wrap wedged between two large styrofoam cutouts with the various installable parts housed in purpose cardboard boxes. The configuration of the boxes makes use of the space inside the chamber well and removing all the parts is straightforward.
The package contains the PowerSpec Ultra, a power cord, USB cable, sensor line, filament guide tube, filament spool holder, acrylic sheets (hood, doors, sides), a handle, startup guide, dual extruder heads, 4GB SD card, bolts, hex wrench, and a set of screws.
Unfortunately, the package doesn’t include any filament even though it does include two empty filament boxes to prevent the build plate from moving during transit. A tantalizing tease in our book as we saw the packaging and were pleasantly surprised only to realize they were empty.
Installation is well documented with a startup guide and installation video on the SD card. Hands-on installation involves fitting the extruder casing to the horizontal mount above the build plate by way of a set of silver screws, then attaching the various acrylic paneling. When it came to fitting the handle, we found that unless we used what felt like a wholly unsatisfactory torque the screws caused the acrylic to warp and crack.
The next step is fitting the spool holders on the back panel of the printer by inserting the plastic holder into circular mounts and tightening the nut securing them.
The filament guide tube is fitted from the extruder to the guide on the back on the printer that leads to the filament spool holders. To complete the setup, you have to plug in the power cord and fit the filament spools onto the holders.
The last step is feeding the filament into the extruder by heating the extruder via the display screen on the printer and gently feeding it through the tubing until the extruder gears latch onto the material.
As for bed leveling, the Ultra ships pre-leveled but transit can more often than not budge the calibration, and this was the case with our model.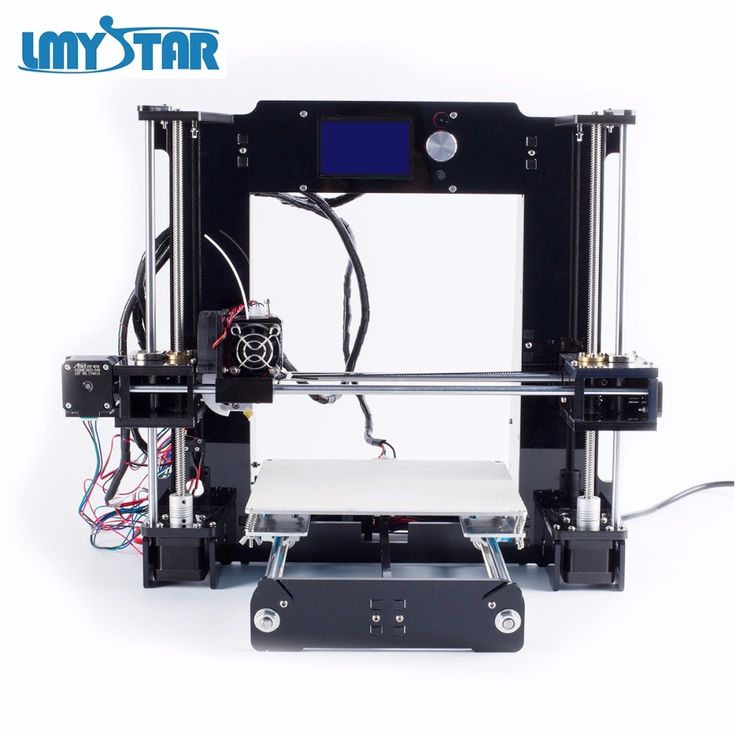 The process will be familiar to those with 3D printing experience and involves slipping a piece of paper under the extruder then adjusting the three-point spring-loaded screws under the build platform. The printer assists by providing automatic positioning but adjusting the bed is down to the user.
Printing
Before we were even able to trigger a print, the Ultra suffered from consistent USB connectivity mishaps. Either the printer wasn’t recognized, or it failed to respond with the only option being to power down both the printer and PC to start over again.
To add insult to injury each power down caused the on-printer display to revert to the standard Chinese language factory settings — a small inconvenience but one that weighs heavy after the umpteenth restart.
When the printer did connect, PowerPrint was disastrous, underpowered, temperamental, and unresponsive; it failed to slice models correctly causing all manner of problems. We quickly reverted to Cura.
Once we finally got a print going, we instantly faced first layer adhesion issues: it systematically became dislodged regardless of whether we used PLA or ABS and varying extruder/bed temperatures, even with a generous helping of hair spray, painter’s tape, and BuildTak.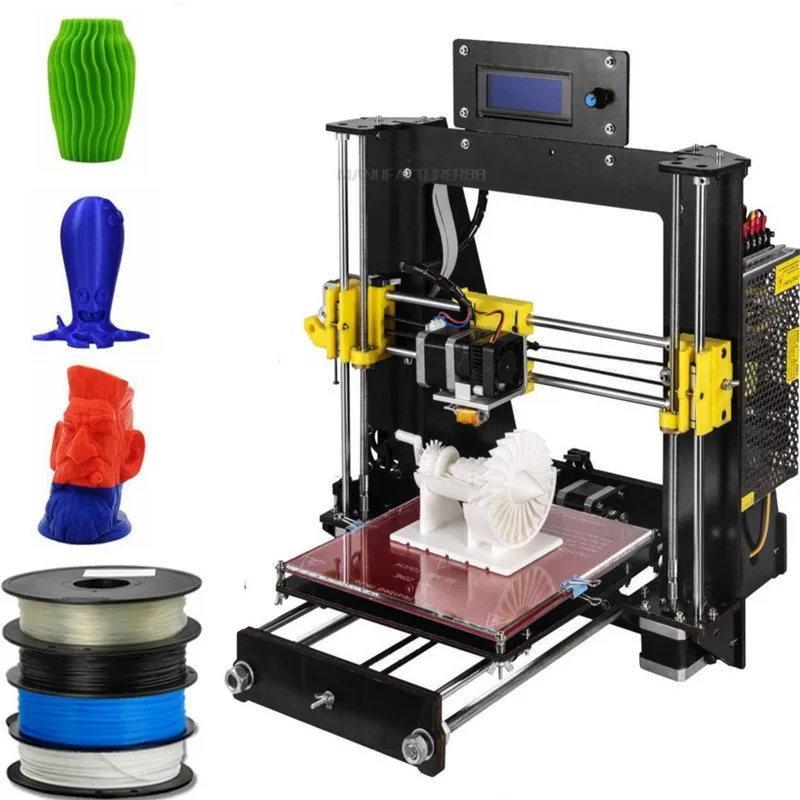 Ultimately, we fitted a replacement glass bed ourselves and this all but solved the adhesion issues.
When we surpassed these initial issue and got to printing, the Ultra revealed itself as one of the most demanding 3D printers we’ve had the opportunity to review. Finding the right settings in the software and on the printer itself is a little like playing the lottery, and involves a tiring back and forth of experimentation. Adjust the bed temperature here, reduce the resolution there, over level the bed, tinker with rafts: you name it, we messed with it.
The results were very much a mixed bag, but when the printer performed as it should the results weren’t extraordinary but well within the bounds of acceptability. The PowerSpec Ultra seems to suffer from inherent layering issues whereby contours are always a little off possibly due to the distance between the bed and the rods alongside the natural wobbliness of the bed.
Support
PowerSpec offers barebones after-sales support from a website that looks like it was designed in the late 1990s, which doesn’t bode well. Contact is only available through live chat, and our experience was patchy at best especially waiting to be connected to a technician. The warranty is a standard one-year parts and labor deal.
On the enthusiast side, the inherent issues of the Ultra mean a community of disgruntled owners has sprung up to share their experiences and, more importantly, the enhancements they’ve made to the printer. It is entirely possible to transform the Ultra into a versatile printer thanks to this wealth of knowledge and troubleshooting expertise.
Verdict
If we are honest, it’s hard to recommend the PowerSpec Ultra due to the myriad issues it coughs up out of the box. The wavering print quality and incessant troubleshooting make for a stressful experience that is at odds with the ethos of 3D printing as an innovative and enjoyable pursuit.
It may, however, suit a veteran who can grab one at a bargain price and is willing to tinker with mods and upgrades.
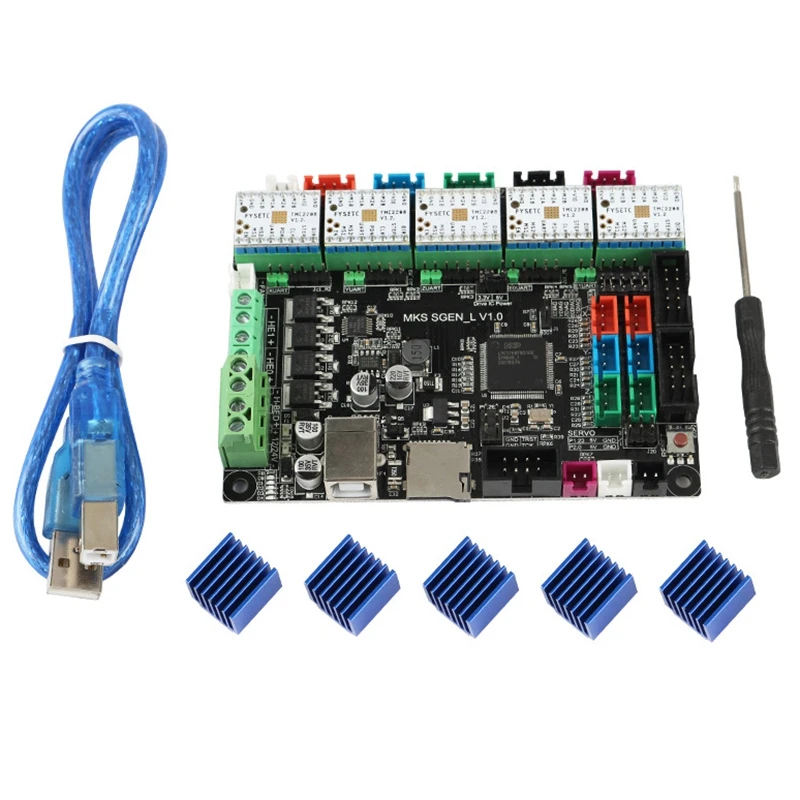
Answers to questions on electronics
Questions about electronic components for 3D printers and electronic components for 3D printing.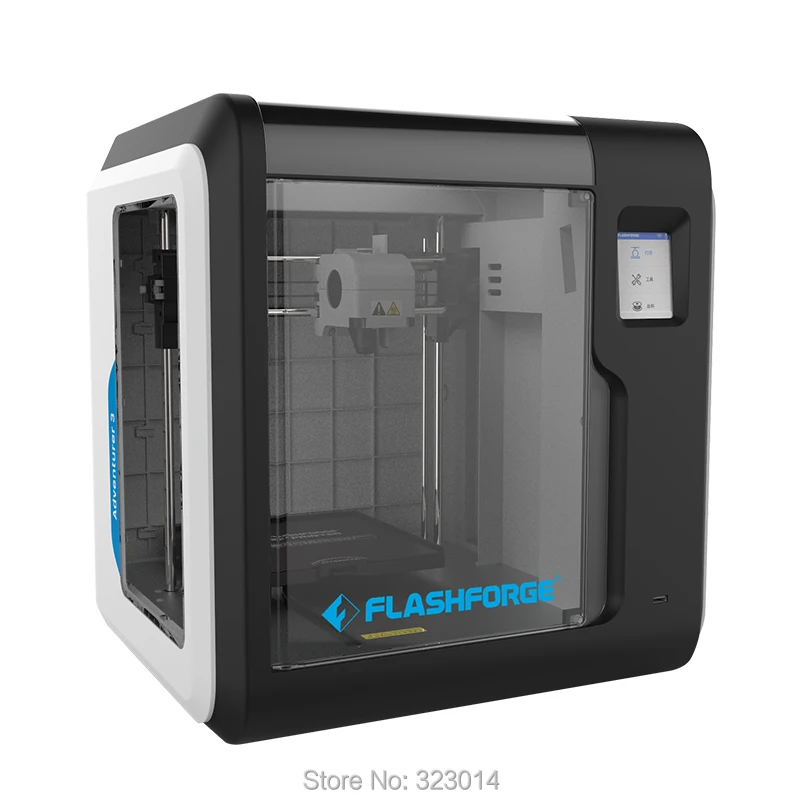
For questions regarding faults, repairs, adjustments, etc. 3D electronics printers. Or, questions about best practices in designing/printing electronic components.
- TronXY Windows 10 driver I'm going to buy a TronXY X3 or P802; but my computer is running windows 10. The specification sheet for printers does not contain anything above Windows 7. Does anyone use any…
- Ender 3 V2 blank screen and LCD continuous beep with clicks I had a constant problem with my printer that I just can't solve. I usually don't ask questions until my problem becomes unsolvable. Unfortunately, like this Printer: Creality…
- Thermistor reading 190°C constantly So to create the background for this post, I cleaned the hot end of the printer (Powerspec i3 Mini v2, which is a Wanhao i3 Mini rebadged and heated bed added) I picked up on the cheap. There was some…
- Can an electrical connection be 3D printed? I'm trying to 3D print a latch or 2-piece joint (resin).
 After that, I plan to coat the joint with a conductive spray and create an electrical connection when the two parts…
 - Is it possible to send/receive serial messages from (to) Ender 3 motherboards (not USB!)? I want to connect an Arduino or similar MCU board to an Ender 3 motherboard and have them communicate. I don't want to use USB. Are there any pins on the controller boards for…
- Ender 3/CR-10 Dual Voltage Controller Specifications Based on what voltage level does the Creality Ender-3 operate at? Dave's answer says that both 12V and 24V can be used on the controller board. It goes on to say that...
- PID fails at too high temperature with new hotend on Tevo Tornado I'm new to 3D printing . I had a big problem with a full hotend: thermocouple broke, fan broke, plastic everywhere... (I really don't know why, because there used to be hundreds of prints...
- 12V power supply from 24V heating cartridge? Would I damage anything running on 12V from a 24V cartridge heater? I know that it will not reach the maximum temperature of 300°C? I am using the E3D hotend setup.
- Will a 12V stepper motor run at 24V? I have a Prusa MK2.5 that runs on 12V, a Prusa MK3 runs on 24V. I noticed that on the Prusa webpage they list stepper motors as compatible with both MK2 and MK3,…
- FlashForge Creator Pro started to spontaneously restart in the middle of printing, vibrate, print repeatedly along one axis, etc. I changed SD cards, printed from USB, updated/reloaded firmware and tried different software packages. So far nothing has worked. When connected…
- RAMPS Plus2 board pinout? I temporarily purchased two different 3D printers that I am helping someone reassemble. These are delta style printers that worked great at some point. They were kept in a large public…
- What is the name of this stepper motor connector? I'm struggling to find the name of the connector I just broke so I can order a new one. This is a six-pin nylon terminal that connects to the stepper motor header lead set.
 ..
.. - These lines are on all prints, PLA, ABS. They are spaced 0.800mm apart [20T 2GT pulley, 1.8deg/step motor = 1 line/4 full steps] Start…
- TronXY X5S system (Marlin) - Very slow menus This is my board MKS Melzi v2.0 cloned I replaced the MCU (actual IC) with a new 16MHz ATmega1284P because the old MCU was damaged - the reason was that the fan…
- Did I burn my Ender 3 V2 main board? Was replacing the nozzle on my E3D V6 clone and the hot tip started to turn so I held it with pliers while tightening it. When I did this, the positive fan wire that...
- Prusa MK3 heat desk shorted: just replace Einsy or heat desk too? The Prusa MK3 heat table power cable has shorted out (on the Einsy side) and it looks like I need to replace the Einsy. Should I also replace the heat table? I don't know much about electronics and I'm afraid that...
- Do you know the value of the L3 inductance of the Creality V2.
 2 controller board? Step extruder "E" on my Ender 5 stopped working a few days ago, and after looking at the motherboard, I found that the L3 inductor had burned out. I have a Creality V2.2…9 motherboard0010
 - How can I connect a separate 5V supply to an Arduino connected to a RAMPS board? Going to add a Raspberry Pi to my printer which requires a 5V source. I want to take this opportunity to also power the Arduino with the same source as the 12V drop… fans) are not working I finished printing all the parts for my HeroMe Gen 5 hot end last night. I decided to just cut off the existing fans and then solder on the JST XH connector so it's easy in the future...
- Effect of statics on 3D printers and print quality I operate four 3D printers for my college's robotics team. They are used fairly consistently throughout the school year; i.e. they are used more as production…
- Ender 3 ignores signal from optocoupler An optocoupler used in conjunction with an inductive sensor in the Ender 3 warehouse is connected as follows: In addition, I also connected the switch to the endstop Z signal and ground.
 I…
I… - Difference between Creality V2.1/V2.2 boards? Where can I find specifications? I can't find an official datasheet for any of these boards. Does anyone know where to find this information? Something that has maximum voltages, pinouts, etc. …
- Heated table main board connectors not included Flsun 3D Cube; Marlin 1.1.1; main board: Makerbase MKS Gen_L V1.0; works either from Repetier or OctoPrint. I recently had to replace the main board when it stopped powering...
- Can we apply more voltage to the heated PCB layer to get faster heating? From my understanding, the heater power must be higher than the heat dissipated into the surrounding air in order for the table to be heated. The reason why the table heats up too slowly is…
- Cooling fan spins very fast, noisy when starting up I built a 3D printer from parts. It uses a standard 12V power supply, an Arduino Mega 2560 replica, and a RAMPS 1.
 4 board. The hotend cooling fan is connected to the 12V-AUX pin (the one that…
 - What is the advantage of Arduino shield based electronics? Some electronic devices are available as a single printed circuit board. They have the processor and everything else on just one board. The other electronics is the shield for the Arduino. So it's always...
- Hot end won't heat up I have a problem with my BQ i3 Hephestos. I've noticed that the last few prints I've tested have drops in temperature from time to time. Yesterday, after 3 out of 4 hours of printing, hotend is completely…
- What is the influence of the lower bodrat? I am using a baud rate of 115200 because I cannot connect to my printer at the recommended baud rate of 250000 byte. Are there any disadvantages or limitations that I…
- How do I connect an LJ18A3-8-Z/BX sensor with an optocoupler to an Ender 3 stem? I have an optocoupler.
 and this sensor. I want to link them together and use them to automatically level the table. Note that the stock Ender 3 board (Creality v1) has 2…
 - How important is it to move the printer controller board out of the case? I'm building an enclosure for an Ender 3 Pro printer and plan to keep the power supply and LCD outside of the enclosure. How important is it to move the printer controller (into which the SD card is inserted) by…
- Short-circuited heating bed After several months of good quality prints, since yesterday my thermal bed has not heated up anymore. I have a BQ Prusa i3 Hephestos with this warm table controlled by this...
- What is this plug? I'm not quite sure what type of plug is on the heater cable. Is it Molex KK or maybe JST PH? Printer Prusa I3 Hephestos (aka BQ Hephestos). It came with this "BQ HOT-END HEATCORE CLASSIC"…
- ender 3 power supply electric shock I recently bought an ender 3 and after setting it up and plugging it in, I got an electric shock from the power supply.
 I live in the UK and as such I was provided with an EU to UK adapter,…
 - Capacitor identification and replacement So during one of my first experiments, I accidentally blew one of my capacitors. Everything else works on the board, except motor control with a blown capacitor, so...
- CR-10 heating problem I've been printing happily on my CR-10 for a couple of months now, but now there's a problem. As soon as I turn it on, the hotend starts to heat up. I have replaced the heater and thermistor but the problem remains.…
- Connecting the heat table to the mains using ATX My 3D printer was powered by two 24V power supplies connected in parallel, and my heat table was connected to the main power supply using the SSR. I replaced two PSUs with one Corsair…
- Ender 3 Won't start - flashing screen and blue LED on main board Just got my second Ender 3 (see my other questions about the problems the first one developed).
 Decided it was best to have a spare while I upgrade my first one with ABL. I collected it…
 - Should I protect my electronics with a 3D printed PLA case? PLA is highly flammable, but a good case can protect the main board from dirt. Is it worth it to protect the PCB with a 3D printed case?
- Control issues with new printer prevent table alignment process I recently built my first 3D printer from a kit, my build went fine without any problems, but now I'm struggling to align my table properly. My LCD screen...
- Access without cover 5V output on 3D printer controller board Typically in Arduino, most 5V outputs have a limited amount of current (40mA). Are there any 3D printer boards or even more common place where you can get output 5…
- UK Wiring Advice I was watching the Ender series and decided to take the plunge. But I'm not sure about electrical matters. The switch is 110 or 220 volts, which I assume goes to 220 volts, since I live in the UK, .
 ..
.. - New main board and thermocouple board I am upgrading my Ender 3 main board to MKS Gen L V2.0 and want to connect a Max31856 thermocouple board to it. Max31856 can use both software SPI and hardware SPI. Looking at…
- Using a 2x CAT6 cable for a 24V hotend I'm looking to replace my duplicator 6's troublesome ribbon cable with a 2xCAT6 device for all things. Is 4 wires 26AWG (2 sets of 2 twisted pairs) copper enough for a 50W heater…
- 100k thermistor not reading properly I am working with a powerful Flashforge Creator Pro Mighty motherboard for my home large 3D printer and the heat rack I bought uses a 2 wire 100k thermistor while…
- Any defacto standards for managing new tool options on generic 3D printers (firmware control and signaling)? Are there any defacto standards for interoperability between regular 3D printers and custom extruders or other tools? I thought about how nice it would be to have…
- Looking for an electronic flex/spring cable To do some cable management I wanted to use the same wires we can find in USB chargers that are wrapped like springs.
 The only ones I found are…
 - Printing from an SD card and connecting to a serial host at the same time I'm wondering if it's possible to print to a 3D printer from an SD card and connect to a serial host at the same time. I want to use the Marlin M118 serial print command to run...
- Installing E3D v6 extruder electronics on Ultimaker Original+ I printed the mechanical parts for the E3D v6 installation on my Ultimaker Original+. But I don't know how to connect my heating cartridge, my thermistor and my 3 fans to the electronic board.…
- What does it mean when they say up to 256 interpolations and 16 micro steps for TMC stepping sticks? I am planning to purchase some TMC step sticks for my 3D printer. I wanted to know what does 256 interpolations with 16 microsteps mean, in simple terms? Does it help? If so, how?
- Original Ultimaker X axis not moving - possible electronics issue I'm writing this question here in the hope that someone can help me with the fix process I'm currently in! Last week during a print session, my original Ultimaker…
Q2 2017 3D Printing Trends from 3D Hubs
3DPrintStory News 3D Printing Trends Q2 2017 by 3D Hubs
Every quarter, the online 3D printing service 3D Hubs publishes a 3D Printing Trends report. This comprehensive report provides up-to-date and verified information on the most popular desktop 3D printers.
Reports use data from their international community of over 7,000 3D printing services in over 150 countries. Pretty good sample for analytics.
Below are the 3D printing trends for the second quarter of 2017. Compared to earlier reports, we can say that the top leaders have not changed much, but new players have appeared on the 3D industry scene. In addition, we will look at trends in the distribution of 3D printing in the world, regional leaders, etc.
Top Rated 3D Printers
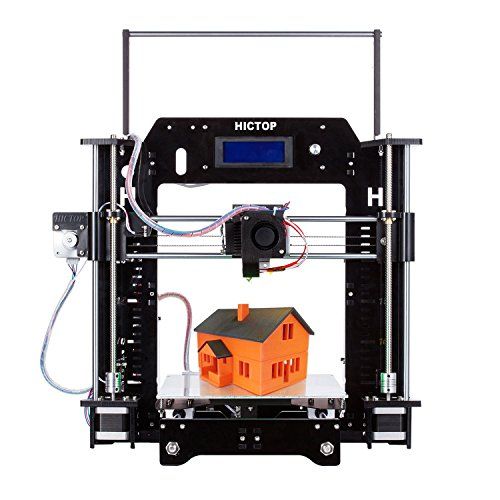
Compared to Q1 2017, the top 3D printers with the best ratings remained virtually unchanged. The first four positions are still held by Original Prusa i3 MK2, BCN3D Sigma, Form 2 and PowerSpec 3D Pro.
The most significant breakthrough was made by the 3D printer Cel Robox. This model has risen from 10th to 5th place in the ranking. The Prusa i3 MK2 and Form 2 widened their lead over their competitors.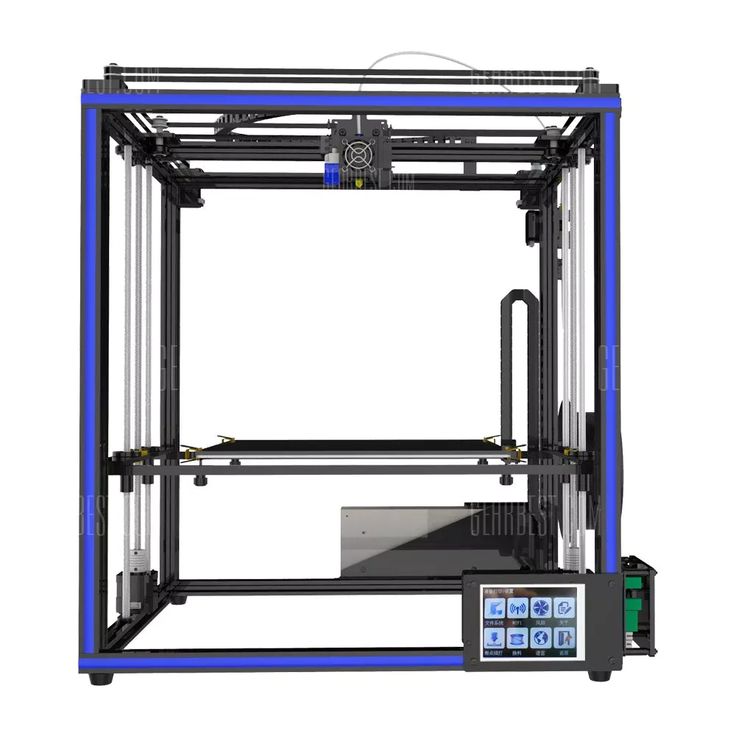 Each of these models has received over 1,000 reviews on 3D Hubs.
Trends in the growth of popularity of 3D printers
If we talk about the growth trends in the popularity of 3D printers, there are many models in the top that have only recently appeared on the market. Ultimaker 3 Extended and Ultimaker 3 take 1st and 3rd places respectively. At the same time, the first one made an unprecedented quarterly breakthrough and grew in popularity by 400%!
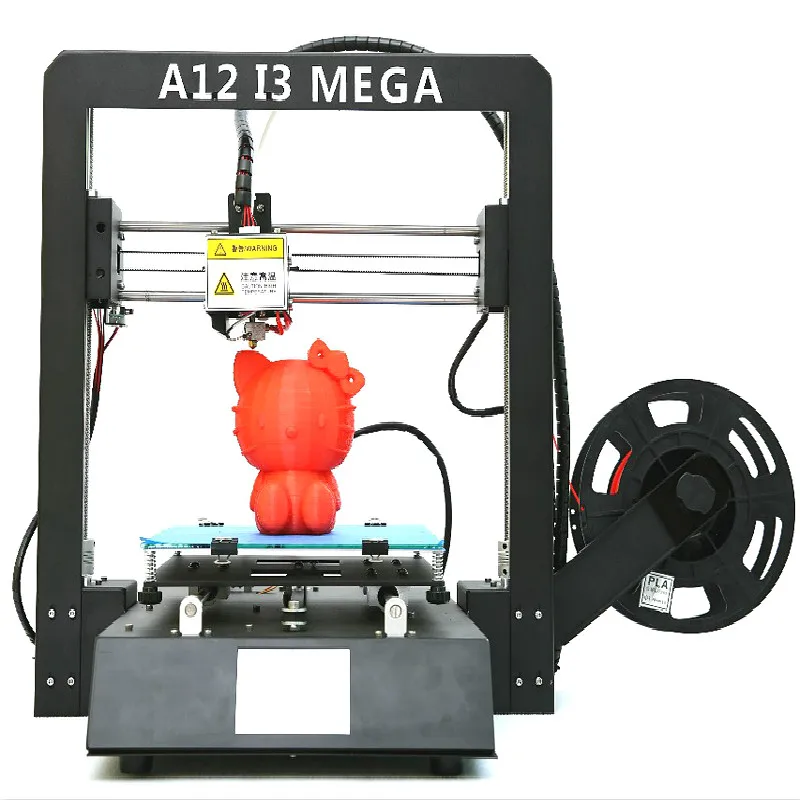
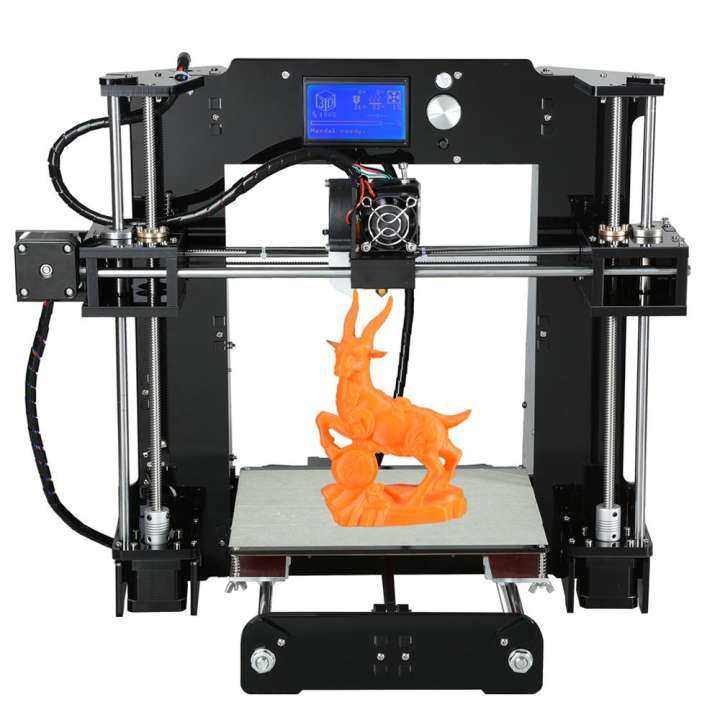
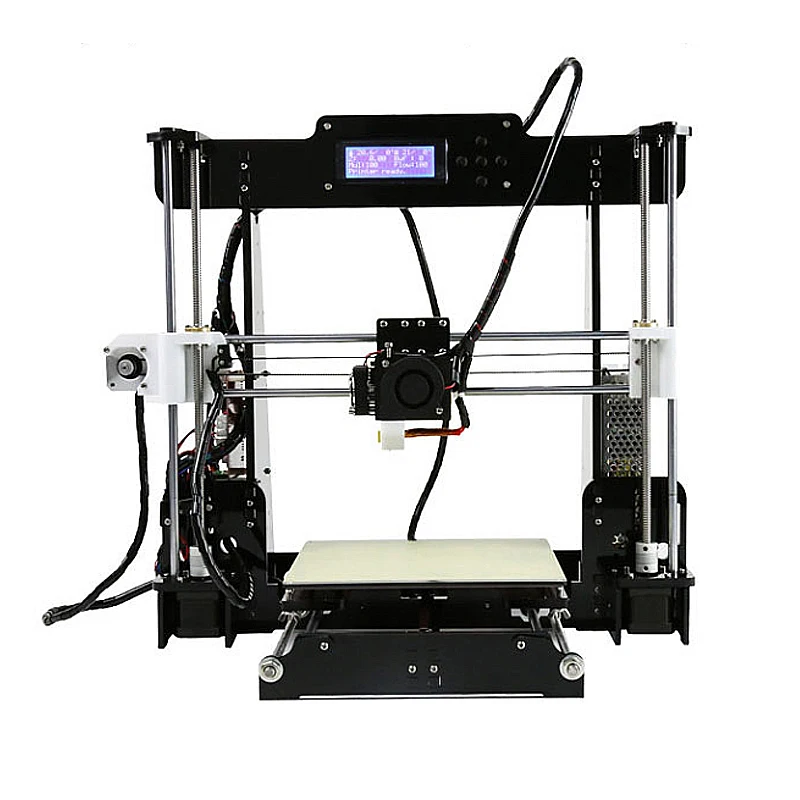
On the 2nd position, between the two Ultimaker models, there is an inexpensive 3D printer ANET 3D - A8, which grew by 330.8%. These models are followed by Wanhao Duplicator i3 PLUS. Monoprice MP Select Mini settled in 5th place, and Prusa i3 MK2 in 6th. These models also showed a significant increase in popularity, but were still forced out of their leadership positions by other new products.
Top cities with 3D printers
Very interesting statistics are provided on the number of 3D printers in cities around the world. 3D Hubs track 3D printers with online access and, based on their location, summarize the data in this top. New York remains in first place for more than the first quarter. But London is gradually gaining momentum and has already moved to the 2nd position, overtaking Los Angeles, which, in turn, dropped to the 5th line of the top. Paris and Amsterdam moved up to 3rd and 4th respectively.
Prevalence of 3D printers
In terms of the prevalence of 3D printers, the market remains generally stable. The most common models on the 3D Hubs network are Ultimaker 2, Makerbot Replicator 2, Zortrax M200 and Flashforge Creator Pro.
The only significant change is the leap Form 2, which is starting to catch up with its previous Form 1+, which was discontinued by Formlabs.
In the top 3D printer manufacturers, the changes are more significant. Ultimaker continues to lead and has increased its lead over Makerbot by 1.8%. Form 2 helped Formlabs climb from 6th position to 5th.