Phrozen 3d printer review
Phrozen Sonic Mini 4K Review: High Resolution 3D Printing, Low Cost
Tom's Hardware Verdict
The Phrozen Sonic Mini 4K resin 3D printer offers high resolution ideally suited for making finely detailed models but utilizes a tedious calibration process that has a few quirks.
Why you can trust Tom's Hardware Our expert reviewers spend hours testing and comparing products and services so you can choose the best for you. Find out more about how we test.
Today's best Phrozen Sonic Mini 4K deals
$369
View
$499.99
View
The Phrozen Sonic Mini 4K is an affordable entry in the increasingly-competitive resin 3D printer market which offers high resolution at a low cost. If you’re interested in printing small models or objects and capturing as much fine detail as possible, the Phrozen Sonic Mini 4K is a machine that may work for your application. The build volume of the Sonic Mini 4K is typical for resin machines in this price range, but the high Pixels-Per-Inch density makes this one of the best 3D printers you can buy.
Specifications
Swipe to scroll horizontally
| Machine Footprint | 9.8" x 9.8" x 12.9" (24.9cm x 24.9cm x 32.8cm) |
| Build Volume | 5.2" x 2.9" x 5.1" (13.2cm x 7.4cm x 13.0cm) |
| Resin | DLP Photopolymer Resin |
| UV Light | 405nm ParaLED Matrix 2.0 |
| Masking LCD Resolution | 3840 x 2160 |
| Masking LCD Size | 6. 1" 1" |
| Screen | 2.8" LCD Touchscreen |
| XY Axis Resolution | .035 mm |
Phrozen Sonic Mini 4K: Included in the Box
(Image credit: Tom's Hardware)The SM4K includes all of the accessories required to get the printer up and running, as well as a few of the consumables that you’ll need to process and clean printed parts. You get a USB thumb drive preloaded with ChituBox 1.7.1, an Allen key for adjusting the build plate, a plastic scraper for the FEP film, disposable gloves for handling uncured resin, a metal scraper for the build plate, and some sandpaper for roughing up the build surface. The included user manual covers the entire calibration and setup process as well as the default settings for common resin types.
- Phrozen Sonic Mini 4K (Black LED) at Amazon for $499.99
Printing Safety with Phrozen Sonic Mini 4K
(Image credit: Tom's Hardware)As with all resin 3D printers, you need to be careful when using the Sonic Mini 4K.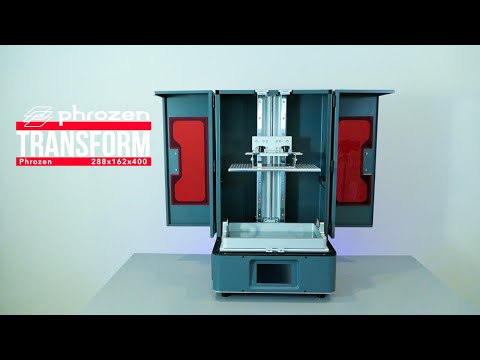 Uncured resin can be dangerous , so you must wear gloves and eye protection when pouring it or handling parts that have uncured resin on them.
Make sure you use the printer in a well-ventilated room to minimize the danger from inhaling fumes. Any spills or uncured resin stuck to a surface should be cleaned using 99% Isopropyl Alcohol and the container for the resin should be kept closed and secured when not actively pouring material.
Assembling the Phrozen Sonic Mini 4K
(Image credit: Tom's Hardware)It took me less than an hour to get the printer assembled and printing, which is typical for a resin printer like this one. The external power supply plugs into the back of the printer, and the cover simply sits on top of the base of the unit. The build platform slides into place on the Z axis gantry and is calibrated as a separate step.
Calibrating the Build Plate on the Phrozen Sonic Mini 4K
(Image credit: Tom's Hardware)Similar to FDM 3D printers, the build platform on a resin 3D printer requires calibration to create an even surface. The Sonic Mini 4K uses an adjustable build platform with four screws to offset the surface and compensate for any uneven surfaces.
The calibration process is more involved than on a printer like the Elegoo Mars 2, because there’s no ball and socket design on the platform. A ball and socket design allows the platform to be leveled using only two screws and offers a high level of accuracy, as opposed to a four screw system which is easier to manufacture but harder to adjust. Adjusting the corners of the platform is difficult due to the tension put on the platform from the mounting bracket and the configuration of the bolts makes it difficult to make any adjustments while leveling.
(Image credit: Tom's Hardware)The interface of the printer indicates that the vat should be removed during leveling, but the user manual says that the vat should be left in during leveling. Leveling with the vat installed can potentially damage the delicate FEP screen, so this may cause confusion and frustration for users inexperienced with leveling the build platform on a resin 3D printer. A piece of coarse 80-grit sandpaper is included for roughing up the build surface, but this can also lead to problems with the FEP being punctured if the platform is unevenly sanded or scuffed.
Printing Workflow on the Phrozen Sonic Mini 4K
(Image credit: Tom's Hardware)The typical workflow for printing a part on a resin printer is generally a bit more involved than doing the same on a filament printer. Phrozen has added a profile for the Sonic Mini 4K to the popular software ChituBox, which allows for out-of-the-box compatibility. The ChituBox software can hollow a model, add drain holes, add support structures, and output a file compatible with the printer using the .CTB file format. The Sonic Mini 4K uses a USB thumb drive for file storage, and the touchscreen UI allows you to select a file, see a thumbnail preview, and start the print.
Printing the AmeraLabs Calibration Test on the Phrozen Sonic Mini 4K
(Image credit: Tom's Hardware)For testing the fine features that are printable on resin printers, resin manufacturer Ameralabs has created a test part called Ameralabs Town that has very fine posts, holes, text, and other details. I made this calibration print using the default settings from Chitubox and Elegoo Beige Standard Resin. Unfortunately, the initial output was disappointing, because the difficulty I had getting the build platform level led to the first few layers being compressed and a loss of some of the small detail.
Settings
Swipe to scroll horizontally
| Layer Height | 0.05 mm |
| Bottom Exposure Time | 25 seconds |
| Exposure Time | 2.2 seconds |
| Bottom Layer Count | 6 |
Machining issues on the Phrozen Sonic Mini 4K
(Image credit: Tom's Hardware)After fully disassembling the build platform, it became apparent what the issues were. The bracket that holds the platform had not been bent properly, and the holes for the screws had not been machined properly and had metal shavings that were falling out. Given that this component sits directly above the thin and delicate FEP vat, this is a serious oversight that could potentially lead to a piece of metal piercing the film.
After I manually bent the bracket, cleared the threaded holes, and releveled the platform, the second print showed substantial improvement. Phrozen should have detected and resolved these non-trivial build issues at the factory. While experienced users could diagnose and rectify these problems, they would prove frustrating to a new user who could inadvertently damage the machine.
(Image credit: Tom's Hardware)Printing busts on the Phrozen Sonic Mini 4K
(Image credit: Tom's Hardware)To test out the detail on larger parts, after recalibrating, I printed this bust of Julius Caesar from The Metropolitan Museum of Art. The detail on the model is crisp and sharp, with the layer lines only barely visible under harsh directional light.
(Image credit: Tom's Hardware)The support structure detached without much effort, and left only small marks where it had attached to the model.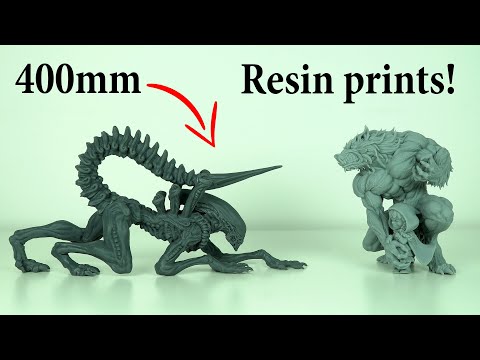 The uncured resin inside the model drained through the holes in the bottom of the base and the sharp detail of the model (especially around the eyes, which have visible pupils) came into focus after I dried and cured the model. Considering this level of detail was possible using the default settings, it’s certainly worth considering the level of detail one could achieve after dialing the machine in to a specific resin.
For the price, the Phrozen Sonic Mini 4K offers very high resolution, a modest build volume, and plug-and-play software compatibility. For an experienced user who isn’t afraid of troubleshooting the calibration process of the Z axis, this 3D printer is a great choice for making highly detailed miniatures and other small models. However, beginners looking to get into resin printing would benefit from a machine with a simpler calibration process, such as the Elegoo Mars Pro.
Andrew Sink first used a 3D printer in 2012, and has been enthusiastically involved in the 3D printing industry ever since.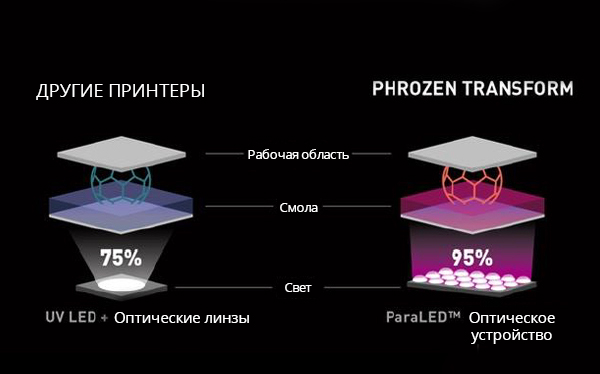 Having printed everything from a scan of his own brain to a peanut butter and jelly sandwich, he continues to dive ever more deeply into the endless applications of additive technology. He is always working on new experiments, designs, and reviews and sharing his results on Tom's Hardware, YouTube, and more.
Phrozen Sonic Mini 8k Review: High-Resolution Resin Printing
Tom's Hardware Verdict
The Phrozen Sonic Mini 8K resin 3D printer offers amazing details and easy setup for a premium price.
Pros
- +
Highest resolution on the market
- +
Pre-built, unbox, calibrate and go
- +
Prints adhere with a passion
Why you can trust Tom's Hardware Our expert reviewers spend hours testing and comparing products and services so you can choose the best for you. Find out more about how we test.
The best resin 3D printers can deliver more fine detail than their filament-powered competitors, but even amongst SLA printers, Phrozen’s Sonic Mini 8K stands out. The Sonic Mini 8K has 7500 X 3240 pixels on its LCD module, more than any competitor on the market, allowing it to create some of the most intricate models we’ve ever seen, especially if you use the company’s own 8K resin. By contrast, the top-rated Prusa SL1S only has 2560 x 1620 pixels on its LCD and Phrozen’s own Sonic Mini 4K, another leading resin 3D printer, has 3840 x 2160.
The Sonic Mini 8K not only provides great output, but also comes prebuilt and is easy to calibrate, providing a great out-of-the-box experience. However, at $599, you’re paying double the price of lower-res competitors with similar build volumes so you need to really want the better output quality to justify the price.
(Image credit: Tom's Hardware)Specifications - Phrozen Sonic Mini 8K
Swipe to scroll horizontally
| Machine Footprint | 11.4" x 11.4" x 16.5" ( 29cm x 29cm x 42cm) |
| Build Volume | 6. 5" x 2.8" x 7" (16.5cm x 7.2cm x 18cm) 5" x 2.8" x 7" (16.5cm x 7.2cm x 18cm) |
| Resin | DLP Photopolymer Resin |
| UV Light | Linear Projection LED Module |
| Masking LCD Resolution | 7500 x 3240 |
| Masking LCD Size | 7.1" |
| Screen | 3.5" Touch Screen |
| XY Axis Resolution | 0.022 |
Included in the Box: Phrozen Sonic Mini 8K
(Image credit: Tom's Hardware)The Phrozen Sonic Mini 8K includes everything you need to get started as soon as you unbox the printer. You get a sturdy logo-engraved metal scraper for the build plate, a cheap plastic scraper for the FEP film, a funnel, disposable gloves, an Allen key, and both North American and European adapters for the power cord. 80 grit Sandpaper is also included to freshen up the build plate.
Also in the box is an 8GB USB thumb drive preloaded with ChituBox Basic 1.9.0 slicer software, a profile for the Mini Sonic 8K, a Quick Start Guide, and two pre-sliced test prints. A paper Quick Start Guide is also included in the kit.
Links to a series of video tutorials appear on the USB drive and in the form of QR codes. At the time of this review, the videos are only for the Sonic Mini 4K.
Printing Safety with Phrozen Sonic Mini 8K
(Image credit: Tom's Hardware)The Phrozen Sonic Mini 8K requires the same safety precautions as other resin printers. Uncured resin is dangerous and the solvents used to clean your prints can be irritating to the skin. Use gloves and safety glasses when pouring resin and handling uncured prints.
Make sure the room you use your resin printer is well-ventilated to avoid inhaling fumes. Spilled or dripped resin should be immediately cleaned with 99% isopropyl alcohol. After printing, make sure to wipe down your printer and bottles to remove smudges of uncured resin. Always keep your resin tightly sealed and safely stored out of reach of pets and children.
Assembling the Phrozen Sonic Mini 8K
The printer comes fully assembled with both vat and build plate screwed into place. Once the abundant packing material was removed, it was ready to plug in and calibrate.
Calibrating the Build Plate on the Phrozen Sonic Mini 8K
(Image credit: Tom's Hardware)Like all 3D printers, the Sonic Mini 8K requires calibration before its first print. Leveling the build plate is fairly straightforward and only takes a few pieces of paper and the provided Allen wrench.
There is very little play in the build plate and I was able to level it on the first go. Note: the directions recommend a single sheet of paper, but I found that using 3 or 4 sheets and a gentle touch results in a bed that is level without squished first layers.
To level the machine, remove the vat and then place three pieces of paper on the LCD screen. Loosen the four adjustment screws on the sides (not the top!) of the build plate.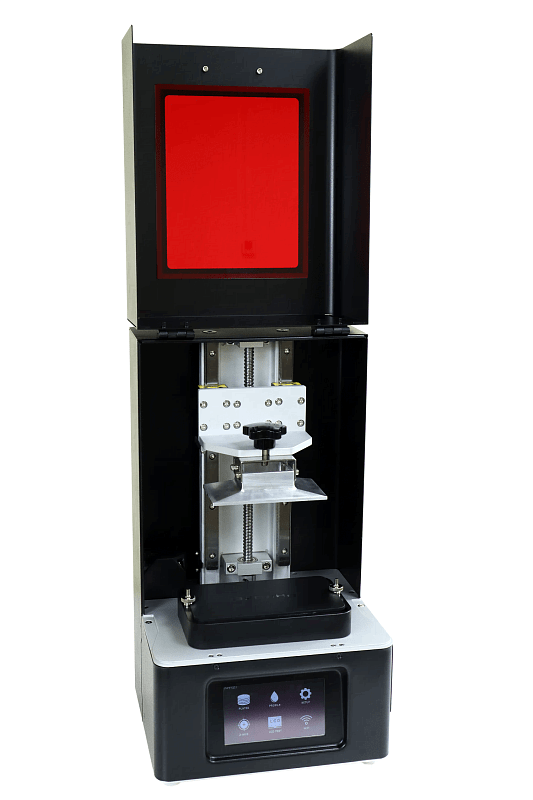 The build plate should wiggle freely.
Press Tools, then Z Calib on the touch screen and wait for the plate to lower to the LCD screen.
There’s no need to hold down the build plate – it’s quite heavy enough. Tighten the screws with the Allen wrench, working in a crisscross pattern. The paper should be snug when you’re done.
In addition, you should wipe down the Z axis and apply a general lubrication with a paper towel to insure a smooth run.
(Image credit: Tom's Hardware)The Phrozen Sonic Mini 8K is no lightweight, tipping the scales at 22 pounds thanks to its mostly-metal construction. It has a sturdy build plate, metal vat and dual rails for a rock solid Z axis. The build plate is laser etched for extra grabbing power – a little too much if you’re not careful. I had to dial back the suggested Bottom Exposure Time, otherwise a hammer was needed to chisel models off the plate.
The plastic cover looks much like other desktop resin printers. It does a fine job of shielding the resin and your model from ambient sunlight and unwanted UV radiation. The cover isn’t sealed, so you’ll still smell the resin while in use. The cover is impossible to keep clean and once a smudge goes unnoticed, it will get cured and become a permanent part of the decor. Handles would be a nice addition.
The top of the build plate is nicely angled and allows nearly all the resin to drip back into the vat when the print is finished.
(Image credit: Tom's Hardware)One flaw in the Phrozen Sonic Mini 8K’s design is the presence of recessed screws on the top of the build plate. This area collects resin every time the plate is dunked and is difficult to clean when changing materials. I had to put the plate in a large tub and use a syringe of isopropyl alcohol to flush the crevices clean.
Slicers Compatible with the Phrozen Sonic Mini 8K
The Phrozen Sonic Mini 8K is out of the box compatible with the most recent versions of both ChituBox and Lychee Slicer. Our printer came with ChituBox Basic 1.9.0 and a separate printer profile to download. Version 1.9.1, which includes the Phrozen Sonic Mini 8K profile, was released after our testing was completed.
Printing Workflow on the Phrozen Sonic Mini 8K
Slicing software for resin 3D printers give you the ability to add supports, hollow your model and add drain holes – which is much needed to save on expensive resin. I used ChituBox for this review. Phrozen has a good slicer tutorial in its help center for customers new to resin printing.
(Image credit: Tom's Hardware)Please Note: I had to lower the Bottom Exposure Time to 20 seconds, as the prints were impossible to remove from the plate without breaking at Phrozen’s recommended time of 40 seconds.
You will want to run your own exposure tests to find the best settings for your printer setup as brand and type of resin, plus room temperature are all variables. Phrozen includes an exposure test .STL file on the USB thumb drive.
(Image credit: Tom's Hardware)Once sliced, CTB files can be loaded on the provided USB thumb drive and plugged into the slot on the front of the machine. Touch the Print button, select your file, then press go.
Phrozen Aqua Gray 8K Resin and Sample Prints
Model by Dark Gods (Image credit: Tom's Hardware)Phrozen has created a special 8K formula resin to bring out the details on its new high resolution machines. The low-odor resin is more viscous and only requires a 2 second exposure time per layer, as opposed to 3 seconds for ordinary resins.
Most designers aren’t creating models specifically for ultra high resolution printers, so you may have to search for designs that really take advantage of the Sonic Mini 8K capabilities. But even when given models designed for 2K printers, the Sonic Mini 8K reveals hidden details that older printers glossed over.
I printed this model of RipJaws from Dark Gods Eternal, available with Phrozen’s Epic Bundle during the pre-sale. The model was sliced at a .03 mm layer height and split into several parts. It took more than two days to print and all the tiny spikes made it literally painful to assemble. However, the quality really is amazing. You can see every tiny bolt, spike and wrinkle on the monster’s hide.
I wanted to see how the Sonic Mini 8K handles budget resin, so I printed a Wekster bust in both the Phrozen Aqua Gray 8K and blue Inland Water Washable resin. Both models were printed with a .05 layer height and tilted back at a 45° angle to make the most of the XY resolution. Each model took 7 hours and 13 minutes to print, with an exposure time of 2 seconds per layer.
Here I’ve converted the image to black and white for a better comparison. They’re both quite good, but the 8K resin on the left shows crisper details in the fur and teeth. Note the leather grain in Rocket’s jacket, and the wood grain in Groot’s forehead.
Model by Wekster, available on Patreon. (Image credit: Tom's Hardware)This close up of Loubie3D’s Sky Warrior was printed in Phrozen Aqua Gray 8K resin at .05 layer height and shows no layer lines at all. The model is 120 mm tall and made up of 2401 layers, which took 9 hours and 55 minutes to print at a 2 second per layer exposure time.
Miniatures for tabletop gaming are equally stunning when printed on the Phrozen Sonic Mini 8K, even without using Phrozen’s premium resin. Tiny details in the armor and sword hilts are quite clear. The figures shown below were printed at a .05 layer height and 3 second exposure time, taking 4 hours and 36 minutes to print. These fighters are available for free at Prusa Printers.
Models by MZ4250 (Image credit: Tom's Hardware)Washing and Curing
Before you can admire your prints, you’ll need to wash and cure. Phrozen suggests a 30 second wash in 95% Isopropyl alcohol, then a second dip in another container of cleaner IPA. A soft brush can be used to get the nooks and crannies clean.
Completely dry the print with a hair dryer on cool – IPA left on the print will turn white. You can also let the print air dry in a place away from sunlight.
Remove supports before UV curing the print as they’re much softer. Use side cutters and tweezers to remove the supports. Remember to always wear gloves while handling uncured prints.
Then place the print in a UV curing station for a minute or two, or outside in bright sunlight for a few hours.
Your IPA should never be flushed down the drain, especially after being contaminated with uncured resin. Instead, keep using the resin until it’s too dirty, then leave the container open to evaporate. The remaining sludge can be cured with UV light or the sun before being thrown away.
Supports should also be cured before being thrown away.
The Phrozen Sonic Mini 8K is an amazing machine that delivers incredibly detailed prints right out of the box. Yet, like the ever increasing resolution on our big screen TVs and handheld devices, you have to wonder if you really need 7500 dpi on a resin 3D printer? Maybe not, but you will certainly enjoy the results.
The Phrozen Sonic Mini 8K is the first in the market to use this level of resolution, which means few designers are creating models that truly take advantage of its capabilities. But even when printing ordinary models, the Sonic Mini 8K reveals hidden details that would be lost on a low resolution printer.
The Phrozen Sonic Mini 8K currently lists at $600, the same price as Phrozen’s Mighty 4K with a much larger build plate. Makers wanting to save a little cash should check out the Elegoo Mars 2 Pro, which has a self-leveling build plate at nearly half the price, but a significantly lower resolution.
Denise Bertacchi is a Contributing Writer for Tom’s Hardware US, covering 3D printing.
Phrozen 3D Printer Review - Features Comparison
Home / Phrozen / Phrozen 3D Printer Reviews / 3D Reviews / Phrozen Review. 3D printers
Contents
-
- Introduction
- Model range
- Application
- Conclusions
Introduction
The Taiwanese company Phrozen was founded in 2016 by 3D printing enthusiasts and until recently was unknown to a wide range of buyers, until in 2019did not run a very successful crowdfunding campaign to raise funds for the release of a new printer model, the Phrozen Transform.![]() During this campaign, more than half a million dollars were raised from 139 makers around the world and, despite some delays, already in March 2020, all buyers received the long-awaited printers.
During this campaign, more than half a million dollars were raised from 139 makers around the world and, despite some delays, already in March 2020, all buyers received the long-awaited printers.
For less than $2,000, users got a desktop printer with a huge build area. This was a breakthrough for the Phrozen business. In parallel, Phrozen was the first to bring to market a printer with a 4K LCD display, which also became a trend in photopolymer 3D printing. nine0003
Today, Phrozen leads the budget photopolymer 3D printer market primarily due to a higher level of R&D and active innovation. And it is already obvious that due to the lack of production capacity, it is not able to meet the rush demand for its products. However, despite numerous delays and high shipping costs from Taiwan, buyers around the world are ready to wait for Phrozen equipment. After all, by buying it, they can get a unique product that is not represented in the line of other manufacturers. Here, as in an advertising stamp: "With all the wealth of choice, there is no other alternative." nine0003
Model range
Well, now let's take a closer look at the Phrozen product portfolio, which can be conditionally divided into 3 lines. First, we included the Sonic Mini 4K and Sonic Mighty 4K printers. Who are these models for? First of all, for creators of miniatures, animators, modelers, cosplayers and other people who are passionate about their hobbies. Structurally, these devices differ only in the size of the working chamber, the Mini uses a 6 ”display, and the Mighty 9.3”. But at the same time, the Mini 4K model has an XY resolution of 35 microns, while the Mighty 4K has 52 microns, and the print quality of detailed elements is correspondingly better on the Mini 4K. But the maximum model size or the maximum number of models that can be printed at the same time is significantly larger in Mighty 4K. However, both printers do a great job with a variety of tasks. nine0003
The second line can be called professional. Here are the Sonic 4K and Sonic XL 4K models. These printers are primarily used in dentistry and jewelry making. How do they differ from the initial line of Phrozen printers? In these models, everything is aimed at increasing reliability, and, accordingly, performance. A metal body with a hinged lid, improved Z-axis rails with a smoother platform lift, aluminum print trays and other features allow users to use these printers non-stop. The models also differ only in size. Sonic 4K uses a 6.1" sensor, while its older brother uses 8.9". This means that the resolution in Sonic 4K is lower - 35 microns, and the quality of detailed models is higher. But Sonic XL 4K takes its size, which is useful for printing large models or a large number of them.
Well, the last line consists of one model - Phrozen Transform, which comes in two versions - Standard and Fast. Outwardly, they are no different. The Standard version has a 4K LCD display, and the Fast version has a Mono 4K LCD display, which allows you to significantly speed up the printing process, which is especially important for large-sized models, such as architectural ones. Printing can take days, and the ability to speed up results is highly appreciated by many customers. Also, these printers are used for mass printing of small products, but it should be borne in mind that, given the large size of the matrix, the XY resolution in them will be 76 microns. This may not be enough for processing small detailed models (the effect of blurring of small elements is likely). nine0003
Free Shipping
Add to compare
Product added to compare Go
| Manufacturer | Phrozen |
Free shipping
Add to compare
Product added to compare Go
| Manufacturer | nine0056 Phrozen
Free shipping
Add to compare
Product added to compare Go
| Manufacturer | Phrozen |
Free shipping
Add to compare
Product added to compare Go
| Manufacturer | Phrozen |
Application
Now let's look at the most popular tasks for Phrozen photopolymer 3D printers.
- Create miniatures from your own original drawings for sale to fans of games, TV shows, comics, movies and anime
- Creation of exclusive models of ships, planes, trains and cars
nine0003
- Create historical miniatures from original drawings or by scanning existing designs
- Creation of weapons, accessories and masks for cosplayers
- Dentistry in its various aspects
-
jewelry
To obtain the highest quality result of photopolymer 3D printing, it is necessary to pay special attention to the post-processing of models and the use of high-quality photopolymer resins. Printed models must be washed in alcohol or water (depending on the type of resin) and then illuminated in an ultraviolet chamber. For these purposes, Phrozen produces 3 types of UV chambers, which differ in size. Choose a camera based on the size of your 3D printer. To date, 3 models are available: Cure V2, Luna and XL. nine0003
Phrozen resins are suitable for most 405nm photopolymer 3D printers. The line includes standard resins, flexible, reinforced, 4K and many others interesting in terms of their characteristics and purpose. You can read more about Phrozen photopolymers here.
Add to compare
Product added to compare Go
| Manufacturer | Phrozen |
Add to compare
Product added to compare Go
| Manufacturer | Phrozen |
Add to compare
Product added to compare Go
| Manufacturer | Phrozen |
Add to compare
Product added to compare Go
| Manufacturer | Phrozen |
Terminals
In summary, Phrozen's ecosystem of printers, materials, post-processing hardware, and software enables users to effectively use 3D printing. The Phrozen line completely covers the existing demand for photopolymer 3D printers and offers models for various tasks in affordable price categories. nine0003
Phrozen 3D Printer Performance Comparison Chart
|
| Sonic Mini | Sonic Mini 4K | nine0214 Sonic Mighty 4K | Shuffle XL Lite | Transform Standard/Fast | Sonic 4K nine0214 | Sonic XL 4K |
| Printer size | 25x25x33 cm | 25x25x33 cm | 39x29x47 cm | nine0002 39x29x47 cm | 38x35x61 cm | 28x28x42 cm | 39x29x47 cm |
| Printer weight | 5. | 5.3 kg nine0003 | 8 kg | 14 kg | 29 kg | 16.5 kg | 19.5 kg |
| XY Positioning Accuracy | nine0056 35 µm | 52 µm | 75 µm | 76 µm | 35 µm | 50 µm nine0057 | |
| Z-axis positioning accuracy | 10 µm | 10 µm | 10 µm | 10 µm | 10 µm | nine0002 10 µm | 10 µm |
| Print speed | 80 mm/h | 80 mm/h | 80 mm/h | 20 mm/h nine0003 | 10 mm/h / 40 mm/h | 90 mm/h | 110 mm/h |
| Print volume | 12x6. | 13.4x7.5x13 cm nine0057 | 20x12.5x22 cm | 19x12x20 cm | 29x16x40 cm | 13.3x7.5x20 cm | 19x12x20 cm |
| LCD resolution nine0057 | 5.5" 1080P Mono-LCD | 6.1" 4K Mono LCD | 9.3" 4K Mono LCD | 8.9" 2K Color LCD | 13.3" 4K Color LCD / 13.3" 4K Mono LCD | 6.1" 4K Mono LCD nine0003 | 8.9" 4K Mono-LCD |
| Hobby | Fits good | Fits good | Fits good | Fits good nine0003 | Fits good |
|
|
| High detail |
| Great fit | nine0056 Fits good |
| Great fit | Fits good | |
| jewelry | nine0002 | Great fit | Fits good | Fits good |
| Great fit | Great fit nine0003 |
| Digital Dentistry |
| Fits good | Fits good | Great fit | Fits good nine0003 | Great fit | Great fit |
| Large objects |
|
| Great fit | nine0056 Great fit |
| Great fit | |
| Industry |
| nine0003 |
| Great fit | Fits good | Great fit | Great fit |
| Market price nine0057 | 34 900 rubles | 41 900 rubles | 79 900 rubles | 80 000 rubles | 210 000 rubles / 285,000 rubles | 135 000 rub. | nine0002 225 000 rub. |
#3D reviews
Russian entrepreneur, expert in the field of additive technologies and 3D equipment. Founder and head of the Tsvetnoy Mir company and the Center for Innovative 3D Printing Best3D Print.
Share
all materials
Do you have any questions?
Our experts will help you with the choice of 3D equipment or accessories, consult on any questions. nine0003
Detailed review of the Phrozen Sonic MEGA 8K 3D printer and Cure Beam pens: pros and cons, test print
Welcome to the Color World. We continue to introduce you to new models of photopolymer 3D printers from Phrozen. In just a few years, this company has become one of the leaders in the production of photopolymers for almost any task. We already have a lot of reviews on our channel, both on their printers and related equipment. Today we want to talk about the model with the largest print area and at the same time with a very high resolution, the Phrozen Sonic Mega 8K 3D printer. nine0003
At the end of the article you can watch a video review of this printer
As usual, let's start with unpacking and specifications. Despite its impressive size, the printer, like others like it, comes fully assembled and ready to go in a large and heavy box.
It is quite possible to get and install the printer yourself, but it is quite difficult. It is advisable to do this together, because it weighs neither more nor less than 35 kilograms. And the external dimensions of the printer are 400 x 470 x 680 mm. This must be taken into account when preparing the workplace. nine0003
Inside the printer, in addition to the printing platform and the bathroom, which is already in place, we find a box with everything you need to work. The printer package is standard and does not differ from other Phrozen photopolymer printers.
A small paper manual that describes the procedure for the first launch and the minimum settings for the slicer. Warranty card. In a separate bag are two handles with screws and a hexagon, they need to be screwed to the doors yourself. nine0003
8 GB Sandisk USB flash drive. Small plastic funnel for draining the resin. Considering how much resin is used with this printer, this funnel looks like a pellet to an elephant, but so be it. A pair of rubber gloves. Several Phrozen stickers, purely decorative. Plastic spatula for mixing resin in the bathroom and metal spatula for removing models from the platform. Instead of the first, it is advisable to use silicone so as not to scratch the film in the bathroom. And instead of the second one, it would be nice to get a wider spatula and sharpen it well, otherwise there will be little benefit from it. Well, the last in the box is the power wire, or rather even two, for different sockets. nine0003
The printer is a metal cabinet of rather impressive size.
On the front, it has two hinged L-shaped doors with plastic windows that do not let in ultraviolet light. At the same time, the hinges at the doors are closer to the rear wall, due to which, when they are opened, there is a convenient access to the printing area from almost all sides.
The only thing to consider is that you need quite a lot of space on the sides of the printer to open these doors. Inside, at first glance, we do not see anything special. Quite a common design for MSLA printers. Except that everything here is huge. The print area is 330 x 185 x 400 mm, which is even more than many FDM 3D printers. nine0003
Here, for comparison, the Phrozen Mega 8K printer is next to the popular Elegoo Mars 2 Pro medium-sized photopolymer. The difference is just phenomenal. The entire Mars seems to fit into the Mega 8K printable area.
The Z-axis moves on two MGN15 rail guides via a ball screw motor, which is hidden in the bottom of the housing. This should be enough to handle the pull force for this printable area. nine0003
The optical limit switch is located at the bottom.
The print platform is made of a solid 9mm aluminum sheet and has many holes throughout the plane.
It used to be thought that a perforated bed in a resin printer would greatly improve adhesion, but recently, most manufacturers have stopped using perforated beds, even on large printers. This solution has both pros and cons, but more on that later. nine0003
Printer calibration is a bit different from what we usually see. Here the platform is not just pressed with several screws, but has 4 locking screws and 4 fixing screws. We came across a similar system on the Wanhao GR1 printer.
The bottom line is that the manufacturer does not mean at all that the user should touch this calibration. The printer should already be calibrated from the factory. But, as they say, trust, but verify. We will not show how to calibrate and check it on this printer. But Phrozen's Youtube channel has a separate video describing this procedure. The platform is fixed on the carriage with two wing screws. And it has two handles on the sides, which is very useful, since the platform itself and the models that can hang on it turn out to be quite heavy. nine0003
The resin bath is generally no different from the baths found on smaller printers. Is that it is huge and also has two handles on the sides.
It is made of aluminum, and the surface is quite smooth, the resin almost does not linger on it, and when wiped with paper towels, there is no lint left on the surface. In one of the corners there is a small cutout for draining the resin, it is really small and does almost nothing, but it definitely won’t be superfluous. On the back wall there is a MAX mark, above which the resin cannot be poured. The bathtub is fixed with two screws on the sides. nine0003
Under the bathtub we see perhaps the main distinguishing feature of this printer is a huge 15-inch monochrome LCD panel with a resolution of 8K, 7680 by 4320 pixels.
Taking into account the diagonal, the size of each pixel is only 43 micrometers. These are certainly not the smallest pixels that a photopolymer can have. But given the size, at the moment, it's very impressive. nine0003
And the fact that the LCD panel is monochrome allows you to quickly light up the layers, as well as its service life is much longer than that of RGB panels.
The already standard and well-proven system of LEDs with lenses - ParaLED 3.0 - was used as illumination. The illumination wave, as usual, is 405 nm. That is, you can safely use any resin for MSLA photopolymers.
We decided not to disassemble the printer to see the electronics, but it is definitely worth noting that the installed control board and its firmware are from Chitu. nine0003
This name seems familiar to you for a reason, because the same company produces one of the most popular slicers for photopolymer printers - Chitubox. And, therefore, Mega 8K is optimized to work with this slicer and can use all its features and new features.
This does not mean that you are limited to only one Chitubox. Other popular slicers such as Lychee or Formare are also supported. However, only with Chitu's proprietary slicer will you be able to use the latest features supported by this board and firmware. For our tests, we used the free version of Chitubox version 1.9.0.
To control the printer on the front panel is a touch screen. The menu is the same as most Phrozen printers. All the necessary functions are there: calibration and manual movement of the axes; flare check and residual resin flare function; information, print menu, network settings.
Everything is familiar, functional and moderately concise. During printing, it is possible to change the backlight settings. The screen sensor works well, everything is pressed clearly, no false positives were noticed. nine0003
Printing can be done from a USB flash drive, the port for which is located to the left of the screen.
Or you can connect the printer to your local network with an Ethernet cable and transfer files to the printer directly from your computer.
Transferring files over the network is not very fast, and given that a large printer and models will print large and also in high resolution, the cut files are quite large. Sometimes they can reach gigabytes. It is simply not advisable to transfer such files over the network; it is much faster to transfer the file to a USB flash drive and start printing directly on the printer. nine0003
This is all the information that can be told about this printer, just by looking at it and studying the specifications. In fact, an ordinary MSLA printer, just huge and adapted to such dimensions. Of the useful things, the only thing missing is air filtration and, possibly, a heater to maintain a comfortable temperature for printing. Not that it's necessary, but it would be convenient.
Let's prepare the printer for printing. After checking the calibration and performance of the spotlight and screen, you can set up the slicer. Click on the add printer button in the settings, select it from the list and you're done. nine0003
All basic parameters such as screen resolution and print area dimensions are already set.
The exposure time and movement speed for some resins are also already in the ready-made presets.
We will be using Phrozen Aqua Gray 4K High Resolution Modeling Resin. There is already a profile for printing with this resin with a layer height of 0.05mm. Despite this, it makes sense to print a couple of tests to make sure that the settings will work on a particular printer with a particular resin. In our case, we ended up with a burn time setting of 60 seconds for the first layers and 3 seconds for all the rest. nine0003
In addition, we played a little with the speed settings for the movement of the platform between layers. This is just one of the functions of the Chitu firmware. It's called TSMC - Two Stage Motion Control. This function allows you to set two speeds for lifting and two for lowering the platform, both on the first layers and further.
We selected these settings to minimize the risk of models sticking to the platform, printing speed was not the main goal. However, if you spend a little time and play with these settings, you can increase the print speed even more. How to use and configure this feature can be found in the instructions on the Phrozen website. nine0003
For the first test, we decided to print something small. One of the most popular test models for photopolymers is the rook. But you can’t print it alone on such a huge printer, they put 4 pieces in different parts of the platform. Let's check the calibration.
Despite the fact that the models are small, you really need to pour a lot of resin into the bath. In order for the resin to at least cover the surface of the film, at least half a liter is required. And to fully print, you need to pour at least a liter. Sometimes you even have to add resin when printing large models. nine0003
We started printing and immediately encountered one of the advantages of a perforated platform. Usually, when printing on a photopolymer printer, for the first couple of hours there is no way to see whether the model has stuck to the platform or not. This can only be determined by the sound of the model peeling off the film in the bathroom. Immediately, it is almost immediately evident that some of the holes remained closed and resin does not flow from them. This means that the model is glued to the platform from below in this place. nine0003
Considering the volume of resin and the difficulty of cleaning the printer, this property of the perforated platform can save you a lot of time.
On the other hand, there was also a minus of such a platform. Due to the fact that it is flat, the resin remaining on top does not flow anywhere. And it makes sense to carefully clean it off at the moment when the platform stops sinking into the resin. Otherwise, at the end of printing, you will have to wait a long time, pouring it into the bath, and, dripping from a height, it can leave splashes on the printer case. It is not necessary to do this, but it certainly will not make it worse. nine0003
And so, after a couple of hours, we got 4 rooks. They were printed directly on the platform. It was risky, the models are small and it is not clear where the holes of the platform will be, but we were lucky, all 4 boats did not come off and at the same time separated from the platform normally.
As for quality, there are no questions at all. The layers are laid evenly, the detail is at a very high level, and given the size of the printer, it's just great. There are practically no streaks from the pixelation of the screen. nine0003
All letters are printed clearly, the overhangs are even, small elements are in place. Excellent result. The only thing that is a bit annoying is that the bulges due to the perforated platform clearly stand out on the bottom surface.
It is for this reason that in the vast majority of cases you will print on supports with this printer. You can print directly on the platform, but the bottom layer will always be in such bulges. nine0003
With the second test, we decided to check the uniformity of illumination over the entire print area. It happens that in the corners the light from the spotlight hits the screen less, and the resin in these places freezes worse than in the center. For this test, we took a chain mail model from the Thangs website.
It consists of a huge number of rings intertwined with each other. In this case, each ring rests on one small support, and the supports, in turn, are connected in small lines. nine0003
In addition to the uniformity of illumination, a lot of things can go wrong here, it is enough for one ring to break away from its support and all nearby elements can be damaged.
Unfortunately, this is what happened to us.
In one place, a couple of rings came off the supports and damaged several rings nearby, while the supports in this place printed normally and did not peel off from the platform. The rest of the chain mail also turned out great. nine0003
At the edges and corners, all the rings are in place, they are all even, they did not stick together. After washing and backlighting, we got such a chain mail rag. It feels very nice, it's a pity that it's not quite whole.
Due to damaged rings, it was impossible to continue printing immediately after this one. Broken fragments could remain in the resin and damage the bathroom film or even the screen. Therefore, before the next print, I had to drain and filter all the resin, wash the platform and the bath. Honestly, this is the most negative experience associated with this printer. For these procedures, you will definitely need a well-ventilated room, a lot of alcohol, a mountain of paper towels, a respirator, good rubber gloves, a fairly large basin, funnel, filters. Ordinary paint brushes can also help a lot, as long as they are soft and resistant to alcohol. nine0003
And most importantly, it takes a lot of time. It takes at least an hour to carefully drain and rinse everything. And if you still need to remove the model, remove supports from it and rinse it, then it can take a couple of hours.
If using ordinary photopolymers, such as Anycubic Photon or Elegoo Mars, seemed dreary and dirty to you. After Mega 8K, this will seem like child's play. Everything is serious here.
After a complete flush of the printer, we decided to print something really big and beautiful. This model is from malix3design.com. There are many highly detailed models of movie characters and game characters. Models are paid, but it's not a pity to pay for such quality. We decided to try to print a diorama with the Alien and his victim. nine0003
The model is large and complex. Entirely, together with the stand, it would not even fit into the print area of this printer. But good, there is a version, broken into parts.
They decided to print the Alien itself in its entirety, at a certain angle they managed to fit it on the platform, albeit back to back. Just in case, a raft was added under the supports. There were a lot of supports themselves, there are a huge number of small elements and details on the model from different angles. nine0003
For the most part, we installed light supports, in difficult places that begin to print in the air, added medium ones for stability. Most likely, it would be more economical and easier to print this model in parts, and even make some of the parts hollow. But the purpose of this print was to test the printer in really difficult conditions.
The printing was completed successfully, after 32 hours we saw a whole Alien on the platform. nine0003
A couple of free-standing supports broke off while printing, but they didn't affect anything. The bulk of the supports withstood and fulfilled their task.
Removing the Alien from the platform was not very difficult. Next was the most dangerous adventure, to remove the supports without damaging the model itself. We decided to do this even before washing.
Thanks to light supports, almost everywhere it was possible to remove them simply with gloved hands. At the same time, they left practically no traces. Of course, there are small dots, but on such a model they are almost invisible. As a last resort, they can be removed in post-processing. nine0003
Thoroughly washed the model in alcohol using a brush. Removed the remaining small supports from hard-to-reach places. And in the end it turned out like this Alien.
To say that it turned out well is to say nothing. The model is simply amazing. You can look at it for hours. The detailing is phenomenal, the number of small elements is simply countless. Everything was printed clearly. There is not a single protruding layer. The model has a couple of minor flaws, for example, some fingers with claws have come off the supports a little and turned out to be a little flattened. Well, the already mentioned traces of supports, which are visible on smooth areas. But all this is trifles, given the overall complexity of the model. Yes, and the fault of the printer in this, of course, no. nine0003
They sent the Alien for backlighting and started printing the remaining parts. There were 3 of them. 2 parts of the platform with a frightened person and a separate grating, which this person is pressed against.
We sent most of the platform for printing.
It was also printed for more than a day, also on a huge number of tilted supports. So that there are as few traces of supports as possible on the areas that will be visible. nine0003
Well, what can I say, even despite the rather large planes of contact between the model and the film in the bathroom, the model turned out to be quite even. Again, there are no bulging layers, bent corners or offsets.
They also washed it, left it to light up and printed the two remaining details.
nine0027
In general, they also turned out well, although the second part of the platform began to be printed from places that should be glued in the future. And they turned out to be slightly distorted in geometry, the supports could not stand it a little. This detail had to be sanded a little after printing.
For gluing, we decided to use another interesting device from Phrozen, the Cure Beam. nine0003
In fact, this is an ultraviolet flashlight adapted for additional illumination of photopolymer models. We have a separate video about him on our channel. In short, there is nothing outstanding in it, but it is convenient to use it.
The essence of gluing models with resin is that you need to drop a little liquid resin into the place of gluing.
Wipe off excess. nine0003
Then illuminate this place with an ultraviolet flashlight for several tens of seconds.
If the gaps between the parts are large, the procedure must be repeated until the desired result is obtained. Models are practically soldered together. The only thing you need to be prepared for is that the poured and illuminated resin shines much more than the rest of the printed model. Therefore, the seam can be seen under certain lighting conditions. nine0003
On the other hand, if the model involves post-processing and painting, all these places will eventually be hidden under a layer of paint.
After gluing and a little processing of the seams, it turned out like this Alien.
The diorama is very beautiful, while it is weighty and feels solid. True, there are, so to speak, deviations from the canon. We will not go into details of the life cycle of Aliens, but in a good way - this is the Queen of Aliens, and she should be 2-2.5 times as tall as a person, but here she is not much larger than an ordinary infantryman. Well, okay, it's all nitpicking. nine0003
We will draw conclusions.