Pausing 3d print overnight
Can You Pause a 3D Print Overnight? How Long Can You Pause For? – 3D Printerly
If you wonder whether you can pause a 3D print, you are not alone. 3D prints can last many hours, and even days in some cases, so being able to pause a 3D print would be very important.
Yes, you can pause a 3D print directly from your 3D printer’s control box. Simply click your 3D printer to bring up your standard options, then select “Pause Print” and it should pause and home the 3D printer head and print bed to the home position. You can simply resume the print by pressing the “Resume Print” button.
Keep on reading for more information about pausing your 3D prints, and how you can use them to your advantage.
Can You Pause a 3D Print?While it is not recommended that you pause prints, it is very possible to pause a 3D print. Even though 3D printers are designed to run for several hours, it may become necessary to pause prints for several reasons.
Some users are not comfortable leaving the printer running unattended for most of the day when they will be at work. Others consider running it overnight to be too loud since it may disturb people’s sleep.
As soon as you are ready to resume your 3D printing, open the UI and initiate resume. This will undo the pause command and return the 3D printer to the printing state.
If you don’t know where the pause print option is on your 3D printer, kindly read the manual.
You’ll notice a pause option on the user interface (UI), and this can be used to do following:
- Disable heating elements
- Changing filaments
- Changing colors after a certain layer
- Embed various objects into a 3D printed object
- Move the printer to a different location
It is possible to pause your 3D printer for as long as you want, as long as the 3D print stays in place and isn’t removed from the bed or jolted. There may be a mismatch on the layer depending on how well the printer resumes. People usually pause a 3D printer for a few minutes to a few hours.
Some 3D printers are going to perform better with pausing, especially if they are proven among 3D printer hobbyists, like the Prusa Mk3S+ or the Ender 3 V2.
The main goal with how long you can pause your 3D printer is being able to keep your 3D print from moving off the print bed.
The main reason why a 3D printer should not be paused for too long is as one user puts it, after leaving the printer to cool down totally, his print lost adhesion and failed.
The longer you leave a 3D printer paused, there is a higher chance of the print falling off.
For the most part, failures that happen from pausing a print occurs from warping which is when there are significant temperature changes in the extruded plastic.
For more information on how to pause a 3D print watch this video on pausing an Ender 3. The main thing you want to do is to make sure you initiate the SD card so you get the resume option.
Some people have mentioned that they paused a 3D print overnight. Their recommendation for doing this is that all the parts of the 3D printer must be in good condition.
Upon confirmation, you can turn off the machine, allowing you to take a long pause without any major negative impact.
Some users have paused their 3D prints for several hours and still successfully resumed the print. As long as your print stays in one place, you can pause it for a long time. Using adhesives can make your 3D prints stay in one place better.
To be on the safe side, some users recommend that you pause the print but keep the machine on. This can keep the build surface warm. As long as the build plate is warm, it won’t be too hard for the print to retain its shape.
To slow down the change in temperature, you may use an enclosure or a material that is known not to warp as much. The faster your 3D prints cools down, the more chance it has to warp and change shape. This could eventually lead to losing adhesion from the build plate.
You may also choose to break your 3D prints into smaller parts. This will ensure that you have a hard pause between printing each part without impacting the overall design negatively.
After that, you can simply bond the parts together using superglue or another strong adhesive.
Do 3D Printers Need a Break?A 3D printer doesn’t need a break as long as it is maintained properly and has good quality parts. Many people have printed for 200+ hours without any issues, so if you have a reliable 3D printer, your 3D printer won’t need a break. Make sure your 3D printer is lubricated well and has fresh belts.
3D printers are designed to run for hours and hours at a stretch, with some users confirming that they have kept it running for up to 35 hours. Others have 3D printers that can run for more than 70 hours.
Some 3D printers are better than others at running for longer periods of time. You want to test how your 3D printer runs because some can handle 3D printing for plenty of time while others might not do so well.
If you have a cheaply made 3D printer that isn’t very well known, you might just have a machine that won’t run for so long without needing a break. A popular and reliable 3D printer that has been tried and tested is a lot more likely to not need a break.
These have high quality designs and cooling systems that make sure the 3D printer doesn’t run too hot and can handle constant movement.
As long as everything is fine and no prior faults have been detected, your 3D printer should keep working flawlessly, even for an extended period.
If your 3D printer is not well maintained or has come of age, it may be beneficial if you subject the printer to short breaks at intervals. 3D printers are designed to be long-lasting, but not every part.
Each 3D printer should have Thermal Runaway Protection installed, which is a safety feature designed to protect your printer, your home, and the environment around.
The Thermal Runaway Protection works by checking the readings from the thermistor. If this firmware detects a more-than-required temperature, it automatically stops or pauses the printer until it cools off.
If after an extreme temperature is noticed the printer continues working, it could set the home on fire so having this protection is important, especially when running for long periods of time.
Can I Pause an Ender 3 Printer Overnight?Yes, you can pause an Ender 3 printer overnight by using the “Pause Print” feature within the control box. Make sure not to click “Stop Print” instead because this will end the print altogether. You’ll be able to easily resume the print in the morning.
You can even turn off the whole 3D printer and still resume your 3D print but you have to make sure you initialize your SD card, so your 3D printer recognizes that there is a print to resume.
On confirmation, it brings the nozzle back to temperature and on top of the previously paused 3D print to continue from where it stopped.
7 Important Tips for Pausing a 3D Print Overnight – Printing It 3D
Due to its initial patent holder being an appalling commercial failure, 3D printing is still a fairly new technology over 40 years after it was first invented. And like many technologies, it tends to go wrong the moment you turn your back. So what should you do if you want to pause a 3D print overnight?
Here are 7 important tips for pausing a 3D print overnight:
- Use the pause function.
- Turn the printer off.
- Use glue sticks.
- Minimize dust.
- Leave it alone.
- Keep pets and children away from the printer.
- Preheat the bed.
This article will explore tips for pausing a 3D print overnight.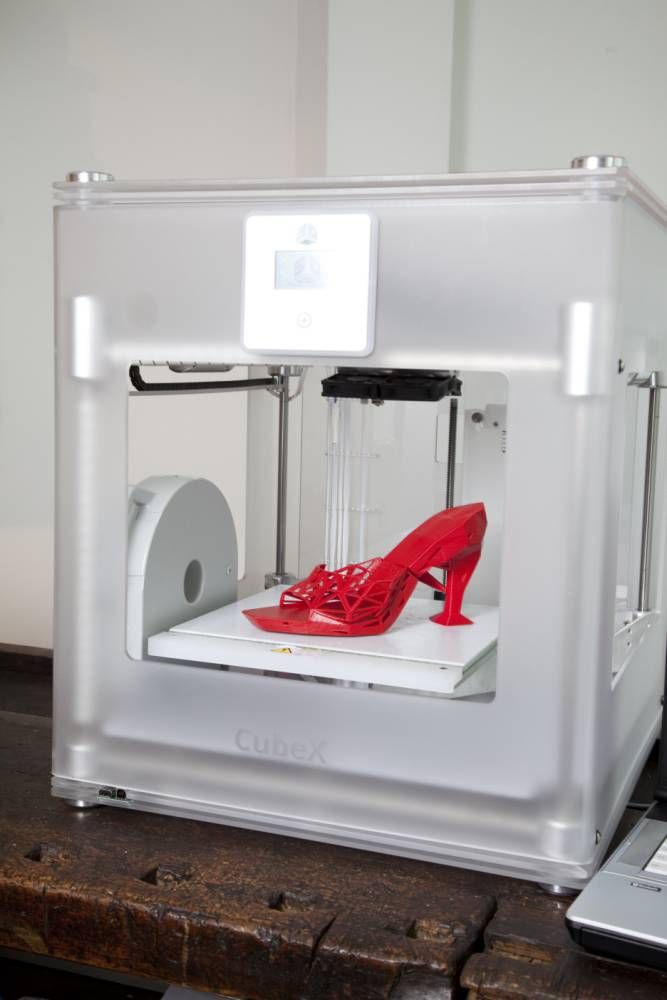 Later it will explore some reasons your printer may stop mid-job and how to restart a 3D print after a loss of power. But first, we will clarify whether or not you can pause a 3D print overnight. Note that some of the advice in this article applies to fused deposition modeling (FDM) 3D printers only.
Can You Pause a 3D Print Overnight?
While some FDM printer models are better at pausing print jobs than others, most commercially available printers can pause print jobs almost indefinitely.
The user interfaces of most FDM printers have the option to pause a print job. Furthermore, many slicer programs have the option to program pauses into the .stl files they generate.
Unless someone tampers with the printer, the only real problem that might develop is the incomplete printed object detaching from the print bed. You can do a few things to minimize the chance of this happening, which are covered below.
Tips for Pausing a 3D Print Overnight
1.
 Use the Pause Function
As above, most commercial 3D printers have a “PAUSE” function programmed into their user interface. Your printer’s manual should cover how to pause a print job.
When a pause is initiated, an FDM printer will remember its stage and go into its standby mode. Most printers will keep the heating element under the print bed turned on unless they are turned off.
2. Turn the Printer Off
Once the print job is paused, there is no reason to leave the printer on overnight. A paused printer will still use a considerable amount of power, and there is a small chance that it could overheat and catch on fire.
When you return to your printer, whether it is the next day or several months in the future, the print job can be restarted through the user interface.
3. Use Glue Stick
If you think you might have to pause a print job, it is a good idea to apply an adhesive agent to the print bed before starting. A glue stick will help keep the incomplete print adhered to the print bed.
As the print bed cools, it will contract a bit, and the incomplete object can delaminate from the bed. The glue stick will hold it in place while still being possible to remove from the bed when the job is finished.
If your incomplete object comes unstuck from the print bed overnight, you can secure it with either a glue stick or scotch tape.
4. Minimize Dust
Minimizing dust in the room where you make your 3D prints is a basic best practice, but it is also important when pausing a print job. If dust collects on your incomplete object, specifically the exposed interior, the dust will prevent new plastic from properly adhering when the print job is renewed.
Cover your printer with a cloth or tarp if you are away for more than a few hours. Another good idea is to have an air purifier nearby to remove dust from the air.
5. Leave It Alone
Once your printer is shut down and covered up (if you choose to do so), leave it alone until you are ready to resume the print job. Don’t push around the print bed or do anything to the object. You might dislodge the incomplete object or damage the printer.
6. Keep Pets and Children Away From the Printer
Another best practice is to keep your pets and children away from your 3D printer. Children are notoriously skilled at breaking their parents’ things and relationships.
If you are leaving an incomplete print job overnight, it is best to keep it behind a closed door to prevent beings who don’t know better from messing it up.
7. Preheat the Bed
When you are ready to resume your print job, preheat the print bed first. This will preheat the incomplete object, which will help additional plastic adhere to it and improve the structural integrity of the finished object.
Reasons a 3D Printer May Stop Midjob
Even if you don’t want to stop a 3D print part way through, your printer may stop on its own. There are four reasons a 3D printer may stop on its own. Thankfully most of them can be dealt with without much effort.
- Overheating
- Filament problems
- Nozzle clog
- Power failure
Overheating
3D printers use heating coils in their extruders and print beds and have other electronic parts which produce their own waste heat. And even with cooling places placed strategically in the extruder, FDM printers can still overheat. If they overheat, 3D printers are designed to shut themselves down to avoid damaging themselves.
Extruder Motor
The most likely part to overheat is the extruder motor. It moves a lot more than the other motors in your printer, and it is near a heating element.
Normally the extruder motor should be kept cool by the extruder cooling fan. But the fan can be clogged up with dust and debris. You can prevent this with proper maintenance.
Part of regular 3D printer maintenance is cleaning out the fans. The most effective way is pressurized air from either a compressor or a can. A cotton swab dipped in rubbing alcohol will do in a pinch.
If you wish to improve your extruder’s cooling, you can add heat sinks to it. Heat sinks are typically sold in batches or as part of kits for around $20 from Amazon or 3D printer manufacturers.
Thermistor Glitch
Another possible cause for a 3D printer thermal shutoff is a faulty thermistor, a variable resistor that adapts to temperature. Your printer’s controller monitors the current in the thermistor circuit, and if it reaches a certain point, it interprets it as an overheat.
Most 3D printers have two thermistors, one in the build plate (assuming it is heated) and one in the hotend. The “hotend” is the part of the extruder that heats up to melt the filament. The firmware of most 3D printers reports a thermistor glitch as a “MINETEMP” error.
The most likely cause of a thermistor issue is a break somewhere in the circuit. Unfortunately, there is not much to prevent this other than being very careful with working around the wires.
If there is a break in the circuit, it can probably be soldered. If the thermistor itself is faulty, it has to be replaced.
Before attempting to solve a thermistor error yourself, please consult with your print’s manual or other literature on the manufacturer’s website.
Filament Problems
It would be best not to leave a 3D printer unattended because something may go wrong with the filament. Your filament could run out, grind against the frame, or snap.
Depleted Filament
One of the most common issues in 3D printing is running out of filament. It isn’t easy to gauge how much filament is left on the spool. 3D printers are equipped with sensors that will automatically stop a print when the filament is depleted, but most do not.
There is at least a way to tell how much is needed for a particular job. Your slicer program should have a box where it lists the amount of filament required.
You can estimate how much filament is left on a spool using a postage scale and some math.
- Weigh a depleted spool.
- Cut off a meter/yard of filament and weigh it.
- Weigh your partial spool
- Subtract the weight of the depleted spool from your partial spool to get the weight of the remaining filament.
- Divide the weight of the remaining filament by the weight of the meter.yard from earlier. The result should approximate the length of filament left on your spool.
Grinding Filament
You have to be careful with how you run your filament from the spool to the extruder. If the filament rubs up against the printer’s frame or other parts, it can be gradually damaged. A damaged filament can jam in the extruder and eventually snap.
Most commercially available 3D printers mount filament spools so that the filament will not rub against anything. But some build-yourself 3D printer kits might not. If you build your 3D printer, make sure to run the filament to not rub against anything.
Snapped Filament
Even if the filament doesn’t grind against anything, it can still snap. Sometimes this will be due to mechanical stress, but usually, it is because of weakness or poor quality.
The key to preserving the strength of 3D printing filament is proper storage. Most filaments are made of mildly hydrophilic (water absorbing) polymers that will gradually absorb ambient moisture from the air. Moist is weaker than properly stored dry filament and is more prone to stringing.
You should store filament in an airtight container with a desiccant (drying) agent inside for the best printing results. A common desiccant is the silica gel packs included in most sealed consumer goods. Such packs are available on Amazon for pennies per gram.
Nozzle Clog
Another reason a 3D printer may stop mid-job is a clogged nozzle. The nozzle is the (usually) metal part of the extruder that places molten plastic.
A partially clogged nozzle will have an inconsistent flow of molten filament. A clogged nozzle will have no flow of molten filament.
There are five common causes for a clogged nozzle:
- Low hot end temperature setting
- Nozzle sitting too close to the built plate
- Dust or other debris caught in the hot end
- Improperly stored filament swollen with absorbed moisture
- Poor quality filament with an inconsistent diameter
The most common cause of nozzle clogging is debris caught in the hot end. That can be avoided with proper maintenance and cleaning. A low-temperature setting can be avoided by following the manufacturer’s guidelines.
The proper nozzle starting height for your printer will be in its manufacture manual or other literature.
How To Fix a Nozzle Clog
A partially clogged nozzle can be fixed with either the “cold pull method” or cleaning filament. The “cold pull method” is where you feed filament through the extruder at room temperature. It is a “brute force” method of cleaning your printer’s nozzle.
Cleaning filament is a special type made of proprietary uncolored plastic that works to dislodge material stuck in the nozzle. Cleaning filament typically costs around $20 for a few meters of filament.
Totally clogged nozzles typically are not worth repairing. Most nozzles are made of either brass or steel and cost less than $1 to replace.
Power Failure
The local power grid could fail at any time. It is a good idea to run your printer off of a combination surge protector and a backup battery. A good backup should provide enough power to either finish a small print or give you time to pause the job properly.
What if There Is a Power Failure During a 3D Print?
Most 3D printers automatically record their progress print jobs as they go. Once power is restored, the job can be resumed as if it was paused. But if for some reason, your 3D printer fails to do so, you can resume the print job with some additional steps.
Warning: this procedure requires doing some math!
- Fix the incomplete object in place with tape.
- Measure the height of the incomplete print as precisely as possible.
- Divide the measured height by the layer thickness.
- Edit the part file in your slicer program.
- Restart the print job.
- Post-processing.
Fix the Incomplete Object in Place With Tape.
The incomplete object may delaminate from the print bed. If your 3D printer loses power during a job, you should secure it in place with some tape. We recommend either scotch or painter’s tape, as they are inexpensive and do not leave residue behind.
Be careful not to burn yourself.
Measure the Height of the Incomplete Print
The key to “resuming” your print job is to start a new partial job on top of the incomplete object. Measure the height of the incomplete object from the print bed as precisely as possible. It is best to use a decimal ruler or a pair of calipers.
Use the same measurement system as your slicer program. If your slicer uses metric, measure the incomplete print in metric.
Divide the Measured Height by the Layer Thickness
Using the black art of math, you have to determine the printer’s layer when the power failed.
In your slicer program, look for layer thickness. Divide the height of the incomplete print by the layer thickness. The result will be the last layer printed.
Use this formula:
HeightLayer Thickness= Last Layer
The result should be a whole number.
If the printer stopped partway through the last layer, you could remove the partial layer with medium-grit sandpaper.
Edit the Part File in Your Slicer Program
Now return to your slicer program. Edit the settings to begin at the layer after the last one printed. If your print stopped at layer 233, tell the slicer to start at layer 234.
Make sure the slicer is set up to print in the same place as the incomplete print and the unfinished object is still correctly aligned. Then generate your g-code and hope for the best.
“Restart” the Print Job
Enter the g-code for the “resumed” job into your printer, start the printer and cross your fingers.
Post Processing
If everything works out, your printer should print the remainder of your object on top of the incomplete object with no issue. There may be some aesthetic imperfections, stringing, or smudges, which can be removed with basic post-processing.
What to do if the 3D printer stops? How to continue printing
There are situations when for some reason the 3D printer has stopped printing. And for many, this is a problem, because if a couple of layers were printed, then you can start printing again and it's not expensive. But if the model was printed halfway or even more, then spending time again on a new print, wasting material again is too expensive.
There may be a number of reasons why printing has stopped:
- commonplace power outage;
- printer failure;
- clogging of the extruder nozzle;
- layer peeling and other incorrect printing problems.
Not all printers have the option to resume printing from a specific location. Moreover, they are currently in the minority. And so you have to solve all the problems yourself.
This material is devoted to this problem. We will look at Gcode and a universal way to continue printing from a specific layer.
How does 3D printing software work?
This is the first question to be dealt with. Any 3D printer works on the same principle, regardless of the printing technology. The model is first divided into a large number of the thinnest horizontal layers parallel to each other. If printing is carried out using FDM, DLP technologies, then each layer is divided into many lines, which, as it were, are drawn by a print head or a laser. In the case of DLP technology, each layer is a bitmap, which is highlighted immediately. In this case, the line width for the FDM printer will be the diameter of the nozzle selected for printing, and the height will be set by the layer thickness. That is, a certain route is set for the extruder, so to speak, a map along which it will form a layer. This map will be presented as a specific set of commands. It is this set that is called GCode. This code is generated by special programs in automatic mode. These programs are called slicers. They cut the model into layers according to the given parameters and form the GCode. Prominent representatives of such programs are Cura, Slick3r and others.
In G-code, each printhead path vector is specified by Cartesian coordinates. In addition, the code file contains a number of other information:
- movement speed;
- temperature;
- extrusion speed, etc.
Initially, GCode was developed specifically for CNC machines, so it can contain a variety of functions, commands. However, for 3D printers, GCode is much easier.
Slicers that work with 3D printers that print using SLA technologies, DLP work on a slightly different principle, and the generated code itself will contain slightly different information, since the plastic is not extruded, it is not the print head that works, but the laser controlled by projectors, galvanometers, mirrors, etc. In DLP, in general, the entire layer is illuminated at a time, that is, with a single spot.
Resuming printing with Cura slicer on FDM printers
Consider the process of resuming printing using the example of benchy, a well-known 3D model. And the first advice is that you should not move an underprinted model, since it will not work to install it in the same place with an accuracy of millimeters.
This method allows not only to resume printing from a certain place in case of failure or force majeure, but also when printing a model with one extruder, but with different materials or plastic of different colors. To do this, you first need to make GCode in manual mode, and during printing, stop the machine and change the thread.
So, the first step is to measure the height of the resulting product. To do this, you need to use a digital caliper. The more accurate the metering, the less noticeable will be the place where printing was paused.
The second step is to use the Cura slicer to find the correct layer for the height of your print. In our case, the height was 12mm. Printing was carried out at a layer thickness of 0.15 mm. So in GCode this data will correspond to layer number 80.
The SciTE program is used to edit sources. We use it for the next step - we open our GCode in it. This software is simple and intuitive. When opening a file with a code, be sure to select "All files".
The next step is to find layer 80 in GCode. To do this, declare a search: "Sear > Finde > LAYER:80".
The cursor is positioned at the end of layer 79. While holding SHIFT, move to the beginning of layer 1 and click on it. As a result, everything that corresponds to the already printed area will be selected. Delete the selected area. Next, you need to save the result and, if necessary, manually prescribe the resolution.
As a result of these manipulations, you get a new GCode, according to which printing will start from the layer you need. This code needs to be checked in Cura.
Slicers that are designed for printing using SLA, DLP technology, support the function of resuming printing from the right place if it is interrupted.
10 reasons to use OctoPrint for 3D printing
3DPrintStory Reviews 10 Reasons to Use OctoPrint for 3D Printing
Surely everyone had problems with 3D printing, which was left overnight in the hope of getting a finished 3D model in the morning. Or it was simply not possible to constantly monitor the 3D printing process in order to stop it in time. e in case of an error. It is this problem - the problem of monitoring 3D printing - that is solved with the help of the wonderful free and open source software OctoPrint.
OctoPrint is a Raspberry Pi-based 3D printer application that allows you to remotely control your 3D printer. Created by Gina Heusge in 2012, the software is constantly being improved with new versions and new features (via plugins) coming out regularly.
In this article, we highlight the top 10 reasons to use OctoPrint. Some of the problems in this list are solved with the help of additional plugins. By the end of this list, you'll probably want to try OctoPrint if you haven't already.
Wireless 3D printing
Many budget 3D printers do not provide the ability to control or monitor the 3D printer wirelessly. Models must either be downloaded to an SD card or transferred directly via cable. These connection options have their limitations. OctoPrint offers an excellent solution to this problem.
As we briefly mentioned earlier, OctoPrint provides software that is installed on the Raspberry Pi and then connected to the 3D printer. Thanks to the wireless capabilities provided by Raspberry Pi, you can control your 3D printer wirelessly via LAN.
OctoPrint allows you to remotely send G codes, control the temperature of the extruder and hot end, monitor the 3D printing process, and much more. Thanks to OctoPrint's wireless 3D printing capabilities, you can always control your 3D printer, even if you are not physically present.
3D printing from anywhere in the world
As you know, wireless 3D printing is convenient if you are at home and on the same network. But what if you left home and wanted to start printing and was finished when you got home? Or what if you want to keep an eye on the 3D printing process when you're not at home?
Plug-in OctoPrint Anywhere allows you to manage (start and stop) and control 3D printing from literally anywhere. This is a website that can be accessed from your computer or mobile device.
This plugin has a lot of fans, but keep in mind that the OctoPrint developers recently announced that it will eventually be replaced by a more elaborate and updated plugin called Spaghetti Detective.
View G-code
Typically, OctoPrint users monitor the 3D printing process via a webcam connected to their Raspberry Pi. However, if you don't have a webcam or just want to check your 3D print in a different way, the G-code viewer is a great tool.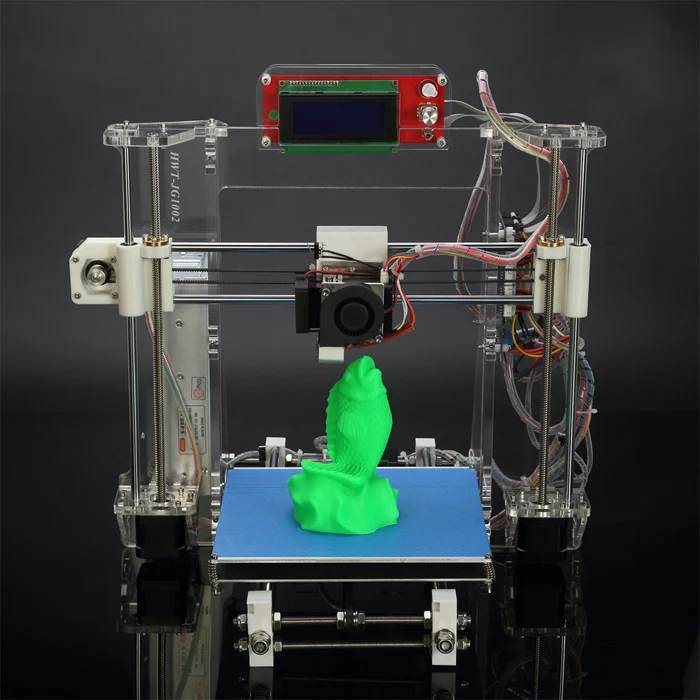
This underrated OctoPrint feature shows nozzle position and layer number in real time. You can also find the status of your 3D print in the window just below the renderer, which shows the current G-code commands being sent to the 3D printer.
Commands from the terminal
The ability to send commands from the terminal is a great feature for more advanced users. You can view the codes sent to the 3D printer in real time.
One of the most useful features is sending custom G-code commands to your 3D printer. Instead of relying on another program to communicate with your printer, such as Pronterface, you can directly send commands to the OctoPrint terminal.
This feature can be useful in a number of scenarios. If you need to calibrate your 3D printer, you can view the existing system presets in a terminal command. Some commands also allow you to enter and save new calibrated values. This is a very handy feature for those who like to tinker with their 3D printer at a deeper level.
Slow motion
You know that 3D printing is a long process, it can take hours to print one model. Setting up a time-lapse video allows you to view the entire 3D printing process, which lasts several hours, in a matter of seconds.
With OctoPrint and with a camera connected to your Raspberry Pi, you can capture excellent 3D printing time-lapse video by setting the frame rate and interval between shots. For true enthusiasts, there are also more advanced customization options.
OctoPrint stores the timelapse locally on the Raspberry Pi and you can download it to your computer. Another useful feature of time-lapse video is the ability to determine the exact cause of a 3D print failure, or at least the point at which the failure occurred.
Octolapse is a plug-in that builds on the functionality of OctoPrint's Timelapse section to produce cleaner, crisper videos.
Slicing 3D Models in the Cloud
Cloud Slicing, as the name suggests, is a remote slicing feature that allows you to slice your 3D models without actually installing the slicing software on your computer. Model slicing is performed using a plugin installed on the Raspberry Pi.
Consider the scenario where your laptop is full of applications and you can't/don't want to install a new slicer. Or imagine not wanting a slicer for every computer you use. This is where the Cloud Slicing plugin fits in perfectly. This feature uses the Cura or Slic3r engine plugin.
Touch screen for user interface
Touch screen user interface has become the norm for many everyday devices. However, many 3D printers still lack this useful feature.
With the OctoPrint TouchUI plugin, you can add this feature and display the OctoPrint interface on the touch screen. This plugin will allow you to use OctoPrint without connecting a computer. The user interface on the touch screen is very similar to that in the browser, so the transition in terms of learning a new interface will not be difficult.
Installing a touch screen can seem like a tedious task, but there are plenty of tutorials and videos to help you through the process.
Open-source community
Individual developers have spent hours of their time improving 3D printing, including free and open source programs such as Marlin, Cura, and OctoPrint itself.
OctoPrint's popularity is largely due to open source and free access. All source code is available on the GitHub page. Thanks to this, many users and developers have shared their ideas and brought them to life. User-developed plugins greatly extend the functionality of OctoPrint.
Manage multiple 3D printers
As you can imagine, this function is useful when you are working with more than one 3D printer. You can connect multiple webcams to one Raspberry Pi.
The video below shows instructions (in English) on how to install three printers on a Raspberry Pi:
Another option is to use OctoFarm, a free and open source service that allows you to control and monitor multiple 3D printers on a single Raspberry Pi. With it, you can monitor multiple 3D printers on the same screen, send files for 3D printing, and monitor the printing progress.
List of useful plugins for OctoPrint
In general, it is quite difficult to make the top 10 useful OctoPrint features, as the list is really huge. So below is a small selection of additional plugins that will help you simplify and secure the 3D printing process.
- Pushover: This plugin sends you push notifications when a print is completed or 3D print fails for some reason. A simple and very practical plugin.
- Heater timeout: It often happens that the 3D printer stays on and the extruder is still hot, which can cause a fire. This heater timeout plug-in disables hot end heating after a set amount of time. This will help you avoid potential fires and excessive electricity bills.
- Emergency stop: there is always the possibility that something might go wrong during 3D printing. This plugin adds a large red bar at the top of the OctoPrint user interface which, when clicked, will stop the 3D printer from working.

Learn more