Objet 3d printers for sale
Objet30 Pro 3D Printer Review 2022
4.6
See Price
Stratasys’ ambition with the Objet30 Pro is to offer the precision and adaptability of an industrial-grade fast prototyping printer within a device with physical dimensions nearing those of an inkjet printer or office photocopying machine – a compact workhorse capable of highly detailed prints.
We’ve taken a look at the Objet30 Pro to see how well it lives up to these claims. Here’s our honest opionion.
| Printing Area | 294 x 192 x 148.6 mm |
| Layer Resolution | 16 to 28 microns |
| Supported Filament | Rigid Opaque, Transparent, High Temperature, Simulated Polypropylene, FullCure |
| Printing Tech | PolyJet |
| Extruders | 2 |
Table of ContentsShow
Design & Features
Touted as a desktop printer, the Objet30 Pro has all the allure of a professional grade printer with a sleek black and white color scheme that shapes a rectangular body that interestingly curves inwards vertically towards the center of the unit. The plastic casing will be familiar to anyone having used a consumer-grade ink printer making it very much at home in a design studio, home office or university alongside similar devices.
The total weight of the printer is a robust 106 kg, which apart from making transportation a hassle, ensures near unwavering stability, even when the print heads are whizzing away at the highest speed setting.
The components are all heavy duty and of the highest quality, positioned for maximized functionality but also a certain aesthetic, mechanical appeal especially when opening the hood and peering inside. The extruder mount can only be described as chunky with one of the most prominent profiles we’ve come across from a printer with this footprint.
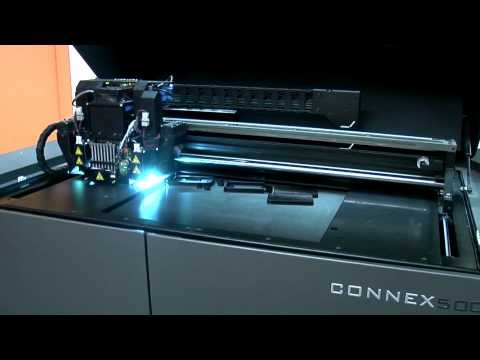
The Objet30 Pro employs Stratasys’ patented PolyJet printing technology, which sits somewhere between typical FDM and precision SLA printers. The process resembles the inkjets found in standard printers whereby a jet places drops of liquid photopolymer material onto the build plate and then hardens or cures it by shining UV light onto it. This method is uncommon with results that offer precision unseen in printers using FDM technology.
The build area tallies up to 294 x 192 x 148.6 mm with axis resolutions of 600 dpi, 600 dpi, and 900 dpi for the X-axis, Y-axis, and Z-axis respectively. Generally speaking, the Objet30 Pro attains software to real-world print accuracy levels correct up to around 0.1mm, but this vacillates important waging on the type of model, size, the materials used, and the complexity of the design.
The Objet30 Pro has a dual extruder setup; one for printing material and the other for support material, both sitting alongside the UV light that does the curing work. The configuration allows layer resolutions ranging from 16 to 28 microns depending on whether it prints on the high quality or high-speed setting. The precision makes it one of the most detailed printers on the market regardless of cost and is a world away from the 100 microns best of most consumer models.
The material support of the Objet30 Pro is where the printer comes into its element with different liquid photopolymers endowed with a range of physical properties for all manner of situations, the only real downside being that only materials sourced from Stratasys are compatible.
Rigid Opaque in white, black, gray, and blue allow for high detailed prints that reach the quality level of end products for prototyping. Transparent VeroClear is ideal for fine-modeling used to simulate end-product transparent materials. High-Temperature RGD525 is geared towards functional testing for scenarios where high temperatures, be it air or liquid, are required. Lastly, the printer supports DurusWhite Simulated Polypropylene designed for durability and robust usage for example low tolerance hinges and snap-fit products.
The printer also uses the non-toxic gelatinous FullCure 705 support material that is not only ideal for crafting complex overhangs and the like but is removable via the DT3 Clean Station that ships with the printer.
The materials are housed in a convenient slide out draw sitting below the main printing area. Should any of the liquid photopolymer cartridges run dry, the printer has an inbuilt feature that pauses the building process to allow the user to load in a replacement, when the device picks up where it left off.
Connectivity is limited to a local network via ethernet cable, which is the standard for industrial sized printers that need a connection to multiple workstations.
As for software, the Objet30 Pro functions with Stratasys’ Objet Studio that converts any STL or SLC 3D CAD file into a sliced model that the printer can interpret and render. All controls are managed from Objet Studio with no LCD or controls on the printer itself.
Functionality ranges from automatic support creation, a range of editing tools, material selection, auto-positioning, maintenance, and the like. Compatibility is reserved for Windows systems. Overall, Objet Studio is as intuitive as it is versatile and rivals open source slicers such as Simplify3D.
Assembly
The Objet30 Pro arrives fully assembled with no installation other than fitting the liquid photopolymer cartridges into the loading tray and loading the roller bath/blade assembly into its berth below the build plate.
The package includes the Objet30 Pro waste containers, roller bath assembly, wiper blade assembly, sanding sponge, ethernet cable, nozzle ruler, loupe, tool kit (scraper, Allen key, mirror, spatula), cleaning cloths, transparency sheets, pink paper, nitrile gloves, scale, spray bottle, support cleaning fluid, model cleaning fluid, user guide notebook, USB flash drive, and a stylus pen.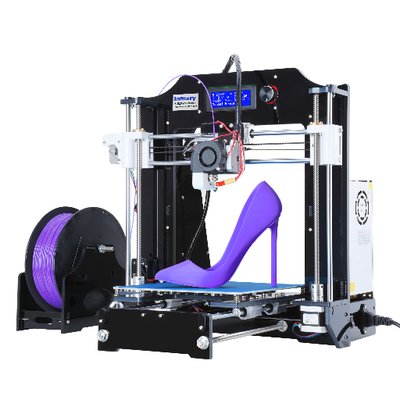
Due to its complexity, the Objet30 Pro does require quite a bit of maintenance from cleaning the innards, replacing printheads, emptying waste containers, but nothing a versed lab or office technician couldn’t handle.
Printing
For a price tag nearing $20,000, we wouldn’t accept anything short of extraordinary, and the Objet30 Pro fits the bill. Prints are more or less immaculate, and the range of printing materials allow a varied selection of models. All our test prints were smooth, precise, and showed a level detail usually found in pre-assembly line models. We encountered no issues whatsoever with the printing process.
The results are suited to all manner of ends from engineering, consumer goods, low tolerance prototyping, end-user small scale manufacturing, dentistry, electronics, medical, and of course design. Virtually any industry can benefit from the quality of the prints generated by the Objet30 Pro.
Objet Studio is packed with choices and is incredibly simple to use even though it controls such a strong beast of a machine.
Support
As you’d expect from Stratasys, the support is of the highest caliber with a rich vault of guides, tutorials, and videos peppering its web site alongside the Stratasys Service Offering which includes on-site technical service and maintenance, part replacement, user training seminars, and discounts on accessories among other benefits.
Additionally, technical support teams are available throughout the world through phone, email or in person support. The printer itself ships with a standard one-year warranty.
Verdict
When reviewing leviathan grade printers with all the bells and whistle it is hard to produce a verdict other than excellent, but then again this is very much expected from the associated price tag.
The Objet30 Pro follows suits, and if you’ve got the budget to match (including maintenance and on-going production costs), then you quite simply can’t go wrong with this model.
It comes highly recommend for any professional context in need of a reliable, versatile, and precision-oriented 3D printer that won’t take up too much space yet deliver the same level of quality as pricier alternatives.
3D Printing - Sales, Service and Support
SEE CURRENT 3D PRINTING PROMOTIONS
ADDITIVE MANUFACTURING Solutions and Technology
800-688-3234
Which 3D Printing Technology is Right For You?
FDM
- Durable Parts
- Large Build Envelopes
- Prototype and Test
- Uninterrupted Builds FDM 3D Printers
POLYJET
- Realistic Models
- Multi-Material Prints
- Full-Color Pantone
- High Run Quantities PolyJet 3D Printers
METAL
- SupportFree
- Production Level Parts
- Multiple Metal Materials
- Print Low Angles Metal 3D Printers
P3
- Programmable PhotoPolymerization
- High Output Resin
- High Performance Materials
- Repeatability Production P3 Printers
SAF
- Selective Absorption Fusion
- High Demand Output
- Accuracy and Repeatability
- Cut Hidden Costs Production SAF Printers
Stereolithography (SL)
- Open-source Material Capability
- UV curing oven
- High Quality Parts
- 3-axis Dynamic Scanning SL 3D Printers
FDM
– Durable Parts
– Large Build Envelopes
– Prototype and Test
– Uninterrupted Build Times
FDM 3D Printers
POLYJET
– Realistic Medical Models
– Multi-Material Prints
– Full-Color Pantone
– High Run Quantities
PolyJet 3D Printers
METAL
– SupportFree
– Production Level Parts
–
Multiple Metal Materials
– Print Low Angles
Metal 3D Printers
Stereolithography
– Scalable Fabrication
– P
recision Parts
–
Open-source Material
– U
nprecedented Speeds
Stereolithography 3D Printers
DON'T MISS THese UPCOMING WEBINARs!
Leveraging Additive Manufacturing on the Factory Floor - Part 1
February 17, 2021, 11:00 AM - 12:00 PM, CDT
In this two-part webinar series, we talk about how 3D printing can help you produce more, increase the quality, and reduce the cost of your jigs, fixtures, and manufacturing aids. We will also discuss a few customer success stories, as well as the Stratasys printer and material portfolio.
Leveraging Additive Manufacturing on the Factory Floor - Part 2
February 24, 2021, 11:00 AM - 12:00 PM, CDT
In this two-part webinar series, we talk about how 3D printing can help you produce more, increase the quality, and reduce the cost of your jigs, fixtures, and manufacturing aids. We will also discuss a few customer success stories, as well as the Stratasys printer and material portfolio.
3D Printing Services
AWARD WINNING TECHNICAL SUPPORT
GoEngineer’s extensive technical knowledge can assist with your additive manufacturing needs. Our Award winning team is ready to help. Reach out and see why GoEngineer is the #1 reseller of SOLIDWORKS and Stratasys systems in the world!
LEARN MORE
ADDITIVE MANUFACTURING TRAINING
Learn to utilize all features and tools of Stratasys commercial 3D printers with GoEngineer additive manufacturing on-boarding training. Take advantage of our 3D printing team of experts to help launch all your 3D printing capabilities.
LEARN MORE
3D Print and Part Design
No matter your size, quantity or complexity of part(s) needed, GoEngineer can help you! Take advantage of our 3D Printing and Part Design Services to help your organization produce the best parts and prototypes available on the market.
LEARN MORE
Additional Resources
Take Advantage of GoEngineer’s Extensive Knowledge Base and Resources
Find a Solution
Our robust Knowledge Base contains over 12,000 resources to help answer your product design questions. From basic CAD questions to in-depth guides and tutorials, find your solution here. Find a Solution
PROFESSIONAL TRAINING
Improve your skills with professional training and certifications in SOLIDWORKS, CAM, 3D Printing, and 3D Scanning offered four ways: self-paced, online, on-site, or in-classroom. Certified Training Courses
BLOG
#1 Technical Resource Worldwide - Right at your fingertips. Search or browse through hundreds of SOLIDWORKS tips & tricks, additive manufacturing product developments, announcements, how-to guides, and tutorials. Blog
YouTube Channel
Our YouTube channel hosts hundreds of educational tutorials, product demonstrations, recorded webinars, and best practices for all of our products and services. GoEngineer's YouTube Channel
ONLINE STORE
Order 3D printing materials and consumables, enroll in SOLIDWORKS training classes, and buy official GoEngineer gear directly from our online store. Online Store
FREE SOLIDWORKS Tools
Enjoy this collection of small ‘macros’ that were tailored to help our customers. These free SOLIDWORKS tools are for you to use, review, and modify. SOLIDWORKS Automation Tools
WEBINARS
Our engineering webinars are hosted by some of the top experts in the industry. They are always recorded, always free, and always offer a live Q&A. WEBINARS
3D Printing Services
Need to 3D print a part? Our Additive Manufacturing experts will 3D print your part and deliver it to you using the latest technology on one of our professional FDM, PolyJet, SL, or Metal 3D printers. 3D Printing Services
Frequently Asked Questions・Cults
What is 3D printing?
This is a 3D printing process that creates a real object from a 3D digital file. There are several ways to achieve this goal, all based on depositing and solidifying the material layer by layer.
How to print in 3D?
3D printing is very easy. Just download the digital model for 3D printing (for example, on Cults). Typically, a 3D file is in the .STL or .OBJ format. When you restore the file to your computer, you must import it into your 3D printer software called a cutter. You enter into the cutter all the necessary settings for preparing the print (size, temperature, infill, etc.). When your 3D model is ready, you just need to convert it to gCode from your cutter. You will then place the gCode on an SD card or USB drive to connect it to your 3D printer and start 3D printing. You can also use our Maker Tools which lists all the necessary 3D printing software. nine0006
What is an STL file?
An STL file is a common file format for 3D printing. It stands for Stereolithography and was invented in the 1980s by one of the founders of the 3D system. An STL file for a 3D printer allows you to create mosaics from triangles. These triangles share edges, which means that the machine can know their location and location. This format does not include information about color, texture, or other common CAD model parameters. You can also use the OBJ format for 3D printing. You can learn about different formats of 3D printable files here. nine0006
How to create a 3D model?
To model an object in 3D, you will need special 3D software. The software should also allow you to export your creation to a 3D printable format such as STL or OBJ. There are several solutions for creating 3D files, but if you are a beginner, we recommend the free online 3D modeling software Tinkercad. Depending on your level, you can use more professional software such as ZBrush, Solidworks or Blender. A complete list of 3D modeling software can be found in this article which lists the best 3D modeling software. You can also use our Maker Tools which lists all the necessary 3D printing software. nine0006
Can I print in color?
Some 3D printers can print in color. In this case, the information must be reported in a 3D file. The cheapest printers so far only print in one color.
What material can I print?
It depends on your 3D printer, the most common material is plastic (ABS or PLA), but you can print metal, silver or wood. For more information, you can read our article 3D Printing: An Introduction to Various Technologies. nine0006
What is the maximum object size??
Again, this depends on your 3D printer. More precisely, it depends on the size of its printing plate.
What is 3D streaming?
This is a process where models are sent directly to the 3D printer without having to download them first. It is a solution that offers the ability to secure and control the exchange of 3D files.
How to fix 3D printing problems?
Personal 3D printers are still at the stage where not all 3D printed objects turn out well the first time. You will have to do this several times, and start printing again and again, changing some parameters. It is learning and knowledge that will be gained over time. The more you create in 3D, the more you will know your 3D printer and create more and more successful objects. We have listed an entire guide to Cults that will allow you to troubleshoot and fix 3D printing problems. A very good document for all beginners! You can also view our Maker Tools which lists all the necessary 3D printing software. nine0006
How do you dispose of your 3D prints?
As we all know, 3D printing can take a long time from now on and take over all your drawers and cabinets quickly! This is a very good sign because it means you are fully using your 3D printer. To make the most of this, we have listed a few tips that will allow you to reuse items.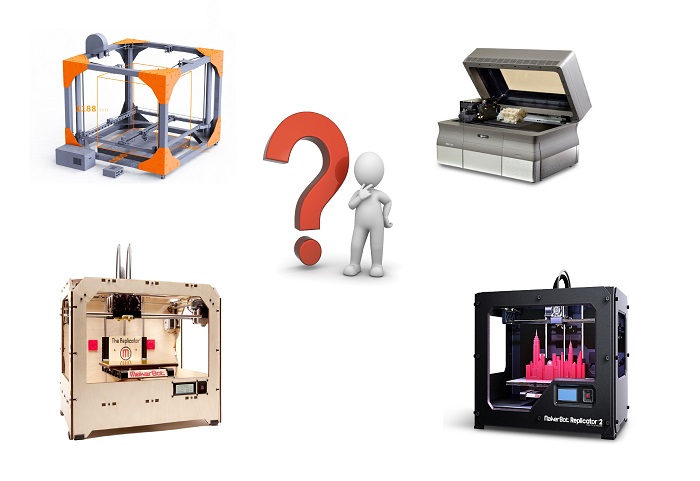 For example, in this article we explain how to recycle or reuse your empty fiber spools and in this article we explain how to recycle or reuse your failed prints. Useful and original tips that will make your hobby 100% enjoyable! nine0006
Is 3D printing compatible with food contact?
This concern is often expressed in the manufacturing community. Indeed, some fibers are not recommended for use in foods. But today there are many harmless materials that can be eaten or drunk. For example, PLA filament, RepRap PP or PETG plastic.
How do I join the community and sign up for Cults?
Create an account by clicking Community. By filling out a short form, you will officially become a Cults user. Alternatively, you can also go to this page https://cults3d.com/en/polzovateli/vhod and enter your email address, username and password, or use one of the social network login buttons. nine0006
How do I upload my 3D models to Cults?
To upload one or more of your 3D files, simply click the Upload button in the upper left corner of the horizontal menu. After that, you will be taken to this page: https://cults3d.com/ru/zagruzhat. Then you will need to click on the "Add 3D Model" block. If you are not yet registered on the platform, you will need to create an account, otherwise you will just need to log into your Cults account. Then you only need to fill out a form with the name of your creation, its description, 3D files, images, etc. Then on the second page, you will need to select the price and license applicable to your 3D model. When all these steps are completed, your creation will be online! If you're still undecided about publishing your models on Cults, feel free to read this article Why publish your designs on Cults? List of advantages and benefits to get an idea. nine0006
How can I share my Makes (photographs of 3D printed objects) on Cults?
To share photos of your 3D prints made from files uploaded to Cults, simply click the Upload button in the upper left corner of the horizontal menu. After that, you will be taken to this page: https://cults3d. com/ru/zagruzhat. Then you will need to click on the "Add brand" block. If you are not yet registered on the platform, you will need to create an account, otherwise you will just need to log into your Cults account. Then you only need to fill out the form by first selecting the appropriate 3D file from the drop-down menu, a description of your 3D print, settings used, photos, etc. When all these steps are completed, your make will be online! nine0006
How can I download 3D files?
Downloading some STL files is very easy. You just need to click on the purple "Download" button in the top right corner of each page of creations. Then click the "Upload Files" button on the last page. Your downloads will start after clicking on "Download Files" and will appear in a special download folder defined by your internet browser. Please note that you must be logged into your Cults account before doing so, or register if you are a new member. nine0006
How to buy 3D files for 3D printing?
To buy 3D files, you just need to click the purple "Download" button in the upper right corner of each creation page. Then you need to go to the shopping cart and confirm it by clicking the purple "Proceed to download" button. And choose your favorite payment method. You can choose to pay by credit card or PayPal. Finally, on the last page, click the Upload Files button. Please note that you must first log into your Cults account or register if you are a new member. nine0006
How can I find downloaded files?
It is very easy to download the file you have already downloaded. Connect to Cults with your login, go to your personal account to see all your orders: https://cults3d.com/ru/zakazy. Click the purple Download button on each row on the right side of the page and download your ZIP files by clicking the Get Your Models button.
How can I create a collection on the site from my designs or my favorite designs?
- To create a collection, simply click on the "New Collection" button on this page, and then click on the "Add to" button located below the "Upload" button on each design page you wish to add to the collection.
 You can also create a collection directly from the suggested options after clicking the "Add to" button by selecting the "New Collection" option. nine0076
 - To remove a design from a collection, you can uncheck the collection from the drop-down menu after clicking the "Add to" button.
- By clicking on the three small dots of each collection you have created, you can select:
- switch the collection to "private" mode: it will be visible only to you in your personal account
- or share it in "public" mode: then it will be visible to everyone and available in the "Community Collections" section and on your Cults profile in the "Collections" tab. nine0076
- If you're a designer and want to organize a lot of your work on your profile, it's very easy. Just create a public collection, but choose only your own designs. This way, your themed "Featured" designs will appear right above your designs on your profile, in the "3D Models" tab. They will also appear in the Community Collections section, on your Cults profile under the Collections tab, and of course in your personal account.

- Collections are displayed in chronological order of creation. nine0076
How do I organize my collections?
It's quite simple. You can go to your Design Collection Page, click on the three-dot menu, and select the Climb option. This will move your collection higher in your listing.
How to save creations on the site?
It's very easy to save a 3D file for later use. Just click on the "Add to" button below the "Upload" button. You can then click on the "Collection" you want or create a "New Collection". After that, you can find all the saved files in the collection in your personal account. To cancel saving, you can simply click on the "Add to" button again and uncheck the collection where the design is already saved. nine0006
What if I don't have a 3D printer?
With Cults you can get a 3D printed object even if you don't have a 3D printer. It is very easy to do this. Select the desired 3D model, upload it and at the end of the upload process you will be able to select the "Compare Craftcloud 3D Printing Prices" option. This will give you the opportunity to get multiple quotes based on the materials you choose; then order professional 3D printing and have it delivered to your home.
You can also check out our list of online 3D printing services here to choose the right 3D printer for you. nine0006
How do I edit my profile?
To change your username or profile picture, or edit your entire profile, you can go to your personal account at this address: https://cults3d.com/en/profil/redaktirovat and edit the relevant fields.
How do I change my account URL?
Your URL was chosen based on your alias, unfortunately it is not possible to change it at this time.
What if I forgot my password? nine0004
In the login form you can request a new one by e-mail. If you have forgotten your email, there is nothing we can do for you.
How to become a seller?
By default, your account is configured as a community member. When you upload your first creation, you are officially a Cults seller. To do this, just click "Download" (yes, we thought of everything).
How to get money from sales?
To withdraw money, go to your personal account in the Sales section. Payment threshold is 10 € . Transfers are made manually via PayPal after you have activated the "Request Payment" button located in your personal account.
What if I don't have PayPal access to earn money from sales?
PayPal is restricted in some countries. In addition, in exceptional cases, we may use an alternative payment method to send you money from your sales. Alternatively, we use the Payoneer solution. In order to get a refund on your sales through Payoneer, you must register with Payoneer and make a Payoneer "Request for Payment" sent to [email protected]. This payment request must match the exact amount of your unlisted threshold or it will be rejected. The minimum threshold at which Payoneer will be able to send a "payment request" is 300 euros. nine0006
How can I increase the popularity of my 3D models?
Do you want to make your creations more visible? Check out our Cults tips to increase downloads and sales of your 3D files. By following these tips, you will definitely reach the maximum number of people who will be interested in your creations. To enable you to take full advantage of our platform.
What are the payment methods for purchasing 3D files?
Cults offers the option to pay via PayPal or credit card. Your purchases are 100% secure. For PayPal, you can pay from your PayPal balance or use your credit card through PayPal. Otherwise, our Stripe online payment system allows you to use your credit card directly. We accept Visa, Mastercard, Maestro, JCB, Discover, American Express, Diners Club International and UnionPay. If you are unable to pay for your purchases online, please contact us via our contact form. nine0006
My upload didn't work!
Don't worry, you also received a download link in your email. You can download your files later. All purchased files are also available in your personal account here: https://cults3d.com/en/zakazy, you can download them whenever you want.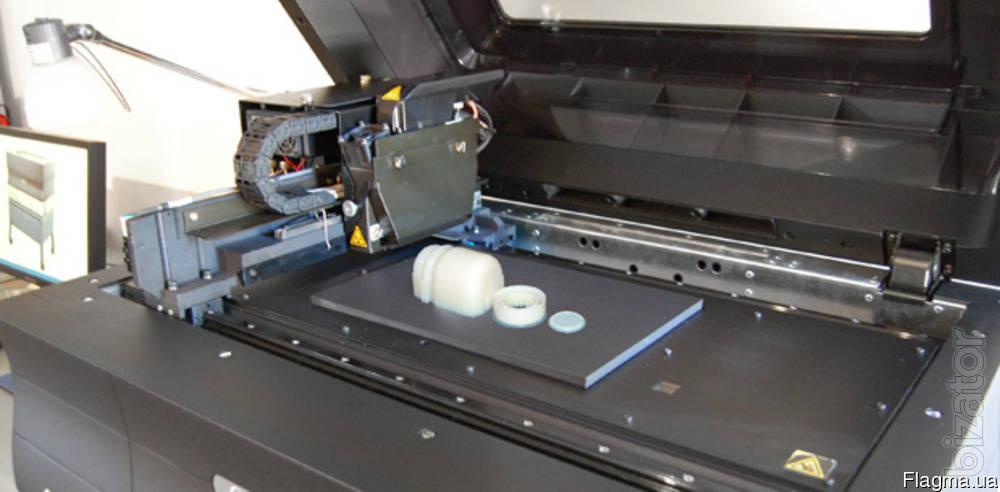
Why do I get a message that the 3D file is corrupted when I unzip the file?
The problem is probably that you haven't installed any 3D software to open the STL file on your computer. When you extract the downloaded ZIP file on your computer (you also need a file extractor), we recommend that you install the free Meshmixer software to open the STL file. You can download Meshmixer here, it's a very good software and it's free. This will allow you to edit and modify the STL in the future. Or you can just open the STL files in your 3D cutter and it will work without any problems. nine0103 Otherwise, the problem is with the unzipped software. We recommend that you download your order again (for free) here: https://cults3d.com/en/zakazy. Then unzip files downloaded online through this website: https://unzip-online.com/en or use other software such as The Unarchiver.
Finally, another source of the problem could be a connection problem during boot. This means that the file was not loaded correctly. This can happen if the files are large and contain multiple 3D models. So make sure you have a good connection and don't get interrupted during your new trial downloads. nine0006
You can also check out our Maker Tools, which lists all the major 3D printing programs, they might be helpful!
How to use the RAR file?
When you unzip your ZIP file, it may also contain a RAR file inside. It is also an archive file (like a ZIP file) that you will need to unzip. To do this, you will need a suitable program capable of unpacking RAR files. You can visit this page: https://cults3d.com/en/stranitsy/maker-toolbox in the "UNZIP/UNRAR" section you will find free software that can be useful for decompressing archives of this type. nine0006
What licenses can I apply to the 3D models I have uploaded?
The 3D models available on Cults are subject to licensing and not all are free from copyright. These licenses define what you can and cannot do with the 3D model. You can read the full license documentation for a better understanding of how they work.
The Cults - Private Use license is used by default. This means that the 3D models under this license are for private use only:
- You can print them at home for your own use;
- You may not modify or adapt digital 3D model files and share them;
- You cannot sell digital files of 3D models;
- You may not sell 3D prints of models or any 3D prints derived from these models for economic or financial gain.
Only 3D models licensed for commercial use may be licensed for sale. For free models, you can refer to free licenses for commercial use. For paid designs, you can refer to Cult Licenses for Commercial Use. nine0006
If you are not sure what you are allowed to do, it is best to ask your questions directly to the designer(s). You can use the comments section below each design, or click "Message" when you're on the Cult's profile to contact them.
Can you print and deliver the goods?
Cults is a platform specialized in 3D modeling, we do not do 3D printing. You can only upload digital 3D files. To order a 3D print, simply upload the STL files of your choice and send those STL files to 3D printers such as Sculptéo, iMaterialise or Shapeways. You send them a 3D file and they give you a quote for 3D printing and shipping to your home. You can also check out our list of online 3D printing services here to choose the right 3D printer for you. nine0006
Why are my images purple?
Have you just uploaded a creation and your images are not showing right away? Don't worry, this means that Cults analyzes the image and saves it before publishing. It may take some time (depending on concurrent traffic, disk space, image weight, etc.) but it will be online soon. If it does not work out, you will probably have to redo your image. To do this, you can use the utilities listed in our Maker Tools, which will allow you to optimize the weight of your images. nine0006
Why are my images misdirected?
The problem is most likely due to the fact that you have blocked the automatic rotation of the phone when taking a photo. To resolve this issue, open the image on your computer and rotate it fully, then save again. Then all you have to do is upload it to your page again and delete the old photo.
I have uploaded a 3D file, but I can't find it on my computer...
The files may be in a different folder on your computer. You can check in your browser's advanced settings where your downloads are located by default. nine0006
How can I contact the designer or manufacturer?
Sending a message to a community member is very easy. All you have to do is go to his profile, for example by clicking on his/her avatar. When you are on his/her public profile page, you just need to click on the "Message" tab located on the right side of the navigation submenu. Posts on Cults are not private messages, but a public discussion. It is a place of exchange, thanks to courtesy and respect. Any commercial or malicious calls will be removed. Happy discussion! nine0006
The 3D file has been updated, do I need to buy the model again to access this new version?
When a 3D file is updated by its designer, anyone who has purchased or downloaded it for free will have access to the new version directly from their personal Cults space. So there is no need to re-purchase it to get the new version. Just go to the Downloads section of your personal account and click the Download button next to the desired order. After that, you can download the latest version. nine0006
Why is my file sold at a higher price than I set?
Cults is a French company subject to VAT (Value Added Tax). Therefore, for legal reasons, VAT must be added to the selling price of your creation. Cults is a transparent intermediary, so VAT is calculated only from the platform commission. This VAT applies only to residents of the European Union. If you live outside the European Union, prices will be without VAT. This tax is collected by Cults and paid in full to the government authorities. Cults receive no commission on this tax. For more information, you can refer to the Wikipedia page. nine0006
What currencies does Cults accept?
On the platform, we can display prices in 24 types of currencies. You can select them in the upper right corner of the site in the purple bar next to the language selection.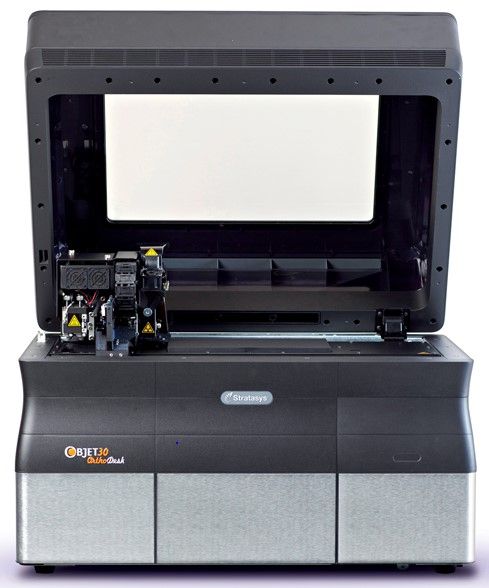
Here is the list of currencies available on Cults:
- ARS: Argentine Peso.
- AUD: Australian dollar.
- BGN: Bulgarian lev.
- BRL: Brazilian real.
- CAD: Canadian dollar. CHF
- : Swiss franc.
- CNY: Chinese yuan. nine0076
- CZK: Czech crown.
- DKK: Danish crown.
- EUR: euro.
- GBP: British pound.
- HUF: Hungarian forint.
- INR: Indian rupee.
- JPY: Japanese yen.
- KRW: Korean won.
- MXN: Mexican peso.
- NOK: Norwegian crown.
- NZD: New Zealand dollar.
- PLN: Polish zloty.
- RON: Romanian leu.
- RUB: Russian ruble. nine0075 SEK: Swedish krona.
- UD: American dollar.
What is "dark mode"?
Dark Mode is a special display that offers you a darker Cults interface. What is it used for? This type of appearance potentially has several benefits: reduced eye fatigue, reduced power consumption and thus battery savings to do something for the planet (technically dark pixels consume less power) and finally improved readability (from an ergonomic point of view , some colors are better seen on a black background).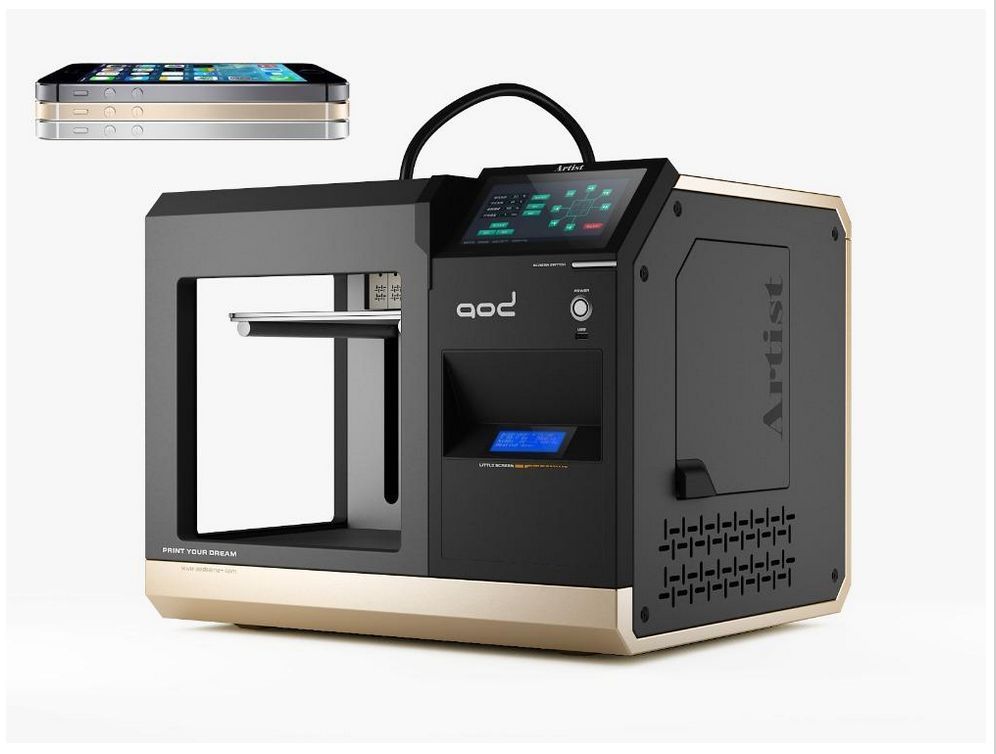 You can set up this display from your personal account here. Please note that the "Automatic" mode defaults to the appearance mode you have selected for your computer, tablet or phone. nine0006
Why do I only see a shadow on my 3D cutter plate?
You just see a shadow because the designer didn't center the model correctly. The design is not aligned with the printed form. Therefore, you need to completely zoom out and return the design to the printing plate. You can set all XYZ position measurements to 0 so that the file appears properly centered on the plate.
How can I get a refund for my order?
To receive a refund, you must first contact the seller on their Cults profile via the message page or as a comment on the purchased 3D file page. If the designer agrees to refund your money, he will have to go to the "Sales" section and click on the "Refund" button corresponding to your order. The refund will then be credited directly to the bank account you used to pay for the order within 1-2 business days.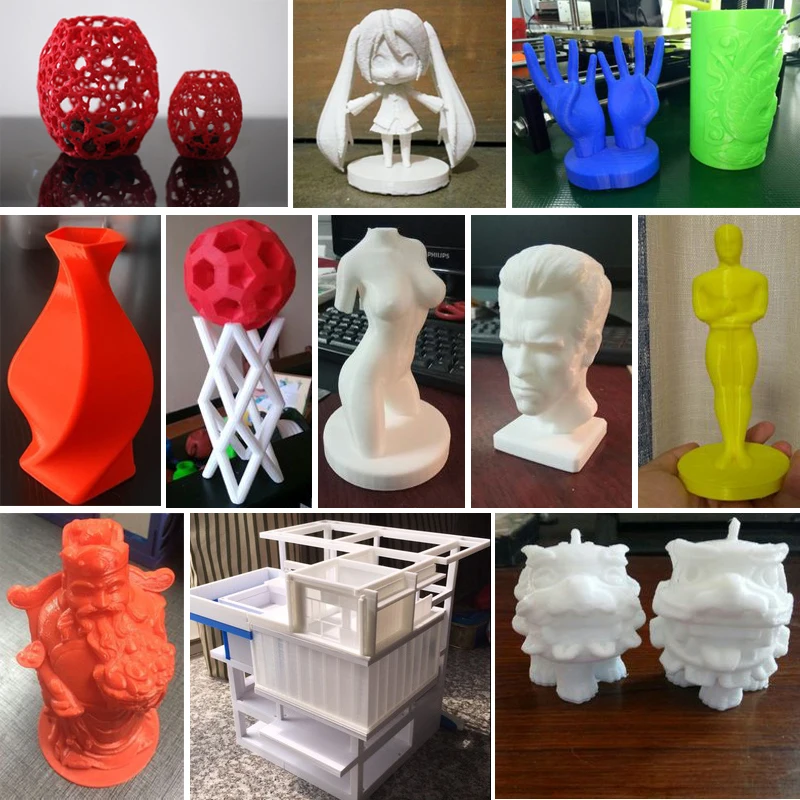 You will receive a confirmation email that will confirm the refund. nine0006
What is the Cults refund policy?
Our refund policy is as follows:
- The customer may dispute the purchase within 30 days of download.
- The buyer must first contact the seller by sending a message on their Cults profile or leaving a message in the Comments section of the 3D file page.
- If the buyer does not receive a response from the designer within 7 days, or the seller is unable to resolve the issue, the buyer is requested to contact Cults. nine0076
- Cults will then take over the case and refund the money if the problem is indeed proven and has not been resolved by the seller. Pursuant to Article L 121-20 of the Consumer Code applicable to digital goods, buyers do not enjoy the right of withdrawal if the digital work is fully consistent with its description and function. The refund policy can be found on this page.
How do I download an invoice related to my order?
The invoice can be downloaded from your personal account on the Downloads tab or directly on the order confirmation page using the "Invoice" button. Before doing so, please complete the various details related to your identity in the Account tab. This information will remain private and only visible to you, but is required for the preparation of your invoices. nine0006
How do I publish a design in secret mode?
Secret designs are hidden but visible to everyone you share the link with. This can be useful if, for example, you want to share your design with a specific group of people so that only they can access and download the exclusive design.
To change the visibility of your design:
- Select "Make Secret" from the three-dot menu on the current page or on your template page.
- Select "Make Public" to return to public mode. nine0103 - On the Edit Price/License page, you can also select the visibility mode: public, secret, or disabled.
How do I create a promotion on my paid projects?
You can add a percentage discount to the price of your designs by clicking the Add Discount button when you are on the pricing page. You can then choose the duration of the promotion, knowing that the maximum duration of the discount is 30 days. You cannot change the price of a discounted design. nine0006
How do I delete one (or more) of my designs?
- Or, go to each page of your designs in the upper right corner and click on the icon depicting 3 small dots, then select the "Deactivate" option.
- Or go to the "Designs" menu in your personal space and click on the "Deactivate" option, accessible through the icon depicting 3 small dots at the end of each line.
Does Cults 3D have an app for smartphones and tablets? nine0004
Cults is a website with responsive web design, which means it is readable and accessible on any smartphone or tablet screen. Just go to your device's internet browser and access the platform through your favorite search engine or by typing in the website's URL. To make it easier to access Cults on mobile and tablets, you can create an icon on your home screen to open Cults directly. Here are some manipulations you need to do, it's very simple.
On iPhone:
- Open Safari browser on iPhone or iPad
- Enter URL in the address bar:
https://cults3d.com - Click the share icon (square with up arrow)
- Scroll to the right of the newly appeared menu
- Press the button On the main screen
- Give your shortcut a name like "Cults 3D" (as original :))
- Click the "Add" button in the upper right corner of the screen to save your changes
On Android:
- Open the Google Chrome app
- Enter URL in the address bar:
https://cults3d.com - Click on the three small dots in the menu at the top right
- Select "Add to Home Screen"
- Give your shortcut a name, such as "Cults 3D" "or My favorite site I love so much!"
- Click "Add" and the Cults shortcut will appear on your home screen.
How can I protect my Cults account? nine0004
If you want to further secure your account, you can easily enable two-factor authentication in your account settings. Note that two-factor authentication only works for accounts that sign up with an email address and password; it does not work for accounts using Google, Facebook, Twitter, etc. To activate this protection, you can use third party apps such as Google Authenticator, Authy by Twilio, 2FAS Auth or a password manager on your smartphone. nine0006
The procedure is very simple:
- Open the application
- Scan QR code
- Enter the one-time code that appears on your application in the field provided on the Cults website
- And that's all!
How do badges work on Cults?
Badges are awards given to all active and dedicated members of the community. They are small pictograms illustrating some kind of success and come in different colors/materials depending on the level reached (chrome, copper, gold and neon). They are visible in the profile of each user and appear when certain milestones are reached. Discover all the badges you can unlock on Cults on this page and find out how many people were able to get each badge. If you like some of the icons feel free to get the icons in .svg format for 3d modeling and 3d printing. More icons will be unlocked over time, so stay tuned! nine0006
Printing 3D objects in Photoshop
User's Guide Cancel
Search
Last update Dec 13, 2021 08:23:10 PM GMT
- Photoshop User Guide
- Introduction to Photoshop
- Dream about it. Do it.
- What's New in Photoshop
- Editing the first photo
- Create documents
- Photoshop | FAQ
- Photoshop System Requirements
- Transfer of presets, operations and settings
- Introduction to Photoshop
- Photoshop and other Adobe products and services
- Working with Illustrator artwork in Photoshop
- Working with Photoshop files in InDesign
- Substance 3D Materials for Photoshop
- Photoshop and Adobe Stock
- Working with the built-in Capture extension in Photoshop nine0075 Creative Cloud Libraries
- Creative Cloud Libraries in Photoshop
- Working in Photoshop using the Touch Bar
- Net and guides
- Creating transactions
- Cancellation and transaction history
- Photoshop on iPad | General questions
- Introduction to the working environment
- System requirements | Photoshop on iPad
- Create, open and export documents
- Adding photos
- Working with layers
- Drawing and painting with brushes
- Selecting areas and adding masks
- Retouch compositions
- Working with Adjustment Layers
- Adjusting the key of a composition with the Curves layer
- Applying transform operations
- Trim and rotate compositions
- Rotate, pan, zoom and restore canvas nine0075 Working with text layers
- Frequently Asked Questions | Photoshop Web App Beta
- Working environment overview
- System requirements | Photoshop 9 Web App Beta0076
- Keyboard shortcuts | Photoshop Web App Beta
- Supported file formats | Photoshop Web Application Beta
- Opening and working with cloud documents
- Collaboration with stakeholders
- Limited editing options for cloud documents
- Photoshop Cloud Documents | Frequently Asked Questions
- Photoshop Cloud Documents | Workflow Questions
- Working with and managing cloud documents in Photoshop
- Cloud storage update for Photoshop
- Unable to create or save cloud document
- Troubleshooting Photoshop cloud documents
- Collection of cloud document sync logs
- Sharing and editing cloud documents
- File sharing and commenting in the application
- Working environment basics
- Learn faster with the What's New panel in Photoshop
- Create documents
- Working in Photoshop using the Touch Bar
- Tool gallery
- Performance settings
- Using tools
- Touch gestures
- Touch gesture capabilities and customizable workspaces
- Technology overview versions
- Metadata and comments
- Default key combinations
- Touch gesture capabilities and customizable workspaces
- Putting Photoshop images in other applications
- Installations
- Default key combinations
- Rulers
- Show or hide non-printing auxiliaries
- Specifying columns for the image
- Cancellation and transaction history
- Panels and menus
- File placement
- Positioning elements with referencing
- Positioning with the ruler tool
- Setting sets
- Customizing keyboard shortcuts
- Net and guides
- Photoshop for design
- Artboards
- View on device
- Copy CSS from layers
- Dividing web pages into fragments
- HTML options for snippets
- Changing the arrangement of fragments
- Working with web graphics
- Create web photo galleries
- Resizing images
- Working with raster and vector images
- Image size and resolution
- Importing images from cameras and scanners
- Creating, opening and importing images
- Image viewer
- "Invalid JPEG marker" error | Opening images
- Viewing multiple images
- Customize color palettes and color swatches
- HDR images
- Image color matching
- Converting between color modes
- Color modes
- Erase sub-images
- Blend Modes
- Choice of colors
- Making changes to indexed color tables
- Image information
- Distortion filters not available
- Color details
- Color and monochrome corrections with channels
- Selecting colors in the Color and Swatches panels
- Sample
- Color mode (or picture mode)
- Shade
- Adding a color mode change to an operation
- Add swatches from HTML CSS and SVG files
- Bit depth and settings
- Understanding Layers
- Reversible editing
- Create and manage layers and groups
- Selecting, grouping and linking layers
- Putting images into frames
- Opacity and layering
- Layer masks
- Applying Smart Filters
- Layer compositions
- Move, arrange and lock layers
- Mask layers with vector masks
- Manage layers and groups
- Effects and Layer Styles
- Editing layer masks
- Extract resources
- Display layers with clipping masks
- Generation of graphic resources from layers
- Working with Smart Objects
- Blend Modes
- Combining several fragments into one image
- Combining images with Auto Layers
- Alignment and distribution of layers
- Copy CSS from layers
- Load selections based on layer boundaries or layer masks
- See-through to show the contents of other layers
- Layer
- Mixing
- Composite images
- Background
- Select and Mask workspace
- Quick selection areas
- Getting Started with Selections
- Selecting with the Marquee Toolbox
- Selecting with the Lasso tools
- Selecting a color range in an image
- Pixel highlight setting
- Convert between contours and selection boundaries
- Channel Basics
- Moving, copying and deleting selected pixels
- Creating a temporary quick mask
- Saving selections and alpha channel masks
- Selecting focus areas in an image
- Duplication, splitting and merging of channels
- Channel calculation
- Extraction
- Bounding box
- Perspective distortion
- Reducing blur due to camera movement
- Healing Brush Tool Examples
- Export color lookup tables
- Image sharpness and blur correction
- Introduction to color grading
- Applying the Brightness/Contrast setting
- Shadow and Highlight Detail Correction
- Correction "Levels"
- Hue and saturation correction
- Juiciness correction
- Adjusting the color saturation in image areas
- Quick tone correction
- Applying special color effects to images
- Image enhancement with color balance correction
- HDR images
- View histograms and pixel values
- Image color matching
- Crop and straighten photographs
- Converting a color image to black and white
- Adjustment and fill layers
- Curves correction
- Blend Modes
- Target Imaging for Press
- Color and tone correction with Levels and Curves eyedroppers
- HDR Exposure and Toning Compensation
- Filter
- Blur
- Lighten or darken areas of an image
- Selective Color Correction
- Replacing object colors
- Camera Raw system requirements
- What's New in Camera Raw
- Introduction to Camera Raw
- Creating panoramas
- Supported lenses
- Camera Raw 9 Vignetting, Grain, and Haze Removal0076
- Default key combinations
- Automatic perspective correction in Camera Raw
- Reversible editing in Camera Raw
- Camera Raw Radial Filter Tool
- Manage Camera Raw settings
- Processing, saving and opening images in Camera Raw
- Image enhancements with Camera Raw's improved Spot Remover
- Rotating, cropping and modifying images nine0075 Color correction in Camera Raw
- Removing objects from photos using Content-Aware Fill
- Content-aware patching and relocation
- Retouching and fixing photos
- Image Distortion and Noise Correction
- Basic troubleshooting steps to solve most problems
- Object transformation
- Crop, rotate and canvas settings
- Crop and straighten photographs
- Creating and editing panoramic images
- Deforming images, shapes and contours
- Perspective
- Using the Liquify filter
- Content-aware scale
- Transforming images, shapes and paths
- Deformation
- Transformation
- Panorama
- Drawing symmetrical ornaments
- Options for drawing a rectangle and changing the stroke
- Drawing details
- Drawing and editing shapes
- Paint tools
- Creating and modifying brushes
- Blend Modes
- Adding color to outlines
- Edit contours
- Painting with mix brush
- Brush Presets
- Gradients
- Gradient interpolation
- Fill and stroke selections, layers, and paths
- Drawing with the pen tool group
- Pattern making
- Creating a pattern with the Pattern Builder filter
- Loop control
- Managing pattern libraries and presets
- Drawing with pen tablet
- Creating textured brushes
- Adding dynamic elements to brushes
- Gradient
- Draw stylized strokes with the Archive Art Brush
- Drawing with pattern
- Synchronizing presets across multiple devices
- Adding and editing text
- Universal text editor
- Working with OpenType SVG fonts
- Character formatting
- Paragraph formatting
- Creating text effects
- Text editing
- Leading and letter spacing
- Font for Arabic and Hebrew
- Fonts
- Troubleshooting Fonts
- Asian text
- Creating text nine0075 Text Engine error when using Photoshop's Type tool | Windows 8
- Video editing in Photoshop
- Editing video and animation layers
- Introduction to video and animation
- Video and animation preview
- Draw frames in video layers
- Import video files and image sequences
- Creating frame animations
- Creative Cloud 3D Animation Preview
- Creating timeline animations
- Creating images for videos
- Using the Liquify filter
- Using Blur Gallery group effects
- Filter basics
- Filter effects reference
- Adding lighting effects
- Using the Adaptive Wide Angle filter
- Oil Paint Filter
- Effects and Layer Styles
- Application of certain filters
- Image area feathering
- Save files in Photoshop
- Export files to Photoshop
- Supported file formats
- Saving files in other graphic formats
- Move projects between Photoshop and Illustrator
- Saving and exporting video and animation
- Saving PDF files nine0075 Digimarc copyright protection
- Printing 3D objects
- Printing with Photoshop
- Printing and color management
- Checklists and PDF presentations
- Print photos in a new image layout
- Spot color printing
- Duplexes
- Printing images on a printing press
- Photoshop Color Enhancement
- Printing troubleshooting | Photoshop
- Create activities
- Creating data-driven images
- Scenarios
- File batch processing
- Operation playback and management
- Adding conditional operations
- About actions and the Actions panel
- Recording tools in operations
- Adding a color mode change to an operation
- Photoshop UI Development Kit for Plugins and Scripts
- Understanding Color Management
- Accurate color assurance
- Color settings
- Working with color profiles
- Color management of documents for viewing on the web
- Color management for printing documents
- Color management of imported images
- Perform proofing
- Learn more about content credentials
- Identity and origin of NFT tokens
- Connecting accounts for creative attribution
- 3D in Photoshop | Common questions about deprecated 3D features
- Creative Cloud 3D Animation Preview
- Printing 3D objects
- 3D drawing
- 3D Panel Enhancement | Photoshop
- 3D Concepts and Tools
- Rendering and saving 3D objects
- Creating 3D objects and animations
- Image stacks
- 3D graphics workflow
- Measurements
- DICOM files
- Photoshop and MATLAB
- Counting objects in an image
- Merging and converting 3D objects
- Editing 3D textures
- HDR Exposure and Toning Compensation
- 3D panel settings
Photoshop allows you to print any compatible 3D model without worrying about the limitations of a 3D printer. When preparing to print, Photoshop automatically renders 3D models impenetrable. Photoshop also generates the necessary support structures—platforms and bases—to help you achieve successful 3D printing results.
Preparing 3D objects for printing
- Select the menu item Window > Workspace > 3D to switch to 3D mode. nine0076
- Open the 3D model in Photoshop. If necessary, resize the 3D model while opening the file.
- Select menu item 3D > 3D Print Settings.
- In the 3D Printing Preferences panel, choose whether to use a printer connected to your computer via USB (local printer) or online 3D printing services such as Shapeways.com or Sculpteo.
You can now print 3D models as 3MF (3D Manufacturing Format) files. When specifying 3D printing options, select 9 for option1218 Print to is set to Local and Printer is set to 3MF file. When you send a 3D object to print, Photoshop creates a 3MF file. On Windows computers, Photoshop also launches the Microsoft 3D Builder application to further process the 3MF file.
To update the list of supported printers or online profiles, select Get Latest Printers from the Send to Print To pop-up menu.
- Select a local printer or Shapeways.com print profile. nine0076
View estimated prices for printing 3D models using available Shapeways.com profiles by selecting Printer > Estimated Price.
- Select the print volume units from inches, centimeters, millimeters, or pixels. This unit will serve to measure the dimensions of the volume of the printer as well as the dimensions of the printing plate.
A. 3D model B. Printing plate C. Printer volume overlay nine0006
- Select the 3D Printing Detail Level—Low, Medium, or Fine. The time it takes to print a 3D object depends on the level of detail selected.
- If you don't want to see the bounds of the 3D model's print volume, clear the Show Printer Volume Overlay check box.
- Set the Scene Size options to the appropriate size for the 3D printed object. When you change one value (X, Y, or Z), the other two values are scaled proportionally. When resizing the Stage Volume, notice that the print plate under the 3D model resizes accordingly. nine0076
You can scroll through the Scene Volume settings by clicking the size label (X, Y, or Z) and dragging the cursor left or right. By holding down the Shift key, you can scroll through the values faster.
- Select Scale by printer volume if you want to automatically resize the 3D model so that it takes up the entire available printer volume on the selected printer.
- If your 3D model includes normal maps, bump maps, or transparency maps, you can ignore these types of maps when printing the model. Notice how the 3D model changes in real time as you change the Surface Detail settings.
 nine0076
 - Optionally, you can exclude 3D object support structures (platforms and bases) from printing. Use this option with caution as printing a 3D model without the necessary support structures may produce unsatisfactory results.
- If your printer supports multiple materials, select the material you want to use to print this 3D object.
(Experimental) Enable multitone printing for the MakerBot Replicator 2x 9 printer0103
You can enable an experimental feature that allows you to print continuous tones with your MakerBot Replicator 2x 3D printer.
Requirement: Enable experimental Photoshop features
Experimental features must be enabled in Photoshop before using multitone printing:
- Select Preferences > Experimental Features.
- Select the Enable multitone printing check box. nine0076
- Click OK.
- Restart Photoshop.
Experimental features not yet fully tested. They should be used with caution.
Choose a multi-tone surface material
- Select the MakerBot Replicator 2x printer in the 3D Printing Settings panel.
- In the Material field, select Multitone Surface. If you don't see this option, make sure the experimental Multitone 3D Printing feature is enabled. nine0076
- Set other parameters according to the generated 3D model.
- To view and print a 3D object, select 3D > 3D Print.
Preview and print 3D object
After setting the 3D printing options, follow these steps.
- Click the Start Print icon () or select the menu item 3D > 3D Print. Photoshop will combine the 3D elements of the scene and prepare it for the printing process. nine0103
- If you choose to print with your Shapeways.com profile, Photoshop will display a message that the actual print cost may differ from the estimated cost displayed. Click OK.

- In the preview window that opens, you can use the 3D camera tools to rotate, scale, or move the 3D object.
Rotate the 3D camera.
3D camera rotation.
Move the 3D camera.
3D camera slide. nine0006
Return to the home position of the 3D camera.
- If necessary, select the Show restoration check box. Photoshop displays various restoration colors such as Initial Mesh, Thickened Walls, and Hole Closed.
- You can also turn on Ray Tracing Preview. Viewing ray tracing allows you to more accurately reproduce the printed material. nine0076
- If you want to export the 3D printing settings to an STL file, click the Export button and save the file to the desired folder on your computer. This STL file can be sent to a network service server or moved to an SD card for printing with your own printer.
- View a summary of the 3D print object and click the Print button.
You can cancel the current 3D printing process using the menu item 3D > Cancel 3D printing. nine0103
3D printing utilities
Photoshop provides interactive step-by-step utilities that you can use to set up, calibrate, and maintain your 3D printer. These utilities can only be used when the 3D printer is turned on and connected to a computer.
- Select the menu item 3D > 3D Printer Utilities.
- Select the utilities you want to run.
Print plate calibration nine0006
Helps in leveling the printing plate. This utility includes the following general steps:
- Requires you to remove all residual print materials from the 3D printer.
- Initializes the printhead.
- Allows you to adjust the amount of gap between the platen and the printhead at nine nozzle positions.

You can use this utility in wizard mode or manual mode.
Download Thread nine0006
Helps load filament into a Fused Deposition Modeling (FDM) 3D printer. To facilitate filament loading, Photoshop starts the head heating process and the filament loading mechanism.
Remove thread
Helps to remove the filament from the FDM 3D printer. To facilitate the removal of the filament, Photoshop starts the head heating process and the filament loading mechanism.
Replace thread nine0006
Helps to replace the old filament in the FDM 3D printer with a new one. To make changing filament easier, Photoshop starts the head heating process and the filament loading mechanism.
- Follow the instructions on the screen.
Pack objects on the base plane
Sometimes you may want to print multiple instances of an object on the same panel. Do the following.
- Select the required objects in the 3D panel. nine0075 Select 3D > Pack Objects on Ground Plane.
- Start printing objects.
FAQ
Photoshop currently supports the following 3D printers:
- MakerBot Replicator 2
- MakerBot Replicator 2x
- ZCorp Full Color
- Mcor Iris
- MakerBot Replicator 5th Generation
Photoshop also supports several Shapeways.com and Sculpteo profiles. nine0006
The MakerBot Replicator 5th Generation Printer Profile does not yet support USB direct printing. You can export files to a USB drive and print them to a local printer.
Yes. Before printing, you can set a cross section to cut off part of the 3D model. Follow these general steps.
- Select the menu item Window > Workspace > 3D to switch to 3D mode.
- Open the 3D object you want to print. nine0076
- Select Scene in the 3D panel.

- In the Properties panel, select Cross Section.
- Specify the cross section parameters in the Properties panel.
- Select the menu item 3D > Apply Cross Section to Scene.
- Print the 3D scene.
The desired cross section must be dried before printing.
Yes. Follow these general steps. nine0006
- Select a material in the Scene panel.
- In the Properties panel, click the folder icon () next to Bump/Transparency/Normals and load the texture. You can also specify a new texture to apply to the 3D model.
- When specifying a new texture, save the texture. The texture is applied to the 3D model as a bump map or transparency.
- Print a 3D model.