Turn webcam into 3d scanner
6 DIY 3D Scanners You Can Build at Home
Creating a 3D model of a real object can be done extremely fast if you have a 3D scanner at home. The problem is: 3D scanners are expensive to buy new.
If you're looking for a solution, why not try building your own affordable 3D scanner at home? It might not create perfect 3D models, but it's a cost-effective alternative to buying a 3D scanner.
Is It Cheaper to Build a DIY 3D Scanner?
The cost of buying a decent 3D scanner ranges from $700 to $10,000 at the highest end. On the other hand, building a DIY 3D scanner can cost less than $200—some even as little as $35.
Depending on the resolution of your homemade 3D scanner, you will still have to work to tidy up the 3D model so that it can be used for things like 3D printing, game development, or perhaps design prototyping. But overall, it will still speed up the design process when compared to building a model from scratch.
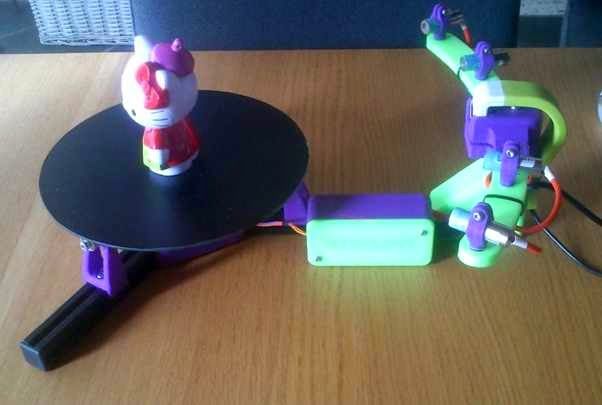
1. Cheap 3D Printed 3D Scanner
This 3D scanner is built using 3D printed parts, featuring both open source software and open source hardware files. If you choose to install the maximum of four lasers, then the cost of the project comes in at $35 to $50. Once it's built, handling the digital scan will require some legwork to smooth out. But considering its price tag, it's well worth giving it a go.
You can find the STL files and a full build guide on Instructables. Besides the 3D printed components, you will need one to four lasers, a stepper motor, a turntable, and an Arduino Nano to bring it all together. One benefit of this project is that it's been built many times by community makers, resulting in plenty of images and feedback surrounding the project to help fill in any gaps.
2. DIY 3D Scanner Using a DSLR Camera
Another option for building a 3D scanner is to use a DSLR camera and a method called photogrammetry. At its most basic, it involves taking a lot of images of an object from different angles and stitching those photos together in a software program to create a 3D model.
Alongside a DSLR camera, you will need an Arduino, a stepper motor and driver, an LCD screen, and an IR LED. The goal of the hardware is to build a rotating platform that moves by set amounts so that your camera can photograph the object in a very detailed and controlled way. You can find a great explanation of the project on Instructables.
The real difficulty of this project comes in processing the photos. A good photogrammetry program is essential, and that can cost over $150 to license. There is some free software available, but it may come with limitations.
If you're wondering if there is an alternative solution, you can read our guide to how to turn everyday objects into 3D models without a 3D scanner.
3. Optical CT/3D Scanner With Arduino
For something a little different, in this project you will build a 3D scanner that also doubles as an optical CT scanner. This type of scanner will do the trick if you have objects that are semi-transparent, like a gummy bear or a segment of orange. Otherwise, you can use this setup with the photogrammetry method for regular 3D scans.
Everything in this build is enclosed inside a box. This allows greater control over lighting the object to produce sharper images. While it involves some woodworking and construction, the hardware is still powered by a humble Arduino Nano, plus additional parts that you can find at any hardware store.
A great guide is available on Instructables for building the box, alongside details for creating a sleek control panel for changing photo parameters on the go.
4. FabScan: Raspberry Pi + Arduino 3D Scanner
This 3D scanner uses both a Raspberry Pi and an Arduino to build a 3D laser scanner. What sets this build apart is that it can be operated remotely via a web browser on a phone.
Much like other DIY 3D scanners, a stepper motor and driver are used to rotate a turntable holding the object you want to scan. Additionally, you will need a line laser and a Raspberry Pi camera. You can find the guide and a full components list on Instructables.
While the creators have gone with a laser-cut MDF box, you can just as easily use spare parts lying around the home to create the enclosure. Alternatively, cardboard can work too, and painting it black will aid in diffusing the laser light so that it doesn't interfere with the scan.
Once you have a good scan of your object, you might be interested in 3D printing it. Haven't got a 3D printer? Here is our pick of the best 3D printers.
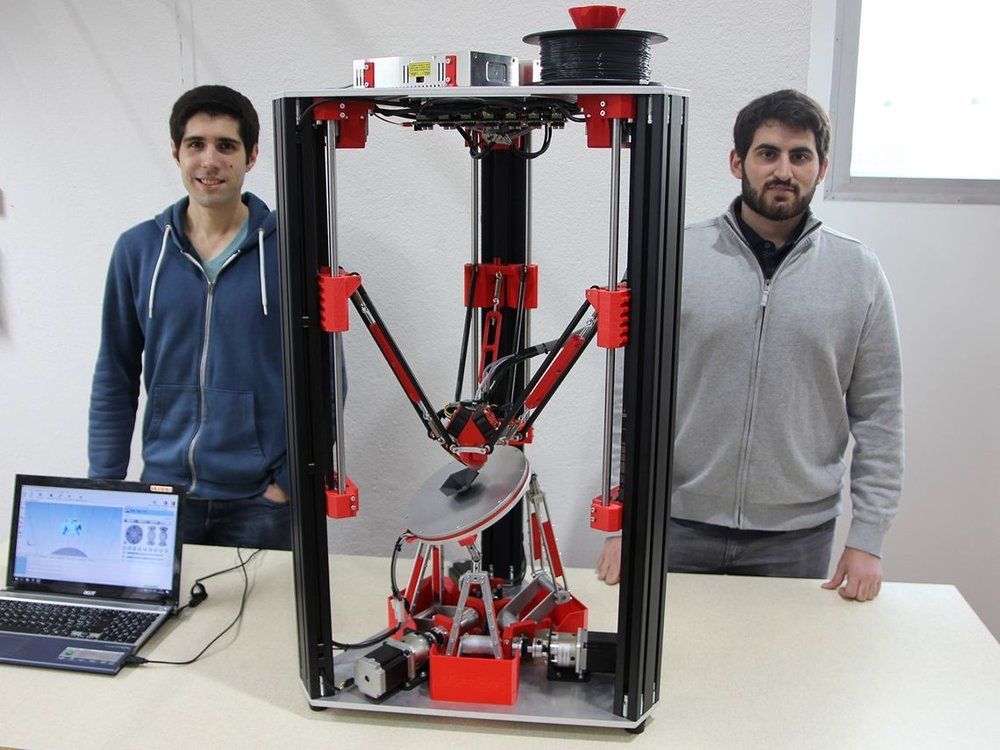
5. The Ultimate Human Sized 3D Scanner With Raspberry Pi
While most homemade 3D scanners are built to capture a small object, it's also possible to build a human-sized 3D scanner. The way to do this is with a lot of Raspberry Pis, as you can see over on Instructables.
The maker behind this project scaled up his 3D scanner using a whopping 47 Raspberry Pis plus a Raspberry Pi camera for each module. The goal was to use the photogrammetry method to take a photo of his subject from every possible angle. Because he wanted to capture a 3D model of his two-year-old son, this all had to happen instantly.
Incredibly, it works, and it works very well too. If you have the time and investment to buy a box full of Raspberry Pis, you won't be disappointed because the results are impressive. The maker says you can use fewer Pis and cameras and still get good results, especially if you only need to capture the front of a person’s face.
6. Standalone 3D Scanner
Maybe you're just after a simple and small 3D scanner that you can make over the weekend. If so, then this project will suit you. This 3D scanner on Instructables is designed to be all-in-one, meaning that the photos are compiled onboard and an STL file is saved directly to a memory card. Instead of compiling the photos in a separate photogrammetry program, this 3D scanner handles them for you.
While it doesn't produce incredibly detailed scans, it does make for a rapid way to take a 3D model straight to 3D printing. One thing to bear in mind, however, is that the dimensions of the 3D scanner structure need to be kept exactly as written in order to match the code.
Building a Homemade 3D Scanner
Putting together a 3D scanner at home isn't extremely difficult to achieve. When compared to the expensive price of commercial 3D scanners, it's well worth building a DIY 3D scanner yourself.
With a Raspberry Pi or Arduino and a few extra affordable parts, you'll be well on your way to creating a cheap and awesome 3D scanner.
Top 3D scanner apps and software in 2022
3D Learning Hub
See all categories
Contents:
- Introduction
- How does 3D scanning work?
- Photogrammetry software
- 3D scanning software for 3D scanners
- 3D scanning apps
- Let's 3D scan today!
Introduction
How does 3D scanning work?
We already wrote an article about how 3D scanning works, so dig into it if you would like to know all the details! In a nutshell, 3D scanning allows you to produce a 3D model of a physical object. 3D scanning is a technology that’s now available for everyone. Doctors and other professionals use 3D scanners at work, but they are also widely used by commercial companies and amateurs.
3D scanning can be as easy as using your own smartphone or setting up a bunch of cameras. There are 3 methods to use 3D scanning technology: laser 3D scanning, photogrammetry, and structured light scanning. We prepared a guide to help you choose the best 3D scanner for your project. Since there are different devices used for 3D scanning, we organized our list of the top 20 3D scanning software by type: photogrammetry software, 3D scanning software used for 3D scanners and 3D scanning apps for your phone.
Photogrammetry software
Photogrammetry software is a technology based on photos to produce your 3D models. It uses photographs to calculate measurements and turn them into 3D data. To 3D scan with a phone, drone or a camera, you need photogrammetry software. We already dedicated a blog post to the best photogrammetry software, but now we will enrich this list.
3DF Zephyr
3DF Zephyr is one of the leaders on the market thanks to its UI. It is very intuitive and user-friendly. Inexperienced users will be guided through the 3D scanning process, however, 3DF Zephyr is not only for amateurs. Professionals from different fields will use a lot of helpful tools, such as the ability to transform the model into CAD software. There are also plenty of options to tweak the 3D model and adjust it.
Agisoft Metashape
This professional 3D scanning software is popular for GIS applications (Geographic Information System), but also for visual effects production, historical documentation and game development. The software is capable of working with both close-range and aerial photogrammetry.
An interesting feature of Agisoft Metashape is that the user can make 4D models as the software allows to save whole scenes as editable 3D objects
Autodesk ReCap
Autodesk ReCap stands for Reality Capture.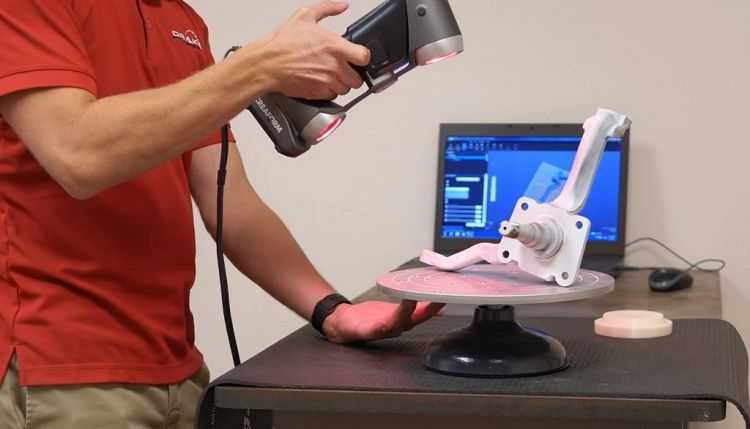 It uses photos, but can also apply laser scans to produce 3D models. It can be used for aerial scans and close-range. The 3D objects can be used with CAD and BIM software. With this 3D scanning software, you will be able to achieve high-quality models, which can be edited thanks to specialized tools.
Bentley ContextCapture
This is a very powerful professional photogrammetry software, capable of producing whole infrastructure landscapes. It will give you a lot of advanced tools to organize and edit the 3D models. This software is popular for construction projects, it can create highly detailed street views This software can be with aerial photogrammetry and laser scanning in order to achieve the best 3D models. With Bentley ContextCapture you can even produce 3D animations and fly-throughs.
Colmap
Colmap allows for the production of 3D mesh from one camera or from a set up of cameras. It is free and easy to use. There are more advanced options available, especially to improve quality. However, you can’t edit the 3D model in this software. It is great for quick and easy 3D scanning.
DroneDeploy
As the name suggests, this 3D scanning software was designed for drones. It consists of two apps. One controls the path of the drone and will guide it from take-off to landing. A second program gathers the photos and creates a 3D model. It provides you with tools to measure areas, volumes, and distances. Additionally, you can add more personalized features.
IMAGINE Photogrammetry
IMAGINE is a professional photogrammetry software. It is important for you to consider if you’re planning to work with mapping 3D scans. It is very well known in the industry and used by the department of transportation, commercial mapping companies, and national and regional mapping authorities. It provides users with plenty of professional tools such as different point cloud views, to help transform the photos and manage large data.
Meshroom
Meshroom stands out for an easy learning curve. The 3D scanning process is very intuitive, and based on nodes and creates a 3D model for you. You also have the option to edit the nodes later and adjust the 3D scan according to your needs.
MicMac
This professional photogrammetry software was created by the French National Geographic Insitute and the French National School of Geographic Sciences. It provides you with highly professional tools, especially for academic and industrial applications. It can be used for small and large scale scans.
OpenMVG
Yet another 3D scanning software for professionals. It is trusted by computer-vision scientists and the Multiple View Geometry (MVG) industry. OpenMVG operates with Structure from Motion (SfM) photogrammetry technology.
Photomodeler
Photomodeller allows you to create 3D objects thanks to 3 different methods.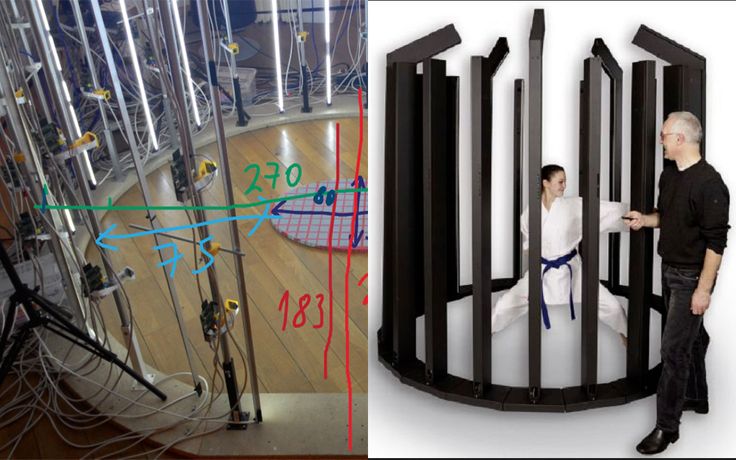 You can manually fit common characteristics, automatically produce a 3D model from coded targets or match point clouds from overlapping images. It is an easy to use and affordable 3D scanning software.
Pix4D
This 3D scanning software covers all the tools from flying a drone to generating a 3D model. It will assure your drone path is correct and then allows you to create orthomosaics, index maps, elevation models or point clouds to produce an accurate 3D model. You also have access to different analytic tools so the model can be edited.
3D scanning software for 3D scanners
3D scanning apps
This cutting-edge technology of 3D scanning has gone so far that you can even use your phone to both make a 3D scan and then a 3D model. There are dedicated apps that will allow you to turn a real object into a 3D model in just a few clicks.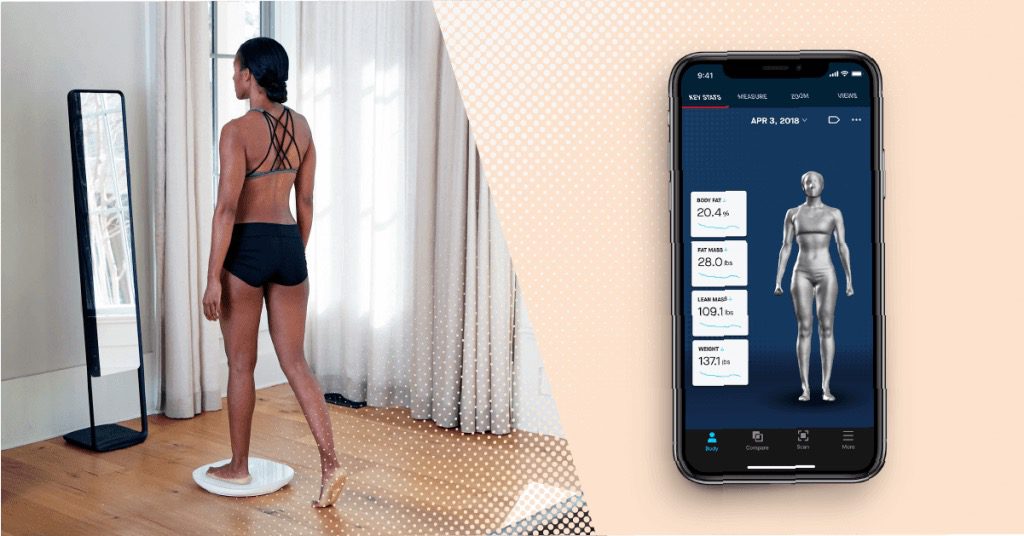 Learn how to 3D scan with a smartphone
Qlone
This is all-in-one mobile 3D scanning software. Qlone will allow you to 3D scan and produce a 3D model with just your smartphone. It’s easy and fast to use. The 3D model can be exported into several 3D formats and sent for 3D printing.
Trnio
Trnio can be considered as photogrammetry software but can be used on a smartphone. It turns pictures into 3D objects, but you can also actually 3D scan the object. It offers two quality options: high and low texturing resolution.
Sony 3D Creator
If you need to get high resolution models using a 3D scan app on your smartphone, this Sony 3D Creator app could totally fit your needs. This free app is perfectly adapted to beginners, allowing you to render your 3D model in 4K for a better resolution.
Heges
Heges is a scanning app for iPhone, targeting professional users. This program has many interesting features: it performs 360° rotation, it includes “Infinity scanning” for large spaces. You can also make the most of its dark mode allowing you to scan in dark environment!
Scann3D
Yet another photogrammetry software. It has a very simple UI and is user-friendly. Take 20-40 pictures in order to generate a 3D model. It can work with small objects as well as bigger objects (such as a tree). You can export your model as an STL file, one of the most popular formats for 3D printing.
3D Creator
This mobile app was developed by Sony and will provide you with high-quality 3D scans, it’s especially popular for portraits. The models can be used within different apps such as messages, but also to 3D print models in full color.
Scandy Pro 3D Scanner
This intuitive 3D scanning software makes it so easy to generate high-quality models. It prides itself in light files without losing quality, built-in support for STL, OBJ, GLB, USDZ and PLY formats, and moreover, fully-featured editing tools.
Let's 3D scan today!
As you can see the list of Top 3D scanning software is long and for sure one of them will fit your needs. From professional landscape mapping to medical 3D scanning, this technology amazes us. But it can also be used at your home, all you need is a phone.
3D printing can be just as easy. All you need to do is to upload your 3D objects to our online Additive Manufacturing service. 3D printing has never been more simple!
Don’t forget to subscribe to our Newsletter and follow us on Facebook for the latest 3D printing news!
Related Topics
- Return to Top
Get the latest 3D printing news delivered right to your inbox
Subscribe to our weekly newsletter to hear about the latest 3D printing technologies, applications, materials, and software.
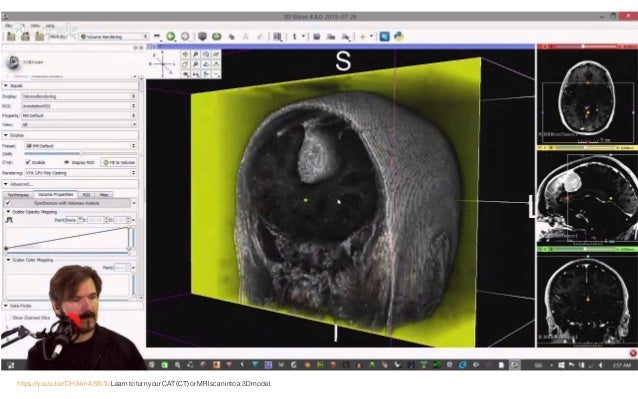
3D scanner for $30 / Sudo Null IT News We can do the same with a special program, a laser pointer and a webcam. Only thirty dollars.
About 3D scanning
Many spheres of our life are inconceivable without three-dimensional graphics. A huge army of 3D modelers (or simply 3D’s) create models every day, which are then successfully used in a variety of areas, ranging from cinema, advertising, industrial production, architecture, and ending with God knows what else. Any person involved in modeling, sooner or later, faces the following task: you need to create a model of what already exists in our three-dimensional world. It could be anything. For example, a prototype model that a customer put on your desk and asked to do “exactly the same, only on a computer.” Moreover, it is necessary to model not just so that it “looks like”, but so that the prototype object and the three-dimensional model are like twin brothers separated by a computer screen.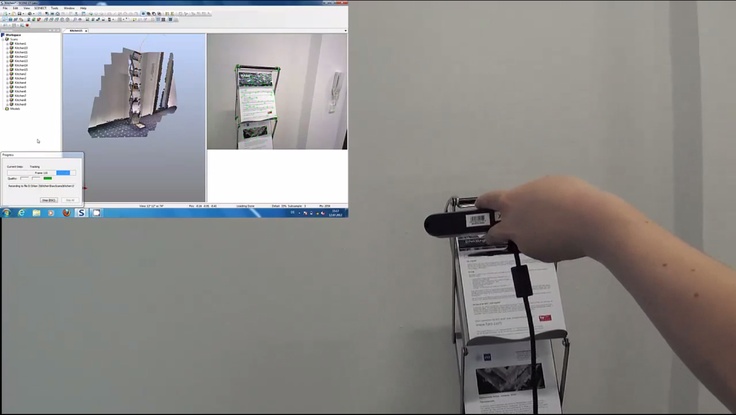 It happened to me as well. While completing another modeling order, I faced very strict requirements for matching my model to the client's sample. After the nth unsuccessful coordination, it became clear that this time the absolute accuracy of the model is needed. In any case, the client was sure that otherwise, if Armageddon did not come for all mankind, then at least something similar would happen. What was left for me to do? Finally try 3D scanning! I then thought: "This is modeling for the lazy." A minute of work - and that's it, the model is ready! To my great surprise (and disappointment), it turned out that even the simplest 3D scanner costs a lot of money. Or rather, very large. To buy it, I had to multiply the cost of this model by a number with five zeros. But if you can not buy, then we will do it ourselves. Below I want to share with you the experience of how to assemble a 3D scanner with your own hands. I will not only tell you what components and where to buy for this, but also how to use this scanner.
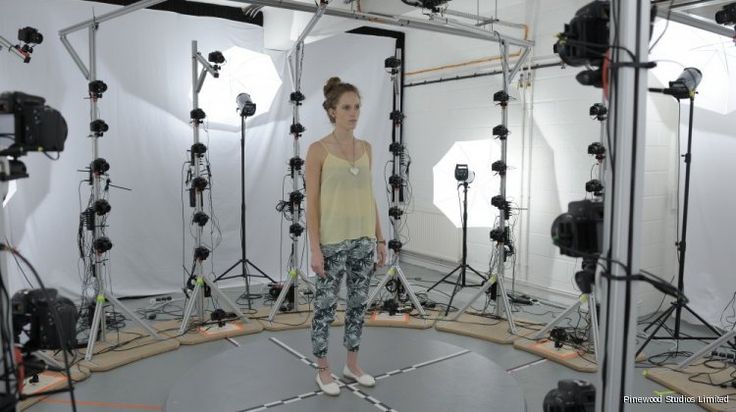 nine0003
What do we need?
As it turned out, you can literally make your own 3D scanner from improvised materials: we need a special program, a laser pointer, a webcam, and some homemade devices.
Special software. The most important part of a scanner, including an expensive professional scanner, is its brain, the software that performs the digitization. What we need are tools that allow you to scan / digitize 3D objects with the help of available tools: webcams and a laser pointer. These are DAVID-laserscanner and TriAngles, available for free testing, but with some limitations. The latter has a rather unpleasant limitation: for its operation, a uniformly rotating table is required, on which the scanned object will be located. In addition, severe requirements are imposed on the object itself. Its shape should be close to cylindrical, and even better - spherical. DAVID-laserscanner does not have such requirements, so I chose it.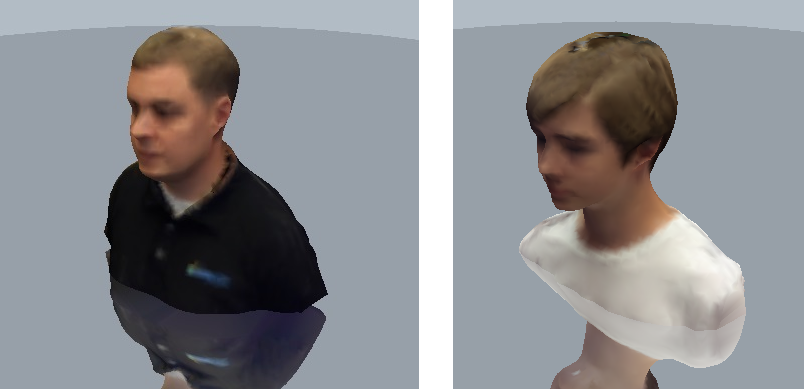 Despite the fact that the program is paid and its cost ranges from 199 to 229 euros, you can test it for as long as you like - there are no time limits. The only limitation lies in the features of saving scan results. You can save scans, but in low quality. However, miracles sometimes happen on the Web, and if you manage to find a version of DAVID that saves in high quality, then you will save on this too. And whoever seeks will always find.
Webcam. The program reads the object's parameters necessary for creating the object using a webcam. You may have it. If so, great, you can try to crank everything with her. The main thing is that the resolution is at least 640 x 480. There are other requirements: manual focusing (the ability to turn off autofocus), a minimum of noise at high resolution, a high-quality camera lens - the lens should not give strong distortion. The camera must be connected to a USB port and work on WDM drivers (that is, simply speaking, it must be visible for selection in the DAVID program).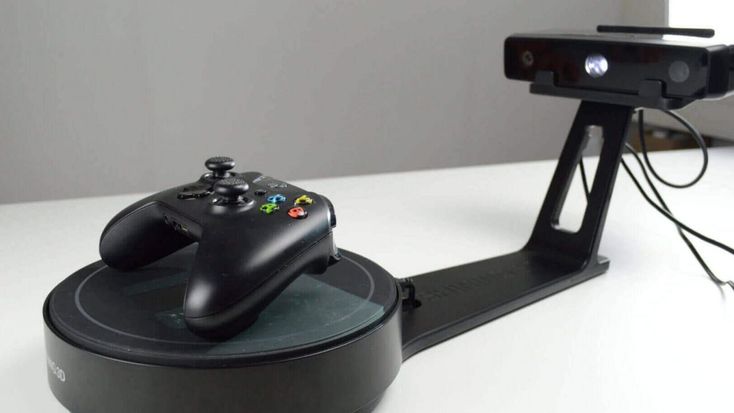 Most modern webcams meet these requirements, but only you and I can check their compatibility with DAVID, so we will trust the recommendations of the program's creators to avoid any surprises. Of the cheap cameras, the developer himself recommends the Logitech WebCam Pro 9000 with cam holder, which can be bought for a hundred dollars. I have successfully scanned my $35 Logitech C270.
Setting up the scanner
Laser module. The scanner requires a component that will give a line. It's a line, not a dot. It is important! I read on the forums that a regular Chinese laser pointer would do, but it doesn't. No matter how fast you move your hand armed with a laser pointer, it's not the same. A little later I will explain why. Now one thing is important - you need a scanner that gives a line. Red, green, blue - the color of the scanner is unimportant. In general, you can do without a scanner, using alternative solutions (read in the sidebar).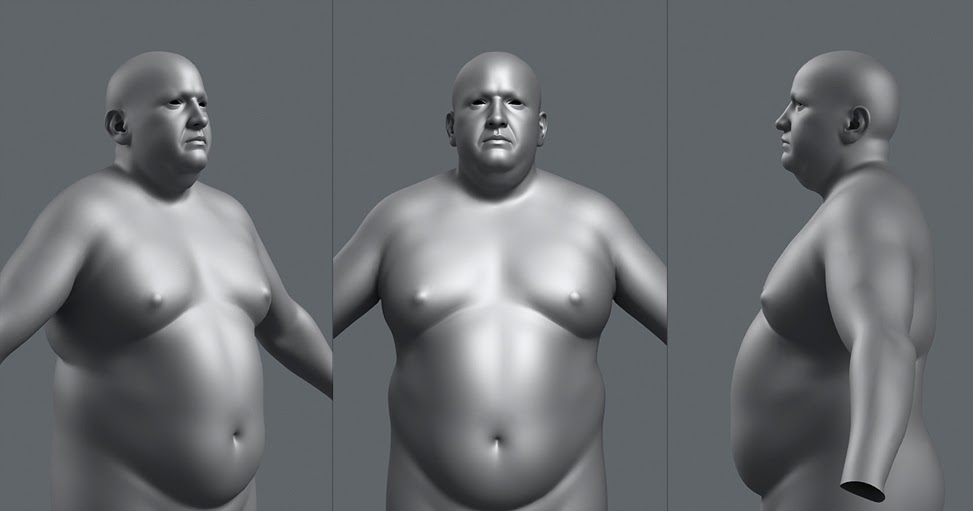 But the laser module is definitely the easiest and most affordable option. I purchased a 650nm red laser module with a 5mW line focus for $25. You can buy this one anywhere, for example, in a hardware store or via the Internet, as I did (I think at www.greenlaser.com.ua). I do not recommend purchasing modules of higher power (up to 20 mW), since their use is advisable in very rare cases. There are ready-made self-powered modules - if you find it, then buy one better. For my laser module, I had to create a small tool to make it convenient to hold in my hand, turn it on / off. I fed him with the usual crown 9B: red wire "+", black "-": if it is the other way around, it will heat up and, as a result, will fail prematurely.
Calibration angle. Orientation in space, being able to read the image parameters, allows the program a special device - the calibration angle. Fear not, this is the cheapest component, which is two sheets of specially applied markers that need to be placed at an angle of 90 °.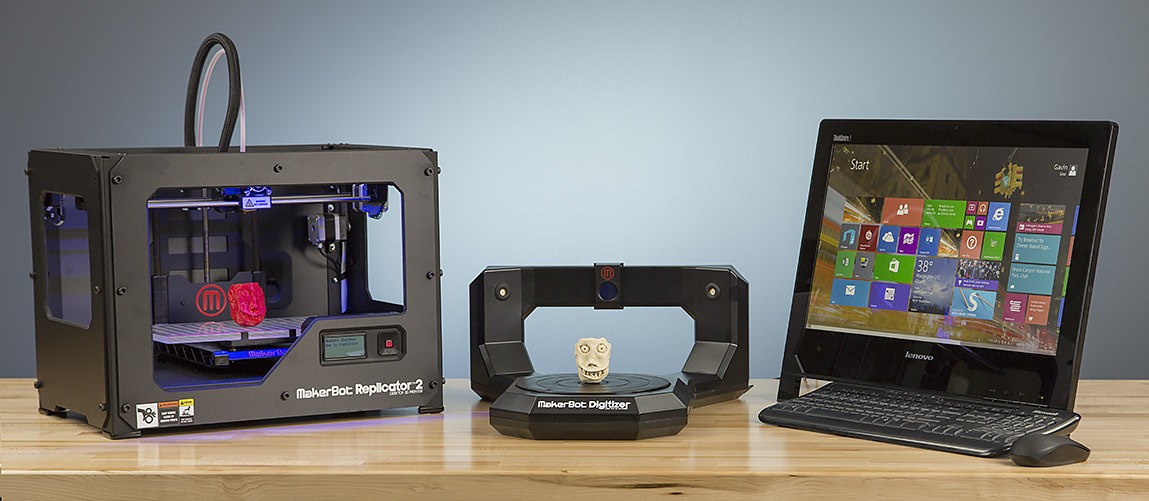 After installing DAVID, you will find PDF or CDR files in the root directory, for example “Calibpoints_Scale30_DIN_A4.pdf”. Or with a similar name, but in CDR format for printing from CorelDraw. Select the file whose name corresponds to the size of the paper on which you are going to print. In general, I advise you to proceed from the size of the scanned object. Don't make a big angle if you're going to scan small objects. For starters, A4 size calibration sheets are quite suitable. It is more difficult to fix them at the right angle. I made my first corner like this - I simply bent the white corrugated cardboard, fixed it on the base, and then attached the calibration sheets butt-to-butt. It is better not to glue them, as the sheets will become wavy - this is unacceptable. Instead, you can carefully attach them around the edges with tape. I must say that after the very first scans, it became clear that the angle was not ideal. Therefore, I had to redo everything: I connected two pieces of chipboard, fastening them with corners.
 Turned out good: corner 90°, the surface is perfectly flat – all of which could not be achieved with corrugated board. In short, there are many options.
Scanning: with and without light
Creating a model
Now the most interesting thing - we proceed to the scanning process itself. Take a look around: there will probably be some souvenirs or figurines in the room - any small object will do for experiments. What definitely does not work is transparent or translucent objects. The laser beam should be reflected, not absorbed by objects. The creators of DAVID recommend in such cases to cover objects with talcum powder or, if you don't mind, with spray paint. I did not bother myself and took a few figurines. Conventionally, four stages can be distinguished in the scanning process, I will tell you about each in more detail. nine0003
Stage 1. Calibration. This is a preliminary stage, so the object to be scanned will be put aside for now.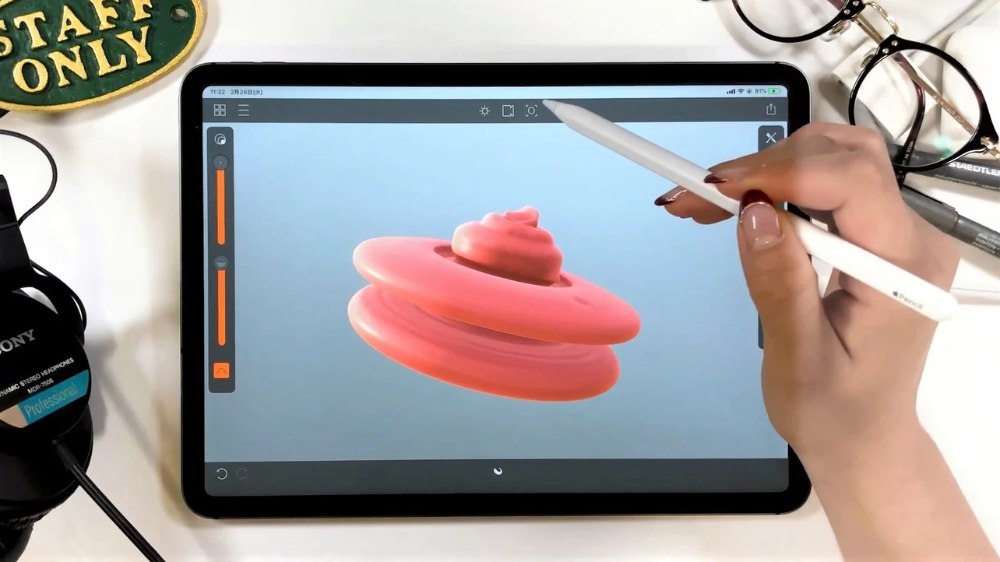 Fix the webcam against the calibration corner so that all components are stationary relative to each other. The camera should be positioned at the level of the lower edge of the calibration sheets. The image must be bright during camera calibration. I scanned in the evening or during the day, but with a shaded window, and the calibration angle was illuminated by artificial light. The calibration itself is carried out in the DAVID-laserscanner. We select our webcam from the list of devices, adjust the image: increase the brightness, contrast. As a result, only black markers are visible on the screen. Click the "Calibrate Camera" button. If everything is done correctly, the program will congratulate you that the calibration was successful. Otherwise, you can try to change the position of the webcam, play around with brightness and contrast. I did not succeed the first time, but then the joy was like after the first handed session! nine0003
Stage 2. Placement of the object. To scan, place the object in the corner of the calibration corner. For best results, it should be approximately in the middle of the calibration sheets. If its dimensions are small, you can use a stand: a box, books, a wooden block of a suitable size. Tell the program the type of laser you are using. Let's turn off the lights! The screen should be dark. If not, lower the brightness values. Do not be afraid if the markers are not visible: the program has memorized their location, and now they are not so important to us. Turn on the laser and aim it at an angle just above our subject. A broken white line should appear on the screen (the program analyzes a black and white image). The distance between the camera and the laser plane (i.e. the triangulation angle) should be as large as possible for greater accuracy. Otherwise, you will see a warning: "Crossing angle is too small." At the beginning of the article, I talked you out of using a point laser pointer, and here's why. Even moving quickly with a dotted pointer, not only will you not get a straight line, but the program will not be able to calculate the value of the triangulation angle.
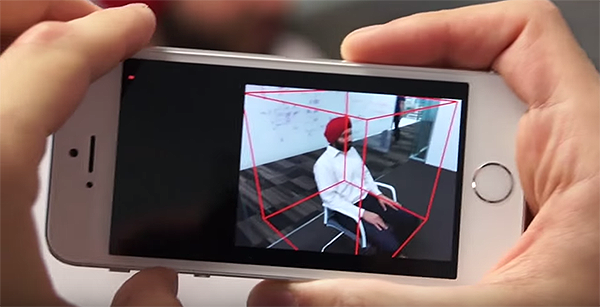 nine0003
Stage 3. Scanning. The scanning process starts after pressing the "Start" button. It is necessary to draw the beam up and down on the object several times so that the program reads the parameters of the object through the webcam. There is an important point here: you need to turn the brush with the laser, and not lower your hand! Speed is not important, but don't try to do it very fast. When scanning, I often looked not at the object, but at the screen, watching how the program analyzes the shape of the object, drawing colored lines on the screen. Looking at the screen is more convenient for two reasons. Firstly, if the laser line is not visible on both sides of the object or the triangulation angle is insufficient, the program will immediately display a message (and you can fix it). Secondly, looking at the laser is tiring for the eyes due to the high contrast between the black background and the bright beam. Having passed through the object with a beam up and down as much as necessary, press the "Pause" button. Now you can save the scan result to a separate file using the "Save" button. There is another option - immediately transfer the image for subsequent stitching with other scans by clicking the "Transfer" button. When you click "Transfer", the scan is transferred to the next stage (gluing) without saving to a file, but we do not leave the current stage and can repeat the scan by changing the position of the object (do not forget to press the "Delete" button before a new scan). It is important to understand here: to create a model, you need to make several scans. For simple objects, it will be enough for you to rotate the object, for example, by 45º. If the surface of the object is complex, then you will need to scan it from different sides and only then stitch the scans together. Another important point: the scans must necessarily overlap each other to make it easier for the program to analyze them. nine0003
4th stage. Form stitching. The last step before getting the model is merging the scans. If you did not save the scans, but transferred them for gluing using the appropriate button, then you can start stapling right away. Otherwise, click the "Add" button and load the previously saved files. The stitching process can be divided into two stages: scan joining and stitching itself. By selecting scans in pairs, you indicate to the program the joining method. DAVID copes with this very well, provided that there is something to join - the scans must overlap each other. If the patches do not overlap, you will have to go back to the previous step and scan from those positions of the object that will give such an overlap. Having completed the docking for all scans, click on the "Sew" button. Depending on the selected settings, in a few seconds we will see the result of stitching all the scans into a single model. Click the "Save" button. Now we can load our model into ZBrush or Mudbox and bring it to perfection. The model is ready! nine0005 In the TriAngles program, due to the rotation of the object, the formation of the digitized surface would occur automatically, this is its advantage over DAVID.
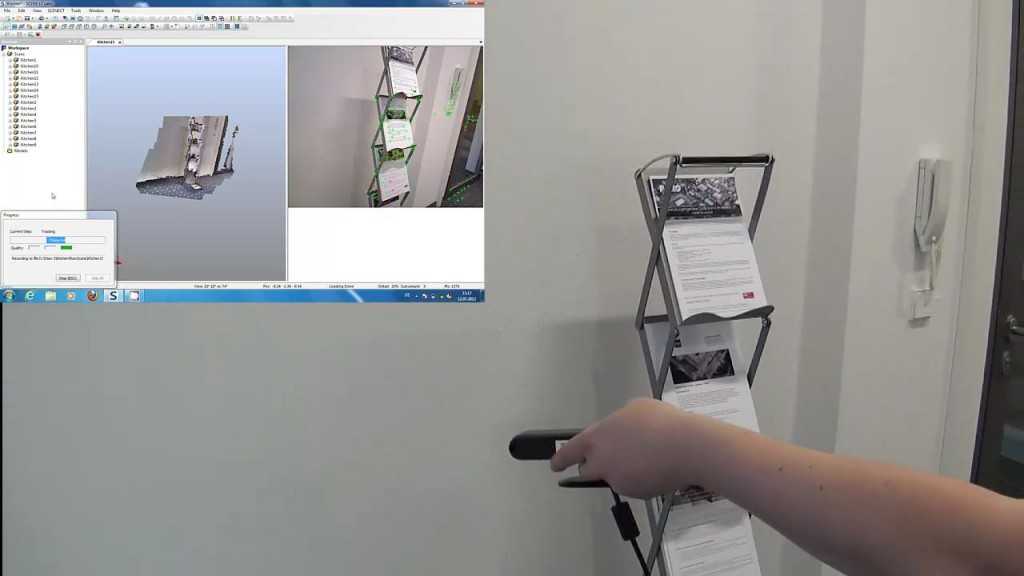 But how would she cope with the formation of the surface in the "dead" zones? I don't think so. Or in these places we would get an error. We wanted to get the model as accurate as possible. Therefore, we will consider additional steps for stitching scans as necessary costs.
Finalizing the finished model in the 3D editor
Instead of a conclusion
It is quite possible to assemble a 3D scanner that will produce more than decent results at home. I hope you can verify this. Unfortunately, to scan small objects (and I needed to create objects for jewelry) you need a very good USB camera with a CCD matrix, which I don’t have (it’s quite expensive), so my experience remained experience: apply it on case for scanning jewelry did not work. But I experienced an unforgettable pleasure, getting full-fledged models of a variety of objects using a scanner that was assembled literally on my knee. nine0003
A homemade 3D scanner can get a good result
If there is no laser
You can do without a laser to 3D scan an object (I'm not kidding).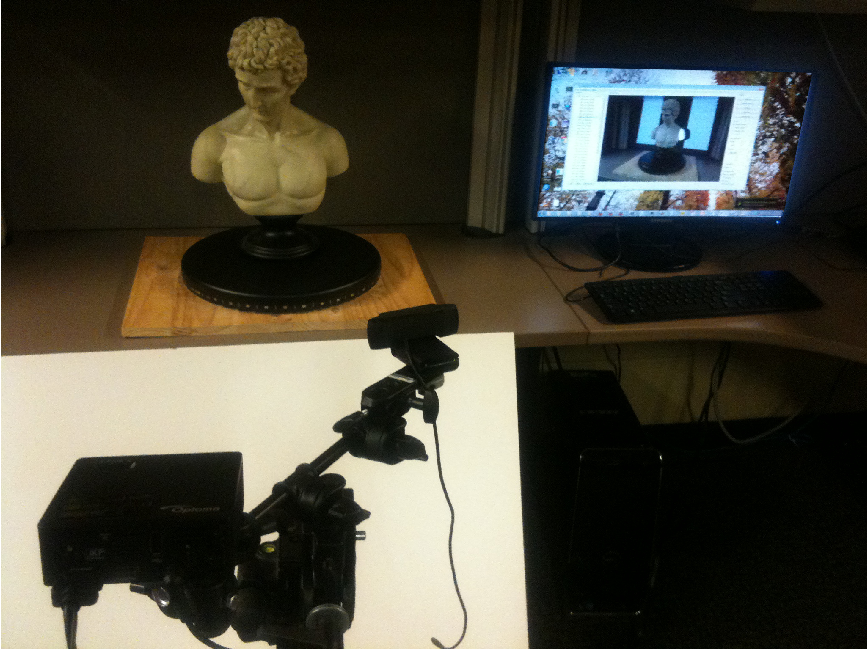 A projector with a powerful lamp is suitable, the light of which must be directed through a narrow slit to the object being scanned. We get a narrow white line - why not a white laser? True, in addition to the projector (which is not cheap in itself), you also need serious equipment to hold the projector in the right position. It's hemorrhoids. You can go from the opposite direction - send a bright light, and draw a shadow from a stretched thread over the object: this is also provided by the program developers. In this case, the program can invert the processed image. However, something told me that this would not give a good result. nine0003
The developer's website www.david-laserscanner.com has an excellent manual in Russian. Be sure to read it! It describes in great detail both the requirements for the equipment, and the scanning sequence, and various nuances that you may have.
Hacker Magazine, October (10) 153
Eduard Guz .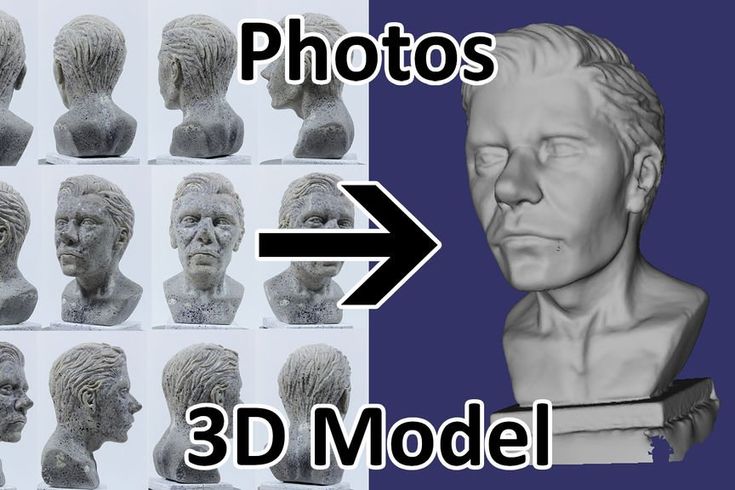
You can look through this material in magazine layout here.
Subscribe to Hacker
- RUB 1,999 for 12 numbers of paper version
- 1249 rub. for an annual subscription to iOS/iPad (Android release coming soon!)
- "Hacker" on Android
details and technology. Homemade 3D Scanner
If you want to make your own 3D scanner, the first step is to find a webcam. If you have it, the cost of the entire project will cost 40-50 dollars. Desktop 3D scanning has made great strides in recent years, but it still has major limitations. The hardware of the technique is built on the basis of a certain volume and resolution of scanning. You can get good results only if your subject meets the requirements and shooting resolution. nine0003
How 3D photography works
Photogrammetry uses a set of conventional 2D photographs taken from all directions around an object. If a point on an object can be seen on at least three images, its location can be triangulated and measured in three dimensions.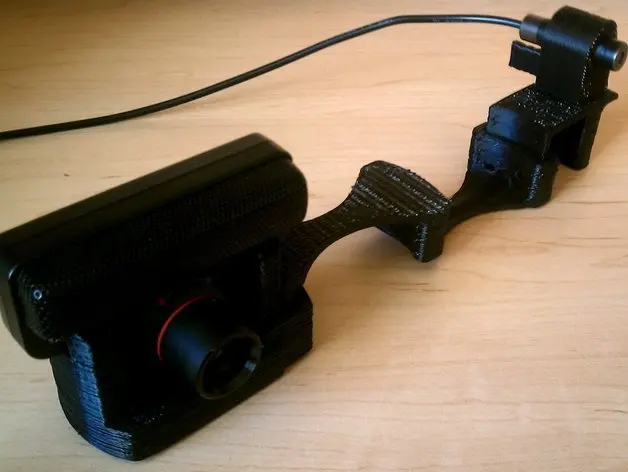 By identifying and calculating the location of thousands or even millions of points, the software can create an extremely accurate reproduction.
Unlike a hardware scanner, this process has no size or resolution restrictions. If you can take a photo of an object, you can scan it:
- The limiting factor in photogrammetry is the quality of the photographs and therefore the skill of the photographer.
- Photographs must be clearly visible and clearly in focus.
- They should also be placed around the object so that every part of them is covered.
Without a 3D scanner, you can only make a 3D image of large objects. Small items cannot be scanned. To understand this in more detail, we will analyze the concept of photogrammetry. nine0003
What is photogrammetry and how does it affect the display of objects?
Photogrammetry is the science of taking measurements from photographs, especially to reconstruct the exact position of points on a surface. It can also be used to reconstruct the motion paths of designated reference points on any moving object, its components, and in close proximity to the environment.
In short, it gives you the ability to create a 3D grid from multiple photos by comparing similarities between images and triangulating them in 3D space. nine0003
Photogrammetry has been around for a while, but it wasn't until Autodesk jumped into their Memento beta program that things started to work. Memento was renamed to ReMake when it left the beta phase. Sounds like magic, right? Well, it's not magic, it's reality. Now anyone can do 3D scanning without spending hundreds on a scanner. Even affordable open source 3D scanners require quite a lot of knowledge to get them to work properly. With photogrammetry anyone can get what they want. nine0003
Turntable - the second step of creating a scanner
All you need to create your own 3D scanner is your smartphone, included headphones and a player. Here's how it works: you turn the crank, and for every full turn of the turntable, the phone's camera is triggered by the headphone volume 50 times.
Simple! Transfer photos to your computer and then use Autodesk ReMake to do wonders. It's amazing, but not only is it good at meshing, it also provides tools to tweak the mesh, repair holes, align, prepare for 3D printing, or serve as a system shape as a 3D resource for games or renders! nine0003
Well, given that Apple has removed the headphone jack for the iPhone 7 and above, an updated version of the scanner creation will be used. It is based on the principle of working on a trigger for a Bluetooth camera. This will replace the need for a headphone jack.
- High quality photogrammetric scanning requires high quality photographs of the subject from all angles.
- The easiest approach for scanning small things is to rotate the object while taking the photo. nine0102
- To do this, the scanner uses a stepper motor controlled by the Arduino board.
- The stepper rotates the object by a fixed amount, and then the infrared LED turns off in a freaking tricky series of flashes that mimic a camera's wireless remote control.
An LCD display screen with a set of buttons allows the user to control the Arduino. Using the buttons, the user can select the number of shots to be taken per revolution. A high quality DIY 3D scanner can work in automatic mode, where it takes a picture, advances the stepper motor and repeats it until it completes a full revolution. nine0003
There is also a manual mode where each press of the button takes a picture, moves the jog dial and waits. This is useful for scanning details. The 3D scanner focuses on the frame around the image.
Optional software
When the photogrammetry software detects a feature in a photo, it tries to find that feature in other images and records the location on all pictures that appear.
- If the object is part of a rotating object, we get good data.
- If the detected feature is in the background and does not move while the rest of the object is being scanned, it can break the space-time continuum, at least as far as your software is concerned.
There are two solutions:
- One is to move the camera around the subject so that the background stays in sync with the movement. This is good for large objects, but it's much more difficult to automate the process. nine0102
- An easier solution is to leave the background untouched. This is easier to do for small objects. Add the right lighting to that and you're on your way to featureless backgrounds.
Another tip is to overexpose your images with a stop or two. This allows you to capture more detail in the subject's shadow while separating the background so that any remaining background objects disappear into brilliant white.
- "Arduino". It has pins that are not covered by the LCD screen, making it easy to connect. nine0102
- SainSmart 1602 LCD Shield which has a display and some buttons to control the scanner.
- Stepper motor driver (Easy Driver).
The NEMA 17 stepper motor will rotate the scanned object. With a large stepper motor (with appropriate driver and power supply), this high quality DIY 3D scanner could scale up the scan. 950 nm IR LED triggers the camera. Some popular models of handheld 3D scanners are based on this principle. You can repeat the building process with your own hands. We offer several options to choose from. nine0003
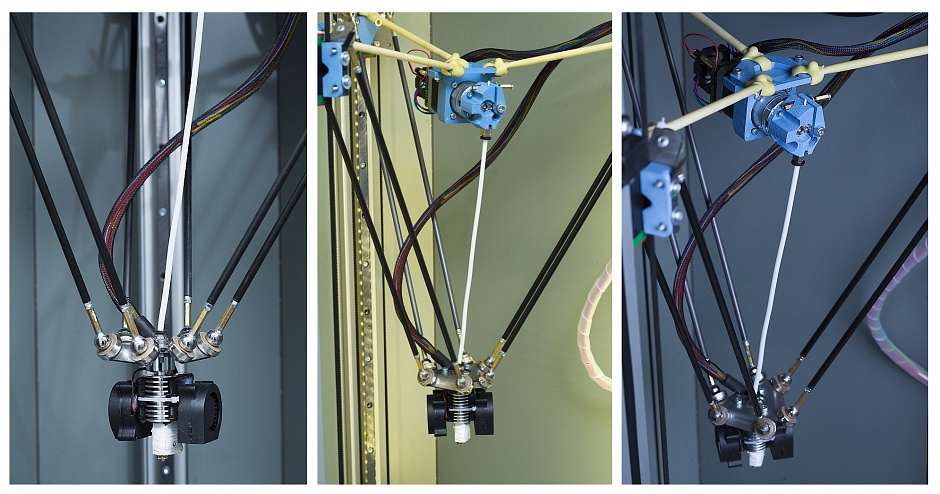
Spinscan by Tony Buzer: the foundation of all scanners
In 2011, 3D printing genius Tony Buzer released Spinscan. This is a homemade open source 3D scanner based on a laser and a digital camera. Later, MakerBot used the ideas from Spinscan to create the closed source Digitizer Scanner.
FabScan
FabScan started as a graduation project and has since been adopted by a small community that continues to improve its capabilities. The FabScan works like many other laser scanners, but it's aided by a built-in housing that helps even out light levels, preventing scan distortion. nine0003
VirtuCube
An alternative method for laser scanners is the structured light scanner. Using a pico projector instead of a laser, the VirtuCube can be easily created with a few printed parts and basic electronics. This whole system can be placed in a carton box to prevent other light sources from causing printing errors.
Two exciting new open source laser scanners have already been released: The BQ Cyclop and Murobo Atlas.
BQ - laser scanning system
Spanish consumer electronics company BQ announced the Cyclop 3D scanner at CES. Cyclop uses two laser line levels, a standard USB webcam, and BQ's custom Arduino controller. BQ has written his own scanning application called Horus. While reports say the Cyclop isn't available yet, BQ says it will be later this year.
"Atlas" - a project in progress that needs some work
Murobo's 3D scanner with a description of how it works is currently seeking funds on Kickstarter. Like Spinscan, Digitizer and Cyclop, Atlas uses laser line modules and a webcam to scan an object on a rotating platform. Atlas replaces the Arduino Raspberry Pi to integrate control and capture into a device. Like Cyclop, the creator of Atlas promises it will be an open source project. Sets for 129dollars sold out, but some remained at $149 and $209.
In 2019, the company aims to release a smartphone-based 3D scanner that will not only display background visibility but also construct focus when capturing an image. In America, DIY novelties are amazing. If you don't know how to make a 3D scanner, use the unfinished version of Atlas. There is a fairly clear functionality, and developers only need to flash the device and ensure the operation of those functions that they want to see as a result. nine0003
CowTech Ciclop: new multifunctional
Price goes up to $160 (depending on whether you print 3D parts or not). The company is based in the USA. The resolution of the finished images reaches 0.5 mm. Maximum scanning volume: 200 × 200 × 205 mm. BQ formed the basis of a DIY 3D scanner kit for a 3D printer. With your own hands, you can modify the version of the model to create images in four-dimensional space.
CowTech Engineering leveraged BQ-led funds to give unique value to the updated model. Opportunities added:
- environmental view,
- background capture,
- inverted style lens display.
True to the open source movement, Cowtech launched a Kickstarter campaign to raise money to launch a production version of the original, Ciclop CowTech. The team set a lofty goal of raising $10,000 but was greeted with surprise and delight when the community was able to raise $183,000. The CowTech Ciclop DIY 3D scanner kit from a camera and phone was born. nine0003
So what's the difference between the CowTech version and the BQ DIY version?
CowTech Ciclop still uses Horus 3D software as it is a fantastic store for 3D object scanning. The differences, however, lie in a slightly different design, which the team spent several days developing so that the parts can be 3D printed on any FDM 3D printer.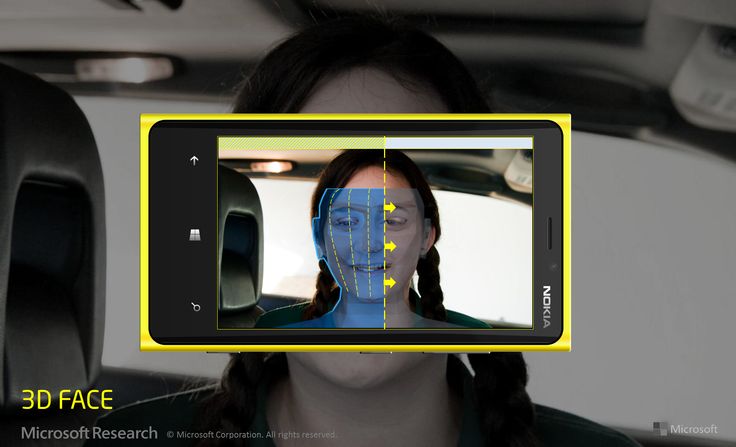
The same blanks can be used to design your own devices. The company's 3D scanners and printers only have a small build volume, so CowTech has designed parts that can be printed on any printer with a build volume of 115×110×65mm, which is found in almost all 3D printers. nine0003
Ciclop from CowTech:
- There are adjustable laser holders here.
- CowTech DIY uses laser cut acrylic.
BQ Ciclop:
- Models use threaded rods.
- No laser cut acrylic.
No big deal, and the scanners still look pretty similar, but CowTech only intended to improve on the existing design, not reform it. CowTech sells scan-ready Ciclop for 159dollars on your website. All in all, this is a great cheap DIY 3D scanner, very efficient for laser triangulation 3D scanning.
Rotary machines and tables for creating scanners
- Mobile phone equipped with DIY 3D scanner technology: photogrammetry - there is a technological feature.

- Price: Free self-printing (although materials will cost around $30).
- This do-it-yourself 3D scanner will be quite easy to create. Dave Clark, a British manufacturer, made sure that the models could be disassembled even before the start of sales. Spare parts will go to the creation of other scanners. nine0102
This is because it is based on photogrammetry rather than laser triangulation and is compatible with your smartphone! You can download the 3D printable file to sync devices.
You can make a 3D scanner with your own hands from improvised means. You just need to trust the creators of DIY 3D. A simple device instantly turns your iPhone or Android into a 3D scanner by connecting it to this player. Then, using headphones and a phone camera, he takes over 50 photographs of the object, which will be scanned as the turntable rotates. nine0003
Once you have taken these images, you can load them into a program such as Autodesk ReCap to turn the photos into a full 3D file.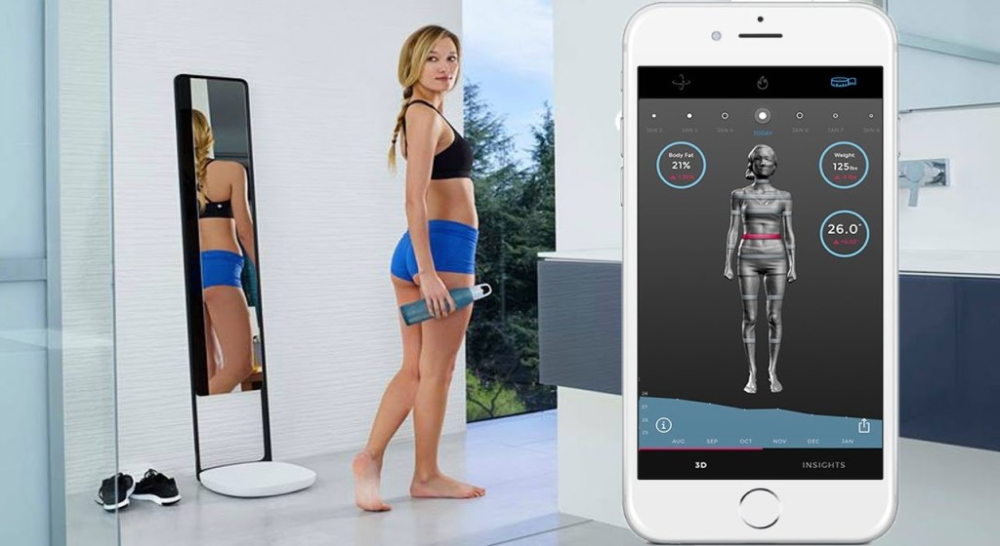
Overall this is a fantastic creative project and a great DIY 3D scanner for people on a budget.
Microsoft Kinect 3D Scanner
It's even lower at just $99 (but no longer sold, though Kinect V2 is still available with Xbox One). The company's slogan is: "Make your own 3D scanner from Kinect and surprise your friends.
While Microsoft has responded to demand by creating its own 3D Scan app for the Kinect scanner, there are a number of third-party options that may be preferable. These are:
- Skanect, made by Occupital, which also sells a structure sensor.
- Reconstruct Me. It provides a set of tools that allow you to perform 3D scanning for less than $100.
The results are not fantastic, but for the price they are quite acceptable. It has been shown to be inferior to traditional protogrammetry in quality, especially in fine detail, such as on small models such as shark teeth. Still, for beginner 3D scanners, this is a fantastic entry-level product, especially since you might already have one for the Xbox 360.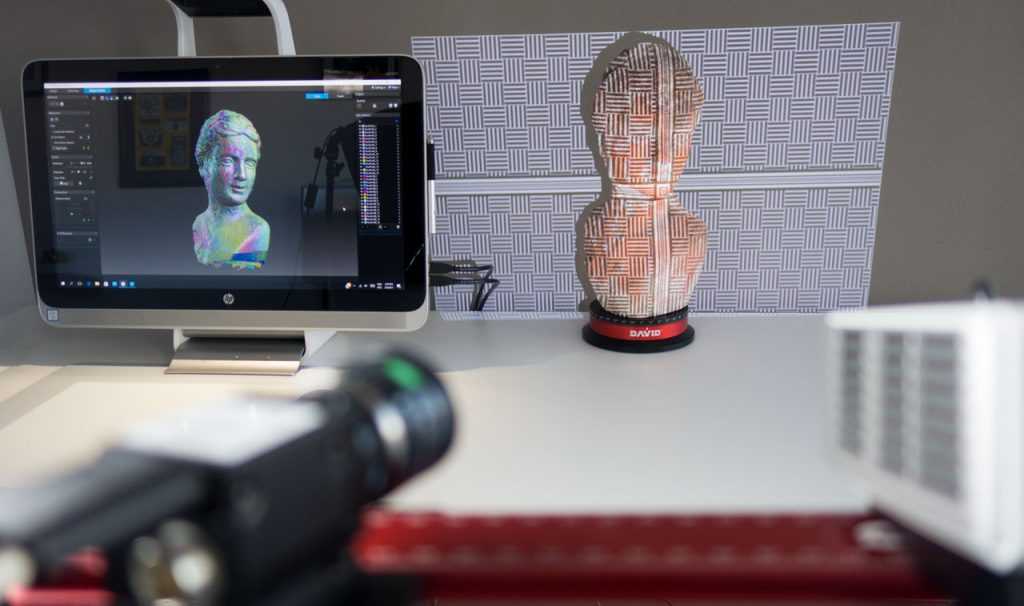 0003
0003
Before building a scanner
There are many cameras you can use. Of course, in order to know how to make a 3D scanner from your phone with your own hands, you need to calculate what is needed for this. If you plan on using Pi Scan to control your cameras, then you should use the Canon PowerShot ELPH 160. But if you're using some other setup, here are some general camera recommendations:
- How many megapixels do you need? Measure the items you are about to scan. Aim for the largest average size (do not choose the largest outliers). For example, most textbooks are 22.86 × 27.94 cm. Now multiply this size by the PPI (pixels per centimeter) you intend to capture. 300 is a safe minimum, although you can't go wrong if you grab more. So, in our example - 9 × 300 = 2700. 11 × 300 = 3300. We need an image of at least 2700 × 3300 = 8,910,000 pixels, or about 9 megapixels.
- What control do you need? If you're just scanning a single book, or scanning an item just for its informational content (as opposed to trying to capture the actual appearance), you don't need very good shots.
 If the lighting or camera settings change from shot to shot, you'll still get a good result. nine0102
 - Shutter speed - white balance ISO aperture.
- Flash on/off Any custom image processing (sharpening, color enhancement, etc.).
- Focus (ideally the ability to lock the focus).
- Impact compensation.
- Image magnification - most SLR cameras allow for all of this kind of control; for compact cameras, only Canon Powershot cameras that support CHDK. They allow you to control all these parameters. nine0102
Much depends on the budget. Scanners are sold at the same price as cameras. If you want to do everything yourself, then the budget is limited. Pay attention to the affordable segment of the optics and spare parts market.
- The first difficulty encountered in building a 3D laser scanner is finding a rotating platform. At the same time, it needs to be controlled only with the help of MatLab. Instead of spending a lot of money or time, you can buy a 28BYJ-48-5V stepper motor with a ULN2003 drive test module board.
 nine0102
 - Next, glue the platform to the stepper motor shaft and place it in the groove inside the holder. The platform should be flush with the "marble", but keep in mind that the cheaper it is, the more inconsistent diameters that can make things not level.
- If you have a method for obtaining precise rotation that can be controlled in Mat Lab, set up the camera at any distance and height, as well as the laser line to the left or right of the camera and the turntable. The angle of the laser should be optimal to cover most of the turntable, but nothing needs to be exact, we'll handle the difference in model scale in code. nine0102
- The most important part for proper operation is camera calibration. Using the MatLab computer vision toolkit, you can get the exact focal length and optical center of the camera with an accuracy of 0.14 pixels.
Please note that changing the camera resolution will change the values of the calibration process. The main values we are looking for are the focal length, measured in pixel units, and the pixel coordinates of the optical center of the image plane.