My 3d print
Upload 3D Model | 3D Printing Service
Upload 3D Model | 3D Printing Service | i.materialiseOops...Seems your browser is blocking cookies. Please adjust your settings to accept cookies.
drag and drop it like it’s hot
Analyzing your design
Please wait for a few seconds while we update the 3D viewer with the repaired model.
Something went wrong while updating your model. Please try again.
No results found.
Sorry! Something went wrong. Please refresh the page and try again.
Upload 3d model
Share Your Model Recent models
3D model workspace
Materials
Loading. ..
Colors and Finishes
Loading...
{{$select.selected.name}} No results found.
Scale
Quantity
Price
{{vm.getProductProcessingStateKey() | translate}} Calculating
Discounted price
By clicking ‘Accept Repair’, I understand that the repair may have altered the geometry of my model.
(*) If the model is 3D printable in the requested material
Materials
Analyze
Optimize
3D Printing
- How It Works
- 3D Printing Materials
- 3D Printing Technologies
- Hire a 3D Designer
- Educational Discount
Business
- Manufacturing Partnership
- Referral Partnership
- White Label Integration
- Crowdfunding
- API
Support
- Contact Us
- Shipping Info
- Tutorials
- 3D Design Tools
Shop
- Shops
- Designers
- Open a Shop
Community
- About Us
- Blog
- Forum
Terms and Conditions Privacy Policy Cookie Statement Sitemap
© Copyright 2022 Materialise nv, all rights reserved. “i.materialise” is a registered trademark of Materialise nv.
9 Ways How To Fix 3D Prints That Are Not Solid – 3D Printerly
3D printed parts come in all shapes and sizes, but in some instances they come as not very solid. If you are 3D printing an object that you don’t want to be very solid, then this is perfect, but what about when you want your 3D prints to be solid?
To fix 3D prints that are not solid you should increase your infill percentage, improve your top layer settings by increasing the wall thickness. You should check whether you are experiencing under extrusion issues because this can lead to 3D prints that aren’t solid.
Keep on reading for more information on why your 3D prints aren’t solid in the first place, as well as many fixes that you can implement as soon as possible to finally correct this issue.
Why Are My 3D Prints Not Solid?
For your 3D print to be successful, it has to have a solid exterior that is filled with a grid. The print’s exterior should be smooth and solid.
However, users often find it challenging for the top layer to be flawless and end up producing prints that have gaps in them. This phenomenon is known as pillowing.
There can be a host of reasons why the outside of your print isn’t as solid as it should be. Let’s look at them one by one.
- Infill Percentage too Low
Most of the time, what makes 3D prints not solid enough is the low infill percentage. It is one of the most common causes of the first layer not being solid. The low infill density can also be connected to the fewer number of top layers.
If the interior of the print is not solid enough, then the exterior is likely to be the same.
- Poor Top Layer Settings
Often, too few top layers can be the leading cause of obtaining 3D prints that are not solid. The solid top layer is to be printed on top of the grid that is supposed to fill the print.
A thin top layer or a few layers cannot bridge the gaps of the infill, thus leading to a 3D print that’s not solid.
- Under Extrusion
If you feel that you’re doing everything possibly correct but are still acquiring prints that are not solid, it is very likely that under extrusion is the reason behind it.
When the nozzle of your 3D printer is not extruding as much filament as the software expects it to, under extrusion is said to occur.
The plastic released from the hot end is not hot enough to bond with other layers, making the 3D print not solid enough to stay put.
- Printing Speed too Fast or too Slow
If the printing speed of your 3D printer is too fast, there is a higher chance that you will have gaps in them.
Similarly, if the printing speed is too slow, it may cause print deformation since the filament is at a higher temperature for longer, and won’t deal with overhangs and bridging so well.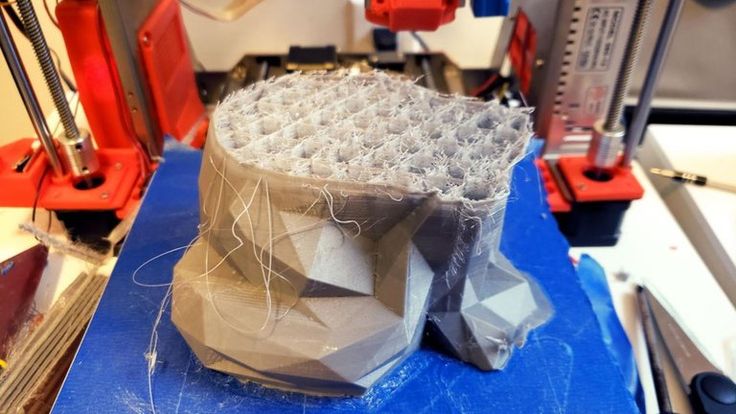
Both of these scenarios can make your 3D print’s first layer not solid.
- Mechanical Issues With Your 3D Printer
Users often face several mechanical issues with their respective 3D printers that hamper the printing process. There can be a vast array of issues that can hinder the possibility of a solid, successful print.
From loose nuts and bolts to poor lubrication to worn-out gears, anything can contribute to a failed 3D print not solid enough.
- Filament Quality and Diameter Settings
New users often tend to ignore this aspect of 3D printing, nonetheless, it is important. The quality of filament you are using plays a huge role in determining the quality of the print obtained.
- Changes in Temperature
Unexpected temperature changes can also ruin your 3D prints. If there is a temperature build-up, then the top layers may not be cooled well enough. It can lead to spoiled layers and thus cause gaps in the print.
How to Fix 3D Prints That Are Not Solid?
Now that we know the reasons behind what makes your 3D prints not solid, let us look into what you can do to combat this issue.
1. Increase Your Infill Percentage
As mentioned earlier, a low infill density is likely to be a leading cause behind your 3D prints not being solid. The infill acts as the foundation for your top layers.
You need to make sure that the infill density is optimal enough to shoulder the top layers on top of it. Increase your infill density by 10-15% to see what suits your printer best and print accordingly.
You can also increase your “Infill Overlap Percentage” which is the amount of overlap between the infill and the walls as a percentage of the infill line width.
The more overlap you set, the more firm the walls connect with the infill.
2. Change Your Infill Pattern
Certain infill patterns have differing levels of density overall, meaning that a 10% infill percentage with one infill pattern can produce more infill than another pattern with a 10% density.
It’s a good idea to have a play with your infill patterns and “Preview” your layers beforehand to get a good look at how your 3D prints will be made up.
Once you slice your model in your chosen slicer, there should be a place where you can preview each layer from top to bottom, allowing you to see how densely packed the infill is.
One setting that can give you a general idea of your infill is the “Infill Line Distance” which is a setting in Cura that gives the distance between printed infill lines.
For example, a “Grid” pattern with 10% infill density gives an infill line distance of 8.0mm, and a 15% infill density gives 5.33mm.
When you switch your infill pattern to “Gyroid” with a 10% infill density, you get 4.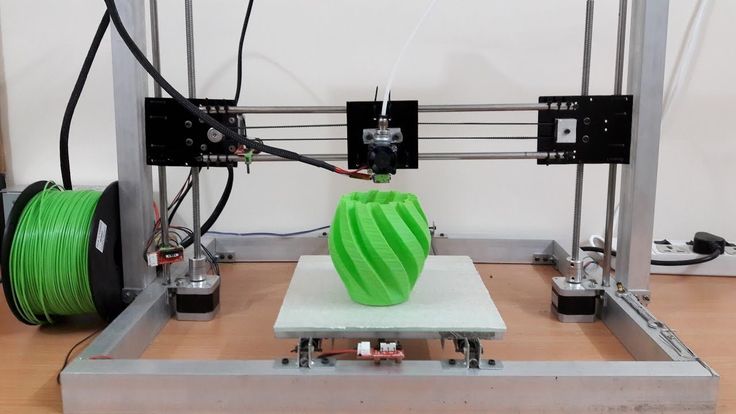 0mm, and a 15% infill density gives 2.67mm.
You would need a 5% infill density with the Gyroid infill pattern to get the same 8.0mm as the 10% infill density on the Grid pattern.
3. Adjust Top Layer Settings
Besides the infill percentage and pattern, the number of top layers plays an important in deciding the quality of your print.
Your top layers are related to the “Wall” or “Perimeter” of your 3D prints, meaning the thickness of the exterior. When your exterior isn’t very thick and sturdy, you are likely to run into issues with your 3D prints not being solid.
You should increase your top/bottom layer thickness in your slicer by increasing the number of top/bottom layers, as well as setting a good enough overall wall thickness for your 3D prints.
A good wall thickness for a fairly sturdy 3D print is around 1.5mm or around 3x your line width, but to improve the “solidness” of your models, you can increase that.
In Cura, you can directly set what your “Wall Thickness” will be, so you can really increase the sturdiness and durability of your printed objects by changing just this one setting.
You also want to focus on the “Top/Bottom Thickness” setting for the best results.
If you find that your 3D prints have some sagging down through the gaps of your infill, your top layer thickness and infill can easily fix this.
4. Fix Under-Extrusion
After low infill density and poor top layer settings, under-extrusion is the next common problem users face while 3D printing. You need to fix under-extrusion issues to avoid missed layers and gaps in your 3D prints.
Given below are some of the common solutions to this issue –
- Increase the hot-end temperature in 5-degree increments
- Calibrate your extruder steps for accurate filament extrusion
- Check your nozzle for clogs and jams
- Replace worn-out parts
- Optimize the layer heights according to Magic Numbers
- Use good quality filaments
Check out my article on How to Fix 3D Printer Not Extruding Enough (Under-Extrusion) which goes into more details to fix this problem.
The video below takes you through the essential step of calibration your extruder’s e-steps for accurate filament extrusion.
5. Adjusting the Print Speed
Depending on how well-tuned and maintained your 3D printer is, you may be able to reach high printing speeds without it having much negative effects on your print quality.
When your 3D printer hasn’t been properly calibrated, a high printing speed can definitely lead to inaccuracies in your print quality, relating to the infill and the wall thickness.
Make sure your 3D printer can handle the speed that you are using, and most of the time, slowing down your 3D printing speed can help out in this regard.
Your slicer already makes sure to automatically adjust the printing speed when printing certain parts of your model, such as the first layers, wall speed, supports speed, and so on.
A printing speed of 40-60mm/s is the ideal range for most 3D printers, and you can adjust your speeds by 10mm/s to test the differences in print quality and durability for solid prints.
6. Improve the Foundation of Your 3D Prints
One of the more important factors for the success of your 3D prints is just how strong the foundation is from bottom to the top. When you have certain shapes and sizes of models, you might find it hard to get a sturdy print base.
Adjusting the orientation of your model so that most of the bottom is flat increases how well the rest of the print will go.
You can also use brims or rafts to help improve the foundation of your model.
When you don’t have a sturdy foundation, you are more likely to have models slightly moving around during the print, leading to worse dimensional accuracy and potentially prints that aren’t as solid as they can be.
7. Solve Mechanical Issues of the 3D Printer
Users and 3D printing enthusiasts often face mechanical issues that hamper their printing process.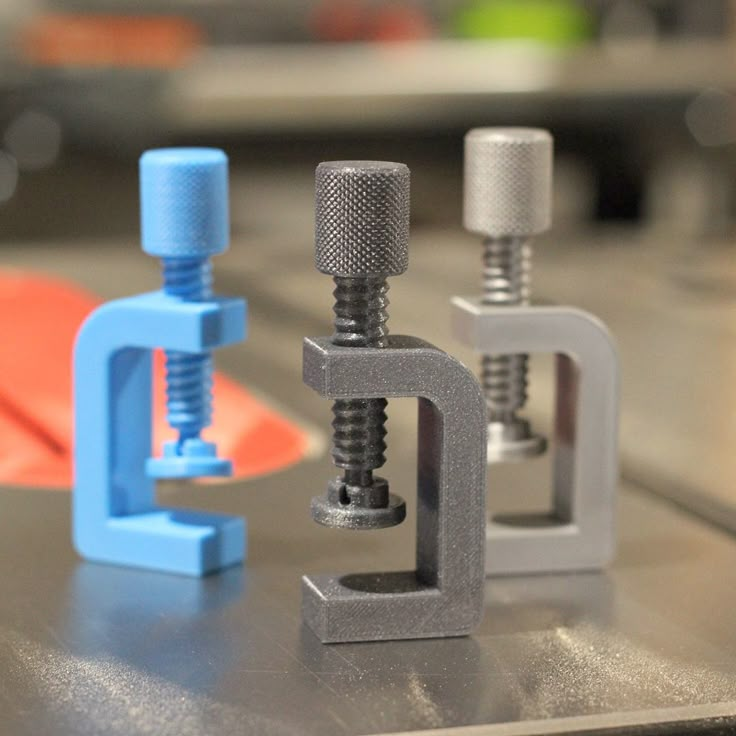 Given below are common fixes to the problems –
- Proper lubrication for the smooth working of parts and gears
- Tighten screws, nuts, and bolts
- Replace worn-out gears
- Clean the nozzle periodically
- Optimize print settings
- Check the stability and level the bed
8. Using Good Quality Filament and Checking Diameter
Using good quality filament can go a long way in getting successful prints. You should make sure that the filament diameter you’re using matches with the diameter inserted in the software.
The ideal way to do this is to measure multiple infill diameter points along your filament, then take an average and set that as your filament diameter.
You can easily measure the diameter by using a pair of good quality calipers. The most commonly used filament diameters are 1.75mm and 2.85mm.
The video below by Thomas Sanladerer goes into a really detailed filament measuring video to see how tolerant brands of filament are. He finds that most filament is within a good tolerance.
As long as you aren’t getting the cheapest stuff you can find, and using a reputable brand, you should be fine on your filament quality.
9. Improve Cooling
Increasing the fan speed or just accelerating the cooling process can largely help avoid sagging of top layers. Cooling allows the filament to harden and thus act as a strong base for the top layers.
In this way, you can acquire smooth, solid, and sturdy prints, and minimize pillowing.
Many people recommend that you use a good fan duct to direct the air right to your 3D printed objects.
The Bullseye Petsfang Duct from Thingiverse is a popular one that people use for their 3D printers.
How to Fix 3D Prints That Are Spongy
The main cause for 3D prints that are spongy is from under extrusion. This can happen due to your filament diameter not being set correctly, not having your extruder steps calibrated, a clog or jam in the hotend, or your printing temperature being too low.
Here’s what you should do to fix spongy 3D prints:
- Change your filament diameter if it’s incorrect
- Check your nozzle size is correct in your slicer
- Calibrate your extruder steps
- Perform a cold pull to remove any partial clogs
- Replace your nozzle if it’s worn out
- Increase your printing temperature if it’s too low
- Make sure your filament roll is not obstructed and spinning freely
- Dry filament that has absorbed moisture
- Fix any heat creep issues, which is when heat travels too far up the heat break.
Check out the video below to see one of the fixes. The main fix was changing his filament diameter from 3mm to 1.75mm, since this impacts the flow of filament through the nozzle.
Rules for 3D modeling for 3D printing
It is known that a prerequisite for 3D printing is the presence of a 3D model, according to which the printer will grow a three-dimensional object. But, even after simulating an object, you should not assume with absolute certainty that the job is done, and soon the printer will give you the finished product. The fact is that not all models are suitable for 3D printing. There are certain requirements for the dimensions, thicknesses and design of models - and these requirements vary depending on the material used and the printer.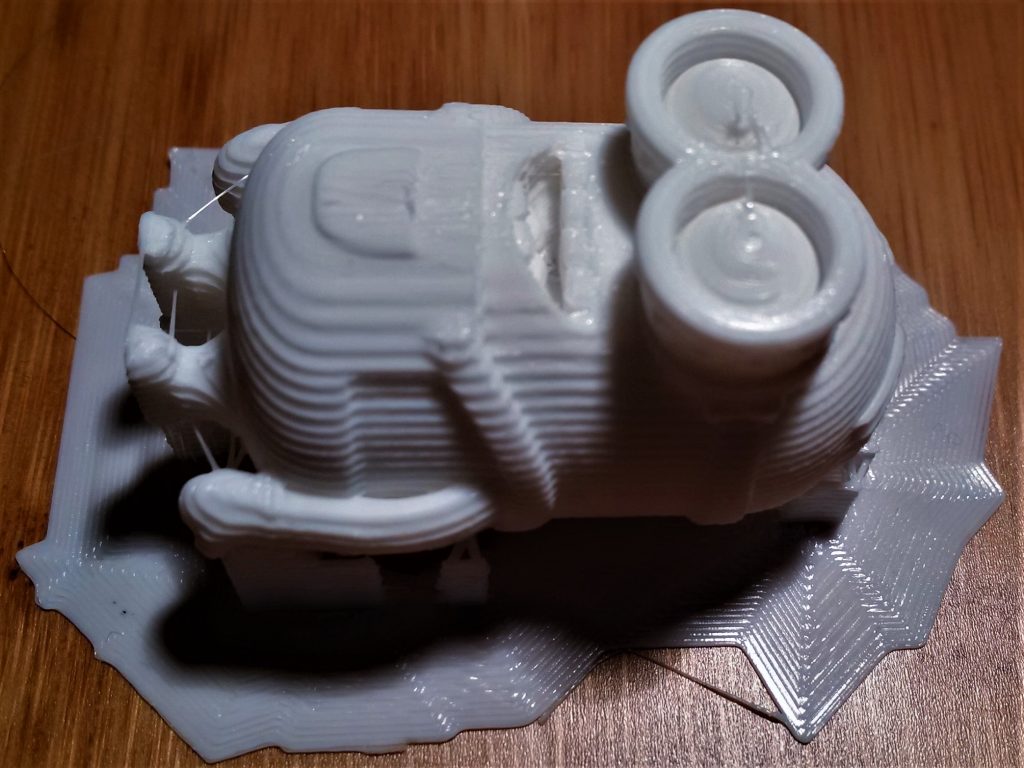 In addition to these individual characteristics, there are general requirements that distinguish printable models from other 3D models. And now we will talk in more detail about how to prepare a model for 3D printing.
First of all, you need to remember that STL files (for one-color models) and WRL (for color plaster 3D printing) are suitable for 3D printing. Almost all 3D modeling programs allow you to export models to STL, so this should not be a problem. You should also take into account that for online download on our website, files no larger than 50 MB each are accepted, as well as an extended list of formats that are automatically exported to STL: STP, STEP, OFF, OBJ, PLY and directly STL. If the file size is more than 50 MB, then you need to send the model to our email address: [email protected]. By the way, one of the easiest ways to reduce the volume of the model and the file size is to create hollow 3D models, we already wrote about how this works in our blog.
Before you start creating a model for 3D printing, it is important to understand what material you want to print the product from.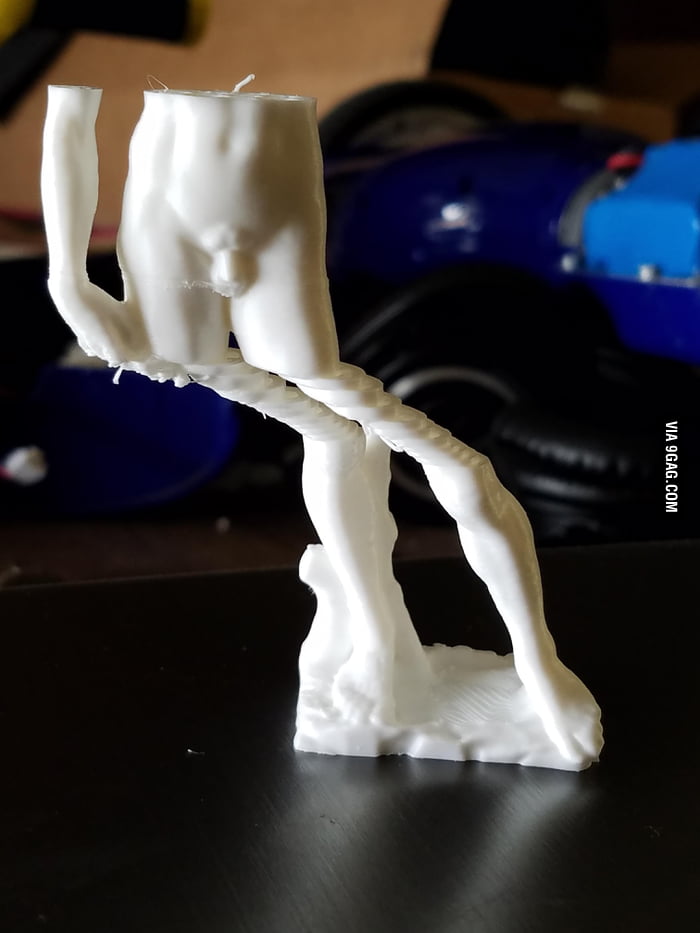 Each material has its own individual characteristics for 3D modeling - maximum and minimum model dimensions, wall thicknesses, distance between moving parts, etc. You can learn more about the requirements for a particular material in the appropriate section on our website.
If you use the online model upload on our website, it will automatically check for standard 3D modeling errors. Models are checked instantly, and if errors that prevent 3D printing were not found, then immediately after uploading the model will appear in your personal account in the "My Models" section. If the model did not pass the test, then you will see a notification that the file cannot be loaded, then you will need to check and refine the model again.
What are the most common errors encountered when modeling for 3D printing?
- Inverted normals - incorrectly oriented normals. Normals should always point outward, they define the boundaries of the object and allow the 3D printer software to understand which is the inside and which is the outside of the model.
 If at least one of the normals is directed in the opposite direction and contradicts the other normal, then this causes a failure in 3D printing, since the printer cannot distinguish between the front and back sides of the object.
 - Non-manifold geometry - Non-manifold 3D model is a prerequisite for 3D printing. The essence of this concept is that each edge of a 3D model must have exactly two faces.
The following errors are usually included in this concept:
o Mesh with holes - "unclosed" mesh problem. Remember the basic rule of 3D modeling: your model must be "watertight" or "airtight". If a hole is formed, it means that some edge is missing one face, therefore the model is not manifold, and therefore not suitable for 3D printing.
o Presence of internal polygons. There must be no faces inside the model, for example inside walls.
o Common ribs. An error occurs when more than two polygons are attached to the same edge. Each edge in your 3D model should connect only two adjacent faces.
o Matching edges. Occurs when two separate edges are created at the same location and are not connected, such edges must be merged into one common edge.
o Polygon overlap. Occurs when a polygon is created on top of an existing one. Intersecting edges can confuse a slicer - a program that translates a 3D model layer by layer into a control code for a 3D printer.
o Zero polygon thickness. To avoid this error, make sure that each polygon has the specified thickness.
How can standard errors in 3D modeling be corrected?
To do this, it is enough to use the Netfabb program, which, with more than 95% chance to correct all errors. You can download Netfabb here or use the online version of the program.
Read about the basic principles of working with Netfabb in the "Lessons" section of our blog.
Where 3D printing leads
3D printing
Life's path led me to work in a mock-up workshop, where I met a wonderful person, a master of his craft and now my friend! At that time, my friend was skeptical about the possibility of 3D printing and had a negative experience, so to speak (hairy parts with holes).
The topic of LAYOUT was intertwined with ship modeling, a matter quite new to me, unexplored and thus quite interesting. The first emergency task was to model two ships in 350 scale Corvette project 20380 and a rather old large landing ship project 1171. To be honest, I'm a little sweaty, but my eyes are afraid, but my hands are doing. I will give photos of ready-made models, so as not to upload too many photos of blanks.
Corvettes of project 20380, BDK of project 1171, scale 1:350.
And my friend was surprised and delighted that 3D printing could be different. In general, the end result pleased us both. And then excitement appeared in the work))) During this period, I discovered many new nuances in modeling and printing.
Then they made a couple of project 775 large landing craft. At that time, FDM printing, photo-etching and various improvised materials were used in the work.
BDK project 775, scale 1:350.
Two most interesting projects followed - the hospital ship Irtysh (modeled almost from the photo) and the handsome BDK project 1174 (just an interesting ship that absorbed all the power of the design ideas of engineers).
Ship hospital Irtysh, scale 1:350.
BDK project 1174 Ivan Rogov, scale 1:350.
We made two civilian projects, a fairly old dry cargo ship and a fishing boat.
Transport refrigerator Orion, 350 scale.
Fishing boat, 42 scale.
Finally bought a photopolymer printer. The thing is awesome! Learning to print on a new device took place, of course, in an emergency. An order was received for the manufacture of a semi-submersible floating drilling rig. Here we are both sweating)))
MODU, complete, 200 scale.
Removable dome of the MODU, for a visual representation of the internal structure of the drilling part.
Drilling part of the MODU.
And a little Easter egg.
But the most difficult thing for me to model was the Large anti-submarine ship of project 1155. Its peculiar complex architecture drove me into a creative crisis, but still a harmonious and beautiful project.
Project 1155 BOD, 200 scale.
Photopolymer opened new interesting possibilities in printing.
Small things for 200 scale.
Small things 350 scale.
BDK project 775, 350 scale, there is already a superstructure and all small things made on photopolymer.
There were many more recurring projects, but maybe next time about them.
I would like to continue building ship models because there are still a lot of interesting projects.
Now we are looking for possible cooperation with organizations and people interested in this topic. We will consider any suggestions.
Please feel free to ask questions if you are interested in this post.