3D printers reddit
gettingstarted - 3dprinting
- Getting Started
- Why 3D Printing?
- Getting started with 3D Printing
- Where to get a model printed
- What printer to get
- Where to find models
- Material Choices
- Slicers
- Printing and Troubleshooting
- Post Processing
- How to make models
- Further Info
| If you're new around here, welcome! We thought we'd put a few links together to springboard your foray into the fabulous (and sometimes frustrating!) world of 3D printing. :) |
|---|
| If you are contributing to this wiki please keep this page incredibly concise and extremely high level, keep further detail for the Detailed Info pages. |
Why 3D Printing?
3D printing (a.k.a Additive Manufacturing) is now pretty well established in industry as a prototyping tool, and is becoming more common as a process for creating finished custom or low-run parts.
In the home, printers can be a marvelous tool for solving practical household problems for example by repairing items, or creating new items that are fully customised for their position or use case. They also can be used for fun, and are popular for making tabletop gaming minis, and toys.
For inspiration browse the top posts of this subreddit.
Getting started with 3D Printing
The various types of 3D printing technologies all create real-world three-dimensional objects from digital models via the addition of material. These processes are able to produce novel structures that other manufacturing techniques cannot. Usually the 3D printing process looks like this:
Get a digital 3D model (by downloading or making one)
Slice it (use a program to generate instructions for the printer)
Print it (and troubleshoot it)
Post-process it (remove support material, clean up areas, paint etc)
Where to get a model printed
If you don't want to buy a printer (and you just want to have something printed), you can engage the help of a 3D printing service. Some popular choices include:
For a full list of service-providers (including design and model hosting services), please see the Services page.
What printer to get
If you're totally new to printing, the best place to ask for help when deciding what printer is right for you is our stickied monthly Purchase Advice Megathread.
Generally personal printers come in two main categories;
FDM (FFM) printers are best suited to larger objects and functional parts and work a bit like a like a hot glue gun that moves around, extruding plastic filament and building up an object layer by layer.
DLP (Layer Masking) printers are best suited to extremely detailed prints, and use light to cure resin in layers, masking it with an LCD screen.
There are, however, many other types of 3D printing technologies, which are explained here.
Where to find models
If you don't want to make your own models to print, there are many sites that host models for download.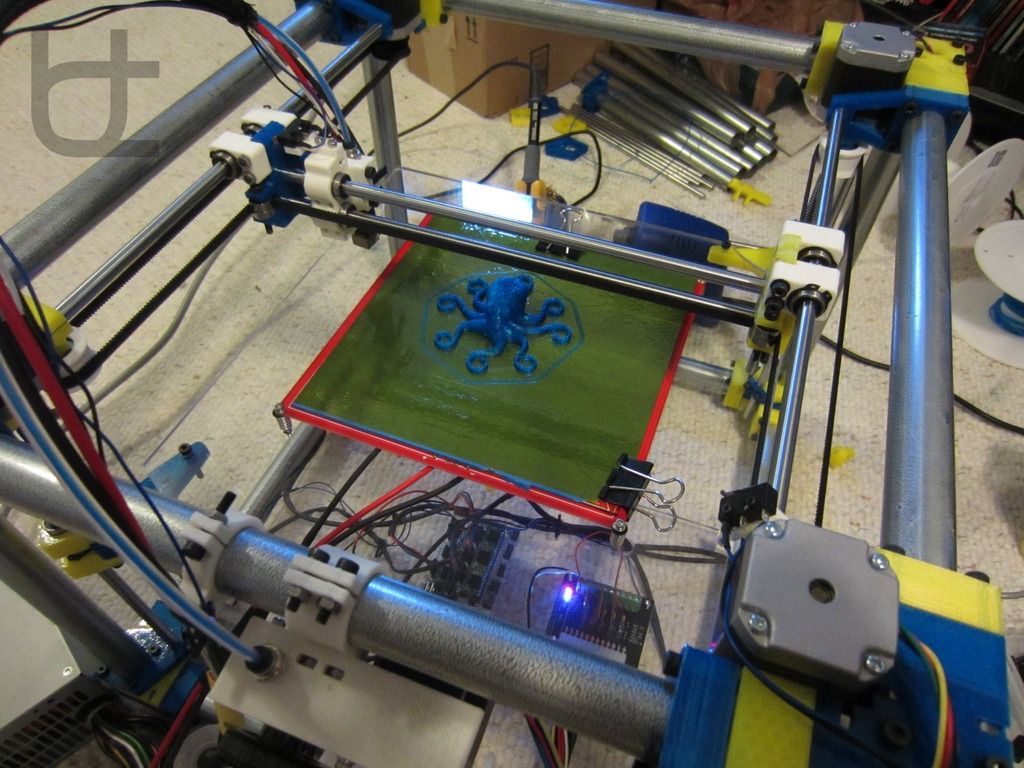 The more popular ones are:
Printables: upcoming and community-focused, feature-rich
Thingiverse: biggest model host, often buggy
Thangs: free models, which can be searched by geometry
My Mini Factory: free and paid models, guaranteed to print
GrabCad: functional/ technical models
YouMagine: Open source models
pinshape: free and paid models
yeggi: 3D model aggregator/search
CGTrader: free and paid models, not all of them made to be printed
A community-curated list of model host services can also be found on the services page.
The RepRap foundation also keeps a list of printable model-host services here.
When selecting a model you need to ensure they are manifold, here's an explanation of what that means and guide on fixing them. You can also try these free, automated services; Netfab, and Microsoft's tool
Material Choices
When you are just starting out with FDM 3D printing PLA is the recommended choice.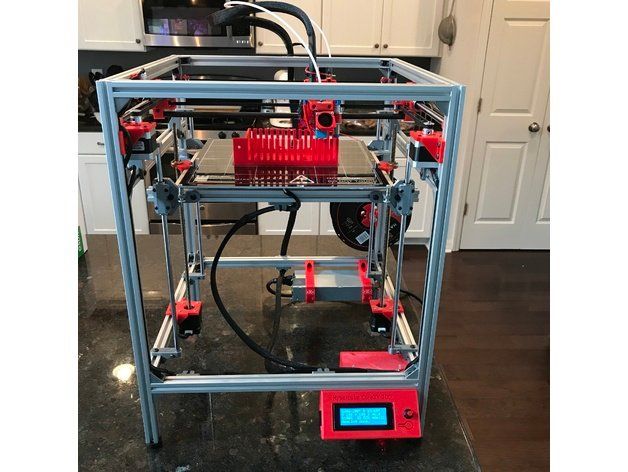 It's very easy to work, relatively strong, with and comes without many of the safety concerns of other materials. A deeper discussion of materials can be found here.
If you are starting on a resin printer, check out our Resin Info page.
Slicers
Slicing software takes a 3d model and turns it into instructions for the 3D printer. The instructions are generally exported in GCode which essentially is a list of locations to move to, amount of filament to extrude, etc.
The popular choices for slicing software are:
Ultimaker Cura: free, open source, highly customisable. Getting Started, Full Manual
Prusa Slicer (Based on Slic3r), Beginning with Prusa Edition (old version)
There are, however, many other options, most of which are discussed here
Be sure to check the layer preview to see if it makes sense in your slicer before printing (no unsupported overhangs, no parts missing, etc). More info on the Slicers Page
Printing and Troubleshooting
Follow your manufacturer's instructions in setting up your printer and starting your first print.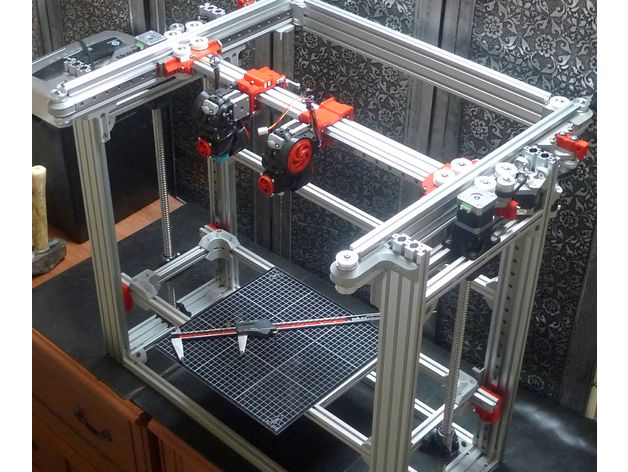 It's a good idea to print a test print first (usually printers come with one).
If it succeeds congrats on your first print! You can now start slicing and printing your own models or some calibration prints
If your print fails you can begin troubleshooting.
This video helps you get to know the parts of your machine, so you know what we're talking about! :)
By far the most common reason for prints failing is an issue with levelling/tramming:
Full-resolution printable copy can be found here.
This visual reference, and this video may also help.
Once you have your prints sticking and printing, these guides can help you identify and solve any other issues you're experiencing:
Our Troubleshooting and Calibration wiki page
A Printa Pro PrintaGuide
rigid.ink poster and visual guide
Matterhackers Troubleshooting Guide
Simplify 3D Visual Troubleshooting Guide
Ultimaker Visual Troubleshooting Guide
RepRap Wiki Pictorial Troubleshooting Guide and Descriptive Troubleshooting Guide, these are a bit more technical/ advanced
It's also worthwhile seeking information from the manufacturer of your machine.

You can try searching for similar issues that other folk have experienced in the following communities: /r/3Dprinting, /r/FixMyPrint, the 3D Printers Discord
If the above suggestions don't solve your issue then it's time to seek help from the community:
This video is a great overview on how to seek help with prints.
The best places to ask for help are here on /r/3Dprinting, /r/FixMyPrint, the 3D Printers Discord. When asking for help be sure to provide the following:
- A highly descriptive title (even if you don't know exactly what everything is officially called, please do your best to describe the issue in plain English. This not only helps you get the help you want, but also helps the rest of the community by keeping the sub searchable, so others can benefit from the help you receive.)
- Photos of the issue, screengrabs of the layer view in your slicer, screengrabs of the model itself.
- A description of what the machine was doing as it produced this issue.
- Your basic settings such as: nozzle and bed temperature, speed, nozzle/line width and later height, the printer you're using and the material you're printing in. Or better yet, a screengrab or an export of your settings (you can upload files free without an account here)
- Any other information you think could be relevant such as modifications or hypotheses.
Post Processing
Most prints need some work after they come off the printer to turn them into a finished part. Supports need to be removed, and surfaced may need to be smoothed. Here are some tutorials:
- How to finish 3D Prints guide
More info on the Post Processing page
How to make models
Can't find what you want online? Why not design and make it? Model-making software is split into 4 main categories, depending on your goal:
Full-resolution, printable copy here
These are just the top picks, model making is discussed in more depth on the Making Models page
More communities:
/u/Devtholt keeps a Multireddit of all 3d printing subreddits including some specifically for help, or tailored to certain printers or printer manufacturers.
 Also has some subs that are related to 3D printing peripherally, such as /r/lasercutting and /r/CNC
3D Printers Discord great platform for troubleshooting and socialising.
RepRap Forums
gettingstarted/%23wiki_getting_started_with_3d_printing - 3dprinting
gettingstarted/%23wiki_getting_started_with_3d_printing - 3dprintingLooks like you're using new Reddit on an old browser. The site may not work properly if you don't update your browser ! If you do not update your browser, we suggest you visit old reddit .
Press J to jump to the feed. Press question mark to learn the rest of the keyboard shortcuts
Search all of RedditFound the internet!
Feeds
Popular
Topics
ValheimGenshin ImpactMinecraftPokimaneHalo InfiniteCall of Duty: WarzonePath of ExileHollow Knight: SilksongEscape from TarkovWatch Dogs: Legion
NFLNBAMegan AndersonAtlanta HawksLos Angeles LakersBoston CelticsArsenal F. C.Philadelphia 76ersPremier LeagueUFC
GameStopModernaPfizerJohnson & JohnsonAstraZenecaWalgreensBest BuyNovavaxSpaceXTesla
CardanoDogecoinAlgorandBitcoinLitecoinBasic Attention TokenBitcoin Cash
The Real Housewives of AtlantaThe BachelorSister Wives90 Day FianceWife SwapThe Amazing Race AustraliaMarried at First SightThe Real Housewives of DallasMy 600-lb LifeLast Week Tonight with John Oliver
Kim KardashianDoja CatIggy AzaleaAnya Taylor-JoyJamie Lee CurtisNatalie PortmanHenry CavillMillie Bobby BrownTom HiddlestonKeanu Reeves
Animals and PetsAnimeArtCars and Motor VehiclesCrafts and DIYCulture, Race, and EthnicityEthics and PhilosophyFashionFood and DrinkHistoryHobbiesLawLearning and EducationMilitaryMoviesMusicPlacePodcasts and StreamersPoliticsProgrammingReading, Writing, and LiteratureReligion and SpiritualityScienceTabletop GamesTechnologyTravel
Create an account to follow your favorite communities and start taking part in conversations.
r/
3Dprinting
"gettingstarted/%23wiki_getting_started_with_3d_printing" does not exist
This page uses a restricted URL and can not be used as a wiki page
Wiki home
About Community
/r/3DPrinting is a place where makers of all skill levels and walks of life can learn about and discuss 3D printing and development of 3D printed parts and devices.
Created Mar 4, 2010
Related Communities
r/resinprinting
35,034 members
r/ender3
183,513 members
r/PrintedMinis
95,450 members
r/anycubic
12,840 members
r/prusa3d
47,506 members
r/PrintedWarhammer
35,426 members
r/ender5plus
7,687 members
r/Ender3Pro
20,433 members
r/3Dmodeling
187,889 members
r/SCREENPRINTING
54,199 members
Useful Links before Posting
Before Posting for Help, consider searching if your issue hasn't already been answered, or look for answers in our Wiki sections
r/3dprinting Rules
Posts must be 3D-printing-related
Requests for purchase advice must go in the stickied megathread
Less than 10% self-promotion
Community Behavior
Monday is Meme Day. You can only post Memes on Monday
First layer Fridays, Spaghetti Saturdays
No Karma/Repost Bots
Filter by Flair
News
Project
Discussion
Troubleshooting
Meta
Question
No File
Paid Model
Meme Monday
Moderators
Moderator list hidden. Learn More
ImpressumReport NetzDG Content
helpTransparency report
User AgreementPrivacy policy
Content policyModerator Code of Conduct
Reddit Inc © 2022. All rights reserved
Reddit and its partners use cookies and similar technologies to provide you with a better experience.By accepting all cookies, you agree to our use of cookies to deliver and maintain our services and site, improve the quality of Reddit, personalize Reddit content and advertising, and measure the effectiveness of advertising.By rejecting non-essential cookies, Reddit may still use certain cookies to ensure the proper functionality of our platform. For more information, please see our Cookie Notice and our Privacy Policy .
Advertisement
Examples of positive and negative applications of the 3D printer
Every year 3D printing becomes more and more popular. The 3D printer, as a tool for turning a digital model into a physical object, is gaining popularity, outperforming other production methods in many ways due to its affordability.
But do not forget that a 3D printer is just a tool. A lot depends on how this tool will be used.
Available 3D printing technologies
All 3D technologies can be conditionally divided into 4 types.
Layer by layer welding with molten material.
The principle of operation is similar to the familiar glue gun. The print media is melted to a semi-liquid state in the print head and applied with a nozzle to the print surface where it solidifies. This is how the finished 3D model “grows” layer by layer on the printing table.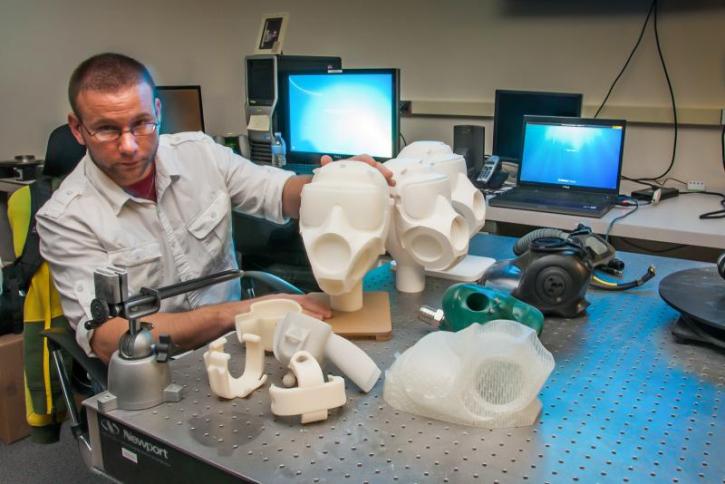 Not only thermoplastics can be used as consumables, but, for example, chocolate, icing, concrete, etc.
This is the most common type of printer. Inexpensive FDM printers are often used as home assistants. This is facilitated by an inexpensive price and a variety of consumables.
Selective curing of resin (photopolymer printers).
The material used is a photopolymer resin that hardens under the influence of UV radiation. As a source of UV radiation, a thin laser beam, a DLP projector or an LCD screen with a UV matrix, or any other design can be used. For example, some industrial 3D printers apply a photopolymer using thin nozzles and immediately illuminate it with a UV lamp.
Previously, these printers were quite expensive. Today, with advances in technology, photopolymer 3D printing has become affordable and photoresin printers have become popular as home hobby printers.
Selective bonding of powdered material.
On the print head of the printer there are several nozzles through which a binder is supplied, which is selectively applied to the powdered material. Various materials can be used as a material: for example, gypsum or metal powders. But gypsum is most often used.
Since dye can be added to the "glue" during printing, such printers are usually used for the production of color demonstration models or souvenirs.
Laser sintering of powdered materials.
The youngest technology, but with great potential for use in large-scale production. With the help of a laser or a heated print head, selective sintering of the metal powder occurs in an environment filled with an inert gas.
These are already serious industrial printers that are used for the production of functional metal assemblies and parts. Currently, such 3D printers are actively used in the aerospace industry.
Unethical use
3D piracy
Where there is duplication of objects, there are always disputes about copyright and piracy.
The production of any product is a long and painstaking work, and often more than one person. Before you get a finished decorative product, for example, a figurine, you need to think through everything to the smallest detail. Usually, before modeling, the artist draws a lot of sketches, the details of clothing and accessories are thought out. Only after that the 3D modeler gets to work and begins painstakingly recreating the 3D model.
Functional models are often redesigned by engineers after the prototype has been made. There can be a very long way between the initial idea and a stable working mechanism. And it’s very disappointing when such work is simply copied and posted in the public domain.
LEGO
It was one of the first mass manifestations of "3D piracy". At that time, 3D printing was only gaining popularity, and many users, having printed a dozen figurines, were looking for a useful application for a 3D printer. Given the low plastic consumption, the printed LEGO blocks were very inexpensive.
3D printed LEGO bricks
Despite the far from ideal surface, many were satisfied with such a copy.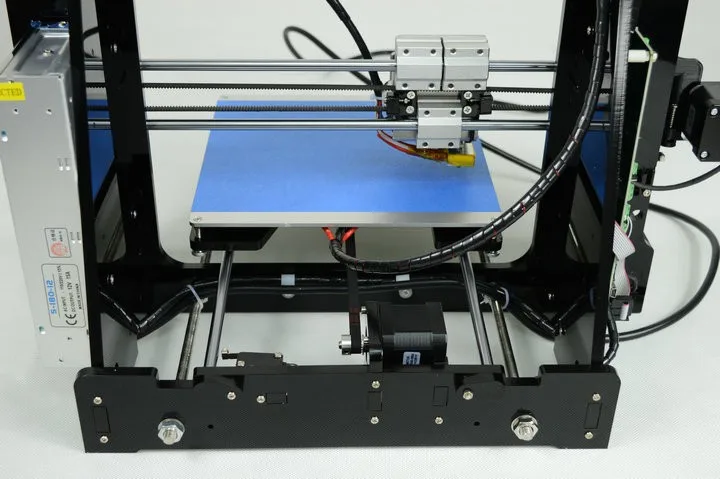 Some have argued that the accuracy of a home FDM printer is not enough for the bricks to fit well with the original LEGO, but for most users everything fit perfectly.
At the moment, LEGO is actively removing models that copy the original sizes of the famous bricks and men from the network. On popular sites, only custom elements of LEGO-men and LECO are left that are not the original size.
Custom heads for LEGO men
Games Workshop
Games Workshop, which produce the most expensive table soldiers in the world, sued Thomas Valenti (USA) back in 2012. Thomas has modeled, printed and made publicly available several miniatures inspired by the Warhammer universe. The court sided with Games Workshop and the models had to be removed.
3D Printed Chaplain
Chaplain 3D model from Warhammer 40k
Games Workshop went one step further by banning fans from creating art and other work based on the original settings and characters. As a boycott, users of the Warhammer 40,000 section on Reddit are proposing to abandon the company's products as much as possible - print game figures on 3D printers, use paints from other companies, or switch to other universes.
Hollywood
The production of modern films is not a cheap pleasure, and film companies try to recoup their costs not only by showing them in cinemas, but, for example, by producing souvenirs.
DreamWorks has an entire consumer goods division that helps recoup the cost of a movie if it fails at the box office. Film companies recognize that fan-made productions often surpass the official "souvenir" in accuracy and detail.
DC Universe Batman fan model
Many film companies are closely following the development of 3D printed merchandise, but do not yet know how to respond. For example, Paramount Pictures, Marvel Studios and Warner Bros. they themselves began to upload models for 3D printing to the network, before the release of new films.
Weapon Seal
Seal of weapons
24-year-old law student Cody Wilson was the first to make a gun on a 3D printer. Cody designed and 3D printed a combat pistol on his own. After 8 years, the idea of making firearms using 3D printing has not only not died out, but flared up with a bright fire.
It started in Texas in 2012. It was there that the company Defense Distributed was registered, the ideology of which was the development of models of firearms that anyone could make on a home 3D printer.
Guns
Liberator
The first “swallow” was the Liberator - a compact plastic pistol printed on a 3D printer from ABS plastic. The only thing that could not be made on a 3D printer was the striker, which was successfully replaced by an ordinary nail. The first printed pistol was made on a Stratasys Dimension SST 3D printer.
Liberator - the name is borrowed from a cheap pistol that was developed in 1942 in the USA.
The Liberator fired a fairly weak .380 ACP round and could only last a dozen rounds at most.
Failed Liberator
Zig Zag
In the spring of 2014, a video appeared on the Internet with a man shooting from a plastic revolver with a huge drum. The video greatly stirred up all of Japan.
Zig Zag
Unknown was Yoshitomo Imura (Yoshitomo Imura) - 28-year-old employee of the Shonan Institute of Technology. Despite Imuru's claim that he fired blanks on the tape, he was arrested and sentenced to 2 years in prison.
The Zig Zag design was a reimagining of revolvers popular in the 19th century, which used a rotating .38 caliber barrel block mounted on a pistol grip.
Washbear
In 2015, mechanical engineering student James Patrick posted a video online showing a 3D printed PM522 Washbear in operation.
PM522 Washbear
The PM522 visually resembled a children's pistol from a science fiction movie, but at the same time the pistol had a strong and rigid frame. Washbear is also safer than its predecessors. At rest, the firing mechanism was not in line with the primer, so the PM522 was protected from accidental firing, for example, when dropped. The only metal part was the nail that replaced the striker.
Rifle
Grizzly
Canadian with the nickname CanadianGunNut, ThreeD Ukulele or simply Matthew, inspired by the Liberator project, designed and posted his project - Grizzly. Grizzly is an ABS+ plastic rifle. It took the Canadian 3 days to design the rifle and another 27 hours to manufacture it using a Stratasys Dimension 1200es industrial 3D printer.
Grizzly 9 Rifle0063
The first version of the Grizzly had a smooth and straight .22 barrel. But this turned out to be not a very good decision, and the barrel cracked after the first shot. Subsequently, Matthew replaced the barrel with a tapered barrel with rifling inside.
Plastic “cutting” could not affect the ballistics of the bullet in any way, but added strength to the barrel.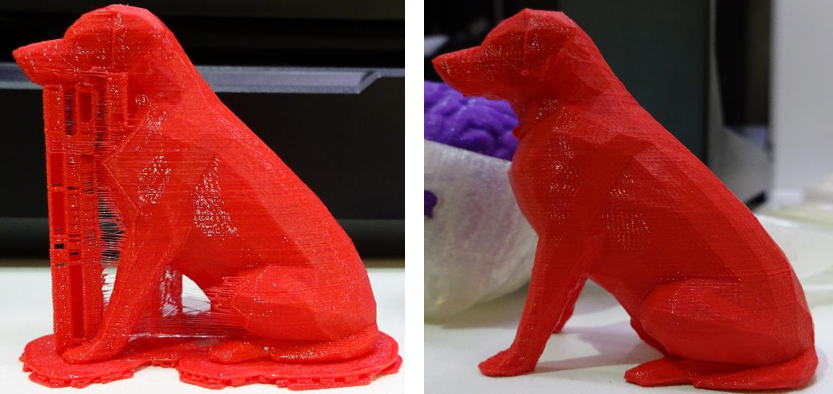
Shotgun
Liberator 12k
The Liberator 12k is a 12-round shotgun made by a well-known, in narrow circles, enthusiast in the world of 3D printing - Jeff Rodriguez.
Liberator 12k
Rodriguez managed to create a simple and at the same time reliable design, "mixing" a pistol and a pump-action shotgun in the design of the Liberator 12k. A huge plus for manufacturing and reliability was the absence of small parts in the shotgun mechanism.
Since the plastic was not strong enough, Rodriguez reinforced the design of the Liberator 12k with metal pins and added metal tubes inside the barrel and drum. The metal parts were purchased from a regular hardware store, so anyone could easily make a Liberator 12k with their home 3D printer.
Semi-automatic weapons
Shuty-MP1
The first sign was the Shuty-MP1, a semi-automatic pistol made by an amateur gunsmith with the nickname Derwood, in April 2017.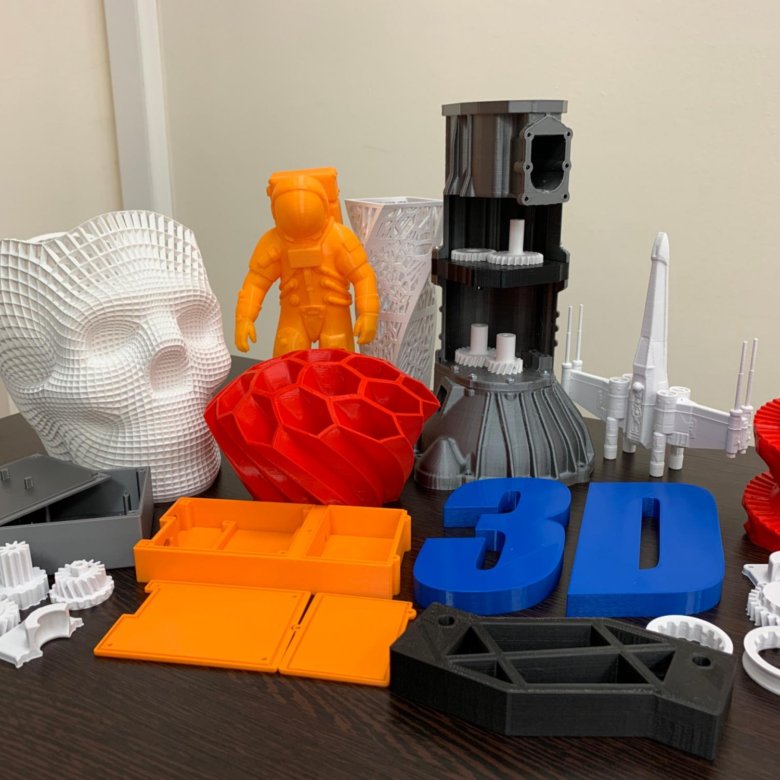
Shuty-MP1
Shuty AP-9
The Shuty AP-9 still uses a pistol barrel, but the trigger and return spring are taken from the civilian version of the M16. This improved the reliability of the rifle.
Ethical use
Despite the negative examples of application, 3D printing is actively used in many areas, helping to save time and create products that cannot be produced by other methods.
Medicine
Implants
Metal-printing 3D printers are actively used in medicine for the manufacture of titanium implants. For example, a patient needs to have a hip joint implant made. According to the results of CT, the necessary area of bone tissue replacement is agreed with the doctors and a prosthesis model is created that is ideal for this patient. After all approvals, the finished model is sent for printing.
3D model of implant
The main areas of 3D printing of implants in medicine are maxillofacial surgery, traumatology, orthopedics, oncology and veterinary medicine. A big advantage over classical methods of manufacturing implants is the ability to create a cellular or porous structure. This allows for better integration of the prosthesis into the bone tissue.
Samples of printed implants and pins
Dentures
The manufacture of even a relatively simple traction prosthesis is a rather laborious and lengthy process. 3D printing has reduced costs and accelerated the production of prostheses. In addition, it became possible to customize the prosthesis.
Customized child prostheses
Some enthusiasts are modeling and posting models and detailed instructions for assembling traction prosthetic hands and fingers in the public domain so that any user can print and make a prosthesis at home.
Simple Traction Hand Model
Production
Building custom drones
Aerialtronics is a small Dutch company that specializes in building unique, customized drones. Aerialtronics manufactures and develops unique drones, the characteristics of which can vary depending on the needs of the customer.
Initially, a basic concept model was designed, which consists of a platform and a set of elements that can be changed at the request of the customer. Changes can affect almost any part of the drone. The customer can choose the number of motors and their power, payload, flight time, supported software and much more.
Aerialtronics base model
But any, even minor changes in the characteristics and design of the drone required the manufacture of new elements and design changes. Classical manufacturing methods turned out to be quite laborious and long. To save time and money, a Stratasys uPrint SE Plus 3D printer was purchased.
Drone Assembly
Thanks to 3D printing, it was possible not only to speed up production, but also to devote more time to improving individual components, because the finished model is ready the next morning. Rapid manufacturing allows you to print a part, test it, make the necessary changes to the 3D model and make a new sample. Aerialtronics engineers manage to manufacture and test 8-10 variants of a part in a few days in order to achieve maximum quality.
Prototyping
Gas turbine prototyping.
Prototyping by traditional methods is often time consuming and expensive. Because of this, the price of an error in calculations and 3D modeling can be very expensive.
For example, the production of turbine engine parts is usually based on careful preparatory calculations, but even this does not always prevent errors in the production of a test prototype. After all, even the most modern software methods cannot replace physical tests. But due to the high cost (over $20,000), it becomes impossible to produce multiple prototypes for testing.
Turbine Technologies (Wisconsin, USA) and its subsidiary Kutrieb Research have found a way out - 3D printing. Thanks to the 3D Systems ProJet 3D printer, it was possible to reduce the cost of prototyping by about 10 times to $2,000.
3D model and printed part of turbine
A turbine model is printed on a wax 3D printer, tested and then cast from metal. In addition to the cost, it was possible to significantly speed up production. After all, it took up to 5 weeks to make traditional stencils with pouring into molds, and a 3D printed model is ready by the morning.
Totals
Despite the unethical side of 3D printing, there are still more positive use cases. 3D printers have become indispensable assistants in various industries - from home hobbies to serious industries. With the help of 3D printers, unique products are made that could not be obtained using other machines.
Popularization of 3D printers is a matter of time. But do not forget that 3D printing is just a tool, just like a drill or a hammer. It depends only on the user how it will be used.
Building a DIY 3D printer at home: recommendations from personal experience
3D printing and assembly of 3D printers is my hobby and passion. Here I will not share detailed diagrams and drawings, there are more than enough of them on specialized resources. The main goal of this material is to tell you where to start, where to dig and how to avoid mistakes in the process of assembling a home 3D printer. Perhaps one of the readers will be inspired by applied engineering achievements.
Why do you need a 3D printer? Use cases
I first came across the idea of 3D printing back in the 90s when I was watching the Star Trek series. I remember how impressed I was by the moment when the heroes of the cult series printed the things they needed during their journey right on board their starship. They printed anything: from shoes to tools. I thought it would be great someday to have such a thing too. Then it all seemed something incredible. Outside the window are the gloomy 90s, and the Nokia with a monochrome screen was the pinnacle of progress, accessible only to a select few.
Years passed, everything changed. Around 2010, the first working models of 3D printers began to appear on sale. Yesterday's fantasy has become a reality. However, the cost of such solutions, to put it mildly, discouraged. But the IT industry would not be itself without an inquisitive community, where there is an active exchange of knowledge and experience and who just let them dig into the brains and giblets of new hardware and software. So, drawings and diagrams of printers began to surface more and more often on the Web. Today, the most informative and voluminous resource on the topic of assembling 3D printers is RepRap - this is a huge knowledge base that contains detailed guides for creating a wide variety of models of these machines.
I assembled the first printer about five years ago. My personal motivation to build my own device is quite prosaic and based on several factors. Firstly, there was an opportunity to try to realize the old dream of having your own device, inspired by a fantasy series.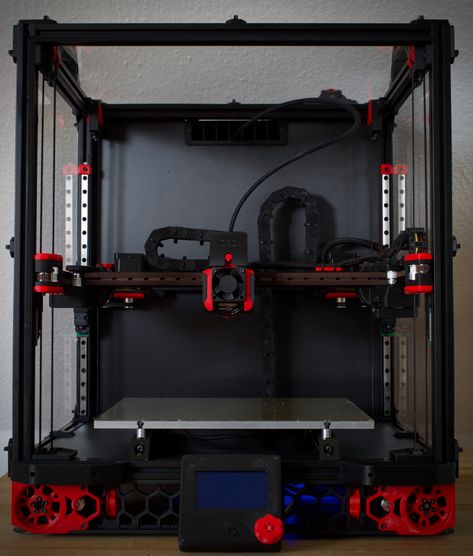 The second factor is that sometimes it was necessary to repair some household items (for example, a baby stroller, car elements, household appliances and other small things), but the necessary parts could not be found. Well, the third aspect of the application is "near-working". On the printer, I make cases for various IoT devices that I assemble at home.
Agree, it is better to place your device based on Raspberry Pi or Arduino in an aesthetically pleasing "body", which is not a shame to put in an apartment or take to the office, than to organize components, for example, in a plastic bowl for food. And yes, you can print parts to build other printers :)
There are a lot of scenarios for using 3D printers. I think everyone can find something of their own.
A complex part in terms of drawing that I printed on my printer. Yes, it's just a figurine, but it has many small elements
Ready solution vs custom build
When a technology has been tested, its value in the market decreases markedly. The same thing happened in the world of 3D printers. If earlier a ready-made solution cost simply sky-high money, then today acquiring such a machine is more humane for the wallet, but nevertheless not the most affordable for an enthusiast. There are a number of solutions already assembled and ready for home use on the market, their price range ranges from $500-700 (not the best options) to infinity (adequate solutions start from a price tag of about $1000). Yes, there are options for $150, but we, for understandable, I hope, reasons, will not dwell on them.
In short, there are three cases to consider a finished assembly:
- when you plan to print not much and rarely;
- when print accuracy is critical;
- you need to print molds for mass production of parts.
There are several obvious advantages to self-assembly. The first and most important is cost. Buying all the necessary components will cost you a maximum of a couple of hundred dollars. In return, you will receive a complete 3D printing solution with the quality of manufactured products acceptable for domestic needs. The second advantage is that by assembling the printer yourself, you will understand the principles of its design and operation. Believe me, this knowledge will be useful to you during the operation of even an expensive ready-made solution - any 3D printer needs to be serviced regularly, and it can be difficult to do this without understanding the basics.
The main disadvantage of assembly is the need for a large amount of time. I spent about 150 hours on my first build.
What you need to assemble the printer yourself
The most important thing here is the presence of desire. As for any special skills, then, by and large, in order to assemble your first printer, the ability to solder or write code is not critical. Of course, understanding the basics of radio electronics and basic skills in the field of mechanics (that is, "straight hands") will greatly simplify the task and reduce the amount of time that needs to be spent on assembly.
Also, to start we need a mandatory set of parts:
- Extruder is the element that is directly responsible for printing, the print head. There are many options on the market, but for a budget build, I recommend the MK8. Of the minuses: it will not be possible to print with plastics that require high temperatures, there is noticeable overheating during intensive work, which can damage the element. If the budget allows, then you can look at MK10 - all the minuses are taken into account there.
- Processor board. Well known to many Arduino Mega. I didn't notice any downsides to this solution, but you can spend a couple of dollars more and get something more powerful, with a reserve for the future.
- Control board.
 I'm using RAMPS 1.4 which works great with the Arduino Mega. A more expensive but more reliable board is Shield, which already combines a processor board and a control board. In modern realities, I recommend paying attention to it. In addition to it, you need to purchase at least 5 microstep stepper motor controllers, for example - A4988. And it's better to have a couple of these in stock for replacement.
 - Heated table. This is the part where the printed element will be located. Heating is necessary due to the fact that most plastics will not adhere to a cold surface. For example, for printing with PLA plastic, the required table surface temperature is 60-80°C, for ABS - 110-130°C, and for polycarbonate it will be even higher
There are also two options for choosing a table - cheaper and more expensive. Cheaper options are essentially printed circuit boards with preheated wiring. To operate on this type of table, you will need to put borosilicate glass, which will scratch and crack during operation. Therefore, the best solution is an aluminum table.
 - Stepper motors. Most models, including the i2 and i3, use NEMA 17 size motors, two for the Z axis and one each for the X and Y axes. Finished extruders usually come with their own stepper motor. It is better to take powerful motors with a current in the motor winding of 1A or more, so that there is enough power to lift the extruder and print without skipping steps at high speed.
- Basic set of plastic fasteners.
- Belt and gears for its drive.
Examples of elements appearance: 1) MK8 extruder; 2) Arduino processor board; 3) RAMPS control board; 4) motor controllers; 5) aluminum heated table; 6) NEMA 17 stepper motor; 7) a set of plastic fasteners; 8) drive gears; 9) drive belt
This is a list of items to be purchased. Hardcore users can assemble some of them themselves, but for beginners, I strongly recommend purchasing ready-made solutions.
Yes, you will also need various small things (studs, bearings, nuts, bolts, washers ...) to assemble the case. In practice, it turned out that using a standard m8 stud leads to low printing accuracy on the Z axis. I would recommend immediately replacing it with a trapezoid of the same size.
M8 trapezoidal stud for the Z axis, the use of which will save you a lot of time and nerves. Available for order on all major online platforms
You also need to purchase customized plastic parts for the X axis, such as these from the MendelMax retrofit kit.
Most parts available at your local hardware store. On RepRap you can find a complete list of necessary little things with all sizes and patterns. The kit you need will depend on the choice of platform (we'll talk about platforms later).
What's the price
Before delving into some aspects of the assembly, let's figure out how much such entertainment will cost for your wallet. Below is a list of parts required for purchase with an average price.
Platform selection
The community has already developed a number of different platforms for assembling printers - the most optimal case designs and the location of the main elements, so you do not have to reinvent the wheel.
i2 and i3 are key platforms for self-assembly printer enclosures. There are also many modifications of them with various improvements, but for beginners, these two classic platforms should be considered, since they do not require special skills and fine-tuning.
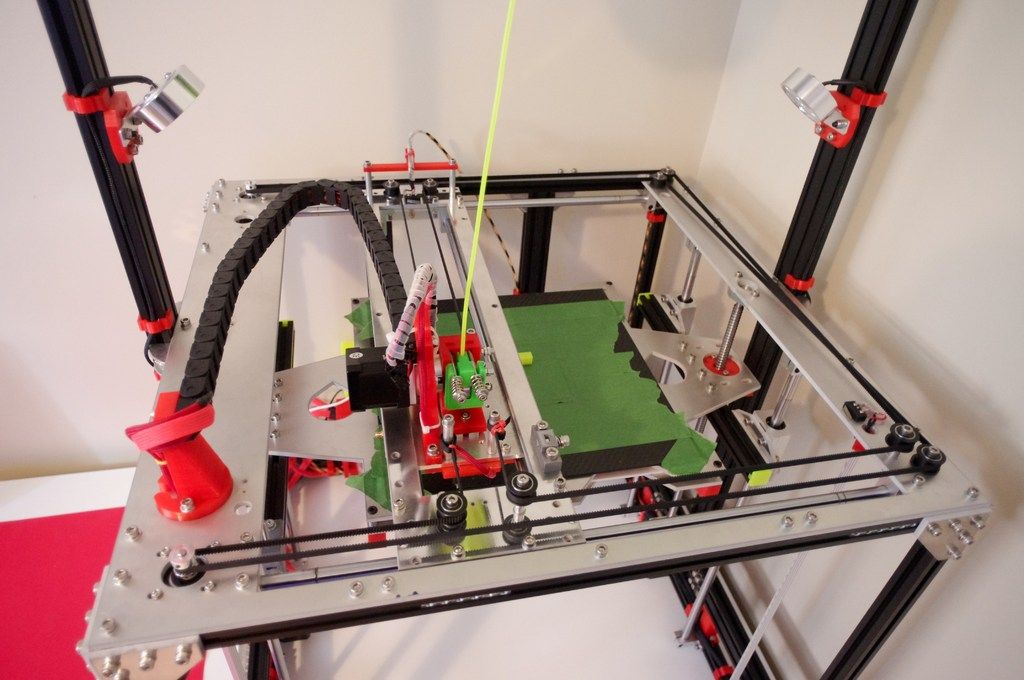
Actually, illustration of platforms: 1) i2 platform; 2) i3 platform
On the plus side of i2: it has a more reliable and stable design, although it is a little more difficult to assemble; more opportunities for further customization.
The i3 variant requires more special plastic parts to be purchased separately and has a slow print speed. However, it is easier to assemble and maintain, and has a more aesthetically pleasing appearance. You will have to pay for simplicity with the quality of printed parts - the body has less stability than i2, which can affect print accuracy.
Personally, I started my experiments in assembling printers from the i2 platform. She will be discussed further.
Assembly steps, challenges and improvements
In this block, I will only touch on the key assembly steps using the i2 platform as an example. Full step by step instructions can be found here.
The general scheme of all the main components looks something like this. There is nothing particularly complicated here:
I also recommend adding a display to your design. Yes, you can easily do without this element when performing operations on a PC, but it will be much more convenient to work with the printer this way.
Understanding how all components will be connected, let's move on to the mechanical part, where we have two main elements - a frame and a coordinate machine.
Assembling the frame
Detailed frame assembly instructions are available on RepRap. Of the important nuances - you will need a set of plastic parts (I already talked about this above, but I'd better repeat it), which you can either purchase separately or ask your comrades who already have a 3D printer to print.
The frame of the i2 is quite stable thanks to its trapezoid shape.
This is how the frame looks like with parts already partially installed. For greater rigidity, I reinforced the structure with plywood sheets
Coordinate machine
An extruder is attached to this part. The stepper motors shown in the diagram above are responsible for its movement. After installation, calibration is required along all major axes.
Important - you will need to purchase (or make your own) a carriage for moving the extruder and a mount for the drive belt. Drive belt I recommend GT2.
The carriage printed by the printer from the previous picture after it has been assembled. The part already has LM8UU bearings for guides and belt mount (top)
Calibration and adjustment
So, we completed the assembly process (as I said, it took me 150 hours) - the frame was assembled, the machine was installed. Now another important step is the calibration of this very machine and extruder. Here, too, there are small subtleties.
Setting up the machine
I recommend calibrating the machine with an electronic caliper. Do not be stingy with its purchase - you will save a lot of time and nerves in the process.
The screenshot below shows the correct constants for the Marlin firmware, which must be selected in order to set the correct number of steps per unit of measure. We calculate the coefficient, multiply it, substitute it into the firmware, and then upload it to the board.
Marlin 9 firmware constants0391
For high-quality calibration, I recommend relying on larger numbers in measurements - take not 1-1. 5 cm, but about 10. So the error will be more noticeable, and it will become easier to correct it.
Calibrating the extruder
When the frame is assembled, the machine is calibrated, we start setting up the extruder. Here, too, everything is not so simple. The main task of this operation is to correctly adjust the supply of plastic.
If underfeeding, the printed test item will have noticeable gaps, like test die 1. Conversely, the result will look bloated if plastic is overfed (dice 2)
Getting Started Printing
It remains for us to run some CAD or download ready-made .stl, which describe the structure of the printed material. Next, this structure needs to be converted into a set of commands understandable to our printer. For this I use the Slicer program. It also needs to be set up correctly - specify the temperature, the size of the extruder nozzle. After that, the data can be sent to the printer.
Slicer interface
As a raw material for printing, I recommend starting with regular ABS plastic - it is quite strong, products made from it are durable, and it does not require high temperatures to work with. For comfortable printing with ABS plastic, the table must be heated to a temperature of 110-130 ° C, and the extruder nozzle - within 230-260 ° C.
Some important details. Before printing, calibrate the machine along the Z axis. The extruder nozzle should be about half a millimeter from the table and ride along it without distortion. For this calibration, a regular sheet of A4 paper inserted between the nozzle and the surface of the heated table is best suited. If the sheet can be moved with little effort, the calibration is correct.
Another thing to keep in mind is the surface treatment of the heated table. Usually, before printing, the surface of the table is covered with something that hot plastic sticks to well. For ABS plastic, this can be, for example, Kapton tape. The disadvantage of adhesive tape is the need to re-glue it after several printing cycles. In addition, you will have to literally tear off the adhering part from it. All this, believe me, takes a lot of time. Therefore, if it is possible to avoid this fuss, it is better to avoid it.
An alternative option that I use instead of scotch tape is to apply several layers of ordinary light beer, followed by heating the table to 80-100 ° C until the surface is completely dry and re-applying 7-12 layers. It is necessary to apply the liquid with a cloth moistened with a drink. Among the advantages of this solution: ABS plastic separates from the table on its own when it cools down to about 50 ° C and is removed without effort, the table does not have to be peeled off, and one bottle of beer will last you for several months (if you use the drink only for technical purposes :)).
After we have collected and configured everything, we can start printing. If you have an LCD screen, then the file can be transferred for printing using a regular SD card.
The first results may have bumps and other artifacts - do not worry, this is a normal process of "grinding" the printer elements, which will end after a few print cycles.
Tips to make life easier (and sometimes save money)
In addition to the small recommendations given in the text above, in this section I will also give a short list of tips that will greatly simplify the operation of a 3D printer and the life of its owner.
- Do not experiment with nozzles. If you plan to immediately print from materials that require high temperatures, then it is better to immediately take the MK10 extruder. On MK8, you can "hang" special nozzles that support high-temperature conditions. But such modifications often cause difficulties and require special experience. It is better to avoid this fuss on the shore by simply installing the right extruder for you.
- Add starter relay for heated table. Improving the power supply system for this important printing part with a starter relay will help solve the known problem of RAMP 1.4 - overheating of the transistors that control the power of the table, which can lead to failure of the board.
 I made this upgrade after having to throw away a few RAMPS 1.4s.
 - Select the correct media diameter for printing. Recommend 1.75mm plastic for MK8 and MK10. If we take plastic, for example, 3 mm, then the extruder simply does not have enough strength to push it at an acceptable speed - everything will be printed much longer, and the quality will drop. ABS plastic is ideal for MK8, MK10 will be able to produce products from polycarbonate.
- Use only new and precise X and Y guides. Print quality will be affected. It is difficult to count on good quality with bent or deformed guides along the axes.
- Take care of cooling. During my experiments with various extruders, the MK10 showed the best results - it prints quite accurately and quickly. The MK10 can also print plastics that require a higher print temperature than ABS, such as polycarbonate. Although it is not as prone to overheating as its younger brother MK8, I still recommend taking care of its cooling by adding a cooler to your design.
 It must be permanently enabled, this option can be configured in Slicer. You can also add coolers to keep the stepper motors at an acceptable temperature, however, make sure that their air flows do not fall on the printed part, as this can lead to its deformation due to too rapid cooling.
 - Consider heat retention. Yes, on the one hand, we are struggling with overheating of the elements. On the other hand, a uniform temperature around the printer will contribute to high-quality printing (the plastic will be more pliable). To achieve a uniform temperature, you can put our printer, for example, in a cardboard box. The main thing is to connect and configure the coolers before that, as described above.
- Consider insulating your desk. Heated table heats up to high temperatures. And if part of this heat leaves properly, heating the printed part, then the second part (from below) just goes down. To concentrate the heat from the table onto the part, you can perform an operation to insulate it.
 To do this, I simply attach a cork mouse pad to its bottom using stationery clips.
Terminals
I am sure that during the assembly process you will encounter a number of difficulties specific to your project. Neither this text nor even the most detailed guides will insure against this.
As I wrote in the introductory part, the above does not claim the status of a detailed assembly manual. It is almost impossible to describe all the stages and their subtleties within the framework of one such text. First of all, this is an overview material that will help you prepare for the assembly process (both mentally and financially), understand whether you personally need to bother with self-assembly - or give up on everything and buy a ready-made solution.
For me, assembling printers has become an exciting hobby that helps me solve some issues in home and work affairs, take my mind off programming and do something interesting with my own hands. For my children - entertainment and the opportunity to get unusual and unique toys.