Build surface 3d printer
3D Printer Build Surfaces - 3DJake International
Sort byRelevanceBestsellersCustomer ReviewsPrice, Low to HighPrice, High to LowNew arrivalsHighest Discount
-
BuildTak PEI film 32 sizes- First-class production
- Easy to apply
- Ideal with the FlexPlate system
-
Zimple Ziflex Ultimate Surface - High Temp 6 sizes- Good adhesion and easy removal
- Ultra flexible
- Magnetic positioning
-
3DJAKE PEI Flexplate Black Edition 4 Model types- Flexible steel plate
- With magnetic base
- In different sizes
-
Phrozen Build Platform 10 Model types- Original spare part
- From Phrozen
-
Creality Glass Plate 2 Model types- Original spare part
- From Creality 3D
- Available for various 3D printers
-
BuildTak FlexPlate System 26 sizes- Easy to use
- Variety of Different Sizes
- Complete System
-
Zimple Ziflex Ultimate Starter Kit - Low Temp 12 sizes- Good adhesion and easy removal
- Ultra flexible
- Magnetic positioning
-
Elegoo Platform 7 Model types- Original spare part
- From Elegoo
-
3DJAKE Magnetic Plate 7 Model types- Good adhesion
- Flexible
- High quality
-
BuildTak 3D Print Surface 28 sizes- Perfect adhesion
- Optimal bond
- Reusable
-
Zimple Ziflex Ultimate Starter Kit - High Temp 6 sizes- Good adhesion and easy removal
- Ultra flexible
- Magnetic positioning
-
Creality Magnetic Build Surface 12 Model types- An original spare part from Creality 3D
- Available for various 3D printers
-
Qidi Tech Magnetic Build Board 4 Model types- An original spare part from Qidi Tech
- Coated on both sides
- Magnetic
-
Creality Carborundum Glass Plate 23 Model types- Strong adhesion
- Easy removal
- Original spare part
-
3DJAKE Flexplate System with Nano-Coating 4 Model types- Flexible steel plate & magnetic base
- Different sizes available
- Better adhesion
-
Anycubic Build Platform 11 Model types- Original spare part
- From Anycubic
-
3DJAKE Glass Plate with Chemical Coating 6 Model types- Very good adhesion
- Easy removal of prints
- Resistant to heat
-
Zimple Ziflex Ultimate Surface - Low Temp 8 sizes- Good adhesion and easy removal
- Ultra flexible
- Magnetic positioning
-
3DJAKE Resin Flexplate System 16 Model types- Flexible plate
- Different sizes
- Easy to use
-
Artillery Heated Bed 4 Model types- Original spare part
-
Anycubic Heated Bed Including Ultrabase 3 Model types- Original spare part
- By Anycubic
-
Creality Heated Bed 20 Model types- Original spare part
- From Creality
-
3DJAKE Resin Flexplate Build Plate 16 Model types- For easy print removal
- No kinking or warping
- Specially patterned surface
-
Zortrax Perforated Plate v2- Compatible with the Zortrax M200
All prices incl. VAT.
What Build Plate Surface Should I Use? We Review The Most Commonly Used
We’ve all been there. You start a print job and right away things begin to go off the rails. The first layer of your print material isn’t properly adhering to the surface of your print bed. As a result, it begins to move or slide.
Subsequent layers are laid down on top of this unstable substrate. They too move or deform. In the end, instead of ending up with a cleanly printed object, you’re stuck with a monster made of spaghetti or a semi-shapeless blob of thermoplastic. Not quite what you were envisioning.
Alternatively, your initial layers seem to adhere fine. The object seems to be printing out nicely.
However, as the print head begins moving upward further away from the print bed, and those initial layers begin to cool, you notice that the corners of your object begin to pull up and inward.
Instead of clean angles, you end up with an object whose bottom edges are warped. At best, this makes your object unsightly. At worst, it makes it unusable.
Those first few layers really are the most important of the whole print. Get them wrong and it’s clean up and restart time. Which all wastes your valuable time, and at best is just disappointing and frustrating.
The problem here is build plate
surface adhesionMost 3D printers come with a print bed that is made of glass or aluminum. Both of these materials are quite durable and relatively impermeable. Therein lays the problem. Glass and aluminum, by themselves, both have extremely smooth surfaces.
This smooth 3D printer build plate surface offers the print material very little purchase to grab onto. As a result, the material tends to resist adhering to the surface of the print bed. The result is the movement of the initial print layers or warping of the material as it cools.
So, what are the advantages of a heated bed for your 3D printer?
Heated print beds have tended to somewhat reduce this problem, especially for materials with a lower printing temperature like PLA. However, even a heated bed does not eliminate all adhesion problems all the time, especially for materials that need a higher printing temperature, like ABS.
The solution to the problem is to find a build plate surface that will provide greater adhesion for the print material to hand on to as the job progresses. In this article, we’re going to take a look at some of the more common and successful build plate surface solutions out there, so that you can choose one that’s right for you and the print material that you’re working with.
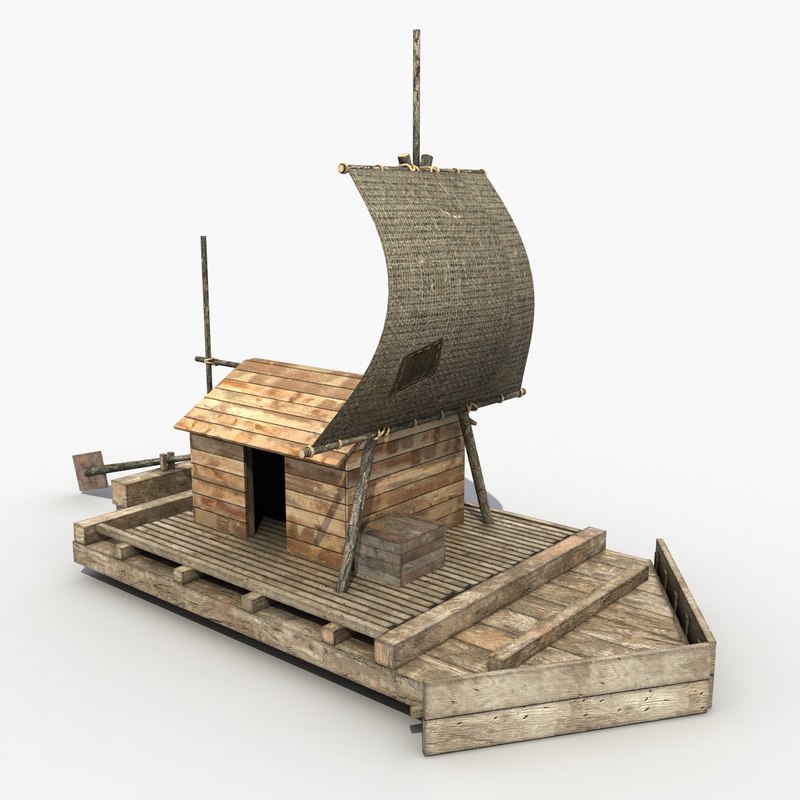
Before we look at the common 3D printer bed surfaces available to you, you may be wondering “What is a 3D printing raft, and when should I print with one?”
A raft is a couple of layers printed before your main print. Some printers (like the Zortrax M200) have a perforated heated bed, requiring you to print with a raft every time. This does work well, because you never have to worry about bed adhesion with a raft on a perforated bed.
For anyone with a regular solid bed, we think the only times you’ll likely want to print with a raft is when you’re printing objects with a very small contact area on the bed and you’re worried the print might unstick during printing. But for most instances, if you get the right surface for your bed – you shouldn’t need to worry about rafts.
The Best 3D Printer Build Surfaces
Hairspray
Let’s deal with this one right away. Some people swear by hairspray as a great way to ensure 3D printer bed adhesion. We’re not that much of a hairspray fan for a couple of reasons.
First, hairspray was a great solution to adhesion problems back when most printers didn’t have heated beds. Today, not only do most printers have heated beds, but there are also better and more durable solutions available.
Second, let’s face it, hairspray is a mess to use. It gets on your printer, it’s a pain to clean up and you have to reapply it for every new print job. We recommend you go with different adhesion solution, but if you’re set on trying hairspray, make sure you choose one that’s extra hold and contains plenty of vinyl, acetate, and copolymer.
If you spray it outside and leave it to dry, it should provide an acceptable bed surface.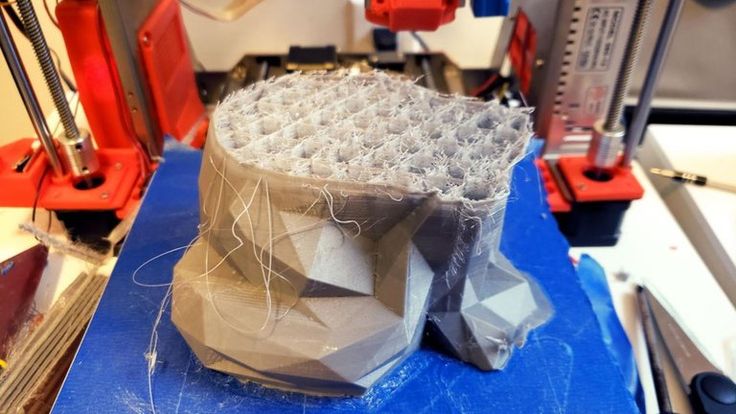
Read more: the best hairspray for 3D print adhesion
Blue Painter’s Tape
Blue painter’s, or blue masking tape, is an easy way to give your build plate surface more adhesion, especially if you’re using a material with a lower print temperature like PLA. This is a commonly used bed, because it’s not too messy, works OK, and is relatively easy to get hold of.
Because it is easy to remove at the end of a job, many people apply it directly to the surface of their print bed. It is easy to apply, mainly because it can be easily placed and replaced, over and over, to ensure that it lies evenly with no bubbles and with tight seams between rows.
One problem with painter’s tape is that no matter how careful you are, the seams between the rows will still be slightly raised. This will, of course, affect the look of the bottom of your printed object.
For some objects, this presents no problem. For other objects, where the look of the bottom is an issue, you can use super wide painter’s tape. Its 6-inch width can give a seam-free print surface to smaller objects and cut the number of visible seams in half for larger objects.
Kapton Tape
Kapton tape is a great solution for bed adhesion if you’re working with a material that has a high printing temperature, like ABS.
Kapton tape was developed by NASA for use in space. It is a super-thin, film-like material that is extremely heat resistant.
Kapton can also be difficult to apply and remove. To solve these problems, many people have a 1.5mm piece of window glass cut to the size of their printer bed. They then apply the Kapton tape to the glass using the “water method” and then attach the Kapton coated glass to the print bed using clamps or adhesive.
Make sure that your build surface is level after attaching it to the bed. Like painter’s tape, Kapton comes in a 6 inch wide roll that makes covering your surface quicker and easier.
Pritt Stick
Pritt stick is another great way to get adhesion on your build surface. It works well with both our PLA and ABS and it’s neat and easy to use to boot.
You simply apply a layer of the Pritt stick to a 1.5mm piece of glass cut to the shape of your print bed (or your print bed itself, if the surface is already glass). Let the glue air dry and then attach the glass to your print bed using clamps or an adhesive. Double-sided tape works well. Heat your bed to the proper temperature as normal, and wait about 30 minutes before beginning your print job.
The key to Pritt Stick and similar, is that you get an even coating, without blobs. If you apply in a too-cold environment, the coating will be too thin. And if you apply with the heated bed too hot, it can get gloopy and leave blobs everywhere.
The good news is once a good layer is applied, it should last a good few prints before it needs re-doing. Voila, near-perfect 3D printing bed adhesion. Essentially though, like the above methods, it’s still some degree of messy and not exactly ‘plug and play’.
Buildtak
Buildtak is a thin plastic material that self-adheres to the build surface and, according to its manufacturer, “provides an optimal printing surface for 3D objects to adhere to for the duration of a print, while allowing for a clean, easy removal of completed builds.”
Buildtak is manufactured and marketed by the Ideal Jacobs Company who, interestingly enough, developed Buildtak after purchasing a 3D printer and finding that it was difficult to get objects to adhere to the build surface.
Buildtak comes in 13 different sizes, so finding a size that fits your build surface shouldn’t be an issue. It comes with a self-adhesive backing that can be somewhat easily applied to the build surface. As always, make sure that the build surface is leveled after installation. Buildtak works with both PLA and ABS, as well as more exotic materials like HIPS and PETG and users report that you can expect to get about 50 to 100 hours of use out of one Buildtak sheet.
It’s worth noting that with Buildtak and PEI (below) you may need to increase your heated bed temps by a few degrees – as these surfaces can very slightly insulate the heat from your bed.
PEI Sheet
PEI, or polyetherimide, is a thermoplastic that provides a good build plate surface adhesion solution for a wide variety of printing materials, including both PLA, ABS, Nylon and others. It is extremely heat resistant, performing well in temperatures up to 170C.
It is also reusable, relatively inexpensive, and requires almost no maintenance between print jobs, other than a wipe down with an isopropyl alcohol and water solution.
You want to use a sheet of PEI that is between 0.5mm and 1.0mm thick (approx. 0.03”) and around the size of your bed. Common sizes are 200mm x 200mm up to 300 x 300mm (12” x 12”). Thicker sheets will only be harder to apply to your build surface, require more heat, and due to the raw material cost – are more expensive.
Once you’ve got your PEI sheet, you can easily cut it to size with a box cutter or Exacto knife. The sized sheet can then be laminated to one side of a two-sided adhesive transfer sheet like these. Once laminated, the sheet can then be attached to your build surface using the other adhesive side of the transfer sheet. A short video tutorial detailing this process can be found here.
Once you’re finished, remember to re-level your print bed and you’re ready to pretty much kick you surface adhesion problems to the curb.
PEI is our favorite; mess-free, fit & forget print surface that more or less copes well with every material we’ve thrown at it. If it doesn’t work for you, it’s likely it has some grease or is dirty. Just use some alcohol wipes, and very fine grit sandpaper to restore it.
Ultimately if you’re still having issues with bed adhesion, you may want to try using a better quality filament. Cheap and poor-quality filaments can be inconsistent with sticking to the heated bed.
Related articles:
- 3D printer heatbeds: a guide
- Ender 3 glass bed – buyer’s guide and tips
- Warping and curling issues? Here’s how to fix them
everything you need to know
Many 3D printer owners experience parts coming off the table during 3D printing. Let's take a look at the causes and solutions.
What is adhesion?
The very concept of "adhesion" means the adhesion of surfaces of dissimilar bodies. In 3D printing, platform adhesion is the ability of the plastic that a part is made of to adhere to the surface of the stage during printing.
If the adhesion is insufficient, then the manufactured parts may be deformed or even come off the table. During 3D printing, the part must be firmly attached to the platform, and after completion, it should be easy to remove. Filament manufacturers typically recommend adhesives for their filaments, and 3D printer manufacturers offer worktables in aluminium, glass, stainless steel, or even with specialty coatings. All this helps the plastics stick better during printing, but there are no working surfaces that are equally well suited for all types of plastics.
Also, do not forget about thermal expansion, which causes a change in the dimensions of manufactured parts at different temperatures. The difference in temperature between the bottom and top of a part can cause the edges of the part to peel off during 3D printing. This mainly applies to materials such as ABS, which require a heated worktable to work with. When printing with these materials, the layers need to cool down a bit to be able to build a 3D object at all, but not so much as to cause peeling at the edges.
In this article we will look at what affects adhesion and how to solve many problems in terms of adhesion of products to work surfaces.
3D Printer Enclosed Chamber
For printing on materials with high heat shrinkage, the best option is to use 3D printers with an enclosed chamber that prevents drafts and retains heat. Many printers are equipped with an active chamber heater that maintains the desired temperature and does not allow the parts to cool. A uniform background temperature during 3D printing reduces warping and ensures better adhesion.
Owners of open printers are left to come up with various devices (for example, boxes) that cover the 3D printer to keep heat, or build heat-retaining walls around the printed model, which increases printing time and filament consumption.
First coat adhesion
The first thing you should pay attention to is the adhesion of the first layer. This is one of the most common problems faced by almost all printers. If the first layer is laid unevenly, then the percentage of rejects for the rest of the part increases very much, so it is very important to solve the issue of adhesion of the first layer before 3D printing. In most cases, the problem is solved by calibrating the work table and adjusting the distance between the nozzle and the work surface.
It is important to correctly set the distance between the nozzle and the stage surface
Brim and Raft methods
For better adhesion of the product to the working surface of the table, in the print settings it is often necessary to create additional elements - the substrate or the frame of the model, which help to keep the manufactured part on the table. Brim or Raft increase the contact surface of the plastic with the work surface around the lower layers and thereby increase traction.
Underlays or Rafts consist of several layers and are horizontal grids of filament located under the model. The raft is used as a base for the first layers of the product and is designed to increase the level of adhesion. In addition, the raft helps to level the surface of the table: if there are irregularities on the surface, they are leveled to a certain extent by the substrate, and the model is printed already on a flat base. Another advantage of rafting is that it reduces the chance of problems due to too much or too little gap between the nozzle and the table when laying the first layer.
Brim is used to stabilize small patterns or "islands" (separated areas of the printed product). Brims increase the contact area and help the model stay on the table if it comes into contact with the surface in small areas.
Worktable temperature and adhesion promoters
After calibrating the platform and adjusting the gap between the nozzle and the surface of the table, let's move on to the next question. The next reasons for poor adhesion may be the wrong stage temperature (if the 3D printer has a heating option) and the wrong selection of adhesion promoters for a particular filament.
Working stage temperature selection
One of the common causes of poor adhesion is the wrong stage temperature selection for a particular material. When the molten filament is applied to the table and then cools, deformation occurs. If the temperature of the stage is incorrectly selected, the outer edges of the printed product are compressed, and we get warpage: the edge of the product comes off, clings to the nozzle, and the product completely comes off the platform.
Usually, 3D printing filament manufacturers list the recommended heating temperature for the stage on their website or boxes. For the most common materials, you can use average values.
Examples of worktable temperatures for some materials:
- PLA: 60°C
- ABS: 100-110°C
- PETG: 85°C
- Nylon: 100°C (depending on material composition) )
- Polycarbonate: 110°C (the higher the temperature, the better)
Worktable temperatures for each manufacturer's plastic may vary.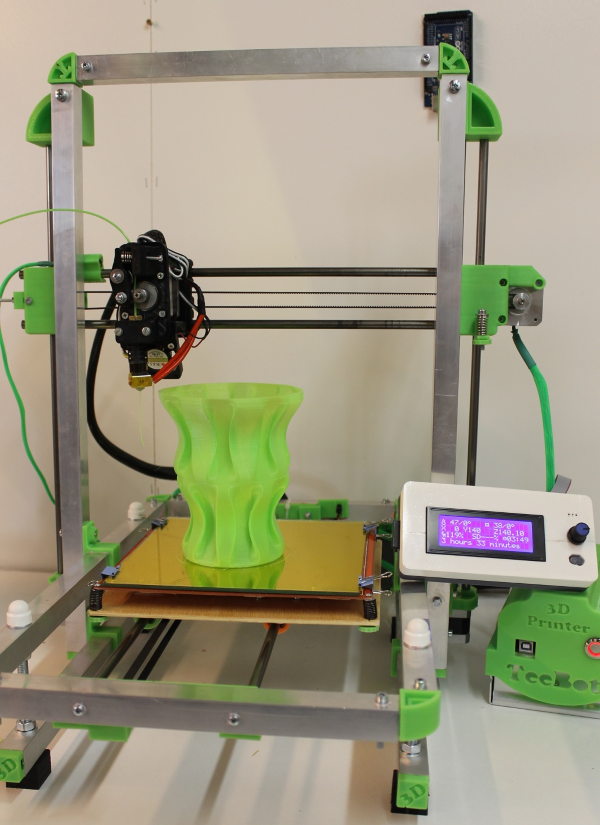 You can choose the optimal temperature only empirically.
Adhesion agents
To increase adhesive properties and reduce the risk of damage to the glass surface of the desktop, additional agents are often used, such as varnish or glue for 3D printing, PVA glue, stationery glue stick, dissolved ABS plastic (so-called "ABS juice" ), blue tape, etc. One tool for printing all types of plastics will not be enough. In our article, we will not consider such folk remedies as beer or sugar syrup, but will focus on more traditional methods.
Basic adhesives:
Varnish or adhesive for 3D printing
The days of hair sprays are long gone, and now almost no one uses them due to low efficiency. More effective adhesives for 3D printing have come to replace.
Typically, 3D printing lacquers and adhesives are formulated to take into account the properties of different filaments and allow the first layer of the printed model to be reliably adhered to the worktable. Simply put, these are universal tools suitable for working with multiple types of filaments.
There are already quite a few manufacturers of 3D printing varnishes and adhesives on the market in various volumes and for any budget. It's not worth saving - one bottle will be enough for several months of printing, and you will save your nerves and time spent on reprinting damaged parts.
Easy to use: spray varnish or glue on the platform and spread it evenly over the surface with a clean, soft cloth.
ABS juice
Composition for those who like to save money or who do not have glue or varnish on hand. It is made simply: finely chopped ABS rod or the remnants of a previous printing with ABS plastic are immersed in acetone and after a few hours a thick solution is obtained that can be applied with a brush even on a cold platform.
This method is very reliable as an additional adhesive, but acetone evaporates during 3D printing and creates an unpleasant odor.
PVA glue, stationery glue stick
PVA glue is applied to the work surface with a brush and rubbed until a uniform thin layer is obtained. As a rule, when hardening, the glue becomes transparent. After drying, you can start 3D printing. The method is not bad, but the reliability of such a method is doubtful due to the fact that not all PVAs work well.
Stationery glue stick is mainly used when there is nothing else at hand. The most popular option is Kalyaka-Malyaka glue. The glue is applied in one layer, after the platform cools down, the part is easily separated, and the glue itself is easily washed off the glass and from the printed part.
Kapton film, blue masking tape and Lomond film
Masking tape is more suitable for 3D printers without platform heating. The adhesive tape is carefully glued to the entire area of the table and allows you to print small details without heating the table. This option is especially suitable when working with PLA plastic, however, with an increase in the area of \u200b\u200bproducts, the edges of the parts can come off along with the adhesive tape, so the relevance of this method is limited. Kapton tape or Lomond film is more commonly used.
On Kapton tape, the lower surface (the sole of the product) is very smooth, the parts are well separated after cooling, but you can’t leave the product on the cooled table, as the plastic pulls the tape together, and air bubbles form under it. When 3D printing on Kapton tape, it is necessary to heat the platform and additionally smear the adhesive tape with glue. Suitable for 3D printing of medium-sized products.
Lomond film was popular until various adhesives appeared. After gluing, the top layer on the film itself must be washed off for better adhesion. Details after printing on such a film are quite difficult to tear off. Over time, bubbles also form under the film, so the film must be changed regularly. Suitable for 3D printing large items.
Additional Points to Remember
PLA is the least demanding polymer. For stable printing with polylactide, it is not necessary to treat the surface of the table with additional adhesives, a clean glass surface is sufficient.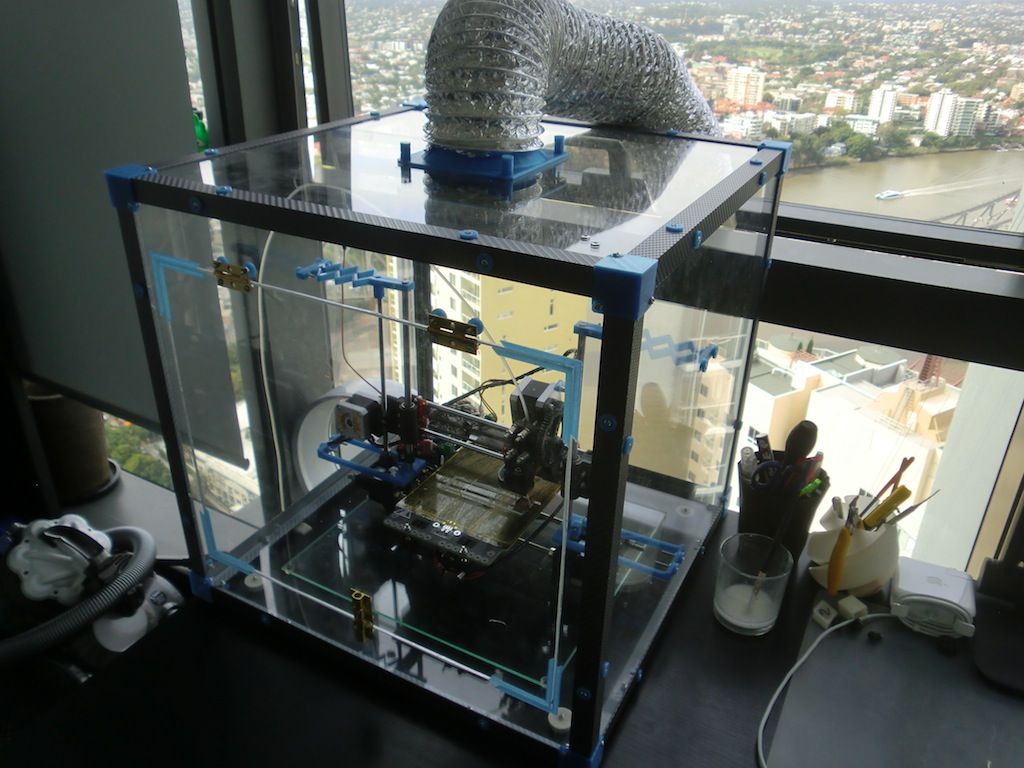 A prerequisite is that the platform is heated to 60°C. If the platform is not heated, then it is better to print using adhesive agents - varnish, 3D printing glue or blue tape for small parts.
PLA also loves airflow, so keep the fans on full.
ABS is highly shrinkable and needs help to better adhere to the surface. The main types of additional tools are varnish or glue for 3D printing, ABS glue, stationery glue stick, PVA glue.
When working with ABS, the platform must be heated to 100-110°C. It is advisable to use 3D printers with closed cameras that support high background temperatures. When 3D printing on open printers, it is necessary to use a heat-retaining cocoon around the model. Many slicers already offer this feature. Blowing of products made of ABS plastic is highly undesirable, as cracking of parts in layers and detachment from the working surface due to shrinkage can occur.
PETG is a very easy to work material that does not require high temperatures or fine print settings. Plastic has excellent adhesive properties and adheres very strongly to clean surfaces. On the other hand, high adhesion can lead to separation of pieces from glass tables when products are separated, so it is advisable to apply separating layers on the work surface - the same glue or varnish for 3D printing. This will help both separate products and prevent damage to the glass.
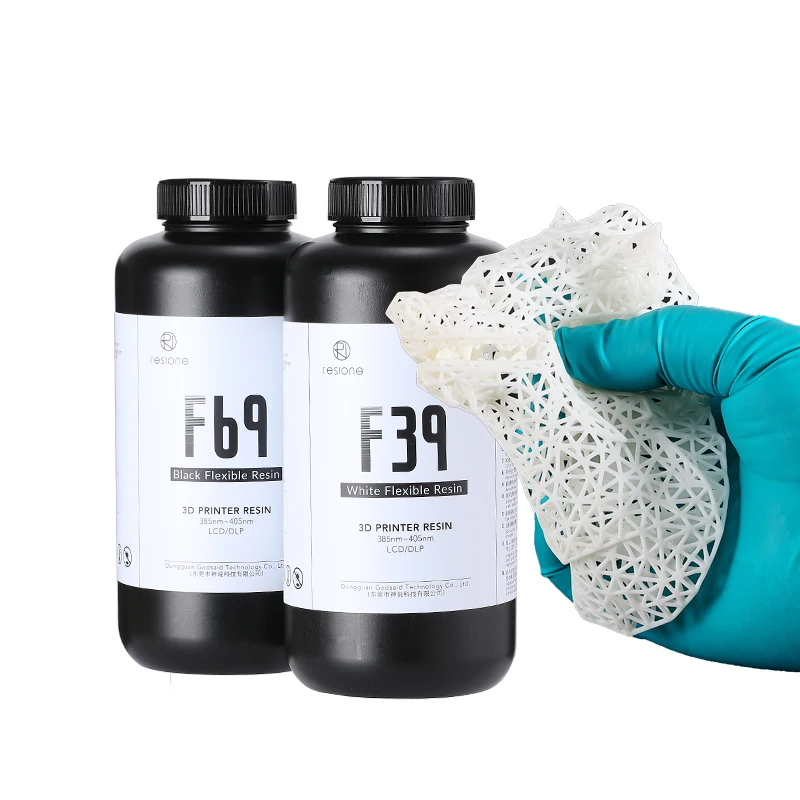
Flex has high adhesive properties, bonding well not only between coats, but also to work surfaces. Again, it is advisable to use 3D printing varnish or glue to avoid damaging the glass. Film coatings are not recommended.
In the case of composite materials , the choice of adhesive agents is mainly determined by the type of material serving as the basis. Usually recommendations for preparing for 3D printing with composites can be found on the manufacturer's website. If not, please contact technical support for advice.
For example, the FormaX composite from the X-line range is based on ABS plastic, but the properties of the composite material differ from pure ABS due to the presence of carbon fiber filler..png) Formax is not characterized by cracking in layers, but the composite requires the use of additional adhesive agents, so the manufacturer recommends using varnish or glue for 3D printing
Formax is not characterized by cracking in layers, but the composite requires the use of additional adhesive agents, so the manufacturer recommends using varnish or glue for 3D printing
Material storage and drying
The effect of moisture on filaments can be both cosmetic and functional. The most innocuous result of high humidity is a change in the textures of 3D printed products, although this is rarely limited to roughness alone (and haze when it comes to transparent plastics) and is usually accompanied by a decrease in interlayer adhesion and adhesion to the substrate. A more serious effect can be an uneven supply of plastic: water in a sufficiently wet filament boils when passing through the hot end, and the resulting steam leads to the appearance of bubbles in the material being laid and even to jerky extrusion with all the ensuing consequences in terms of quality and poor adhesion. Detailed instructions for storing plastics are available at this link, and for drying plastics - here.
That's all for now.
The Wiki on our site has separate, detailed articles about each of the filaments. How to print and with what parameters. Come read here.
If you have additions or comments - we are waiting for your answers.
Regards, REC3D team.
Photos from the blogs of Sergey and akdzg are published in the article.
Why do I need a heated table for a 3D printer?
3DPrintStory 3D printing process Why do you need a heated table for a 3D printer?
With the development of 3D printing, a lot of new research and experiments have appeared. Many of them are aimed at finding the best way to increase the adhesion of the first layer.
And we all know why this is so important. A standard heated 3D printer table will do the job. Although there are other alternatives when working with the first layer, nothing compares to this one.
Most importantly, 3D printer tables are a very important part of the overall design. In fact, without a table, you will not be able to create physical embodiments of your 3D models. Therefore, understanding how you can make the best use of the table should be your top priority for quality 3D printing. Understanding and navigating the different types of heated tables and their features will definitely help you choose the right 3D printer and implement your own ideas.
But before we get into all the 3D printer heated tables, let's get to the bottom of what 3D printing is. Most of us are already aware of this, but a brief overview will ensure that we are on the same wavelength in the context of the current article.
What is 3D printing?
We have been hearing about additive manufacturing or 3D printing for a long time. And the lucky ones who had a chance to work with this technology at least once are becoming more and more every day.
3D printing has become one of the most revolutionary technologies and is spreading very quickly, influencing the entire ecosystem of production, industry and hobby.
3D printing is a process in which 3D printers create layers one on top of the other to create a finished product of the desired shape and dimensions.
3D printing may differ in the principle of creating 3D models. For example, there are FDM, SLS, SLA and many others. They differ in the way the layers are created and connected. However, the fundamentals remain the same. Layers are stacked on top of each other to build the entire 3D model.
3D printing has made it possible to create extremely detailed models and designs in a short amount of time and in many cases cheaper than classic manufacturing processes. But when using a 3D printer, certain precautions must be taken to ensure that the finished product exactly matches the desired characteristics.
However, 3D printing has its own problems. And the biggest of them is too fast heating and cooling of the layers of the 3D model. One of the major problems that arise from improper heating/cooling is shrinkage. It changes the shape of the 3D model and deforms it. Therefore, in this case, we get low-quality products.
To solve this problem, heated tables for 3D printers have appeared. These tables, among other things, are designed to maintain the required temperature of the first layers of the model and the entire model as a whole. They help control the temperature during the entire 3D printing process. Therefore, this additionally results in proper adhesion of the first layer throughout the entire 3D print time of your model.
What is a 3D printer heated bed?
Returning to the main topic of the article, we must answer the question: what is a heated table for a 3D printer? Although we have already briefly discussed the usefulness of heated tables, let's learn more about them.
Heated tables using printed circuit boards as a heating element
Heated tables for 3D printer designs may vary. Among the most common types of heated tables, mounting or printed circuit boards are used as heating elements. They usually come with budget 3D printers. However, this solution is not very suitable if your 3D printing projects are complex and require frequent work with a 3D printer. In short, they are designed for small projects that do not take much time to complete.
The reason why they are not suitable for complex 3D printing is that PCBs are made of copper and aluminum plates, and they are prone to deformation when heated for a long time. Over time, heated plates will no longer perform the task for which they were originally designed.
There is another problem that may arise. They take longer to heat up. You can get rid of this problem, but for this you will need to replace the power supply with a more powerful one.
Heated tables using AC silicone sealant for heating element
The second type of heated 3D printer table is one that uses silicone to seal the heated elements. To create a structure, a heated element is inserted between pieces of glass and a heat insulator.
This is to minimize excess heat leakage and to deliver maximum heat to the table surface. In addition, electricity consumption also becomes smaller. And they can work longer without causing any problems to users.
This version of the heated table design is much more reliable and can last you much longer. In addition, the bill for the consumed electricity will also be reduced due to the minimization of losses for heating the table.
3D printer working process with heated table
The 3D printer works by extruding a plastic filament onto the table. Immediately after exiting the extruder, the material begins to cool. As we all know, shrinkage goes hand in hand with the cooling process. The problem arises when the layer is not cooled uniformly at all points. This leads to uneven shrinkage and, ultimately, to deformation of the entire 3D model.
In order to avoid cooling the plastic at different rates at different points, heated tables have been developed. The job of a heated 3D printer bed is to ensure that the parts do not cool completely until the 3D print is complete. This allows for a more uniform shrinkage process.
In short, heated tables basically take care of two things. First of all, by increasing the surface energy of the printing table, the heated layer enhances the adhesion of the first layer. Secondly, a sufficiently high temperature of the lower layer is ensured, which avoids the problem of deformation at any stage of the 3D printing process. Therefore, the heated bed maximizes efficiency and avoids excessive cooling of the layers.
When material enters the 3D printer's workbench through the extruder, it carries a certain amount of heat with it. For best results, the temperature of the heated bed should be below the glass transition point. This should turn the liquid thread into a solid form. The temperature sensor is responsible for maintaining the required temperature of the table.
You may need to experiment to find the optimum table temperature, as the melting point of different materials and manufacturers is different.
Several DIY Heated Table Designs for 3D Printer
The basics have already been discussed above, now let's look at some interesting DIY solutions.
In addition to the PCB and AC sealed heating element, there are other DIY designs to replace your table with a heated table.
Polyamide Film Heater
Polyamide, which we also call Kapton, offers a huge advantage when used as a tape for printable surfaces. They are best suited for use with PLA plastic. Providing effective heat resistance and high adhesion for PLA printing, this film is very popular. The use of this film helps to improve the surface quality of 3D models.
However, you may not know that in combination with a heating element sandwiched between two polyamide films, you can get a polyamide film heater. In addition, they are easy to install by adding glue to the back. They heat up very quickly. In addition, they can be of different shapes and sizes. So this is a great option to upgrade your 3D printer table.
Aluminum Coated 3D Printer Heater
If you are looking for an efficient and cost effective solution, this is the one for you. However, keep in mind that installing these heaters on your 3D printer may require some work.
After installing the heaters, it is necessary to close the electrical circuit using a thermistor and an insulator. Last but not least, the thermal paste must remain between the lined heater and the build surface.
Do you need a heated table for your 3D printer?
Since many 3D printers do not have a heated bed, the question is, do you need a heated bed?
You may have heard that working with PLA does not require a heated table. Or perhaps you've only heard of ABS printing on a heated table. But what is the truth?
When 3D printing with ABS you will need a heated table. Why is that? ABS tends to compress more than other materials. Therefore, the likelihood of deformation increases when 3D printed using ABS. With the table heating turned on, the material will better set on the first layer, minimizing potential deformations at the edges of the 3D model.
What about PLA? Do we need a heated table or not? In the case of PLA, heating is not always needed. However, if you want to print large models, it is better to use a heated bed to eliminate the possibility of possible problems.
As mentioned above, you also need to know the optimum temperature for your material. Otherwise, there will be no point. For example, when working with ABS, it is recommended to heat the table to 110 ° C. On the other hand, when using PLA, it is worth stopping at 60 ° C. By the way, the temperature of the 3D printer table is set at the stage of processing the model in the 3D slicer.
3D Printer Heated Table Precautions
Heated tables maintain very high temperatures, so you should take the necessary precautions.
Heated tables can leave scars for life if they come into contact with the skin.