Support test 3d print
▷ support test 3d models 【 STLFinder 】
Support Test
thingiverse
Support Test
Support test
thingiverse
Support test
Support Test
thingiverse
einfacher Support Test
Support Test
thingiverse
Just a simple support test. I couldn't find one so I quickly made this one. Its a quick print. ...print at your settings and fine tune your supports.
Support Test
thingiverse
[Support Test part](https://github.com/dotdash42/Calibration-Shapes/blob/SupportTest/models/SupportTest.stl)  ### Geometries All...
Support Test
prusaprinters
Simple print model to test support settings.
Support Test
thingiverse
Easy test for ordinary/custom support or experimental tree
Support Test
thingiverse
Made this to test slicer support structure and settings.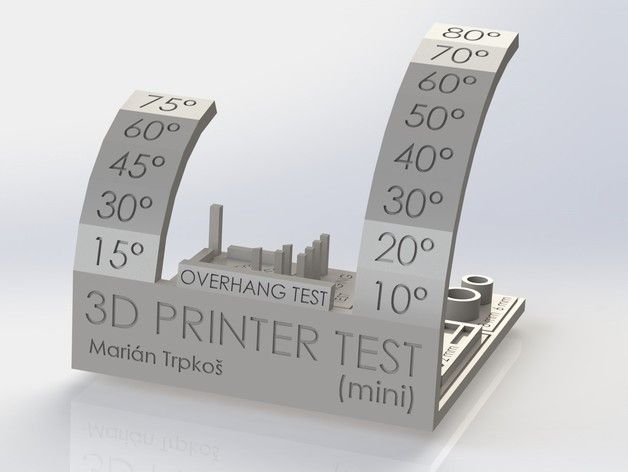 ...WIP
Support Test
cults3d
Easy test for ordinary/custom support or experimental tree
support test
thingiverse
a simple file to test your support settings.
Support Test
thingiverse
I made this for Mike to test his support settings. ... Standard, and shorter, quick version
Support Test
prusaprinters
You can test your support floor and roof with this 50 minute long model.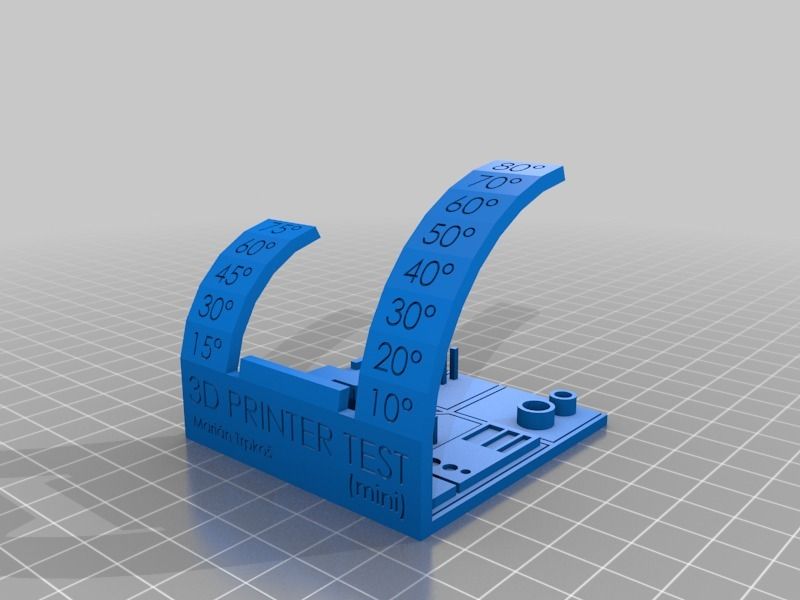
Support Test
thingiverse
A little test to verify the support's settings. ... Un petit print rapide pour vérifier les réglages des supports.
Support test
thingiverse
I used shellixyz's bridge test and simply removed one bridge-foot. ...So now it's something to quickly test my support material settings :)
Support Test
thingiverse
This is a quick way to test supports on your 3d printer In Cura I enable support for everywhere not just touching buildplate, this is to test the curved overhang
support test
thingiverse
to test supports for mid air prints.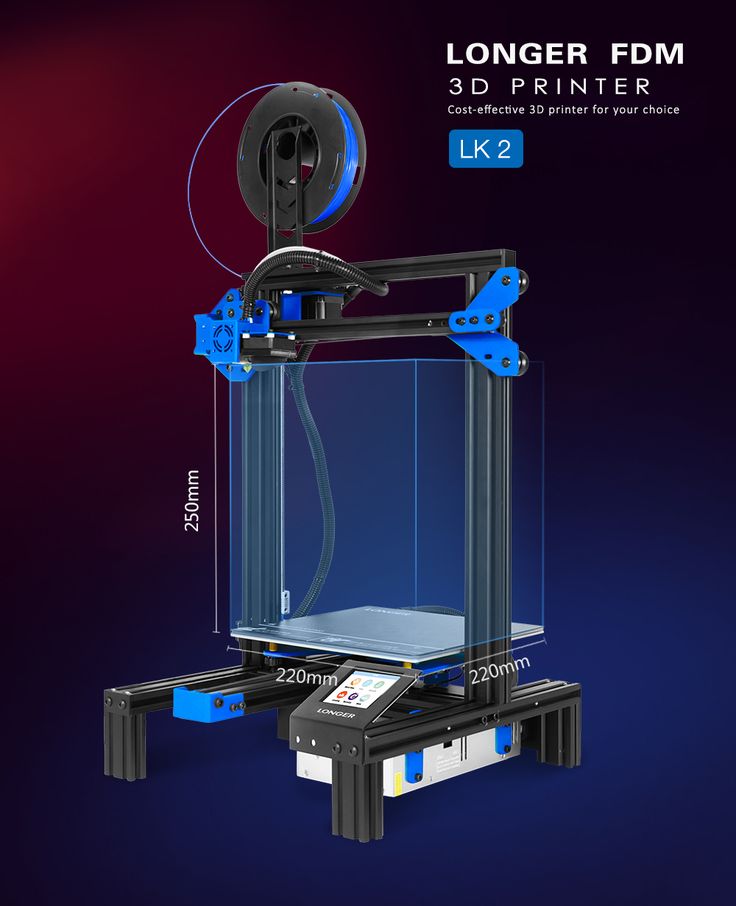 this is to visually see is supports will fail in slicer program and for adjustments. ...no need to print unless you want or need to.
support test
cults3d
to test supports for mid air prints. this is to visually see is supports will fail in slicer program and for adjustments. ...no need to print unless you want or need to.
Support Test
thingiverse
This is a test I designed to see how well your supports work. ...This will also help you dial in your support settings to get the best prints possible!
Support test
cults3d
I made this after remixing the all in one 3D printer test (/thing:3718940) because I realized I didn't want to do a full 8 hour print just to see if I was making improvements on my support settings.
Support test
thingiverse
I made this after remixing the all in one 3D printer test (/thing:3718940) because I realized I didn't want to do a full 8 hour print just to see if I was making improvements on my support settings.
Support Test
thingiverse
A quick test to see if your support settings are decent. Tests supports against a simple flat 90 degree angle roof and floor Creates supports for a 90 degree angle roof that touches the floor of the model so that you can test the quality of the...
Support-Test
thingiverse
A small Test to tweak Support-Settings. One only for Bridging and the other combine Support from Buildplate and from Model itself. Feel free to remix my Thing. ...Only give Credits and take Care that you choose the same License as i do =) Also check...
Support test
prusaprinters
It will test supports attached to the build plate as well as supports that are sitting on top of your model. In Cura, I used a 15% support density in zigzag pattern. I also enabled support interface and used 1mm floor/roof thickness, grid pattern at...
Support Test
thingiverse
Calibration test for SLA type printers. ... See attached drawing for dimensions. Small test (15mm x 25mm x 5mm) to quickly verify exposure settings and dimensional calibration.
support test
thingiverse
サポートの設定を改善するのに使ってください。 Use it to improve your support settings.
Support Test
thingiverse
Edit it online https://www.tinkercad.com/things/7zQmzyKZcw5 An exploration in using TinkerCAD scribble tool to create a unique shape that requires no support printed in it's orginal orientation, but requires support depending on other orientation...
Support test
prusaprinters
Unnecessary part for bottom contact check which is above the support can be removed easily. Please try it.</p><p>If you can see the link here, you can find my tuning result. ...Sorry in Japanese.</p><p><a...
Support test
thingiverse
I remixed from Arkinto's "Overhang Slab" this to help adjust support settings for multiple needs when printing. Should be able to print as is. Tip: If you're doing multiple prints, when you finish a print, use a fine point sharpie to write the...
Support Test
thingiverse
# Why I needed something to calibrate my support settings to improve the surface finish and ease of removal so I designed this.
# What
It has very simple 90-degree overhangs, uses very little filament and is fast to print which I think is a. ..
..
Support test file
thingiverse
Support test file
Top Ten Calibration Prints for Your 3D Printer
Get the most out of your 3D printer with these calibration tests which are designed to reveal small adjustments you can make to get your 3D prints to really shine.
Updated on November 9, 2022
by
MatterHackers
With this set of 3D models, you can fine-tune your 3D printer to optimize your it's capabilities and get the best 3D printed parts possible. Let's dive in!
Jump To:
- Vertical Surface Test
- Horizontal Finish Test
- Dimensional Accuracy Test
- Overhang Test
- Bridging Test
- Negative Space Test
- Retraction Performance Test
- Support Material Test
- Full Bed Dimensional Accuracy Test
- Z Wobble Test
- Squareness Test
- Download Calibration Models
Vertical Surface Test
This test is designed to look for "ghosting" or “ringing,” where features echo and ring out along vertical surfaces.
As the print head makes a quick movement, it can oscillate, which creates a ring effect.The oscillations diminish on longer lines and the vertical surfaces clear up until a sharp turn is made again. Ghosting can come from a lack of rigidity like a loosely mounted hotend or a wobbly frame, springy belts, printing at high speeds with a heavy direct-drive print head, a bed that isn't rigidly mounted, or firmware settings for acceleration or jerk that are too high for what the printer can achieve.
Some printers can handle high jerk and acceleration, where others will falter and show significant error because of it.
Vertical Surface Test
Horizontal Finish Test
With three different sections - flat, slope, and domed - you are able to see any sort of artifact or ridges from where the perimeters start and end. The more noticeable these points, the lower the score.
Cleaning this up depends on slice settings about perimeters, like start and end overlap, overlap percentage, and where the seam (start/end point of each outer perimeter) is located.
Horizontal Surface Test
Dimensional Accuracy Test
When you're printing coasters and keychains, it doesn't really matter if a part is 0.2mm too wide, but for multi-part prints that need to fit together, the accuracy of each part is very important to keep things fitting properly. Slots for connector pieces can be just fine off of Printer A but too tight to use from Printer B, or holes for nuts and bolts are supposed to allow for easy installation, but require unnecessary force to assemble.
The second level of this pyramid is supposed to be 20mm wide and deep, and loses points based on the average deviation from 20mm; if the average deviation is between 0 and 0.1mm, a full 5 points is earned. If the deviation is between 0.1mm and 0.2mm, 4 points are earned, and so on.
If you get a bad score, you should run through a calibration sequence for your extruder, making sure that your e-steps are accurate. You can find a helpful guide on how to do that here.
Dimensional Accuracy Test
Overhang Test
This test is designed to see how well the printer can cool down the hot plastic as it is extruded; the better the cooling, the cleaner the bottom surface is. Printing speed does affect cooling, so the lower the print speed, the more time for freshly laid down filament to cool before the next layer is ready.
A small print with high print speeds is going to need much more cooling than a large print at slow speeds since material will have only a very brief amount of time to cool enough to solidify.
It is important to consider that the type of fan used for layer cooling (axial vs radial) and the direction your fan outlet is facing will impact how well an overhang is printed, so it would be wise to print this test rotated every 90 degrees to see if some faces fair better than others. You might even consider a new ducting for the cooling fan to try and direct the airflow toward the part.
Drooping, curling, and hanging filament all lower the score, especially when the lower angles have difficulty.
Overhang Test
Bridging Test
Most slicers have the ability to detect bridging, which is where filament needs to cross an unsupported span. Usually the slicer will turn up the layer cooling fan, slow down the print speed, and change how the this section is printed so the span is efficiently crossed with long strands rather than small zigzags.
This bridging test piece tests a bridging condition, but most models won’t have bridges this obvious or long. You can expect to see some minor bridging over holes in the side of a model, over grooves, or over slots for inset nuts.
You get 1 point for each clean bridge.
Bridging Test
Negative Space Test
Much like the dimensional accuracy test, it's important that negative space is accurately replicated. When you're trying to insert screws cleanly without drilling it out or threading the plastic, it's important to know how much extra space you need to model into your part to accommodate. In general, when I need to insert an M3 bolt, I'll model a 3.2mm hole to make sure it slides in easily.
In general, if you precisely calibrate the steps/mm for the extruder, start and end overlap, and seam alignment, you can push out all 5 pins without much force. If there's difficulty removing any of the pins, there’s still something that needs to be calibrated out to achieve tighter tolerances. One point is earned for every pin that can be pushed out.
Negative Space Test
Retraction Performance Test
This test is hard to quantify the difference between a 4 and a 5, but the main thing this is looking for is retraction optimization. This is one of the toughest slice settings to calibrate due to just how many factors affect retraction, like the number of retraction settings, and even things like layer cooling, print speed, extruder style, or even your extruder's ability to extrude and retract without chewing the filament.
Retraction Test
Support Material Test
Whether you're using a dedicated support material like PVA or HIPS or you're using a single extruder printer and using the same material as your support material, it's important to have your support settings calibrated. Same material supports are printed with what's called an "air gap" where the print head rises above the print to create a slight gap between the roof of the support and the bottom of the printed part, giving the filament extra time to cool and droop onto the supports, preventing them from permanently adhering to each other. That air gap is something that needs to be optimized; too small and the supports adhere to the finished print, too large and the bottom surface will be really stringy and droopy until it can recover.
Dedicated support materials produce a bottom surface finish almost as clean as the top surface, because they are printed without an air gap since they can be dissolved away. The test model has separate sections for intricate supporting and a flat bottom surface, because an air gap optimized for one may not be enough for the other.
Support Test
Full Bed Dimensional Accuracy Test
While the dimensional accuracy test checks the accuracy of a fairly small part, this test checks accuracy across the entire bed. A small error in the dimensional accuracy test will compound into a larger discrepancy across the bed, which is 10 times longer than the first test. The smallest difference in expected vs actual measurement just means that any multi-part prints are going to skew depending on the orientation the part was printed in.
Full Bed Dimensional Accuracy Test
Z Wobble Test
Unlike every other test, which uses a scale to grade the proficiency of the 3D printer, this test is simply a pass or fail. The tower has a wide brim to make sure it is well adhered to the bed, and to ensure that any sort of issue in the walls of the tower comes from the printer's structure, and not because it tipped off of the bed. If there is any wobble, it should be cyclical and repeat with a period identical to the pitch of the lead screw attached to the Z axis. If the lead screw had an 8mm pitch, then you should see the pattern repeat every 8mm.
A key thing to watch out for is to make sure that your Z axis is properly constrained and not over constrained. Properly constrained means you have smooth rods, linear rails, or extrusions with V-slot wheels making sure that the Z axis only moves on Z and doesn't shift around. Rods, rails, and wheels should be tensioned or secured so that they don't wiggle or move when the Z axis is raising or lowering. Over-constrained is something like installing bearings at the top of the leadscrews in a support bracket. This is actually counter intuitive, because no lead screw is perfectly straight and adding that bearing causes a deflection in the lead screw. There should in general only be two part interacting with the lead screw: a coupler that attaches it to a motor (or be part of the motor) and a lead screw nut, anything else is overconstraining it and can hurt print quality more than help.
Z Wobble Test
Squareness Test
This test was developed to make sure that the printer's X and Y axis are assembled square with each other; this test will determine if the printhead moves on X, does it move a marginal amount on Y as well, or vice versa. Using an angle gauge, you will measure each of the five squares and determine how far off each corner is from 90 degrees. The further off from 90, the lower the printer's score.
Squareness Test
These are the top ten ...really 11 prints because there's just no way to cut out any one of these, they all serve a very specific purpose that without them you're missing some element of troubleshooting and calibrating your 3d printer to perform at its absolute best. And these are the tests that we run to make sure that the printers that we work with are running at their best as well, so I hope that with these calibration prints you’re better equipped to help calibrate your own 3D printer and getting it to perform at the best that it absolutely can.
All of these calibration prints, collected by Make, can be found in one place on Thingiverse here:
https://www.thingiverse.com/thing:2755063
Happy calibrating!
Article Tags
- 3D Printing
- Firmware
- 3D Design
- MatterControl
- Press Releases
- Small Business
- Automotive
- E3D
- Jewelry Making
- Engineering
- Entertainment Industry
- MatterControl Touch
- ESD Materials
- NylonX
- BCN3D
- Open Source
- Crafty Pen
- Digital Fabrication Anatomy
- How To
- Hardware and Upgrades
- Tips and Tricks
- Weekend Builds
- Top Ten
- Education
- Tech Breakdown
- Women in 3D Printing
- Project Ideas
- Advanced Materials
- Reference
- Vacuum Forming
- Pulse Dual Extrusion
- Product Spotlight
- Aerospace
- Jobs
- Military & Government
- Multi-Tool Machines
- Getting Started
- Healthcare
- How To Succeed With Any 3D Printing Material
- Creality3D
- Architecture
- 3D Printer Reviews
- Hacker of the Month
Related Products
View all related productsHow to optimize the settings of supports (calipers) in Cura
3DPrintStory 3D printing process How to optimize support (caliper) settings in Cura
All Fused Deposition Modeling (FDM) 3D printers create objects by extruding thermoplastic material layer by layer. Therefore, each layer must be supported by the layer below it. When there is no layer under a part of the 3D model (as in the case of overhangs and bridges), support structures may be needed. They are printed with the main model and removed during post-processing.
You might be thinking, "That doesn't sound too scary." However, the word "support" horrifies many 3D printer users. Some even consider it almost profanity. After all, support structures not only require more material, but they are also known to negatively affect surface quality and are difficult to remove.
Unfortunately, some models simply need supports. But this does not mean that we cannot optimize them by changing the appropriate settings.
In this article, we will first talk about when you need support and when you don't. Then we'll look at some of the important caliper settings in Cura to tweak them for the best results.
Note . This article is written specifically for Ultimaker Cura users, but the basic principles behind the settings can be applied to various other slicers.
Do you need calipers?
To determine if you need support structures, there are a few things to consider:
- 45 degree rule (overhangs): if overhangs are more than 45 degrees (from vertical), they will need support. To test your 3D printer's capabilities in terms of maximum overhang angles, try printing this test 3D model. When your 3D printer stops printing adequately at a certain stick-out angle, that's the angle you need to use additional supports to reach.
- 5mm rule (bridges): if bridges are wider than 5mm, they may need support. Of course, not all 3D printers are the same. Some can print over long distances. Others can hardly print thinner ones. Try printing this test model to see if your 3D printer needs calipers. You'll know the maximum bridge length you need after which calipers are needed when you see that the bridges in the test model start to sag.
Once you've decided you need calipers, let's take a look at the Cura settings to get the most out of them.
Support Settings
Cura has several settings to help you optimize the support of your 3D models. Here's where to start:
When you first open Cura, click "Custom" in "Print Settings". Here you can adjust settings that are otherwise hidden in the "Recommended Settings" section.
Right click and select "Configure Setting Visibility"
Select "Check All".
You can now see all the settings that Ultimaker provides in Cura. Scroll down to support settings, click "Generate Support", and now we can start tweaking the support settings for your 3D model!
Support Placement
After you click "Generate Support", the first setting will be "Support Placement". Here you can select "Everywhere" or "Touching Buildplate". You probably guessed that this determines whether supports are printed everywhere (where necessary) or based only on the desktop.
In most cases, it's better to choose "Touching Buildplate" because supports all over the surface of your 3D model can cause nasty imperfections on the surface of the finished product.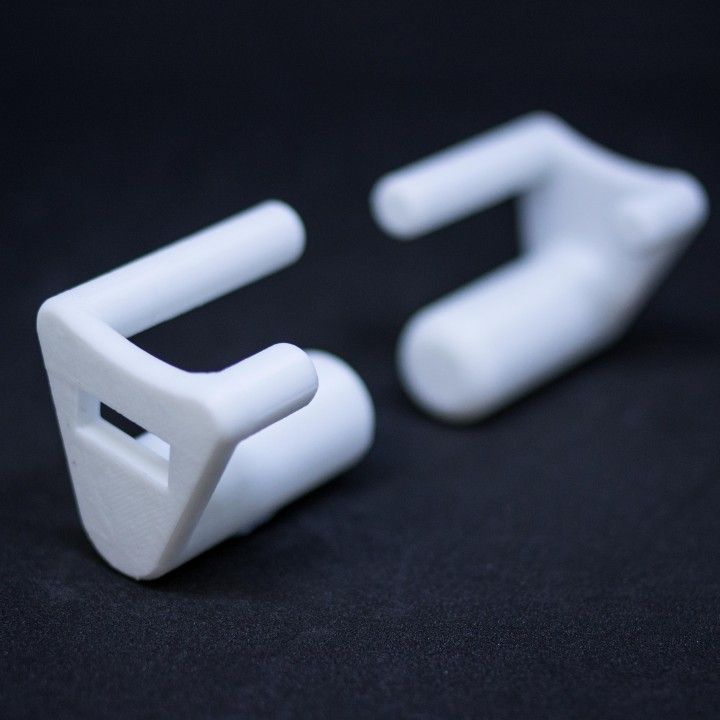
However, sometimes supports are needed everywhere. This is the case with really complex models that cannot be printed without additional calipers.
Support Overhang Angle
With the "Support Overhang Angle" setting you can specify the maximum overhang angle above which you want to use the supports. As mentioned earlier, the default angle is usually 45 degrees. However, this angle may be different for your particular 3D printer. So you should first check this parameter using a test 3D model.
By the way, this angle may also differ depending on the features of a particular 3D model. 0 degrees is the generation of calipers for each minimum angle of overhang, 89 is the minimum of supports, respectively.
Support Patterns
Ultimaker Cura supports various "Support Pattern" patterns. Each of the templates balances strength and ease of removal.
Quick and easy
- Zig-zag (zigzag) - the fastest in execution and the easiest to remove.
- Lines is an evolution of the previous template. They are still great, easy-to-remove supports, but are slightly stronger than zig-zags and usually don't come off in one piece.
- Concentric - best for models that are close to spheres or cylinders. As a rule, it is slightly stronger than zigzags and lines.
Note that due to the unidirectionality of the above three patterns, they tend to be more vulnerable. For example, vibrations and thin support structures can cause the nozzle to not align perfectly with previous layers, which can cause problems in the long run.
What's more, if these patterns are even slightly caught by the moving nozzle, they can break away from the surface below and collapse like an accordion!
Robust
and grid (grid) and triangle (triangle) are excellent templates for obtaining strong supports. They are resistant to vibration, but increase 3D printing time and generally have better contact with supporting surfaces. This can make post-processing difficult.
Support Density
"Support density" is very similar to fill density in the sense that you choose a compromise between strength, speed and ease of removal.
High density support structures are generally more rigid and can withstand vibration. In addition, the increased contact with the lugs makes the high density supports ideal for intricate or detailed supports. With high densities, expect stronger support, but more material usage, longer print times, and more complex post-processing.
Low density bearings are ideal for general bearing surfaces that do not require many contact points. Low density calipers are more likely to react to vibration during 3D printing, but they reduce material cost, 3D printing time, and ease of removal.
Caliper density of 20% is a great value to start with, but feel free to change this value to suit the needs of your 3D model.
Z Distance
This important parameter determines the distance from the top and bottom of the supports to the 3D model. This parameter consists of two sections: upper distance and lower distance.
A high value for these distances allows for a larger clearance between the model and the support, which simplifies post-processing and creates a smoother 3D model surface due to fewer contact points. A low value is useful when you are trying to support complex protrusions that require high detail. However, with a low support value, it is more difficult to remove.
As with many settings, experiment with these distances to find the perfect fit for your 3D printer.
X/Y Distance
X/Y Distance is very similar to Z Distance. This setting adjusts the horizontal distance between the model and its support.
Again, the further the distance, the easier it is to remove the support. The shorter the distance, the stronger the support structure.
As a rule, a larger X/Y distance means a better surface quality in vertical sections. If the vertical parts on your models are uneven due to adjacent supports, try increasing the X/Y distance.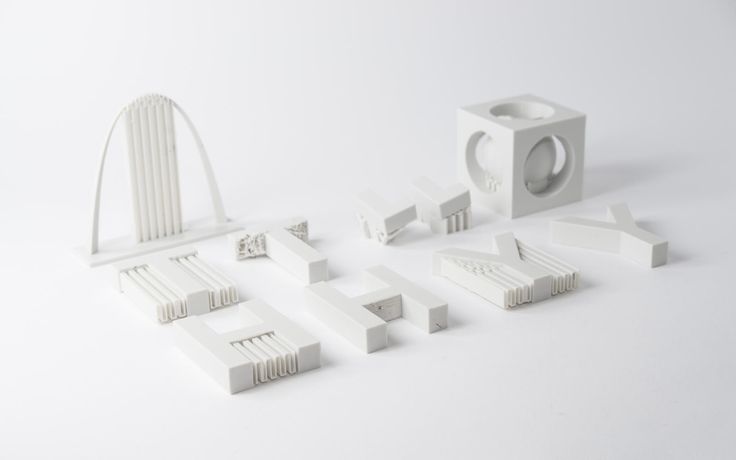
A smaller X/Y distance will result in better support for overhangs, namely those located near vertical surfaces. However, they can cause defects in vertical surfaces and complicate post-processing.
Support Distance Priority
Depending on the type of plumb line you are trying to print, the Z distance may conflict with the X/Y distance. In Cura, however, you can set the priority in these distances so that in the event of a conflict, the most important is preserved.
It's generally better to have Z override X/Y because the Z distance is what the model actually supports. However, you can always change this override setting if the specific 3D model requires it.
You can also set the minimum X/Y distance. Then, even when the Z distance takes precedence, the minimum X/Y distance is still kept.
Join Distance
The Join Distance allows you to set the maximum horizontal distance between support structures. When two support structures are closer together than this value, they will be printed as one structure. The higher the value of this distance, the faster the supports will connect. If the support structures are particularly thin, this can help provide more support for the 3D model.
However, if you set the value too high, the support structures can become tight and difficult to remove.
Horizontal Expansion
When the support surfaces are very thin, it is difficult for your 3D printer to create strong structures in a small area. The "Horizontal Expansion" option allows you to set the horizontal expansion so that even small anchor areas are adequately supported.
Entering a large value for this setting will always result in stronger supports, but this setting requires your 3D printer to use more material.
Towers
For very small protrusions, Cura allows you to print towers that taper at the top to support areas smaller than the minimum diameter you set (other areas will use regular support structures.)
the towers were not too weak, they had a larger diameter than the area they supported. You can always change this diameter in Cura. You can also adjust the angle at which your towers rise to a certain point to make the towers flatter or sharper.
What is support in 3D printing?
One of the most frequently asked questions when working with clients is “What is 3D printing support?”. In this section, we will clearly show what is commonly called support and what types of support exist at a given point in time.
Support material (supportmaterial) is an auxiliary material used in 3D printing to build complex objects and increase the quality and stability of construction. Without the use of support, it is impossible to 3D print models with cavities, overhanging structures, complex detailing, thin walls or ceilings, and other complex elements.
Simply put, support serves as a kind of temporary foundation for the printed product. Layered construction assumes that each next layer of the product relies on the previous one. In the case when the design of the product does not provide support under the first layer in one place or another, support comes into play.
It must be understood that the removal of supporting structures is one of the most difficult types of work.
Therefore, this article was written, fully explaining what support structures are and why they are needed in 3D printing.
How to determine where support is needed?
This is done automatically by the software supplied with all professional 3D printers. You just need to upload a file in STL format, and the program will independently calculate where the use of auxiliary material is necessary for high-quality construction. It is worth noting that most software also allows the user to edit the number and location of auxiliary structures. The software is directly related to the capabilities of a 3D printer and will automatically show you where support is needed and where it is not.
In addition, the program calculates the amount of auxiliary material needed before printing.
If we do not agree with the automatic calculation of supports by software for a three-dimensional printer, then software comes to our aid where supports can be placed manually. The picture shows an example of manually building supports in the AutoDesk MeshMixer program.
Types of support materials
Soluble
There are 2 types of soluble auxiliary materials such as HIPS and PVA. These types of plastics are used for printing supports in complex models, where high quality of the resulting product is an important component.
Each type of plastic has its pros and cons.
For example, HIPS can be used both as a base material and as an auxiliary. This plastic is soluble in limonene, so it is excellent for printing supports, where the main plastic is ABS, since they do not interact with each other. It also has its drawbacks - this is the high cost of limonene.
PVA, on the other hand, is used exclusively as an auxiliary material. It dissolves well in water and is only compatible with plastics where PLA is the main material. But there are two important differences from HIPS: the high cost of the material and the more simplified post-processing of the finished product.
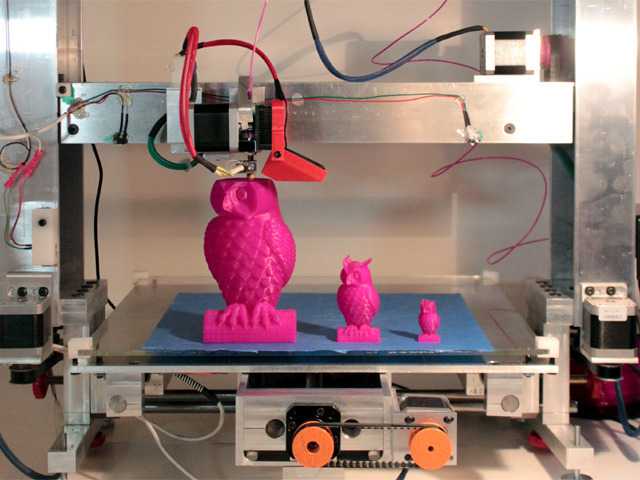
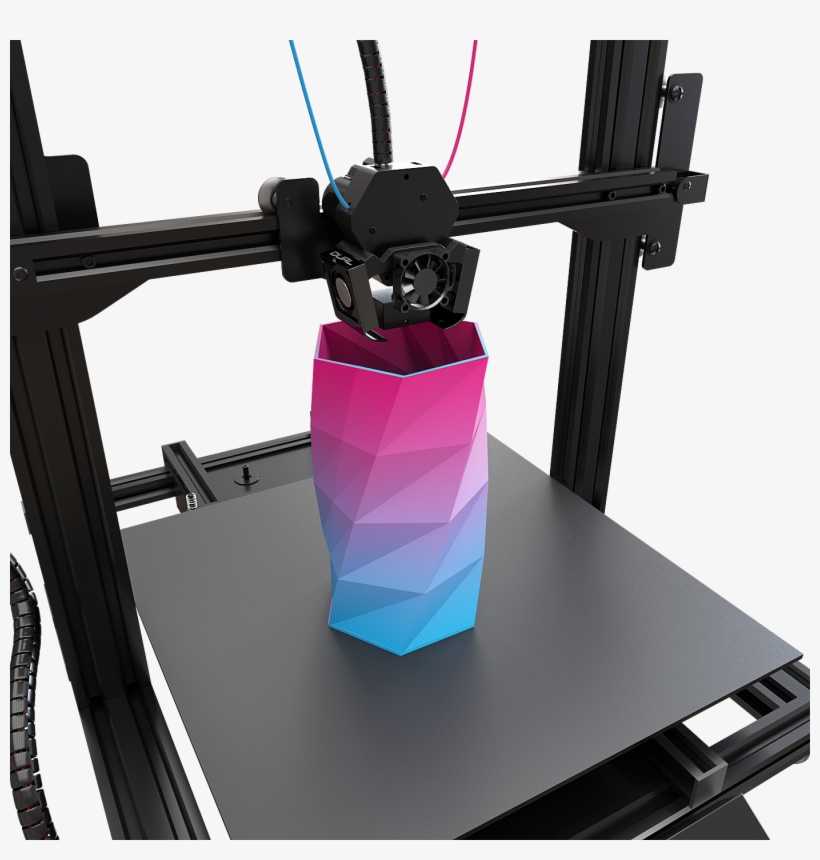
3D printer in the process of printing with support structures.
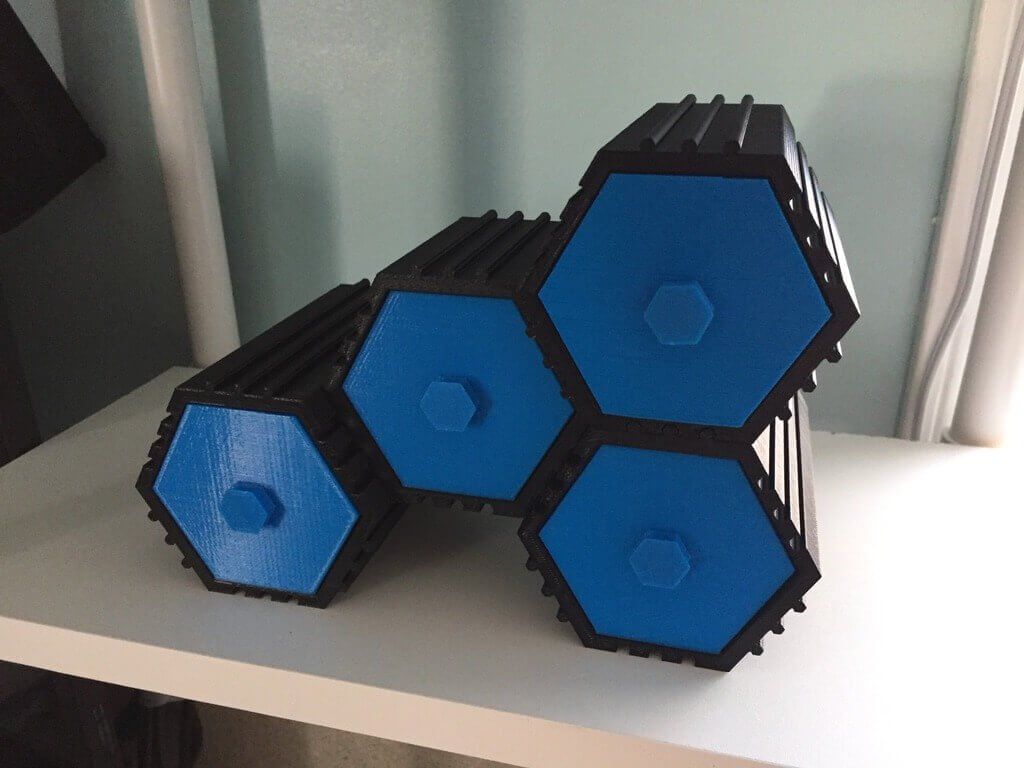
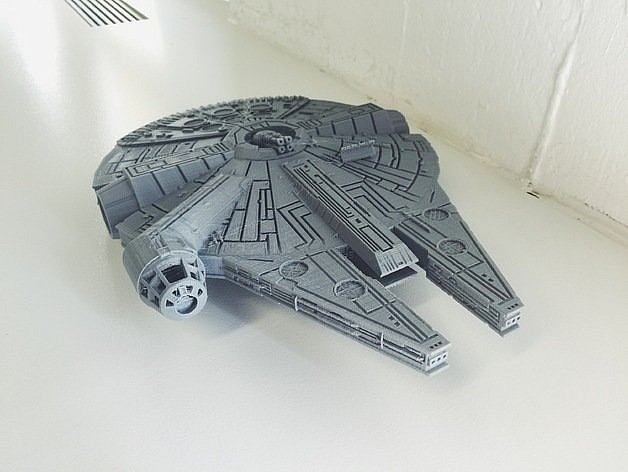
The finished product immediately after 3D printing.
Detail after washing out the supporting structures.
Mechanically removed
Excess material is broken off, sawn off, scraped off. In this case, the support is the same material from which the model itself is built. But, in order to facilitate its subsequent removal and reduce the consumption of model material, the support is built more “sparsely” compared to the object itself. It has a much lower density and strength, only sufficient to temporarily support the weight of the object being grown.
Fused
Melts and flows out with slight heating (much lower than the deformation temperature of the main product).