Monochrome lcd 3d printer
Monochrome vs. RGB LCD screen in resin 3D-printing
The basics of resin 3D-printing are based upon the exact curing of resin at a specific location in the XYZ space. Within regular 3D-printers, the Z resolution is better defined as its layer thickness. while the XY resolution is defined by the imaging technology that makes the resin cure. From the earlier days, these were always laser based printers. Where the laser ‘writes’ in the resin and everywhere it touches the resin the material will cure into a solid plastic. Since then there have been plenty of developments in new imaging techniques. After lasers, Envisiontec (now ETEC) developed a projector based imaging technique in the early 2000’s, still known as DLP 3D-printing. This technology has some benefits over laser based systems and made it possible to develop the first desktop sized resin 3D-printers. Although the DLP technology still has some disadvantages (like limited build size / pixel size ratio and its price at the time). In around 2017 Wanhao brought the first affordable LCD based printer. Although companies like Structo and Photocentric released the technology a few years earlier. This new imaging technology based on LCD screens rapidly took over the entry-level and now even the professional resin 3D-printing space. From here the history in imaging technologies for resin 3D-printing is well-known. From 2K RGB LCD / MSLA resin 3D-printers in the beginning, it evolved to 2K monochrome screens, 4K and even 8K mono LCD screens. In this article you will learn more about the technology differences behind monochrome LCD screens vs RGB LCD imaging technology.
LCD screen technology in resin 3D-printing
We couldn’t write it better as Ackuretta: “LCD stands for Liquid Crystal Display – you will be familiar with this technology, as you are reading this article either through a mobile device or a computer screen. That bright thing in front of you is the LCD screen.”
Next to the Z-axis, which provides the Z resolution, the most important component of a resin 3D-printer is its imaging system. For LCD printers it is obviously the LCD screen combined with its LED array. The technology of the LCD screens in a resin 3D-printer is quite similar as for instance a laptop LCD (except for the backlight, which we come to later). During the last decades there has been an incredible amount of work by imaging companies to create better, larger and sharper LCD screens.
How does an LCD screen work?
An LCD screen is build-up with a lot of different layers and each layer has its own function for the LCD to work. As the name LCD tells us, it display is based on liquid crystals. These crystals are randomly present and behave like a liquid in normal state. In this state they are quite transparent to light. When locally (per pixel) a current is applied on these liquid crystals, they will change orientation and block light. By doing this for every pixel and placing a background LED behind it, a 2D image is created.
Image by Electronics360: simple schematic drawing of the important parts of an LCD screen.
In other words, if there is an electric charge applied to these liquid crystal molecules, they untwist. When they straighten out, they change the angle of the light passing through them so that it no longer matches the angle of the top polarizing filter. Consequently, no light can pass through that area of the LCD, which makes that area darker than the surrounding areas.
Monochrome vs. RGB LCD screen in resin 3D-printing
LCD based resin 3D-printers started with RGB LCD type of display, which works perfect for most display work. But for resin 3D-printing it is only important that you have one wavelength (one color) of light to print. This is often 405nm light, which is purple/blue-ish. On this wavelength your standard resins will work fine. The funny thing here is that the “old-fashioned” monochrome (means one color) LCD screens work much better for this. Of course these screens are not really old-fashioned and there has been a lot of development in one-color LCD screens as well in the past decades.
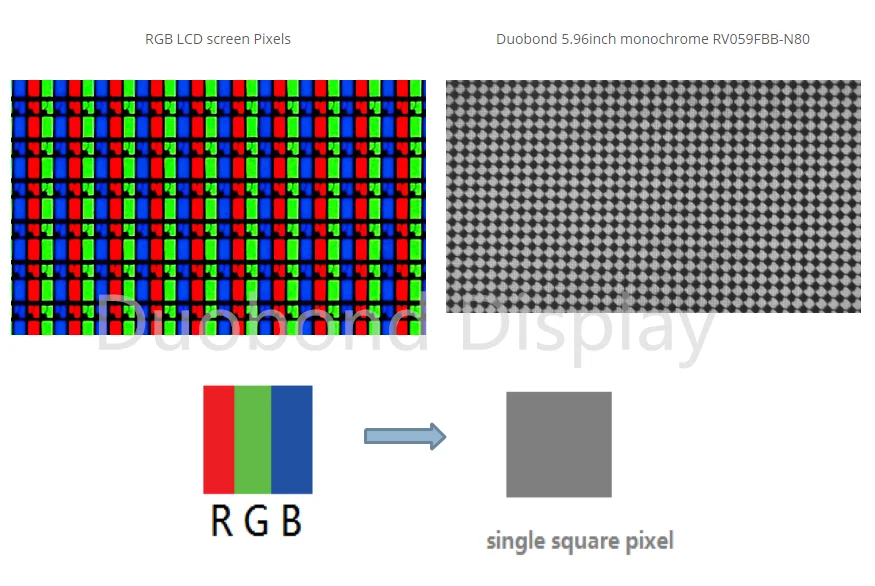
The picture below shows a RGB and a monochrome LCD screen. The RGB screens contain color filters. As RGB is an abbreviation for Red, Green and Blue. The color filters are necessary for color TV, phone and computer screens, but in 3D printing you don’t need color. These color filters from the first generation LCD printers lead to a reduced transmittance rate. Meaning that there is less light output and thus slower curing of the resin.
Image by Ackuretta: the difference in light output from an RGB (color) LCD screen versus a monochrome LCD screen.
LCD Aperture ratio explained by Chitusystems known from Chitubox
If we dive deeper into the imaging technology of LCD’s, one important value is the aperture ratio. The Aperture ratio is the ratio of the area of the light transmission part of the pixel to the total area of the pixel. They made a comparison image below with an LCD with aperture ratio of 50 ∼ 80%.
Image by Chitubox / Chitusystems: difference in aperture ratio is important in LCD technology
According to Chitusystems: “The increase in aperture ratio is mainly determined by the design scheme and process capability. In the manufacturing process, the alignment accuracy of the array substrate and the color filter substrate will also have a decisive influence on the aperture ratio”.
Image by Chitubox: a square pixel is formed when the Red, Green and Blue sub-pixel is exposed.
Going back to the difference with monochrome screens, these do not have a Red, Green or Blue color filters and operate in just one color. Think it as a black and white image (with grey-tones possible). In the pixels that are displayed as white, a lot of the 405nm light from the LED’s below can pass on the complete pixel.
What are the advantages of Monochrome LCD displays in resin 3D-printing?
Monochrome LCD’s are better for resin 3D-printing as they will increase printing speed and increase the life-time of the screen. To start with the last one, LCD screens in resin 3D-printing are considered as consumables. These screens need to be replaced when the performance drops. In contrast to DLP systems, which can be re-calibrated and should work for many years.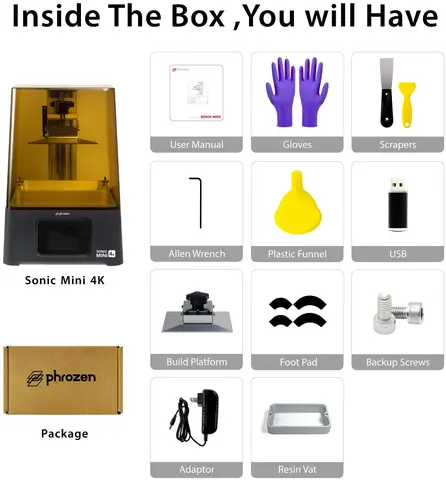 With RGB type LCD screens the lifetime of a screen is approximately 500 hours with normal usage. You will notice dead pixels, flickering LCD screen or parts not working anymore when the life-time of the LCD is over. In our experience this lifetime of an RGB LCD can vary from 200 hours to 700 hours randomly over many different printers. If you replace it yourself it costs around $30-150 on spare parts and it is a fairly easy job, manuals can be found for most printer models online. For monochrome screens the lifetime is advertised at 2000 hours, which is a major improvement over the 500 hours of the RGB LCD screens. We have been working on monochrome printers since their launch (around end of 2020). Although we do not print full-time and only for R&D and quality purpose, we have not replaced any monochrome screen at the time of writing (January 2023). The print hours were not counted but we are sure this is much more compared to the RGB screens LCD’s which we have replaced many times in the past, before de-commissioning these printers.
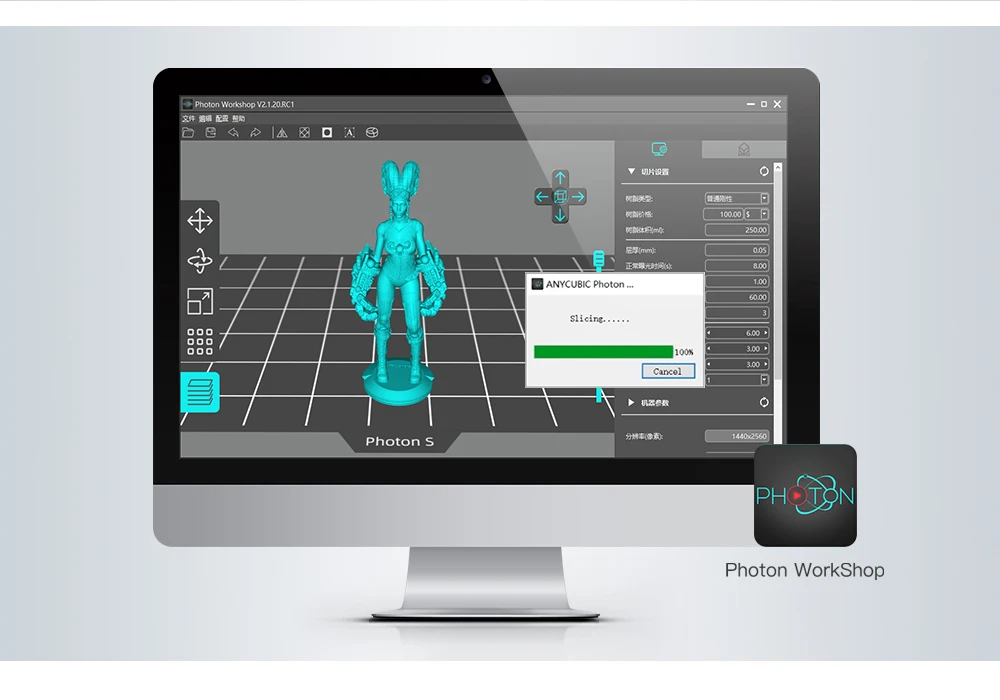
Print speed of monochrome LCD screens compared to RGB LCD in resin 3D-printing.
The brightness and contrast ration of the screens are more dialed in for 405nm light and there are no color filters present, which increases the brightness of the LED’s. These improvements all help in getting a faster print speed. The following printers are both 2K LCD printers, the photon is an RGB type and the Mono is the monochrome version. You can see the difference in print speed there:
- – Anycubic Photon
- – Anycubic Photon Mono
Especially for rigid resins the print speed is very much faster on monochrome LCD screens. For instance Liqcreate Premium Model would need 16,0 seconds exposure time for 0,1mm layer thickness on an RGB screen and only 2,0 seconds on the Monochrome LCD screen from the Anycubic Photon Mono. For some specialty resins like Tough-X the print speed will only double from 30 seconds to 14 seconds, as these specialty resins need more time and UV power to cure.
Conclusion on Monochrome vs. RGB LCD screens for resin 3D-printing
With printing on >20+ LCD type printers for many years we would advise to everyone that is looking for a new resin 3D-printing to choose a monochrome LCD printer. With every new model released we see some new benefits and better LCD screens. The benefits of Monochrome LCD screens are evident and we have not found any negative side of this yet.
Voxelab Proxima 6.0 Monochrome LCD Resin 3D Printer for Super Nice Prints with Extreme Detail
Up to 52% OFF🎁Proxima 6.0 4K: Free 500ML Resin
loading
Share the product to
- Overview
- Parameter
- In the Box
- Comments
- FAQ
- More
Voxelab Proxima 6.
 0 Main Features
- Sufficient performance: build volume 130*76*155mm, print speed 17-22mm/h.
- 3.5" touchscreen: set up 3d printing quickly by taps.
- 2K monochrome LCD screen, pixel size 50 microns (2560*1620): quick curing, helps achieve quicker printing speed and longer service life.
- Assisted bed leveling system: simple bed leveling system lets you level the platform in 15 seconds.
- Full grayscale anti-aliasing feature: print with exquisite details.
- Linear rails: ensure Z-axis move steadily, eliminates riffles on final prints, shows smooth surface and delicate texture.
- 3D print materials: compatible with most 405nm wavelength photosensitive resins in the market.
- Slicing software: ChituBox (V1.8.1), Lychee and VoxelPrint.
- Integrated FEP film design: replace FEP film by tightening 12 screws, super easy.
- Resin vat maximum level: prevent pouring too much resin. Put an end to resin waste!
Voxelab Proxima 6.0 Reviews
Voxelab Proxima 6.0 Highlights
High Precision Longer Service Life
Print Speed Doubled
Build Volume 130*76*155mm
Easy Leveling System
Full Grayscale Anti-aliasing
Stable Light Source Higher Efficiency
Easy Installation of FEP Film
Resin Vat Maximum Level
Two Slicing Software
6" 2K monochrome screen, pixels resolution 2560*1620, single-pixel size 50 μm. Service life is more than doubled than that of ordinary color screens.
Full Grayscale Anti-aliasing
With full grayscale anti-aliasing feature, Proxima 6.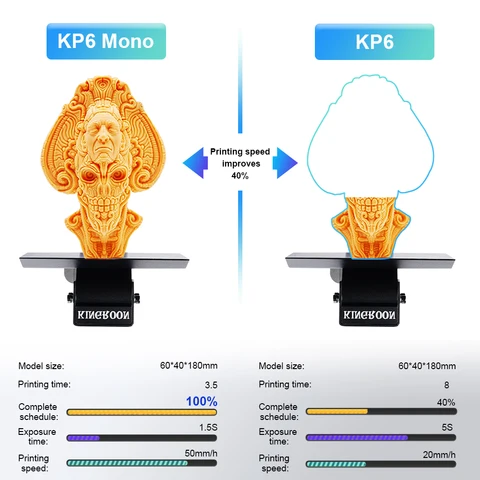 0 prints model with exquisite details. Refined printing is a piece of cake!
No Anti-aliasing
Full Grayscale Anti-aliasing
Proxima 6.0 uses 405nm-wavelength UV integrated light to ensure a higher printing success rate. Reflector spotlight makes the light source more concentrated and even.
Print Speed before Upgrade
Print Speed after Upgrade
Upgraded monochrome screen improves permeability and print speed. When using Voxelab standard photopolymer resin, print speed is around 17-22 mm/h with 0.05mm layer resolution.
Improved Printing Efficiency
Proxima 6.0 is capable of printing several models at one go.
Linear Rails Reduce Model Grains
Linear rails ensure Z-axis move steadily, eliminates riffles on final prints, show smooth surface and delicate texture.
Roller-rail Printing Effect
Linear-rail Printing Effect
A simple bed leveling system lets you level the platform in 15 seconds.
Integrated FEP Film Design
Just tighten 12 screws to replace FEP film. You can finish replacing it within 3 minutes!
Three Slicing Software
Supports ChituBox, Lychee and VoxelPrint 3d printing software for fast model slicing.
Resin Vat Maximum Level
There is a maximum level in the resin vat to prevent pouring too much resin. Put an end to resin waste!
Note: Voxelab LCD 3d printers are suitable for most 405nm wavelength resins in the market.
If you are using Voxelab LCD 3D printers, we recommend print with Voxelab resin for better printing results and performance.
Model Display
Garage kit
Model
Art
Education
Parts
Toy
- Printing TechnologyLCD-based SLA 3D Printer
- Light Source405nm LED light source
- Layer Thickness 0.025-0.1mm
- Build Volume 130*76*155mm
- Pixel Size 50μm
- LCD Screen6" 2K monochrome LCD screen
- Eclipser Resolution 2560*1620
- Support Resin405nm wavelength photosensitive resin
Device
- Tough Screen3.
 5'' tough screen
 - Printer Size230*200*410mm
- Input Voltage12V 5A
- File FormatInput: stl file
- Power60 W
- Net Weight6.8 kg
- Gross Weight8.2 kg
Software/Communication
- Slicing SoftwareChituBox V1.8.1/Lychee/VoxelPrint
- Print MethodUSB
Others
- Language EN/CN
Product accessories
3D Printer X1
Power cable X1
Quick start guide X1
After-sales service card X1
Power adapter X1
USB stick X1
Build platform X1
Gloves X1
Tool kit X1
Paper funnel X1
Metal scraper X1
Plastic scraper X1
All comments ( 35 )
No questions.
Your questions will be answered by the users who have purchased this product
May not be greater than 255 characters.
Useful information
There is a wide variety of 3D printers on the market today. LCD, DLP and SLA 3D printers use photopolymer resins. But which ones are best for your needs?
Today we will focus specifically on the aforementioned photopolymer 3D printers. We'll take a look at the pros and cons of each type of printer and compare their resolution, accuracy, clarity, speed, and cost.
A BRIEF DESCRIPTION OF LCD 3D Printers
LCD 3D printers use a liquid crystal screen to project a specific light pattern, which is then used to cure a photopolymer resin in a bath. The LED lamp is used as the light source, while the LCD screen controls the light pattern. The light is emitted by an LED lamp. Then it passes through the liquid crystal screen and is absorbed by the resin. The image of each layer is generated on the LCD screen and at the same time it is completely solidified.
Phrozen LCD 3D printers use ParaLED technology, in which an array of LED chips projects light through an LCD screen, which is then evenly distributed over the print area.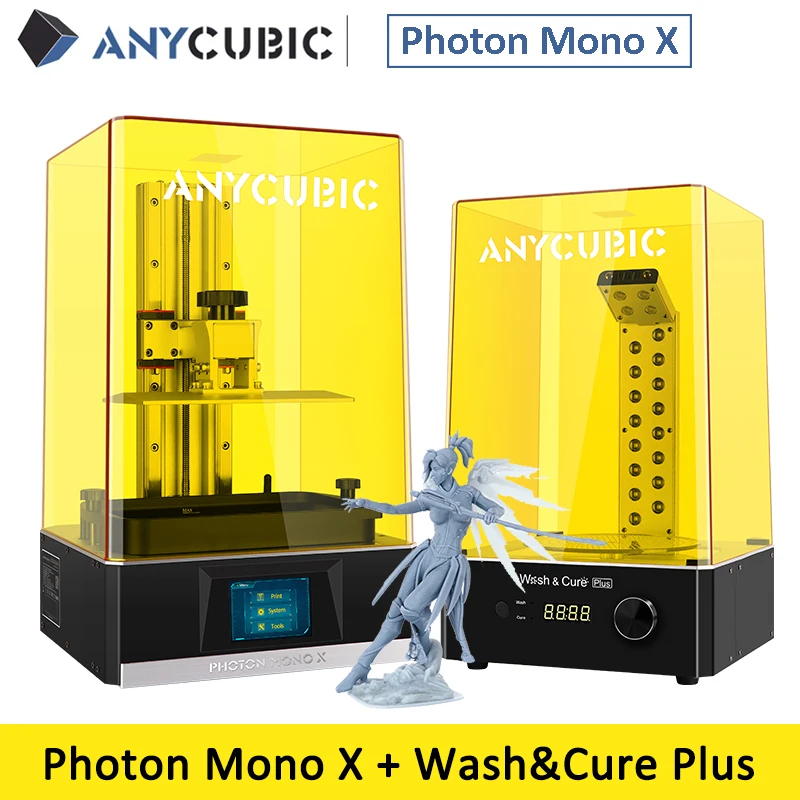
A BRIEF DESCRIPTION OF DLP 3D Printers
DLP 3D printing, or digital light processing, uses a digital projector to flash ultraviolet light in the area to be printed and immediately cures the resin layer.
The optical pattern for DLP 3D printing is mainly generated by a digital micromirror device (DMD) inside the projector lens. The DMD itself is made up of many tiny mirrors that control the pattern of light being projected. Light is reflected from its surface, located at an angle to the liquid resin.
A BRIEF DESCRIPTION OF SLA 3D Printers
SLA 3D printing, or stereolithography, uses lasers as a light source for 3D printing. The resin hardens as the laser beam prints each dot in a specific layer.
When a laser beam is reflected from a computer-controlled mirror, it is directed by the mirror to various coordinates that are in the resin and cures it in layers.
COMPARISON PERMISSIONS
Resolution is related to 3 dimensions: XY resolution and Z resolution.
The Z resolution is mainly determined by the specification of the 3D printer motor, motor driver, and lead screw. The Z resolution refers to the minimum layer height. For daily printing, we will use the average layer height, for example 30-100 µm, for printing instead of the minimum layer height.
For example, the Z resolution of the Sonic 4K Phrozen printer is 10 µm, but we usually print at a layer height of 30-100 µm. The lower the layer height, the longer it will take to print the model. This means that as the number increases, the printer will print faster. Please note that the layer thickness can be preset on each 3D printer.
Keep in mind that the resolution of the STL file itself will also affect the resolution of the final print.
For each type of 3D printer, the XY resolution is defined as follows:
LCD 3D printers: For LCD 3D printers, the XY resolution is determined by the pixel size.
LCD 3D printers can produce higher resolution 3D prints, depending on the pixel size of the printer's LCD display.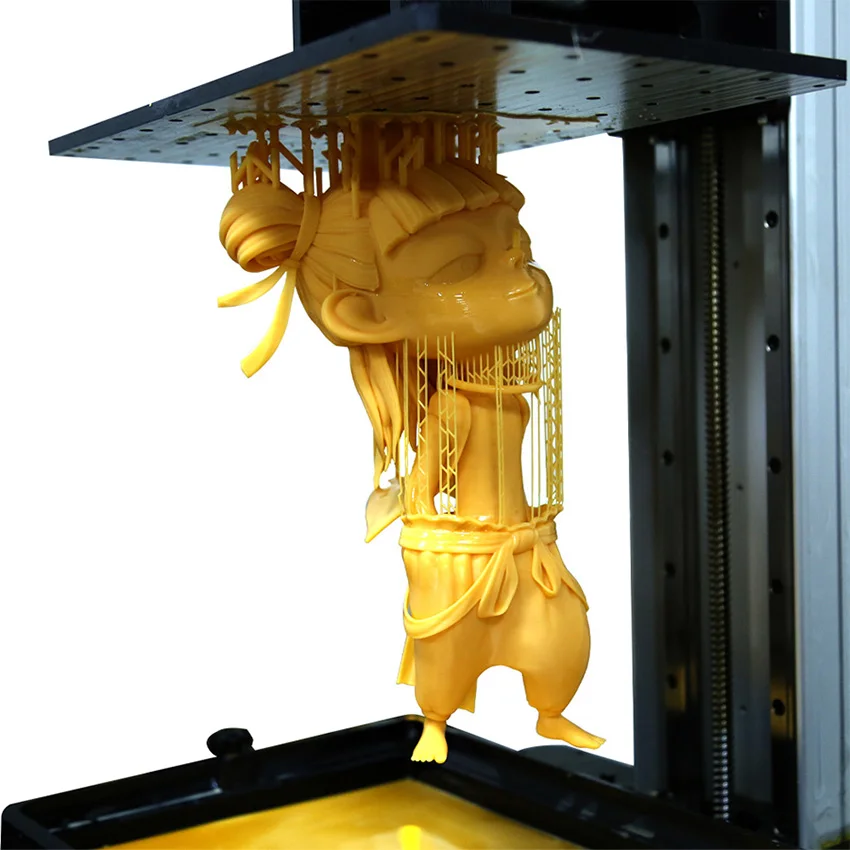
For an LCD screen, you can calculate the pixel size by dividing the length of the LCD by the number of pixels along its length. Take Phrozen's Sonic 4K as an example, its X-axis resolution (pixel size) is 134.4 mm / 3840 pixels = 0.035 mm.
Phrozen's Sonic 4K allows you to print in 4K at 35µm resolution and 722 PPI (the highest PPI on the market). PPI stands for Pixels Per Inch. The higher the PPI of the printer, the more detailed the 3D model will be.
DLP 3D printers:
For DLP 3D printers, the XY resolution is also determined by the pixel size. Although the difference is that the pixel size of DLP 3D printers depends on the size of the small mirrors on the DMD.
Each layer is seen as square pixels and light is projected according to the size of the pixel.
DLP 3D printers use the same concept as LCD 3D printers; you can calculate the pixel size by dividing the length of the small mirrors by the number of pixels present on the DMD.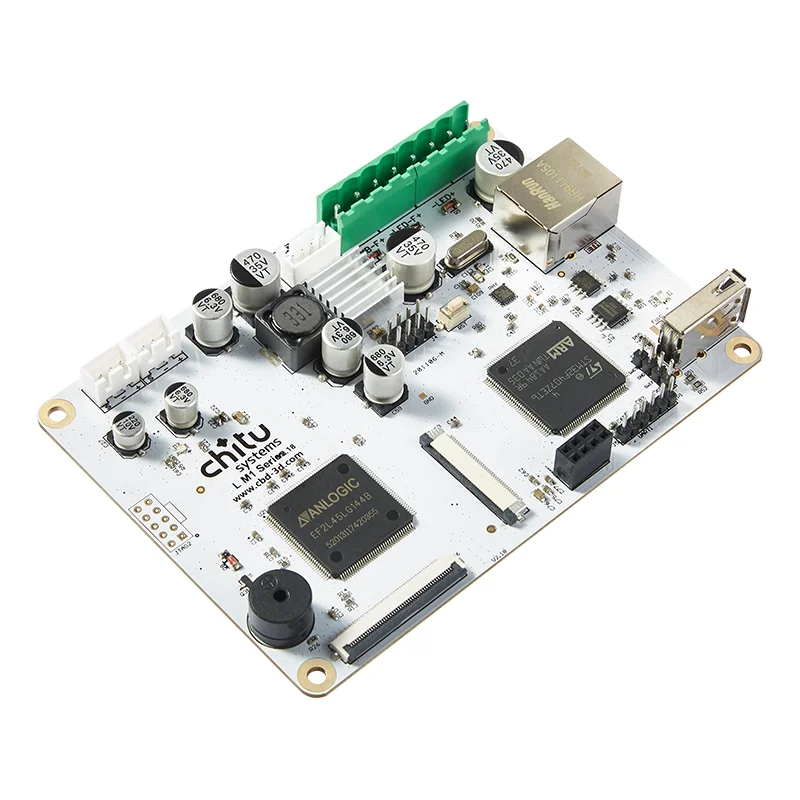
SLA 3D printers: For SLA 3D printers, the XY resolution will depend on the average spot size of the laser beam and the amount of steps that the laser beam is driven.
The size of the laser spot can be adjusted according to the size of your print. Some may also define its resolution in different ways, such as scan speed or beam size at minimum power.
Due to differences in methods, SLA 3D printers should be treated as a separate case when compared to DLP and LCD 3D printers.
Comparison of measurement accuracy.
LCD 3D Printers: With a wide variety of LCD 3D printers on the market, companies are now rushing to create LCD 3D printers that are far more accurate than previously possible. This means that LCD 3D printers are approaching the accuracy of traditional SLA 3D printers with the proper calibration components.
Phrozen 3D printers use ParaLED technology to provide the most parallel angle of UV light emission. This is to ensure that each resin layer receives an equal amount of UV light during the printing process, improving the efficiency of light passing through the LCD screen while projecting each pixel size accurately and accurately.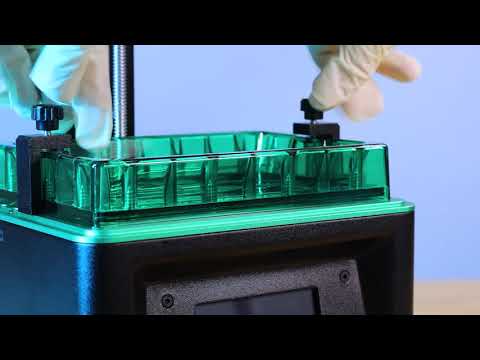
DLP 3D printers:
DLP 3D printers tend to be less accurate than SLA and LCD 3D printers.
This is because DLP printers use the projector lens to project light from a small source to a wider source, which increases the chance of pixel distortion due to spherical aberration.
Some professional DLP 3D printers try to improve this slight distortion by building floor standing 3D printers to increase projection length to reduce the effect of spherical aberration.
SLA 3D printers:
Because SLA printing uses lasers, 3D models printed using this technique are generally accurate. SLA 3D printers print models with a flat and smooth surface as the laser travels in a continuous path, slowly drawing out each layer.
Although SLA 3D printers can print smooth models, the purchase price of such a device can be 3-5 times higher than LCD 3D printers. In addition, printing on an SLA 3D printer takes much longer, we will talk about this later. For those who want to print miniatures and other similar models at home, it would make more sense to purchase an LCD 3D printer.
Speed Comparison
LCD 3D printers:
LCD 3D printers are similar to DLP 3D printers in that the entire resin layer cures at once, which means it can also print much faster than SLA 3D printers and print out a collection of 3D models in one go.
Print speeds can vary from 20mm/hr for Phrozen's Shuffle XL Lite to 80mm/hr for our Sonic 4K, depending on whether the 3D printer uses a single crystal screen.
Monocrystalline screens last much longer and print much faster than regular color LCD screens.
This is because monochrome LCD screens are designed to provide higher light transmission and higher thermal resistance. Thus, 3D printers using Mono-LCD screens can cure resin with shorter layer exposure time and have a longer life than color LCD screens.
In comparison, color LCD screens take longer to cure the resin, as the LCD panel has a lower light transmission rate than Mono-LCD screens.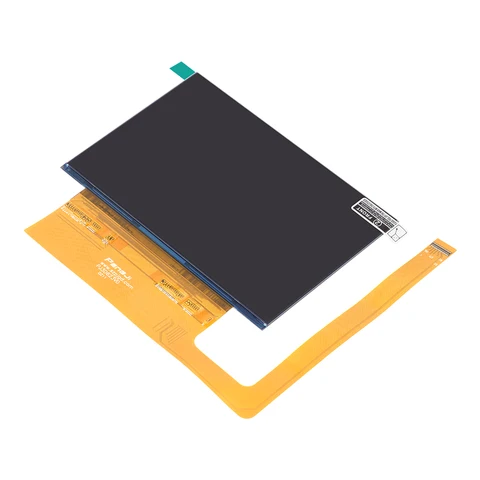
Being ahead of the curve, Phrozen pioneered Mono-LCD display technology in the world of 3D printing.
DLP 3D Printers: Because the entire resin layer is cured with UV light at the same time, this means you can print a large number of tiny models at the same time when using a DLP printer. This process will be much faster than with an SLA 3D printer and even some LCD 3D printers.
DLP printers can print between 20 and 140mm/hr, but they lose resolution and produce smaller print sizes than LCD 3D printers.
SLA 3D printers:
Since SLA 3D printers use lasers to trace the pattern of one layer before moving on to the next layer, it takes much longer to print each individual model using this type of printing technique.
The printing speed can vary from 14mm/hour to 36mm/hour.
Because SLA 3D printers use a different printing technique, it cannot be fully compared to the printing methods of DLP or LCD 3D printers. If you want to print models at high speed, it would be better to purchase LCD 3D printers as SLA 3D printers print very slowly.
Price
LCD 3D Printers: Compared to other 3D printing methods, LCD 3D printers are designed as an affordable alternative to their 3D printing counterparts. These 3D printers use a liquid crystal panel for printing, which can be easily replaced. Also, LCD printers can be small, so most LCD 3D printers are desktop-sized, making them easy to store.
LCD printers can cost anywhere from $500 to $3,000, such as the Sonic Mini Phrozen, which costs around $500, and our Sonic XL 4K, which costs $3,100.
Phrozen 3D printers produce models with high efficiency, providing high resolution printing to capture all the fine details of your 3D models. Phrozen offers a wide range of 3D printers for personal use, dental applications, jewelry and more.
DLP 3D printers:
DLP 3D printers are more expensive than LCD 3D printers because this printer requires the use of a digital micromirror device (DMD), which also tends to be expensive.
The price of DLP 3D printers typically ranges from $5,000 to $100,000.
SLA 3D printers:
In terms of cost, SLA printers tend to be more expensive than their counterparts: DLP printers and LCD 3D printers. This is because SLA printers include machines and lasers, which tend to be more expensive.
Depending on the brand and type of SLA 3D printer you decide to purchase, the price can range from $5,000-$7,000 for a basic SLA 3D printer to several hundred thousand dollars for an industrial SLA 3D printer.
While DLP 3D printers print the fastest, they produce lower resolution models, and they are also more expensive than LCD 3D printers. 3D models can also be easily distorted due to the use of a projector lens.
SLA 3D printers print products with fairly high accuracy using a laser, although it prints very slowly. These 3D printers also tend to be much more expensive, making them less accessible to the average user.
Although LCD 3D printers do not print as fast as DLP 3D printers, they print with precision using an LCD screen and UV light, producing extremely high resolution 3D models. At the same time, the cost of LCD-3D printers, especially Phrozen LCD-3D printers, remains very affordable.
Anycubic Photon Mono LCD 3d printer
Hi all.
This is my first review of a photopolymer LCD 3D printer, and indeed my first acquaintance with this technology.
Anycubic Photon Mono features a 6" monochrome LCD display with 2K (2560 x 1440) resolution.
Didn't understand what it was about? Then rather under the cut, there is a lot of information about the printer, a little about printing technology and a few examples of printing.
A little about photopolymer LCD printing:
This technology is quite new and cheap to produce. It is also called DUP or mSLA.
The technology works thanks to a powerful ultra-bright UV LED that evens out the glow - a Fresnel lens and directly to the matrix of the IPS LCD panel, which forms a white outline and a black background of the light layer. The black color does not pass through the radiation, and the white light is freely exposed, due to which a hardening layer of the material is formed. The model is built layer by layer.
Now color LCD screens have been replaced by monochrome ones and this is a big breakthrough in technology. A monochrome display lasts much longer, and the print speed with such a display is much higher (about 4 times). Thanks to the monochrome matrix, the exposure of the layer was reduced to an average of 2 seconds.
Anycubic Photon Mono has a monochrome display and this is its biggest advantage.
Features :
- Control: 2.8" touch screen
- Software: ANYCUBIC Photon workshop
- Print area: 130 mm * 82 mm * 165 mm
- Print resolution: 2560*1620(2K), 51 micron
- Layer thickness: 10...150 micron
- Print speed:
- Max 50mm/h
- Rated power: 45W
- Consumable type: UV resin 405nm
- Light wavelength: UV LED 405nm
- Printer size: 227mm (L) * 222mm (W) * 383.
6 mm (H)
- Weight: ~ 4.3 kg
Packaging
The printer is supplied in a heavy cardboard box with dimensions of 295mm * 290mm * 530mm and a weight of ~ 6.5kg.
The printer itself is packed in a soft protective cover.
All printer parts and accessories are in place, nothing dangling. This package will reliably protect the printer from damage.
Equipment
The whole set in one photo. Here we have the printer itself, a resin bath, a printing platform, pieces of paper (instructions and a sheet for leveling the platform), a box with a power supply and other tools. Unfortunately, photopolymer resin was not included in the kit.
Platform leveling instructions and sheet for setting the correct clearance.
The print bed is made of aluminum and is sloped for better resin flow. Resin for these printers is quite expensive, so every drop counts.
The plastic pot for photopolymer is notched with volume indication. A beveled spout is provided for convenient pouring of the resin into the jar. FEP film (the film that is at the bottom of the bath) is replaceable, this is one of the consumables for photopolymer 3D printers. It must be handled very carefully so as not to scratch the film.
Box with tools and other accessories.
And here are all its contents. Included: 5 paper filters, gloves, plastic and metal spatulas, a set of hexagons and a service card, a mask, a flash drive and a power supply. Only a plastic spatula can touch the FEP film. The metal one is designed to remove the printed product from the platform, although someone here uses a separate plastic spatula.
Power supply for 12V 4A (48W), weighty, looks to be of good quality.
Appearance
The printer looks nice. The orange shield protects against resin odors and UV radiation.
Dimensions of the printer
Front 2.8" color screen. Below it flaunts the name of the printer model. there is a power button, a usb connector and a sticker with printer characteristics.0144
Let's take a closer look at the mechanisms.
The carriage moves on a rail.
The same monochrome 2K display. On the sides - fixing the bath.
Protective cover sensor. When the cover is removed, printing stops and a nasty squeak begins. By the way, the sensor can be disabled in the settings.
Z-axis end stop.
Resin bath installation example.
Volume markers. It is not worth pouring more than MAX, because during the printing process, the platform displaces the resin to its volume and the resin may leak onto the screen.
Disassembly
To access the board, you need to unscrew only 4 screws. Unfortunately, the manufacturer did not add rubber feet at the corners, which would be very helpful.
The rich inner world of the printer.
Control display board.
Main board. It has a connector for connecting a fan, but there is no fan as such.
Here is the array of UV diodes with lenses.
And this, apparently, is a lowering for UV diodes, if I'm not mistaken.
I almost forgot about the printer menu. It is here, in my opinion, standard for all photopolymer printers from Anycubic. It is possible to move the Z axis, check the illumination, disable the sensor for the presence of a protective screen, squeak when pressed, and more.
Printing examples
Level the platform before printing. This is done very easily following the instructions.
Then we install the bath and pour the resin. Several warnings at once : do not take a bath from below, it is better not to touch the film with your fingers at all; Shake well before pouring resin.
Printed with water-washable gray photopolymer resin from Eryone. (Very soon there will be a review on it).
First test model. Default exposure values: 45s for the first 6 layers and 2s for the rest, 50 micron layer.
Here I look at the model live and try to find the layers, but they are not visible, it is like a cast. This is very cool. The model looks just cast.
This is the second test model delivered on a flash drive with the printer. In general, this is part of the whole test model, because 8 of these are printed at once and with different layer illumination: from 0.8s to 3.6s. In general, for my resin, the recommended exposure time is 2 seconds. Some of the needles were accidentally broken with a finger ((in fact, they were there.
I really wanted to print baby yoda (I think most watched the Mandalorian series). Illumination of the first layers 22s, subsequent - 2s. This model was printed with supports. Perhaps it was necessary to print it immediately on the platform, without lower supports, but so far I am only mastering this printing technology. The resin was washed off simply with tap water, apparently not everything was washed off and in the process of additional illumination the model turned partially white. Most likely it was necessary to use a soft brush for better washing. The model with a height of only 35mm turned out to be very detailed. In the future, I will paint it with acrylic paints.
Wife colored and here is the result.
If the contact between the model and the print platform is large, it is quite difficult to tear off the models.
During printing, you can change the exposure time, print speed, and other settings.
Baby Yoda time lapse print
Dopas
Since I also have FDM printers, the first thing I printed was the lid for the bath and the fixtures for draining the resin from the print platform.
This is what the mount looks like.
And this is the lid for the tub.
Links to 3d models:
Platform mount
Bath lid
Detailed instructions for the printer and native slicer
Unpacking and calibration video from the manufacturer.
I would like to hear the advice of experienced printers on the correct position of the model on the platform. I also read somewhere that it is not necessary to drain the resin every time, this should only be done when changing the resin to another. Therefore, I did just that, after printing I don’t drain the resin, but simply cover the bath with a lid and that’s it. If the printer is idle for several days, then before the next printing, I simply mix the resin in the bath with a plastic spatula and start printing.