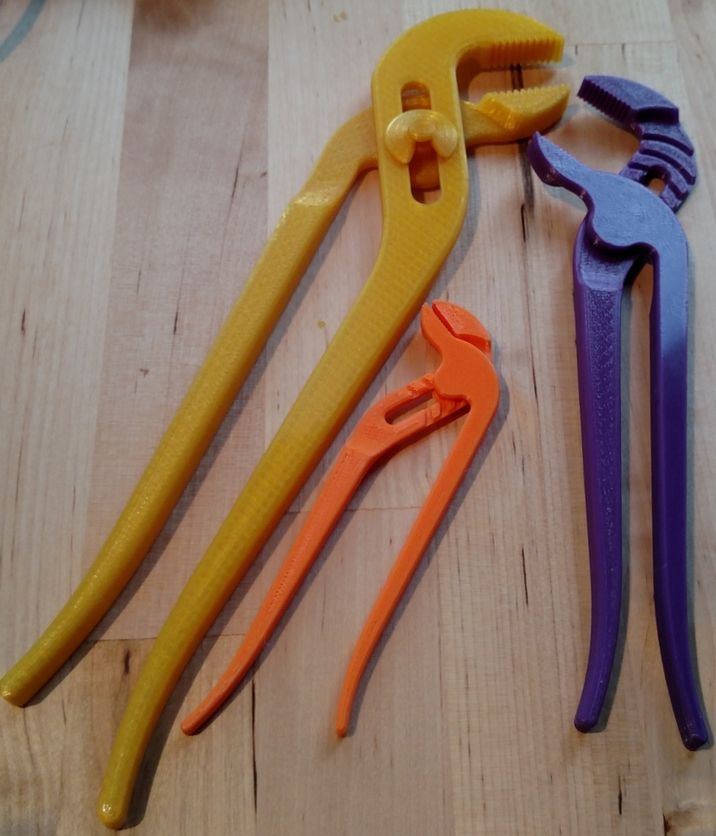
3D printed delidding tool
Reddit - Dive into anything
Here is the Thingiverse page, and the Imgur album.
This tool was designed in OpenSCAD.
I've pasted the description below. let me know what you think of both the writing and the tool.
About
This is a customizable parametric processor delidding tool. Variables can be edited to fit any LGA (Land Grid Array) processors. PGA (Pin Grid Array) processors do not work with this tool.
Go to the Imgur album to see all of the pictures.
Note: For some reason, the previews for the tool base part aren't rendering properly. That is not how it will look when you print it. To see an accurate representation, look at the first screenshot of the OpenSCAD window, or the second render of the example STL file.
Customizing
You must customize this tool for your processor. The default settings are for an LGA1366 processor, which probably isn't what you're using.
![]()
Open the Customizer app, and change the variables to your processor's measurements. You probably don't need to change any in the
box-marginstab.If you are confused about any of the parameters, all you need to do is ask for clarification.
Note: When measuring the CPU, enter a little extra room, about
±0.2mmon the width and depth, if your prints shrink. If you have great dimensional accuracy you probably shouldn't worry.Instructions
Lay the processor inside of the tool base as you would for a motherboard socket.
Place the tool cover over the top of the processor so the ridge underneath butts against the edge of the processor's IHS.
The underside of the cover (facing up when printed) should be flush against the top of the processor.
There should be a gap between the inner edge of the tool base and cover the same length as the margin (default: 5) specified in the variables.
The top side of the cover and base should be flush with each other.
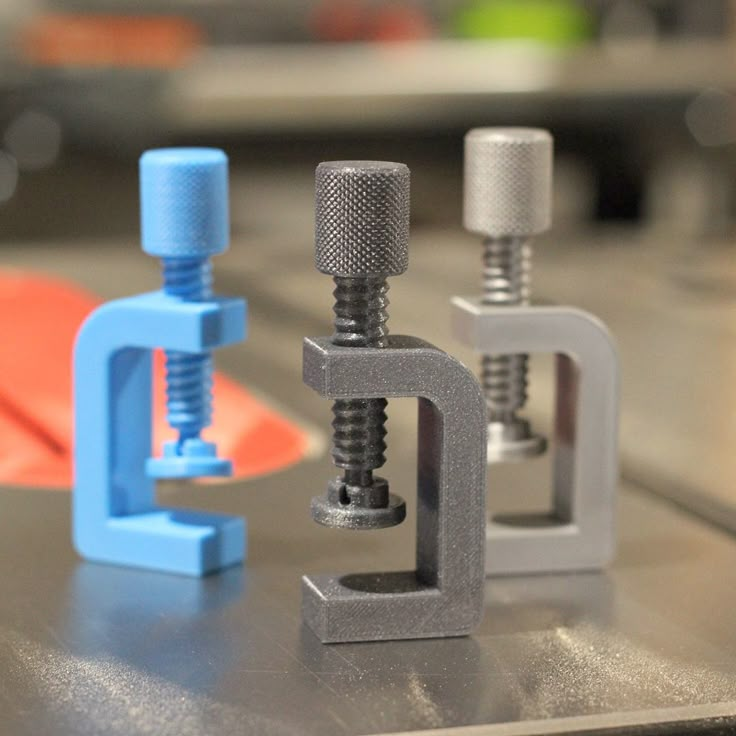
Use a C-clamp or equivalent to press the base and cover together.
The threaded side of the clamp should be pushing down on the top of the cover.
The non-mobile part of the clamp should be on the bottom of the base.
Tighten the clamp securely, don't be afraid to put pressure on the processor. If there isn't enough pressure, the cover may slip and break during the next step.
Place the tool in a vice, lengthwise. This will put pressure on the side of the PCB and IHS to separate the silicon seal between the two.
Slowly close the vice until you feel or hear the silicon seal break. There should be an audible snap, and tension on the vice will be reduced suddenly. The gap between the two parts should also be gone.
Take the tool out of the vice, and carefully remove the clamp.
Take the processor out carefully, preferably dump it in your hand upside-down. The IHS and PCB are now separate, and your warranty void.
You should know what to do after opening the processor. The rest is on you.
Disclaimer
Your warranty is now void.
This is a risky process, but potentially very beneficial. Your processor may break. If you don't know what delidding is, please research the topic thoroughly before proceeding.
You can delid processors without a lip on the IHS, just set
lip_depthto0. However, only do so for Intel processors. Do not delid AMD processors! All AMD chips are soldered with indium, so there is no reason to delid them anyways. See this video by der8aur if you want to know more.I am not liable for any damage caused by this tool.
▷ delid tool 3d print 【 STLFinder 】
Easier to print CPU Delid tool
thingiverse
A very small remix of Dawnaur's original CPU Delid tool. I made the square "track",or overhang that the delidder slider runs between, into a wedge shape. This negates any need for supports and makes the printing of the the parts very easy. The...
Easier to print CPU Delid tool
prusaprinters
A very small remix of Dawnaur's original CPU Delid tool. I made the square "track",or overhang that the delidder slider runs between, into a wedge shape. This negates any need for supports and makes the printing of the the parts very easy. ...The track...
Skylake delid tool
youmagine
!!!!!You may Try out the Kaby-LAKE Delid tool as Skylake CPUs should also work with it !!!!!https://www. youmagine.com/designs/intel-kaby-lake-delid-toolA simple tool to remove the Heatspreader of your Skylake CPU.tested with 6600K, 6700K, 4790K ,...
Intel Ivybridge delid tool
youmagine
This is the Ivybridge Version of my simple delid tool. This Version is BETA,< There are two Ivybridge Heatspreader versions available, this one is based on the "round" spreader of the I3-3220. The -K CPUs have a different spreader with sharp corners,...
Intel Kaby Lake delid tool
youmagine
Thanks to "Stullen Andi" for sharing the CPU dimension source :) This Version is BETA, I dont have a Kaby Lake CPU therefore it would be great if someone can print, test it and give feedback if it will fit This tool should also work with. ..
..
Intel delid IHS realignment tool
thingiverse
Tool for easy and accurate realignment of the heatspreader. ... Tested with a Coffee Lake i7 8700K.
der8auer Delid-Die-Mate 2 AMD Tool
thingiverse
AMD Tool for der8auer Delid Die Mate 2 1x M6x60 Ryzen Raven Ridge APUs are not soldered -Ryzen 3 2200G -Ryzen 5 2400G der8auer @ Youtube Raven Ridge - Ryzen 5 2400G delidding. ...Before/After Temps English: https://www.youtube.com/watch?v=Wkb4NmeONqY ...
Delid Tool for Intel CPUs heavy duty
thingiverse
This is a delidding tool for Intel cpus. It works easily with soldered cpus.
...
You need:
2 M8 screws
3 M8 Nuts
1 10€-cent coin
1 small metal plate
It works easily with soldered cpus.
...
You need:
2 M8 screws
3 M8 Nuts
1 10€-cent coin
1 small metal plate
Intel LGA 1366 CPU Delid Tool
thingiverse
You'll need: * An M8 Bolt * An M8 Nut * A coin (like a US dime or penny) I tested this tool with two Xeon X5690s, gripping the bolt with pair of vice grips, turning until I hear/feel the IHS give way, and they came off clean and easy. For the...
Intel delid tool
grabcad
Project isn't finished yet. May be updated.CPU brackets for s775 and s1151. Mounting threads: M6. Shaft thread: M12x1.25. ...Moving distance: 3 mm in each side from center position. SolidWorks 2016.
delid tool (modified)
thingiverse
한국 100원짜리 동전도 들어갑니다 준비물은 M6 BOLT *1 M6 NUT *3 PART 1,2 몽키 스패너 리퀴드 cpu 필요합니다. ...
CPU Delid tool 771/775/1150/1155/1156/1151
thingiverse
And again, check if your cpu have internal paste or indium solder before trying to delid it ! If you have issues on sliding, be sure to remove any support trace, having your printer calibrated, and not printing too fast. ...Upcoming: A better version,...
3D Print Tool Box
thingiverse
3D tool holder for our various workbench tools.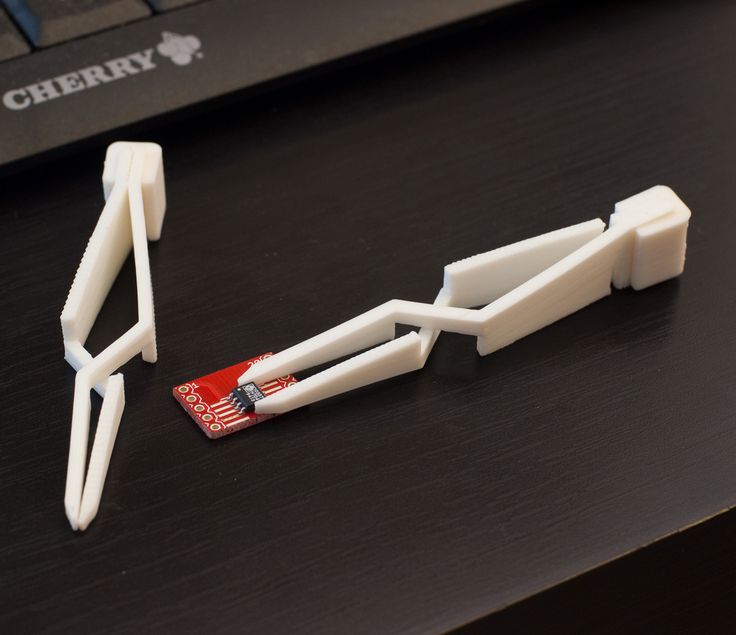 ... Simple but works!
3D print tool caddy
prusaprinters
Edit it online https://www.tinkercad.com/things/l7KJIQPgwLp Print Settings Printer Brand: Prusa Printer: i3 MK2SRafts: No Supports: NoResolution: .3 mm Infill: 15% Notes: Needed a tool caddy for my 3D printer maker tools with enough spaces to...
3D print tool organizer
thingiverse
organize your tools
3D Print Removal Tool
thingiverse
My first contribution to Thingiverse! .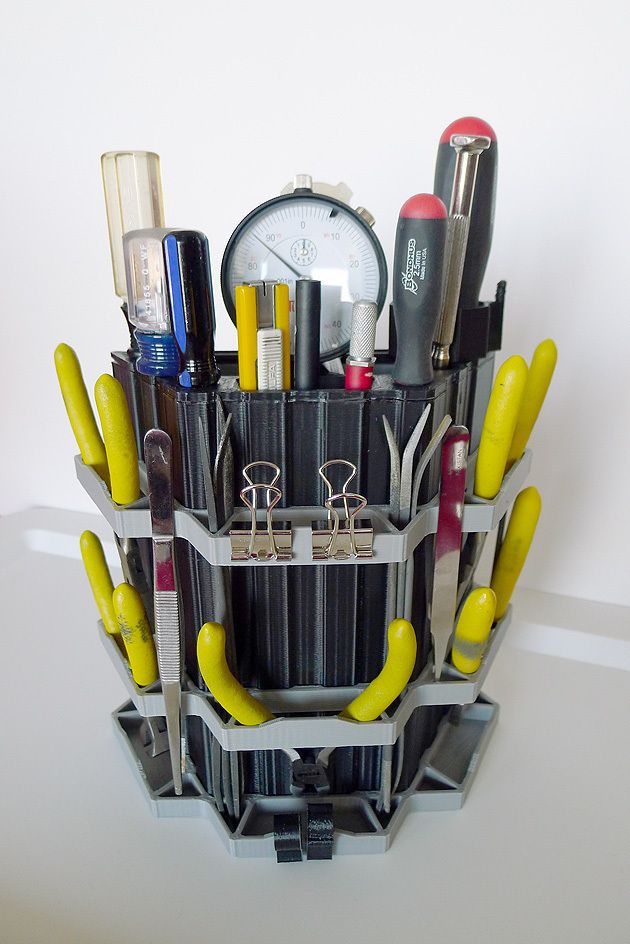 ..This is a tool to help remove items from a raft or from the print bed. ... I know there's several of these around already, but I was also using the design process to get familiar with DesignSpark.
3D Print Tool
thingiverse
... poke my prints around with and stuff so I whipped up this design in tinker cad. ...It has a flat end for poking around and a wedged end for removing prints from a build plate. Enjoy! MrToaf Instructions Just Slice it up and print. ...NO SUPPORT NEEDED
3D Print Job Removal tool
thingiverse
This is a tool to separate that hard to remove 3D print job from your build plate.
Guitar tuning tool 3D print
grabcad
What: Guitar tuning tool existing of only 2 parts which can be 3D printed (PLA) and click together. How: print and assemble, thats all.
multi-tool 3D print model
cgtrader
multi-tool leather man multi tool ready for 3d print measure 52/8/11mm , you can scale itDesigned by Sketch up pro 2015 Rendered by Lumion 3.0.1Printing-file format COLLADA file .dae Source-file format sketch up file .skp it is all solid works ,...
DIAMOND TOOL 3D print model
cgtrader
DIAMOND TOOL
3d print finishing tool station
thingiverse
i made this to hold my 3d print finishing tools it should hold a soldering iron mini heat gun screw drivers dremel tips etc. ... ...
feel free to customise to your needs and give me a shout to show me what you changed
... ...
feel free to customise to your needs and give me a shout to show me what you changed
3D PRINT BIG TOOL BOX
thingiverse
So that's my take for a 3D Printer tool box.... It's not an easy project.... many hours of printing. the model in the picture is the monoblock one. I added another split model, so it will make it more easy and efficient - fewer supports and...
Felting Needle Tool - 3D print
sketchfab
... is much easier and comfortable. Tool consists of two parts - upper and bottom. Parts can be joined together with the help of M5 bolt and couple M5 nuts. Modelled as 2 watertight shells. Inspected for errors. Ready to print. ...File formats: STL, OBJ
Divot Tool 3D print model
cgtrader
Divot tool is an 3D printable model which can be easily customized. It is made in 3ds max. Model is created in units of measurement that are suitable for 3D printers.You can download the STL file from the download button. ...
Divot tool 3D print model
cgtrader
Divot tool is an 3D printable model which can be easily customized. It is made in 3ds max. Model is created in units of measurement that are suitable for 3D printers.You can download the STL file from the download button. ...
...
3D Print Removal Tool Handle
thingiverse
Bought this useful tool https://www.amazon.com/gp/product/B00VB1U886 but its handle was pretty weak and broke away from the blade after a short while. Printed this new handle for it. Press fit blade to handle - hard push but solid once on. Printed...
K40 Focus Tool - 3D Print
thingiverse
STL file for the focus tool. ...Took measurements from Inkscape.
Tool box 3D print model
cgtrader
A tool box I made for 1/10 scale vehicles. This one I personally use on my crawler with alot of my other scale accessories. Use it for crawlers, drift cars, scale models and more. Enjoy! ...
DELID Ryzen 2400g & 2200g DELIDDER
thingiverse
Delidder for for AMD Ryzen 2400G and 2200G ONLY, This is tested on a 2400G and it works, you should use a Wrench with this ;-) i made this Delidder for AMD Ryzen 2200g and 2400g, AFAIK its the only 3d printable delid model for those specific CPUs...
Selective Laser Sintering (SLS) 3D Printing Guide
Selective Laser Sintering (SLS) 3D printing is a technology trusted by engineers and manufacturers across industries to create durable and functional models.
In this detailed guide, we'll explain selective laser sintering technology, the different systems and materials on the market, the workflow and different applications of SLS printers, and when to choose 3D printing with this technology over others. additive and traditional manufacturing methods.
White paper
Looking for a 3D printer to create durable, functional models? Download our white paper to learn how selective laser sintering (SLS) technology works and why it is popular in 3D printing for functional prototypes and end-use products.
Download white paper
Selective laser sintering (SLS) is an additive manufacturing technology that uses a powerful laser to sinter fine polymer powder particles into a solid structure based on a 3D model.
SLS 3D printing has been popular with engineers and manufacturers for decades. With its low model cost, high productivity, and common materials, this technology is well suited for a wide range of applications, from rapid prototyping to low-volume production, limited trial runs, or custom-made products.
Recent advances in technology, materials and software have opened up the possibility of SLS printing to a wider range of companies.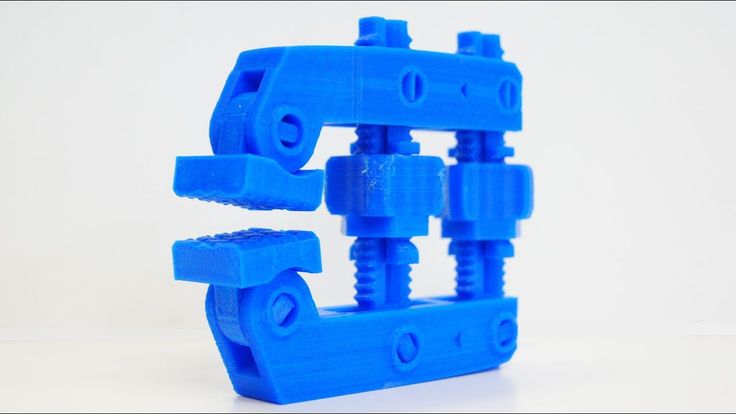 Previously, such tools were used only in a few high-tech industries.
Introducing the Fuse 1 high performance SLS 3D printer, finally available.
Webinar
Watch our product demo to learn about Fuse 1 and SLS 3D printing from Formlabs.
Watch webinar
Schematic representation of the selective laser sintering process. The SLS method uses a powerful laser to sinter small particles of polymer powder into a solid structure based on a 3D model.
-
Print: A thin layer of powder is applied to the top of the platform inside the working chamber. The printer preheats the powder to just below the melting point of the feedstock. This allows the laser to more easily raise the temperature of certain areas of the powder bed and monitor the solidification of the model. The laser scans the cross section of the 3D model, heating the powder to the material's melting temperature or just below.
 Particles are mechanically joined together to form a single solid object. The unsprayed powder supports the model during printing and eliminates the need for special support structures. The platform is then lowered into the working chamber one layer, typically 50-200 µm thick, and the process is repeated for each layer until the models are complete.
 -
Cooling down: after printing and before post-processing, the build chamber should cool down a little in the printer body and then outside the body to ensure optimal mechanical properties of the models and avoid their deformation.
-
Postprocessing: finished models must be removed from the working chamber, separated from each other and cleaned of excess powder. The powder can be recycled and printed models can be blasted or tumbled.
To learn more about the workflow, see the SLS 3D Printing Workflow section below.
SLS models have a slightly grainy surface, but the layer lines are almost invisible. To achieve a smooth surface, SLS models are recommended to be blasted or tumbled. This sample was printed on a Fuse 1 industrial 3D printer with SLS technology for workshops from Formlabs.
The green powder supports the model during printing and eliminates the need for special support structures. This makes SLS ideal for complex geometries, including internal features, undercuts, thin walls, and negative draft features.
Models created using SLS 3D printing have excellent mechanical properties: their strength is comparable to that of injection molded models.
Compare Selective Laser Sintering (SLS) 3D printing with other common plastic modeling technologies: Fused Deposition Modeling (FDM) and Stereolithography (SLA).
Selective Laser Sintering (SLS) is one of the first additive manufacturing technologies developed in the mid-1980s by Dr. Carl Deckard and Dr. Joe Beeman at the University of Texas at Austin. Since then, the method has been adapted to work with a variety of materials, including plastics, metals, glass, ceramics, and various powdered composite materials.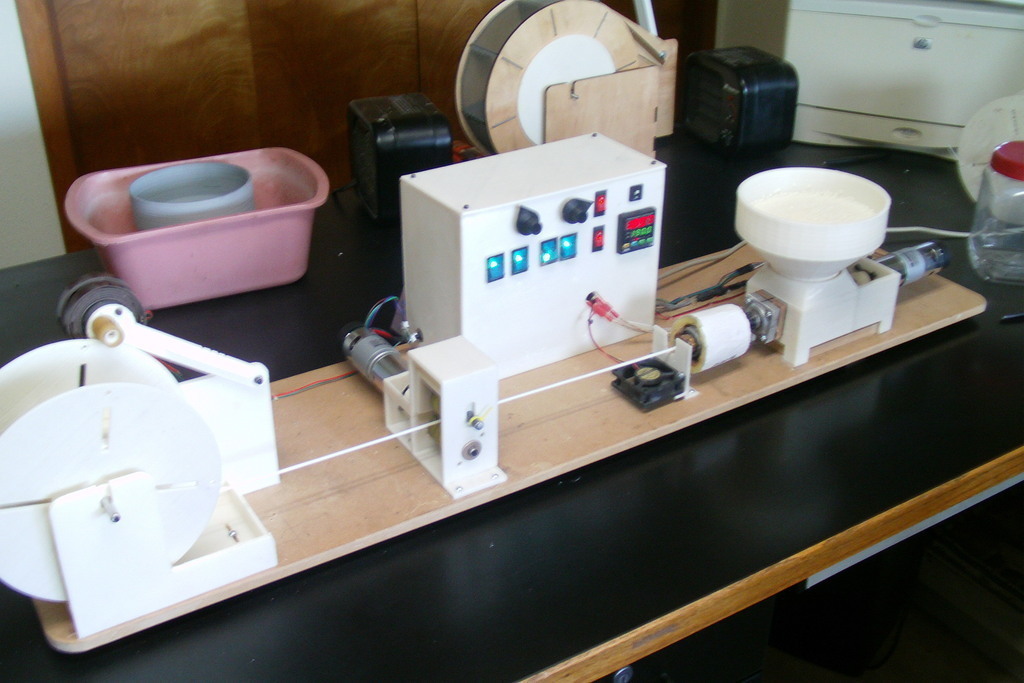 Today, all of these technologies are classified as wafer synthesis, additive manufacturing processes that selectively sinter regions of a powder layer under the influence of thermal energy.
The two most common substrate synthesis systems currently available are a plastic based method commonly referred to as Selective Laser Sintering (SLS) and a metal based method known as Direct Metal Laser Sintering (DMLS) or Selective Laser Melting (SLM). ). Until recently, both systems were very expensive and complex, which limited their use to the production of small batches of expensive models or custom-made products, such as aerospace components or medical devices.
Innovation in this area will make plastic-based SLS as affordable as other 3D printing technologies such as stereolithography (SLA) and Fused Deposition Modeling (FDM) and become widely available in affordable, compact systems.
All selective laser sintering 3D printers use the process described in the previous section. Basically, such printers differ in the type of laser, the volume of printing and the complexity of the system. Different solutions are used for temperature control, powder dosing and layering in different devices.
Selective laser sintering technology requires high precision and strict control during the printing process. The temperature of the powder and (incomplete) models must be controlled within 2°C during the three stages of production: preheating, sintering and storage before extraction, in order to minimize warping, stress and thermal deformation.
For decades, selective laser sintering has been one of the most popular professional 3D printing technologies, but due to its complexity, strict requirements and high price, only service bureaus and large enterprises could use it.
Conventional industrial SLS 3D printing systems have one or more powerful lasers. An inert atmosphere (nitrogen or other gases) is needed to prevent the powder from oxidizing and breaking down during the printing process, which requires specialized air handling equipment.
These installations also require special heating, ventilation and air conditioning (HVAC) systems and industrial power supplies. In addition, even the smallest industrial installations occupy an area of at least 10 square meters. m.
Due to the high initial cost of approximately $100,000 (and much more for complete solutions), traditional industrial systems with SLS technology were out of reach for many enterprises.
As with other 3D printing technologies such as Fused Deposition Modeling (FDM) and Stereolithography (SLA), more affordable, compact systems with SLS technology have recently begun to appear on the market. However, these solutions had significant drawbacks. These include low quality models and complex manual workflows due to a lack of post-processing solutions. This severely limited their use in industrial production.
The Formlabs Fuse 1 printer is in a new category with these deficiencies fixed . It is the first industrial SLS 3D printer for the workshop, delivering high quality, compact size, streamlined workflow, and cost far less than traditional industrial systems of the same type.
The Fuse 1 printer does not require any special infrastructure and will easily fit into your workplace.
The Fuse 1 uses a single laser and has a smaller working chamber that requires less heat. The powder is exposed to elevated temperatures for a shorter period of time, so there is no need for inert gases and specialized ventilation equipment. Thanks to its lower power consumption, it can run on a standard AC power supply without requiring special infrastructure.
The Fuse 1 features patent pending Surface Armor technology. This creates a semi-baked shell that heats evenly around the models as they are printed. This results in excellent surface quality, stable mechanical properties, high reliability and a high material renewal rate.
In addition to providing a compact, self-sustaining ecosystem and complete powder handling capability, Fuse 1 is complemented by the Fuse Sift Station, a stand-alone stand-alone device for model retrieval, recovery, storage and powder mixing.
Overall, the Fuse 1 industrial 3D printer with SLS for workshops has slightly less print volume than traditional entry-level SLS systems, but is smaller, easier to work with and less expensive.
| Fuse 1 Industrial SLS Workshop Printer | Traditional Industrial SLS 3D Printers | 5 Cost | ||
|---|---|---|---|---|
| Disadvantages | Less print volume Limited material options | Expensive equipment Big sizes Infrastructure requirements Large amount of maintenance Special Operator Required |
The most common selective laser sintering (SLS) material is nylon. It is a high performance engineering thermoplastic for both functional prototyping and end-use fabrication. Nylon is ideal for the production of complex knots and strong models with high environmental resistance.
3D printed SLS nylon for strength, rigidity and durability. The final models are impact-resistant and highly wear-resistant. Nylon is resistant to UV, light, heat, moisture, solvents, temperature and water. Nylon models printed on a 3D printer are also biocompatible and do not cause allergic reactions. This means that they can be worn and used safely in many situations.
Nylon is ideal for a range of functional applications, from consumer product design to healthcare applications.
Nylon is a synthetic thermoplastic polymer from the polyamide family. It is available in several versions, each designed to print different products. Nylon 12 Powder has a wide range of applications and is a general purpose, general purpose SLS 3D printing powder. Nylon 12 GF Powder is a composite material with a high fiber content, increased stiffness and heat resistance for difficult industrial conditions. Nylon 11 Powder helps fill a gap in prototyping and end-use applications where increased ductility, impact resistance and the ability to withstand wear without brittle fracture are required.
- Impact proof prototypes, fixtures and fittings
- Thin-walled pipes and bodies
- Rivets, fasteners and latches
- Orthopedic products and prostheses*
- High Performance Prototyping
- Small batch production
- One-piece clamping and holding fixtures and tooling
- Conventional SLS models
- Heavy duty clamping and fastening fixtures and spare parts
- Continuous models
- Thread and sockets
- High temperature models
* Material properties may vary depending on model design and manufacturing method. It is the manufacturer's responsibility to confirm the suitability of printed models for their intended use.
109 40%
 8 MPa (°C)
 Nylon 12 Powder and Nylon 11 Powder are one-component powders, but some SLS 3D printers can also use two-component powders, such as coated powders or powder blends.
Nylon 12 GF Powder is a composite material with a high fiberglass content, while other nylon composites with aluminide, carbon or glass are designed to increase the strength, stiffness or flexibility of models. In such two-component powders, only the component with the lower glass transition point is sintered, which binds both components.
SLS 3D printing accelerates innovation and helps businesses in a wide range of industries such as engineering, manufacturing and healthcare.
Manage the entire product development process, from iteration of first concept design to production of ready-to-use products:
- Rapid Prototyping
- Product mockups for user feedback
- Functional Prototyping
- Functional testing of products under severe conditions (e.
 g. piping, brackets)
Manage your supply chain and respond quickly to changing needs:
- End-Use Manufacturing
- Small batch production
- Mass production of new customized consumer products
- Spare parts manufacturing, supply chain sustainability
- Durable, durable clamping and fastening devices (e.g. clamps and clamps) and accessories
- Custom manufacture of automotive, motorcycle and marine equipment parts, and restock military items on demand
Self-manufacturing of ready-to-use medical devices, taking into account the individual characteristics of patients:
- Medical device prototyping
- Prostheses and orthotics (e.g. prosthetic limbs and orthoses)
- Surgical models and instruments
- End use products (nylon 12 biocompatible and sterilizable*)
* Material properties may vary depending on model design and production method. It is the manufacturer's responsibility to confirm the suitability of printed models for their intended use.
Use any CAD software or 3D scan data to design the model and export it to a 3D printable format (STL or OBJ) file. All printers with SLS technology use software that allows you to adjust settings, position models, estimate print times, and layer your digital model. Once set up, the model preparation software sends commands to the printer via a wireless or cable connection.
The Fuse 1 uses PreForm print preparation software (free to download). It allows you to easily duplicate and place multiple models on a 3D grid to maximize your print volume. PreForm automatically suggests the optimal orientation and position of models with the ability to make manual changes.
The workflow for preparing the printer varies from system to system. Most traditional SLS systems require extensive training, tools, and physical actions to prepare and maintain them.
Fuse 1 redefines the SLS workflow, making it simple and efficient, as well as providing trouble-free printing and complete powder handling thanks to modular components.
The Fuse 1 can be easily loaded with powder using a special cartridge.
The Fuse 1 uses a detachable build chamber so you can start a new print while the previous build chamber is still cooling.
Once all pre-checks have been completed, the machine is ready to print. Depending on the size and complexity of the 3D models, as well as their density, printing using SLS technology can take from several hours to several days.
When printing is complete, the build chamber in the housing should cool down a bit before proceeding with the next step. To start the next print, you can remove the build chamber and insert a new one. Before post-processing, the working chamber must cool down to ensure optimal mechanical properties of the models and avoid their deformation. This can take up to half of the total print time.
Fuse 1 is equipped with a touch screen that allows you to see in real time how each new layer is formed during the printing process. This camera image can also be transferred to a computer using PreForm to monitor the print without leaving the workplace.
Compared to other 3D printing processes, post-processing of SLS-printed models requires a minimum of time and labor. With no supporting structures, it is easy to scale and provides consistent results across batches of models.
After printing is completed, remove the finished models from the build chamber, separate them and clean them of excess powder. As a rule, this is done manually at the cleaning station using compressed air or a jet apparatus.
The excess powder left after the creation of the model is filtered to remove large particles from it. After that, it can be recycled. Under the influence of high temperature, the properties of green powder deteriorate slightly, so for subsequent printing it must be mixed with new material. Due to the possibility of reusing materials, SLS technology produces a minimum amount of waste.
SLS technology typically uses separate devices for powder recovery, storage and mixing. The Fuse 1 workflow uses a single Fuse Sift to retrieve patterns and greens, store, dispense, and mix material streams.
Fuse Sift completes the Fuse 1 SLS print workflow. This system is used for safe and efficient model retrieval and powder recycling.
Fuse Sift automatically doses and mixes used and new powder, reducing waste and controlling powder delivery.
After the powder has been sieved, the 3D models printed using selective laser sintering technology are ready for use. However, there are a few more post-processing steps you can perform on these models.
By default, the surface of 3D models created using SLS technology remains grainy. To achieve a smooth surface, Formlabs recommends blasting or tumbling models made using this method. Models can be spray painted, lacquered, electroplated or otherwise to achieve the desired color, surface quality and properties such as water resistance (special coating) and electrical conductivity (electrolytic coating). Models created with SLS Formlabs are dark in color and therefore not well suited for staining.
Immersion printed SLS model from Partial Hand Solutions.
SLS models can be electroplated for a metal-like surface.
Selective laser sintering is preferred by engineers and manufacturers for its wide design options, high productivity, low model cost and proven end use materials.
Most additive manufacturing processes such as stereolithography (SLA) and Fused Deposition Modeling (FDM) require specialized support structures to fabricate overhang structures.
Selective laser sintering does not require support structures because the unsintered powder surrounds the model during printing. SLS printing makes it easy to create overhangs, intricate geometries, interconnecting parts, internal channels and other intricate details.
Intricately patterned arm splint for weight reduction.
Engineers typically design models in terms of the capabilities of the final manufacturing process, also known as design-for-technology (DFM). When additive manufacturing is only used for prototyping, it comes down to creating models and designs that can be replicated in the manufacturing process using traditional tools.
Selective laser sintering is emerging as a viable rapid production method and its application area continues to expand, so it can open up new possibilities in design and construction. 3D printers with SLS technology can create complex geometries that are impossible or incredibly expensive to manufacture using traditional processes. SLS technology also allows design professionals to combine complex assemblies into a single model that would normally require multiple models to be created. This helps avoid the problem of loose connections and saves assembly time.
Selective laser sintering can unleash the potential of generative design, as it allows the creation of lightweight models that use complex lattice structures that cannot be fabricated by traditional methods.
Selective laser sintering is the fastest additive manufacturing technology for making functional, durable prototypes and end-use products. Lasers used for powder sintering have much faster scanning speeds and are more accurate than the layering methods used in other processes such as Industrial Fused Deposition Modeling (FDM).
To maximize the available print volume in each printer, multiple models can be placed side by side. Operators can use the software to optimize print volume and maximize productivity by leaving only minimal clearance between models.
SLS technology allows operators to fill the build chamber with as many models as possible, as it allows them to be printed without supporting structures, saving time in post-processing.
SLS 3D printing requires the right materials for functionality and versatility. Nylon and its composites are proven, high quality thermoplastic materials. Laser-sintered nylon models have close to 100% density and mechanical properties that are comparable to products made using traditional manufacturing methods such as injection molding.
Screwdriver printed in Nylon 12 Powder. After a simple post-processing, nylon models have a smooth, professional quality surface.
SLS Printable Nylon is an excellent replacement for conventional injection molded plastics.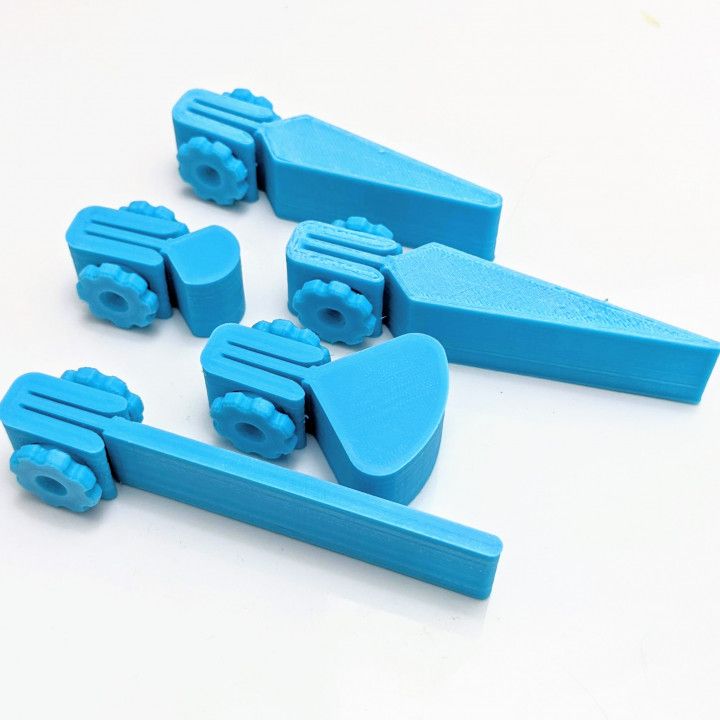 The latches and other mechanical connections produced from it are superior to products created using any other additive manufacturing technology. It is ideal for making functional plastic parts that will work and not break down over time like products created through other additive manufacturing methods.
When calculating the cost of one model, it is usually necessary to take into account the cost of ownership of equipment, material costs and labor costs:
-
Equipment cost of ownership: The more models a printer can produce over its lifetime, the lower the cost per model. Therefore, higher performance results in a lower cost of ownership per model. With high laser scanning speeds, the ability to produce multiple models at once to maximize the working volume, and a simple post-processing process, SLS 3D printing guarantees the highest productivity of any additive manufacturing method.
-
Material: Most 3D printing technologies use proprietary materials, while nylon is a common thermoplastic that is produced in large quantities for industrial applications.
 This makes it one of the most inexpensive raw materials for additive manufacturing. SLS 3D printing requires no support structures and allows you to print with recycled powder with minimal waste.
 -
Labor: Labor is a disadvantage of many 3D printing solutions. Work processes in most technologies are quite laborious and difficult to automate, which can significantly affect the cost of one model. Easy post-processing with SLS printing reduces manual labor and allows for easy scalability.
A 3D printer with SLS technology is a significant investment initially, but this investment often pays off even faster than buying smaller devices. SLS for workshop technology significantly reduces initial acquisition costs and also reduces model costs in most applications.
If 3D printing is rarely used in your business, it is recommended to use the services of third-party service bureaus. But in this case, the cash costs will be higher and you will have to wait longer for the order to be completed. One of the main advantages of 3D printing is its speed compared to traditional production methods. But this advantage loses its value when it takes up to several weeks for a third-party company to deliver a model.
REEKON Tools
 In many cases, for the production of limited or small trial runs, selective laser sintering is a cost-effective alternative to injection molding.
  The principle of building a prototype using this method is simple and clear. The simulated 3D object in STL format is transferred to the 3D printer software. After placing the model in a virtual working chamber (automatically or manually), cutting the model into horizontal layers, the 3D printing process begins. The extruder print head melts the filament, laying down layer by layer according to the model data. If necessary, before starting printing, auxiliary structures (supports) are automatically or manually placed on a virtual 3D model, which, after printing, can be removed with a special solution or manually.
 In addition, consumables for printing in this way are affordable. All this together makes this technology the most highly competitive and affordable in economic terms.
 Photopolymer resin is poured into a special container. It contains a working platform on which the part will be built. Initially, the working platform is set so that it is covered with the thinnest layer of photopolymer (0.05-0.13 mm). This will be the size of the layer when printed. Then the laser is turned on, it irradiates the areas that will later become parts of the finished product. As a result of irradiation, the material hardens and the working platform sinks to the extent of the layer. The algorithm repeats again until all programmed layers are exhausted. Then the finished product is immersed in a special bath, into which a composition is poured to remove excess elements. And at the end, the product is again irradiated so that it gains maximum strength.
  The technique is distinguished by easy post-processing of products and their almost perfect surface. The disadvantage of this technology is the impossibility of using several materials at once. Color printing is also not possible. The properties of the model and its color will determine the initial characteristics of one photopolymer. In addition, the cost of such printing and equipment is not cheap.
  As the metal cools, the mold breaks and the metal part is removed.
  Thus, this technology is one of the varieties of photopolymer 3D printing and photopolymer resin is used as a consumable. This resin is irradiated with projected light from the LEDs and hardens. The technology is very similar to stereolithography. However, with SLA 3D printing, each layer is, as it were, loomed with laser beams. And in DLP technology, the layer is completely projected onto a photopolymer using the same matrix with micromirrors, that is, this method is more like stamping. Thus, while maintaining the highest accuracy of 3D printing, it was possible to significantly increase its speed. At the moment, the speed of DLP printing is several times higher than FDM, SLM and SLA printing. For this reason, the DLP 3D printing technique is one of the most promising.
 Not every, even a large company, can afford such a 3D printer.
  So it takes about 10-15 minutes to 3D print 2.5 cm along the Z-axis, and it's really fast. Although the print speed in any case will directly depend on the thickness of one layer.
  The thickness of one layer is only 10-15 microns. With its help, you can print thin-walled products, objects with complex geometry. Photopolymers practically do not shrink and do not change their geometry after hardening, and this is also an advantage, especially when it is necessary to print anatomically accurate models. The DLP LED 3D printing technology itself, although it provides for a layer-by-layer method for creating a model, still does not differ in pronounced layering of the finished model. The surface is almost perfectly smooth, requiring no additional processing.
 The technique was invented and patented by Stratasys. The operation of a PolyJet 3D printer is very similar to a conventional, well-known inkjet printer, but printing is carried out not on paper and not with simple ink, but on a special substrate in the chamber, and an acrylic-based liquid photopolymer acts as a material. 9The 0482 PolyJet-enabled 3D printer is equipped with a special print head with nozzles. There can be several printheads, which allows you to print faster and even prototyping several objects at once. The printing process is carried out by dosed deposition of a photopolymer. One layer of 16 microns is sprayed at a time. Then this layer is exposed to an ultraviolet lamp and the photopolymer turns into a hard plastic. After that, the working platform with the substrate is lowered, and the algorithm is repeated again. When printing complex geometric shapes, a support material is used. For this technology, a special gel-like material has been created, which is easily removed with plain water or hands.
 This is truly a new standard for realism in the most complex prints. PolyJet technology allows you to achieve perfect surface smoothness and imitate any even the most subtle texture. The camera of the PolyJet 3D printer is quite large, but if you need to print a large object, then it can be broken into parts, which are then simply glued together.
  It consists in layer-by-layer gluing and coloring of the powder gypsum composite. 3D printing of this type is based on a technique called 3DP, which is its improvement.
 However, finished models are easy to sand, paint and glue. To improve the characteristics of the model and protect them from moisture, you can cover the surface with varnishes, waxes, resins, as well as all kinds of fixatives.
  However, for a long time it was not available to the market until DTM was created in 1996. In 2001, 3D Systems bought this company, and in 2014 the patent expired, and now this technology is available to a wide range of consumers.
  After the layer is completed, the platform is lowered and a new layer of material is applied. The procedure will be repeated until the very last layer is completed.
 You can order 3D printing using SLS technology from us. All you need is to provide us with a file with a 3D model in STL format. We guarantee you high quality printing in full accordance with the provided 3D model.
 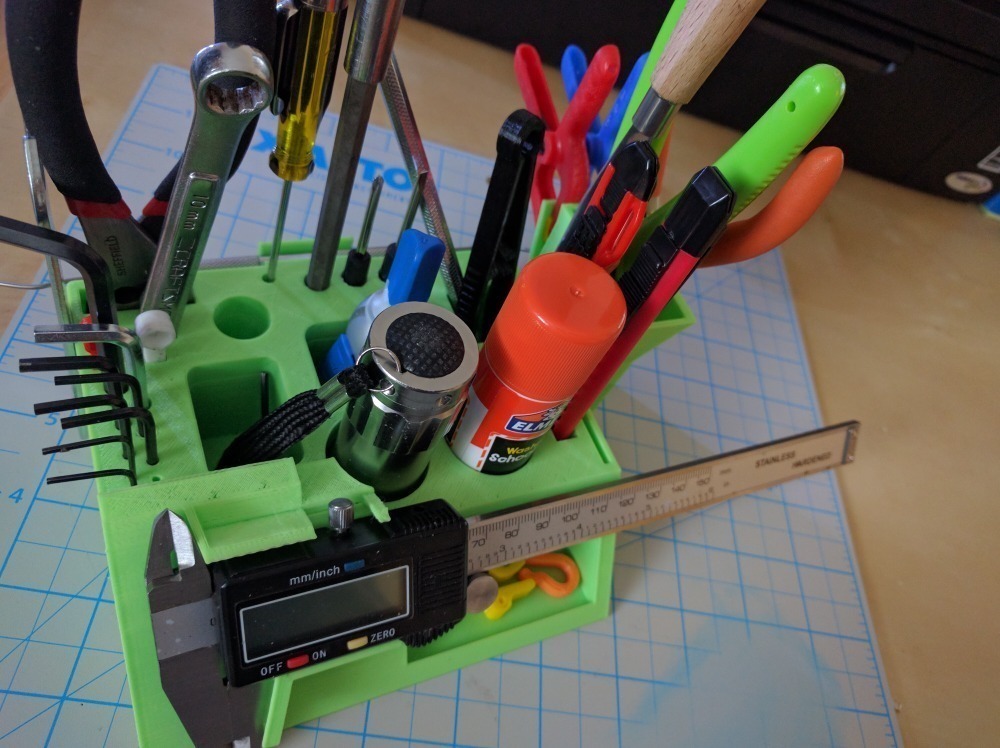 Also, SLM printing is used in experimental and scientific and technical activities, where it is possible to significantly reduce the R&D cycle, because the most complex mechanisms and products can be created without serious equipment.
  Consumables can be: powdered metals and alloys. It can be tool or stainless steel, titanium and its alloys, aluminum, platinum, gold, as well as cobalt-chromium alloys.
  All you need is just to order 3D printing using this technique in our company. To do this, you need to provide us with an STL file with a CAD model for printing.
  So-called electron guns fire high power electron beams that fuse metal powder. The method is similar to other 3D printing methods - the layering of consumables. A layer of metal powder is applied, and electron beams, following the contour of the model, fuse the material. Then the algorithm is repeated again until all layers are created and a finished three-dimensional object is obtained in accordance with the mathematical 3D model.