Matter and form 3d scanner review
Matter and Form 3D Scanner V2 Review
Introduction
This is a bit of background info about the history of affordable 3D scanners, so feel free to skip the intro and drive right into the Review.
Back in 2013, desktop 3D printers were supposedly going mainstream. That is when I bought my first 3D printer, a 5th Gen MakerBot Replicator. I didn’t like it at all, so I started complaining about it on my website. Accidentally, I created my very first blog post. That review drove a lot of interest and got me into reviewing other 3D printers until I decided I didn’t like those machines at all and switched to 3D scanning — the rest is history.
When I was testing 3D printers I did know that there were also 3D scanners because they used to be marketed towards the same audience. MakerBot had the Digitzer — a small turntable combined with two lasers and a camera. It was originally priced at $1400. Truth be told, you couldn’t scan a lot of things with it — mainly small toys and trinkets. It didn’t capture color and the geometry it captured wasn’t very detailed. But it was probably an experiment just as desktop 3D printers were.
Anyway at that moment in time (and it’s only 5 years ago really) more companies started betting on the affordable 3D scanner market. 3D Systems introduced the Sense handheld 3D scanner, which actually was the first 3D scanner I reviewed. But not much later a company called Matter and Form announced their take on the MakerBot Digitizer. This first generation device, now known as MFS1V1, also featured two lasers but did have a color camera.
And on top of that, the scan head could automatically move upwards by means of a threaded rod, very similar to desktop 3D printers. This meant it could scan objects that were taller. And the whole contraption could be folded into a case so you could take it everywhere. Is was originally priced at $600 — less than half of the MakerBot Digitizer. Nowadays you can still get one brand new for $399 on Amazon.
I have used both the MakerBot Digitizer and Matter and Form V1 a few times but I never officially reviewed them because their scan quality and long scanning times seemed a bit sub-par to me at the time I started reviewing 3D scanners. Structured light-based desktop scanners were just becoming more affordable with the introduction of the EinScan-S (Review) which was a bit rough around the edges but made detailed scans quite fast.
So I thought that desktop 3D scanners with lasers where a bit passe. I recently reviewed the Eora3D smartphone-based scanner which I think as great potential but is still a bit too limited for automatic 360-degrees object scanning with the current app, especially the meshed results. And Matter and Form’s Bevel (Review) didn’t convince me as a face scanner at all.
So it kind of surprised me that Matter and Form is re-releasing its laser-based desktop scanner. It’s now called the MFS1V2, or Matter and Form 3D Scanner V2.
Changes & Pricing
Not a lot has changed on the hardware side. The enclosure is now totally black instead of the black and white color scheme of the V1 and, according to the manufacturer, improvements to the design of the hardware have been made to enable a higher scan accuracy of 0.1mm vs. 0.25 – 0.45mm (depending on which spec sheet you read) on the older model. But al major components, such as the lasers, HD CMOS sensor and motors, are the same.
A bigger change is on the software side. In April this year, Matter and Form introduced new 3D scanning software called MFStudio. It’s available for both Mac and Windows and boasts a completely new user interface and a modular add-on system.
The first module is called +QuickScan which, as the name implies, reduces the scanning time. It’s apparently a single-laser scanning algorithm that M&F invented for the Bevel (Review) and have now ported to the desktop product. This feature is an in-app purchase of $79 for existing users of the MFS1V1 — which is reduced to $499 on the Matter and Form site but sells for $399 on Amazon while stock lasts — but is included with the MFS1V2, which retails at $749.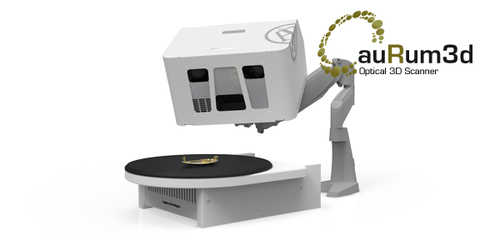
The price surprises me because the press release on the Matter and Form website mentioned a price of $649. I also can’t find a listing of the scanner for $599 without the +QuickScan feature.
Hardware
The Matter and Form 3D scanner can fold into a small suitcase. The idea that this makes it portable is nice but I’m not sure if people would transport a desktop 3D scanner often. And it’s still too large to put in a big with a laptop. It’s made entirely out of plastic and is very light. It feels a bit cheap for a $749 product, especially compared to the Eora3D (Review) which is also a small laser-based desktop scanner that costs $599 on Amazon but made out of anodized aluminum.
The Eora3D doesn’t have a built-in camera and uses the one on your smartphone. But almost every modern smartphone camera sensor is better than the HD CMOS sensor in the Matter and Form 3D Scanner.
The electric turntable on the MFS1V2 is 16 centimeters in diameter. This is larger than the 12cm plate included with the Eora3D but notably smaller than turntables that come with most structured light scanners. For example, The EinScan-SE (Review) comes with a 20cm wide turntable. But that device costs $1299, $550 more than the MFSV2. According to the specs, the maximum diameter of scannable objects is 18cm so they can hang a bit over the edge of the turntable.
The scanner is all made out of one part, so the distance between the scan head and turntable is fixed. The head can move upwards to enable scanning objects up to 25cm tall, according to the specs. It’s noteworthy that while the turntable operated almost completely silent, the stepper motor that moved the head upwards is very loud. Luckily it only moves after each 360-degrees cycle and 5 times maximum.
The red lasers are Class 1, so they are eye safe. However, the downside of consumer grade red lasers is that they aren’t very bright so you’ll quickly run into contrast problems as I’ll demonstrate later in this review.
For comparison, the Eora3D’s Class 2 (also “eye safe”, but a bit less) green laser is notably brighter and offers more contrast on a greater variety of surface colors and characteristics. That effect is enhanced by using a better, more light sensitive smartphone camera and that, like our eyes, camera sensors are usually more sensitive to green than to red (or blue).
Besides the scanner, the box contains a calibration card and a rubber ducky that can be used as a test subject. Also included is a USB cable and a power adapter with add-ons for every thinkable international power outlet.
The scanner has a single button to turn it on and off. The idea of using the MF logo as a button is nice but the LED is very dim so it’s hard to tell if the device is on in average room lighting.
Finally, the specs state this scanner has an accuracy of “within ± 0.1mm”. Even if that is really true, actually getting that accuracy in scan detail depends on a lot of variables such as object color, material, lighting condition and the size of the object. I usually judge these figures the same as I do with mileage figures on cars: I’ll judge it myself after a long test drive!
Software
MFStudio is the big new thing. They could have just introduced the software without a new scanner but I do understand some of the marketing thoughts behind it. The good news is: the software is really nice! It’s very user friendly with clear instructions for turning the device on, calibration and scanning. Totally new is that you can make more than one scan with an object in various positions and align the results to create more complete 3D models.
All settings can be made though sliders and the live viewports respond to what you’re doing. That’s nice, but it still means you have to dial in exposure values for geometry and color capture manually and separately. It would have been great if the software was smart enough to do initial auto exposure in both cases. Manual override would of course be nice for advanced, but for beginners a single scan button would have been nice. I wouldn’t be surprised if MF would introduce a +AutoExposure add-on in the future.
You can select how high the scan head must go in 5 blocks and you can also opt to scan only a part of an object by limiting the turntable rotation to a minimum of 45 degrees. Unfortunately, the fact that the meshing algorithm always produces watertight meshes makes partial scanning useless for most purposes.
No matter what settings you change, you’ll always have a clear indication of the expected scanning time in the top of the interface. This is really important because scanning times on the Matter and Form scanners can be very long. Regular scanning can easily take up to an hour. Of course there’s now the +QuickScan feature that indeed greatly reduces the scanning time so it’s great to see indications between 1 and 15 minutes, depending on various settings. The question of course is how much this speed increase impacts scan quality.
Calibration
Most light or laser-based scanners need calibration but the fact that this scanner has a fixed camera-to-turntable distance means that you won’t have to do it often. Calibration is also simple and quick: just put the card on the turntable in two positions and you’re done within minutes. I normally hate calibration but this is one of the fastest procedures I’ve every encountered on a desktop 3D scanner so kudos for that.
Scanning in Regular Mode
If your project needs the best quality you’ll have to use the regular scan mode. It uses both lasers which are positioned in different distanced from the camera. So the scan will contain the least amount of holes and scan data from two laser lines makes the procedure more robust than using a single laser.
Yes, regular mode is slow. Scanning a 10cm tall toy figure would require the height to be set to 3/5, although I found that setting it to 4/5 filled in a little bit more details on the top. If you want to scan just geometry, a scan would take 37 minutes. With color capture enabled, it jumps up to 57 minutes. That might be fine if you just want to scan stuf for fun. And people that use desktop 3D printers are pretty well used to lang waiting times for printing small, fun objects.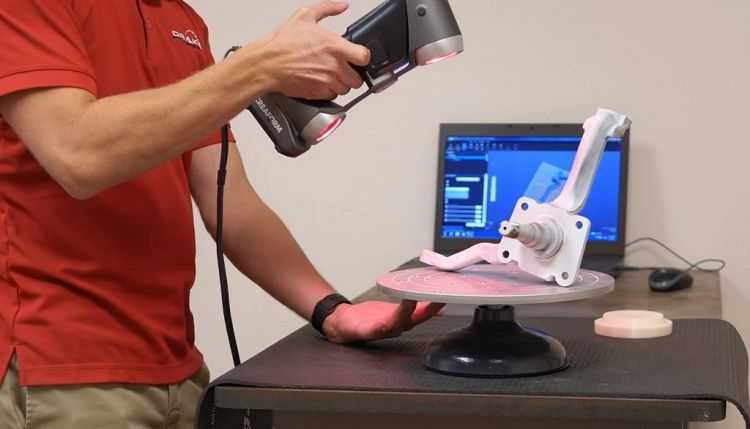 But for more professional use cases where you’d want to scan multiple objects it’s very slow. For comparison, an entry level structured light scanner like the EinScan-SE an scan a small object like this in less than four minutes.
In regular scan mode the turntable stops many times (I guess 360 times but I didn’t count) to allow a capture of the first laser, second laser and then a color capture with a different exposure value. After a full rotation, the scan head moves up and the procedure is repeated. It’s nice to see the point cloud being built in real time on your screen. And in this mode this is also in color. There’s a clear indication of the remaining scanning time.
Color capture in this mode is made from stills so RGB exposure time is automatically increased when you increase the brightness. This does further add to the total scanning time but it does prevent motion blur in the final texture. It’s good to know that while the point cloud is colored, the actual texture of the final meshed model will be generated through UV-mapping based on the separately captured HD color frames.
Scanning in +QuickScan Mode
In QuickScan mode (let’s drop the + for better reading) you have to choose if you want to use the first or second laser. The first one is further away from the camera which will result in scans that are more accurate but can possibly contain more holes. Laser two will capture more of the object but with slightly reduced quality.
In this mode I could scan the same 10cm tall toy figure in 6.5 minutes instead of almost an hour, so that’s a huge speed increase. The scanner can scan this fast because the turntable now rotates in a continuous motion. It does one pass for the geometry with the chosen laser on and a second pass for color capture with the laser off and a higher exposure on the camera. Keep in mind that the highest exposure values can result in motion blur, depending on the lighting conditions. As a hack, this mode does allow to switch on studio lights after the laser pass and switch them off again when the scan head moves upwards.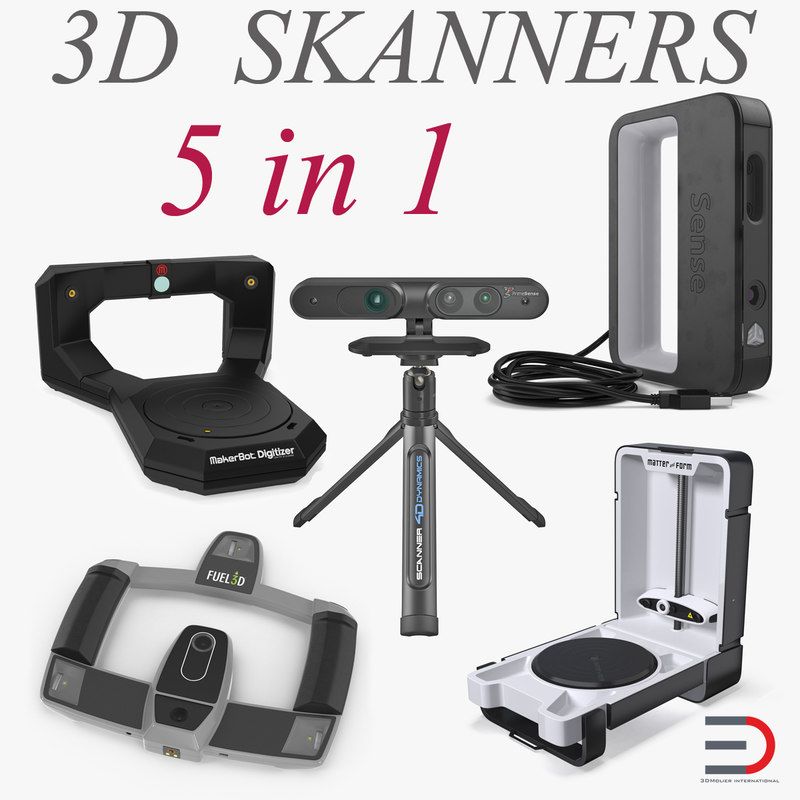
It’s noteworthy that while QuickScan does capture color it does not color the point cloud. It will UV-map the model in the meshing phase with the captured color frames.
Anyway, QuickScan is faster. And those scan times are realistic for a $599 device in my option. In most cases it does result in a lesser result though. If that’s a problem really depends on the object. I found that most QuickScans has more holes in them. And because the software fills all holes when meshing this can result in unwanted surface details.
I’ve added results from both modes later in this review.
Unscannable Colors, Materials & Shapes
In general 3D scanning has the problem that not every object is scannable. The usual problems are surface characteristics like transparency or glossiness. And many 3D scanners have a hard time scanning surfaces that are very dark or black. But as I wrote before, the Class 1 red lasers on the Matter and Form 3D scanner had problems with relatively light colors, notable blue and red. Even in perfect lighting conditions I sometimes couldn’t capture geometry of objects made of red or blue plastic.
Where did Miffy’s arms go?
Some parts also can’t be captured because the lasers are fixed and only the turntable is moving. So these parts are literally in the shadow of other parts. For comparison, the Eora3D’s single laser also moves horizontally in a sweeping motion. Below is an example of a scan of a dog figurine that’s clearly a hard shape for this scanner to capture. And this was made in regular scan mode.
Lighting Condition Hacks!
Lighting conditions for this scanner are tricky. I found that to get the best contrast on the lasers, the room lighting should be almost off. But that of course does greatly impact color capture. The design of the device also makes it hard to light the object properly from the front with external because the casing is so close to the turntable.
Directional light from windows, even on an overcast day, can also impact scan quality of both the geometry and color.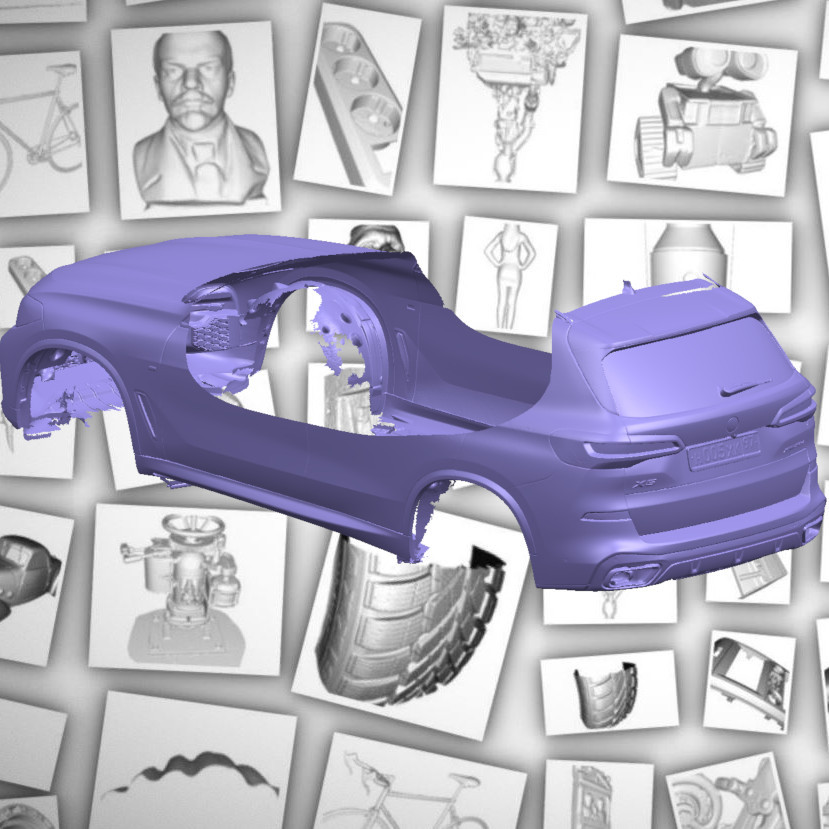 So I ended up placing the whole scanner inside a $70 Foldio 2 light tent. I didn’t use the LEDs in the tent itself but the semi-translucent white material of the tent made the scan area dark enough for proper laser contrast and diffuse enough for proper color capture. Depending on the surface characteristics of the object I switched on external studio softboxes to get the best geometry/color-capture balance.
Christmas vibes!
This experiment made me realize that it’s a pity that Matter and Form didn’t put more thought into upgrading the hardware. Especially now that the QuickScan feature does a separate color capture pass, a built-in LED light that would automatically switch on during color capture could greatly increase texture quality without any hassle.
In the photo above I’ve attached a $1.49 USB-powered LED Strip to the inside of the casing which I plugged in and out manually. It’s a bit short and not very bright, but actually works pretty well as a proof of concept. If only the inside of the casing was white like the V1 model, which would have allowed for more diffuse light. But then there’s office paper!
Scan Density vs Size
An interesting thing I found was that because of the fixed amount of line captures during a 360-degree rotation, object with a small diameter result in denser point clouds than larger objects. For objects wider than 8-10cm there’s quite a bit of spacing in between them, causing a loss of detail. It would require a lot more captures per rotation to fill these in but there’s no setting for that.
Editing & Aligning
In the new MFStudio you can add an unlimited amount of scans to a project. In practice you’ll probably make two scans with an object in different positions. You can use a brush tool to select and clean unwanted points.
You can clean noise with a slider but for me it wasn’t entirely clear when I was deleting actual noise of started deleting valuable data. But it’s a visual tool and the software has a great undo feature so you can experiment.
If you’ve cleaned your scans you can align them by clicking the A icon on the base scan and than the A icon on the scan that needs to be aligned. This is an automatic feature so success will depend on distinctions in shape of the object and the overlap between two scans. You can’t assist the algorithm manually so you’re either in luck or not.
While you can hide, unhide or delete scans in the project window, I greatly miss a way to duplicate scans. That feature would allow users to experiment more with different variations of editing an noise reduction.
Meshing
Meshing is a separate tab with only two options: a quality slider and a checkbox to enable or disable texturing. The software fills all holes by default, and there’s no way to turn this off. Great for 3D printing purposes but very annoying if you want to create a 3D asset for digital use. A slider to control hole filing is an absolute necessity in a future update of MFStudio in my opinion.
Alternatively you can export the raw point cloud data and perform meshing externally but you can export the captured color frames so you can’t perform UV-mapping then.![]()
While meshing just the geometry is pretty fast on my Surface Book with i7 processor and 16GB of RAM, the texturing algorithm takes a lot of time and is very resource intensive. There’s just an animation and no status bar so I often wasn’t sure if the program had crashed or was still working hard. It actually always finished but sometimes after 20 minutes for a 10 cm tall model and up to an hour for large objects meshed at the highest quality setting. I can imagine that this will be a problem on less powerful computer hardware.
What I also miss is a way to edit the final texture in terms of brightness and contrast. This would have been a great way to counteract the fact that geometry capture works better in lower light conditions. Luckily you can edit the texture files easily in a photo editor of choice as you’ll see below.
As you will see in the results below, some of the textures have black parts on them. Sometimes it’s just a spot, sometimes it’s a larger part.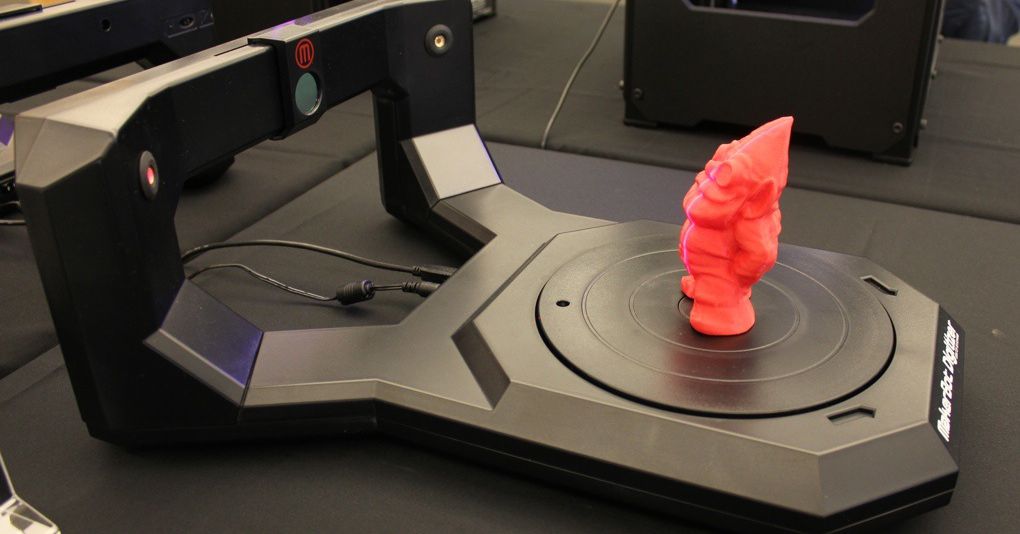 Either way, they shouldn’t be there and I hope it’s a bug that can be fixed.
Exporting
You can export the point clouds as PLY or XYZ files and meshes as STL or OBJ files. The latter includes a UV Texture map. It’s good to know that, regardless of using the regular or QuickScan option, the OBJ always has a separate texture map. It’s usually a 3840 x 1920 map that consists of 6 views of the model.
It’s not an efficient UV map at all but it is very easily editable in a photo editor like Photoshop this way, which I actually like.
It would be great if Matter and Form added a few more export formats and maybe a Sketchfab exporter in the future. The embeds below were made by uploading the exported OBJ files. Finally, it’s also noteworthy that after the time-consuming meshing and texturing phase, exporting to OBJ again can take a while, even on a PC with an SSD drive. So there’s a lot of waiting involved.
Results
Below is a scan of the toy you see in the photos in regular scan mode, followed by the same object made in QuickScan mode.
Small Toy (Regular Scan) – Matter and Form V2 by Nick Lievendag | 3D Scan Expert on Sketchfab
Small Toy (+QuickScan) – Matter and Form V2 by Nick Lievendag | 3D Scan Expert on Sketchfab
As you can see, the textures both scans are similar, and not as sharp as I had hoped. If you press the 3 key on your keyboard to view the models without texture, you can see that the geometry is also similar but the regular scan did capture more actual details of the front of the ears while the QuickScan uses more hole filling. But that’s a small difference. In general I think that for this model the QuickScan feature is similar enough to be the one to choose. However, I do find that both (and all) results contain quite a lot of surface noise since the actual plastic toy is completely smooth. Smoothing the noise externally would also reduce the details in the necklace.
Below is another example of another small toy. It’s a combination of a horizontally and vertically placed scan with the pre-meshing noise filter of MFStudio at full effect:
vtech toy (full noise filter ) – MFS1V2 by Nick Lievendag | 3D Scan Expert on Sketchfab
As you can see the noise filter has removed quite some noise compared to the other toy but you’ll probably never get the super smooth results that structured light scanners can deliver. It’s also noteworthy that this figurine again doesn’t have complete arms. Whether that’s because of the red color, specularity or position of the laser (or a combination of all) isn’t totally clear to me but scanning objects like this doesn’t result in complete models.
Next up is a toddler-size sneaker that just fits on the turntable. It’s matte and white so it should be ideal for any scanner, except for maybe the black stripes. Again I aligned two scans: one with the shoe on its sole and one positioned on its side.
Toddler sneaker – Matter and Form V2 by Nick Lievendag | 3D Scan Expert on Sketchfab
I don’t like the texture quality but the geometry is actually quite usable although there’s also still quite some noise. And the scanner wasn’t able to capture the patterns on the nose of the sneaker.
To better illustrate which parts of the mesh above are actual captured details and which are generated through hole filling, here’s the unedited point cloud from the MFS1V1:
Toddler Sneaker (Point Cloud) – MFS1V2 by Nick Lievendag | 3D Scan Expert on Sketchfab
You can clearly see that the laser line captures have been further apart in near the front and back. Combining the two scans made the lines into a grid which does create a better mesh but that this has quite large holes in it.
This point cloud also allows me to best compare the scan data of the MFS1V2 with the Eora3D because the latter didn’t have a high quality meshing feature at the time of testing (I will re-test it soon).
Toddler Sneaker (Point Cloud) — eora3D Studio by Nick Lievendag | 3D Scan Expert on Sketchfab
It’s really hard to compare scans this way but to me it shows that the Eora3D captures a denser point cloud throughout the object with less noise.
For a totally different comparison, here’s the same sneaker scanned with the EinScan-SE structured light scanner. The embed below is a fully textured mesh.
Toddler Sneaker — EinScan-SE by Nick Lievendag | 3D Scan Expert on Sketchfab
It might be comparing apples and oranges, but even though the texture of that scan will need some retouching it’s sharp and usable. And the geometry is a lot more detailed.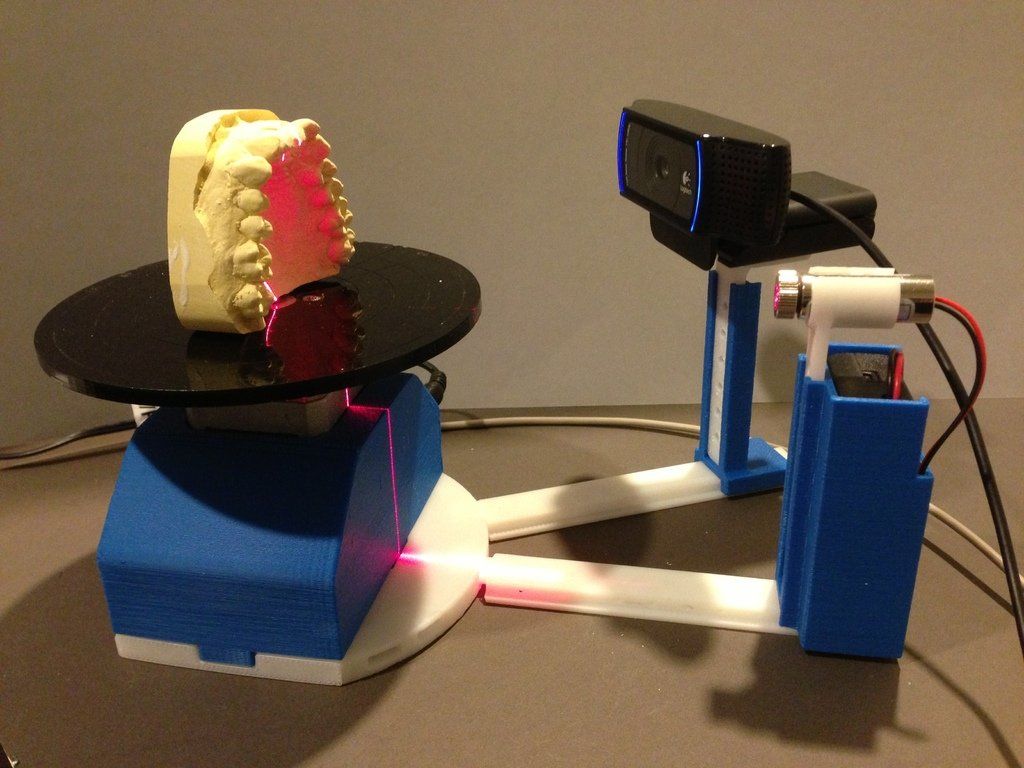 It’s also smooth where it needs to be and textured where the actual model has actual depth patterns. You won’t be surprised if I say I like the last result a lot better. And it was also a lot faster to scan than both the laser scans.
Onto something bigger, in this case an old jar that’s 18cm wide and 14cm wide at the handles. This is actually the largest object I could fit on the Matter and Form V2 that also has some definition on the top part.
Old Jar (+QuickScan) – Matter and Form V2 by Nick Lievendag | 3D Scan Expert on Sketchfab
I’m happy that the Matter and Form V2 is able to scan objects beyond the small trinket category, but there are quite a lot of part’s I’m not really happy about. The texture has funky black parts and the color changes upwards. That might very well be because of changes in room lighting during scanning (the texture is scanned in 5 different height passes) but that further proves that that approach has downsides. I was surprised to see that the edge of the opening on the top has been captured quite good but unfortunately the same can’t be said about the handles of the jar. I also couldn’t put this object on the turntable sideways because the opening of the jar would almost touch the scan head and completely block the lasers from reaching the handles.
Putting the same model on the larger turntable of the EinScan-SP (which will give similar results as the SE for objects like these) which also has a larger distance to the scan head (even when mounted on the included stand), I could easily scan to separate positions and combine them into a more complete (and mode detailed) model of the jar:
Old Jar — EinScan-SP by Nick Lievendag | 3D Scan Expert on Sketchfab
To wrap up, here’s a scan of the small, full color sandstone 3D print you saw in some of the photos above. I’m including it because it seems to be the ideal subject for this scanner: it’s matte, it’s small, it’s bright and it doesn’t have arms (or other extruding parts). It’s a regular scan.
Lorentz 3D Print (Regular Scan) – MFS1V2 by Nick Lievendag | 3D Scan Expert on Sketchfab
Even for this object, the top of the head and shoulders couldn’t be captured in a single scan in standing position. I could have improved the texture with better lighting conditions but the geometry is good. There’s more noise in the geometry than the actual sandstone material has, though.
Conclusion
The V2 is an evolution of the original Matter and Form 3D scanner from 2014 but it’s not a revolutionary new product. No major hardware parts were changed so it’s a combination of very small hardware design changes and a large change in the software. This might indeed result in higher accuracy from a measurement perspective, but it will depend on your use case if that is relevant.
While this the MFS1V2 is capable of capturing a lot of details for a scanner of this price, the output is inconsistent. Some objects turn out okay while others are disappointing. This is true for any scanner to a certain extend but extra noticeable on this one. The fixed setup greatly limits the size of scannable objects and on top of that the red laser has problems with certain surface colors, especially when they are even a bit glossy.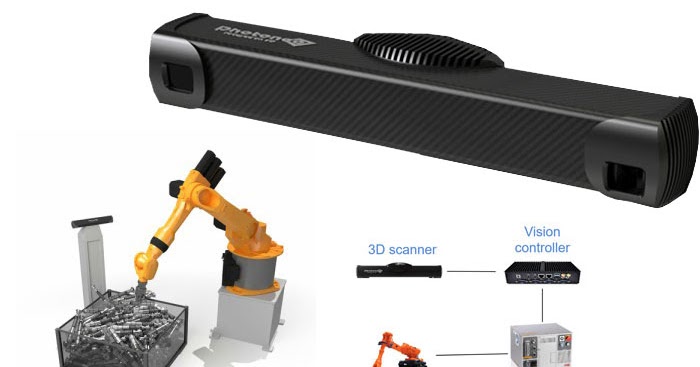 The scanner very much prefers matte surfaces so you might have to treat objects with matting spray to get better results. But even when doing so, scans of smooth objects can contain quite a bit of noise.
The position of the lasers in relation to the camera is fine for some object but can be problematic for others. Even when using both lasers in regular scan mode, complex objects often contain holes because the lasers can’t reach extruded parts or into some cavities. The new MFStudio software does allow aligning multiple scans but not all objects (certainly not larger ones) can be put sideways on a turntable and the increase in total scan time also makes doing this unrealistic, at least in regular scan mode.
You also can’t just put the scanner anywhere as room lighting conditions greatly impact the scan quality. If you want to have control over both geometry and color capture, you’ll have to put the scanner in a light tent or something similar.
The new, single-laser +QuickScan feature is a big time saver. It brings scanning most object under the 10 minute mark which is a lot more realistic than scan times of an hour or more in regular scan mode. Again, it works nicely on some objects but depending on the laser you choose you can end up with a model with even more holes. The software will fill those holes automatically when meshing but that might be an unwanted feature for purposes other than 3D printing.
While the scanning phase does offer an indication of the remaining time, meshing does not and if you want textures it can take very long. There’s no progress bar at all and sometimes it took up to an hour on my quite powerful Surface Book. The resulting textures sometimes contain black parts or other inconsistencies.
Need Tailored Advice?
Want to know if scanning with a laser or with structured light is better for your specific use case?
Consider my affordable Consulting Service.
I consult for individuals and startups and educational facilities, as well as large Fortune 50 corporations, so don’t hesitate to send me an email with your 3D scanning challenges.
Ultimately, even though the MFS1V2 is quite picky about the objects it can scan and doesn’t always produce consistent, complete results, there aren’t many other scanners (see alternatives in the panel below) in this price range that can scan small objects with this level of detail. Even if you would clean the scans of the surface noise, you will still have a lot more details than any depth sensor (like Structure Sensor or Intel RealSense) can capture on objects this small.
For $749 I expected a bit more of this updated hardware/software combination. As it stands now the $599-$649 price tag mentioned in the original press release would make a more sense te me. I’m also not convinced by the add-on software business model. I hope that M&F will also keep adding free improvements to MFStudio and won’t be charging users $79 for each new feature.
Using laser lines still seems to be the only way to produce a commercially viable desktop 3D scanner for less than $1000, but with structured light scanners coming very close to that mark I’m very curious how this market will develop in the coming years.
Alternatives
Besides open-source DIY laser scanner kits like the $115 Ciclop, there are no other computer-connectable desktop 3D scanners that cost less than $750 so there’s little competition for the MFS1V2.
The only logical competition in the commercial laser scanner range is the $599 Eora3D. That smartphone-based device has the benefit of using a more powerful laser your smartphone’s great camera. It had the downside of working with complex 3D calculations and editing on a mobile device but Eora3D Studio did just add iPad (Pro) support so you don’t have to do everything on a smartphone anymore. However, I should note that when I last tested the Eora3D Studio app, the alignment and messing features weren’t well enough developed to do proper mesh-to-mesh comparisons with the Matter and Form V2.
If your pockets are a bit deeper than $749, there’s the $1299 EinScan-SE structured light scanner. Like the MFS1V2 it also works on Windows and Mac (the latter is in beta) but it does allow scanning objects with more diversity in surface characteristic, that are a lot bigger, in less time, and often with less noise in the geometry. It also offers 0.1mm accuracy if that’s important to you and updates of the EinScan software have so far always been free.
If you’re on a budget and just want to make 3D scans of small stuff for fun (meaning you don’t care about the increased accuracy), probably the best alternative for the Matter and Form 3D Scanner V2 is the V1 that’s now $399 on Amazon while supply lasts. You can use it with the new MFStudio (download here for free) and get the +QuickScan feature as an in-app purchase for $79, which I recommend.
Subscribe to my Monthly Newsletter
Get great contents delivered straight to your inbox everyday, just a click away, Sign Up Now.
Email address
Matter and Form V2 3D Scanner In-Depth Review
ADVERTISEMENT
8.2Expert Score
Matter and Form V2
Matter and Form V2 is an accessible 3D scanner that follows a straightforward approach.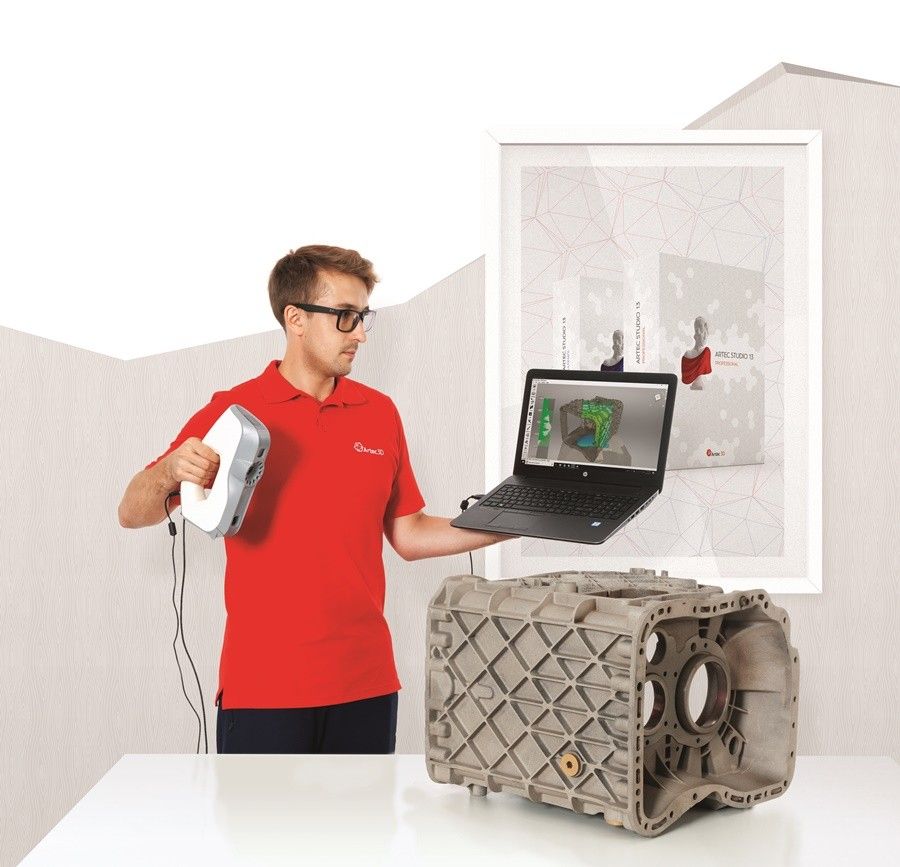 It has amazing features such as +Quickscan, simple software, and exceptional customer support.
Affordability
8
Quality
7
Speed
8
Capability
8
Practicality
8
User Expectations
10
PROS
- Easy to grasp the software
- World-class customer service
- Scans quickly with + Quickscan
- Affordable
- Compact and flexible design
CONS
- Reports state how the scanner finds it difficult to identify empty spaces.
- Difficult to scan in low light conditions
Table of Contents
V2 is the next-generation scanner designed to transform beginners into professionals. It is an affordable desktop 3D scanner manufactured by Matter and Form – a company based in the United States.
Based on laser triangulation technology, V2 is known for its speed, easy-to-grasp software, foldable design, and watertight meshes.
The scanner houses a similar design to the scanner’s predecessor, but an improved type of usability. Many users have appreciated the +Quickscan that holds the capability of scanning an object in 65 seconds! How quick, yeah?
So, let’s explore more of such intriguing features that the scanner hosts. But, for that, we need to dive in-depth. Excited? Let’s get started.
ADVERTISEMENT
Features
V2 is multifunctional. Not only can it scan the geometry of an object using its lasers, but also pick up the texture of objects using the in-built camera. The scanner is equipped with a calibration card as well as a blue rubber duck because of which the entire scanning process becomes very simple.
Also, the scanning is fairly straightforward. It allows users to move the object around. In the meantime, the machine scans every single angle to align the scans for creating a complete model.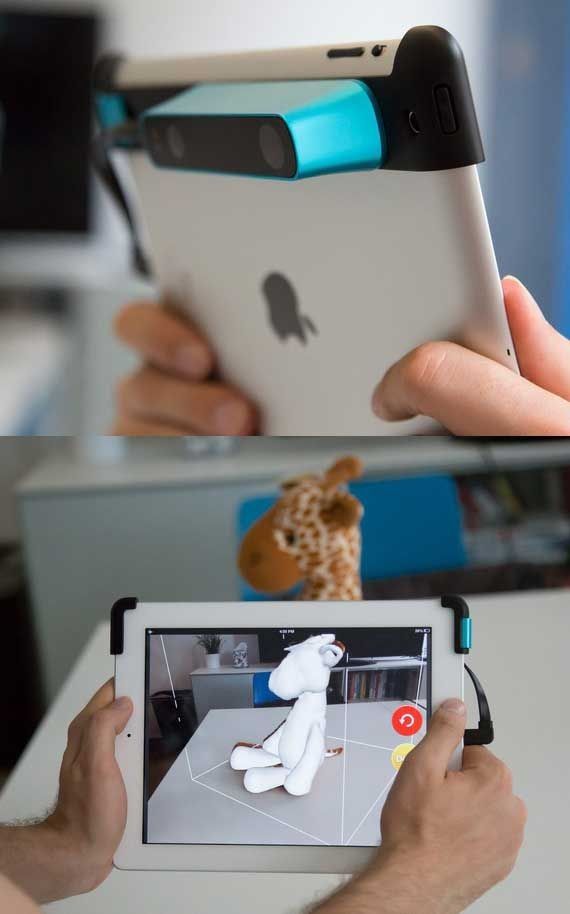 Below mentioned are some of the most striking features that separate the scanner from others in a similar price range.
Easy to assemble
V2’s setup is a piece of cake. All it requires is a couple of tweaks here and there and you are almost there! Ready to start scanning. The points that users need to ensure are a) keeping the scanner at a reliable place. b) That place should be near to the computer where it works best under specific lighting conditions.
Uncomplicated software
The scanner manufacturer has paid special attention to keep the software completely uncomplicated. It offers cleaning tools that are easy to grasp and become used to. Also, the color texturing is very simple.
Not only that, but also each and every selection made by you has a different set of explanations of what is it specifically used for, and how it works?
The best part about the software is that it shows operators the exact points that the scanner is picking up in real-time. So, it becomes easy for you to predict how much time is remaining thereafter.
ADVERTISEMENT
Unparalleled support
The technical team of Matter and Form is extremely assistive and friendly. Their reply to query-full email is very practical. They are always apt and asking you to contact them for any sort of trouble during the setup or anytime during the scanning process.
In fact, for easing out your work of explaining how to do stuff with the scanner they have put in place video tutorials in which you can video chat with the team.
An expert faces you onscreen and he/she explains to you different ways in which you can work with the scanner to ensure it performs the best.
+Quickscan
This service was designed by Matter and Form especially to provide immediate assistance for scanning. It is primarily meant for educators as well as curiously impatient perfectionists. Quickscan is a part of the many updates that are available in V2.
It’s specifically associated with 3D scanning software. When coupled with the scanner, the feature enables users to obtain the complete geometry of the scan in 65 seconds.
In case you get an entire package, it offers enhanced product workflow with camera exposure previews as well as adaptive regular scanning.
Flexible design
V2’s design is completely foldable. So, if you are buying it for home or office use, you’d not have to assign a particular place for the scanner. Because it can be folded and easily stored anywhere! Moreover, the outer shell of V2 also doubles as a protective case for the turntable as well as the camera.
It is one of those eye-safe red lasers that operate on its patented technology. Such a characteristic makes it a scanner that’s compatible with a wide range of materials the number of which is more than other scanners available in the same price range.
ADVERTISEMENT
Specifications
Credit: 3dscanexpert
V2 offers an approximate scan accuracy of 0. 1 mm. The maximum object size and weight that’s scannable on the scanner is 25 cm * 18 cm and 3 kilograms respectively.
Its optics department is taken care of by a standard HD CMOS sensor and two class 1 eye-safe lasers. The scanner can be connected using a USB 2.0 high-speed interface for file transfer.
Price
Matter and Form V2 is available for $749.
First Impression
The scanner comes safely packed with other things that you’ll need while scanning. Such as:
- A USB cable
- An AC power adaptor
- Four interchangeable worldwide power plugs for power supply
- A calibration card
- A user manual
- A product information booklet
- A small plastic toy
- An MFStudio software with +Quickscan
Setup
As mentioned above, it is extremely easy to set up V2. All that the users need to do is find a suitable place where it can be unfolded near the power supply and the computer.
The time taken for setting the scanner up from unwrapping it from the box is not more than a few minutes. So, you’d be doing your first scan within no time at all.
Scan Type/Cost
Credit: prnewswire
The laser triangulation technique is based on trigonometric calculation. The scanners based on this method typically make use of three main elements:
- Laser transmitter
- A camera
- The object that’s to be scanned.
Generally, they use semiconductor lasers because of their low cost and small size. The digitization commences with the emission of a rectilinear laser beam that deforms after making contact with the object.
In the meantime, the camera analyzes the deformation of the line that’s emitted by the laser for determining its position in space via trigonometric calculations.
When compared to other scanning technologies, the cost of scanning a part or functional prototype using laser triangulation is on the lower end.
ADVERTISEMENT
Scan Quality
V2’s scan quality is so precise that it’s able to pick up even the tiniest writing that is typically seen on the bottle. Moreover, the scanner can capture fine details of small objects with intricate geometries.
Having said that, V2 does have its own set of requirements when it comes to scanning in low-light areas. But after making a few changes here and there users can get impressive results. The fact that V2 is able to achieve a scan accuracy of around 0.1 mm is in itself proof of excellent scanning by the machine.
Software
Credit: dynamism
V2 is compatible with MFStudio + Quickscan that can be safely run on Windows versions above 7 and MacOs above 10.11. It supports file formats such as PLY, and XYZ on point cloud and STL, OBJ, DAE, PLY, and gITF2 on Mesh.
The best part about this application is its multilingual support. Users can operate it in English, French, Spanish, Italian, Portuguese, German, Chinese (Traditional/Simplified), and Arabic.
Customer Support
All sorts of support are given by the scanner manufacturer in terms of providing an installation help guide, to video tutorials online. Moreover, operators can always contact the technical team via email or call.
ADVERTISEMENT
Parameters Influencing Buying Decision
Below mentioned are chief factors that are to be kept in mind while making the buying decision.
3D Scanner Cost: Although there are scanners available at a cheaper price than V2, they aren’t that functional. So, considering the amazing features that the scanner brings on board, V2 is affordable.
3D Scanner Speed: V2 has a decent scan speed that gets a sudden boost when paired with +Quickscan. After that users can scan an object in mere 65 seconds.
3D Scanner Quality: Average.
3D Scanner Capability: The scanner is capable of performing varied types of scans on a wide range of objects starting from a simple plastic bottle to a fruit.
3D Scanner Practicality: V2 can be put into application for researching, educating people with the wonderful 3D scanning techniques as well as art and designing.
3D Scanner User Expectations: The manufacturer claims how their scanner is for transforming beginner-level users into professional ones. So, it bridges the difference in knowledge and makes up an expert with fine tunings of the scanning world.
The Verdict
V2 is an accessible 3D scanner that follows a straightforward approach. It has its own quirks like every other scanner, but overall those eccentricities are balanced by amazing features such as +Quickscan, simple software, and exceptional customer support. So, under a price of $750, V2 is worth taking into consideration by all the users looking to upgrade their scanning skills.
Editorial Team
Stay updated on the recent happenings in 3D Printing and be the first to know when an awesome product hits the market.
Review of 3D scanners for metrological control / Sudo Null IT News
In this article we will talk about optimizing quality control processes using 3D scanning, about the design and principles of operation of metrological 3D scanners. Using real examples, we will show the effectiveness of using equipment for solving various problems. After reading the review, it will be easier for you to navigate among a large number of models on the market and determine the criteria for choosing the right device.
Introduction
Every year the industry produces more advanced instruments and devices. Machine parts often have a complex geometric shape, are in close interaction with each other. In order to ensure the smooth operation of the mechanisms, it is necessary to match the shapes, sizes, assembly accuracy and other parameters. Quality control in mechanical engineering was carried out using various technologies, including using coordinate measuring machines (CMMs). However, scanning is by far the most efficient method in terms of the ability to capture data for measurements and the speed of information processing.
Capabilities of 3D scanners
Source: solutionix.com
3D scanners cope not only with smooth surfaces, but also with complex areas: corners between edges and faces, depressions, holes. An important advantage of the devices is the non-contact method of operation, which allows scanning at a distance, in hard-to-reach places.
After the changes are made, the information is transmitted on-line to a computer, where the software compares the received data and the specified parameters and demonstrates deviations: size mismatches, cracks, signs of deformation and corrosion, and other changes.
Applications
Source: sastrarobotics.com
Digital measurement is a high-tech process that has a number of important advantages over other verification methods. The only disadvantage of the technology is the high price of the equipment. In large industries, with a quick payback, the use of 3D scanners is economically justified. Consider examples:
- large-scale production of parts and devices with mandatory input and output quality inspections;
- small-scale production of objects of complex geometry, impossible without constant quality control.
Situations when other technologies cannot be applied:
- work with objects made of specific materials deformed during the contact method for determining parameters;
- measurement of electronic parts at risk of being damaged by static electricity;
- re-measurements of objects that are physically absent can also be made on a digital copy taken in advance.
Purposes of use
Source: www.capture3d.com Input control of materials and details is necessary at any enterprise.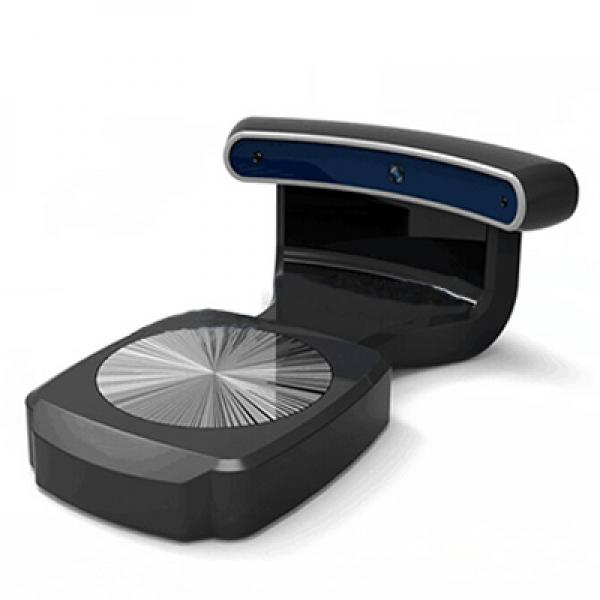 For large-scale production, selective batches are inspected. However, this requires a large number of controllers, which increases the cost of the product.
The use of 3D scanners automates the workflow, eliminates errors associated with the “human factor”, allows you to switch from selective quality control to continuous, increases the speed of verification several times compared to manual labor.
Analysis of the location of parts relative to each other
In a product consisting of several parts, it is important to monitor the correct arrangement of elements in relation to each other. Scanning technology easily captures the position of objects in space and transmits information to a computer monitor.
Checking the geometry of large objects
A number of large objects, such as construction equipment, marine and air transport, require regular testing of the hull geometry. The process is lengthy and requires the search for specialists with the necessary qualifications and experience. Metrological 3D scanners easily cope with the digitization of large-sized objects, guarantee high measurement accuracy and save time and financial resources of companies.
Checking the geometry of small objects
Sometimes measuring small objects is more difficult than measuring large ones. 3D scanners successfully measure to within a few microns, regardless of the size of the parts. Deviations of shape and size from the base model are highlighted in the program, which makes it easy to notice and eliminate them.
Selection of equipment
Source: tool-maker.net
There are dozens of models of metrological scanners on the modern digital equipment market. The choice of instrument begins with the identification of the range of tasks set by the production. Here are some parameters that you need to pay attention to and compare with key goals:
1. Working area
It is quite clear that large objects require devices with a large working area. Please note that the size of the working area is in inverse proportion to the resolution. By choosing a device with an excessive scan area, the user may find insufficient accuracy and resolution.
2. Accuracy of data
It is obvious that the highest possible accuracy is required in aircraft construction and production of other critical parts.
In reverse engineering of consumer goods, products without complex mechanics, as well as when used in the creation of works of art, souvenirs, in the development of computer games, such accuracy will not be used, for these purposes it makes no sense to overpay for a scanner tens and hundreds of times.
3. Run speed
This parameter includes the calibration and direct scan time. For high-volume production, where 3D scanning is used for quality control, involving dozens of measurements per minute, high speed is an important characteristic. Production of small batches of products and reverse engineering are less demanding on the speed of the device.
4. Software
We recommend giving preference to scanners that work with proprietary highly specialized software. The software required for processing scans, if not included, may require significant additional financial investments.
5. Price
When choosing a 3D scanner, you must independently or with the help of a qualified specialist correlate the tasks of the user and the capabilities of the device. It makes no sense to overpay for unnecessary features. At the same time, it is important that the device has the necessary set of parameters that are guaranteed to give the desired result. It is important to predict the payback period of the equipment.
Examples of 3D scanners for metrological quality control
Let's start our acquaintance with the presentation of the Russian sample - RangeVision Pro. The device is officially approved as a measuring instrument by the Federal Agency for Technical Regulation and Metrology.
Basic information about RangeVision Pro
Source: top3dshop.ru
The device is designed as a universal measuring device for small and large objects with a size of 30 to 1000 mm. Three working zones and a set of interchangeable lenses allow the scanner to accurately digitize jewelry and car body parts.
Measuring accuracy is ensured by structured illumination technology, 6-megapixel cameras and original software solutions.
RangeVision software allows you to stitch image elements, fill in empty areas and straighten images. The program includes basic functions for checking the geometry and taking measurements. The output file format is supported by all popular computer-aided design and virtual simulation systems. Software updates are freely available.
RangeVision Pro Features
3D Scanner Applications in Various Applications
Dolsatech Quality Inspection
Source: rangevision. com
com
whose quality had to be checked. The usual incoming inspection system could not cope with a large flow of products and did not have the ability to test objects of non-standard geometry.
RangeVision PRO 3D scanner was used to optimize the process. Current measurement technologies involve the transportation and storage of control samples in specially designated areas. The mobility of the Russian scanner made it possible to reduce logistics costs.
Source: rangevision.com
With the scanner, there was no need to move batches for measurements. RangeVision PRO works in workshops and warehouses - in any convenient place.
In this case, a three-dimensional model of a part with a size of 1700 mm * 720 mm was created. Stickers were pasted onto the part, which made it possible to automatically assemble individual images into a single 3D model. The information was processed by the proprietary ScanCenter software supplied with the scanner.
Quality Inspection at INKAY TECHNOLOGY
Source: rangevision.com
INKAY TECHNOLOGY SRL in Italy had the task of verifying that the dimensions of the body casting matched the base model saved in the CAD file. Given the non-standard geometry of the object, it was decided to abandon the usual technologies and use the RangeVision 3D scanner.
The work was done in 3 stages:
- We created scans of the outer part of the body using markers for automatic image stitching.
- To scan the inside, the case was divided into 2 parts, each of which was digitized separately.
- Stitched all the images into a single model.
Source: rangevision.com
Quality inspection at Krasnoye Sormovo plant
Source: rangevision.com
As we mentioned above, 3D scanning is justified not only in high-volume production. Often the equipment is effectively used in the piece production of parts. The shipbuilding industry uses cast components with complex geometry, the quality control of which is difficult and time consuming. Therefore, the use of 3D equipment in the industry is becoming more common.
Krasnoye Sormovo specialists chose RangeVision to inspect the quality of the controllable pitch propeller hub.
Part height - 70 cm, diameter - 80 cm. The RangeVision PRO 3D scanner was moved around the hub, taking pictures from different angles. A 3D model was assembled from the 100 images obtained. The stl-file was combined with the basic calculation model in the GOM Inspect software to determine deviations. The work, as a result of which the specialists received an accurate report of the conformity of the finished product to the base model, took several hours.
ScanTech PRINCE775
Source: www.3d-scantech.com
ScanTech PRINCE 775 portable handheld 3D laser scanner is based on 2 cameras with LED illumination. 2 operating modes are available to users:
- In BLUE mode, the blue laser is active; this mode is used to obtain models of high detail;
- RED mode with red laser is enabled when high digitization speed is a priority.
As a result of scanning, a point cloud is created, which is processed using the ScanTech software solution. The finished image is displayed on the screen of the working device.
Scanner Features
Using PRINCE 775
The main scope of the scanner is the digitization of large-sized objects, such as parts of ships, cars, industrial installations. The device can also work with small objects, such as jewelry.
ScanTech PRINCE 775 Applications:
- reverse engineering;
- industrial design;
- quality inspection;
- creation of computer games and 3D films;
- and in many other areas.
Source: www.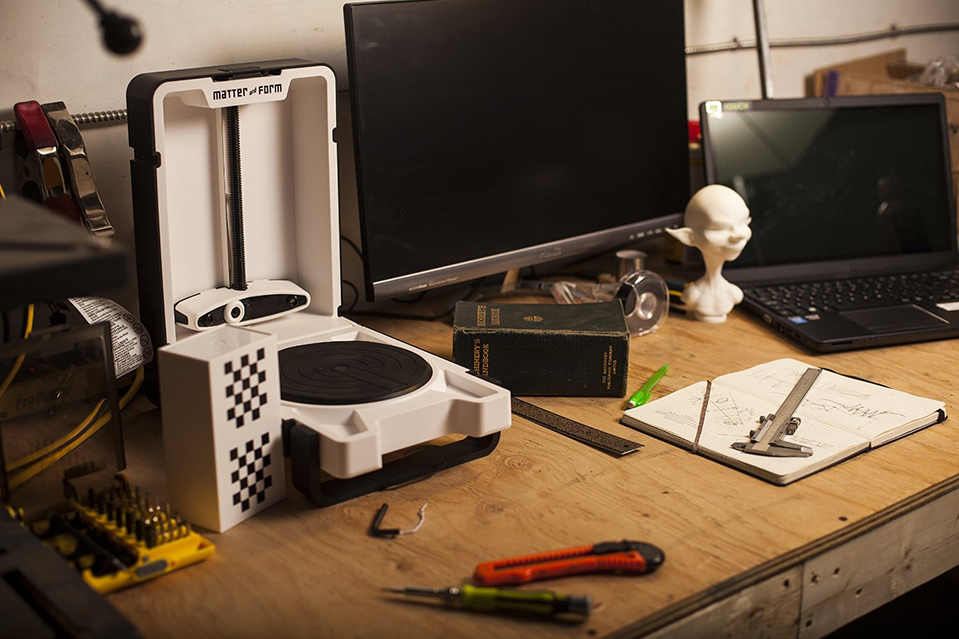 3d-scantech.com
An example of the use of a PRINCE handheld scanner complete with MSCAN - the use of two instruments increases the efficiency of the process, due to the features of the equipment.
The first device provides high accuracy and detail, the second helps to study large objects using photogrammetry.
Source: www.3d-scantech.com
Digitization of Airbus A350 parts using the kit: MSCAN+ PRINCE. The pair has proven itself in the rapid resolution of quality inspection tasks.
Source: www.3d-scantech.com
Digitization made it possible to create a three-dimensional model of the impeller, since it was impossible to accurately measure it in other ways.
Creaform HandySCAN Black Elite
Source: creaform3d.com. The device is suitable for most users, including those who do not have practical skills in working with such equipment.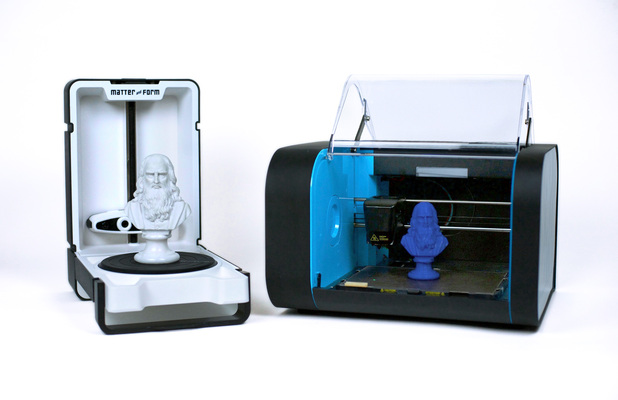 Despite the ease of use, the scanner guarantees high-precision models, even when digitizing large objects of complex geometry.
Scanner features
Application area Creaform HandySCAN Black
The device is designed for professional use in various fields. HandySCAN Black excels in tasks such as:
- incoming and outgoing quality control in production;
- reverse engineering;
- pipeline inspection;
- digitization of objects for any purpose.
The scanner is easy to use: all you need to do is connect to your laptop and select a program. During the digitization process, you can pause, examine the intermediate results and continue working.
Creaform MetraScan 750|Elite
Source: industryarena.com
Another handheld metrology scanner that creates high-precision models even for large objects.
Specification MetraScan 750|Elite
MetraScan 750|Elite
The device is widely used in architecture, energy industry, for reverse engineering and metrological control.
Solutionix C500
Source: psarta.com
The Solutionix C500 is a compact color 3D scanner. The mobile device is placed on any flat surface.
Based on a turntable and two 5MP cameras. The rotation of the platform allows cameras to capture an object from different angles. High speed operation and ease of use provide excellent equipment performance.
Specification Solutionix C500
Application Solutionix C500
Due to its compact size and the ability to quickly and accurately color scan the device is in demand in many areas, for example:
- in dentistry;
- jewelry industry;
- in education;
- for solving reverse engineering problems in various fields.
Terminals
The use of metrological 3D scanners improves the quality of products and reduces their cost by saving time and resources, minimizing scrap. Automation of production processes, by incorporating 3D scanning technology, increases the efficiency of the enterprise and its competitive position in the market.
To choose a professional metrology 3D scanner, contact Top 3D Shop. Technical experts will help you choose the equipment that is optimal for solving your problems, with the most suitable ratio of price and functionality.
How do 3D scanners work and should I buy them?
3D scanners seem like something straight out of science fiction, but they are real and are already revolutionizing the day-to-day work of several key industries.
But even though the technology is incredible and there are some fantastic benefits to using a 3D scanner, especially when combined with the impressive functionality of a 3D printer, the price is still a little high for most consumers.
Because of this, it's important to understand exactly what you can get from a 3D scanner today and whether the pros outweigh the cons for what you're hoping to achieve.
How do 3D scanners work?
It's easiest to think of 3D scanners as intensive cameras, but instead of producing photos or videos, they create 3D renderings.
3D scanners collect information about objects within a given field of view, but unlike cameras, 3D scanners collect information about the position of an object in space, and not about its color and appearance . This is possible by calculating the distances between the scanner and various points on the object's surface.
Generally, 3D scanners can be sorted into two different types: contact scanners and non-contact scanners .
Contact scanners, as the name suggests, require direct contact with the object being scanned, while non-contact scanners use laser light or radiation (such as x-rays or ultrasound) to collect information about the object.
One of the current limitations of 3D scanners is that they can only capture information from visible surfaces of an object within the line of sight of the camera. In the video below, Ben Heck explores some of the challenges of trying to get an accurate scan with a handheld 3D scanner:
Because of this, to get a full 3D rendering, many different scans from different viewpoints must be compiled into a single file. But with the latest advances in 3D scanning technology, the time it takes to complete a large number of scans is always shrinking.
Most commercial 3D scanners are non-contact and often use laser light.
The laser is aimed at an object of interest (various models may use either a single laser dot, a laser line, or a series of linear projections), which then reflects the laser back to the scanner. The scanner is also equipped with a sensor that collects data from the laser(s) about the shape of the object (calculated from the angle of the reflected light).
As you might expect, scanning a single object in 3D requires a huge amount of data, and this data must be processed using 3D scanning software. There are many 3D scanning software packages available online and the one that works best for you will depend on what you hope to achieve.
What are 3D scanners used for?
3D scanners can be used in various industries. For example, museums use them to offer 3D renderings of famous artifacts, while manufacturers use them to create product details. Even so, 3D scanners provide great opportunities for home users as well.
The most obvious is to use them in conjunction with 3D printers to create accurate scale models or prototypes of existing objects. These models can be used for entertainment (like a replica the size of a model of your own car), to capture physical copies of objects as souvenirs, to solve annoying everyday tasks. annoying or plan a future design project.
Even without a 3D printer, a lot can be done with a virtual 3D model. Use the virtual model of an object, person, or place creatively in game design or as an avatar, for a visual design process, or to capture the information you need about a physical space.
The only limits on what you can do with the 3D scanner are your own creativity and the physical capabilities of your 3D scanner. Other than that, everything you can dream of scanning is basically in your hands! (Seriously, everyone. It is already possible to print food on a 3D printer. , you know.)
Is it worth buying a 3D scanner?
When it comes to 3D scanners, it's safe to say that it's not about volume whether to buy a 3D scanner, but about whether when is worth buying it, but there are two main factors that you should take into account before diving into
3D scanner technology is still under development .
Expect regular jumps in specifications and features over the next few years. That being said, consumer 3D scanners today are quite proficient and should allow you to complete most of the tasks you want to do.
Keep in mind, though, that new variations in 3D scanning technology are still being developed, including cool innovations such as a 3D scanner laser chip that's small enough to fit in a smartphone.
Another consideration is, of course, price.
While 3D scanners are more affordable than ever, they are still out of most people's budget Some quality models can be had for as little as $600, but most are still in the $1000 range not much more expensive than a higher-end laptop, but still a bit more money than most people are comfortable throwing in right away.
Also, if you don't already have a 3D printer, you may be limited in what you can do with your scanner. Of course, 3D printing on a budget is always an option, but it's still an additional expense. For reference, inexpensive 3D printers cost around $350.
What 3D scanners are available?
MakerBot Digitizer ($1200) MakerBot's
Digitizer has an impressive array of features. In just 12 minutes, the scanner collects thousands of points from all angles into a point cloud, which is then converted into a 3D model. The information collected by the digitizer is also converted into a format that can be read on the 3D printer of your choice.
MakerBot software allows you to easily transition between scanning, editing and/or printing, including the ability to merge different scans.
The main limitation of the digitizer is its relatively small scanning field: 8″x8″ with a weight limit of 3kg. Objects must be able to fit on his platform in order to be accurately captured. Also, the Digitizer is currently in the early stages of implementation, as some things still need to be developed before it's finally released to consumers.
Scanify ($1490)
Scanify is a handheld commercial scanner that generates full-color 3D images of faces and objects in record time - it only takes 0.1 seconds to create one image.
Handheld functionality provides more flexibility in the scanning process, but also requires more control to achieve the perfect scan. The speed of Scanify comes at the expense of the accuracy of certain objects, including solid-color objects, objects with sharp corners, and reflective objects.
Scanify's professional software comes at $99/year but offers many editing, stitching, and 3D printing options.
Matter and Form 3D Scanner ($600)
If the prices in Scanify and Digitizer are a little scary, the Matter and Form 3D Scanner might be faster. This 3D scanner was originally a Kickstarter project but has evolved into one of the best budget 3D scanners out there.
It features a rotating platform and a moving camera combination that quickly captures all angles and colors of an object in just five minutes with quality comparable to more expensive models.
As with Scanify, scannable objects are limited to a smaller scale of 7″ x 9.8″ with a weight limit of 3.0kg – but basic software is included to help create waterproof print meshes.
Matter and Form Bevel ($80)
Matter and Form has responded to the demand for mobile scanners by introducing Bevel: a smartphone app that allows you to scan objects in 3D on the go.