Makergear m2 desktop 3d printer review
Makergear M2 Review 2022 - Why This 3D Printer Is Not Worth It
3.2
See Price
3D printers are complicated at the best of times. There’s a huge amount of variation from one model to the next, and all the jargon really gets in the way of making a decision sometimes. That’s why we’ve decided to create a simple, easily understandable guide to one of the most popular 3D printers available: the MakerGear M2.
There’s an extra challenge when it comes to buying premium products: you need to find a printer that’s worthy of its price, but one that isn’t weighed down with functionalities you’ll never get to use. Let’s take a look and see if the M2 lives up to the hype.
| Filament Diameter | 1.75mm |
| Extruders | 1, optional 2nd |
| Supported Materials | PLA, ABS, PLET, HIPS, HDPE, TPU, Polycarbonate, composite |
| Connectivity | USB, SD Card |
| Printing Speed | 80-200mm/s |
| Build Volume | 8 x 10 x 8” |
Table of ContentsShow
Design
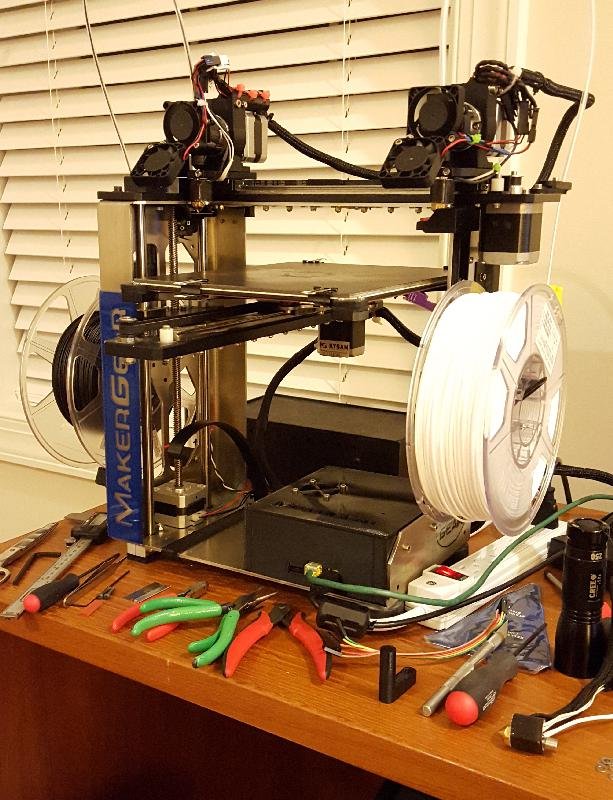
This printer has a spacious, open build area that allows you to build larger objects than most other models. Admittedly, there’s only one extruder by default, but if this is a big drawback for you, you can always add an extra one. This is achievable because the entire unit is modular – it simplifies maintenance and allows you to effortlessly upgrade.
It’s sturdily built, too. Instead of 3D printed components, it’s made almost entirely of metal for added durability. The print bed comes already leveled, and there’s software included to help you reset it if needed. Thanks to its four-point system, though, this should only be necessary rarely.
With a base temperature of 110°C, this printer allows you to print even with materials that require very high amounts of heat. This should also prevent sticking, which is excellent. This unit ships with a 0.35mm nozzle, but MakerGear offers additional sizes and materials on their website.
Printing
Print quality is above-average but still not perfect, despite this printer’s high price tag. It handles overhangs exceptionally well, but there was significant distortion on relatively simple test models. It seems to excel at low-poly prints, but more complex ones tend to warp or complete with loose strands – hardly ideal, but good for fast prototyping.
We were pretty impressed with the number of different filaments you can use, though. All the usual suspects are supported, but you can also use wood or carbon-fiber filaments. That said, you’ll need to buy a metal nozzle since you don’t get one as standard.
Let’s be clear: this printer is not suitable for commercial applications. It’s clearly intended for experienced users who know how to troubleshoot difficult prints, and at such a high price, it’s prohibitively expensive for newcomers. These facts aside, it’s a strong choice for those looking to improve their skills and learn by doing.
Features
At this price, you expect to see some WiFi capabilities, but this is absent in the M2. USB and SD card connections are supported, though. It includes a copy of Slic3r and Pronterface – two free, open-source applications. Generally, high-end printers come with free professional software, or at the very least, a discount, so this is a bit of a let-down.
Unfortunately, the M2 requires you to use multiple programs unless you’re willing to pay for premium software. First, you have to slice your model, then use a secondary application to send it to the printer (assuming you’re not putting it on removable storage). Also, the bed-leveling and filament changing requires you to use the proprietary software.
However, we did like how easily this product can be upgraded. You can choose to add an extra extruder, additional filament spool, or an LCD screen, and spare parts are also available via the MakerGear website. Even with a single extruder, the printing is pretty fast, so you may not even need one.
Cost
At a little over $1800, this printer isn’t for anyone but experienced users. A fully upgraded version will run you around $2000, and that’s before you add $149 for a copy of Simplify3D. Simply put, this model is extremely expensive, and yet, only suitable for mass-producing very simple objects.
On the other hand, we find the spare parts kit to be worthy of its price. You get all of the most commonly broken components including a filament drive and hot end, so you’ll always have spares on hand should anything go wrong. Because of its modular design, replacement is very easy, which is a bonus.
Support
MakerGear’s support area provides several ways to find help. You can call the company, submit a support ticket, send an email, or check out the user forum. The company claims to respond to messages within a few hours, but you should note that weekend inquiries will likely be answered the following Monday.
The M2 comes with a six-month limited warranty, which is standard. What isn’t standard is the extension option: for $350, you can add an extra year’s coverage. Normally, we’d say this was extortionately expensive, but given the high price point of this printer, it might actually be worth the investment.
Simply, the M2 is very expensive and lacks some of the features that many mid-budget printers have as standard. We don’t think it’s fair to ask customers to pay around $1800 for a product and then wait over the weekend for support if problems arise.
Summary
While the MakerGear M2 has a premium price, it seems to be designed to milk as much money from consumers as possible. Even if the price were halved, we’d struggle to justify purchasing it, simply because of its complexity and poor print quality on reasonably simple models.
It’s pretty complicated to use too, with multiple programs required to get even easy prints started. This is a classic case of “high price, low expectations”, and without significant improvements, the M2 can’t even come close to justifying its extreme initial cost. Buyer beware.
MakerGear M2 Review | Tested by GearLab
This pricey printer performed on par with much less expensive models
The MakerGear M2.
Credit: MakerGear
- 1
- 2
- 3
- 4
- 5
Price: $1,999 List
Pros: Alright prints, good customer support
Cons: Expensive, hard to use
Manufacturer: MakerGear
By David Wise and Austin Palmer ⋅ Jun 14, 2017
Our Editors independently research, test, and rate the best products. We only make money if you purchase a product through our links, and we never accept free products from manufacturers. Learn more
55
OVERALL
SCORE
RANKED
#11 of 12
-
Print Quality - 40% 6.0
-
Ease of Use - 30% 4.0
-
Print Capabilities - 20% 6.0
-
Support - 10% 7.0
RELATED: Best 3D Printer of 2022
Our Verdict
The M2 by MakerGear comes at a premium price and failed to impress. This model didn't have amazing print quality and was much more difficult to use than the bulk of its peers. While this is a reasonably capable printer, it's hard to rally behind its unremarkable performance at an exceptional price.
Compare to Similar Products
(change comparison)
This Product | Prusa i3 MK3S+ | Anycubic Vyper | FlashForge Adventurer 3 | Creality 3D Ender 3 Pro | |
|---|---|---|---|---|---|
| Awards | |||||
| Price | $1,999 List | $1,099 List | $460 List $429.99 at Amazon | $450 List $449.00 at Amazon | $236 List $236.00 at Amazon |
| Overall Score | |||||
| Star Rating |
|
|
|
|
|
| Pros | Alright prints, good customer support | Easy to use, highly capable, great prints | Easy setup, useful features, affordable | Fully enclosed, integrated camera, easy to use | Great budget buy, solid printing capabilities, decent print quality |
| Cons | Expensive, hard to use | Pricey, limited vendors | Print quality can require tinkering, warranty could be better | Limited filament compatibility, so-so customer support | Finicky with ABS, can require a bit of tinkering |
| Bottom Line | This pricey printer performed on par with much less expensive models | If you are looking for a top-notch filament printer, then we think is an excellent choice | If you're looking for a sophisticated printer option that's nearly ready to go out of the box and can go toe to toe with the pricier guys, this is a great choice | If you are searching for an enclosed and easy to use option that won't break the bank, then this is a great option | If you are looking for an inexpensive bare-bones printer and don't mind making some adjustments to it, then this model is an exceptional choice |
| Rating Categories | MakerGear M2 | Prusa i3 MK3S+ | Anycubic Vyper | FlashForge Adventur. .. .. | Creality 3D Ender 3... |
| Print Quality (40%) | |||||
| Ease of Use (30%) | |||||
| Print Capabilities (20%) | |||||
| Support (10%) | |||||
| Specs | MakerGear M2 | Prusa i3 MK3S+ | Anycubic Vyper | FlashForge Adventur... | Creality 3D Ender 3... |
| Build Volume (XxYxZ) | 200x250x200mm | 250x210x210mm | 245x245x260mm | 150x150x150mm | 200x200x250mm |
| Maximum Extruder Temperature | 300°C | 300°C | 260°C | 240°C | 255°C |
| Layer Cooling Fan? | 1 | 1 | 2 | 1 | 2 |
| Heated Bed | Yes | Yes | Yes | Yes | Yes |
| Build Plate Material | Borosilicate glass with laminated print surface | Removeable magnetic steel sheet, smooth. Textured and satin surfaces available. Textured and satin surfaces available. | Removable magnetic spring steel, scratch resistant | Removeable and flexible plastic with sticker | Aluminium build plate with a magnetic course plastic sticker |
| Maximum Bed Temperature | 110°C | 120°C | 110°C | 100°C | 110°C |
| Compatible with Third-Party Materials? | Yes | Yes | Yes | No | Yes |
| Included Nozzle sizes | 0.35mm | 0.4mm | 0.4mm | 0.4mm | 0.4mm |
| Print layer resolution | 0.05 - 0.25mm | 0.05 - 0.35 mm | 0.1mm | 0.1 - 0.4mm | 0.1 - 0.4mm |
| Filament Size | 1.75mm | 1.75mm | 1.75mm | 1.75mm | 1.75mm |
| PLA? | Yes | Yes | Yes | Yes | Yes |
| ABS? | Yes | Yes | Yes | Yes | Yes |
| Network Printing | No | Yes | Available with 3rd party products | Yes | No |
| Standalone (SD card or USB drive) Printing | No | Yes | Yes | Yes | Yes |
Show full specification detailsHide full specification details
Our Analysis and Test Results
The MakerGear M2 finished roughly in the middle of the pack. It scored comparably to much less expensive models, with its noteworthy features being its high price and difficulty of use.
The MakerGear M2 is a pricey model that fell a little short in testing.
Credit: Jenna Ammerman
Performance Comparison
To rank these products, we bought and tested the top models currently available, then put them through a rigorous series of side-by-side tests. Each product was scored from 0-100 based on its performance in our four rating metrics: Print Quality, Ease of Use, Support, and Print Capabilities. The next sections detail what the M2 did well and where it went wrong.
Some of the test prints made by the MakerGear.
Credit: Jenna Ammerman
Print Quality
For our Print Quality metric, we printed a wide variety of test prints with each model and had a panel rate them — without knowing which printer made them. The M2 did reasonably well in this metric accounting for 40% of the final score, earning a 6 out of 10 for its overall above average performance.
A selection of the evaluation prints from the MakerGear M2.
Credit: Jenna Ammerman
The M2 did a relatively poor job at printing the 3D Benchy tugboat, earning a below average score in both PLA and ABS. This model had similar issues as the Lulzbot TAZ 6, with the bottom layers not lining up perfectly and a little bit of noticeable Z-Axis wobble. However, the small smokestack on the PLA version was printed nicely.
The Benchy tugboats didn't turn out as nice as the ones made by other models.
Credit: Jenna Ammerman
This printer's performance didn't improve in our Eiffel Tower or Bridging test, as the MakerGear program would not slice either file correctly and kept crashing — the identical file that we used for every other printer. However, the M2 did extraordinarily well in our overhang test in PLA, with even the steepest overhangs being super clean. Unfortunately, the ABS version failed to print. The M2 did subpar in the nickel test, with the PLA version being too large and the ABS version warping. The articulated elephant print was also average to below average. The PLA version had some solid layer defects on the lower right side and messes up the undersides and the bottom of the right ear. The ABS version doesn't articulate very freely and caused us some concern when initially breaking the legs free and the bottom layers of the body weren't smooth.
As shown, the ABS version of the overhang test was not great.
Credit: Jenna Ammerman
The platform jack and hollow cube were some of the more difficult prints and the M2 didn't excel at them. The PLA platform jack opens and closes relatively smooth but has plenty of visible Z-Axis wobble and tons of extra strings. The ABS version failed. The PLA cube had a few loose strands and some more visible wobble, while the ABS version had tons of strings hanging down on the bridges and slightly warped.
The bridges also weren't the best with the M2.
Credit: Jenna Ammerman
Moving on to our duo of low-poly figurines, the M2 impressed us with its solid performance. The prints were very nice, with the exception of the small tips that looked a little messy, and the ABS version of one model that failed to print, popping off the bed halfway through.
The MakerGear made some decent low-poly models, if they printed completely.
Credit: Jenna Ammerman
The MakerGear did quite well in this next set of prints, creating an above average spiral vase and tall tower, as well as doing exceedingly well in our support test. The PLA vase had one spot where the layer separated, while the ABS version looked great. However, there were some noticeable thinner sections in both versions. The supported section looked great on the underside and the sacrificial support structure was removed easily. Both ABS and PLA tall towers were reasonably well done, with only some slightly noticeable undulations as you moved up the tower — superior to the Monoprice Maker Select's prints.
The MakerGear redeemed itself slightly with this trio of prints.
Credit: Jenna Ammerman
The M2 finished out our print quality set of tests with a good performance in our remaining prints — a threaded jar and lid with knurled grips.
The M2 finished on a high note, with high-quality threaded containers.
Credit: Jenna Ammerman
The jar was excellent in both PLA and ABS, with smooth sides and threads. The lids weren't quite as nice, lacking some detail that other printers — like the FlashForge had.
The M2 was much more difficult to use.
Credit: Jenna Ammerman
Ease of Use
The MakerGear M2 was an exceptionally difficult printer to use, earning one of the lowest scores of the group with a 4 out of 10, substantially hurting its score, as this metric comprised 30% of the overall score. We ranked these products on the difficulty in swapping filaments, leveling the bed, and the necessary setup out of the box, as well as the different methods available to connect to the printer and the information displayed while printing.
The M2 was average in terms of unboxing and setup, with only the build plate, spool holder, and filament guide tube needing to be installed. However, the documentation wasn't the most helpful and lacked helpful pictures.
It was relatively little work to set the MakerGear up.
Credit: Jenna Ammerman
This model needs to be connected to your computer to start printing but we found that the cable can be unplugged later after the print is going and it will continue uninterrupted. This model requires a suite of software programs to run, recommending that you use Slic3r as a slicer, then PrintRun by Pronterface to actually send the code to the printer. In addition, you need to use the M2 Quick Start program to level the bed or swap the filaments.
The software toolchain on the M2 was the worst of the group.
Credit: Jenna Ammerman
This amounts to a very frustrating experience, resulting in this printer being one of the most difficult print with overall, swap filaments or level the bed.
The MakerGear had a single layer cooling fan.
Credit: Jenna Ammerman
Print Capabilities
Bouncing back slightly, the M2 earned a 6 out of 10 for its slightly above average performance in the Print Capabilities metric, accounting for 20% of the final score. We compared the software compatibility, build volume, filament compatibility and the extruder setup between models to determine score.
As mentioned above, the recommended trio of software programs to use is relatively awful but you can pay for Simplify3D, which will replace all three. This model had a reasonably large build volume, measuring in at 200 x 250 200mm (8 x 10 x 8 inches).
We had a few bed adhesion issues with the MakerGear's print bed.
Credit: Jenna Ammerman
The build plate is heated borosilicate glass with a laminated replaceable print surface. Unfortunately, we had some bed adhesion issues causing failed prints. This printer did earn some points by being compatible with generic filaments. This model has a single layer cooling fan, with a maximum nozzle temperature of 300°C. This allows a wide range of filaments, such as PET, HIPS, HDPE, TPU, or PC, to name a few.
Support
Support is the final metric in our tests, accounting for the residual 10% of the whole score. We compared the level of documentation for each model, the included warranty, and the accessibility and helpfulness of the customer support staff. The M2 finished out with a good score of 7 out of 10 for this rating metric.
While there were a handful of videos on the company's YouTube page, they weren't quite as numerous or helpful as other models. However, the support staff was quite accessible, with both an email and a phone line open Mon-Fri, 9am-4pm ET. They were very helpful in answering our printing questions and walked us through solving them. Finally, the warranty included with the M2 was average, with 6 months included at the purchase price and an additional 6 months that can be purchased as an upgrade.
Value
The M2 is a terrible value, costing high and scoring low.
Conclusion
The M2 produced some alright prints — when it actually printed. It had a horrific recommend software process and the lack of standalone printing with a menu on the printer is quite frustrating. All in all, we didn't find much that drew us to this printer and found plenty that drove us away.
— David Wise and Austin Palmer
2016 3D Printer Guide
When you finally decide that you are buying a 3D printer, the next question immediately arises: which one?
To answer this question, the team at 3DHubs, a worldwide community of 3D printing activity centers, looked to the experience of every member of their community.
Based on 5350 verified 3D printer owners with a collective 3962 printing experience of 714300 products printed on 441 different 3D printer models, a study was conducted in 2015 that resulted in the 3D Printer Guide - the most understandable and a comprehensive guide to choosing a 3D printer.
The goal was to rank 3D printers by: print quality, ease of use, build quality, reliability, failure rate, customer service, community, running costs, software, and cost.
In order to better understand which machine is right for you, all desktop 3D printers have been divided into 5 most common categories. For enthusiasts, plug and play, kit/do it yourself, budget and of course resin. A total of 20 models made it to the list of the best 3D printers for 2016, and each of these machines has at least 20 in-depth reviews from experienced users that helped determine their position on the list.
In addition, 126 more models with 5 or more reviews were included in the extended rating of 3D printers.
Enthusiast printers are a category of 3D printers aimed at those users who are looking for reliable machines capable of consistently producing high quality products. They are easy to use and quite flexible regarding updates and various modifications. In addition, active communities have already been created around printers in this category, where you can learn a lot or ask for advice. These printers are best suited for hobbyists, designers or small businesses. The top five in this category has very small gaps, and the category itself is by far the most numerous.
1. Maker M2 2. Lulzbot Taz 5 3. DeltaWASP 4. Flash Forge Creator Pro 5. Witbox 6. Ultimaker 2
Approx. Focusing on the needs of the target audience for these printers, the study focused less on ease of use and more on openness, upgradability, print quality, and community.
Plug 'n' Play printers are considered the easiest to use and can start printing as soon as you take them out of the box. Based on consistently high print quality, low crash rates and excellent user support, this group of printers is ideal for those who are primarily concerned with quality and headache-free. They are limited in the possibilities for modification and various experiments.
1. Zortrax M200 2. CEL Robox 3LulzBot Mini 4. BEETHEFIRST
Approx. For this category, reliability and ease of use are fundamental characteristics, and the quality of customer support is also a significant factor.
Do you want to experience what 3D printing is like, but have limited finances? Maybe you are a student taking the first steps in this direction, or you just don’t want to bother and assemble a printer yourself, but want to save money, then one of the budget 3D printers will suit you.
1. CraftBot 2.Printbot Simple Metal 3.UP Mini 4. FlashForge Creator
Approx. The budget category includes 3D printers assembled by manufacturers and the price of which does not exceed $1000.
Those who love to make things and assemble construction sets will get the most satisfaction from 3D printers from the KIT/DIY category (kit/do it yourself). Born in fab labs, workshops and garages around the world, fully open 3D printers form the backbone of the DIY community.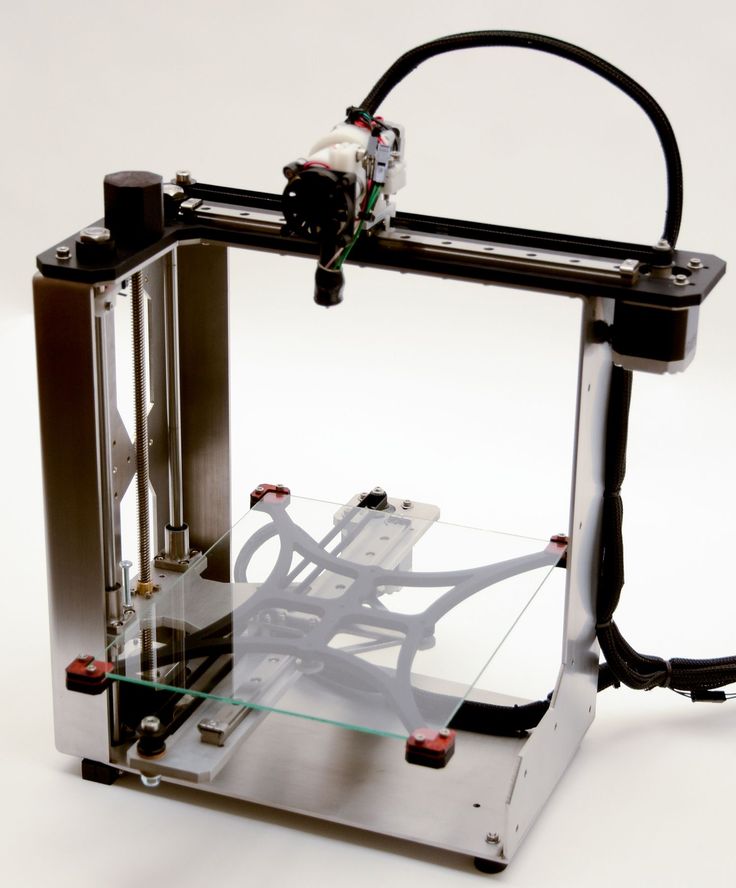 Although they can be difficult to assemble and calibrate, and the print quality will not be up to par, you can improve and refine it endlessly, here you are only limited by your own imagination.
1. Rostock MAX 2. Prusa Steel 3.Mendel90 4. Ultimaker Original+
Approx. When considering printers in this category, there was less emphasis on ease of use and more on the community aspect.
Printers in the following category are the most expensive and require additional post-processing, but print quality and accuracy are unmatched by other desktop 3D printers. We are talking about machines that create objects from resin, not a solid bar. Such printers will come in handy in the production of all kinds of prototypes and high-precision master models.
1st Form 1+ 2. B9 Creator
Approx. For printers in this group, the study focused more on the ease of use and reliability of the machines, as when working with them, quite dangerous materials are used.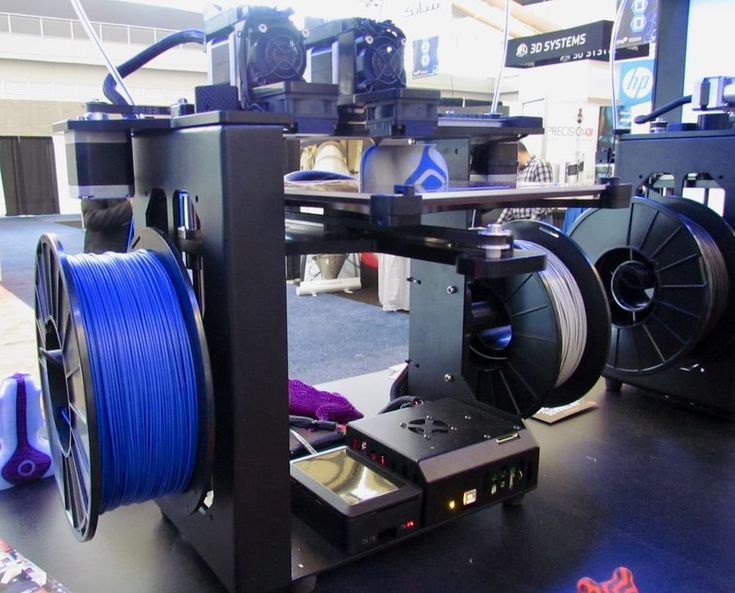
P.S. Many thanks to the entire 3DHubs community, whose centers of activity are located all over the world and we are those who are passionate about 3D printing technology and moving it to the masses. Without all of us, it would be impossible to compile the 3D Printer Guide for 2016, join us!
Detailed view of the MakerBot Replicator Plus 3D printer
3DPrintStory Reviews Detailed review of the 3D printer MakerBot Replicator Plus
The MakerBot Replicator Plus has received improvements in terms of design, speed and many other features compared to previous models. This time around, MakerBot tried to attract a professional audience to 3D printing, and it succeeded. This 3D printer is quieter and has many other advanced features that make it one of the strongest 3D printers in its price range.
MakerBot Replicator Plus 3D Printer Specifications
Let's take a look at the MakerBot Replicator Plus features that make this 3D printer a real gem. It has a few limitations and is expensive. But the implementation of the rest of the nodes of this 3D printer makes it easy to neglect these shortcomings. Overall, this 3D printer has been and remains very popular among 3D printers.
The MakerBot Replicator Plus is all black and looks great thanks to its rugged design. The company has increased the dimensions of this 3D printer compared to its predecessor, which is 410 x 440 x 525 mm. The weight is about 18 kg. Nozzle diameter 0.4 mm.
The build volume of the 3D printer is 165 x 290 x 190 mm. Open frame design. It is open at the top, front and sides, providing a great view for those who like to follow the 3D printing process.
MakerBot boasts many updates that have been implemented in this 6th generation released by the company. All new features are worthy of attention. This model would be a great option for teaching the basics of 3D printing or for those who want to start a small 3D printing business. With 25% more workspace and 30% faster 3D printing than the previous version, the MakerBot Replicator Plus is a clear improvement over its predecessor.
Price MakerBot Replicator Plus 3D Printer
MakerBot succeeded in many ways in terms of quality, but not in terms of price... The MakerBot Replicator Plus is expensive. $2,499 is a hefty amount of money for most people, especially if someone is just getting started with 3D printers.
Although the company intended to target the professional and educational sector, the price was even by that measure. There are many professional 3D printers with comparable features at a lower price.
The price of the MakerBot Replicator Plus certainly limits its availability to most users. But as the 3D printing community grows, the number of those who can pay that price has also increased. This way, MakerBot will have no problem selling its item, given that its features are worthy for this price. Let's now dig deeper to see what exactly this 3D printer delivers at such an indiscreet price.
MakerBot Replicator Plus 9 First Impressions0055
The first impression of the MakerBot Replicator Plus is the same 3D printer as its predecessor, with a slightly expanded 3D print workspace. In fact, it has the same metal case with plastic containers. Like most older versions, the model is sleek and durable. The open design makes this model suitable for any lab or garage. This same openness makes the MakerBot Replicator Plus a great option for training centers.
However, when you start setting up this 3D printer and start 3D printing, you will realize that many changes have been made to the functionality of the previous version.
Size is the first thing people pay attention to. Once you start plugging this model into an outlet, you will realize that it is nothing like the fifth generation version. If not for the biting price, then the MakerBot Replicator Plus is a great choice for a desktop 3D printer.
Setting Up the MakerBot Replicator Plus 3D Printer
Setting up the MakerBot Replicator Plus is simple, but the instructions could be better illustrated. To set up, you need to connect to WIFI and download the mobile phone app. There is no mention of which OS version is compatible with the mobile phone app. Doesn't work with old version.
Problems may occur if your phone's OS is not updated to the latest version. However, this is not a big problem and it can be fixed. But at some point, the instructions will continue to be confusing. Setup can be done via the USB connector on the back of the 3D printer. There is no mention of this in the instructions. You can also use an Ethernet cable for the necessary settings.
You also need to create an account with MakerBot before starting setup. This gives you the added benefit of remote viewing and 3D printing.
In addition, the mobile phone application is quite easy to use and even beginners will find it useful when setting up a 3D printer.
MakerBot Replicator Plus 3D Printing
This 3D printer is based on the FDM process. The material is heated and extruded to be deposited layer by layer on the worktable. After each layer cools and solidifies, another layer of molten material is applied to the previous layer. This way the whole part will be printed.
Controls and User Interface : Controls are placed at eye level in front of the 3D printer body. Thanks to a clear interface, you can choose between different setting options. The display can be navigated using one button wheel and two more buttons. You can also preview the model before 3D printing. This is a great feature as you can use this 3D printer without a desktop computer via the USB port to preview your model before starting 3D printing.
Material storage : MakerBot has made major changes to the material storage system. Unlike many other options available on the market where the spool storage is located outside, the MakerBot's plastic spool storage is hidden in the back of the 3D printer. This allows you to control the remaining material. Loading material is also simple and convenient. MakerBot didn't mention it directly, but you are forced to use only MakerBot stuff. This is noted in the 3D Printing Materials Warning from other manufacturers, which states that the warranty may be voided if other materials are used. The material offered by MakerBot is as expensive as their 3D printer itself. Coil of PLA plastic weighing 0.9kg will cost from 48 to 65 dollars. Available in about 30 different shades and types of materials.
3D Printing Process: While printing with this 3D printer is effortless, you may have to work hard to remove parts from the desktop when printing is complete. Before printing details, you need to adjust the layer height. After that, a file for 3D printing is generated and sent to the printer for direct printing. After starting 3D printing, you can turn off your computer or control the printing process by turning it on.
3D print speed : The company claims that this version prints 30% faster than the previous model. And this 3D printer is really faster.
Extruder : MakerBot offers a "smart" extruder, available at an additional cost, that is designed to use 1.75mm PLA. It can detect when material is running low and immediately pause 3D printing. It also notifies the user to submit material in order to start 3D printing again.
MakerBot Replicator Plus 3D Print Quality
MakerBot Plus 3D print quality is better than most professional 3D printers. However, at $2,499 you can expect better results. Perhaps the company could work a little more on print quality in the context of the overpriced.
With this 3D printer, you can print fine details in decent quality. However, there are a few problems, such as the tendency of this 3D printer to leave filaments between voids. Although they are removable, they still leave traces and in fact the print is not perfect.
Smooth and beautiful curves can be printed. This 3D printer allows you to create curves with fine details. However, the print speed will have to be reduced to improve detail and accuracy.
Geometric prints are also great, although not as dramatic. The MakerBot Replicator Plus can create bevelled edges with fine detail. This 3D printer does an excellent job of making sculptures and geometric shapes. However, don't expect perfectly sharp corners. Remains of material between the voids will also show up in similar 3D models.
You can also try printing assembled gears. However, when 3D printing sets of gears, the amount of post-processing work increases.
The biggest flaw that calls into question the quality of this 3D printer is desktop without heating . ..
..
MakerBot Replicator Plus 3D printer software
The MakerBot Print application compatible with this model can be considered almost flawless. With simple commands, you can start the 3D printing process in seconds. Just open the printable file and send it for 3D printing. You can even export files to USB or other external drives. The application can be used with a mobile phone or tablet. Thus, you can send a 3D print command over Wi-Fi or even remotely.
MakerBot Help Desk
The company offers good customer support. Your inquiries will only be welcome, and you can get feedback from the manufacturer pretty quickly.
MakerBot Replicator Plus performance evaluation
Before buying a 3D printer, the user looks at various parameters. Based on these parameters, there are a few things you can consider before making your final decision.
MakerBot Replicator Plus 9 Cost0102 : 3D printer is expensive. Since professional 3D printers start at a lower range, there are many options available at a lower price point. The price also looks higher compared to the quality that this 3D printer provides. What's more, FDM 3D printers are available for as little as $200... However, they won't give you the power that the MakerBot Replicator Plus provides.
3D Print Quality MakerBot Replicator Plus : Expect decent 3D print quality with minor to minor flaws.
3D print speed MakerBot Replicator Plus : 3D print speed is excellent. However, there are some issues with creating finer details at high settings.
The possibilities of the 3D printer MakerBot Replicator Plus: The possibilities of the 3D printer are enormous. You can use this printer for both complex geometric shapes and regular models. However, you are limited to using PLA.
Practical 3D printer MakerBot Replicator Plus : This 3D printer is not designed for high end 3D printing.