Makerbot digitizer 3d scanner
3Dnatives Lab: Digitizer 3D Scanner by MakerBot
Published on April 19, 2017 by Alexandrea P.
Today, the 3Dnatives lab will be analyzing the Makerbot Digitizer 3D scanner to continue our series of tests on 3D scanners and printers! Don’t forget to check out all our scanner tests here, and to give us any comments, tips or feedback that you have!
Unpacking
To start things off, we begin by unpacking the scanner. Right away, we found an array of items that it was packaged with, which are as follows:
- The digitizer tucked between two blocks of foam for protection
- A regulator for the calibration of the scanner
- A power supply (for our friends in Europe, there is no European plug. Your dealer should add the suitable cord if they are aware of where you are in the world)
- A USB connection cable (A classic USB printer cable)
- A user manual
The Digitizer’s careful packaging
Functioning
The Digitizer 3D Scanner creates a 3D model of a physical object by taking a quick sequence of photos while the object rotates on a turntable. To accomplish this:
- The scanner has two lasers that are mounted on the left and right corner of the Digitizer that allows it to perform a linear scan that determines the profile of the object. The camera will then take a series of photographs of the object
- MakerWare software for Digitizer combines the photographs and the linear scan to create a scatter plot.
- Once the scan is complete, the MakerWare software will then generate a 3D mesh from the collected data. It will then send the mesh directly to the 3D MakerBot printer via MakerWare, share it through a sharing site like Thingiverse, or can be edited with a modeling software (this scanner can be used with most modeling softwares).
- In addition, the Digitizer has a dimensional accuracy of up to 2mm.
First Steps and Calibration of the Scanner
The first thing to do once your scanner is unpacked and plugged in will be to calibrate it. It is important to follow the following 2 points:
- Brightly illuminate the scanner tray by using a light source, such as a desk lamp for example.
 The light source must not be visible to the camera in order to no disrupt it. Good brightness is paramount and is directly related to the quality of your scan.
 - Place the Digitizer at about 20 cm from a uniformly colored wall. The laser pointers will be pointed towards the wall, giving you better results.
Next, install the latest version of the MakerWare software. Once MakerWare has been launched, you will need to turn on your scanner and connect it. After, you can calibrate the horizontality of your tray, prepare your camera, and align your lasers using the template given with the guidelines in your software.
- The checkerboard gauge for calibration of the Digitizer
Scanning of an Object
As part of our test, we decided to use a model of the Sphinx that had dimensions of 15 x 5 x 10 cm. After scanning, which lasts 9 minutes regardless of the size of the object, the scatter plot was created.
Once the first scan is complete, you are able to see the imperfections that can occur when scanning objects with sharp edges or hollow parts.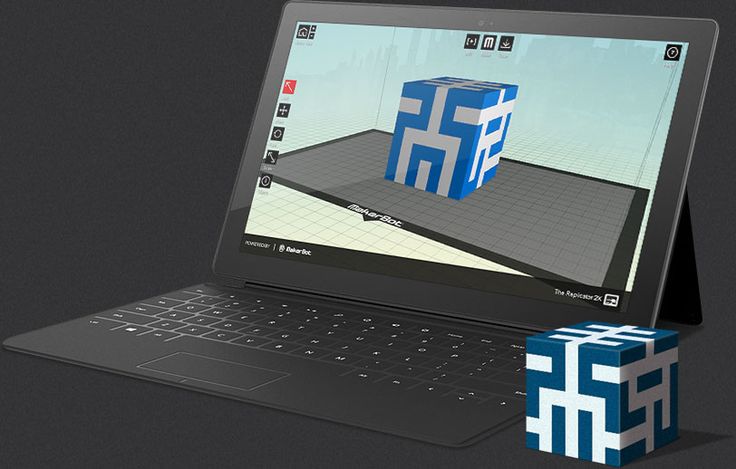 When this happens, you may need to do a new scan with new positioning of the object at another angle. In the MakerWare version 2.4 (which we used), it was possible to do by clicking on the “Multiscan” option.
Video of our digitization of our Sphinx model:
Thanks to this option, it was possible to generate several models that we could merge together over time. After 3 scans of our Sphinx, the space between the legs and the sharp angles were all perfectly digitize, which was not the case after just one single scan. If you want to digitize more than 5 times with one object, we would advise against it, as it will give you worse results than ones that show improvement. This is because the state of the surface will depreciate. Once your file is created, you can then save the 3D model in a .thing format for MakerBot or in STL format.
Below you can find a comparison between the digitized Sphinx after one scan and the same Sphinx digitized after our 3rd scan thanks to the “Multiscan” option. You will be able to notice the improvements between the two versions, mainly at the hollow levels and base.
Results with 1 scan:
Results with 3 scans:
Advice for Scanning
Some objects will give better scans than others, so we decided to give you some guidelines to help improve your scans. Typically, be sure to scan:
- An object whose dimensions are greater than that of a cylinder (50 x 50 mm)
- An object whose dimensions are smaller than that of a cylinder (203 x 203 mm)
- Objects who weigh less than 3 kg
- Stable objects
- Opaque objects
On the opposite side, avoid scanning:
- Transparent objects
- Shiny or reflective objects
- Very dark objects
If you still want to scan a transparent object, a tip would be to paint or powder the object to get a better capture. Also, recalibration of the Digitizer is advised after every 20 scans. In general, there is no other maintenance operation that you need to perform on this scanner.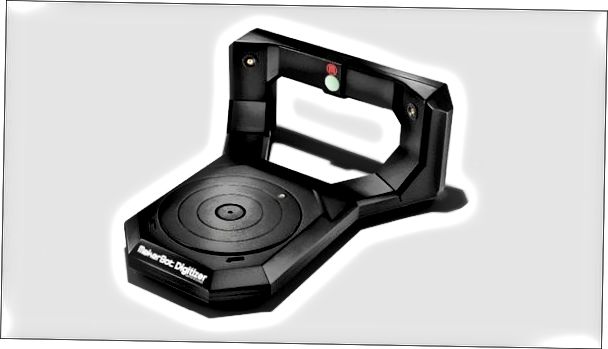
Here you can find a preview after our rendering of our 3D printed scan (the original is on the right):
The result is far from perfect but it still was a cool experience!
MakerWare for Digitizer – 3D Scanning Software – Dream 3D
Dedicated MakerBot Digitizer 3D Scanning Software
FREE
The easiest way to give a physical object a brand new life in the digital world.
Download
Overview
A little bit about MakerWare for Digitizer
Easy to use – A powerful process that runs with two-click simplicity and outputs standard 3D files.
Watertight models – Creates a seamless digital mesh; no patching, stitching, or repairing required.
Ready to print – Start printing your model as soon as you finish scanning.
Combine two or more scans – MakerBot MultiScan Technology allows you to scan objects from multiple angles to capture the top, bottom, and hidden parts of your object. You can then “merge” them together to create the best possible 3D model.
Share straight to Thingiverse – Create a personal collection, scan, take a photo and share.
Type
3D Scanning Software
Operating Systems
Windows, Mac, Linux
Opensource
No
No. of Computers
No limit
Gallery
Take a closer look
Videos
Sit back and enjoy some videos about this software
Please subscribe to the Dream 3D YouTube channel…
3D Scanners
This software is designed for use with these 3D scanners
No products found which match your selection.
Popular
Recent
- it's a very nice piece, i didn't know that a printer could...July 6, 2018 - 4:39 am by Nataly Cuellar
- If your were asked to pick between the Ultimaker 2 or the.
 ..November 12, 2015 - 3:28 pm by Scott Charlson
 - Replacement perforated plate being sent direct from Zortrax,...July 8, 2015 - 2:21 pm by James
- Layers slipping - was advised to check grub screwsJuly 8, 2015 - 2:20 pm by James
Tags
3D Printing 3D Printing Business Case 3D Printing Composites 3D Printing in Film Industry cc 0.6 mm red Ultimaker CES Show Dental 3D Printing Injection Moulding Magna raise3d Ultimaker 2 Extended Ultimaker 2 Go Ultimaker 3D Printer Ultimaker print core Ultimaker S5 Ultimaker S5 Pro Bundle Zortrax 3D Printer
News & Blog
- Idea Maker – How to apply Textures to your 3d modelSeptember 30, 2022 - 9:52 am
- Replique and BASF Forward AM’s food safe 3D printing process for MieleJune 29, 2022 - 7:55 pm
- 3D Printing Enables Advanced Radiation Medical TreatmentJune 29, 2022 - 7:32 pm
- Ultimaker PVA Removal Station – enabling efficient post-processing with peace of mindFebruary 18, 2022 - 9:04 am
- 3D-Printed Shoe Uppers Accelerates Small Batch ProductionDecember 6, 2021 - 1:06 pm
Customer Reviews
Newletter Sign Up
© Copyright - Dream 3D Ltd
Cookie Policy Privacy Policy
MakerBot Digitizer 3D Scanner
MakerBot Digitizer is a desktop 3D scanner from the world famous American company MakerBot. The scanner was announced in 2013 and immediately proved itself well.
Scanning is carried out using one camera and two lasers that scan an object mounted on a rotating stand, measuring 20.3 x 20.3 x 20.3 cm. Since you do not move the object, but the scanner, the scanning time is almost halved , but now the size and weight of the scanned item is limited.
The printer scans objects of complex geometry worse due to rigidly installed lasers, however, with a resolution of 0.5 millimeters, the scanner is perfect for scanning at home, which does not require complex technical solutions and high accuracy.
As a result, you get a digital model in STL format, which is suitable for both 3D printing and further use in digital form.
Key features
| Manufacturer | MakerBot |
| Camera Resolution | 1. 3 MP 3 MP |
| Model | MakerBot Digitizer |
| Manufacturer: | MakerBot |
| Scan area: | up to 20.3 cm (diameter) x 20.3 cm (height) |
| Scan time: | About 12 minutes |
| 3D model formats: | STL |
| Accuracy 3D point 1 zone: | 2 mm |
| 3D resolution 1 area: | 0. 5 mm 5 mm |
| Camera resolution: | 1.3 MP |
| Light source: | laser |
| Scan principle: | contactless |
| Object size range: | 203x203x203 mm |
| Country of manufacture: | US |
| Model: | MakerBot Digitizer |
| Dimensions: | 475x411x203 mm |
| Weight: | 2. 1 kg 1 kg |
| Specialization: | Education |
| Interfaces: | USB |
| Software: | MakerWare for Digitizer |
| Optional: | Scanner type: desktop |
Other offers:
- 3D Scanner RangeVision Smart
Price:
- 3D Scanner Witebox Ciclop DIY
Price:
- 3D scanner David SLS
Price:
- 3D Scanner
Price:
MakerBot Digitizer Desktop 3D Scanner at an Affordable Price
Description
MakerBot Digitizer Desktop 3D Scanner
The compact MakerBot Digitizer Desktop 3D Scanner is great for scanning small, stationary objects. The device works on the technology of laser 3D scanning and allows you to get detailed 3D models of high quality. The digital data obtained as a result of the work requires minimal post-processing and is suitable for reproduction in volume using a 3D printer. On average, a 3D scan takes about 12 minutes. This is enough to obtain an accurate and high-quality 3D model.
This 3D scanner is suitable for a wide range of applications. It can be used both in prototyping and for various engineering and creative projects. The MakerBot Digitizer Desktop 3D Scanner is an indispensable tool for small-scale production, small businesses, offices and workshops. Also it will find application in the household and educational purposes.
MakerBot Digitizer Desktop 3D Scanner Guidelines
Each instrument has specific operating guidelines, limits, and limits. The MakerBot Digitizer Desktop 3D scanner is no exception, and below we list the features of working with it.
The MakerBot Digitizer Desktop 3D scanner is perfect for scanning:
- Objects larger than 50x50 mm and up to 203x203 mm;
- Objects weighing up to 3 kg;
- Fixed objects;
- Opaque objects.
It may be difficult to scan transparent, bright, or reflective objects. It can also be difficult to work with very dark objects, and objects with a hairy surface.
Specifications
| Scan technology | Laser triangulation |
| Body material | PC ABS |
| Scan area | 203×203 mm, cylindrical |
| Ambient operating temperature | 0 - 32°C |
| Scan speed | ~12 minutes |
| Release details | 0.5 mm |
| Precision | ±2.0 mm |
| Interface | USB |
| Software package | MakerBotMakerWare™ for Digitizer |
| File types | STL, Thing |
| Supported operating systems | Windows (7+) Mac OSX (10. |