Make homemade 3d printer
How to Build a 3D Printer From Scratch
If you are reading this article that means that you’ve probably decided to join the community of 3d printing enthusiasts and find out more about 3d printers, or maybe you have already got some experience in it and are ready to try to create your own 3d printer from scratch.
In this article you will find general understanding how 3D printers can be built as well as links to really useful resources where you can find more detailed information with step-by-step description.
Currently there is a big variety of 3d printers in the Internet that already assembled and are ready to print right after you unpack them from a box, of course you also need to buy a 3d printer filament for it. Do not forget that not all 3d printers can use the same filament types, so please read the instruction before you purchase it.
But for some people who love to make something new with their own hands can be more interesting to build their own 3d printer from scratch. Based on our research the 3D printing community is filled with many enthusiastic people so called DIY’ers (Do It Yourself’ers), who are fascinated with building 3d printers literally almost from scratch.
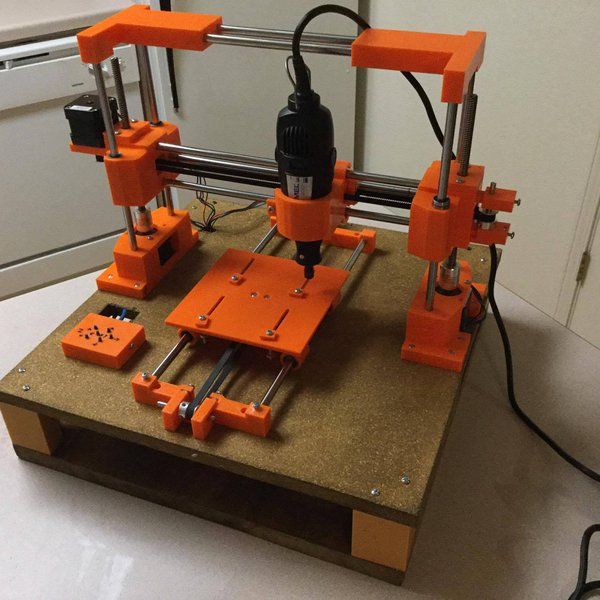
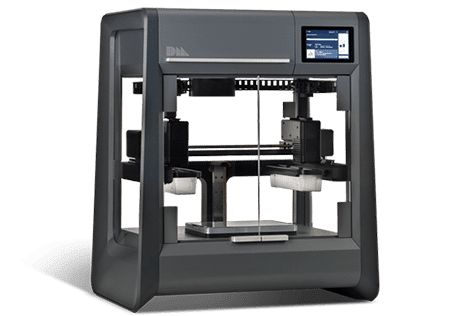
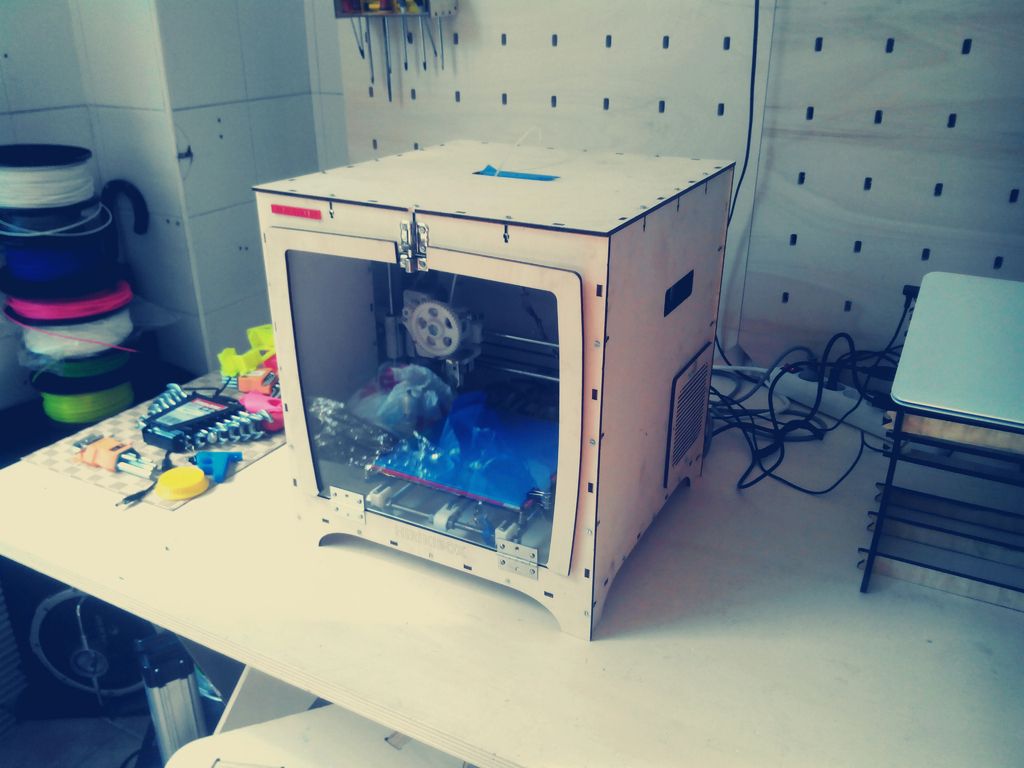
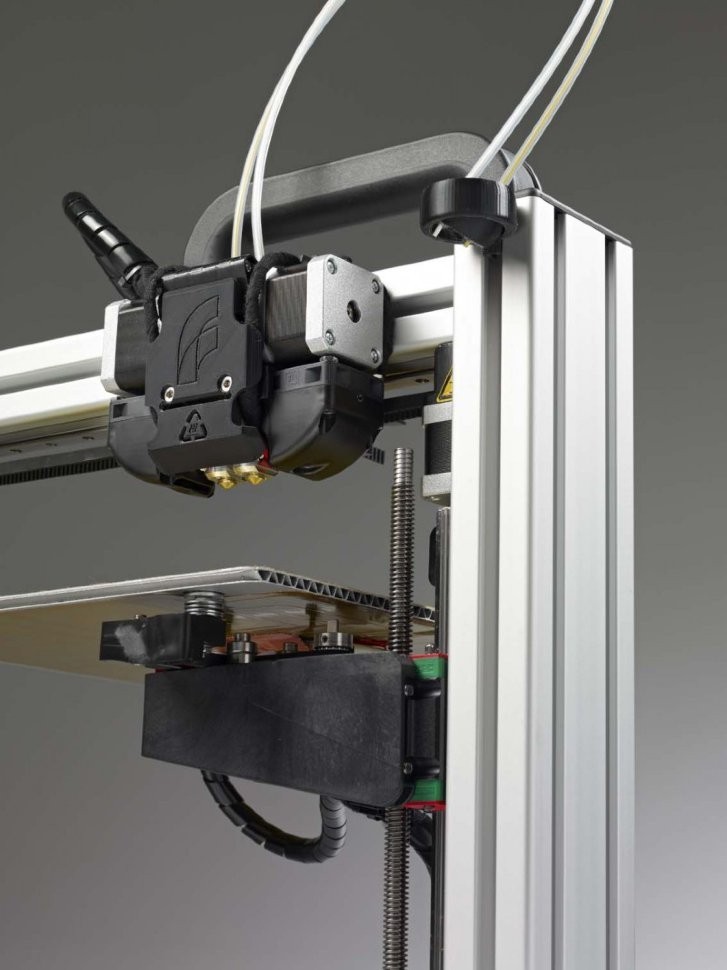
Good example of it is RepRap movement. RepRap is short for a Replicating Rapid-prototyper. In other words it is the self-replicating 3d printer. In fact most of today’s top consumer level 3D printers (picture above) are originated in one way or another from RepRap.
You can find a lot of examples on how to build a 3d printer from scratch on RepRap website, but we also want to describe some of more essential steps in order to give an overall understanding of what to expect if you really decide to make your own 3d printer.
The first step is to find and buy 3d printer DIY kit. Kits usually contain most of parts needed to assemble the printer and can be divided into two main types:
Scratch Built 3D Printer – This 3d printer DIY kit is for those who prefer to build thing from scratch, or in other words go to DIY RepRap route. Apart from some essential advantages this approach has also its disadvantages. In theory it can save you some money and since you build it from scratch you will know every nut and bolt in it by the time you can use it and successfully print your first object. Main disadvantage of this method is time. Literally it will take a lot of time to deal with all these hundreds of bolts, wires, belts and much other stuff. In the end you still need to select and purchase or build a controller board, but it depends on your skills level.
Kit Built 3D Printer – This type of kit is good if you want to save some money and at the same time not to deal with all challenges described in the 1st kit type. Many manufactures sell such kits with “easy-to-assemble” instructions included. I doubt that it will be as easy as assemble a chair from IKEA, so you still have to be mechanically inclined and able to understand basic geometry. Some of such kits contain not all parts and you may need to buy something in addition.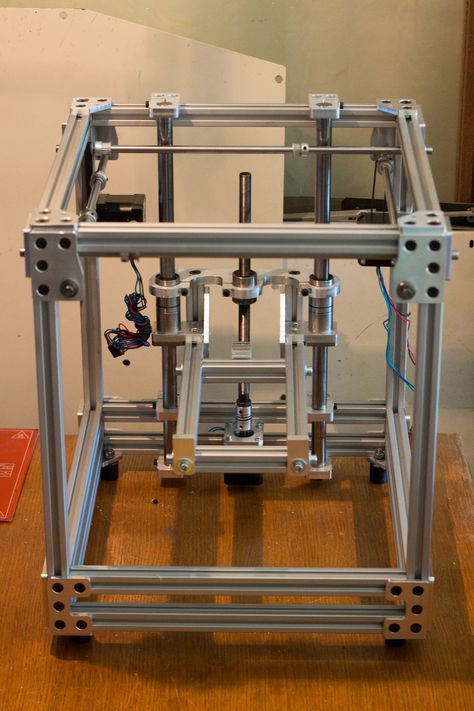
The next step will be to determine the design for your 3D printer. In my humble opinion most of DIY 3D printers have not very breathtaking and futuristic design in comparison with MakerBot and other brands. But it is also a matter of taste, for some people the design is not very important.
Once you have got your 3d print DIY kit and chosen the design you could go ahead and start the most fascinating and time consuming part – build your own 3d printer. Be prepared for sleepless nights and a lot of fun. Maybe you will make up something new and present your findings to RepRap community.
When the hardware part of the 3d printer is ready you also need to add a software component to it. It basically does the following things: allows you to view and alter 3d graphical objects, as well as converts the 3d images into instructions that 3d printer can understand.
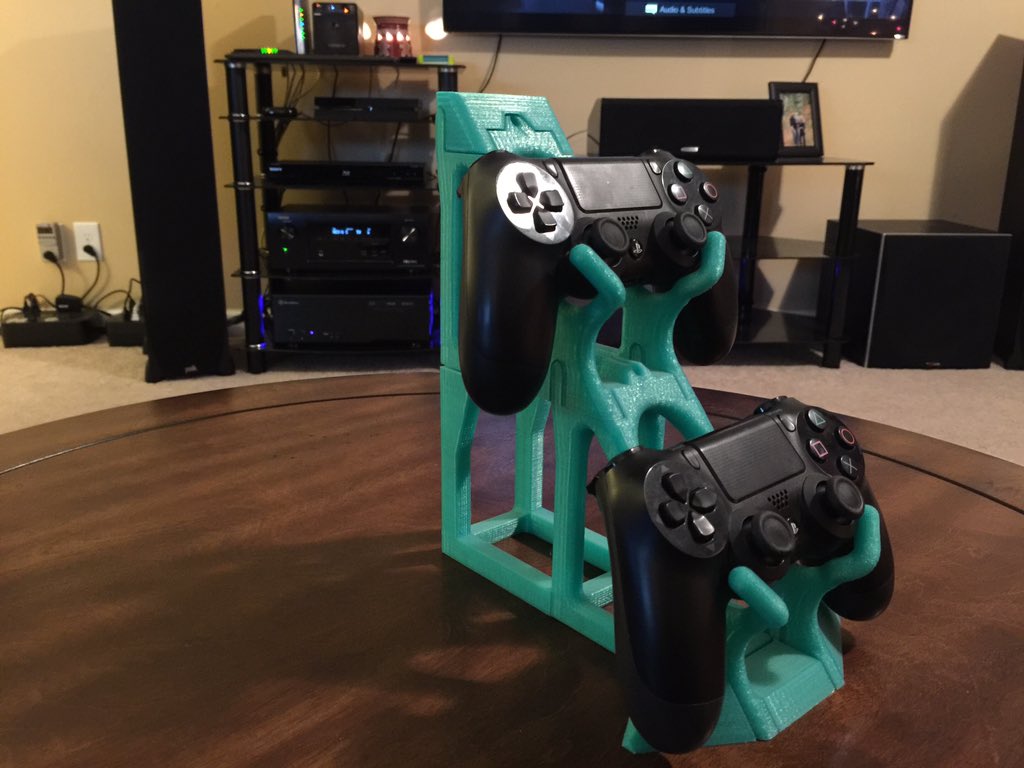
Finally you can 3d print your first object! If you do not have anything to print, you can find a big variety of objects on specialized marketplaces such as Shapeways, Thingiverse and others.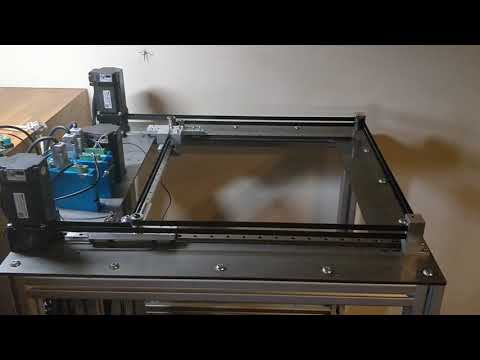 Before printing make sure that the object you want to 3d print has the right size and fit on the printer frame.
At the end there is a list of some links where you can find more information about how to build your own 3d printer from scratch:
- RepRap options
- 3D Printer DIY: How to Build Your Own 3D Printer from Scratch
- 3D Printing: Build Your Own 3D Printer and Print Your Own 3D Objects
- Arduino Controlled CNC / 3D Printer Hybrid
- El34 World – 3D Printer Build using 1 inch T-Slot extrusions
- CNET 3D Printer Build Week
Also watch a video from Ben Heck in which he answers on some 3d printing related questions.
Related Articles:
- What is 3d printing – 3D printing technologies overview
- What is 3D Printing?
- History of 3D Printing
- Direct and Binder 3D Printing techniques
- Photopolymerization and Sintering
- 3D Printing Process
- 3D printing revolution
- 3D Printing Materials
- How to choose a right 3D printer filament type
- 3D Printer Filament Types Overview
- Types of 3D printers or 3D printing technologies overview
- How to find and buy a right 3D printer
- History of 3D printing in one picture
- Places to download 3D printer files and files formats overview
- 3D Printing Services Overview
- You Should Know These Important 3D Printing Concepts
How to build a DIY 3D Printer step by step at Home
DIY 3D Printer: In this blog, you can make your own homemade DIY 3D Printer projects by assembling scratch parts with Arduino board.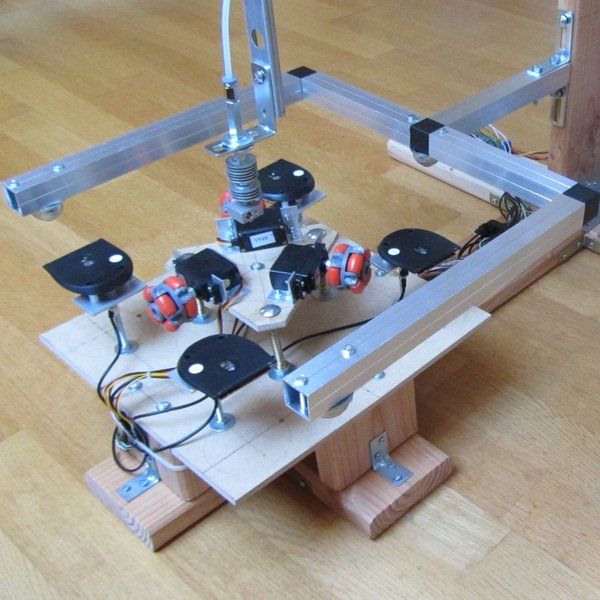
This 3D Printer technology is playing a very important role in the 21st century. Maybe everyone knows about 3D Printers. If you don’t know then don’t worry, I will explain everything here so you don’t need to go to another place.
In this article, you can learn the introduction of 3D Printer and you can also make your own 3D Printer at homes by following below step. This 3D Printer you can make it for your school or college projects for science exhibition.
I made this 3D Printer approx cost of ~250$.
Table of Contents
What is a 3D Printer?
These machines are used to convert the 3D designs that a person can do with the help of the computer into a real object. To attain this, they use liquid plastic (or other materials) rather of the ink to which we are habituated, which after the impression solidifies and made the object.
They are usually big machines that can cost approx five thousand dollars, but technological progress is making them available to the general public easily.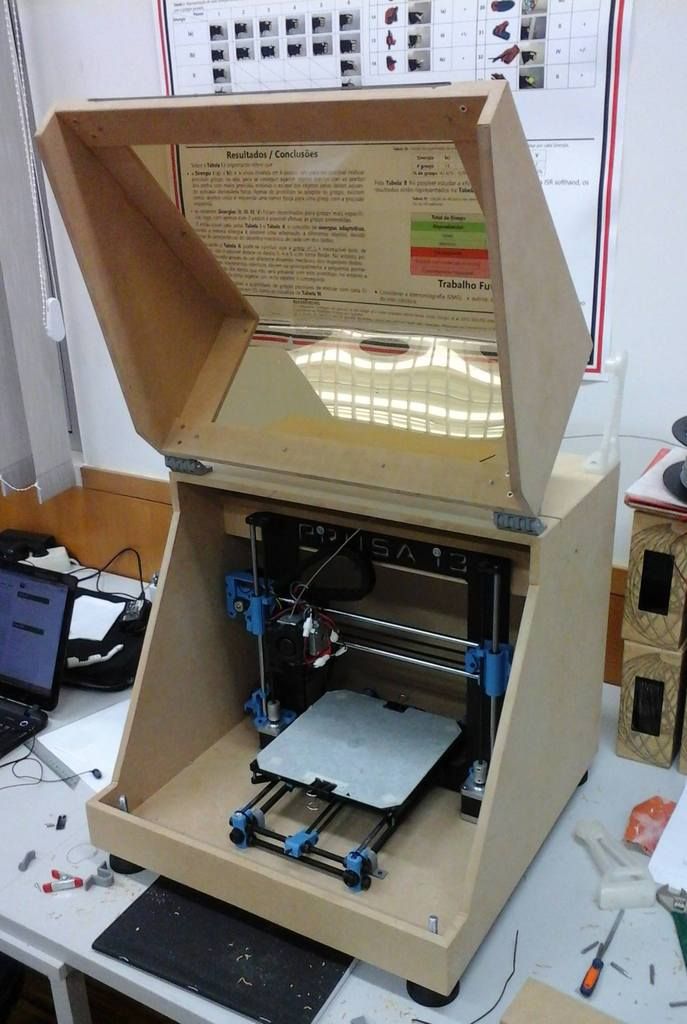
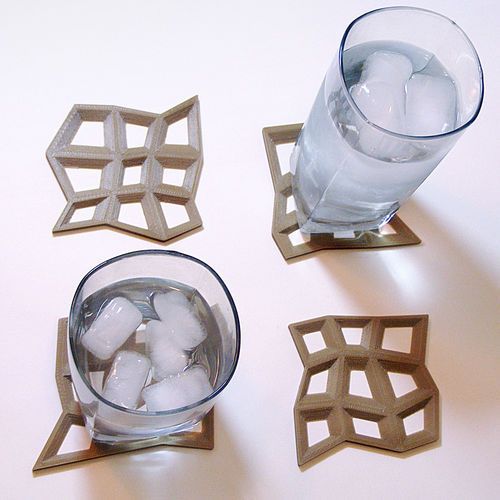
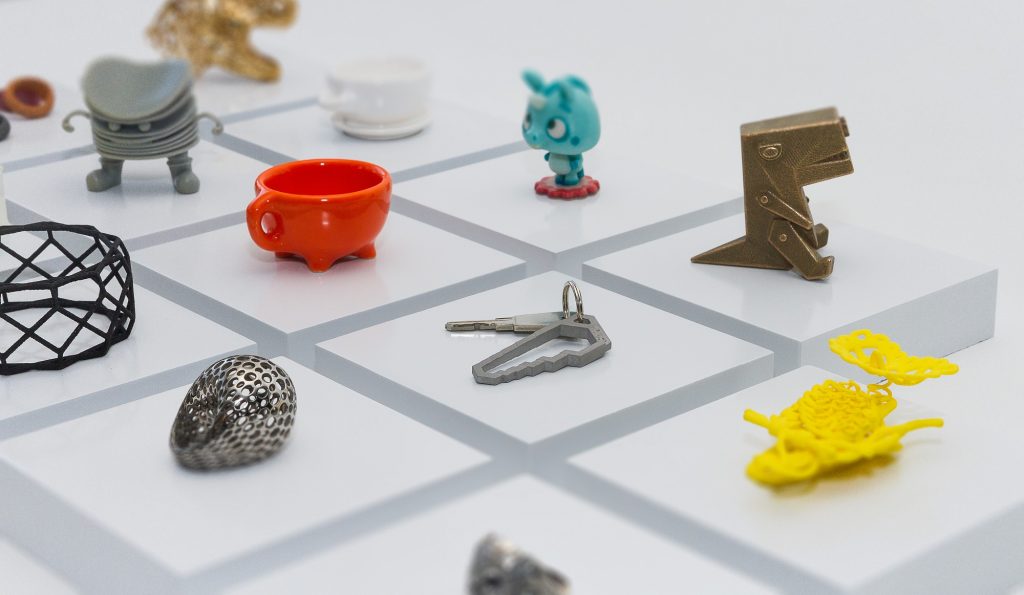
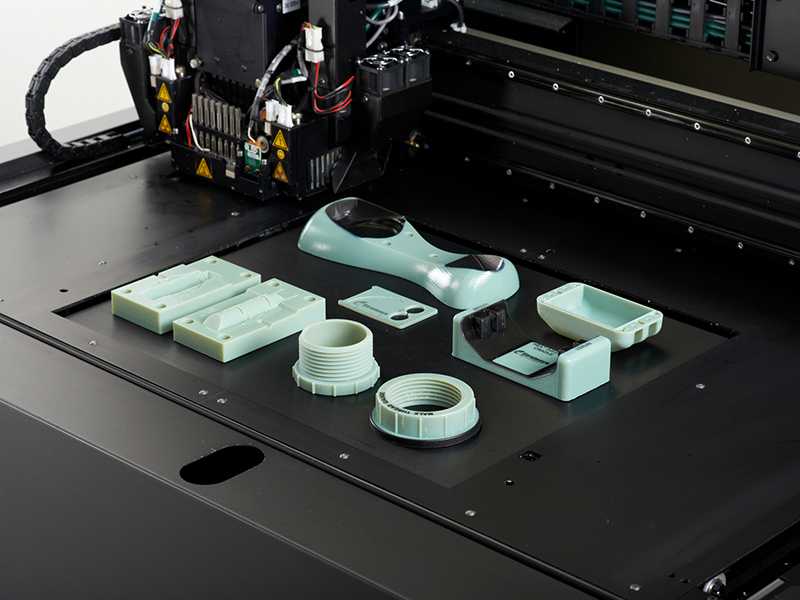
An object that made in 3D Printer shown in below image.
How 3D Printer Work?
There are various ways to get it, but the most common is to disjoin the 3D model into a very thin layer that is printed one on top of the other, and after that fix them, we have a 3D object.
To make it better sympathize, let’s check at one of the most used processes, stereolithography: the printer produce a thin layer of resin and “draws” a thin straight section of the product with a laser beam. That laser solidifies the pattern he drew and sticks it to the next layer of resin, and so the process is repeated layer by layer. At the end of all that resin come forth the 3D object designed.
You can see below image for better understanding.
This is not the only method and different materials like as dust or metals can be used, or even liquid plastic material that solidifies when leaving the printer, but the concept of layers constantly implement.
3D Printing objects are commonly measured in centimeters (it is a small object). but some printers can reach up to several meters. It is also a slow process that needs solitaire: for a 100-gram object, something build complex objects may require several hours. Finally, mention that the materials they use in the 3D Printer are not cheap.
Types of 3D Printer
When you ask me what type of 3D printer is great, I constantly answer with another question: What do you wish to print? You could say that there is no one type of printer great than another.
All Printer has its advantages and disadvantages. The different technologies are complementary and each one put up something different. For this reason, I have decided to make a list in which the different types of printers are classified:
- Extrusion (Fused Deposition Modeling)
- Resin (Photopolymerization)
- Powder (Powder)
- Others
Here we talking about only Extrusion 3D Printer.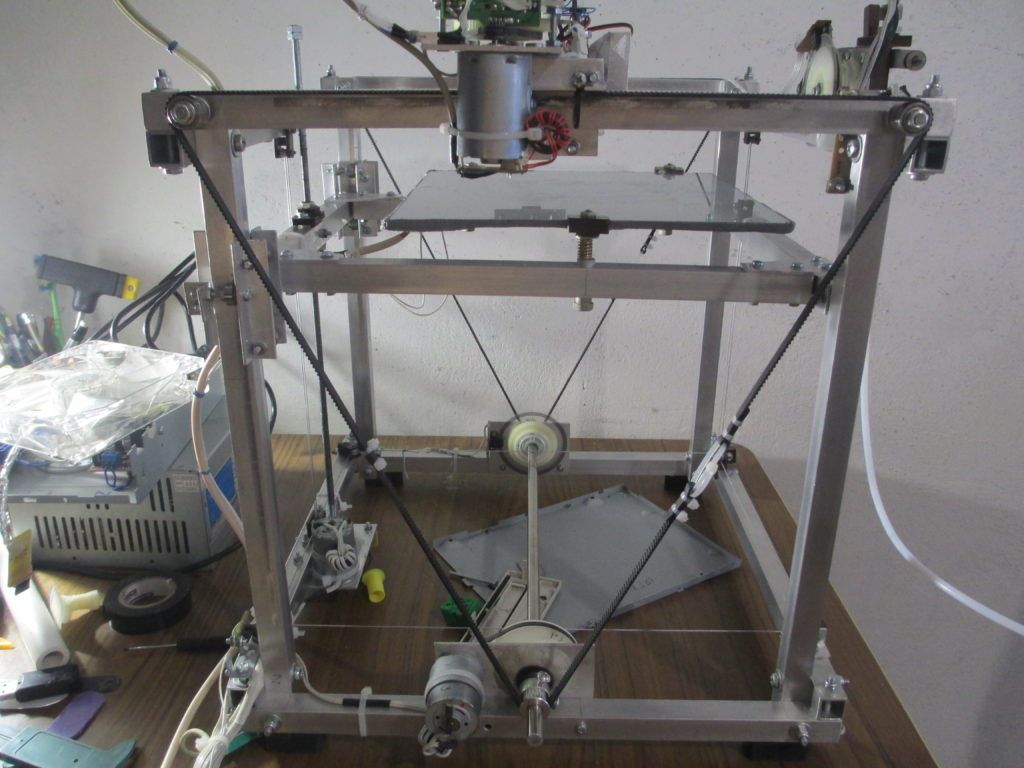
Application of 3D Printer
- Rapid prototypes of industrial products
- Medical Prostheses
- Create your own ornaments and then paint them
- Figures of your favorite character
- The very fast Manufacturing process
- Little skill required to make parts
DIY 3D Printer Homemade
If you are planning to make Science fair projects or Arduino projects for your school or college than follow this below step to make 3D Printer at home.
I also made that Video Tutorials for making these projects. so you can easily understand all the step easily.
Step:1 3D Printer Parts
To make 3D Printer you need to buy below parts. I will give the link of all the parts with cheap price. This link is an affiliate. so I get some little amount of commission. If you buy these part from below link, These would motivate me to do more new creative projects for you.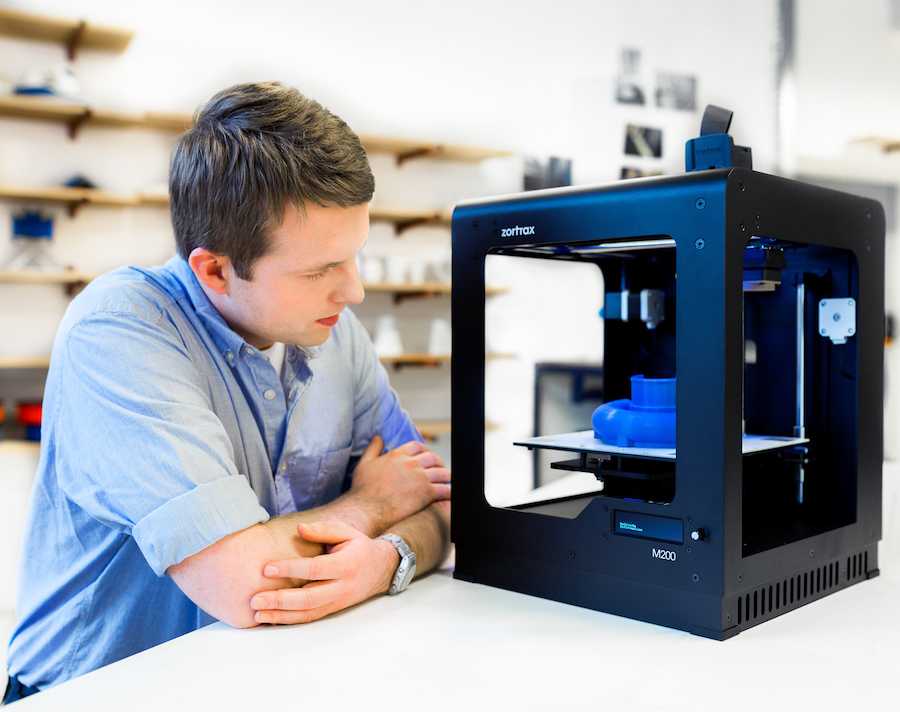
I will give two links to the same product. One is from Amazon and the other is from Banggood website. You can buy the parts by comparing both the website rate.
- 3D Printer Arduino kit………………………[Amazon/Banggood]
- Hot end…………………………………………………[Amazon/Banggood]
- Extruder………………………………………………[Amazon/Banggood]
- Stepper motor (4 no)………………………….[Amazon/Banggood]
- 12 Volt 10 Amp Power Supply……………[Amazon/Banggood]
- PLA Filament 1.75 mm……………………….[Amazon/Banggood]
- 5 x 8 Shaft Coupler(4 no)……………………[Amazon/Banggood]
- Trapezoidal Threaded Screw(2 no 150 mm length)……………………………………………………………………[Amazon/Banggood]
- Trapezoidal Threaded Screw(1 no 200 mm length)……………………………………………………………………[Amazon/Banggood]
- Pencil (or Smooth road)………………………..[Amazon/Banggood]
- 8 x 22 x 7 mm Radial Bearing(5 no)……………….
 [Amazon/Banggood]
 - Limit Switch(3 no)…………………………………………..[Amazon/Banggood]
- Heat Bed(optional)…………………………………[Amazon/Banggood]
- Linear Bearing LM8UU(optional)……[Amazon/Banggood]
- Acrylic Sheet
- Wooden Block
Other remaining material you can buy it from a stationery shop or near to your home easily available.
If you cant find than comment your requirement in the comment box. I will reply to you as fast as possible.
I want to give some information about some important parts of 3D Printers so you can easily understand what’s going on here.
3D Printer Arduino Kit
Buy the below circuit in the pack so you get a good discount. This pack includes the below parts.
- RAMPS 1.4
- Mega 2560 R3 board
- A4988 Driver
Extruder
This Part is very important in 3D Printer.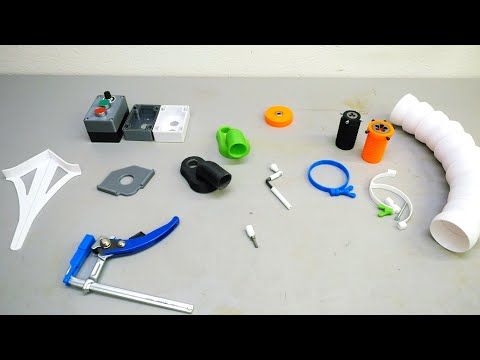 The extruder is used for the pushes the plastic filament inside the hot end nozzle.
There number of small component there in the extruder. see the below image and assemble as per video tutorials.
Hot end
This Part is melting the plastic filament, and this melted plastic goes inside the hot nozzle. It will solidify on the hotbed.
A hot end consists of the below parts:
- Cooling Fan
- Nozzle
- Heater
- Temperature Sensor
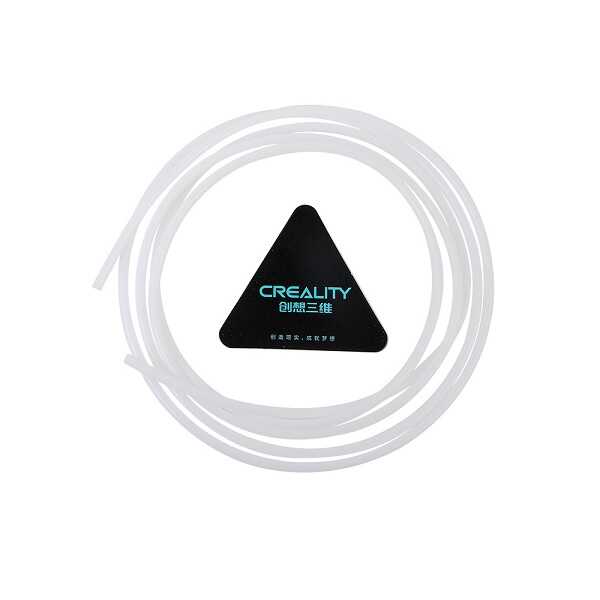
- Teflon Tubing
Power Supply
Here we use 12V and 10 amp Power supply. Please keep in mind that you must use thick gauge wire for output. because heater consumes lots of power so high current flow through this wire. If you use thin wire than it chances to heat up and it will be fire.
PLA Filament for DIY 3D Printer
This Plastic filament is pass through the hot end nozzle and solidified on the bed of the machine. There is a different color of filament available in the market. you can choose what you like.
Required Features of PLA Filament:
● It must have good quality PLA material
● Work with all type of 3D printers
● PLA is a biodegradable filament which is made from renewable resources, like corn starch, tapioca roots, chips or starch, or sugarcane
●It must permit higher print speed, more accurate locating of material with easy cooling.
● PLA smells out like cotton candy perfume when it is used
Step:2 Homemade 3D Printer(Video Tutorial)
Before starting to read blog see below video for better understanding. This Video is uploaded on my youtube channel CreativityBuzz. This Video is crossed more than 530000+ views. If you are interested to watch these type of electrical creative video than subscribe to my youtube channel for more updates.
https://www.youtube.com/watch?v=x5X6Gp-XMEs
Step:3 Axis of 3D Printer
3D Printer is working on 3 Axis, X, Y, Z. The main thing to learn in the 3D Printer is his axis.
If your axis is not properly managed than your machine is not working better.
Here I will show you an image of the 3D Printer Axis.
You can see that from image
X-Axis: It Controls the movement of the nozzle left an right
Y-Axis: Control the movement of Bed
Z-Axis: It Controls the movement of the nozzle up and down
Step:4 Y-Axis Making
The Y-axis controls the movement of the bed. To make a Y-axis arrangement we need 2 stepper motor. follow the below step to make it.
- Take the two acrylic sheet. Make a hole of the size of one hole is 8 mm and another hole size is equal to an outer diameter of bearing (22 mm).
- Stick this acrylic sheet with a wooden plate of length 22 cm
- Insert the Threaded Screw of length 150 mm inside the bearing
- Join the Stepper motor with the threaded screw by Coupling.
- Take a Syringe and cut both the end of it
- Cut both ends of a Ball pen cap
- Insert this cap into the syringe, so this is working like linear bearings. This is made because of the smooth movement of smooth toad when the operation is done.
- Now Insert the big size pencil inside the small hole of acrylic. You can also use a plain rod of diameter 8 mm
- Our one parts of Y-axis done
- Repeat the above 9 steps and make the same frame
- Now join both the parts by 3 pencils attach at the side of wooden plate
- Our Y-axis ready
Step:5 Bed Making
3D Printing is done on a bed. Keep in mind that bed must be at the proper leveling. If it is not in level than your object will not be accurate.
We can also measure the leveling of bed with the help of your smartphone. You can adjust the leveling of bed by nut fitted over the spring.
You can also make bed hating arrangement. But in this video, I was not use heating of bed.
Follow the below step for making bed arrangement for 3D Printer.
- Take wooden plate as per your size and fix on the nut of a threaded screw
- Make a hole of size 2 mm on that wooden plate
- Put the acrylic sheet on the wooden plate and fix it with the help of 4 screw
- Insert 4 screw on acrylic sheet
- Add Ball pen spring on that 4 screws. You can adjust the leveling of bed by this spring
- Now tight these spring by a nut
- Check your leveling by smartphone until it shows 0 reading. If it does not show than adjust the nut of that 4 spring.
Step:6 X-axis Making
The x-axis is very simple to make. You can make it by reading the instruction given in y-axis.
Here the length of Threaded screw is 200 mm.
One thing new is you have to choose the wooden plate length is 27cm.
You can see the image of x-axis that I made.
Step:7 Z-axis Making
This Z-axis is made on the X-axis with the help of Old DVD Writer Parts.
Z-axis is used for the up and down the movement of 3d printer nozzle.
Check below step to make z-axis.
- Attach the wooden block on the x-axis as per image
- Take an old DVD Writer from the Computer shop
- Attach the parts of DVD Writer as per above image
- Our Z-axis is ready to perform
Step:8 Attach X & Z-axis with Y-axis
Now its time to join X & Z-axis with Y-axis. For that, you have to attach two wooden blocks on the x-axis.
Attach this full assembly with Y-axis by fevistick or screw.
Step:9 Extruder Making
To make an Extruder for 3D Printer is very easy. Because you only have to assemble the parts of an extruder.
Follow the step as per pictures, you can be made yourself easily.
When your extruder is ready at that time you can install it in our frame of 3D Printer.
Step:10 Hot end Fixing
After Extruder its time to fix hot end assembly with DIY 3D Printer. You need to make one L shape parts for fixing the hot end with the z-axis assembly.
You can get some idea from below images.
Step:11 Insert PLA Filament
PLA Filament is inserted inside the Extruder. So when Stepper motor is rotated at that time filament is come in hot end nozzle through the extruder.
The diameter of the nozzle is equal to the diameter of the PLA Filament.
Step:12 Wiring Diagram of DIY 3D Printer
DIY 3D Printer wiring diagram is very easy if you follow the instruction in video and follow the below image wiring diagram.
Below diagram is with LCD & Hotbed. This LCD is not necessary if you have a laptop.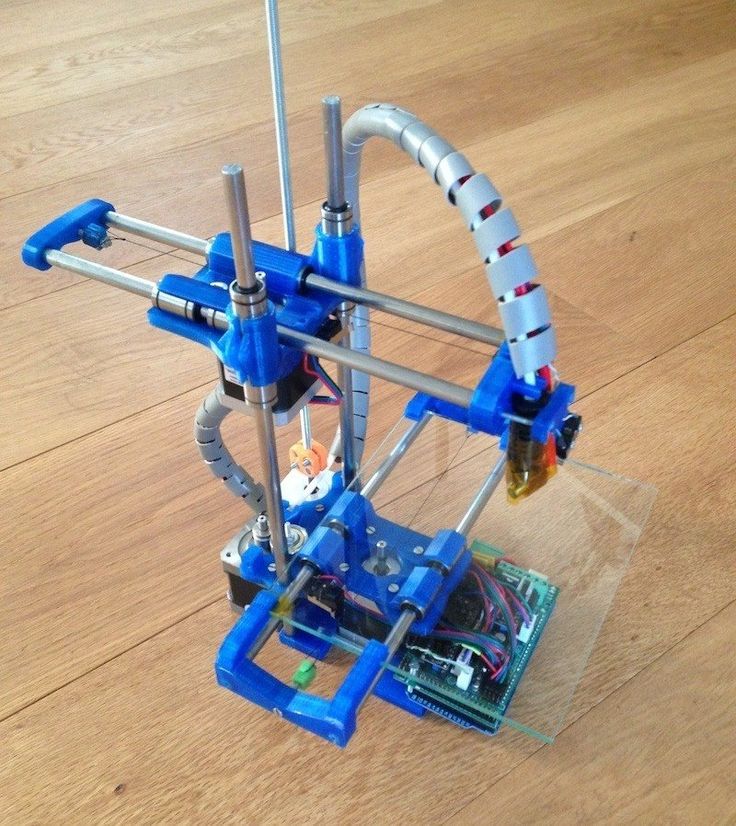 but your use of 3D Printer is high than every time connect the laptop with 3D Printer is not a good idea.
In LCD you can get the slot for micro SD card. So you can feed that G-code through the SD card.
Step:13 Software for DIY 3D Printer
Main things to do in 3D Printer is software. There is a different type of software available for 3d printing. here we use 4 software for 3d printing listed below.
Fusion 360: This software is used for making 3D Model. You can also use other 3D design software like Solidedge, Catia, Creo, Solid work, Autodesk Inventor, etc.
If you don’t know the above software then you can direct download STL file from a number of websites available.
- Cults
- Thingiverse
- YouMagine
- Pinshape
- MyMiniFactory
- GrabCad
- Autodesk 123D
- 3Dagogo
Cura: All the 3D Software understands the language of G-code. This software is used for the convert the 3D File into G-code.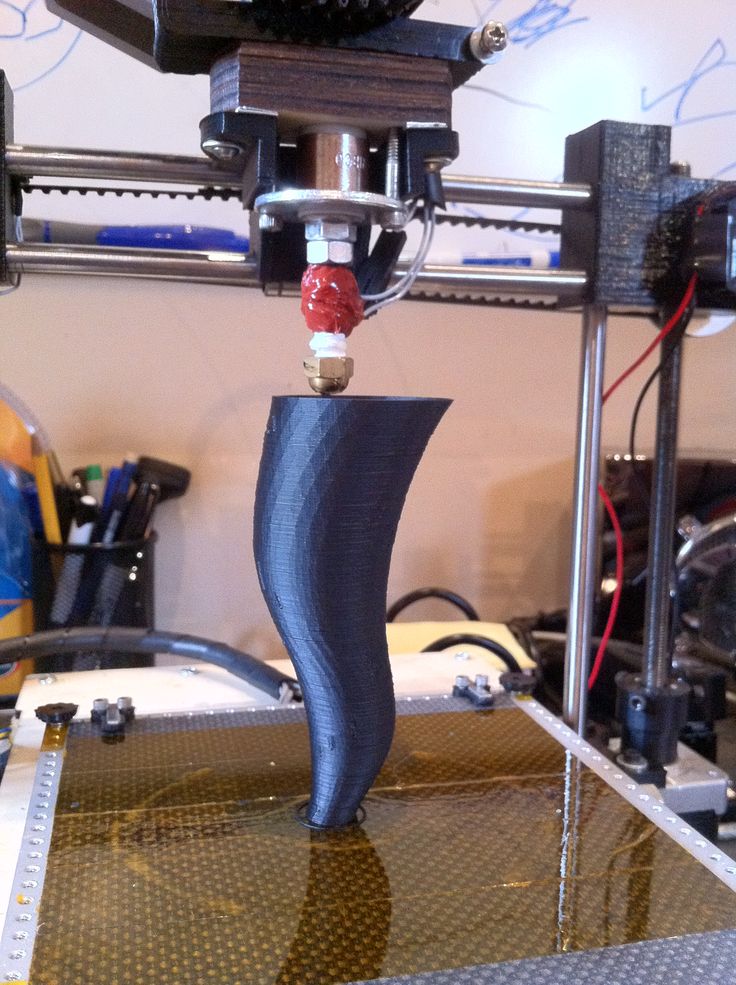
If you are a beginner of this software then this tutorial is for you: Click here
Xloader: It is used for upload the Hex file into Arduino.
Pronterface: This was the main software in 3D Printer. It will Operate your 3D Printing process.
Step:14 Enjoy the DIY 3D Printing
Now your 3D Printer is ready for printing. Make your favorite design on 3D Printer. If you are made this printer than show me your pictures on my facebook page creative buzz. If you getting any problem then comment below.
Read: 3D Printers
Conclusion:
I hope you are made this 3D Printer at your home easily. This printer is not giving you accurate precision like a standard company 3D Printer. But also not a bad precision by this 3D Printer.
If you are planning for your school or college projects than you definitely do this project. It will enhance your skill and mind.
Homemade metal 3D printer, but something went wrong / Sudo Null IT News
Hello everyone, my name is Sergey. In this article, we will talk about 3D printing with metal, more precisely, about my attempt to implement 3D printing with metal.
Very often, people who are interested in or engaged in any activity, no matter what, stumble upon something completely new and previously unknown to them, something that can help develop/improve their main activity. A similar situation happened to me.
Surfing the expanses of your Internet, I came across a wonderful technology for vacuum deposition of metals on various materials. On Habré there is an interesting article about this technology. In addition, on many other resources it was said that the evaporated metal moves towards the target in a straight line.
Many resources0003
And then I thought, what if I spray metal in the place I need, gradually increasing the thickness? I looked for information about whether someone did this - I did not find it.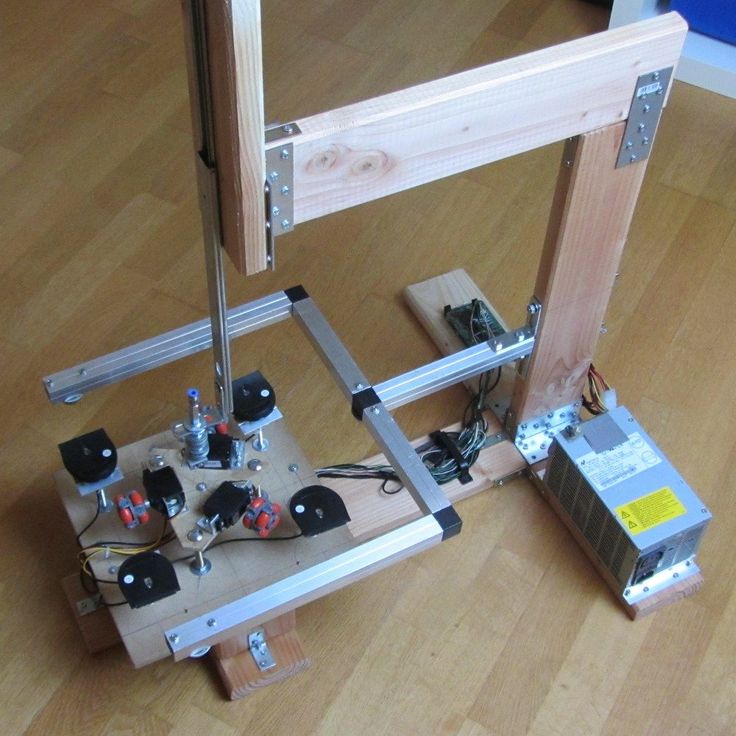
Registered on a forum where sprayers gather together and began to disturb them with questions like: is it possible to build up a “film” with a thickness of 1 or more millimeters. To which I caught a lot of misunderstanding what it was for, but received a positive answer.
General information received, you can begin to prepare for experiments.
It is known from various articles and documents that a vacuum of no more than 10⁻² Pa is required. For comparison, the order of magnitude - the pressure that gives a household vacuum pump (Value and others) - about 4 Pa (measured value), i.e. pressure is 400 times greater than necessary. How to deal with it and what to do? To achieve low pressures, turbomolecular vacuum pumps are used, they work in parallel with the foreline pump and, literally by molecules, capture the remaining air from the chamber. The process is not fast. The pump looks like this.
We installed a pump, it pumps out air and everything seems to be fine, but how to find out the pressure? For this I chose an ionization vacuum gauge.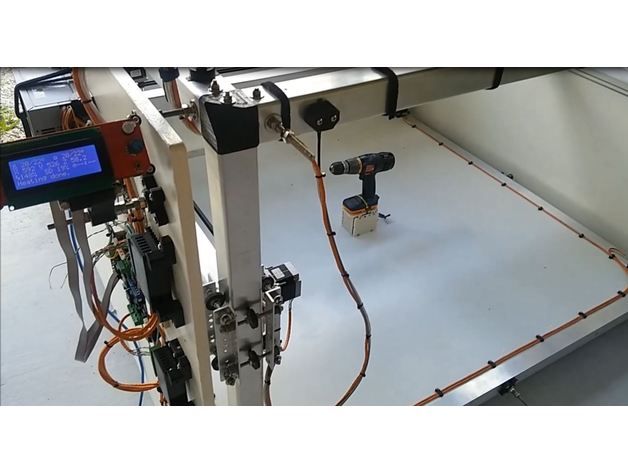
In fact, nothing else is needed, except for the chamber and evaporator. I did not find a ready-made affordable (in terms of finances) camera, therefore, I decided to make my own. It is of a small volume (about 8-10 liters) in order for the air to be pumped out faster. Usually, the chambers have a spherical shape, in my case it is, on the contrary, elongated, in order to be able to set the “target” (the place where the metal is deposited) at different distances from the evaporator. In addition, the camera has a lot of flanges for connecting all kinds of inputs/outputs and sensors. I modeled the camera in a well-known CAD program, drew drawings and transferred it to production.
Current leads and conductors I made from a brass bar and a brass rod, bought on the local market. (Juno, who is from St. Petersburg).
In the photo below, a tungsten boat is fixed between two conductors.
The bottom part looks like this. The photo shows the cooling tubes of the current leads.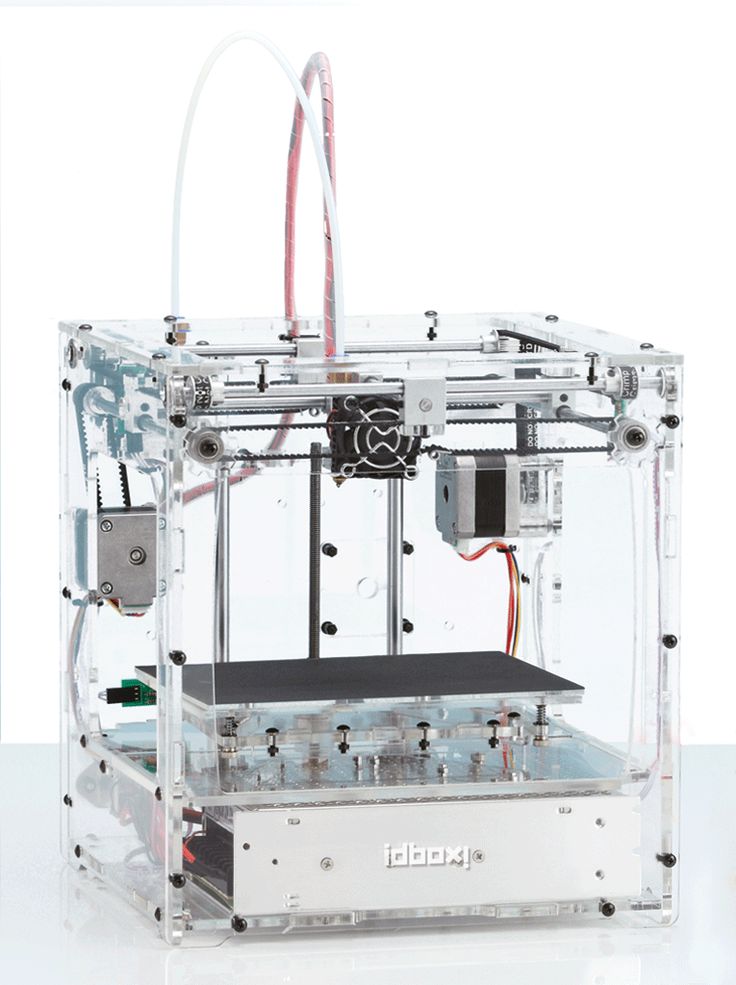 Subsequently, I abandoned them, due to the simplification of the system.
Assembling the camera did not take much effort and complexity. It is much more difficult to achieve vacuum retention in this chamber. To do this, I polished the flanges and all mating surfaces to avoid the slightest leakage through the rubber seal (in the photo below, I processed only the top flange).
As it turned out later, the weld is not airtight at all (meaning for low vacuum). I, out of inexperience, assumed that by pumping a pressure of 300 kPa into the chamber and immersing it in a bath of water, I would carefully find all the leaks and eliminate them. Yes, at the first stage I did just that, but the pressure in the chamber did not fall below 10-2 Pa, there were leaks. Interestingly, before the start of the test, at a pressure in the chamber of 300 kPa, bubbles emerged from the welds with an intensity of approximately 1 bubble (diameter 2-3 mm) in 30-40 seconds. And those were big losses that I eliminated.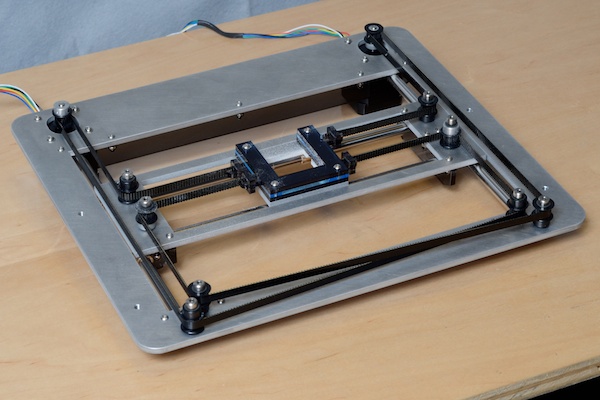 But what to do with minimal vacuum losses that cannot be tracked in "kitchen" conditions?
The solution was close. To do this, all you need is a mass spectrometer.
The idea is simple – the investigated chamber or container is connected to the vacuum chamber of the spectrometer. Air is pumped out, on the graph they look for extraneous peaks of any gases. After that, helium is supplied locally, to the places of possible leakage. It is helium, because its penetrating power is higher and the helium peak can be easily tracked on the spectrum. As soon as helium enters the chamber through a micro-hole, it is immediately visible on the spectrum.
I drove twice and looked for leaks twice. Now the chamber with the installed pump is hermetic and it is possible to carry out experiments further, having previously assembled all the components of the system on the rack.
General view of the incredible installation.
Starting up the plant and checking it comes down to maintaining the lowest possible pressure.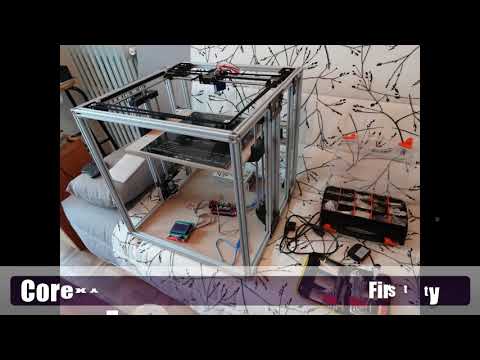 The foreline pump is started first.
The pressure after the operation of the foreline pump can be seen in the picture below.
After the pressure is established (does not change). You can launch "heavy artillery" - a turbomolecular pump. It reduces the pressure by another 3 orders of magnitude.
The time has come for experiments, what I have been going for so long and what I have been waiting for so long.
First experiment.
Place a small amount of silver into the boat fixed between the conductors. Above the boat I install a steam conduit - a soldered tin cylinder, which, as I thought, should limit the spread of metal through the chamber. Above the steam conduit there is a lid with a hole of 2 mm, behind the lid there is a target on which the metal should condense. It is a pity that there are no photos left, but the vacuum chamber was completely dusty. There was not a single place where there was no applied layer of metal. In the photo below, it’s not a different planet at all, but silver sprayed onto the inner surface of the wall.
Second experiment.
I thought it was because of the large gaps between the boat and the steam line. The solution was born immediately and quickly. I took two boats and combined them so that a shell was obtained. I placed silver inside, and cut a hole with a diameter of 2 mm in the upper half.
And he began to heat up the whole thing. But, I did not take into account the rigidity of the boats and the rigidity of the current leads. The shells parted a little and a gap formed between them, through which steam also flew in all directions.
As a result - spraying in the entire volume of the chamber. In the photo below there is a viewing window, the boat in which was slightly above half, but the window was completely dusty.
Third experiment.
After a little thought and grief, I thought that the container with the evaporated metal should be airtight and with only one outlet, but how and what to make it.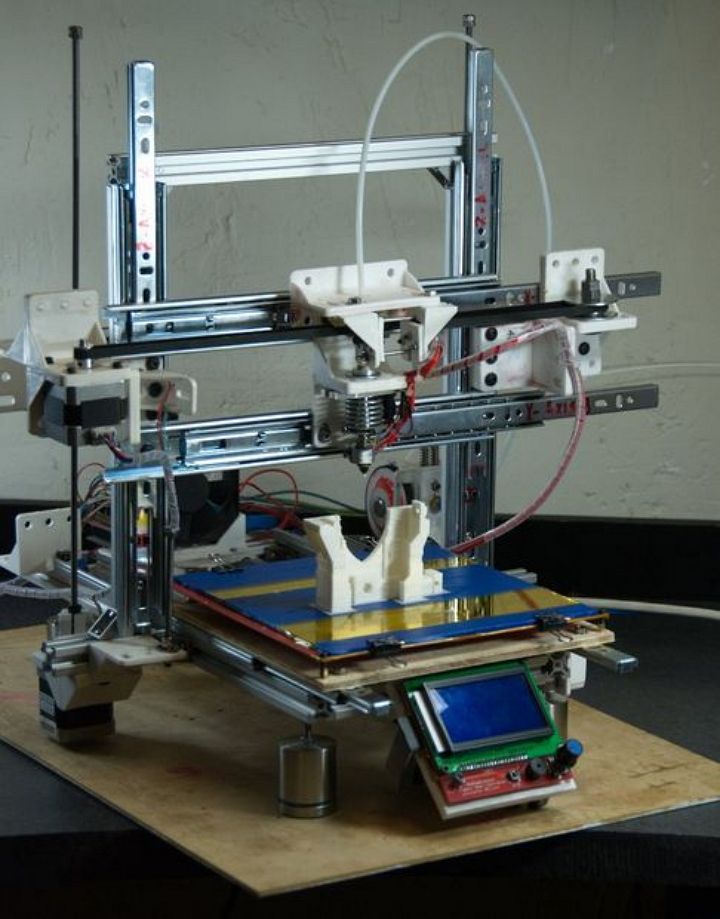 From tungsten - very expensive and difficult to process. The way out has been found! Graphite is an excellent material for making a crucible, let's call it that. On the ad site, I found an ad for the sale of graphite bars from the contact whiskers of a trolleybus, cut out a bar with a hole in the center and made a cover for it. In the photo below - just a bar with a hole for the material (without a cover).
And in this photo already in the chamber with the lid installed (the hole in the lid is 1 mm in diameter).
Under the spoiler are a few photos with a short period of time, from which you can see how dusty the viewing window is.
Loss of transparency
It is obvious that in this case, too, there was no success, to my great regret. All three experiments were carried out with a gradual increase in temperature from the state when evaporation does not occur.
A small video in which the information is presented in a slightly different way, in a different form and volume.
Video link
www.youtube.com/watch?v=4yWQOWIG1qw
Unfortunately, it was not possible to get what was intended, but, on the other hand, invaluable experience was gained in the design and manufacture of vacuum equipment. Most of this experience I have shared with you and I would be very grateful if you express your opinion on this issue.
Thank you all and good luck.
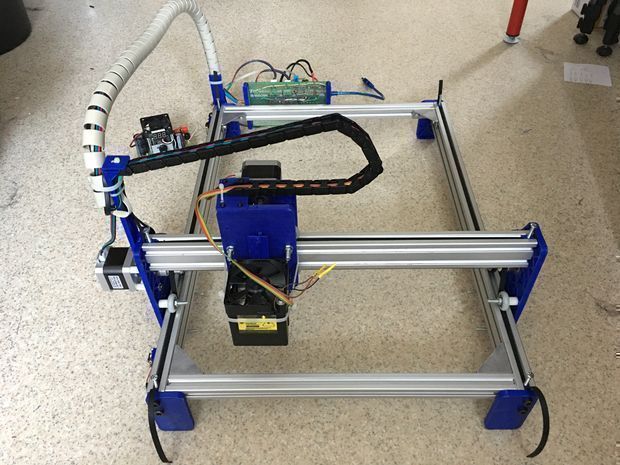
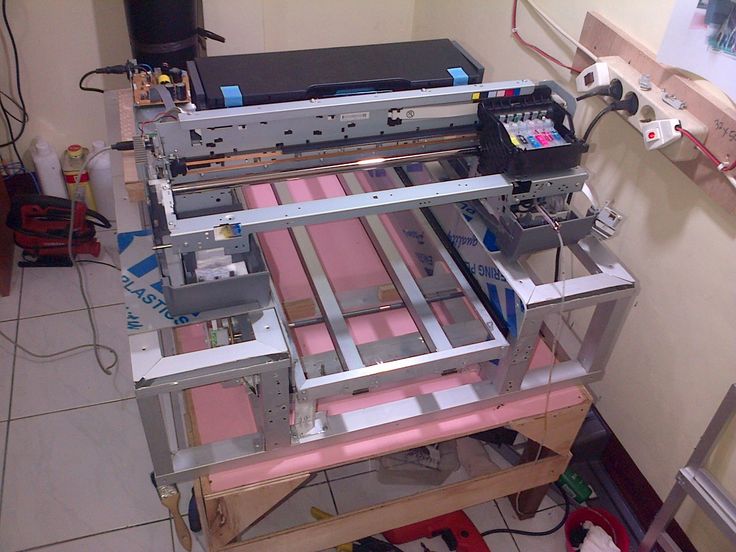
DIY 3D printer from an inkjet printer
How to assemble a 3D printer from parts from an inkjet printer?
3D printer is a high-tech and expensive machine. If you buy a cheap device, you may encounter poor-quality assembly, fragile components and a short uptime. Having in stock unnecessary, decommissioned, failed inkjet printers and scanners, you can assemble a printing device from their parts to create three-dimensional models.
Do-it-yourself 3D printer from an inkjet printer
If the cost of the device is the leading factor in choosing a device for printing 3D objects, it is worth assembling a 3D printer yourself. According to user reviews, cheap models of 3D printed devices made in China have the main drawback - the low quality of components. In particular, guides are the weak point of Chinese devices. These elements are subjected to significant stress, and if they are of poor quality, they can be deformed under the action of tension belts.
Important! In older document printers, the rails are made of hardened steel. They do not bend even with considerable effort. Such details will be an ideal alternative to regular Chinese ones.
By dismantling unnecessary office devices, you can get a set of spare parts necessary for assembling a 3D printer and save a lot on the purchase of components. These are:
- printer head slide assembly;
- timing belts;
- mechanical or optical limit switches;
- power supply;
- stepper motors and drivers with controllers and other parts.
Attention! Inexpensive inkjet printers were mostly equipped not with stepper motors, but with DC motors with an encoder.
Theoretically, they can be used in the assembly of a 3D apparatus by redesigning the latter. Stepper motors are usually extracted from scanners.
But the advantage of DC-motors should be noted: they consume electricity only during movement, while stepper motors are constantly supplied with power.
Accessories such as hot end, extruder and control board will have to be purchased. The frame is assembled from improvised materials - plywood, steel corners or parts of the cases of disassembled copiers.
A self-assembled printer will be much cheaper than factory counterparts, but at the same time, it will be of higher quality than budget models presented on the market by Chinese manufacturers.
How to make a 3D printer from an inkjet printer: step-by-step instructions
To work on assembling a printer from donor components, you will need a set of tools and materials:
- hacksaw, drill - to make the case;
- soldering iron and solder - for mounting electrical cables;
- screwdrivers and hex set - for assembling components;
- pliers;
- multimeter tester - for checking the electrical circuit;
- screws and nuts;
- cable ties;
- electrical tape.
Attention! Knowledge of electronics and engineering is a plus.
Accessories:
- steel rails;
- timing belts;
- micro stepper motors;
- stepper motor drivers;
- extruder and hotend;
- optical sensors - limit switches-microswitches;
- power supply;
- connection cables;
- electronic control board and microcontroller based on Arduino;
- LCD display;
- desktop glass;
- frame parts.
Next, you will need to stock up on a fair amount of patience and pedantry - assembly requires careful observance of all instructions.
Assembly process
- Frame fabrication and painting.
- Mounting the X and Y frame axes and fixing the stepper motors to them. The extruder will move along the X axis, the Y axis is needed to move the platform.
- Installing the Z axis support rod.

- Attaching the extruder.
- Connection of heating elements, cables, power supply.
- Mounting of electronic elements: boards, microcontroller, LCD display.
After assembling and testing the electrical circuits, install the software. At the last stage, the working table, the X, Y, Z axes, the temperature of the heating elements and the filament pulling speed are calibrated.
Important! After starting the printer, print a test model. It will show all the flaws in the assembly and settings.
Mistakes and how to avoid them
Printer performance depends on the quality of the installation. But it is not always possible to eliminate errors when assembling the device.
- One of the serious mistakes that is often made when assembling the printer with your own hands is the incorrect installation of the frame elements. Even a slight misalignment of the corners will cause jamming when the carriages move.
 The geometry of the mating parts must be maintained as accurately as possible.
If the body is made of plywood, it is recommended to cut its elements on a CNC laser machine. When assembling a frame from metal corners, it is necessary to control the mating angles of the parts at each stage. - The second common problem is the backlash of the frame elements. In this situation, print quality cannot be achieved. There should be no gaps between the parts. They occur either when the fasteners are loosely tightened, or if the frame elements are poorly prepared, that is, the dimensions are incorrectly maintained.
- If the electrical wiring connectors are not of good quality, there will be constant power outages. And the installation of short wires will cause them to break. The length of the wiring must match the dimensions of the frame, taking into account moving parts. It is necessary to check the tightness of the connection of the connectors, thereby minimizing the risk of disconnecting individual components and mechanisms from the power supply.
Quality control of the assembly at each stage, checking all connections and geometry of structural elements will help to avoid problems.
That's interesting! The article discussed how to assemble an FDM printer from improvised materials and parts left after dismantling office equipment. And an engineer from the Netherlands assembled a powder-type 3D printer based on an inkjet printer. As a filament, he used gypsum, sand, metal powder, and filled the cartridge with a binder. Otherwise, the technology is similar to laser layer-by-layer sintering.
Assembling a 3D printer with your own hands is not at all such a simple action as it seems at first glance. But lower financial costs and higher quality components compared to budget models from China make it expedient to manufacture a printing apparatus on your own. And given that a significant part of the parts will be recovered from the old inkjet printer and copier, this will further reduce the cost of producing a homemade 3D printer.