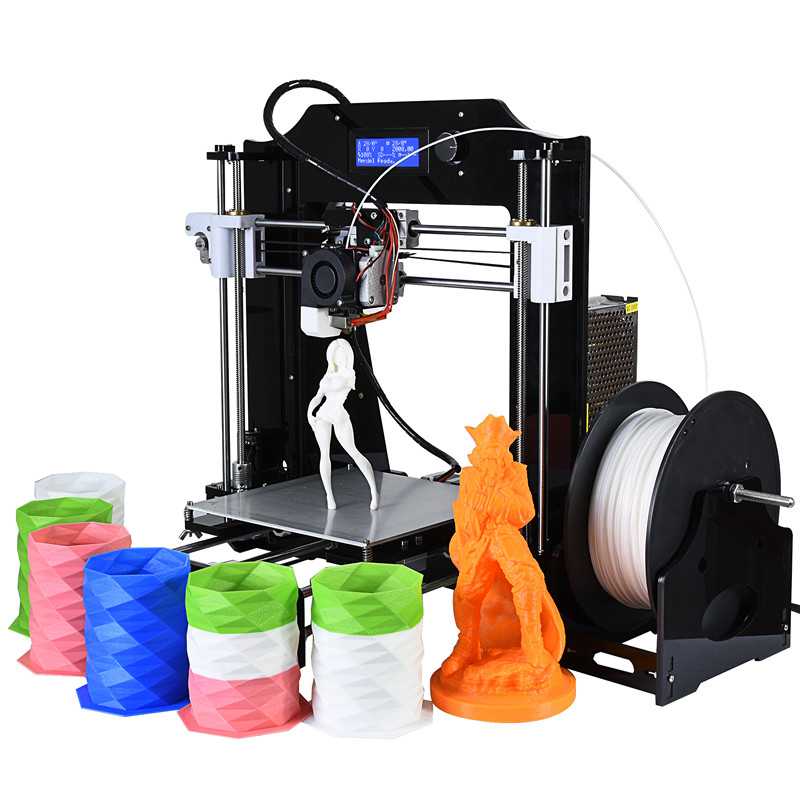
Best linear rail 3d printer
MGN12 linear rail upgrade for 3d printers
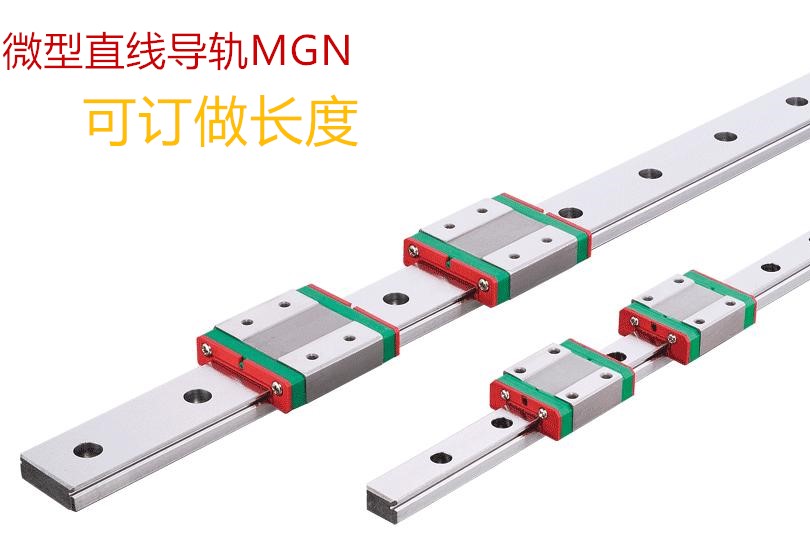
Linear guides are used for linear motion by re-circulating rolling ball elements between a profiled rail and a carriage (bearing block). The friction on a linear rail is only 2% of this of a traditional slide. Linear guides can also be loaded in all directions (no matter how you mount them). These features made the linear rails a preferred solution for high-precision CNC machines. For smaller machines like 3d printers, there are smaller and low-inertia linear rails, like the stainless steel MGN12 of Hiwin.
Using linear rail in 3d printers
The linear rails can be used on all axis of a FDM 3d printer, whatever the type – cartesian or core XY. However, the biggest impact on printing quality is achieved when the movement of the print head is improved (either the X-axis or the XY-axis).
Construction of MGN series rails – rolling circulation system: rail, block, retainer and end cap.This type of linear guides is still expensive and is only used in high-end commercial 3d printers. Enthousiast however upgrade successfuly existing printers and there are already many designs available at Thingiverse for MGN applications on low-cost popular printers, like Creality, Tevo, Anet. The rails are easy to implement, because they mount natively on the 2020 extrusion profiles of these printers.
There are other more advanced designs for complete coreXY printers with linear rails. One example is the BLV printer, featuring linear rails on all axis. Its cost has dramatically improved when some companies started to offer complete kits with optimized bundle prices. Now it becomes possible to build a better mechanical solution than Ultimaker for less than 1000 USD.
Visit the page of the BLV mgn Cube on Thingiverse
Check the current price of the BLV kit.
Myself, I am fan of Voron Design DIY printers. They also feature linear rails on all axis and provide great performance to cost ratio.
The flagship – Voron 2. 4, is amazing CoreXY machine with unique fixed bed design and gantry frame on belts.
It is fully enclosed and perfect for ABS.
The cost is about 1500 USD
Visit Voron Design
Check the price of Voron 2.4 3d printer kit
My Voron 2.4 3d printerMy Voron Zero 3d printerVoron Zero (aka Voron0) is another printer I built. It is small, portable and energy efficient secondary machine. The linear motion uses MGN07 linear rails.
Cost: in the 600 USD
Read my artcle for Voron0
Check the current price of the V0 kit.
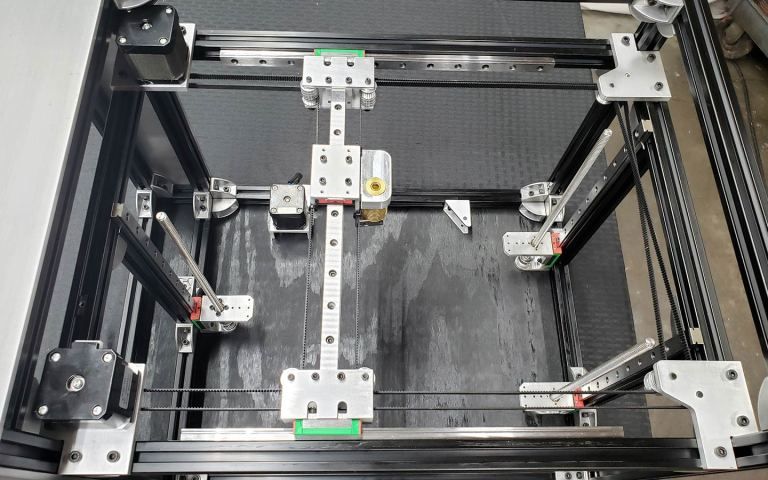
Upgrading the X-axis of Creality CR-10 from V-weels to MGN12 linear guide with direct extruderOne of the main challenges when upgrading the X-axis of a 2020 extrusion based 3d printer to MGN12 linear rail is the design of the X-carriage.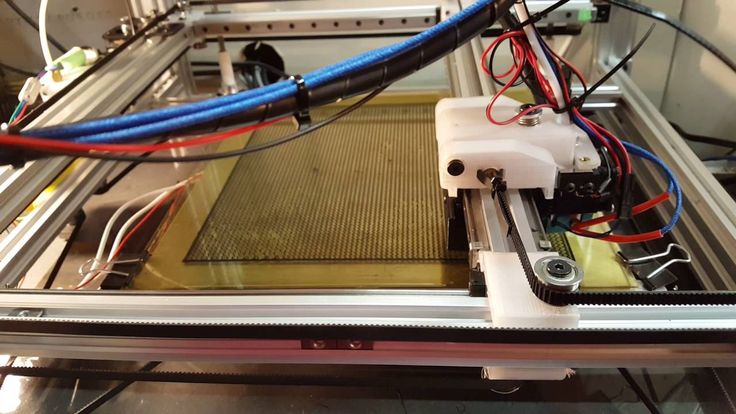 The new carriage should take in account the dimensions of the MGN12 rolling block and the clearance between the fixation holes. Hopefully, Hiwin offers step files to get you started.
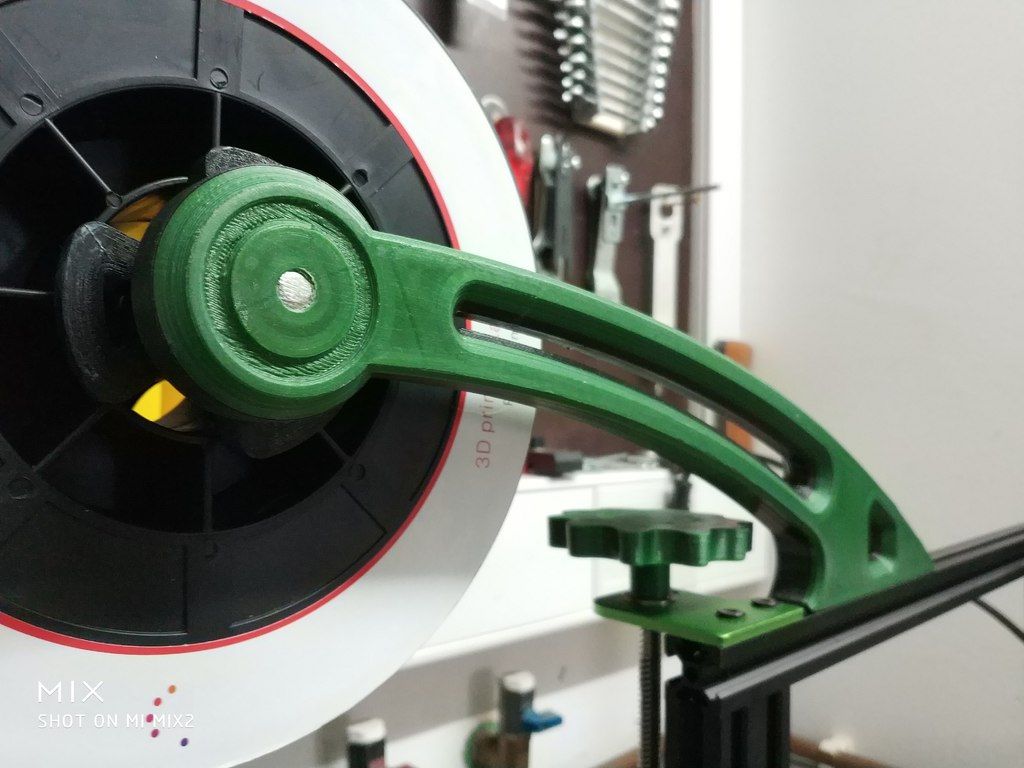
When upgrading the X-axis of my Creality CR-10 printer to MGN12, I decided to build a carriage for light direct extruder. I made first a 3d printed model that helped me to drill and cut a metal sheet precisely.
BMG dual drive extruder upgradefor CR-10, Ender and Tevo printers
Now I am using this print head for over a month and I can say it worth it.
The modification is based on the BMG dual drive extruder from Trianglelab – a quality clone of the original Bondtech product.
It is a geared extruder with ratio 3:1, that delivers constant extrusion pressure wathever the filament.
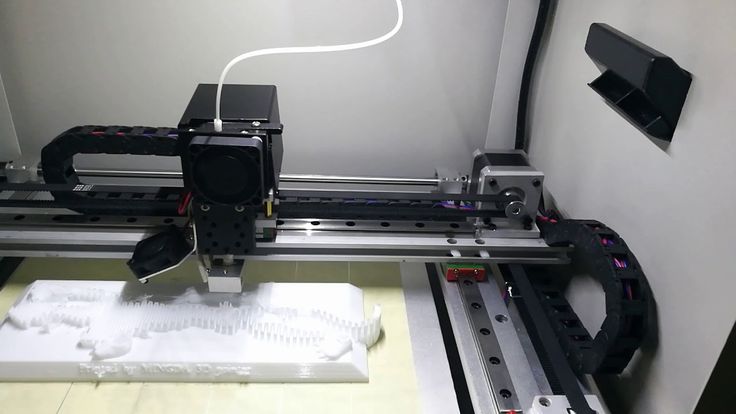
Final configuration of the print head mounted on MGN12H linear rail with BMG dual drive extruder, 23 mm pancake stepper with heatsink and radial part cooling fan.Linear Rails - 3D Distributed
MGN12-H Linear RailAre linear rails better?Linear rails produce a high degree of accuracy and stability compared to round rods with linear bearings. They have better mounting, and smoother motion which improves print quality and machine reliability.
Linear rails are used in different applications in industrial machine and motion system design. Linear Rails are designed to support the movement and load of a mechanical motion system.
Linear rails are used in different applications. Different levels of stiffness in different directions can have stresses on a given plane, or in some cases you may want the rail to slightly flex in one plane opposed to the other.
- Placing the surfaces for the rollers strategically, for example in a location that is unlikely to get contaminated, or where the maximum force will be applied.
- Curved paths, so that the carriage can move along a line that is not straight.
Accuracy of Linear Rails
Linear rails provide a high level of accuracy and stability compared to round rods with linear bearings or other methods.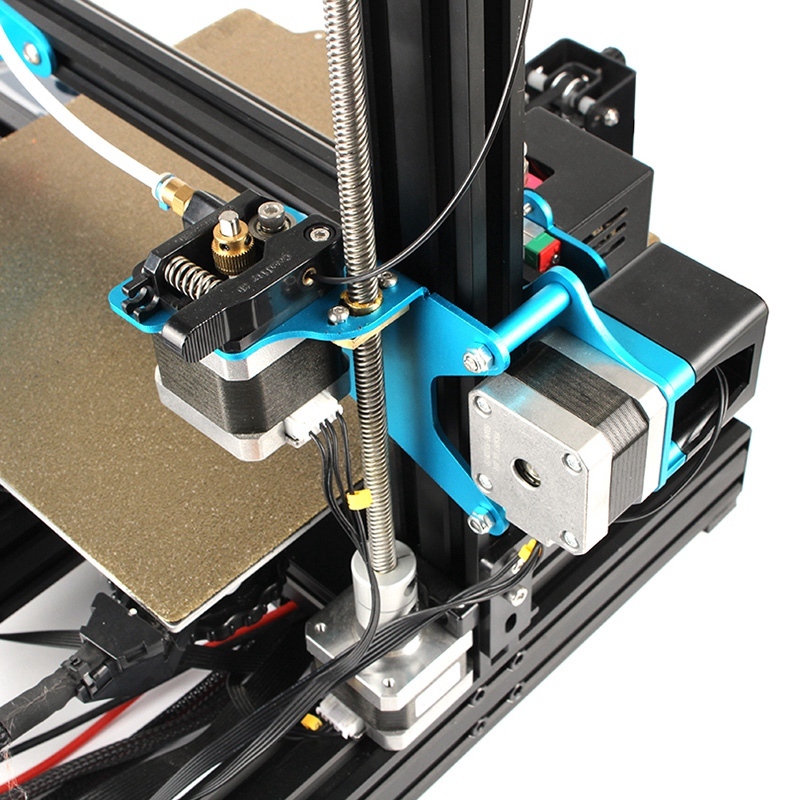
Linear Rail Applications
Linear rails are used in different applications.
Different levels of stiffness in different directions can have stresses on a given plane, or in some cases you may want the rail to slightly flex in one plane opposed to the other.
Curved paths, so that the carriage can move along a line that is not straight.
Linear Rail Alignment
Linear Rail Alignment- Make sure the linear rails are parallel to each other to prevent binding.
- Check for flatness and alignment of the paired sets of rails.
- Check the perpendicularity to the mid-plane between the two rails.
- Make sure the linear rails are parallel to each other to prevent binding.
 Check for flatness and alignment of the paired sets of rails.
 - Check that the gantry is perpendicular to the mid-plane between the two rails. If the gantry becomes over constrained it will cause the stepper motor to skip steps.
- Check the Z-axis lead screws aligned and concentric to the stepper motor shafts. If not, mechanical binding may occur. The gantry can’t really tilt, so the linear rails could be damaged over time. It’s important to not over constrain the z-axis, because it can cause z banding.
Mounting Linear Rails
Linear Rail AlignmentLinear rails can be mounted along the full length of the rail, rather than the specific area of motion, thus increasing the accuracy of their positioning and rigidity.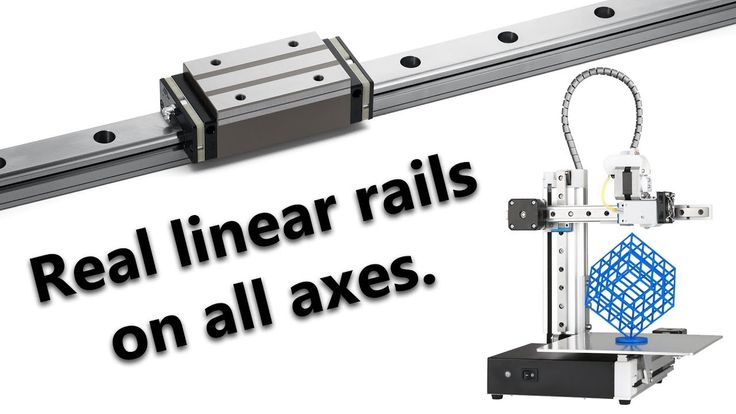 The contact surface between the rollers and the bearings is flat, cylinders can be used instead of spheres. This minimizes mechanical stresses, and the amount of play within the system. This increases mechanical longevity and allows for increased bearing load. The bearings only allow for one degree of movement.
The contact surface between the rollers and the bearings is flat, cylinders can be used instead of spheres. This in turns diminishes the mechanical stresses, and the amount of play, increases longevity and allows for more bearing capacity, among others. Linear rails can be anchored along their full length to aluminum extrusion profiles, thus increasing the accuracy of their positioning, stiffness and their bearing capacity.
Rail Parallelism
The parallelism of the linear rails or linear guide system is key for proper movement of a motion system. As the number of rails and carriage blocks used within a system increases the more important it is to ensure the rails used are parallel. Unnecessary load can result if the the linear rails or linear guide are not parallel within a manufacturer’s specified parallelism tolerance.
The bearings on a linear rail provide proper constraint of movement. There must be two rods with linear bearings to provide the same results of linear rails.
Light Weight Linear Rails
Light Weight Linear RailsLinear Rails BearingsWhen it comes to applications of consumer-grade FDM 3D printers the advantage of 3d printers with linear rails is print quality and reliability.
- The mechanical stresses involved in 3D printing are reduced.
- The movement is constrained along a straight path.
While 3d printer designs with rods + linear bearings are cheap, effective, simpler and lightweight, all characteristics that are highly desirable in a 3D printer. In general, linear rails are preferred over rods because they offer greater precision and smoother motion which can improve print quality and reliability. Specific machine designs benefit from use of linear rails.Depending on the mechanical arrangement of the linear guide system, movement will require rigidity and support from load or gravity.
Linear Rails vs Rods
In most applications, linear rails are prefered over rods. Although, there are specific designs that may benefit from rods. For example, a cantilever arrangement may be better due to linear rails constrain movement in all but one direction, and the orientation offers maximum rigidity against gravity.
While 3d printer designs use rods with linear bearings are cheap, effective, simpler and lightweight, all characteristics that are highly desirable in a 3D printer.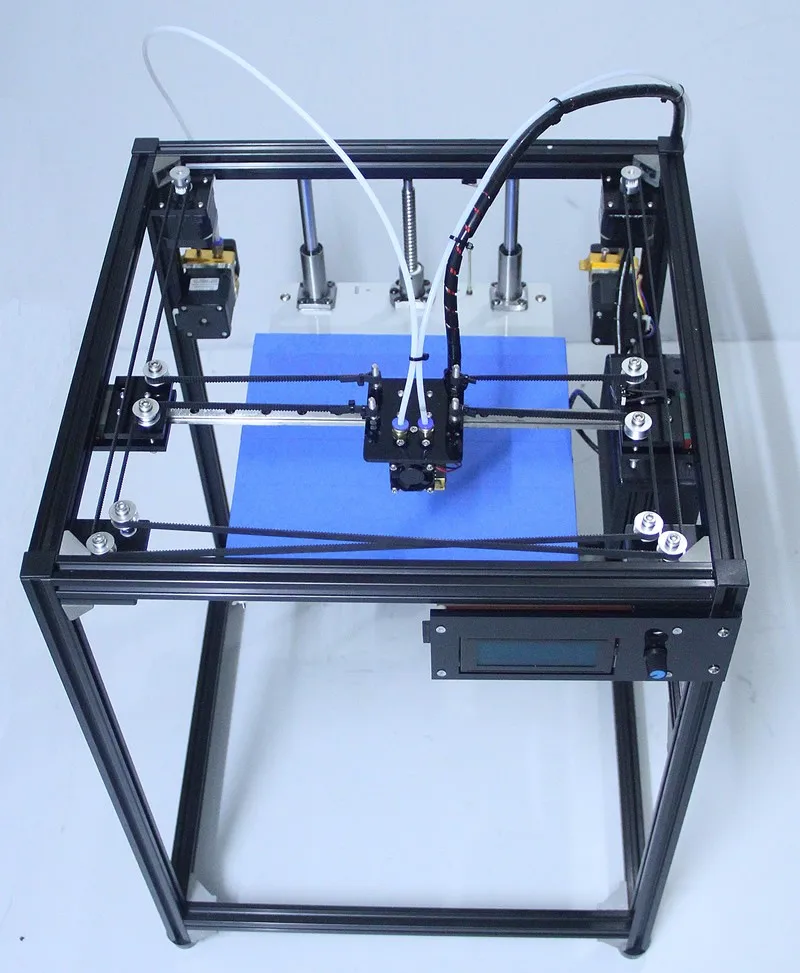
Many of the earlier 3d printers were designed around cheaper mechanical parts such as carbon rods or stainless steel smooth rods which were once commonly used and recommended. As the cost of linear rails become cheaper and cheaper due to the economy of scale and increasing number of buyers and large volume production of manufactures and suppliers. 8mm steel rods and linear bearings are slowly being somewhat phased out but still used on cheap kits found on Aliexpress.
What are linear rails made of?Most linear rails are manufactured from hardened steel and are corrosion-resistant. Hard strength steel or stainless steel is a cold-drawn and ground down to the profile shape and assembled to a linear rail carriage block.
How do you use a linear guide rail?Align and ensure parallelism of the linear guide for proper accuracy.
Are linear rails worth it?Upgrading your 3d printer to linear rails will increase the smoothness of the motion and movements along the axis mounted.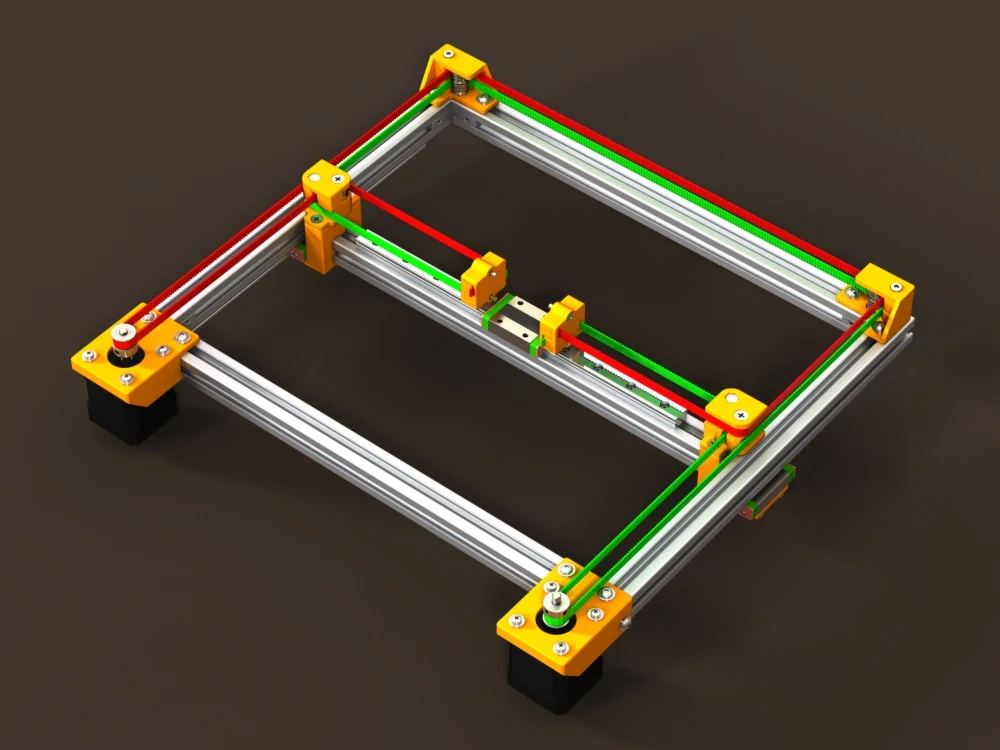 Linear rails can improve print quality through smoothness and precision which will decrease artifacts found on 3d pints.
Here’s the methods to repair linear rails.
- Clean remove the dirt and grease from the rail and carriage block.
- Lubricating light machine oil.
- Run in the carriage along the rail.
- Replace the stainless steel bearing balls if needed.
- Clean and polish the rail channels.
What is a linear rail carriage block?
The linear rail carriage block moves along the rail track groove and constrains the components of the linear slide and provides motion with the direction of a specific axis.
3D Printers With Linear Rails
- Workhorse 3D Printer
- Solidcore CoreXY
Buy Linear Rail Products
Buy 3D Printer Kit
Buy Linear Rails
Linear Rail Stop 2020
$10.00
Linear Stops & End Stop Mounts
Machined Hardware Parts List Machined Hardware Parts 3D Distributed Price Quantity Source Documentation Gantry Plates 2pcs w/bearings $ 80. 00 2pcs. 3D Distributed Folder X- Axis Carriages 2pcs $ 49.50 2pcs. 3D Distributed Folder Y-Axis Carriage 1pc $ 24.50 1pcs. 3D Distributed Folder Y-Axis Motor Mount 1pc $ 22.50 1pc. 3D Distributed Folder Y-Axis Idler Mount
by Shane Hooper
SolidCore 350mm x 350mm BOM 350mm x 350mm x350mm Quantity Description Source $ Each $ Total Documentation Frame Extrusions 2020 T-Slot ZylTech Frame Size List 570mm Long 6 Vertical (Tall) ZylTech Frame Size List 430mm Long 3 Vertical (Z-Axis Rail) ZylTech Frame Size List 660mm Long 4 Length (Long) ZylTech Frame Size List 500mm Long
by Shane Hooper
SLM – Selective Manufacturing
by Shane Hooper
Like this:
Like Loading. ..
..
Each 3D printer - on rails / Sudo Null IT News
I have long wanted to write an article about my positive experience of converting a 3D printer from linear rods to rails, it looks like the time has come.
In the course of this article I will tell you what and how I did, perhaps my experience will help someone put their workhorse on the rails.
▍ So let's start.
It seemed that not so long ago there was a dream to purchase a 3D printer, a dream come true, the ANET E16 printer was ordered back in 2019year from Uncle Liao's country.
Surprisingly, the printer arrived quickly enough and the box was almost without dents :) Naturally, the printer was assembled on the same evening and test prints were delivered: cubes, boxes, turrets. Traveled until late at night. The optimal settings were determined, adjusted, the table was leveled. Uhhh, when I remember, I shudder. It took about 2 weeks to set up the printer to achieve an acceptable print quality, but I had to learn to work with this miracle machine on the go, each time solving several tasks at once and not always sequentially. When the experiments led to good results, it pleased, so there is room to grow. nine0003
After 2 months of operation, in almost daily printing mode, I began to notice that when the table moved forward and backward (Y axis), as described, steel rods with a diameter of 8 mm (in fact, it turned out to be nickel-plated low-grade steel rods) and LM8UU linear bearings - they creak and the table wobbles, as if riding on potholes. Two rods plus 4 bearings, at first I looked if they were dry - grease was present. It turned out to be a load on the table and, accordingly, on the guide rods and bearings. nine0003
Along the guides, paths were gradually drawn from the pulled up material of the rods.
▍ Something needs to be done about this urgently!
Two elements make it difficult to achieve printing accuracy and smoothness of the table:
“Floating table” , you bring the table to “zeros” before starting the printer, and after starting work, the table leads in an unpredictable way to any of the cardinal directions, because.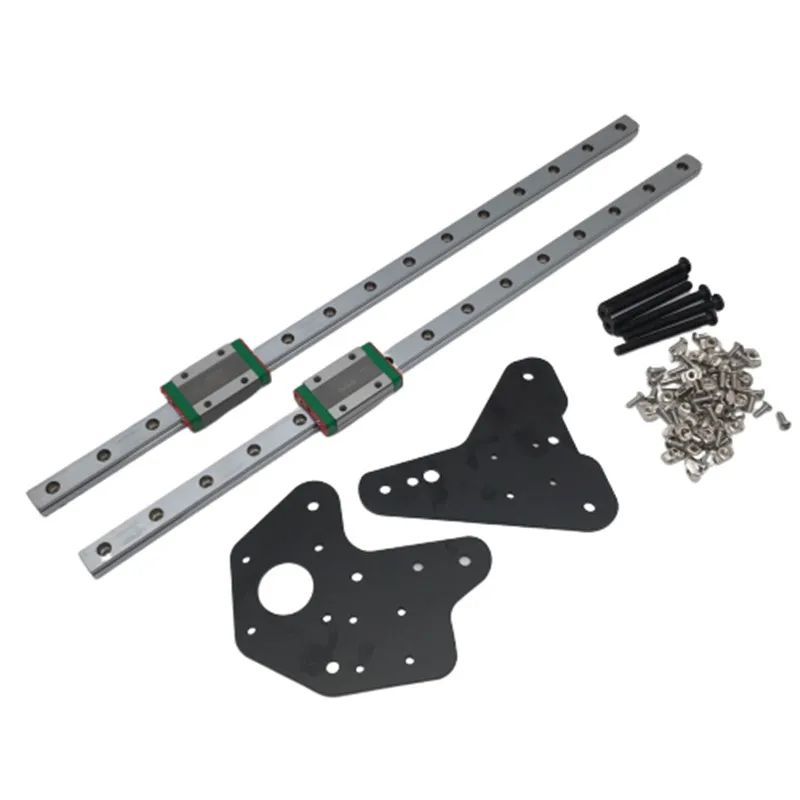 if the bearings work unevenly, then distortions, wedges are provided, a matter of time. nine3 = 45,720 grams or approximately 46 kilograms. Even if we take into account that the bearings distribute the load into three unequal parts, roughly 46kg / 3, we get 15 kopecks per third of the length of the rods 50cm / 3 = 16.6 (and 6 in the period) centimeters in the ideal case. Taking into account the fact that the linearity of the rod along the line of movement is a key characteristic and ideally should not change at all, in my case the rods simply bend and this despite the fact that I never gave them the maximum load. Realizing that the rods can’t hold such a weight, he left for a couple of days to read books, google and re-read dozens of forums in order to find out how people live with this and enjoy life by directly moving the 3d printer table? nine0003
As shown by the search and the results of reading books and forums, everything was invented before us.
▍ There is a way out! Rails are our everything!
In most options, rails with carriages are preferred, such as these MGN12H.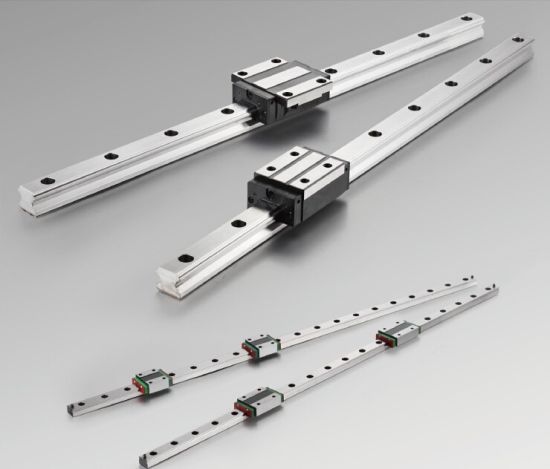 In my case, the carriages were ideal in size and height, because. on the tips of the rails, you still have to install a regular limit microswitch.
The internal arrangement is shown below.
The rails themselves, carriages and bearings are made of durable steel. I ordered in China, from a seller with good reviews. Branded rails and carriages from HiWin cost like a small plane, but they give a guarantee on their rails and carriages. nine0003
Let's estimate the "load capacity" of rails and carriages:
- Load capacity stat. 5.88 kN
- Load capacity dyn. 3.72 kN
kN - kiloNewton, kiloNewton Karl !, this is not a mistake, in statics it turns out that a rail with a carriage can withstand a mass in kg: 5.88 * 1000 / 10 \u003d 588 kg will withstand and will not hesitate and will not sell through. I counted twice, suddenly a mistake, I can’t even believe it.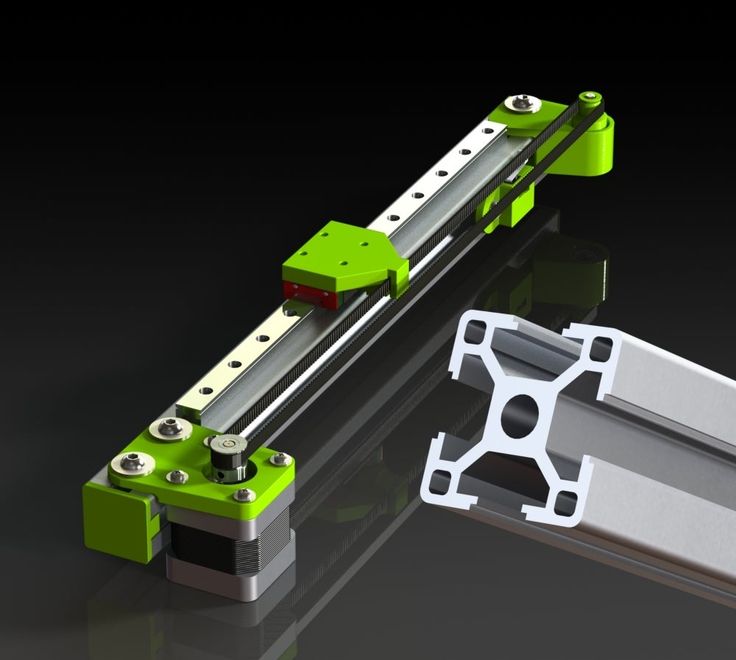 At a rail length of 500 mm, under our table, the rails with carriages do not even move, and before the deflection, the margin of safety is simply huge. I can’t imagine that you can ride on such little girls, just midgets on steroids. nine0003
The advantage of rails and carriages is described very simply, they are made with very high precision, the play is so small that when you move the carriage along the rail it seems that it does not roll, but flows along the rail. The move is so smooth that you wonder how so many ball bearings work smoothly. Whoever came up with this design is a genius.
I will have to work with exact dimensions and I will need a working printer to print new parts, I decided to model all the parts first in a 3D editor and not in vain, because fitting in hardware takes much longer than in a 3D editor. nine0003
I drew all the important elements: new tips are of a universal type, you can put them in any place, including under the end mic.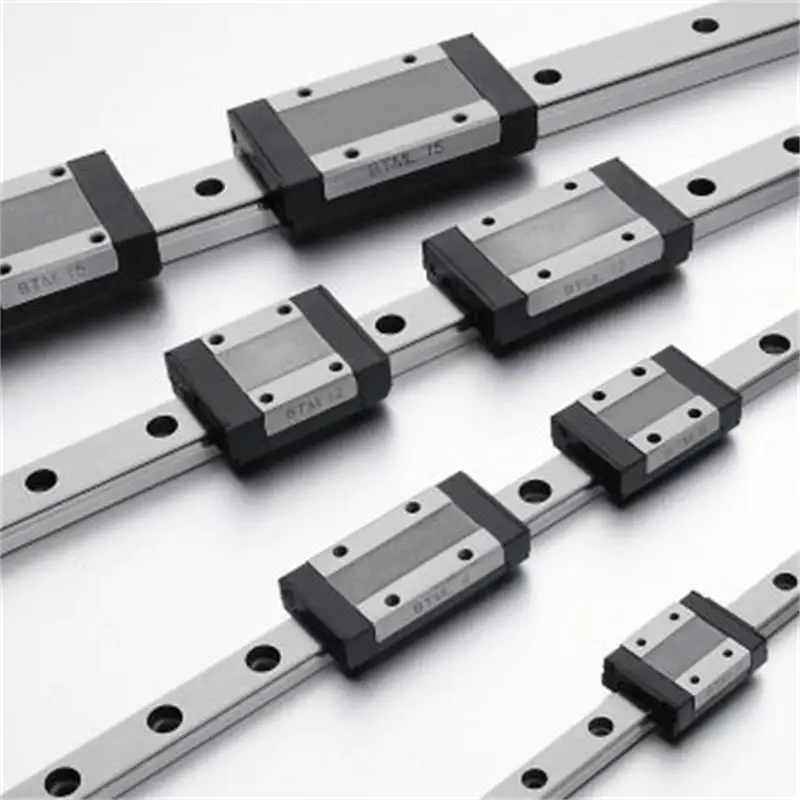
a substrate between the carriage and the table frame - it is very convenient to set up the table after assembling the entire structure.
As a result, after modeling, it turned out to be a fairly reliable, durable and simple design.
I printed for the last time, with a scratch, all the necessary details. He removed the tips, rods with bearings. I installed all the details, connected everything together with screws, that's what happened. nine0003
I installed the spring-loaded base of the table in its regular place, inserted the screws into the attachment points of the tips and tightened them according to their native fasteners. This is where the surprise awaited me. The table reached the middle and didn’t want to go further, as if resting on something, the answer came from the manual along the rails ... tolerance for parallelism ...
We are interested in the average accuracy - column H, for a length of 500 mm, Parallelism can deviate by 131 microns, no more.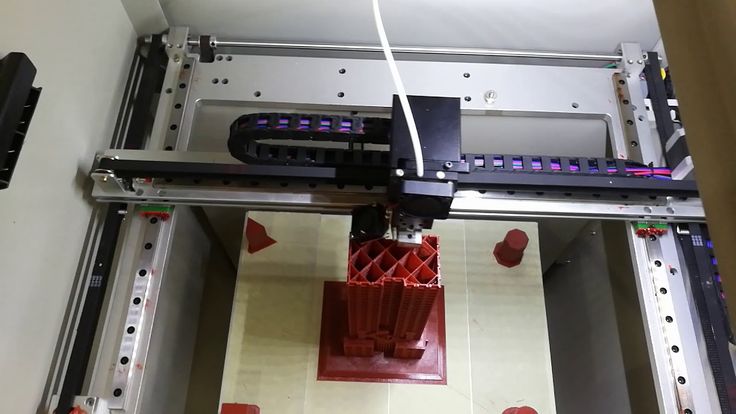 With a micrometer you will not jump, especially in motion. nine0077 It was decided to let this dynamic system level itself and self-adjust.
As time has shown, the decision was correct. Having loosened all the screws securing the tips, after 2-3 printing of test tasks, the rails stood up as they should. The carriage with the table rolled to its full length without jamming or stopping. Then the screws were tightened.
I am very pleased with my technical solution. The labor costs and time, not as big as many people think, that I invested in the design of the printer paid off completely, I have been printing since January 2020 and to this day everything works perfectly. And every time, watching how the printer works, I rejoice like an elephant :)
▍ Finally reached the next
- Print quality improved.
- Printing accuracy has become at the level of 0.01-0.03 mm.
- No need to set up and calibrate the table every time, does not lead it, stands dead.
- The print speed has increased while maintaining the quality.
- Quiet operation of carriages on rails, the printer is almost inaudible during operation.
I am attaching a video of the end result. nine0003
For anyone who wants to repeat this path, here is a link to ThingiverseIf you have any questions, I will always answer.
linear guides - 3DPrinter
Showing all 7 items
Initial SortBy PopularityBy RatingSort by Latest Price: Ascending Price: DescendingAdd to Cart
Carriage MGN15C for linear rail guide
399 UAHRail Carriage - The best linear guide on the market for 3D printers. nine0114
The accuracy and payload of the rail allows it to be paired with a 3D printer printhead, laser or even a milling head.
Installing the rail will greatly improve the 3D print quality of your 3D printer.
Attention: the price is for the carriage MGN15C.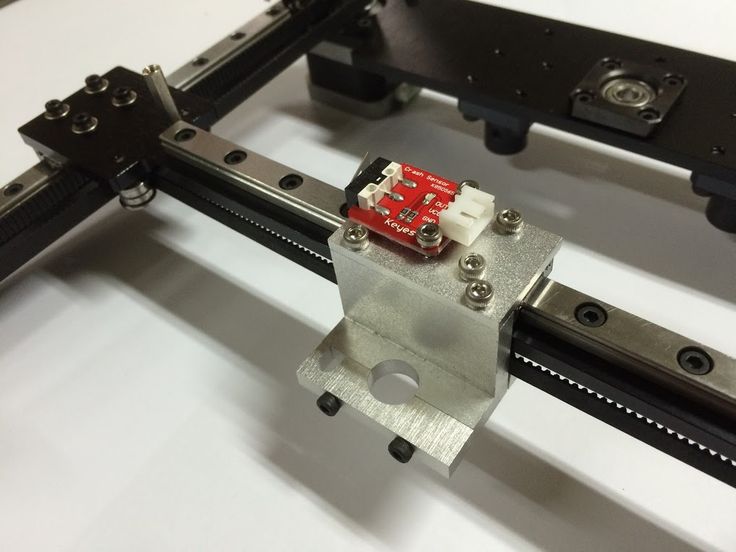
The rail can be purchased here.
*Bracket type: MGN15C
Carriage and rail guide MGN12H - set nine0114 720 UAH – 800 UAH
Rail is the best existing linear guide on the market for 3D printers.
The accuracy and payload of the rail allows it to be paired with a 3D printer head, laser or even a milling head.
Installing the rail will greatly improve the 3D print quality of your 3D printer.
Add to cart
Rail linear guide MGN15 - 100 cm
1200 UAHRail is the best existing linear guide on the market for 3D printers. nine0136
The accuracy and payload of the rail allows it to be paired with a 3D printer printhead, laser or even a milling head.
Installing the rail will greatly improve the 3D print quality of your 3D printer.
Country of origin: China
Please note! The rail in this lot is sold WITHOUT the carriage. You can buy the MGN15C bottom bracket at this link.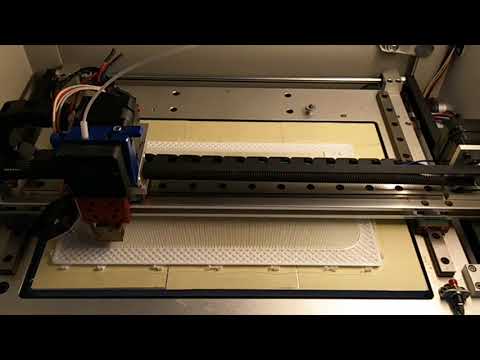
Rail length - 100 cm.
Round Smooth Hardened Shaft for 3D Printer nine0114 250 UAH – 315 UAH
3D Printer Shaft is an excellent and inexpensive solution for linear movement of the print head and platform.
Shaft diameter 8mm, 12mm
Purchasing a new shaft can be justified both when building a new 3D printer and when repairing an old one to replace a damaged or worn shaft.
Price per 1 m
Add to cart
Shaft support SK8
31 UAH nine0135 Shaft mount - allows you to conveniently and securely fix the guide shaft in the 3D printer case.SK8 is a mount designed for the 8mm shaft, the most commonly used shaft in desktop 3D printers.
Scope of supply: 1 pc.
Shaft holder SHF for 3D printer
35 UAH – 79 UAHShaft retainer - designed for fastening linear guides (shaft) on the 3D printer body.
SHF8 or SHF12 - retainer for 8/12mm shaft. The hardened round shaft is a simple and inexpensive solution for linear movement of moving parts in desktop 3D printers.