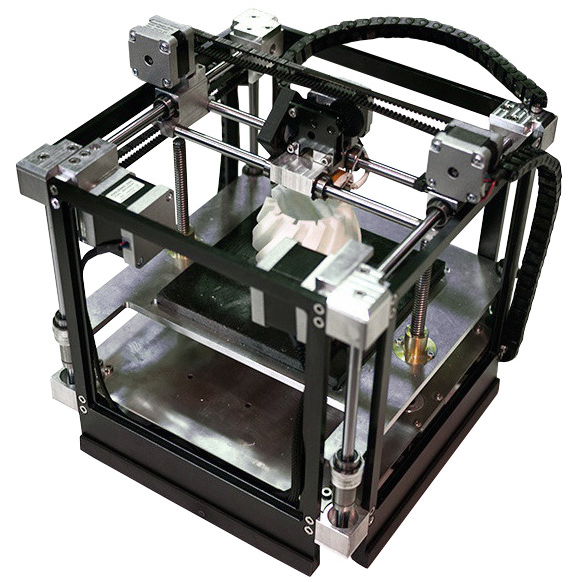
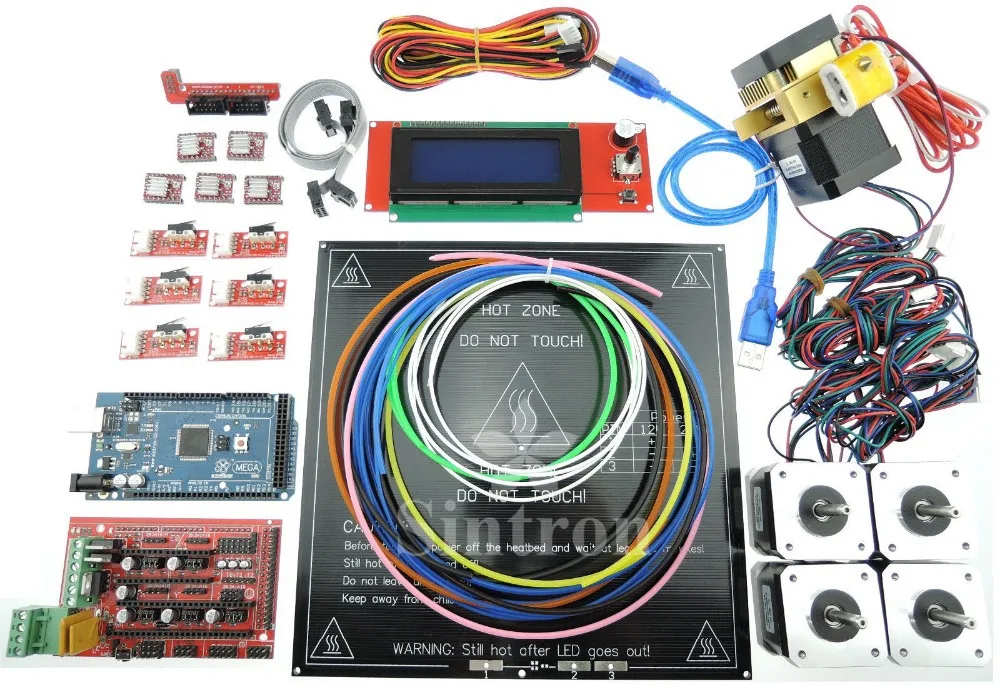
3D printer electronic components
3D Printing of Electronic Components
Vincent Charbonneau provided an overview of 3D printing capabilities on engineering.com website. This overview complete the picture of article about 3D printed capacitors by Nano-Dimension 3D printer here.
As a technology, 3D printing has existed for longer than some might think. Also known as additive manufacturing, due to the fact that objects are printed by adding material layer by layer, 3D printing first came to prominence in the 1990s. Given the technology’s infancy at the time, it was mostly suitable for the creation of aesthetic reference models during a project’s rapid prototyping phase.
Since that time, 3D printing has matured to the point where complex electronic components like circuit boards can now be constructed entirely through the use of CAD models and specialized 3D printers.
3D Printing Electronic Components
While several methods exist for 3D printing electronic components, typically this is accomplished by utilizing a dual-material fused filament process with conductive thermoplastic filaments. These thermoplastic filaments are often made with copper, but occasionally carbon and graphene are used instead. The latter are more brittle than copper, however, and have a tendency to shatter when subjected to significant vibrations.
As with all 3D printing, a digital CAD model of the desired part must first be designed, as this will serve as the printer’s instruction model, providing it with all the dimensional data required to build the component. Once the printing process begins, a trace is created (sort of like a part’s “fingerprint”), and then the requisite materials needed for that specific part are added in layers.
One key challenge when it comes to 3D printing electronic components compared to other printing projects is the need to use wider and thicker traces to compensate for the fact that the conductive ink, paint or filament utilized to build the traces has a higher resistance than the copper that is commonly used.
3D-printed Microstrip antennas. (Image courtesy of Nano Dimension. )
)Many companies have already made significant forays into overcoming the numerous challenges posed by 3D printing complex components, allowing them to produce systems that are increasingly scalable and efficient. One such company is Nano Dimension.
Nano Dimension’s flagship platform is its DragonFly Lights-Out Digital Manufacturing (LDM) system for electronic circuitry. DragonFly LDM integrates a precise inkjet deposition printer with dedicated nano-inks and 3D software to print electronic circuits such as printed circuit boards (PCBs), antennas, capacitors and sensors.
DragonFly LDM printing method. (Image courtesy of Nano Dimension.)The DragonFly’s eponymous “Lights-Out” manufacturing system signifies that the device is designed to run 24/7 with little to no operator intervention. According to Nano Dimension, “In the case of additive manufacturing, LDM means DragonFly users can 3Dprint more functioning electronic circuitry faster, extending the DragonFly’s rapid prototyping capabilities beyond prototyping. Users can now 3D print one-off prototypes as well as low-volume manufacturing of printed electronics.”
Making use of two self-cleaning print heads, one for nano-silver conductive ink and the other for dielectric polymer ink, DragonFly LDM is able to concurrently print with both inks in a single print job. Nano Dimension’s Switch software also plays an important role by preparing electronic designs for printing.
Switch users can adjust many characteristics of a 3D file, such as layer thickness, conductor width, layer order, punching, rotation options, as well as the shape or object outline. In addition, the software helps optimize the printing process by maximizing the use of the printing surface.
“The DragonFly LDM is designed to help our customers prepare for Industry 4.0 and stay competitive in a world that demands electronic devices with increasingly sophisticated features. Like its predecessor, the DragonFly Pro, it’s the first of its kind on the market, carefully designed for both ease of use and even more agile, faster and affordable 3D printing of functional circuitry,” said Amit Dror, CEO and cofounder of Nano Dimension. “We’re confident that the LDM system will provide best-in-class additive manufacturing of printed electronics on the market, making it possible for companies to be more innovative, improve productivity and reliability, lower costs, and reduce time-to-market.”
Another company that has thrown its hat into the electronic 3D printing ring is Optomec, which is focusing its efforts on Aerosol Jet technology and has developed a 3D printer capable of printing interconnects, traces, and even passive and active components on 2D and 3D substrates.
Printers equipped with the Aerosol Jet 3D printing system are able to print on a multitude of substrates, including plastics, ceramics and metallic structures. In addition, Aerosol Jet printers can print conformal interconnects on 3D surfaces, eliminating the need for wire bonding (for instance, printing electrical connections on 3D stacked die or for LED chip fabrication).
Aerosol Jet printing system. (Image courtesy of Optomec.)In terms of emerging applications for its technology, Optomec hopes to one day add biological component printing to its printer’s list of capabilities. “The technology behind Aerosol Jet can print electronic and biological components onto 2D and 3D surfaces. By tightly integrating electronic circuitry with physical packaging, Aerosol Jet is fueling growth in new consumer and military applications where increased functionality in smaller spaces is a key driving factor,” the company stated.
All told, there are many advantages associated with 3D printing, some of which have already been discussed above. From mass customization, greater design freedom, tooling reductions and packing efficiencies, there is no shortage of benefits from 3D printing.
That is not to say that the technology is flawless—far from it. There are still many hurdles to overcome before 3D printing, especially the printing of complex components like PCBs, can really take off on a large scale. Currently, the 3D printing of electronics still has a high energy consumption when contrasted with traditional manufacturing systems, and the printing process itself can be quite slow.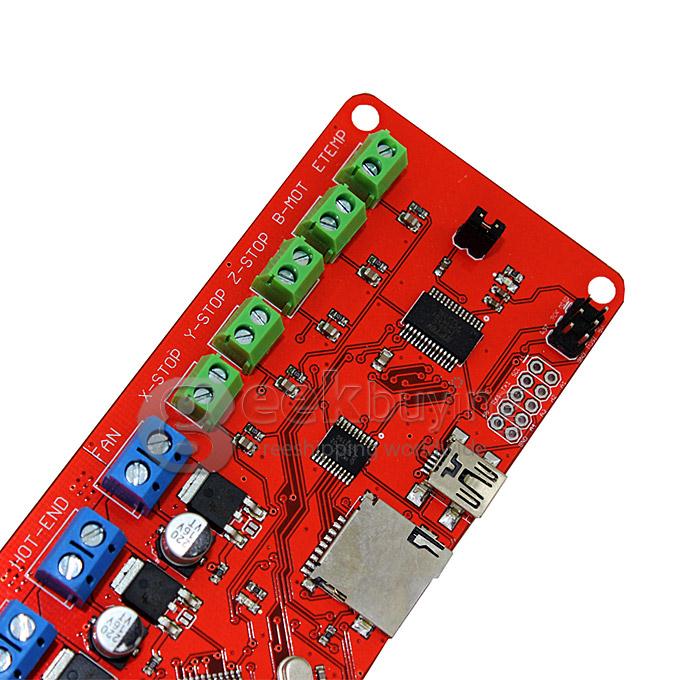 Furthermore, as more and more people gain access to sophisticated 3D printers and the less complex the process becomes, the more difficult it will be to stop the illegal manufacturing or “pirating” of proprietary technology.
3D printing has tremendous potential, and as the technology continues to be refined over time, there is little doubt that increasingly complex components—both organic and artificial—will be printed and produced on a mass scale. There may even come a day when advanced 3D printers become a common household staple, just like refrigerators or stoves. Until that day arrives, companies like Nano Dimension, Optomec and others will continue to push the boundaries of electronic manufacturing via 3D printing.
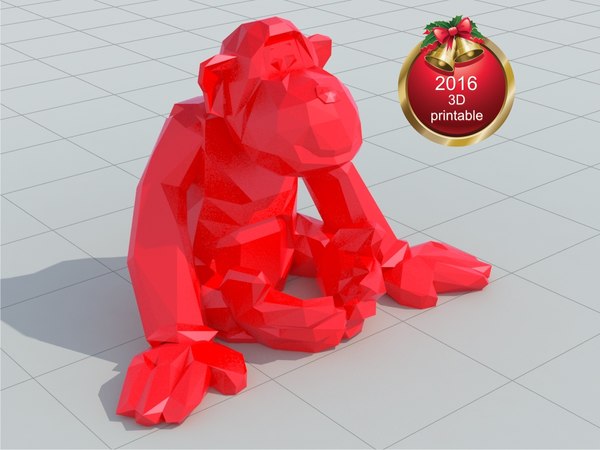
featured image source: Nano-Dimension
Source: Engineering.com
What are 3D Printed Electronics? Let us tell you...
Design
The complexity of electronics combined with the capabilities of 3D printing. Heard of 3D printed electronics but want to know more?
The ability to 3D print electronics is making waves in an industry plagued by long stints of R&D and a never ending cycle of prototypes and new releases.
But what exactly does this process entail? And how, as a designer, architect, or artist, can it help you? Is it sustainable? What are the dangers? And what should you know about it?
This guide is a useful starting point for you to find out…
With 3D printing electronics it is possible to make various types of boards that can be programmed and connected to prototypes – ©iakovenko123/Depositphotos.com – Cover image – ©iprescott10/Depositphotos.comWhat is it?3D Printing objects with electronic functionality is a relatively new concept.
It involves the use of material jetting technology, which is used to jet conductive and insulating inks onto the printing surface.
These inks are applied in lines as thin as a few microns before UV light is used to solidify the inks.
The use of material jetting facilitates multi-material 3D printing, which is particularly useful for the electronics industry.
This means that the different elements necessary in electronics, such as functional circuitry and enclosures, can be manufactured in a single print run.
3D printing electronics involves the use of material jetting technology, which is used to jet conductive and insulating inks onto the printing surface – ©IgorVetushko/Depositphotos.comWhat materials are used when 3D printing electronics?Where systems could typically use just one material in the 3D printing process, recent advancements have enabled the involvement of multiple materials.
This allows manufacturers to merge conductive materials with non-conductive materials.
The thermoplastics used in the 3D printing process are often made with copper, carbon and graphene.
Meanwhile, proprietary conductive and dielectric inks are used simultaneously to build functional circuits and antennas. This expands the range of functions in 3D printed electronics.
Because the process combines multiple materials into the same 3D object it also requires a solvent to ensure their compatibility. The particular solvent used is known as an orthogonal solvent, which is specifically designed not to cause damage to the different components.
The thermoplastics used in the 3D printing process are often made with copper, carbon and graphene – © Julian Pagliaccio, via Wikimedia CommonsWhat can 3D printing electronics produce?With 3D printing electronics, it is possible to make various types of boards that can be programmed and connected to prototypes.
A very wide range of inks can be utilized enabling a full range of printed electronics functionality: conductors, semiconductors, dielectrics, resistors and more.
The process can be used to manufacture electronic components such as resistors, capacitors, antennas, sensors, and thin film transistors.
Using the 3D printing process, it is also possible to rapidly 3D print fully functional electronic circuits that contain electrically-conductive metallic inks and insulating polymeric inks, which could be useful for medical devices, radio frequency shielding surfaces and novel structures for harvesting solar energy.
Today, however, it’s main applications include printing electronics for use in prototypes for upcoming products, prosthetics and more complexly shaped electronic products.
Give me a step-by-stepWhile several methods exist for 3D printing electronic components, they typically mirror the various steps utilised in regular 3D printing. The main difference is the use of a dual-material fused filament process with conductive thermoplastic filaments.
As with all 3D printing, a digital CAD model of the desired part is designed, which serves as the printer’s instruction model.
When the printing process begins, a trace or “fingerprint” is created, and then the requisite materials needed for that specific part are added in layers.
Specialised machinery is required which integrates a precise inkjet deposition printer with dedicated nano-inks and software capable of printing electronic circuits such as printed circuit boards (PCBs), antennas, capacitors and sensors.
Can I do it at home?Due to the complexity of the process, it is not possible to replicate it at home unless you have the capability of manufacturing your own 3D printer.
With the relevant machinery, it is possible to 3D print electronics at home.
Find out more about manufacturing processes, don’t miss What is Explosive Forming? Let us tell you…
The benefits of 3D printing electronics range from faster time-to-market, greater freedom of design and customizationWhat are the pros & cons of 3D printed electronics?At the core of every electronic device is a Printed Circuit Board (PCB) which is difficult to produce. Luckily, with the advent of 3D printing, manufacturing these circuit boards is less challenging.
The benefits of 3D printing electronics range from faster time-to-market, greater freedom of design and customisation.
This is because with the advent of 3D printing electronics manufacturers can create prototypes of circuits and circuit birds in-house, reducing procurement expenses and eliminating concerns about IP infringement.
3D printing also opens up opportunities to design complex shapes and components. For example, multilayer circuits can now be 3D printed on non-flat, flexible surfaces, which would not be possible with traditional manufacturing techniques.
Components can also be printed onto 3D surfaces eliminating the need for a separate substrate and reducing the size, thickness and weight of the end product.
However, there are several limitations when it comes to 3D printing electronics, not only because it is limited in the types of parts it can produce.
Whilst the recyclability of 3D printed electronics is an area being explored by various researchers, it remains a con due to what is currently possible.
Another downside to 3D printed electronics, and in fact, all 3D printed products is their structural integrity.
Whilst printed layers adhere together in some cases, and under certain stresses or conditions, they can delaminate.
Another major downside to 3D printing as a whole is its increasing popularity and accessibility. On one hand, it democratises the manufacturing processes but it also makes it easier to fake and counterfeit products.
I want to know if it’s sustainable…Whilst 3D printing electronics can minimise the manufacturing footprint by localising production, the difficulty in recycling the various components means it can’t be considered a sustainable process.
A visual demonstration of the 3D printing processI want to know more!There are several resources that are useful when it comes to building your knowledge around 3D printed electronics.
If you want to learn more check these out:
- A visual demonstration of the 3D printing process used to manufacture electronics.
- An explanation of the various capabilities of 3D printing electronics.
- A paper detailing the evolution of 3D printing electronics.
- A breakdown of the various benefits and current systems employed when 3D printing electronics
- A detailed research into the future of 3D printing electronics and its benefits when used for prototyping.
Fascinated by 3d printing? Don’t miss 3D printing ceramics: Interview with Hilda Nilsson.
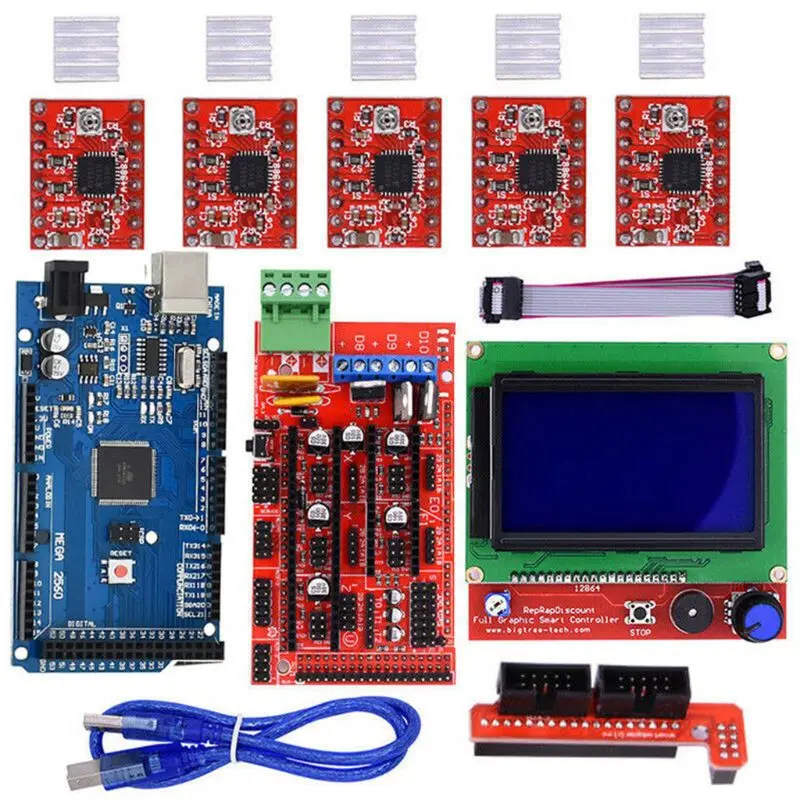
Electronic kit for self-assembly of the Makerbase MKS DLP SLA 3D printer.
Electronic kit for self-assembly of the Makerbase MKS DLP SLA 3D printer.
Kit consists of motherboard, touch screen control and head-up display.
The head-up display uses the popular 5.5-inch Sharp LS055R1SX04 display, which has the following parameters:
- Aspect Ratio: 16*9
- Resolution: 1440*2560 pixels
- Pixel density: 538 ppi
- Work area size: 68.04 * 120.96 mm
- Pixel size: 0.04725*0.04725mm
- Outline dimensions: 70.94 (W) × 128.49 (H) × 1.35 (D)
- Glass dimensions: 80.5 *141 * 0.6 rounding with a radius of 5 mm
- Interface: MIPI DSI
Head-up display dimensions are shown in the following image:
The control is implemented using a resistive touch display MKS Robin TFT35 V1. 0, which is connected to the motherboard via a cable.
The dimensions of the touch screen are shown in the following image:
Motherboard provides autonomous operation, combining all the functions required for SLA 3D printers:
- reading files from a flash drive
- stand-alone control via touch screen
- direct image output to the projection display via MIPI DSI interface
- UV lamp control and cooling fan
- direct stepper motor control (implemented on A4988 driver)
- control of limit switches in two extreme positions of the Z axis.
MKS DLP supports the following file types:
- mdlp (proprietary file format available when using a slicer specially designed for MKS DLP)
- photon (Photon 3D printer file format)
- cbddlp (ChiTuBox slicer file format).
The printer also sees and tries to process files containing G-code, but at the moment this function is not fully implemented.
Using a flash drive, you can also update the entire motherboard firmware, or partially update the configuration file. The contents of the archive with the firmware must be transferred to the root of the flash drive, inserted into the USB socket of the switched off motherboard and powered on. Firmware update takes about 2 minutes, configuration update is instant.
The UV LED illumination as well as the cooling fans are powered by an incoming voltage, which can be between 12 and 24 volts. Therefore, it is necessary to select fans and UV LED illumination with a suitable supply voltage. The fan and UV LED are controlled by powerful MOSFET transistors HY1403, which are capable of switching current up to 43 amperes. The consumption of the device assembly depends on the consumption of the illumination lamps and cooling fans connected to the motherboard.
The stepper motor is controlled by a driver installed on the board. The maximum current of the stepper motor is configured using the configuration file and cannot exceed 1 ampere. If a more powerful stepper motor is used, then it is necessary to connect an external driver, the control signals for which can be obtained from the connector located next to the built-in driver.
The interface of the device is simple and intuitive, it implements only the basic functions necessary for 3D printing: the direct printing procedure, as well as service manipulations with the illumination lamp, the Z axis.
The dimensions of the motherboard are shown in the following image:
Contents of the configuration file:
######### MKS DLP configuration ######### #===================Language Configuration Language Configuration ========================= ================ >cfg_language_adjust_type 1 #Type of switching language (1:Switching through lcd button, 0:Switching through dlp_cfg.txt). Availability of language change from the printer menu: 1 language change is available, 0 language change is not available, the language is set by the following configuration line >cfg_language_type 1 #Language Language selection, only available if the previous item is set to 0 (1: Simplified Chinese; 2: Traditional Chinese; 3: English; 4: Russian; 5: Spanish, 6: French, 7: Italian ) #This configuration is only valid when "cfg_language_adjust_type" is set to 0. #-------------LCD "Info" content configuration The following information is displayed in the “Settings” - “Info” menu ------------------ ------------------ >cfg_system_type DLP #System type to display, can only be ASCII characters and cannot exceed 200 characters >cfg_version_custom 0 #0:Display the firmware inner version :Display the version of Custom version "cfg_firmware_version" 0 - shows the actual firmware version, 1 - show the value specified in the next line >cfg_firmware_version 1.1.4 #Custom version, can only be ASCII characters and cannot exceed 200 characters #------------LCD "Service" content configuration Information is displayed in the menu “Settings” - “service” ----- >cfg_website www.
makerbase.com.cn #Website to display, can only be ASCII characters and cannot exceed 200 characters >cfg_email [email protected] #Email to display, can only be ASCII characters and cannot exceed 200 characters #---------------------------------------------------------------- ------------ ######## LCD display color configuration Button and LOGO customization please refer to instructions Customizing the color of the GUI menu items ########## >cfg_background_color 0xFFFFFF #Background color of LCD >cfg_btn_bkcolor 0xFFFFFF #Background color of universal button >cfg_btn_text_bkcolor 0xFFFFFF #Background color of universal button-text >cfg_btn_textcolor 0x8DB937 #Color of universal button-text >cfg_filename_bkcolor 0x000000 #Background color of file directory button >cfg_filename_textcolor 0xFFFFFF #Text of file directory text >cfg_msg_area_bkcolor 0x8DB937 #Background color of status information display area >cfg_state_msg_bkcolor 0xFFFFFF #Background color of status text >cfg_state_msg_textcolor 0x8DB937 #Status information text color >cfg_sel_btn_bkcolor 0x000000 #Background color of button when it is selected >cfg_sel_btn_text_bkcolor 0xFFFFFF #Background color of button-text when button is selected >cfg_sel_btn_textcolor 0x43cdff #Color of button-text when button is selected >cfg_dialog_bkcolor 0x000000 #Background color of dialog >cfg_dialog_msg_textcolor 0xffffff #Color of dialog information >cfg_dialog_btn_bkcolor 0xff0000 #Background color of button on dialog >cfg_dialog_btn_textcolor 0xFFFFFF #Color of button-text on dialog >cfg_layer_area_bkcolor 0x8DB937 #Background color of the layer display when printing >cfg_printing_state_bkcolor 0xffffff #Background color of printing infomation when printing >cfg_printing_state_textcolor 0x8DB937 #Color of printing infomation when printing #============================ Basic Settings ================== ======= # Travel limits after homing (units are in mm) working height of the Z axis of the printer, the minimum and maximum values are indicated in millimeters >Z_MIN_POS 0 >Z_MAX_POS 155 >Z_PAUSE_POS 10 #Rising heigth of Z axis when pause printing(mm) How much to raise the Z axis during pause, specified in millimeters #============================= Stepper Motor Settings ================ ============ #Invert the stepper direction >INVERT_Z_DIR 1 #Movement setting >DEFAULT_Z_STEPS_PER_UNIT 1600 #Default Axis-Z Steps Per Unit (steps/mm) How many steps are needed to move one millimeter along the Z axis >DEFAULT_Z_MAX_FEEDRATE 5 #Default Axis-Z Max Feed Rate (mm/s) Default feed rate in millimeters per second >DEFAULT_Z_MAX_ACCELERATION 100 #Default Axis-Z Max Acceleration (change/s) change = mm/s Z-axis acceleration >DEFAULT_ACCELERATION 1000 #X, Y, Z and E acceleration for printing moves >DEFAULT_RETRACT_ACCELERATION 1000 #X, Y, Z and E acceleration for retracts >DEFAULT_TRAVEL_ACCELERATION 1000 #X, Y, Z acceleration for travel (non printing) moves >DEFAULT_MINIMUMFEEDRATE 0.
0 #minimum feed rate >DEFAULT_MINSEGMENTTIME 20000 #minimum time in microseconds that a movement needs to take if the buffer is emptied. the minimum time in microseconds that the movement should take if the buffer is empty >DEFAULT_MINTRAVELFEEDRATE 0.0 # >DEFAULT_ZJERK 0.4 #Default Axis-Z Jerk (mm/s) >CURRENT_VREF_Z 600 #Default motor current for Z in mA range (0~1000) Stepper motor current #============================= Endstop Settings ================= ========== >MIN_SOFTWARE_ENDSTOPS 0 # 0:axes can move below MIN_POS; 1:axes won't move below MIN_POS. Software limits, whether the axis can move below the value specified in Z_MIN_POS >MAX_SOFTWARE_ENDSTOPS 1 # 0:axes can move below MAX_POS; 1:axes won't move below MAX_POS; Software limits whether the axis can move above the value specified in Z_MAX_POS # Mechanical endstop with COM to ground and NC to Signal uses "false" here (most common setup). Mechanical limits are activated when shorted to ground >Z_MIN_ENDSTOP_INVERTING 1 # set to true to invert the logic of the endstop.
Inverting Mechanical Limits >Z_MAX_ENDSTOP_INVERTING 1 # set to true to invert the logic of the endstop. #============================== Home Settings ================= ============= >Z_HOME_DIR -1 # Direction of endstops when homing; 1=MAX, -1=MIN :[-1,1] direction of movement when searching for “home” >HOMING_FEEDRATE_Z 240 # Homing Z speeds (mm/m) Movement speed when searching for “home” #===================Buzzer Settings=========================== ============== >cfg_buzzer_type 1 # 0:Buzzer off 1:Buzzer on Turn sound on/off. regardless of the setting, you can change the value via the touch screen menu.
Firmware available at: https://github.com/makerbase-mks/MKS-DLP
Firmware source code: https://github.com/makerbase-mks/MKS-DLP-FIRMWARE
Pilot 450 industrial 3D printer (SLA) - supply of 3D printing equipment from the company Foliplast at a bargain price
Pilot 450 industrial 3D printer (SLA) - supply of 3D printing equipment from the company Foliplast at a bargain price- Main
- Catalog
- Industrial 3D printers
- UnionTech Pilot 450 industrial 3D printer
Equipment
- Description
- Characteristics
- Documents
- Video
- Payment and delivery
- Reviews
- Product photo
Description
Pilot 450 3d printer
The SLA laser printer from UnionTech is characterized by the following parameters:
- The maximum weight of the model is 35 kg.
- Accuracy within ±3 µm is achieved with a warp-free granite base platform.
- The use of precision mechanics ensures high positioning accuracy of the build platform along the Z axis of ±2 µm.
- Enclosed optics isolated from build chamber, tar and dust free. Additional system protection ensures long equipment life.
- The SCANLAB scanner comes directly from the manufacturer (Germany).
- 3-axis scanner motor (Panasonic Servo Motor) meets the highest standards, has durability and high accuracy. The
- laser from American Spectra Physics achieves a stable output power of ±2mW.
- Rated laser power - 800 mW (at the surface of the resin in normal condition - 300 mW).
- Photopolymer resin level is controlled with an accuracy of ±5 µm. Prevention of excessive resin consumption is achieved through patented vacuum adsorption technology.
- All electronic components are CE certified.
Buy an industrial 3D printer Pilot 450 (UnionTech) in Foliplast with delivery to Moscow, St. Petersburg, Samara, Kazan, Novosibirsk and other Russian cities.
Make an order by phone 8 (800) 302-13-41 or send a request in any contact form on the site. Our employees will provide the necessary information and assist in choosing a 3D printer for your production purposes.
Features
| Equipment type | 3D printer |
| Print Technology | SLA (Laser Stereolithography) |
| Construction area size, WxHxD, mm | 450 x 450 x 400 |
| Max scan speed, m/s | 12 |
| Construction accuracy, mm | ±0.1mm (size < 100mm)/ ±0.1% (size ≥100mm) |
| Layer thickness (adjustable), mm | 0.05 - 0.25 |
| Laser model | Triple Frequency Solid State Nd: YVO4 |
| Laser spot diameter, mm | 0.08 - 0.12 |
| Amounts of material included in the delivery, kg | 160 |
| Software | UnionTech BP from Materialize/Windows® 7. 10 10 |
| Dimensions, WxDxH, mm | 1331 x 1368 x 2140 |
| Machine weight (excluding material), kg | 925 |
| Power supply, V | 240 V, 50 Hz |
Documents
TDS Pilot 450 en
855.1 Kb
Videos
To view this video please enable JavaScript, and consider upgrading to a web browser that supports HTML5 video
Implementation of SLA 3d printer for case prototyping
Payment and delivery
Payment method
It is possible to pay for goods and services purchased at TPK Foliplast LLC by means of a non-cash transfer of funds by the customer to the settlement account of the organization.
About delivery
Delivery of goods can be carried out by self-delivery from the main warehouse of TPK Foliplast or with the help of transport companies. Delivery to the regions of Russia by a specific transport company is agreed with the client individually.
For the convenience of preliminary calculation of shipping costs, we provide links to calculators of popular transport companies:
Cost calculation
Cost calculation
Cost calculation
Cost calculation
Cost calculation
Calculation of the cost
In such regions as: Nizhny Novgorod, Moscow, St. Petersburg, Samara, Kazan, Novosibirsk, our products can be obtained at the following addresses:
| Nizhny Novgorod (production and main warehouse): | st. Pamirskaya, 11n Pamirskaya, 11n |
Moscow:
| Major Express - st. Dobrolyubova, d. 2, building 1 | CDEK - Aviamotornaya st., 67/8, building 1 | ||
| Business Lines - st. Lobnenskaya, 18, building 2 | DPD - Kirovogradskaya street, 15 | ||
| Baikal Service - st. Plekhanova, 11, building 6 | PEK - 1st Vyazovsky pr., 4, building 19 |
St. Petersburg:
| Major Express - st. Dvinskaya, 23 | CDEK - st. Rossiyskiy Ave., 8 | ||
| Business Lines - 1st Verkhniy Lane, 12 B | DPD - st. Domostroitelnaya, 1, Letter B Domostroitelnaya, 1, Letter B | ||
| Baikal Service - 1st Upper Lane, 12 E | PEK - st. Tosina, 9 |
Samara:
| Major Express - st. Stara Zagora, 25 | CDEK - st. Volskaya, 71 | ||
| Business Lines - st. Democratic, 45A | DPD - st. Vrubel, 11 | ||
| Baikal Service - st. Tovarnaya, d. 8, building 1 | PEK - st. Zemetsa, d. 32, bldg. 354 |
Kazan:
| Major Express - st. Vosstaniya, d. 100, building. 211a | CDEK - st. Dekabristov, 156 | ||
Business Lines - st. Adela Kutuya, 151 Adela Kutuya, 151 | DPD - st. Hlebozavodskaya, 7 V | ||
| Baikal Service - st. Bukharskaya, 3 | PEK - st. Tikhoretskaya, 19 |
Novosibirsk:
| Major Express - st. Family Shamshin, 30 | CDEK - st. Krivoshchekovskaya, 15, bldg. 1 | ||
| Business Lines - st. Sukharnaya, 35/1 | DPD - st. Bolshaya, d. 256 B, building. one | ||
| Baikal Service - st. Chukotskaya, d. 2B, bldg. 1 | PEK - st. Planetnaya, 30, bldg. 2A |
Photo of finished product
Photo of finished product
A wide range of Large selection of equipment and materials
Leasing Possibility of leasing
Profile specialists Qualified specialists in their field
Related products
-
UnionTech RS Pro 600 3D printer
Pre-order Art. 0000123140
Equipment type: 3D printer
Print technology: SLA (Laser Stereolithography)
Construction area size, WxHxD, mm: 600 x 600 x 500
Ask for a price
Read more
-
UnionTech RS Pro 1400 3D printer
Pre-order Art. 0000123142
Equipment type: 3D printer
Print technology: SLA (Laser stereolithography)
Construction area size, WxHxD, mm: 1400 x 700 x 500
Ask for a price
Read more
-
Equipment
XJRP SPS450H 3D printer
Pre-order Art.
 0000123125
 Equipment type: 3D printer
Print technology: SLA (Laser stereolithography)
Construction area size, WxHxD, mm: 450 X 450 X 350
Ask for a price
Read more
-
Equipment
3D printer PICASO Designer X (series 2)
In stock Art. PIC-d-x-s2
Equipment type: 3D printer
Print technology: FFF (Fused Filament Fabrication)
Construction area size, WxHxD, mm: 201 x 201 x 210 mm
Ask for a price
Read more
-
XJRP SPS250H 3D printer
Pre-order Art.
 0000123123
 Equipment type: 3D printer
Print technology: SLA (Laser stereolithography)
Construction area size, WxHxD, mm: 250 X 250 X 150
Ask for a price
Read more
-
UnionTech Pilot 250 3D printer
Pre-order Art. 0000123137
Equipment type: 3D printer
Print technology: SLA (Laser stereolithography)
Construction area size, WxHxD, mm: 250 x 250 x 250
Ask for a price
Read more
-
Equipment
PICASO Designer XL PRO (series 2) 3D printer
Pre-order Art.
 PIC-d-xlpro-s2
 Equipment type: 3D printer
Print technology: FFF (Fused Filament Fabrication)
Construction area size, WxHxD, mm: 360 x 360 x 610 mm
Ask for a price
Read more
-
XJRP SPS350H 3D printer
Pre-order Art. 0000123124
Equipment type: 3D printer
Print technology: SLA (Laser stereolithography)
Construction area size, WxHxD, mm: 350 X 350 X 350
Ask for a price
Read more
-
Equipment
PICASO Designer Classic 3D printer
Pre-order Art.
 PIC-d-class
 Equipment type: 3D printer
Print technology: FFF (Fused Filament Fabrication)
Construction area size, WxHxD, mm: 201 x 201 x 210 mm
Ask for a price
Read more
-
3D printer SLM 280 2.0
Pre-order Art. 0000123151
Equipment type: 3D printer
Print technology: SLM (Selective Laser Melting)
Construction area size, WxHxD, mm: 280 x 280 x 365
Ask for a price
Read more
-
UnionTech RS Pro 800 3D printer
Pre-order Art.
 0000123141
 Equipment type: 3D printer
Print technology: SLA (Laser stereolithography)
Construction area size, WxHxD, mm: 800 x 800 x 550
Ask for a price
Read more
-
XJRP SPS600H 3D printer
Pre-order Art. 0000123126
Equipment type: 3D printer
Print technology: SLA (Laser Stereolithography)
Construction area size, WxHxD, mm: 600 X 600 X 400
Ask for a price
Read more
Similar items
-
XJRP SPS600H 3D printer
Pre-order Art. 0000123126
Equipment type: 3D printer
Print technology: SLA (Laser stereolithography)
Construction area size, WxHxD, mm: 600 X 600 X 400
Ask for a price
Read more
-
Equipment
PICASO Designer XL PRO (series 2) 3D printer
Pre-order Art. PIC-d-xlpro-s2
Equipment type: 3D printer
Print technology: FFF (Fused Filament Fabrication)
Construction area size, WxHxD, mm: 360 x 360 x 610 mm
Ask for a price
Read more
-
UnionTech RS Pro 1400 3D printer
Pre-order Art.
 0000123142
 Equipment type: 3D printer
Print technology: SLA (Laser stereolithography)
Construction area size, WxHxD, mm: 1400 x 700 x 500
Ask for a price
Read more
-
Equipment
PICASO Designer Classic 3D printer
Pre-order Art. PIC-d-class
Equipment type: 3D printer
Print technology: FFF (Fused Filament Fabrication)
Construction area size, WxHxD, mm: 201 x 201 x 210 mm
Ask for a price
Read more
-
Equipment
3D printer PICASO Designer X PRO (series 2)
In stock Art.
 PIC-d-xpro-s2
 Equipment type: 3D printer
Print technology: FFF (Fused Filament Fabrication)
Construction area size, WxHxD, mm: 201 x 201 x 210 mm
Ask for a price
Read more
-
UnionTech RS Pro 800 3D printer
Pre-order Art. 0000123141
Equipment type: 3D printer
Print technology: SLA (Laser Stereolithography)
Construction area size, WxHxD, mm: 800 x 800 x 550
Ask for a price
Read more
-
UnionTech Pilot 250 3D printer
Pre-order Art.
 0000123137
 Equipment type: 3D printer
Print technology: SLA (Laser stereolithography)
Construction area size, WxHxD, mm: 250 x 250 x 250
Ask for a price
Read more
-
XJRP SPS350H 3D printer
Pre-order Art. 0000123124
Equipment type: 3D printer
Print technology: SLA (Laser stereolithography)
Construction area size, WxHxD, mm: 350 X 350 X 350
Ask for a price
Read more
-
Equipment
3D printer PICASO Designer X (series 2)
In stock Art.
 PIC-d-x-s2
 Equipment type: 3D printer
Print technology: FFF (Fused Filament Fabrication)
Construction area size, WxHxD, mm: 201 x 201 x 210 mm
Ask for a price
Read more
-
Equipment
PICASO Designer XL (series 2) 3D printer
Pre-order Art. PIC-d-xl-s2
Equipment type: 3D printer
Print technology: FFF (Fused Filament Fabrication)
Construction area size, WxHxD, mm: 360 x 360 x 610 mm
Ask for a price
Read more
-
3D printer SLM 280 2.

Learn more