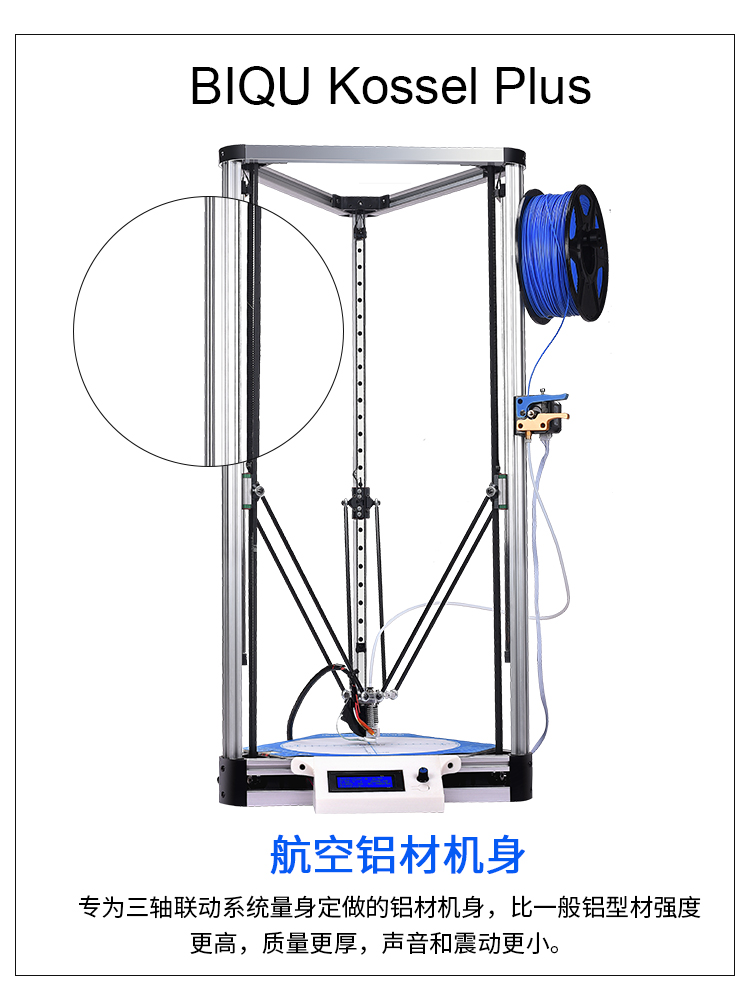
Kossel 3d printer delta
Kossel - RepRap
Kossel
Release status: experimental
| Description | Delta robot 3D printer with extrusion frame. |
| License | GPL |
| Author | User:Johann |
| Contributors | |
| Based-on | Rostock |
| Categories | Kossel |
| CAD Models | GitHub |
| External Link | Blog |
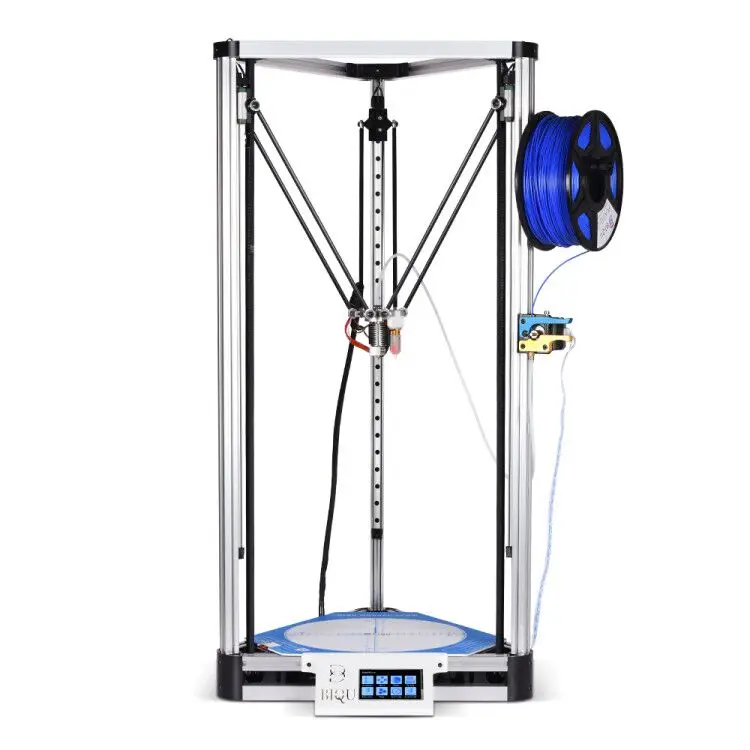
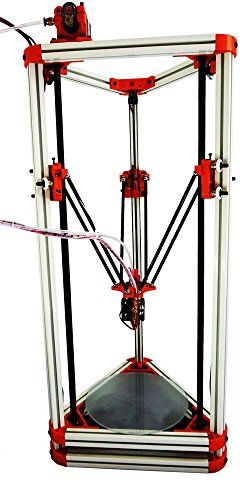
Kossel is a parametric delta robot 3D printer, built in 2012 by Johann in Seattle, USA, based on his Rostock prototype.
It is named after Albrecht Kossel, German biochemist and pioneer in the study of genetics. He was awarded the Nobel Prize for Physiology or Medicine in 1910 for his work in determining the chemical composition of nucleic acids, the genetic substance of biological cells.
Contents
- 1 History
- 2 Design Goals
- 3 Bill of Materials
- 3.1 Printed parts
- 3.2 Frame
- 3.3 Fasteners
- 3.4 Linear motion
- 3.5 Diagonal push rods
- 3.6 Bowden
- 3.7 Endstops
- 3.8 Electronics
- 3.9 Tools
- 4 Assembly instructions
- 4.1 Step By Step Instructions
- 4.2 Autolevel probe
- 4.3 FSR Autolevel
- 4.4 Viki LCD with Azteeg X3
- 4.5 Where to buy
- 5 Links
History
There are several printers in the Kossel family.
Legacy Kossel
- Spectra line instead of timing belt.
- 623 bearings running directly on vertical 15 x 15 mm aluminum extrusion like OpenBeam, 6 bearings per carriage.
- PG35L extruder directly on the end effector (moving platform).
- This design is deprecated but the source files are still available.
OpenBeam Kossel Pro
- Terence Tam's design for mass manufacturing.

- Successfully funded on Kickstarter.
- Stamped and injection molded parts instead of 3D printed.
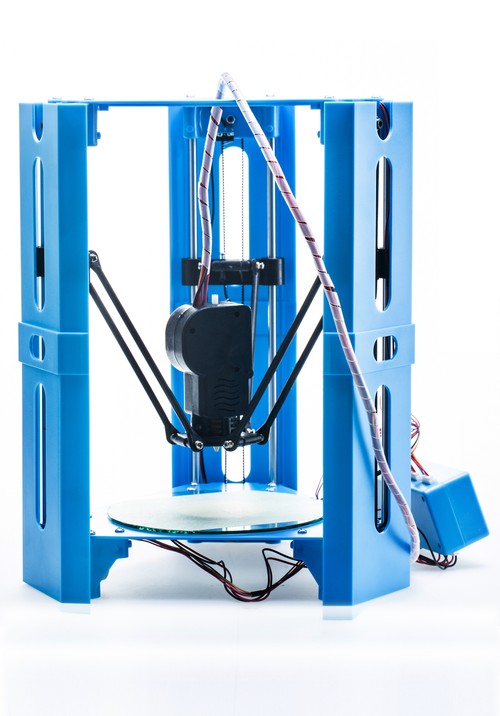
Mini Kossel
- This is Johann's latest and stable version.
- The rest of this page describes the details of Mini Kossel.
Design Goals
- Zero backlash.
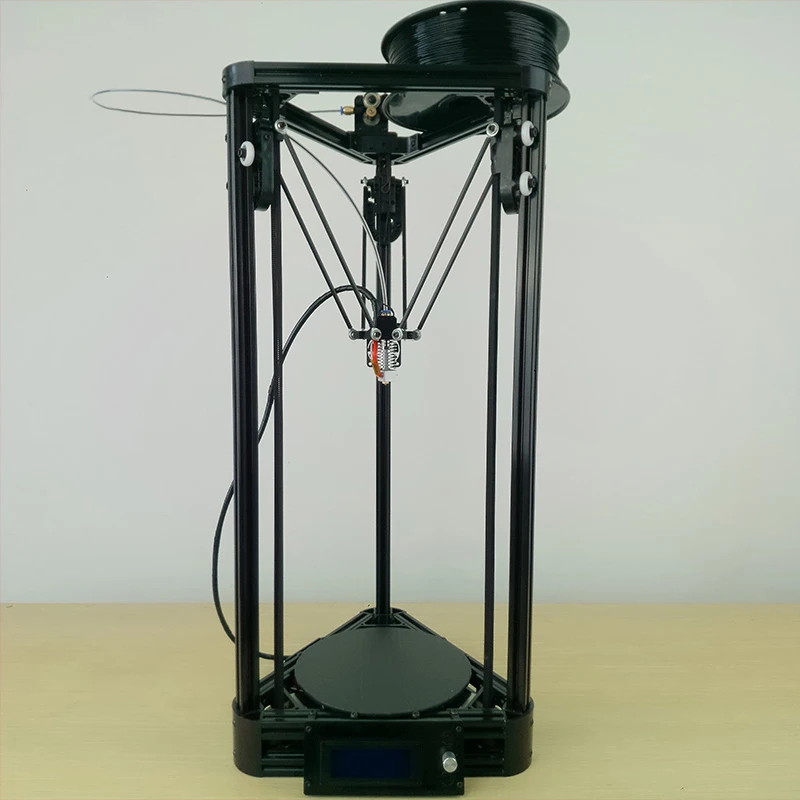
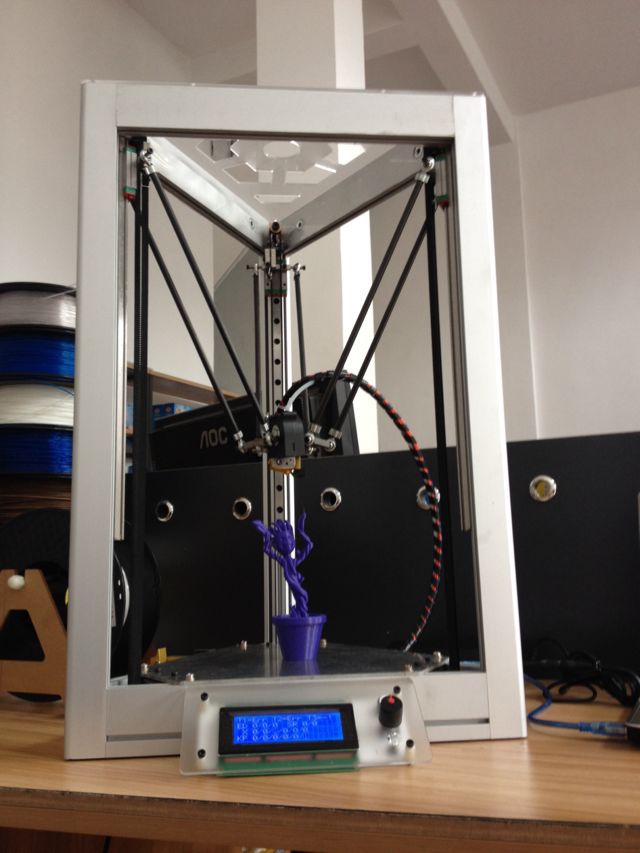
- Type: Delta printer
- Speed: 320 mm/s in all 3 directions.
- Resolution: 100 steps/mm in all 3 directions.
- Repeatability: better than 0.03 mm (30 micron)
- Build volume: cylindrical, 170mm diameter, 240mm height.
- Footprint: triangle, 300 mm width (240mm OpenBeam + printed corners).
- Frame height: 600 mm.
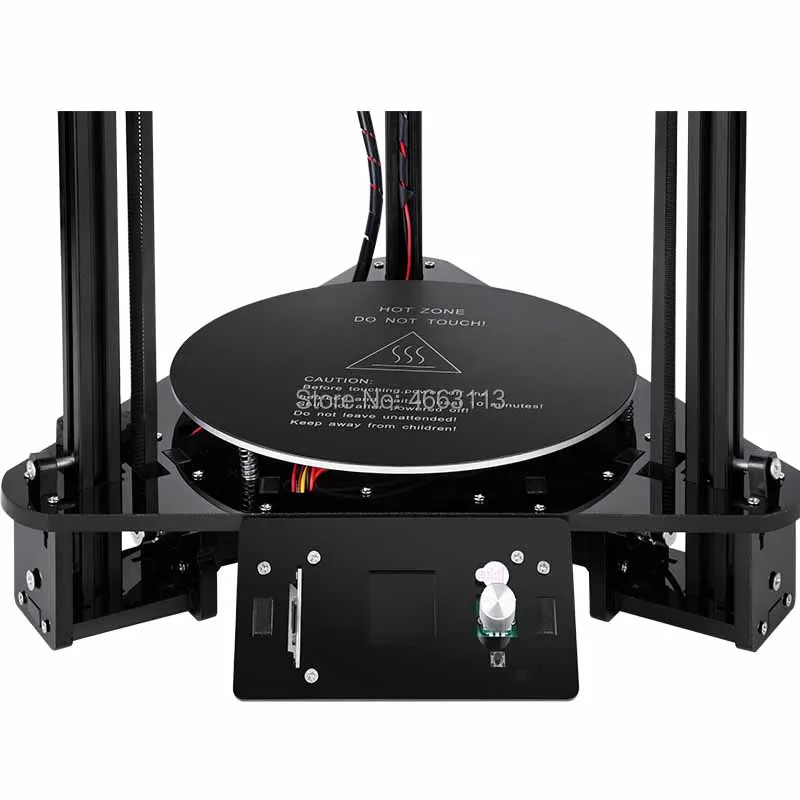
- Print surface: unheated round glass, doesn't move.
- Mass of end effector with hotend: less than 50 grams.
- Simplicity: fewer than 200 parts.
- Hardware cost: less than $600 USD.
- Fully automatic print surface level calibration (autoleveling).
Optionally scale down to a Traveling RepRap that fits within IATA hand luggage size limit (see transportation):
- Frame height: 550 mm.

- Footprint: triangle, 270 mm width, 250 mm across (210mm 15 x 15 mm aluminum extrusion like OpenBeam + printed corners).
Bill of Materials
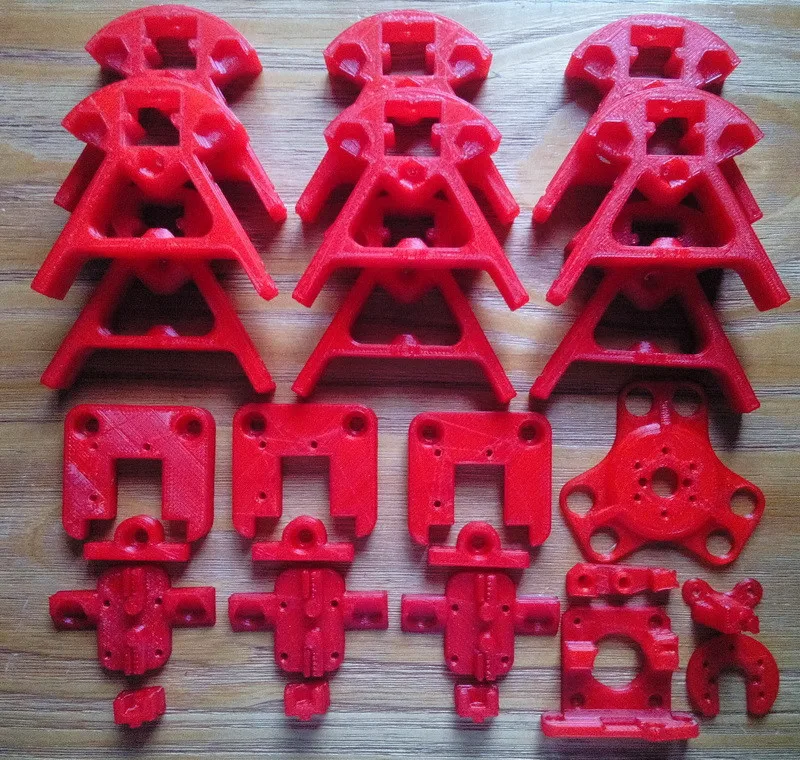
Printed parts
All files come from Johann's Kossel repo: https://github.com/jcrocholl/kossel
- 1x hotend_fan.stl which also serves to attach the hotend.
- 1x plate_1x.stl which includes the following parts:
- 1x End effector RobotDigg Effector
- 1x Extruder RobotDigg Extruder
- 1x Retractable Z probe
- 2x Power supply bracket (optional)
- 3x plate_3x.stl which includes the following parts:
- 3x Bottom vertex RobotDigg
- 3x Top vertex RobotDigg
- 3x Vertical carriage RobotDigg
- 6x Endstop holder
- 3x Print surface holder
Recommended print settings:
- Layer height = 0.2 to 0.3 mm (around 60% of your nozzle size)
- Perimeters = 3
- Top/bottom solid layers = 3
- Infill density = 50%
Note, a PLA End effector may bend or warp if it is not cooled with a fan or insulated.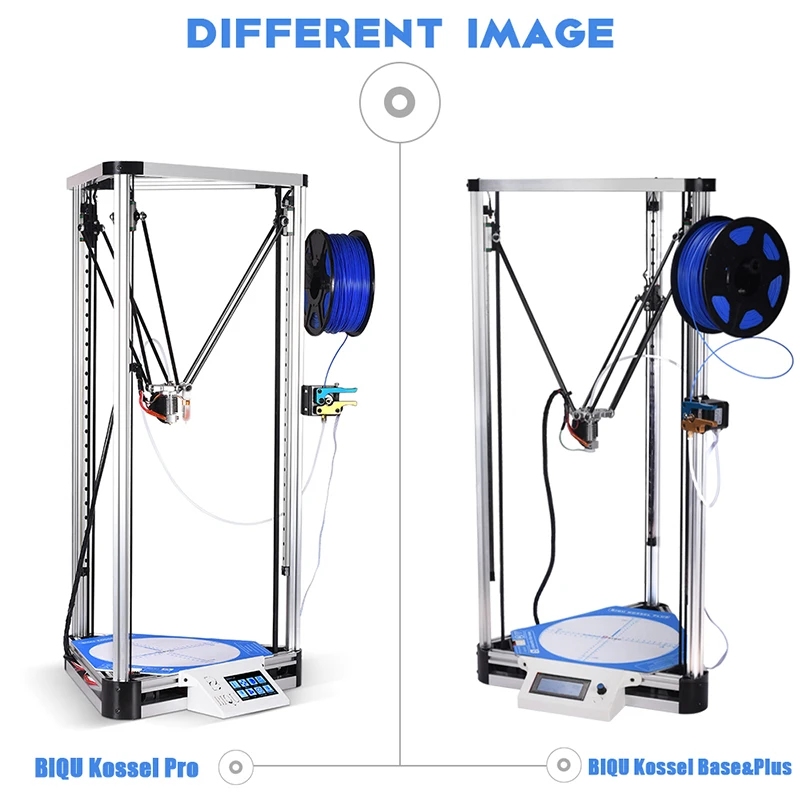 The insulation can be as simple as a loose layer of tin foil to create air pockets between the tin foil and the part. An ABS end effector is less likely to bend. It can also help to insulate parts of the hot end with Kapton tape.
- Quality machined aluminum parts are available from RobotDigg
A kit with the printed parts is available @ Builda3Ddprinter.eu and think3dprint3d in Europe, or TriDPrinting.com, CrunchTech's eBay store or from Erie 3D Printing in the USA.
Frame
- 3x 600mm vertical OpenBeam from Builda3dprinter.eu or OpenBeam.de or Misumi HFS3-1515
- 9x 240mm horizontal OpenBeam from Builda3dprinter.eu or OpenBeam.de or Misumi HFS3-1515
- 1x 170mm round glass/borosilicate plate TriDPrinting.com or Makea3dfactory.comor Builda3dprinter.eu or Ultibots LLC or 3dprinteu.eu/shop
Fasteners
- 100x M3x8mm stainless steel screws (frame and most connections)
- 100x M3 stainless steel nuts
- 100x M3 nyloc nuts
- 6x M3x20mm stainless steel screws (arm attachment to vertical carriage)
- 12x M3x25mm stainless steel screws (belt idlers and effector-rod attachments)
- 6x M3x35mm stainless steel screws (tensioners)
- 50x M3x6mm stainless steel screws (rail attachment to extrusions - 8mm is too long!)
- 12x M3x16mm stainless steel screws (push rod attachment)
- 6x M2.
 5x12mm screws (micro switches)
 - 3x M2.5x16mm (automatic bed leveling probe)
A nuts, bolts and screws kit is available from TriDPrinting.com or Builda3dprinter.eu.
Linear motion
- 3x 400mm hardened steel rail and carriages HIWIN MGN-12H
- 3x 1164mm GT2 belt closed loop with 2mm pitch and 6mm width - UltiBots LLC.
- 6x F623ZZ flanged bearings 3x10x4mm (or F684ZZ 4x9x4mm for printed parts before June 21st)
- 3x GT2 pulley with 16 teeth and 2mm pitch
- 3x Kysan NEMA17 stepper motor,TriDPrinting.comor Builda3dprinter.eu or UltiBots LLC.
Diagonal push rods
- 12x Traxxas 5347 rod ends Traxxas 5347 $14.99
- 12x M4x20mm set screws
- 6x 180mm Carbon tube ID=4mm
A pre-cut rod kit is available from Builda3dprinter.eu and are 3K woven carbon rods]. Fully assembled carbon rod kit is available at 3dprinteu.eu/shop or TriDPrinting.com or www.UltiBots.com
Bowden
- 1x J-Head Hotend 0.
 5mm for 1.75mm filament
 - 1x Clear PFA tubing ID=2mm OD=4mm
- 2x Push fit connector ID=4mm with M5 thread (or bigger thread before June 21st).
Motor
- 1x NEMA-17 motor with an integrated Planetary gearbox with a 5 2/11 :1 ratio.(http://robot-italy.com, Builda3dprinter.eu for EU (http://www.phidgets.com/products.php?product_id=3317 in US).
- 1x Spur Gear, 22 Tooth, 12mm od, 8mm id - #S10T05M022S0508 from SDP-SIor Builda3dprinter.eu. Alternately, a Hardened MK7 drive gear that fits the geared stepper motor is available from TriDPrinting.com
- 3x M3-0.5x25 Cap Screw
- 3x M3 Washer
Idler
- 1x 625 ball bearing (5x16x5)
- 1x M5-0.8x20 Cap Screw
- 1x M5 Washer
- 1x M5-0.8 Hex Nut (Nylock optional)
- 1x M3-0.5x16 Cap Screw
- 1x M3 Washer
- 1x M3-0.5 Hex Nut, Nylock
Endstops
- 3x Omron SS-5 micro switch or Honeywell ZM10B10A01 - UltiBots LLC.
Automatic Bed Leveling Options - Only need one of the following, depending on which you choose.
FSR(force sensitive resistor)
- 3x FSR circular pads
- 3x mounts for fsr pads
Bed leveling probe
- 1x Micro switch (same as for endstops above)
- 1x Bondhus 1.5mm allen wrench
- 1x Safety pin with 2.5mm loop
- 2x Ball point pen spring
- 1x Euro-style terminal block connector
- 1x Heat shrink tubing ID=2mm
Proximity Sensor
Excellent guide to set up proximity leveling can be found on Instructables, search for "auto bed leveling Marlin"
- 1x PNP Inductive proximity sensor
Several versions are available but the most popular and simple to use is the LJ12A3-4-Z/BY. This model works at 6-36vdc(many other models need at least 12v), and has a sensing distance of 4mm. Can be bought on eBay for <$5
- 1x mount for your specific effector/carriage
Electronics
- 1 Electronics setup RepRap Interface Standard #RIS 1 compatible or anything else compatible
- 1x 12V 5A LCD screen power supply
- 1x 3010 DC Fan and 1x 4515 Blower Fan RobotDigg
Tools
This is not a comprehensive list, but should give you an idea of what tools may be required.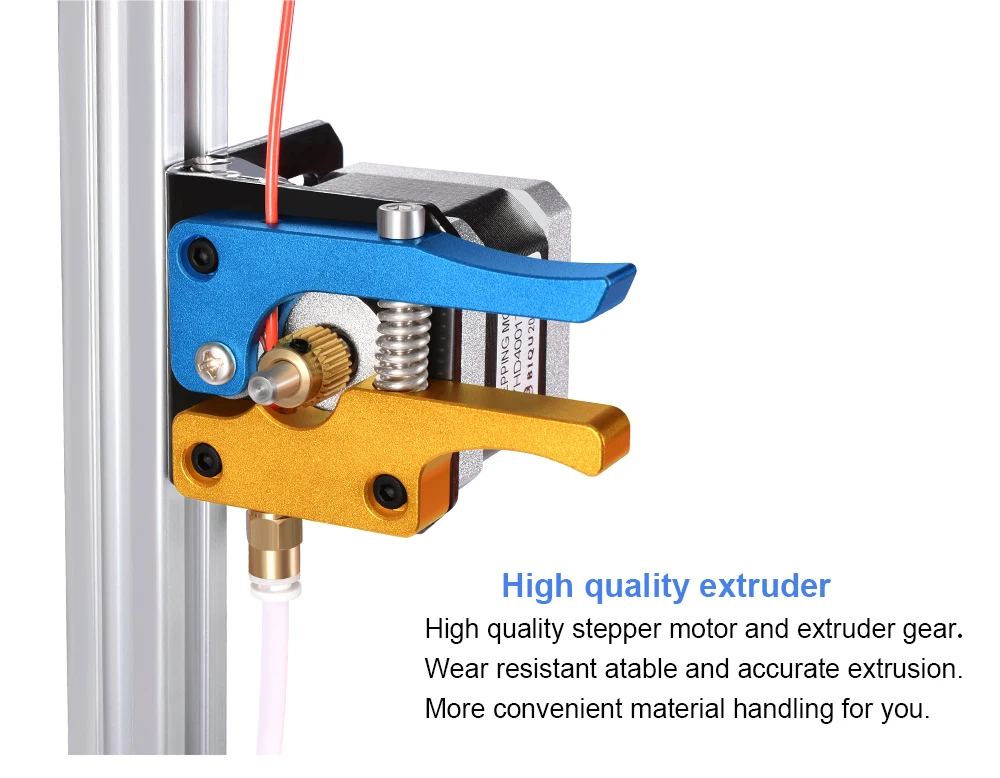 Review all build manuals/videos to ensure you have all necessary tools.
- 1x metric caliper
- 1x M4 Tap Drill bit
- 1x M5 Tap Drill bit
- 1x 1.5 mm allen wrench
- 1x slow-set epoxy
Assembly instructions
Step By Step Instructions
For a video tutorial and step by step instructions see the following website: Kossel mini & Kossel XL build instruction or go to the YouTube channel
Instructions for Kossel Mini kits from Blomker Industries
IPFS link to Instructions
Detailed build manual from Think3dPrint3d with pictures for every step is available here:
Think3dPrint3d Kossel mini build manual
This is a GERMAN translation of Think3dPrint3d's manual:
HKBay.com Mini Kossel Detaillierte Bauanleitung in PDF Format
HKBay.com Mini Kossel Detaillierte Bauanleitung auf Instructables.com
Wiring and commissioning instructions for Mini Kossel using 32-bit Duet electronics:
https://miscsolutions. wordpress.com/2015/01/04/upgrading-the-mini-kossel-to-duet-electronics-part-1-hardware/ and the other articles in that series
Video assembly from the perspective of someone new to the Kosssel:
YouTube Playlist by engineglue
Autolevel probe
X_MAX, Y_MAX, Z_MAX top endstops: NC (Normally Connected). M119 for these should show:
- TRIGGERED when the carriage touches the endstop.
- open during normal operation.
Z_MIN autolevel probe: NO (Normally Open). M119 for Z_MIN should show:
- TRIGGERED when the autolevel probe is retracted (up).
- open when the autolevel probe is deployed (down).
- TRIGGERED when the autolevel probe touches the print surface.
Make sure that M119 does NOT show X_MIN or Y_MIN, if it does you must change them to -1 in Marlin/pins.h.
Although the parts list suggests that a small allen wrench be used, in reality, a short piece of wire might work slightly better since it can rotate more easily.
FSR Autolevel
http://reprap.org/wiki/FSR
Mini Kossel FSR Auto Leveling Setup Guide
Viki LCD with Azteeg X3
References:
- Azteeg X3 wiring diagram
- Viki LCD wiring diagram
- RepRap forum thread with pictures
Connect Viki J2 to Azteeg EXP3 port like this:
- +5V to +5V (red)
- GND to GND (black)
- SDA to SDA (blue)
- SCL to SCL (green)
- ENC_A to D22 (white)
- ENC_B to D7 (yellow)
Connect Viki J3 to Azteeg ICSP port like this:
- CS to CHIP SELECT (D53) (red)
- BTN to D32 on EXP2 (optional) (black)
- DI to MOSI (blue)
- CLK to SCK (green)
- DO to MISO (white)
- CD to CARD DETECT (D49)(yellow)
CS (D53) and CD (D49) are directly next to the ICSP port, slightly under the expansion shield, but the connectors still work fine if you push them in slightly angled.
BTN is for the pause/stop/resume LCD button (kill switch). We recommend not connecting it and using a power switch for emergency stop instead. If you do want to use it, it should be connected to the Arduino BTN_ENC pin. Otherwise set BTN_ENC to -1 if not used.
This uses the LiquidTWI2 library v1.2.3 or later. Copy the LiquidTWI2 directory into the Arduino libraries subdirectory (something like /Applications/Arduino.app/Contents/Resources/Java/libraries/LiquidTWI2, just next to the existing LiquidCrystal folder). If you end up with a directory named "LiquidTWI2-master" then remove the "-master" part. We tested this successfully with Johann's latest Marlin version (as of 2014-03-21) and Arduino 1.0.5.
In Marlin/Configuration.h uncomment or adjust the following lines:
- #define MOTHERBOARD 33 // Azteeg X3
- #define LCD_I2C_VIKI
In Marlin/pins.h under MOTHERBOARD == 33 adjust the following lines:
- #define SDSS 53
- #define SDCARDDETECT 49
- #define BTN_EN1 22
- #define BTN_EN2 7
- #define BTN_ENC 31
Disconnect solder jumper JP12 at bottom of Azteeg X3 to disable onboard SD slot and use pins for external SD reader (Viki LCD SD slot).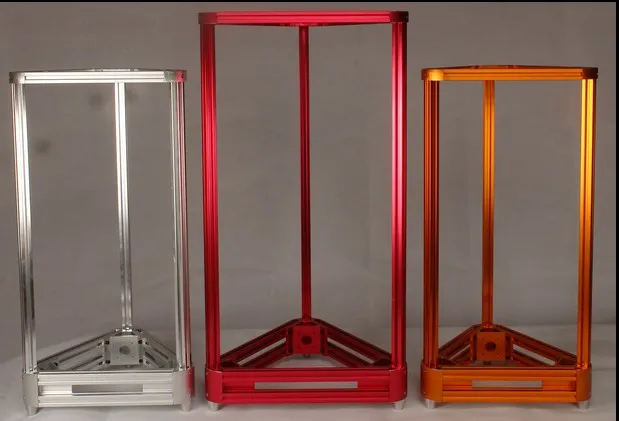
Where to buy
| Shop | Stock | Location |
|---|---|---|
| 3dprinterkart.com | - Kossel/Delta Lowest Prices | India based - ships worldwide |
| 3dprintersbay.com | - Kossel/Delta Printers | US based - Ships Worldwide |
| Build A 3D Printer.eu | Kossel Mini & XL - Highest quality parts | EU/Netherlands based - ships worldwide |
| Think3dPrint3d | Complete DIY Kit Components | UK based - ships worldwide |
| www.HKBay.com | Komplettes DIY Kit mit Deutscher Anleitung | HK/Switzerland based - ships worldwide |
| www.UltiBots.com | Kossel Mini & 250 V-Slot DIY Kits | USA Based - ships worldwide |
| 3DMarkt.at | Complete DIY SET, E3D Extruder, Large | Austria based - shipping to EU |
| reprap.cn | full metal extruder,four wheels design bigger size | China based - shipping to worldwide |
reprapworld.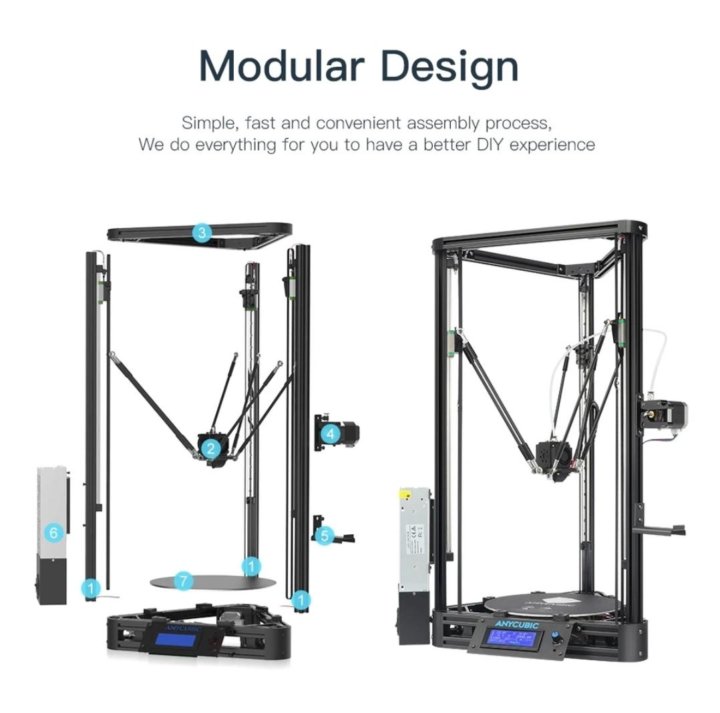 com com | Kossel mini | Netherlands Based - ships worldwide |
| RepRap PT | Printer Parts | Portugal Based - Ships to Portugal and Spain |
| FunReprap France | Kit Kossel Mini et Maxi en Français | Site Français - Mode d'emploi en Français |
| Replikeo | Kit or Assembled Kossel | Hong Kong based - Worldwide shipping |
| DIYKits.eu | Improved Kossel Mini Kit | EU/Croatia - Ships to EU |
Links
- Kits and Parts
- Kossel Pulley Diy Kit
- Specialized shop in Delta printers with video manual to build a Kossel mini and the Kossel XL
- RobotDigg parts n full kits
- KITS $239
- Delta bigger size kit
- Complete Kossel Mini Kit at $599USD ONLY!!
- Think3dPrint3d's kit with detailed documentation on Kossel mini assembly
- single/dual/bigger delta KITS $179
- Guides and instructions
- Assembly Guide for Blomker Industries Kossel Mini Kit
- HKBay.
 com GERMAN translation of Think3dPrint3d's manual
 - Information on how to pick parts
- Pictures on Flickr
- Project blog on Tumblr
- Calibrating a delta printer manually
- How to build a Kossel in china《搭建kossel3d打印机》
- Frame size calculator spreadsheet.
- Mini Kossel FSR Auto Leveling Setup Guide
- Larger (300mm dia. x 480mm print volume) high-accuracy Kossel design and parts list
- Electronics and firmware
- Calibration video using Repetier firmware
- Auto calibration video using IR height sensor with Duet electronics and firmware
- Modified Marlin firmware on GitHub for delta geometry on Arduino.
- RepRapFirmware for delta geometry on Duet.
- How to use Duet electronics in a Kossel
- Source files
- OpenSCAD source files on GitHub for printed plastic parts.
- A prototype heatbed design for the Mini Kossel.
- Community resources
- Online forum for delta printers with vast resources.
- RepRap Forum for delta printers
Kossel - RepRap
Kossel
Release status: experimental
| Description | Delta robot 3D printer with extrusion frame. |
| License | GPL |
| Author | User:Johann |
| Contributors | |
| Based-on | Rostock |
| Categories | Kossel |
| CAD Models | GitHub |
| External Link | Blog |
Kossel is a parametric delta robot 3D printer, built in 2012 by Johann in Seattle, USA, based on his Rostock prototype.
It is named after Albrecht Kossel, German biochemist and pioneer in the study of genetics.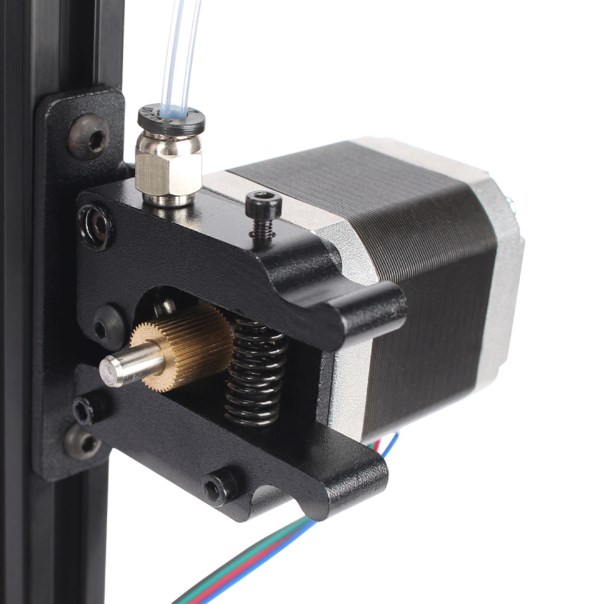 He was awarded the Nobel Prize for Physiology or Medicine in 1910 for his work in determining the chemical composition of nucleic acids, the genetic substance of biological cells.
Contents
- 1 History
- 2 Design Goals
- 3 Bill of Materials
- 3.1 Printed parts
- 3.2 Frame
- 3.3 Fasteners
- 3.4 Linear motion
- 3.5 Diagonal push rods
- 3.6 Bowden
- 3.7 Endstops
- 3.8 Electronics
- 3.9 Tools
- 4 Assembly instructions
- 4.1 Step By Step Instructions
- 4.2 Autolevel probe
- 4.3 FSR Autolevel
- 4.4 Viki LCD with Azteeg X3
- 4.5 Where to buy
- 5 Links
History
There are several printers in the Kossel family.
Legacy Kossel
- Spectra line instead of timing belt.
- 623 bearings running directly on vertical 15 x 15 mm aluminum extrusion like OpenBeam, 6 bearings per carriage.
- PG35L extruder directly on the end effector (moving platform).
- This design is deprecated but the source files are still available.
OpenBeam Kossel Pro
- Terence Tam's design for mass manufacturing.
- Successfully funded on Kickstarter.
- Stamped and injection molded parts instead of 3D printed.
Mini Kossel
- This is Johann's latest and stable version.
- The rest of this page describes the details of Mini Kossel.
Design Goals
- Zero backlash.
- Type: Delta printer
- Speed: 320 mm/s in all 3 directions.
- Resolution: 100 steps/mm in all 3 directions.
- Repeatability: better than 0.03 mm (30 micron)
- Build volume: cylindrical, 170mm diameter, 240mm height.
- Footprint: triangle, 300 mm width (240mm OpenBeam + printed corners).
- Frame height: 600 mm.
- Print surface: unheated round glass, doesn't move.
- Mass of end effector with hotend: less than 50 grams.
- Simplicity: fewer than 200 parts.
- Hardware cost: less than $600 USD.
- Fully automatic print surface level calibration (autoleveling).
Optionally scale down to a Traveling RepRap that fits within IATA hand luggage size limit (see transportation):
- Frame height: 550 mm.
- Footprint: triangle, 270 mm width, 250 mm across (210mm 15 x 15 mm aluminum extrusion like OpenBeam + printed corners).
Bill of Materials
Printed parts
All files come from Johann's Kossel repo: https://github.com/jcrocholl/kossel
- 1x hotend_fan.stl which also serves to attach the hotend.
- 1x plate_1x.stl which includes the following parts:
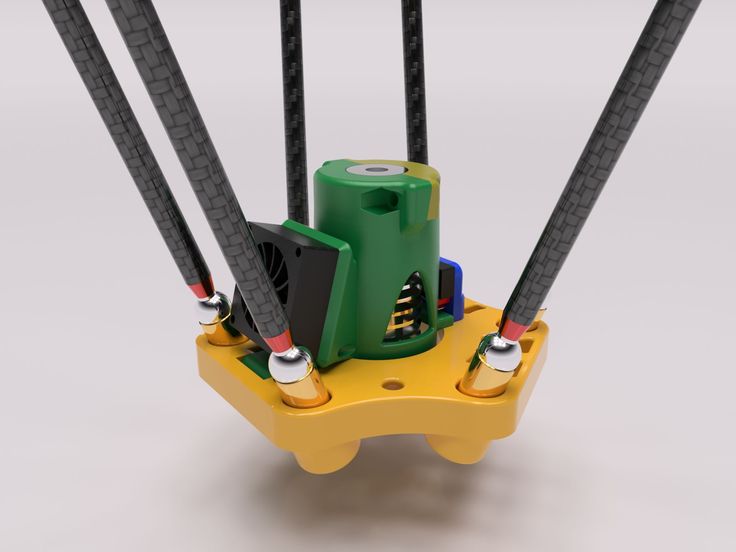
- 1x End effector RobotDigg Effector
- 1x Extruder RobotDigg Extruder
- 1x Retractable Z probe
- 2x Power supply bracket (optional)
- 3x plate_3x.stl which includes the following parts:
- 3x Bottom vertex RobotDigg
- 3x Top vertex RobotDigg
- 3x Vertical carriage RobotDigg
- 6x Endstop holder
- 3x Print surface holder
Recommended print settings:
- Layer height = 0.
 2 to 0.3 mm (around 60% of your nozzle size)
 - Perimeters = 3
- Top/bottom solid layers = 3
- Infill density = 50%
Note, a PLA End effector may bend or warp if it is not cooled with a fan or insulated. The insulation can be as simple as a loose layer of tin foil to create air pockets between the tin foil and the part. An ABS end effector is less likely to bend. It can also help to insulate parts of the hot end with Kapton tape.
- Quality machined aluminum parts are available from RobotDigg
A kit with the printed parts is available @ Builda3Ddprinter.eu and think3dprint3d in Europe, or TriDPrinting.com, CrunchTech's eBay store or from Erie 3D Printing in the USA.
Frame
- 3x 600mm vertical OpenBeam from Builda3dprinter.eu or OpenBeam.de or Misumi HFS3-1515
- 9x 240mm horizontal OpenBeam from Builda3dprinter.eu or OpenBeam.de or Misumi HFS3-1515
- 1x 170mm round glass/borosilicate plate TriDPrinting.
 com or Makea3dfactory.comor Builda3dprinter.eu or Ultibots LLC or 3dprinteu.eu/shop
Fasteners
- 100x M3x8mm stainless steel screws (frame and most connections)
- 100x M3 stainless steel nuts
- 100x M3 nyloc nuts
- 6x M3x20mm stainless steel screws (arm attachment to vertical carriage)
- 12x M3x25mm stainless steel screws (belt idlers and effector-rod attachments)
- 6x M3x35mm stainless steel screws (tensioners)
- 50x M3x6mm stainless steel screws (rail attachment to extrusions - 8mm is too long!)
- 12x M3x16mm stainless steel screws (push rod attachment)
- 6x M2.5x12mm screws (micro switches)
- 3x M2.5x16mm (automatic bed leveling probe)
A nuts, bolts and screws kit is available from TriDPrinting.com or Builda3dprinter.eu.
Linear motion
- 3x 400mm hardened steel rail and carriages HIWIN MGN-12H
- 3x 1164mm GT2 belt closed loop with 2mm pitch and 6mm width - UltiBots LLC.
- 6x F623ZZ flanged bearings 3x10x4mm (or F684ZZ 4x9x4mm for printed parts before June 21st)
- 3x GT2 pulley with 16 teeth and 2mm pitch
- 3x Kysan NEMA17 stepper motor,TriDPrinting.comor Builda3dprinter.eu or UltiBots LLC.
Diagonal push rods
- 12x Traxxas 5347 rod ends Traxxas 5347 $14.99
- 12x M4x20mm set screws
- 6x 180mm Carbon tube ID=4mm
A pre-cut rod kit is available from Builda3dprinter.eu and are 3K woven carbon rods]. Fully assembled carbon rod kit is available at 3dprinteu.eu/shop or TriDPrinting.com or www.UltiBots.com
Bowden
- 1x J-Head Hotend 0.5mm for 1.75mm filament
- 1x Clear PFA tubing ID=2mm OD=4mm
- 2x Push fit connector ID=4mm with M5 thread (or bigger thread before June 21st).
Motor
- 1x NEMA-17 motor with an integrated Planetary gearbox with a 5 2/11 :1 ratio.(http://robot-italy.com, Builda3dprinter.eu for EU (http://www.phidgets.
 com/products.php?product_id=3317 in US).
 - 1x Spur Gear, 22 Tooth, 12mm od, 8mm id - #S10T05M022S0508 from SDP-SIor Builda3dprinter.eu. Alternately, a Hardened MK7 drive gear that fits the geared stepper motor is available from TriDPrinting.com
- 3x M3-0.5x25 Cap Screw
- 3x M3 Washer
Idler
- 1x 625 ball bearing (5x16x5)
- 1x M5-0.8x20 Cap Screw
- 1x M5 Washer
- 1x M5-0.8 Hex Nut (Nylock optional)
- 1x M3-0.5x16 Cap Screw
- 1x M3 Washer
- 1x M3-0.5 Hex Nut, Nylock
Endstops
- 3x Omron SS-5 micro switch or Honeywell ZM10B10A01 - UltiBots LLC.
Automatic Bed Leveling Options - Only need one of the following, depending on which you choose.
FSR(force sensitive resistor)
- 3x FSR circular pads
- 3x mounts for fsr pads
Bed leveling probe
- 1x Micro switch (same as for endstops above)
- 1x Bondhus 1.
 5mm allen wrench
 - 1x Safety pin with 2.5mm loop
- 2x Ball point pen spring
- 1x Euro-style terminal block connector
- 1x Heat shrink tubing ID=2mm
Proximity Sensor
Excellent guide to set up proximity leveling can be found on Instructables, search for "auto bed leveling Marlin"
- 1x PNP Inductive proximity sensor
Several versions are available but the most popular and simple to use is the LJ12A3-4-Z/BY. This model works at 6-36vdc(many other models need at least 12v), and has a sensing distance of 4mm. Can be bought on eBay for <$5
- 1x mount for your specific effector/carriage
Electronics
- 1 Electronics setup RepRap Interface Standard #RIS 1 compatible or anything else compatible
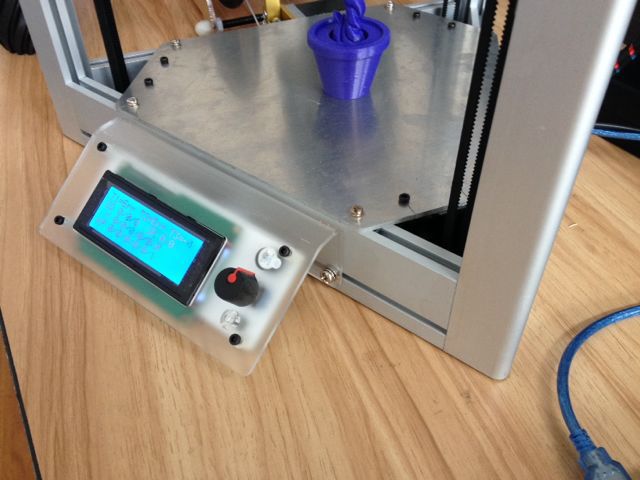
- 1x 12V 5A LCD screen power supply
- 1x 3010 DC Fan and 1x 4515 Blower Fan RobotDigg
Tools
This is not a comprehensive list, but should give you an idea of what tools may be required.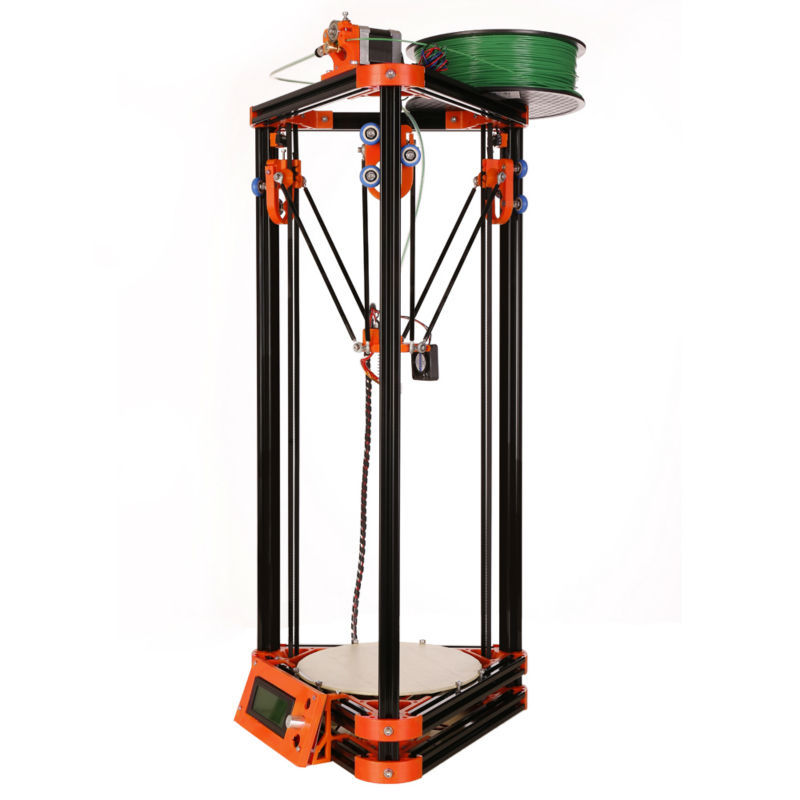 Review all build manuals/videos to ensure you have all necessary tools.
- 1x metric caliper
- 1x M4 Tap Drill bit
- 1x M5 Tap Drill bit
- 1x 1.5 mm allen wrench
- 1x slow-set epoxy
Assembly instructions
Step By Step Instructions
For a video tutorial and step by step instructions see the following website: Kossel mini & Kossel XL build instruction or go to the YouTube channel
Instructions for Kossel Mini kits from Blomker Industries
IPFS link to Instructions
Detailed build manual from Think3dPrint3d with pictures for every step is available here:
Think3dPrint3d Kossel mini build manual
This is a GERMAN translation of Think3dPrint3d's manual:
HKBay.com Mini Kossel Detaillierte Bauanleitung in PDF Format
HKBay.com Mini Kossel Detaillierte Bauanleitung auf Instructables.com
Wiring and commissioning instructions for Mini Kossel using 32-bit Duet electronics:
https://miscsolutions. wordpress.com/2015/01/04/upgrading-the-mini-kossel-to-duet-electronics-part-1-hardware/ and the other articles in that series
Video assembly from the perspective of someone new to the Kosssel:
YouTube Playlist by engineglue
Autolevel probe
X_MAX, Y_MAX, Z_MAX top endstops: NC (Normally Connected). M119 for these should show:
- TRIGGERED when the carriage touches the endstop.
- open during normal operation.
Z_MIN autolevel probe: NO (Normally Open). M119 for Z_MIN should show:
- TRIGGERED when the autolevel probe is retracted (up).
- open when the autolevel probe is deployed (down).
- TRIGGERED when the autolevel probe touches the print surface.
Make sure that M119 does NOT show X_MIN or Y_MIN, if it does you must change them to -1 in Marlin/pins.h.
Although the parts list suggests that a small allen wrench be used, in reality, a short piece of wire might work slightly better since it can rotate more easily.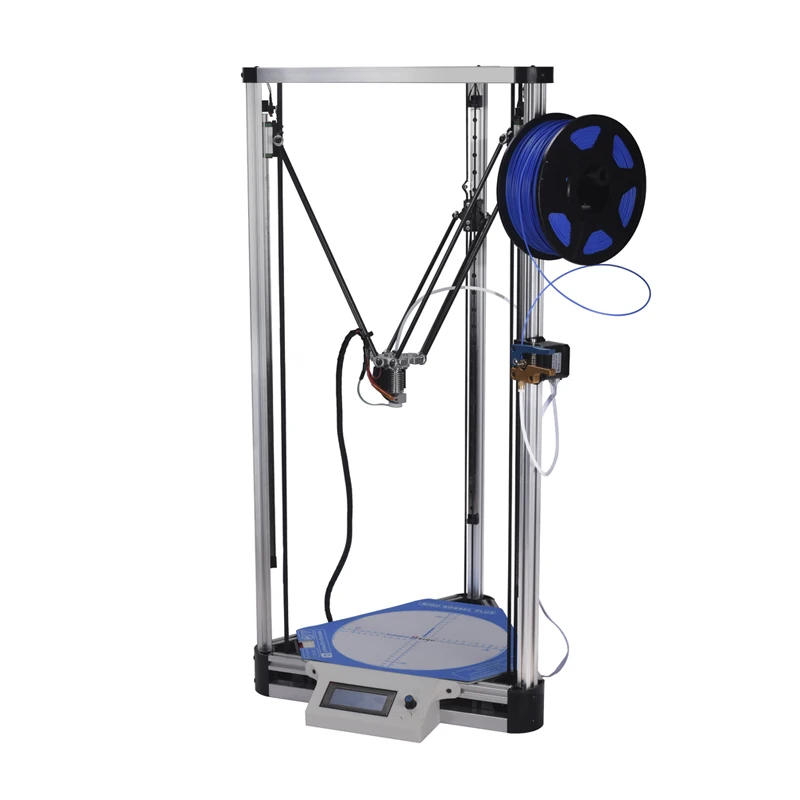
FSR Autolevel
http://reprap.org/wiki/FSR
Mini Kossel FSR Auto Leveling Setup Guide
Viki LCD with Azteeg X3
References:
- Azteeg X3 wiring diagram
- Viki LCD wiring diagram
- RepRap forum thread with pictures
Connect Viki J2 to Azteeg EXP3 port like this:
- +5V to +5V (red)
- GND to GND (black)
- SDA to SDA (blue)
- SCL to SCL (green)
- ENC_A to D22 (white)
- ENC_B to D7 (yellow)
Connect Viki J3 to Azteeg ICSP port like this:
- CS to CHIP SELECT (D53) (red)
- BTN to D32 on EXP2 (optional) (black)
- DI to MOSI (blue)
- CLK to SCK (green)
- DO to MISO (white)
- CD to CARD DETECT (D49)(yellow)
CS (D53) and CD (D49) are directly next to the ICSP port, slightly under the expansion shield, but the connectors still work fine if you push them in slightly angled.
BTN is for the pause/stop/resume LCD button (kill switch).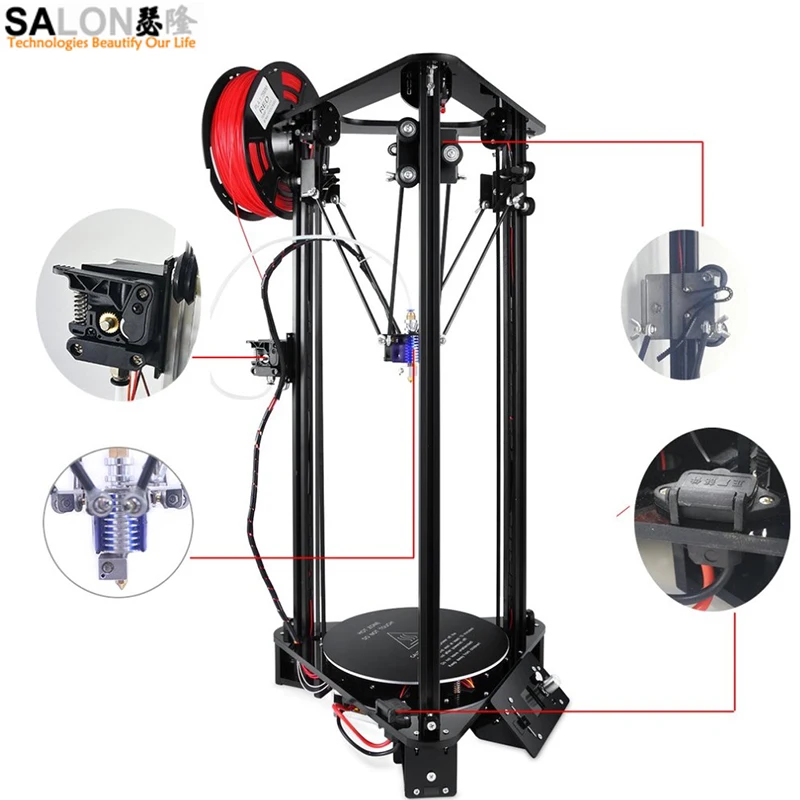 We recommend not connecting it and using a power switch for emergency stop instead. If you do want to use it, it should be connected to the Arduino BTN_ENC pin. Otherwise set BTN_ENC to -1 if not used.
This uses the LiquidTWI2 library v1.2.3 or later. Copy the LiquidTWI2 directory into the Arduino libraries subdirectory (something like /Applications/Arduino.app/Contents/Resources/Java/libraries/LiquidTWI2, just next to the existing LiquidCrystal folder). If you end up with a directory named "LiquidTWI2-master" then remove the "-master" part. We tested this successfully with Johann's latest Marlin version (as of 2014-03-21) and Arduino 1.0.5.
In Marlin/Configuration.h uncomment or adjust the following lines:
- #define MOTHERBOARD 33 // Azteeg X3
- #define LCD_I2C_VIKI
In Marlin/pins.h under MOTHERBOARD == 33 adjust the following lines:
- #define SDSS 53
- #define SDCARDDETECT 49
- #define BTN_EN1 22
- #define BTN_EN2 7
- #define BTN_ENC 31
Disconnect solder jumper JP12 at bottom of Azteeg X3 to disable onboard SD slot and use pins for external SD reader (Viki LCD SD slot).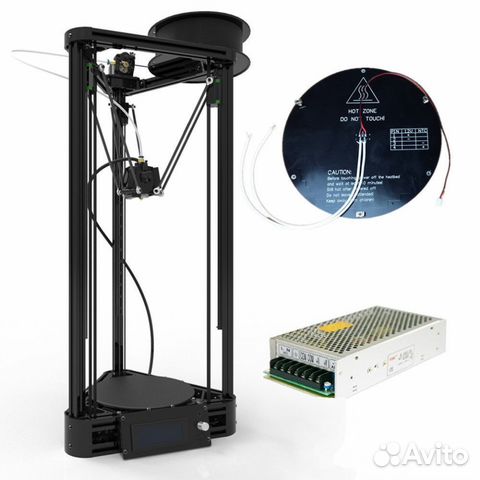
Where to buy
| Shop | Stock | Location |
|---|---|---|
| 3dprinterkart.com | - Kossel/Delta Lowest Prices | India based - ships worldwide |
| 3dprintersbay.com | - Kossel/Delta Printers | US based - Ships Worldwide |
| Build A 3D Printer.eu | Kossel Mini & XL - Highest quality parts | EU/Netherlands based - ships worldwide |
| Think3dPrint3d | Complete DIY Kit Components | UK based - ships worldwide |
| www.HKBay.com | Komplettes DIY Kit mit Deutscher Anleitung | HK/Switzerland based - ships worldwide |
| www.UltiBots.com | Kossel Mini & 250 V-Slot DIY Kits | USA Based - ships worldwide |
| 3DMarkt.at | Complete DIY SET, E3D Extruder, Large | Austria based - shipping to EU |
| reprap.cn | full metal extruder,four wheels design bigger size | China based - shipping to worldwide |
reprapworld.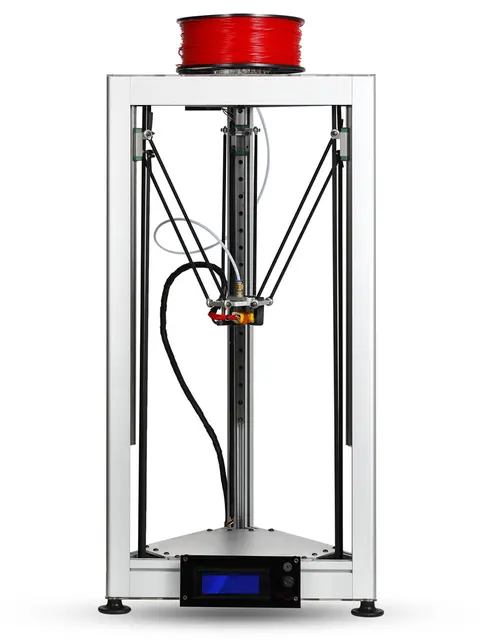 com com | Kossel mini | Netherlands Based - ships worldwide |
| RepRap PT | Printer Parts | Portugal Based - Ships to Portugal and Spain |
| FunReprap France | Kit Kossel Mini et Maxi en Français | Site Français - Mode d'emploi en Français |
| Replikeo | Kit or Assembled Kossel | Hong Kong based - Worldwide shipping |
| DIYKits.eu | Improved Kossel Mini Kit | EU/Croatia - Ships to EU |
Links
- Kits and Parts
- Kossel Pulley Diy Kit
- Specialized shop in Delta printers with video manual to build a Kossel mini and the Kossel XL
- RobotDigg parts n full kits
- KITS $239
- Delta bigger size kit
- Complete Kossel Mini Kit at $599USD ONLY!!
- Think3dPrint3d's kit with detailed documentation on Kossel mini assembly
- single/dual/bigger delta KITS $179
- Guides and instructions
- Assembly Guide for Blomker Industries Kossel Mini Kit
- HKBay.
 com GERMAN translation of Think3dPrint3d's manual
 - Information on how to pick parts
- Pictures on Flickr
- Project blog on Tumblr
- Calibrating a delta printer manually
- How to build a Kossel in china《搭建kossel3d打印机》
- Frame size calculator spreadsheet.
- Mini Kossel FSR Auto Leveling Setup Guide
- Larger (300mm dia. x 480mm print volume) high-accuracy Kossel design and parts list
- Electronics and firmware
- Calibration video using Repetier firmware
- Auto calibration video using IR height sensor with Duet electronics and firmware
- Modified Marlin firmware on GitHub for delta geometry on Arduino.
- RepRapFirmware for delta geometry on Duet.
- How to use Duet electronics in a Kossel
- Source files
- OpenSCAD source files on GitHub for printed plastic parts.
- A prototype heatbed design for the Mini Kossel.
- Community resources
- Online forum for delta printers with vast resources.
- RepRap Forum for delta printers
Answers to questions about kossel
For questions about the Kossel family of printers in particular. Questions about Delta printers in general have their own tag.
This tag is for questions specifically about the Kossel family of printers. Questions about delta 3D printers usually have their own tag.
Kossel 3D printer is a parametric delta printer based on Rostock 3D printer. From RepRapWiki - Kossel:
Kossel is a delta robot parametric 3D printer built in 2012 by Johann in Seattle, USA, based on his Rostock prototype. nine0003
It is named after Albrecht Kossel, a German biochemist and pioneer in the study of genetics. He was awarded the Nobel Prize for Physiology or Medicine in 1910 for his work on the definition chemical composition of nucleic acids, genetic substance biological cells.
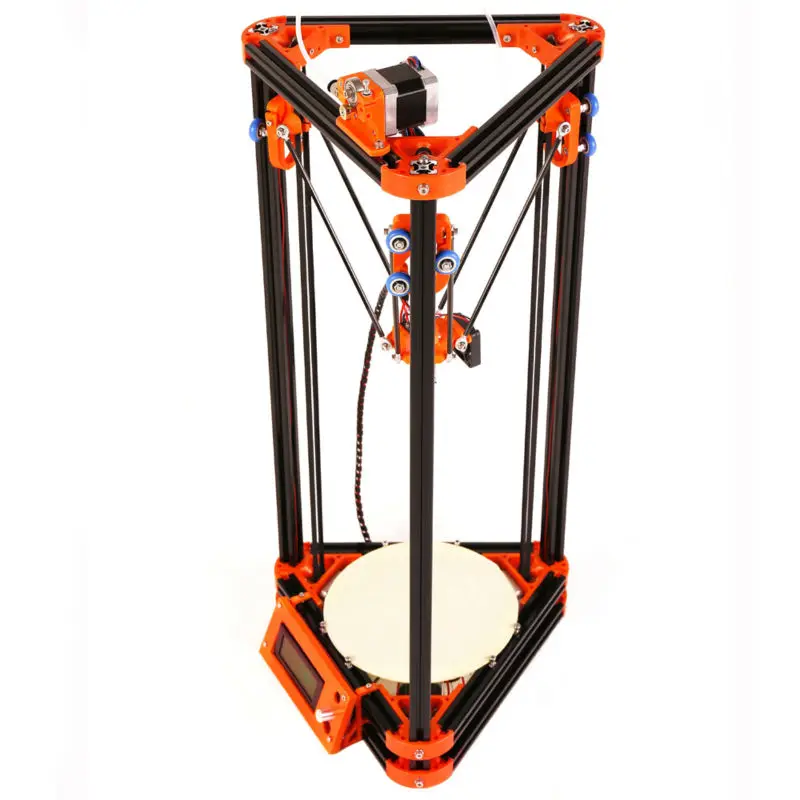
The original printer has spawned a number of derivatives that differ mainly in their size, but which and basically have the same design. Again, from RepRapWiki - Kossel:
History
There are several printers in the Kossel family.
Kossel heritage
- Spectrum line instead of timing belt.
- 623 bearings running directly on a 15 x 15mm vertical aluminum extrusion such as OpenBeam, 6 bearings per bottom bracket.
- Extruder PG35L directly on the end effector (moving platform).
- This design has been deprecated, but the source files are still available. nine0030
OpenBeam Kossel Pro
- Designed by Terence Tam for mass production.
- Successfully funded on Kickstarter.
- Stamped and injection molded parts instead of 3D printing.
Mini Kossel
- This is the latest and stable version of Johann.
- The rest of this page describes the details of the Mini Kossel.
There are other (usually larger) projects from other authors, namely from Terence and David Crocker , among others.
The original goals of this particular delta style printer design, as opposed to the more traditional cartesian style designs that exist, are as follows:
Design Objectives
- Zero backlash.
- Type: Delta Printer
- Speed: 320 mm/s in all 3 directions.
- Resolution: 100 steps/mm in all 3 directions. nine0030
- Repeatability: greater than 0.03 mm (30 microns)
- Assembly volume: cylindrical, diameter 170 mm, height 240 mm.
- Size: triangle, width 300 mm (240 mm open beam + printed corners).
- Frame height: 600 mm.
- Print surface: unheated round glass, does not move.
- Mass of end effector with hotend: less than 50 grams.

- Simplicity: less than 200 parts.
- Hardware cost: less than $600. nine0030
- Fully automatic print surface level calibration (auto leveling).
(Source: RepRapWiki - Kossel)
- Printing half size after replacing board I recently burned one of the MOSFETs on my RAMPS 1.4 board on my Sintron Kossel clone so I upgraded to RAMPS 1.6. Now my printer only prints 50% of the intended size...
- How do I align the kossel endpoints? My printer is kossel (delta 3d printer). I have the probe far from the nozzle (offset -x45 y17), every time I run G29, the result is unacceptable, the distance z between the dots is greater than 0.5mm,…
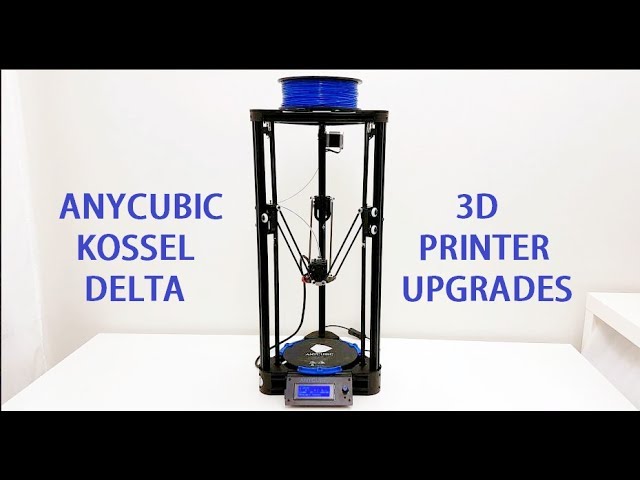
- Anycubic Kossel Delta switch from Trigorilla to MKS Gen L 1.0 I have an Anycubic Kossel Delta 3D printer. The original Trigorilla motherboard died and I decided to buy it but only found a Makerboard MKS Gen L 1.0 which is said to be compatible with… Kossel.
 It has a Trigorilla motherboard. My motherboard is dead and replacing it with another Trigorilla motherboard is very expensive or almost...
 - Marlin: Switch Y to E1 I have an Anycubic Kossel with a Trigorilla motherboard, Mega2560+RAMPS1.4. I am using Marlin 2_0_bugfix My Y connector is no longer working so I would like to use the E1 connector in…
- Looking for files for printed parts for my Kossel XL kit from Builda3Dprinter.eu A couple of years ago I got a Kossel XL kit from builda3dprinter.eu as a a gift, but I stopped building it because several parts were missing, including printed ones. Now that I'm building...
- Partial underextrusion in walls I am experiencing strange underextrusion "pillars" on the outer walls of my XYZ test cube. In the pictures below I have printed PLA test cubes with a 0.4mm nozzle, 0.2mm height and temperature... I am quite new to 3d printing. I have this issue with the print head rising too high during printing as it gets close to the edge of the table.
 It's not a problem with…
 - LV8729 about kossel problems with print sizes (steps) I installed an LV8729 on a kossel configured with SKR 1.3 and marlin 2.0 with all jumpers configured the same for 16 microsteps in X Y Z. Everything seems fine, printer…
- Getting wrong measurements on my Kossel Linear Plus after installing SKR 1.3 with Marlin 2.0 So I replaced the Trigorilla board in the printer with SKR 1.3 with TMC2208 drivers and installed the latest Marlin 2.0 with a configuration based on this . You can find config.h here…
- How to build an extruder motor holder for the Kossel Mini I am building a mini Kossel and I am stuck on the extruder motor holder. My Kossel came without instructions, I was given a set of instructions by a friend ("Kossel Assembly Guide" by Blomker industries). I…
- XY plane distortion calibration in Repetier I built a delta 3d printer (eg mini Kossel) and am now trying to calibrate it.
 I made all the horizontal and vertical rods out of wood myself and bought the gussets (between the rods)…
 - What are the changes in this Kossel? (This question is sort of a self-answer. I know who made this printer, he explained the modifications and I thought it might be of interest to others as well. I asked him to answer this…
- Kossel clone print quality for models Print in Place My first printer is a Delta style Kossel clone and I'm having no luck with Print In Place (PIP) models especially with loops I suspect my printer just can't achieve low enough tolerances,…
- Delta printer offset on the first few layers On the first few layers, each layer has an offset in the -X/-Y direction on the previous layer. But above ~2 mm it is vertical. I checked the printer assembly that there is no noticeable error in the towers. Tried…
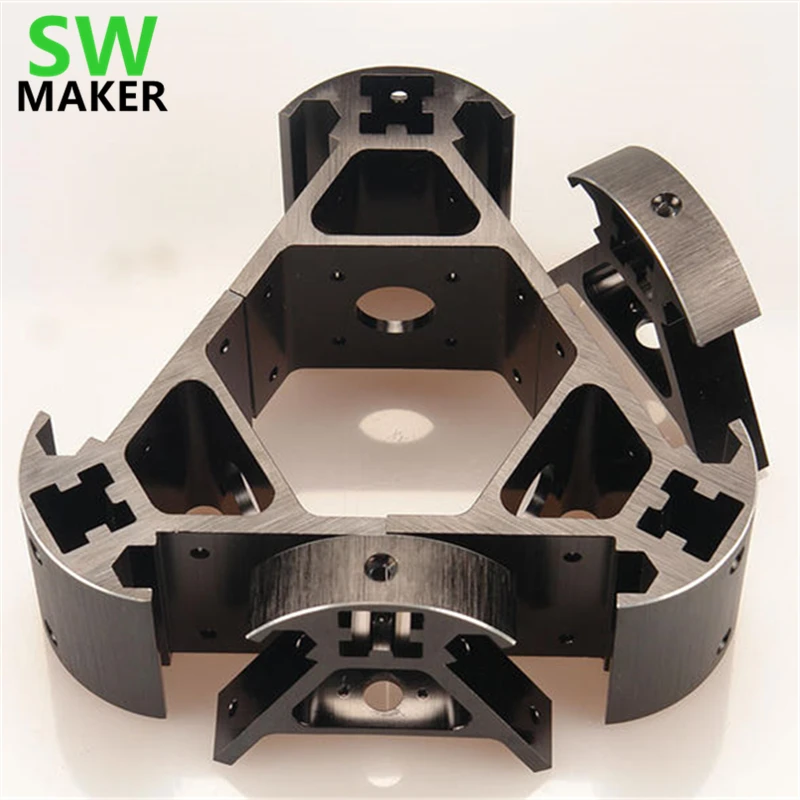
- How to draw delta kossel angle in fusion 360? I want to draw a delta kossel angle in fusion 360 for 2040 aluminum extrusion like the picture below but can't find a way to actually start, I draw 3 side polygons and a rectangle…
- Pronterface not connecting to Anycubic Kossel Linear Plus For Anycubic Kossel Linear Plus I have to upload data to the 3D printer from a software called Arduino and then close it.
 Then I open Pronterface and insert the correct port and…
 - Complete list of fasteners for Sintron Kossel TL;DR I need a complete list of fasteners (bolts, nuts and washers) for Sintron Kossel. Has anyone bought this kit and knows the answer, or knows where it's documented? Full list…
- Kossel accumulates error along the Z axis I have a mini Kossel and I am calibrating. I can go home and find a paper table - a test getting some Z value with M114 . Then I run the effector almost all the way...
- The table leveling method doesn't work with Repetier 0.92.9 firmware? I built a delta 3D printer (e.g. Kossel mini) with a Z probe next to a hotend with manual deployment and a RAMPS 1.4 board: I set up the Repetier firmware with an online tool; All my…
- How long are Traveling Kossel carbon rods? TL; DR - For a given Kossel frame size (taking into account the vertical and horizontal lengths of the aluminum extrusion frame), what would be the length of the carbon fiber bars? As an example from.
 ..
.. - Delta Kossel 3D Printer Heatsink Problems I feel stupid asking, but can this cause problems if the heatsink/heat block/extruder tip can rotate freely in the Kossel Delta 3D printer? The other day I went…
- What is the life expectancy of Kossel? I'm thinking about buying this package, Kossel, as my first 3D printer. It's not the cheapest model, but it seems to have high resolution and stable performance, which is what I need. …
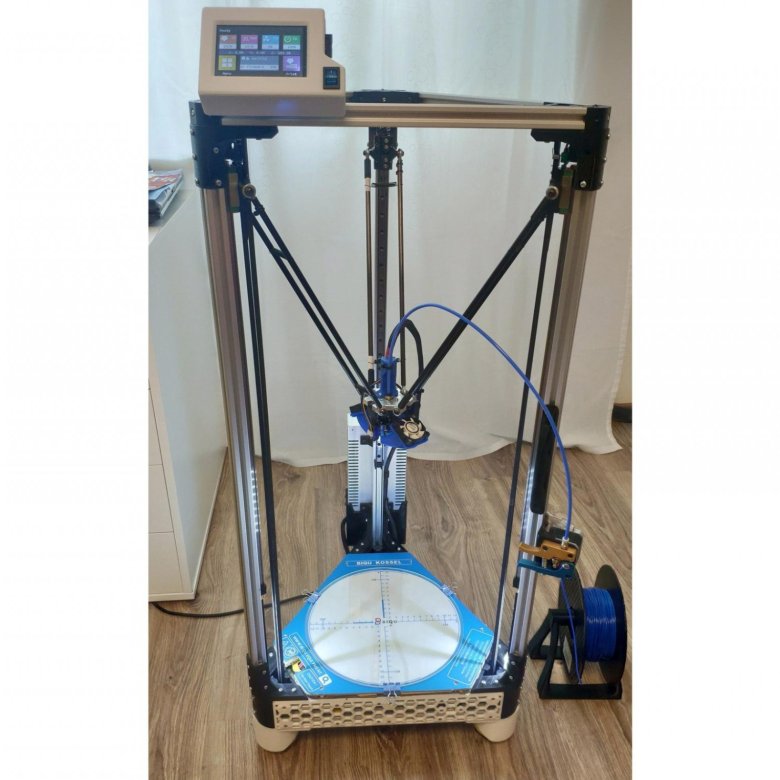
Homemade Delta based on Anycubic Kossel. Part 1 Hi all! Just want to introduce myself, my name is Dmitry. And I’ll tell you a little about myself and how I came to the world of 3D printing (we’ll write everything in bulk). I am relatively new to 3D printing, I learned about this business a couple of years ago when I was in college. It was there that I first had a chance to work with 3D printers and generally find out what exists. Then it was all within the framework of the WorldSkills competition in the 'Prototyping' skill.
 They put me out because I had experience in 3D modeling (albeit in the direction of the gaming industry, but still). For all the time that I was familiar with printers, they seemed to me something unbridled and complex. I started learning 3D printing on Wanhao Duplicator 4, according to my memories - a terrible thing...
 At the end of my studies, for my thesis, I needed to print a couple of parts on a 3D printer, and then for the first time I saw how my curator assembled his Delta. I saw a ready-made version, and I was very interested in its kinematics and dimensions. At that moment, I was wedged - 'Maybe I should buy / assemble some kind of printer at home?'. Since I only worked with Wanhao, in terms of size and practicality, it is, to put it mildly, not very good ... But the delta, due to its small overall dimensions and a fairly large print area, I liked it a lot. Drygostol I did not want from the word at all, because I also managed to see enough of them in college. nine0003
In February of this year, I gathered my strength, money and determination and ordered Anicubic Delta from the Gearbest website, I took the simplest one, on rollers. The delta of the old version came to me, without a limit switch for auto-calibration and completely disassembled, but I was never upset by this, at first. Collected for a long time and dreary, several times reassembling the base. Since I had no experience in assembling, I spent almost 3 days for 2-4 hours. During this time, I managed to regret three times that I bought a delta, but I did not quit this business. I spent another week to calibrate it and so that it would start typing at the very least. From the usual button for Arduino and using the same printer, I was able to print a small manual calibrator, at the very least it was possible to print. nine0003
My printer during and after assembly.
In the course of operation, a heated table, TMC2208 drivers, and an external PSU were attached to the printer. But here I am faced with the idea that this is not enough for me ... And that the delta itself is small ... Then, as luck would have it, literally after a few months of unhurried printing (2-2. 5 kg of plastic was gone), a huge backlash appeared in the tie rod ends, which is very strong affected the print quality at high speeds, I did not really like it. In addition to this, the wear of the fluoroplastic 'wheels' began, and I remember how my curator assembled the printer himself. nine0003
Taking into account all my experience in assembling and working with printers, I began to dig into the topic of assembling printers, how and from what to assemble it. At first, it took a long time to decide what to choose - rails or shafts, but settled on the first option. The structural profile 2020 served as the basis. Having opened the 3D modeling package, I began to design the printer ... The design tasks were simple - to design a large in terms of printed area, but quite a 'compact' Delta printer. Another condition for me was the rigidity of the structure, so I decided to sculpt a rectangular base, to this it also falls that I want to completely close it in a casing, and this is easiest to do in a rectangular case, in my opinion. nine0003
I designed for a long time, even during the assembly process I had to change some nodes, redo something and give up something. But let's go in order, from left to right.
- The first version was only a rough markup, no additional nodes. There were only a couple of frame reinforcements, but no more.
- The second version already contained the first sketches for approximate knots in order to understand how it should look like in the end. Added three reinforcing structures on all sides.
- The third version already contained those body elements (mounts) that were necessary for assembly, and I printed them on my Kossel. The final dimensions have already been taken and the profile has been ordered.
- The fourth version is final. In it, I slightly modified some of the nuances, and added a table. Yes, it's rectangular, and I don't see anything wrong with that :)
That's the final version I started assembling the printer.