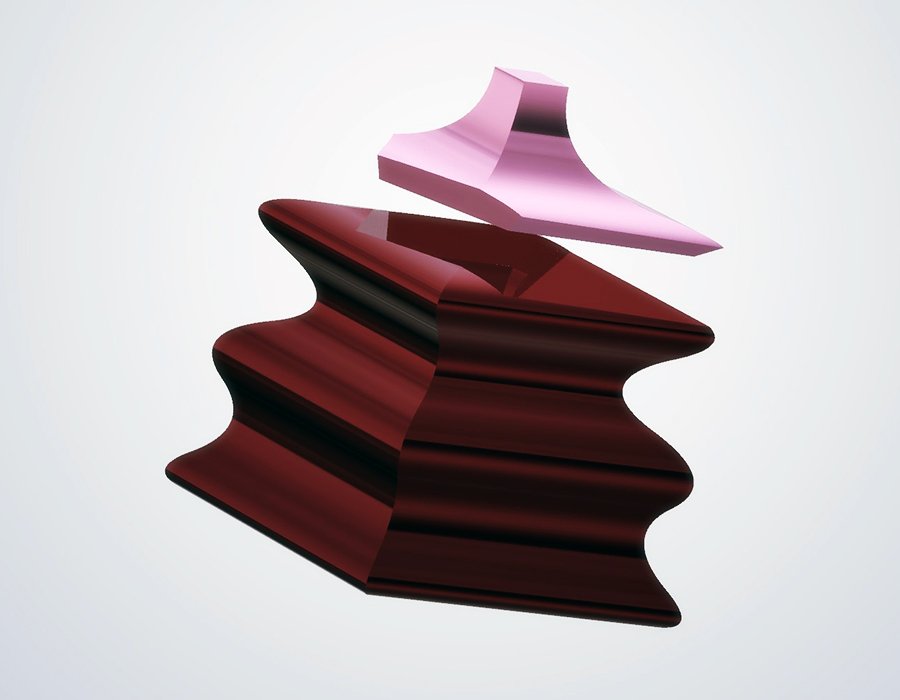
3D print box with lid
Simple Box with Lid for 3D-Print
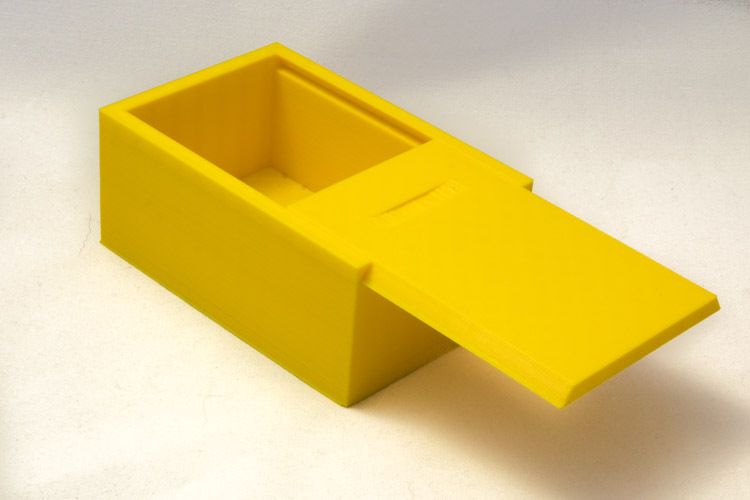
Sometimes, all what you need is a simple box with lid for your gift or to store your cookies. I designed one of this very simple but functional boxes, perfectly optimised for 3D printing.
The design has 4mm thick walls, which make it very robust and it will look great if you print it with transparent or translucent filament and a special infill.
Free Sample Box
There is a free sample box, you can download and use as you like.
These free files are licensed under the Attribution-NonCommercial-ShareAlike 4.0 International license. Use them as you like, to test the quality of the objects and check if you can print them at your desired speeds.
Free Sample Box
The files in the free sets are licensed under a Creative Commons Attribution-NonCommercial-ShareAlike 4.0 International License.
Complete Set
The complete set contains STL files for boxes in 12 different sizes. The following sizes are inside dimensions, you have to add 2×4mm for the wall thickness.
- 8×8×5 cm
- 8×8×8 cm
- 10×10×6 cm
- 10×10×10 cm
- 12×12×7 cm
- 12×12×12 cm
- 15×15×9 cm
- 15×15×15 cm
- 18×18×11 cm
- 18×18×18 cm
- 20×20×12 cm
- 20×20×20 cm
Buy The Complete Set
The License of the Sets in the Shop
You get these files in the shop under a different license. You will find the full text in the “license.txt” file inside of the package and linked in the shop. Basically, it consists of three parts:
- You can use the files personally to do everything you like to print the boxes and grids.
- You may use the prints (not the files) commercially. E.g. you can sell the printed boxes if you like.
- You must not make me liable if these model files destroyed your printer or similar. 😄
Free Updates
Additionally, if you buy one of the sets, I will send you updates or extensions of a set for free.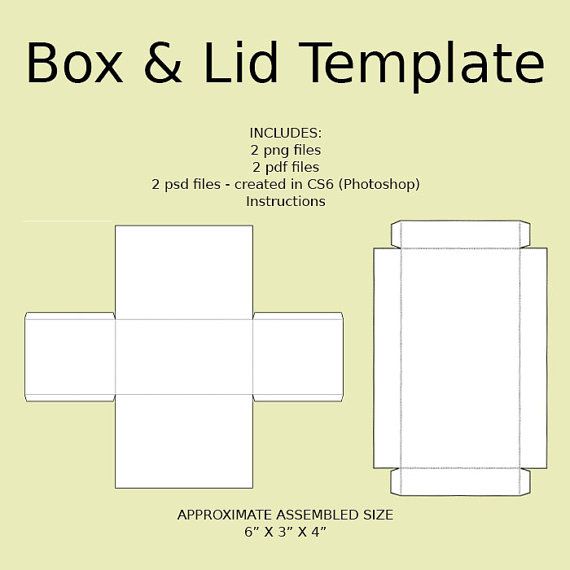
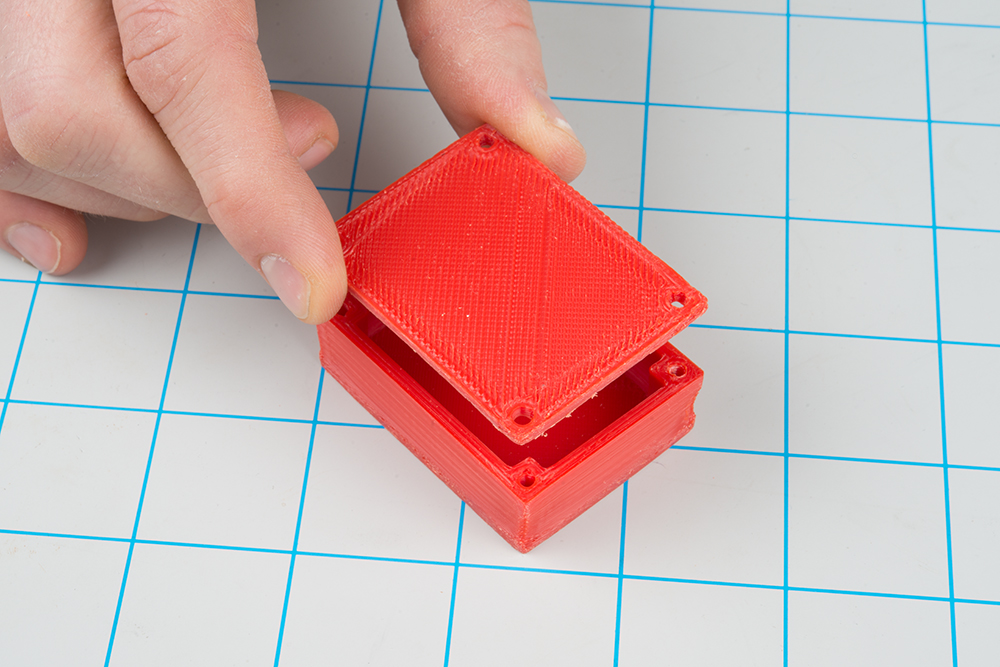
Photos of a Real Print
The box in the following images was made on a Prusa i3 MK3s printer, using Prusament PETG Transparent, with 0.2mm layer height with the default slicer profile “0.2mm quality”.
Print Instructions
For each size, there is a pair of STL files. All file names start with the project number, LR2061 followed by the size SSHH where S stands for the approximate inside width and depth and H for the inside height in cm. After this, you find the part number. 1 for the body and 2 for the lid.
Print these parts in the orientation shown in the following images:
- body
- lid
For best results, use the following settings:
- Filament: PETG or PLA
- Nozzle: 0.4mm
- Layer Height: 0.2mm or lower.
Conclusion
I hope you find this boxes useful and these well prepared models will save you some time. 😄
😄
If you have any questions, missed information, or simply want to provide feedback, use the contact form or Twitter.
More Posts
Update to the Storage Boxes System
Last week I sent all subscribers a small update to my storage boxes system. There are new split boxes for the tall boxes (LR2052-300C-S) and a new extensive PDF catalogue with a great overview, but ...
Read More
Large Update to the Circle Pattern Generator
Today I published a significant update to the circle pattern generator. Version 1.4.1 of the application is available for macOS and Windows for download. This new version adds various shapes, rotations, colours and a generator ...
Read More
Build a Sustainable Refillable Active Coal Filter
If you ever used air filters to keep smells, fumes and dust at a low level in your workshop, you for sure came in contact with these expensive throwaway active coal filters. While throwing-away the ...
Read More
Get Blog Updates With the New Mailinglist
In a few days, I will stop using Twitter for project notifications. If you like to get notified about new projects and updates, please subscribe to the new mailing list: It is a low-frequency mailing ...
Read More
Rail Grid Alternatives and More Interesting Updates
I published another large update to the storage boxes project in the last two weeks. All buyers who subscribed to update emails already got a summary of the changes. If you read the email, you ...
Read More
How to Create a Large 3D Printed Artwork
I recently built a relatively large (100cm × 80cm) 3D printed artwork, which features a painted relief of mathematical functions. Read how I prepared the data, converted it into 3D printable tiles and converted them ...
Read More
▷ small box with lid 3d models 【 STLFinder 】
Small Box With Lid
thingiverse
A small box with lid.
small box with lid
thingiverse
small test box with lid
small box with lid
thingiverse
small box with inset lid
small box with lid
prusaprinters
this is just a small box with a lid made in fusion 360.It is great for storing small thing like sd cards or usb sticks. Made by Fabian in fusion 360 and printed with fiberlogy pla.
Small Box with lid
thingiverse
Just a small 3" x 2" x 1" Box 0. 2) box, with a matching lid. It prints quickly on a MakerBot or RepRap, and the lid fits snugly. It is perfect for carrying very small things, like one marble... It is a great little demo print to show off your...
small box with lid
cults3d
A small box of 60 * 40 * 25 with its cover
Small box with lid
pinshape
A box you can make any size, just make sure to scale the lid to the same size as the box so they fit together. ...Enjoy!
Small Box With Lid
thingiverse
http://www.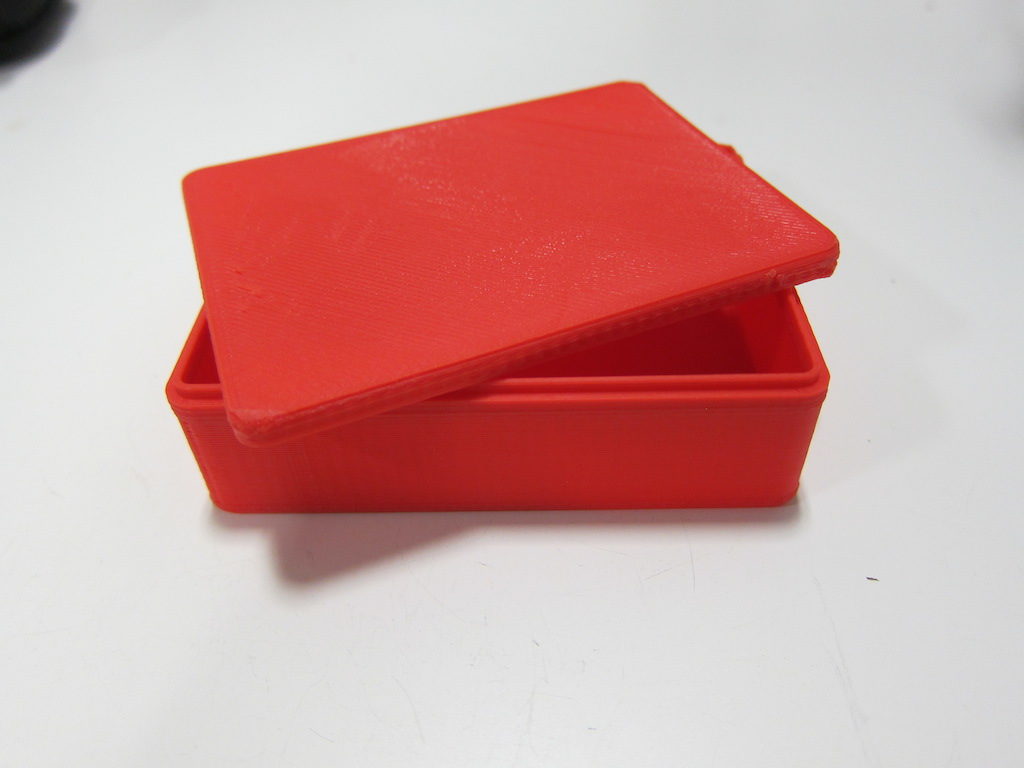 thingiverse.com/apps/customizer/run?thing_id=734598 Instructions Using the following options: bottom_height = 30 y_width = 60 lip_height = 8 thickness = 1.6 looseness_offset = 0.25 lip_overlap_height = 2 generate_box = 1 radius = 5...
small box with lid
thingiverse
... rectangular infill pattern and a solid surface thickness of 2 layers. Nozzle temperature was about 220°C and the substrate (glass coated with ABS-Aceton solvent) was heated to 90°. The weight of the box including the lid is approximately 0.05 kg.
Small box with lid
prusaprinters
This is a small box that I created to hold a circuit board for the headlight range control of the VW T5. The box is needed for the conversion of normal headlightsto LED headlights to bring the electrics for the height regulation under. MLWR...
Small box with lid 32x24x10mm
thingiverse
... ... It was made to fit a mini buck/step-down converter Files: box.stl - basic box bottom box-mountable.stl - added 4 M3 holes for easy mounting box-top.stl - top of the box It was designed with tolerances in mind, so 0.2mm is left from the top piece.
Small box with lid tobacco pocket box
thingiverse
A small box with a compartment that I use for tobacco. Fits in pocket nicely and keeps tobacco separate. Can be used for other things.
...
Size is: 90mm by 70mm by 28mm
Large compartment is 36mm wide.
Can be used for other things.
...
Size is: 90mm by 70mm by 28mm
Large compartment is 36mm wide.
Small box with lid - 45 degree fix
thingiverse
5cm x 6cm x 3 cm box. ...The original file I used had sharp drop offs (parts of print with no material underneath). I made sure that all parts of this print had at least a 45 degree build up. ...added 3 different hole types.
Small rounded box with lid
thingiverse
Small rounded box with lid. I designed it quite "massive" but i like it:)
There is thread inside so you can easily just screw it when you want to close it.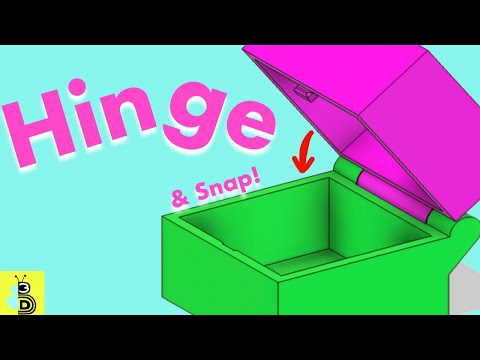 Easy print, no support.
Fusion 360 file included if you want to modify it.
... My...
Easy print, no support.
Fusion 360 file included if you want to modify it.
... My...
Small Box with Threaded Lid
thingiverse
A small box with a threaded lid. Small enough to fit in your pocket or in a drawer. ...Fits small parts, medicine or any small objects.
Small Box with Hinged Lid
thingiverse
... in a bag. Much easier to organize and identify. The lid snaps onto the box and stays where you put it. You can print it with fairly low infill, but don't go too hollow on the lid so it doesn't break when snapping it on or off the box.
Small box with sliding lid
thingiverse
A small box, to put small items in. You can look through it. ... Box: 40 x 40 X 44 mm Lid: 38,5 X 41,2 x 2,2 mm
Small Box With Magnetic Lid
thingiverse
Instructions I printed the box with letters in it which I removed so the STL files are generic so to speak. The lettering can be changes in the CAD file to anything you want. I printed the orange letters later and insterted them since I don't have a...
Small box with Sliding Lid
thingiverse
This is very basic box with a sliding lid. Dimensions are 5x5x4cm. The lid is a tight fit but does loosen up with use. ...
I printed this in low resolution because I didn't need anything else and it works fine and feels sturdy.
small Round Box with Lid
thingiverse
Customized version of http://www.thingiverse.com/thing:189264 Created with Customizer! ...http://www.thingiverse.com/apps/customizer/run?thing_id=189264 Instructions Using the following options:...
Small box with lid and covered magnetic clasp
prusaprinters
Kleine Box mit Deckel, verdecktem Magnetverschluss und Motiv im Deckel.Es ist auch ein neutraler Deckel dabei, den jeder selbst gestalten kann.Für die Motive ist im G-Code ein Farbwechsel drin.Die Magneten sind Neodymmagneten mit 7mm Durchmesser und.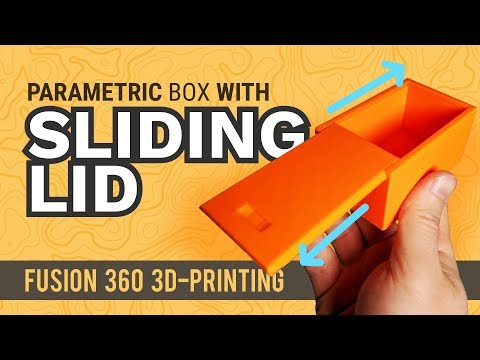 ..
..
Customized Small Box with lid and rounded corners for earplugs
thingiverse
Customized version of http://www.thingiverse.com/thing:72070 Created with Customizer! ...http://www.thingiverse.com/apps/customizer/run?thing_id=72070 Instructions Using the following options: height =...
Small Box with Lid V.1
thingiverse
First Thing fully mad by me in CAD. ...Sorry it is sideways just flip in slicer before printing.
Small Storage Box with lid and hinges
prusaprinters
So I have decided to design this small storage box and lid using hinges in Fusion 360.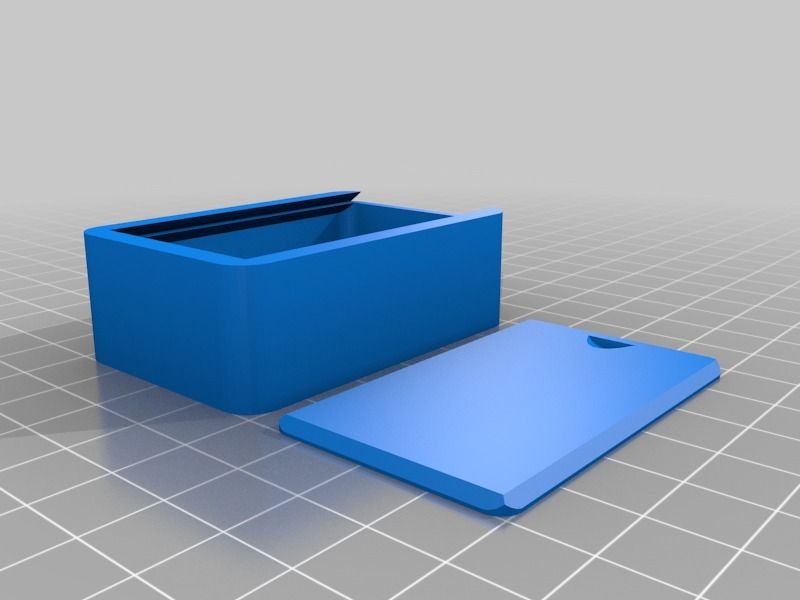 My original design had a 3 mm steel dowel for the hinges. This simpler revision is using PLA filament instead of a steel dowel . So there is no need to get...
Citadels Small Box with sliding lid
thingiverse
Remix of ssxdan 'Citadels tiny travel box' to use a sliding lid that can stay closed via friction. Also remixed in the logo from 'Citadels (2016) travel box' by aur3lius (https://www.thingiverse.com/thing:3000974). ... If you want the lid in dual color...
Citadels Small Box with sliding lid
prusaprinters
Remix of ssxdan 'Citadels tiny travel box' to use a sliding lid that can stay closed via friction. ...Also remixed in the logo from 'Citadels (2016) travel box' by aur3lius (https://www.thingiverse.com/thing:3000974). If you want the lid in dual color -...
simple small storage box with lid
myminifactory
hi this is a small storage box i printed it at 75% to print it faster but will scale very well. at 100% it is 100mm across. ...please like and follow for more prints to come and if you print this please post a picture I would like to see thank you.
Small storage box with lid and tray.
thingiverse
Outside dimensions 88mm x 122.5mm x 25 A friend wanted some storage boxes for small items, and as we couldn't find anything of the size they needed, I figured I'd print some.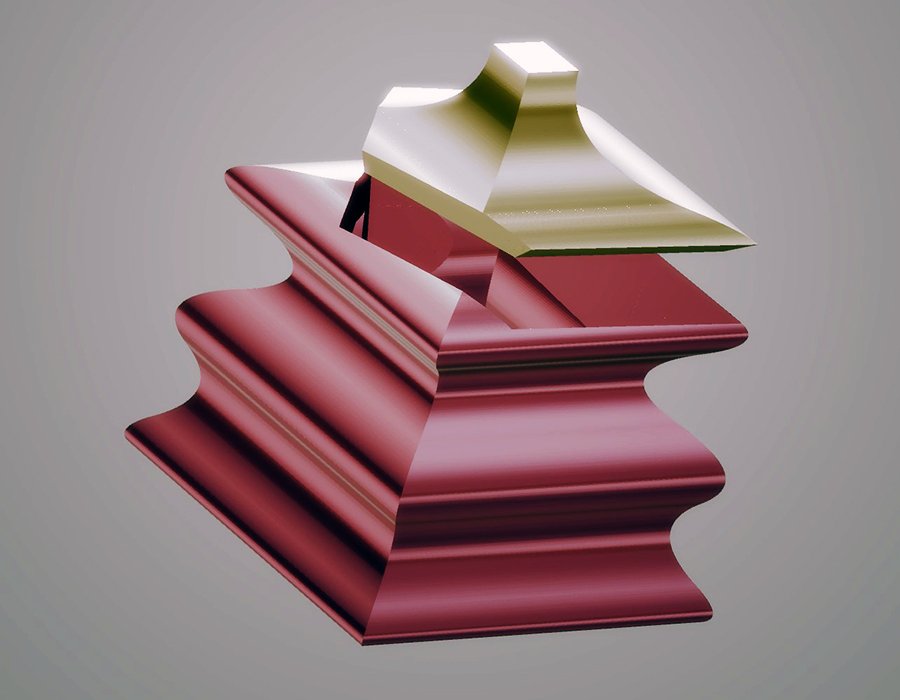 This was the prototype, at half the desired length and width to work out...
Open box. 3d Empty open cardboard box isolated on white background . Stock Photo ©Best3d 51232757
Open box. 3d Empty open cardboard box isolated on white background . stock photo ©Best3d 51232757Sign In to See December Specials
Images
VideosEditorialMusic & Sounds
Tools
Business
Our Prices
All Images
LoginRegister
Download this image,
by registering an account
Already have an account? Log in
I accept the terms of the User AgreementReceive news and special offers
Open box. 3d Blank opened cardboard box isolated on white background. Space for text or image
— Photo by Best3d
- 0020 Show more
Show more
Same series:
Show more
Usage information for
You can use this royalty free stock photo of "Open box.
 3d Empty open cardboard box isolated on white background ." for personal and commercial purposes under the Standard or Extended License. The Standard License covers a variety of uses, including advertising, UI design, product packaging, and allows printing up to 500,000 copies. The Extended License covers all use cases as the Standard, with the right to unlimited printing, as well as the use of downloaded stock images for merchandise, resale and free distribution.0003
 You can buy this stock photo and download it in high resolution up to 3000x3000. Uploaded: Aug 13 2014
Depositphotos
- On photo engine
- Our plans and prices
- Solutions for business
- Blog Depositphotos
- API
900 3 supplier - Sell stock photos
You are using an outdated browser. For a faster, safer browsing experience, upgrade for free today.

How to design and 3D print snap-on enclosures
If you are a product designer or engineer, at some point you may need a custom enclosure design. This could be a simple container to organize small items, or a fully working 3D printed prototype for demonstration to interested parties or testing before moving on to injection molding. nine0003
Using CAD software and desktop 3D printers, you can create an enclosure with interlocking latches in just five easy steps.
Technical report
How do I create custom-made enclosures with exact dimensions? Learn more about stereolithographic 3D printing by reading our free white paper Introducing Desktop 3D Printing with Stereolithography.
Download white paper
Measure your electronic component (left). Begin your 3D model with basic boxes (right). nine0003
Measure electronic components (left). Start building your 3D model with the standard boxes (right).
In this project, we will create a case for a Pine 64 single board computer (download the STL file from the Pinshape website to repeat the steps on your hardware). In this article, we're using SolidWorks, a popular design and development software, but you can use a similar 3D design software.
First take a digital caliper or ruler and measure the electronic components. We like to start case design by accurately reverse engineering the PCB, determining its dimensions, mounting hole locations, and any connectors or plugs that will need to be accessed through the case. You might want to just measure the maximum box dimensions, but it's important to know exactly where the main components are so they can be placed correctly. Reproduce these measurements in SolidWorks by laying out the boxes in a single model file. nine0003
In SolidWorks, an enclosure is best designed as an assembly model, designing the halves as separate parts. Create a new part that will be the base of the body.
 The first important decision to make is to determine how much distance is allowed between the PCB perimeter and the package. It depends on the 3D printing technology you are going to use. 3D printers based on SLA and SLS technologies are highly accurate, so you can safely set a tolerance of 0.5 mm. nine0003
 Desktop 3D printer based on FDM technology can deform your structure and lift it off the platform, so you need to allow for a higher tolerance of 1.5-2 mm. This will guarantee the placement of the printed circuit board in the case, even if its walls are slightly deformed.
Check out our detailed guide comparing FDM vs. SLA 3D printers to see how they differ in terms of print quality, materials, application, workflow, speed, cost, and more.
Leave a space between the edges of the electronic component and the housing (left). Create the walls of the bottom of the hull in the 3D model (right).
Next, you need to make holes for the connectors.
 One common mistake is to cut a hole just large enough to access the connector, be it USB or HDMI, without considering that the many cables around the plug connector can be quite bulky and have to be inserted into the case to connect to the connector (especially if the connector is on a printed circuit board). board is at a greater distance from the case). Therefore, it is better to make larger holes for connectors. You can add from 2 mm around the perimeter. nine0003
 Add cutouts and holes to the bottom of the housing for the connectors.
As you can see in the image above, we've included cutouts that go all the way to the top of the part and one hole for a Micro SD card. Some of the cutouts reach the top of the part because the connectors on the PCB protrude beyond the edges of the part, otherwise the board would be very difficult to fit into the case. Some of these cutouts will be covered by the top half of the case, but you can make the bottom half larger to accommodate the entire PCB and connectors.
 Just keep in mind that you will have to insert the connecting cables deep into the case. nine0003
 As a rule, the shape of the upper part of the case mirrors the shape of the lower half.
If you have finished designing the bottom part, you will have no problems with the top one. The image above shows the effect of a decoupling line running along the perimeter between the two body halves. The top of the case should have similar cutouts for tall connectors, and more material where it meets some of the cutouts in the bottom half. In addition, we have added an additional recessed part in the middle. nine0003
White Paper
Tolerance and fit design reduces post-processing time and simplifies assembly, as well as reduces material costs per iteration. Download our white paper to learn more about tolerances and fit in 3D design and production models.
Download white paper
The standard internal cantilever latch allows the lock to be extended for a stronger hold.
From a variety of snap-on component designs, we settled on a standard internal cantilever connection. The image above shows the main parts for the interlock, absolutely identical on both halves of the housing (male and female components). Depending on the working space available, the small protrusion inserted into the lock cavity can be lengthened to improve grip. In our model, its length is only 1.2 mm, but with a length of 2 mm, the lock would be much more secure. In this particular design, the pins on the PCB take up a lot of space, so the lock is designed to simply push in while still providing enough force to secure the case. The console connection has a 20 mm protrusion, which increases its reliability. nine0003
This sectional view shows details of the lock on both sides.
The illustration above shows the components of the locking joint and the location of the pins (in black) on the PCB that limit the size of the cantilever joint. Instead of placing the snap-on elements inside the lower housing, it is also possible to place the protrusions in the through holes, which will increase their length.
The tabs are small protrusions that are inserted into the opposite side of the case, fixing both halves. nine0003
Add petals to your design to keep the halves from slipping. Petals are small protrusions that are inserted into the opposite part of the body. Since we have created two interlocks on opposite parts, they will only be needed on the two sides where there are no interlocks. This case is large, so we put them in every corner. The material protrudes only 3mm, but that's enough to prevent movement of the 3D printed parts that have been bonded. nine0003
This standard lockable housing can be adapted to almost any small electronic component.
While this may be enough for your project, a few extra details will help bring your 3D case to life. We added indented text to this project for the Pine 64 name and details such as the SD card slot. We added the Pine 64 logo not only for beauty, but also for ventilation, as these boards can get hot. In addition, these parts save material used for 3D printing.
Learn more