Inkscape 3d printing
Inkscape Open Source Vector Drawing Software
Inkscape software allows you to create vector drawings and prepare usable vector paths for cutting or laser engraving.
About Inkscape software
Inkscape is a free open source vector graphics editing software program, with capabilities similar to Illustrator, Freehand, CorelDraw, and Xara X, using the standard or W3C Scalable Vector Graphics (SVG) file format.
This free vector drawing software program was created from the Sodipodi project and a Gill code fork, a software program created by Raph Levien for the GNOME desktop. The primary goal of Inkscape is to create a powerful and easy-to-use drawing tool, fully compliant with XML, SVG and CSS standards.
Inkscape is available on Windows, Mac Os X, Linux, Ubuntu and OpenSUSE platforms.
Inkscape software allows you to create vector drawings and prepare usable vector paths for cutting or laser engraving.
Inkscape Software Features
- Create drawings and 2D shapes freehand or from pre-defined shapes (rectangle, oval, polygon, spiral, etc.
)
- Transform, group, align, combine, and sequence 2D shapes
- Fill in 2D shapes with solids, gradients, or patterns
- Convert shapes and texts into paths, especially to convert outlines into paths
- Convert shapes and texts into paths, especially to convert outlines into paths
- Create dotted outlines, with several pre-defined dotted patterns
- Create texts based on pre-defined paths
- Create texts incorporated in a shape (with the text following the outline of the shape)
- Create renderings
- Export to many vector design formats, SVG in particular
Vector files with Inkscape: List of Formats
Inkscape software supports importing:
- The following photo file formats: Postscript, EPS, JPEG, PNG and TIFF
- The following vector file formats: EPS and SVG
When exporting, svg files are back up with units in pixels.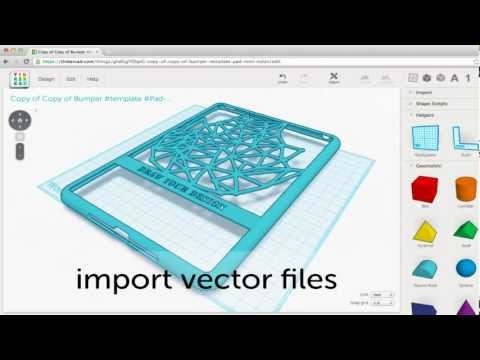 You should know that in Inkscape 90 dpi = 90 px = 1 inch = 25.4 mm (the conversion factor is different in Illustrator software).
There are very useful and easy-to-use plugins for Inkscape software, to design vector files to be used for laser cutting:
- Creating “tabbed” boxes from a series of dimensions
- Creating puzzle pieces for a given shape
- Creating gears and sprockets
Inkscape software is free and can be downloaded on the official website.
Inkscape does not support 3D files. To create a 3D file, consult our tutorials and tips for making 3D models.
Is Inkscape easy to learn?
Inkscape is easy to learn, it’s just about figuring out the best way to use it.
Perhaps, starting with a specific project you want to accomplish will give you focus and goals to work on. Sketch it out on paper, if possible to give you some rough proportions, angles and layouts that you will need.
Best Inkscape Tutorials
- Best tutorial – highly recommended for beginners
- Shapes tutorial – highly recommended for beginners
- Advance tutorial – highly recommended for beginners, it’s more of a basic intro to vector graphs.

- Tips and tricks: Inkscape tutorial
Related glossary pages
Tutorials and Guides | City and County of Broomfield
Skip to Main Content
Loading
| Tool | Guide |
|---|---|
| 3D Printers | 3D Printing at inventHQ |
Tinkercad Tutorials - Tinkercad is a free cloud based 3D modeling site. This link includes starters, lessons and projects. A free account is required. |
|
| What is 3D Printing? - Are you curious about 3D printing, materials used, or getting started? This is a great introductory resources to find out more! | |
| Thingiverse - Online repository of 3D models | |
| Laser Cutters | Inkscape quick start - the basic information you need to know to set up an Inkscape document to cut on the Epilog laser |
| How to send files to the Epilog Laser - how to send files to the Epilog laser | |
| Set up the Laser - how to set up, focus, and start your job on the Epilog laser | |
| *1st Project* Make a keychain in Inkscape - this beginner project is a great way to learn how to design for the Epilog laser | |
| Illustrator quick start - the basic information you need to know to set up an Illustrator document to cut on the Epilog laser | |
| Inkscape | Inkscape Beginner Tutorial - this tutorial covers canvas navigation, managing documents, shape tool basics, selection techniques, transforming objects with selector, grouping, setting fill and stroke, alignment, and stacking order. |
| Inkscape Tracing Bitmap Tutorial - this tutorial teaches you how to trace a bitmap image and convert it into a path | |
| Inkscape Advanced Tutorial - this tutorial covers copy/paste, node editing, freehand and bezier drawing, path manipulation, booleans, offsets, simplification, and text tool. | |
| Inkscape for Laser Cutting - video tutorial that covers the basics of Inkscape for laser cutting | |
| What to do tools are drawing invisible objects - What to do when tools are drawing invisible objects or no longer working as before | |
| Electric Cutters | *1st Project* One color sticker - this beginner project is a great way to learn how to create a cut file for the Silhouette Portrait |
| Silhouette Portrait set up - how to set up and cut a file on the Silhouette Portrait electronic cutter | |
| Silhouette School - this blog is a great learning resources for everything you can do with a Silhouette electronic cutter | |
| Digital Embroidery | Digitize an image - how to turn an image into a file for the digital embroidery machine |
| Digital Embroidery Machine set up - how to set up, thread, transfer a file, and hoop your fabric to use the digital embroidery machine | |
| Sewing | Sewing Practice Sheets - print these sheets to practice machine sewing |
| *1st Project* Easy Drawstring Bag - learn the basics of machine sewing while you make an easy drawstring bag | |
| Simple Lined Zipper Pouch - this tutorial walks you through making a simple lined zipper pouch |
[]
Best Inkscape・Cults 3D Printable Models
Coat of arms EET N°1 La Quiaca
Free
Vintage Fabric Challenge
Free
ImageLib for Customizer
Free
Paw Button
Free
Bender 2D Wall Art Futurama
Free
Pride Rainbow
Free
Black Mirror 'White Bear' model
Free
Dr.
 Stone Drago Coins
 Free
Hack a Day Skull and Wrenches Logo
Free
Slab Shed Collections
Free
Duckie the Duck Cookie Cutter
Free
Laser Focusing Knob
Free
Berks CoLab Nametag
Free
Grayscale Dualstrusion Poster
Free
Hoverfly (Episyrphus balteatus) Illustrator/SVG file
Free
Seahorse earrings / Seahorse earrings
Free
Fancy Lamp
Free
Gecko earrings or keychains / gecko earrings or keychain
Free
BASICEXTRUD
Free
Convert 2D SVG to 3D SCAD models
Free
Gloria the Unicorn
Free
Jesus - Optical illusion
Free
Pass the SALT 2018 tokens
Free
iPod 4 Touch Cases
Free
Inkscape coaster
Free
Inkscape to OpenSCAD export with hole, Bezier and inflation support
Free
Bat Clothespeg
Free
3D Haiku
Free
Europe map puzzle
Free
Central America map puzzle (with tutorial)
Free
South America map puzzle
Free
radare key chain - r2
Free
Engraving and milling of soft materials on the 3D printer SkyOne
3d printer SkyOne , in addition to its main function - printing volumetric models , carries a hidden feature, a lightweight CNC router. To implement the milling function, you will need to purchase Milling and Engraving Kit .
Equipment
- Spindle . Made on the basis of a brushless DC motor with a power of 53W. Rotor speed 4000 rpm. Clamp of the cutting tool - collet chuck ER11.
- Workpiece clamping table . Made from aluminum profile. Table dimensions 190 x 120 mm. A T-slot, 8 mm in size, is used to fasten the workpieces.
- Clamps . Two plastic clamps for attaching workpieces to the table using T-slots. The kit includes clamping plates, wing screws and adjusting screws.
- Cutters . Two cutters, conical and cylindrical.
Preparing for engraving
First, you need to choose what we will apply - the pattern and what we will apply this pattern to - the surface. It is important to note here that the object, but which we will engrave, must be flat, no more than 5 mm thick, otherwise we will need other stop screws, and if the thickness of the workpiece exceeds 10 mm, then other clamping devices.
Another important note - the plane of the part must be parallel to the plane of the table, otherwise the engraving depth will be different.
As a "guinea" sample, we will choose a plate of foamed plastic, and as an applied pattern - the SkyOne logo.
We will engrave using the Repetier-Host printing program, because this program perfectly “understands” G-codes, we will use them, i.e. we need to convert a pixel pattern into commands understandable to the printer.
Special programs such as SolidCAM, ArtCAM or jscut.org browser-based free program are used to convert a drawing to G-codes. It can be downloaded to a computer and used in OFF-line mode.
JSCUT only works with *.SVG files, ie. our logo, saved in a raster, needs to be converted to svg.
To edit a graphic image, we will use the free Inkscape program. You can download it from the official site inkscape.org, for several platforms: Linux, Windows and MacOS X.
Editing the image
Using the file import (File > Import), we add the image we need to the Inkscape worksheet.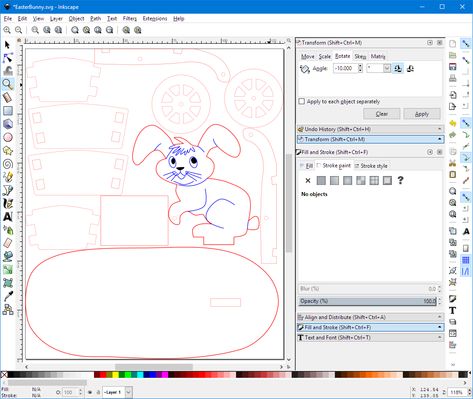 Leave all raster import settings as default. Next, on the imported image, press the right mouse button and select the "Vectorize Raster..." command. Vectorization parameters are selected in place, depending on the saturation of the original image. Since our logo is black and white, all parameters are left by default.
Press the "OK" button and after processing, just close the trace window. We delete the original raster object, leaving only the vector one, it has clearer boundaries than the original. We save the vector file with the .SVG extension on the local media.
Go to jscut.org and click the Launch button!
In the toolbar, click "Open SVG" and load the vector file we saved earlier by clicking the "Local" tab.
Click on the picture with the left mouse button, so that it stands out - it turns blue. And we carry out the operation of setting the engraving parameters.
Parameters setting JSCUT
- Resolution, number of pixels per inch, leave by default - 96 px pre inch , since the image was prepared in inkscape.

- Tabs, - thickening of the contour, we will not use.
- Tool - parameters of the cutting tool.
- Units (measuring system) - let's switch to the metric system - mm
- Diameter (diameter of the cutting part of the tool) - because we will use a conical cutter, then the minimum diameter must be specified, for example 0.2mm
- Angle - 10 degrees
- Pass Depth - Z-axis feed depth. Since the material being processed is soft, we will specify this parameter as 2mm.
- Step Over (Amount of offset of the next pass relative to the previous one) - Decreasing this value increases the processing time - 0.4mm
- Rapid (Tool feed rate at idle) - 1000 mm/min
- Plunge (Z-axis feed rate, during cutting) - 100 mm/min
- Cut - (feed rate during cutting) 200 mm/min
Material - parameters of the material being machined
- Units (measurement system) - switch to metric - mm
- Thickness 1 (material thickness) 0146
- Z Origin (zero Z position) - Top (top of material)
- Clearance (cutter lift above Z origin position) - 2.
 54 mm
54 mm
- Curve To Line4 Conversion (Curve to straight line conversion)
- Minimum segments (Minimum number of line segments for curve conversion) - 1
- Minimum segments Length, mm (Minimum segment length) - 0.254 mm
- Gcode Conversions (Gcode conversion options). Coordinates of the location of the workpiece (engraving field), along the X and Y axes. It has been experimentally established that the shift parameters for engraving the image in the center of the table correspond to: X Offset (shift): -90mm and Y Offset : 170mm
After forming all the settings, press the button
Create Operations
. In the window
Operations
a tab for selecting machining methods (Pocket, Inside, Outside, Engrave and V Pocket) appears and a window for changing the depth of cut parameter (machining) Deep.
To generate a G-code, press the Generate button and wait.
Processing methods
- Pocket - cuts the outline and fill (full shape)
- Inside - cuts only the outline. The edge of the cutter does not extend beyond the contour of the image.
- Outside - cuts only the outline. The edge of the cutter goes beyond the contour line of the image. The image is thickened by the diameter of the cutter.
- Engrave - cuts the outline. The center of the cutter follows the contour line
- V Pocket - Cuts a contour with various depths of cut, minimum at the corners and maximum at the middle of the segments. Applicable only for cutters with a conical sharpening.
You can view an approximate result by opening the Simulate GCODE tab, you should get something like this:
Save the received code to the computer - Save GCODE and open it in the Repetier-Host 3d printing application.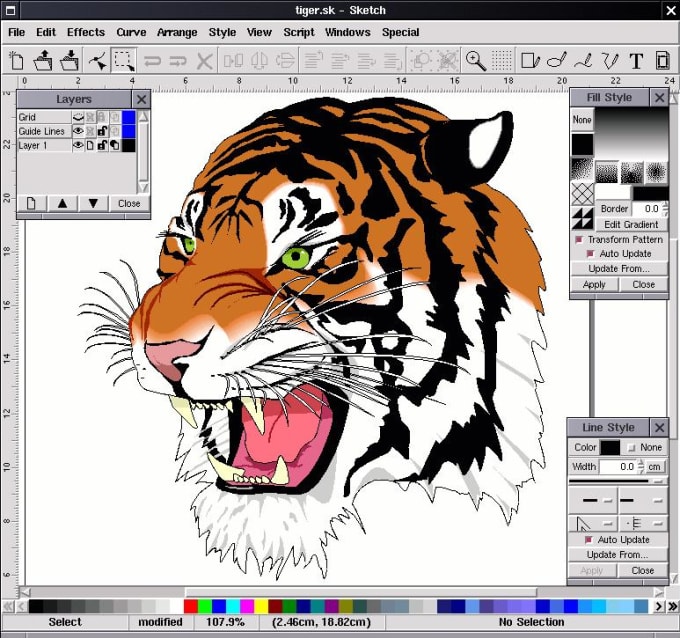
Printer setup
IMPORTANT! Due to the difference in the thickness of the printing and engraving table, the thickness of the material being processed and the dimensions of the cutting tool (length), it is necessary to set a new value for the zero position of the “Z” axis before starting work.
- Turn on the printer. We establish connection in Repetier Host.
- Loading the image file generated earlier in G-codes.
- Open tab "Management" . It is necessary to make sure that the milling cutter and the spindle do not interfere with the rotation!
- Start the router engine - Press the button to turn on the extruder. Temperature value to the maximum.
- Move the table with the workpiece to a safe distance to prevent the cutter from colliding with the table. To do this, enter the G1 Z50 commands in the G-CODE command entry field. When the thickness of the workpiece is more than 6-10mm, the Z-axis value should be larger (see locally).
Learn more


