3D printed tesla turbine
Designing a 3D Printed Tesla Turbine – Part 1
Introduction
Welcome to a two part mini-series on retrofitting a Tesla Turbine with Markforged parts. These blogs are application engineering in its purest form; we’ll be using techniques defined in previous instructional blog posts to design and print this part. By the end, we’ll hopefully have a functional Tesla Turbine with Markforged parts, capable of spinning at extremely high speeds. In the first installment, we’ll discuss Tesla Turbine basics and the Onyx reproduction of the turbine housing.
What is a Tesla Turbine?
One of the original turbines designed by Nikola Tesla. Image from Wikipedia.
A Tesla Turbine is a blade-less centripetal flow turbine patented by Nikola Tesla in the early 20th century. Like its bladed turbine counterparts, it converts moving fluids into energy. However, instead of using angled blades to rotate a shaft, it uses smooth, parallel discs. Fluids enter the turbine traveling tangent to the discs on the outer edge of the turbine, forcing rotation by means of viscosity and surface layer adhesion. As the fluid slows and loses energy, it spirals toward the center of the turbine and exits through the exhaust port. The GIF below shows fluid motion and energy transfer in a Tesla Turbine.
An animation of a Tesla Turbine in action
When Nikola Tesla first created his Tesla Turbine, he described it as his “most important” invention. He theorized that the turbine could maintain 90% efficiency and that its simplicity in design and construction could lead to a revolution in power generation. He had a point: the two other rotary engines used at the time (piston engine and bladed turbine) were expensive to manufacture and had many parts that broke often. Unlike these two machines, the Tesla Turbine was extremely simple. There were no complex features to manufacture; in fact, the blades didn’t even have to be perfectly spaced. In theory, it was the perfect next step in rotary engines.
Unfortunately, in practice the machine had two key failure points. While Tesla first advertised the turbine as near perfectly efficient, in reality it only worked at about 40% efficiency.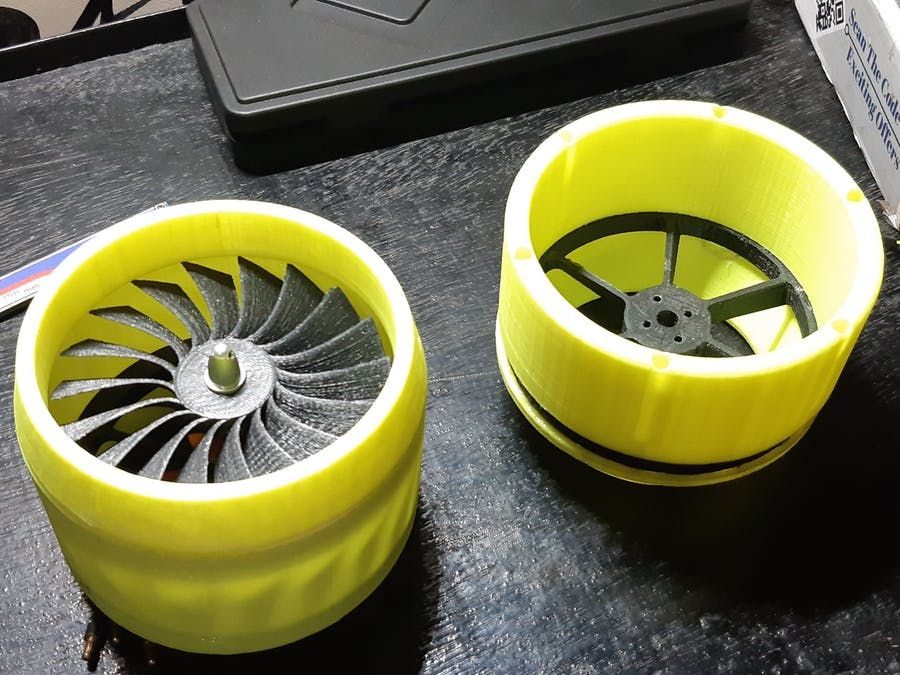 His understanding of boundary layer dynamics didn’t properly account for drag. This development was unfortunate, but not damning by any means; a turbine working at 40% efficiency still well out paces bladed turbines, which work in the 25-30% range. If they could reliably produce power at a rate superior to that of bladed turbines, Tesla turbines would be a household name. They couldn’t. Tesla Turbines spin at extremely high speed — Tesla’s original test turbines spun at speeds between 9,000 and 36,000 rpm — so fast that the blades on the turbines would warp severely during operation. Deformation hardly inspired confidence, and Tesla’s “most important” invention fell into obscurity. Today, Tesla turbines are produced at small scale as teaching props or demonstrations. While they never lived up to their billing, they’re still fascinating machines.
Reimagining a Turbine with 3D Printed Parts
For this project, we used a Tesla Turbine design from the Olin College Machine Shop that has three core systems: A shaft and rotor assembly, a bearing housing, and a turbine housing. The shaft assembly is fully constrained by the bearing housing and contained by the turbine housing. The bearing housing and turbine housing fit together with a close fit metal locating feature and eight screws.
The three subsections of the Tesla Turbine: The shaft and rotor assembly (bottom left), the bearing housing (bottom right), and the turbine housing (back).
The simplicity of this turbine lends it well to machining. It has a wide variety of parts in both material and operation, from a hardened steel shaft to a polycarbonate housing cover. Every part on the turbine can be fabricated with a 2-Axis CNC machine or less. Below is a short BOM of machined parts in the turbine.
Turbine Housing: CNC Milled Aluminum
Bearing Holder: Turned and CNC Milled Aluminum
Shaft: Turned Steel
Shaft Spacers: Waterjet Steel
Blades: Waterjet then Turned Steel
Clamp Plate: CNC Milled Aluminum
Pulley: Turned Aluminum
Inlet Block: CNC Milled Aluminum
A front view of the original turbine housing, CNC machined out of aluminum.
Some parts of the turbine don’t lend well to additive manufacturing. The precision and axial strength requirements make the steel shaft very difficult to print and the turbine blades and spacers benefit from being heavy (and thus having large rotational inertia). This is one rare application in which our impressive strength to weight ratio is not beneficial. For these reasons, we decided to leave the entire shaft assembly (shaft, spacers, blades, and clamp plate) alone and focus on the outer parts of the turbine. Instead, we focused on two parts: The turbine housing and the bearing housing (which we’ll discuss in the next installment). Unlike the shaft assembly, the housing was a perfect candidate for replacement. It’s fully aluminum, CNC milled, and lacking any tolerances smaller than .001”. By 3D printing it, we could maintain strength while drastically reducing weight.
Turbine Housing Requirements
The turbine housing had several important requirements. First, it needed to seamlessly mesh with the bearing housing. This meant that it needed to be +.001/-0 with respect to the locating feature on the bearing housing. Arguably the most important feature on the entire housing, a tight mesh mitigates vibrations that could rip the turbine apart at high speeds. Second, the turbine housing needed sixteen tapped holes; eight on the back plate to mount the bearing housing and eight more on the front to mount a cover plate. The polycarbonate cover plate is a minor part from a structural perspective, but is extremely important in insuring that the high pressure air flows through the turbine blades. Lastly, the cavity of the turbine must have a very small clearance fit with the blades. A small clearance fit gives clearance for the blades to turn while also minimizing the gap between the blades and the cavity wall, which causes significant efficiency loss.
Design and Fiber Routing
Redesigning the turbine for printing involved a few minor changes to satisfy the requirements above. First, we used unit tests to dimensionally verify the tolerancing required for the bearing housing mesh. To meet the required tolerance, we concluded that we need to undersize the hole in CAD by about .002” (Note: this is not a universal number, but instead one gleaned from the unit tests we ran. To learn more about unit tests, check out this blog post). Next, we replaced all the tapped holes in the aluminum version with cavities for heat-set tapped inserts (link here). Heat set inserts are a reliable method of fastening in 3D printed parts, ensuring sound connections where tapped holes cannot.
We routed concentric carbon fiber throughout the part to reinforce the design. To ensure that the bearing housing mount and subsequent forces would not deform the part, we filled the back wall of the part with as many fiber rings as we could. The walls of the part required less strength, so we settled with one ring of fiber on each wall layer. We were able to greatly the hoop strength of the part with minimal fiber with this strategy. Once the part was laid out in Eiger, we were ready to print.
Fiber routing in the back plate of the turbine.
Dimensional Verification
The turbine body fits on a Mark Two; however, we decided to print it on the Mark X for one simple reason: laser dimension verification. Unit tests told us that our dimensions should be accurate; now, we could verify accuracy mid-print. We configured two laser scans: one designed to check the mating feature with the bearing housing and another to check the cavity diameter. During the print, we checked each scan in Eiger to insure dimensional accuracy. The dimensioned scan showed an error of .0004″, well inside the tolerance.
A dimensioned laser scan verifying the correct circle diameter.
Next Steps
After the print finished, we inserted the threaded inserts and attached the aluminum bearing housing. Including the inserts, the printed turbine 170g, which was microscopic compared to the 570g aluminum housing. Once we verified that the metal housing and shaft assembly worked, we designed and printed the bearing housing, which we’ll cover in the next installment of this series.
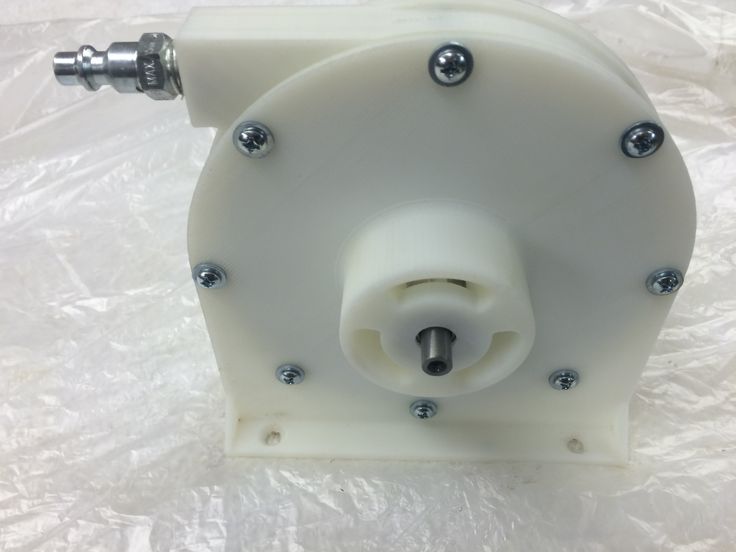
The 3d printed Tesla Turbine housing with rotor inserted.
Read the second part of this post here, and follow us on Facebook, Twitter, Instagram, and Linkedin for more updates!
Free STL file Tesla Turbine・Template to download and 3D print・Cults
Bevel Gear Transmission
Free
cloth pin
Free
Differential
Free
Mechanism that only turns one way, no matter what!!! Bevel Gear
Free
Elctro-Piston V2.0
Free
Mini USB Vacuum Cleaner useful for 3D Printer cleanup and cars
Free
Matt's Mechanism(Useless but alarmingly fun to play with)
Free
Matt's Mechanism(Useless but alarmingly fun to play with)
Free
Best 3D printer files of the Various category
Albert Einstein bust
Free
Gemini 11 titan 2
Free
mechanical flamingo
€2
Make: 2015 3D Printer Shoot Out Test Models
Free
Plant Cell Model (8 Colors)
Free
Ariane 1
€12
Autonomous Drone - Quadcopter (Silent Might) APM 2.
 5
5Free
Best sellers of the category Various
MMPR Dragon Dagger
€4.80
Gnome Yeah ( Supportless )
€2.49 -20% €1.99
ItsLitho "Drop" personalized lithophane Christmas ball
€1.90
Stitch biting star for Christmas tree
€1.74
flexi snail
€2
The Predator Inspired Movable Mask
€6.20
M2 Browning Cal.50 American Heavy Machine gun 3D-print 1/35 and 1/16
€14.99
ItsLitho Christmas Balls Bundle
€7. -30% €5.32 60
60
ItsLitho "Pure" personalized lithophane Christmas ball
€1.90
Articulated Rayquaza Flexible Pokemon Dragon
€1
RS-X-Bow "Government - 1911" style
€6.25
Charizard - Flexi Articulated Pokémon (print in place, no supports)
€3
Adderini - 3D Printed Repeating Slingbow / Crossbow Pistol
€12.50
Christmas Stitch
€1.25
Christmas Park
€4.64
Middle Finger Keyholder
€1
Would you like to support Cults?
You like Cults and you want to help us continue the adventure independently? Please note that we are a small team of 3 people, therefore it is very simple to support us to maintain the activity and create future developments. Here are 4 solutions accessible to all:
ADVERTISING: Disable your AdBlock banner blocker and click on our banner ads.
AFFILIATION: Make your purchases online by clicking on our affiliate links here Amazon.
DONATE: If you want, you can make a donation via PayPal.
WORD OF MOUTH: Invite your friends to come, discover the platform and the magnificent 3D files shared by the community!
Settlement of panel houses, printed on a 3D printer
Nikolay Kitaev | 03/18/2021 | News | No comments
At my site, I have repeatedly had to post information about best construction methods using the 3D printer . Today, this technology is in demand, and engineers and designers around the world are constantly working on its perfection. The big advantage of this method of construction is the speed of construction of houses, quality and low waste.
Californian company Mighty Buildings has developed an original way to build prefabricated houses using 3D printing. Most firms, such as New York's SQ4D or Belgium's Kamp C, use huge 3D printers to create a monolithic structure on site.
And Mighty Buildings technology involves 3D printing of small panels in a factory. In the future, they are compactly folded and delivered to the right address, where a house is quickly assembled from them.
Now Mighty Buildings, together with the developer Palari, is creating a settlement of 15 houses. A 2-hectare site in the city of Rancho Mirage has been set aside for a new residential area. Construction costs will amount to 15 million US dollars.
Solar batteries will be installed on the roofs of buildings, which will make the houses independent of the power grid. In this, the Mighty Buildings project is similar to the Australian settlement Songbird Housing Development.
Each of the Mighty Buildings panel houses has three bedrooms and two bathrooms. In the backyard there is a terrace and a swimming pool. A layout option is also available with an additional residential building, which houses two bedrooms and a bathroom.
Tesla Powerwall batteries and electric vehicle chargers can be added to the building's electrical system. The list of optional equipment also includes a hydromassage pool, an outdoor shower and a fire pit.
See also: Practical experience of a non-volatile home
Mighty Buildings manufactures components for house assembly at its facility in Auckland. The module is based on a steel frame. 3D-printed panels are attached to it, combined with insulating, wind- and moisture-proof, fire-resistant materials, as well as interior and exterior finishes.
According to the developer, this design replaces up to eight layers of conventional building materials. At the same time, the production of panels creates 99% less waste than conventional construction, and the assembly of houses is 95% faster.
« This will be the first implementation of how we see the future of residential buildings - they must be quickly erected, affordable, environmentally friendly and suitable for the expansion of existing settlements with positive dynamics ,” says Alexey Dubov, co-founder of Mighty Buildings and also the company’s chief operating officer.
The home from Mighty Buildings and Palari will be available starting at $595,000. The cost of a configuration with a second residential building with additional equipment can be up to $950,000.
(I hope readers will understand correctly, I am interested in the very technology of building settlements from panel houses printed on a 3D printer : quality, design, speed. As for prices, they are not designed for the mass consumer, although there is a rental in America with ransom, author)
According to the source:
Thank you for reading. If you like it, please share with your friends and drop a couple of lines of your opinion in the comments
Tags: my house, technology, energy efficient house
About the author
Nikolay Kitaev
3D printing engine (5 best models for 3D printing)
3DPrintStory 3D printing process How to 3D Print an Engine (Top 5 Models for 3D Printing)
3D printing at home has come a long way. To date, there are a huge number of 3D printers in various price ranges, there are plenty to choose from. And as there are more and more happy owners of 3D printers, the community is growing, there is a huge number of 3D models that people share.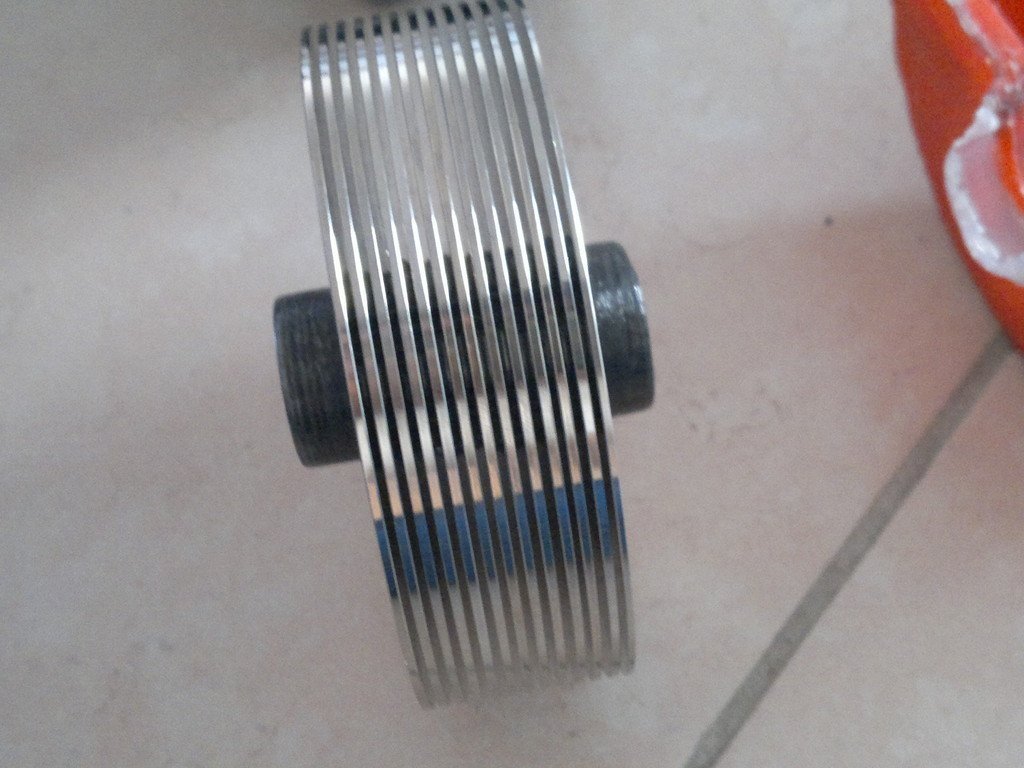 But the static figures downloaded from Thingiverse are gradually getting bored and I want new challenges and experiments. Well, you've come to the right place. How about printing a running electric motor?
If you're interested, then wellcome to the rest of the article, because here we have collected for you the best options for engine designs that you can print on your 3D printer.
Brushless motor
Designed and manufactured by Christophe Laimar, this motor has impressive power. The 3D printed motor uses a 3D printed rotor and stator and delivers 600W of power with an efficiency of 80%. The complexity of 3D printing rightly allows it to be used as a demonstration of technical prowess as well as knowledge of 3D printing.
Where to find : You can download the part files from the developer's website for a fairly small $10 license fee. Also included is an approved list of 3D printing hardware and engine components.
How to make : Christoph provides very detailed information on how to print and assemble this impressive brushless motor project.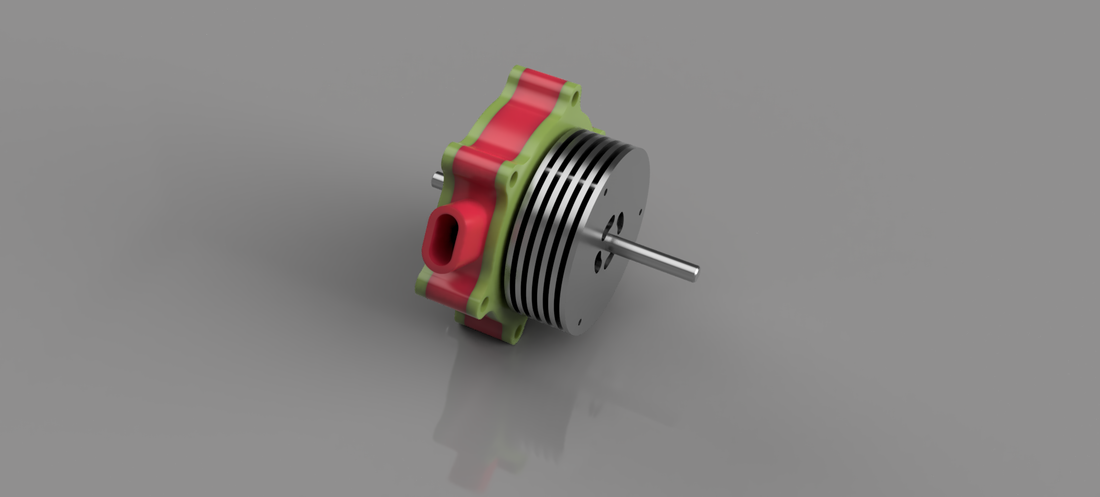 You can find the full instructions for 3D printing and assembling this model on Instructables.
In the video below you can see how this engine works.
Simple DC Motor
This motor is amazing in its simplicity: it was designed for training purposes by user Thingiverse for MakerEd Challenge 2.0.
Where to find : Thingiverse has all the parts you need to 3D print this DC motor. In addition, there are detailed instructions for assembling the model, as well as materials with examples of its use.
How to make : Follow instructions on Thingiverse where the author recommends printing at a high resolution of 0.1mm. In addition, it provides a complete list of required parts for a complete build so that even before starting this project, you can be fully prepared and armed with everything you need.
A short video showing the operation of this 3D printed motor is shown below.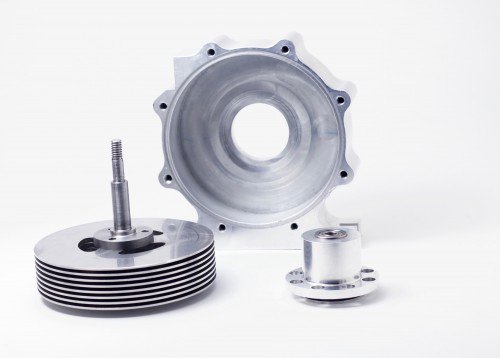
Mendocino small solar motor
As stated by the creator, "The Mendocino engine is a solar-powered electric motor with magnetic levitation." Watching a video of his work will definitely make you wonder how interesting this design really is. The assembled model is practically a work of art, with a stylish floating design.
Where to find : This unusual engine model can be found on Thingiverse.
How to make : The author used a 0.5 mm nozzle with a layer height of 0.2 mm for the stator components. Detailed instructions are also provided on the Thingiverse page.
Tesla Turbine
The model was originally designed and manufactured by the Portuguese manufacturer and engineer Integza. This 3D printed engine is based on a Tesla turbine. It is propelled by the use of high-pressure air, acting in a vortex through thin, 3D printed plates. The original design used a few 3D printed components, but the current second iteration is almost entirely 3D printed.0003
Where to find : The author has posted 3D printing files and instructions on her Thingiverse page.
How to make : unfortunately the author does not offer any technical documentation. But the author has a video where he reveals some background of this project, and also describes the build process.
Spring Motor
Designed and printed by Greg Zumwalt, this powerful 3D printed spring motor demonstrates the unique properties of PLA plastic. And it's especially impressive that Greg has created many other models based on the lessons learned in this project.
Where to find : Greg Zumwalt has posted all his part files on MyMiniFactory.