How to replace 3d printer nozzle
How To: Change a 3D Printer Nozzle
Changing your 3D printer nozzle is quick and easy when you follow these simple steps.
Posted on July 25, 2018
by
Alec Richter
If you’ve never changed a nozzle before, you might be wondering why you’d even want to. Well, there are a couple of reasons. While most stock nozzles are brass and have a 0.4mm diameter, nozzles come in a huge variety of materials and sizes. Brass nozzles are standard and are great at heating up and holding temperature, but stainless steel and hardened steel won’t wear out nearly as quickly as brass will with abrasive materials, like copperfill or NylonX with its carbon fiber. There are 0.25mm nozzles for high-details models and even nozzles as large as 1.2mm for incredibly strong, structural parts. In addition, it’s really nice to be able to minimize downtime by taking out a clogged nozzle, installing a clean one, starting a print, and then worrying about taking care of the clogged one. Every nozzle has its purpose and specialty, but first, you need to know how to change them out, so let’s get to it.
Step 1: Gather tools
- Depending on your 3D printer, this may change slightly, but in most cases, the two things you’ll need are a set of channel locks or a crescent wrench to grip the heater block, and a wrench to hold the nozzle. E3D nozzles, Ultimaker 2+ nozzles, and many other nozzles that use an M6 threading can use a 7mm wrench to grip them, but not all nozzles are the same.
Step 2: Heat up the hot end
- When the heater block, heat break, and nozzle heat up, the metal expands just enough to make the threads just a little bit easier to loosen. When they’re cold, they shrink together tight, to the point that you can tear out the thread of the heater block or nozzle when removing the nozzle. We’ve seen it happen plenty of times over, and I’ve done it myself when I first started 3D printing.
 At this point, remove any filament that’s in the printer as well.
Step 3: Remove the nozzle.
- With the hotend at temperature, use the channel locks to grip onto the heater block. You don’t need to grip it tightly, just enough to keep it from rotating while you remove the nozzle. With your other hand, grip the nozzle with the small wrench and begin unscrewing it clockwise (if you were looking at the hotend from above). Once you break the tension, it should come out easy, just keep unscrewing it until it’s out.
Step 4: Install the new nozzle.
- Since the new nozzle isn’t hot it’ll be a little harder to turn because its threads haven’t expanded, but you can do it mostly by hand to start with since it’s cool, then finish it off with a tool. You want to be extra sure that you don’t over torque the nozzle and tear out the threads at this point as well. You could print this nozzle torque wrench designed by Anders Olsson, and once it’s been tightened enough, the wrench will click and prevent you from turning it any further.
 If you have experience changing nozzles, it’s pretty easy to feel when it’s properly seated, otherwise this tool is super handy; we even have a couple floating around the office.
Step 5: Start printing!
It’s really that easy to change a nozzle. Now go and install the biggest nozzle you can and print something massive in no time at all. If you have any comments or questions, we have a nozzle comparison guide that might answer your questions, otherwise feel free to leave a comment down below.
Happy printing!
Article Tags
- 3D Printing
- Firmware
- 3D Design
- MatterControl
- Press Releases
- Small Business
- Automotive
- E3D
- Jewelry Making
- Engineering
- Entertainment Industry
- MatterControl Touch
- ESD Materials
- NylonX
- BCN3D
- Open Source
- Crafty Pen
- Digital Fabrication Anatomy
- How To
- Hardware and Upgrades
- Tips and Tricks
- Weekend Builds
- Top Ten
- Education
- Tech Breakdown
- Women in 3D Printing
- Project Ideas
- Advanced Materials
- Reference
- Pulse Dual Extrusion
- Product Spotlight
- Aerospace
- Jobs
- Military & Government
- Multi-Tool Machines
- Getting Started
- Healthcare
- How To Succeed With Any 3D Printing Material
- Creality3D
- Architecture
- 3D Printer Reviews
- Hacker of the Month
Related Products
View all related productsHow To Change The 3D Printer Nozzle?
Guides
3DPrintBeginnerMay 4, 2020
2
Today I will show you how to change a 3D printer nozzle correctly. I’ve seen a lot of posts on 3D printer groups where people were having issues with leaks after changing the 3D printer nozzle. Besides that, I just encountered a similar issue caused by improper nozzle change. Thinking that this will help, I’ve written a simple guide on how to change a 3D printer nozzle, and avoid leaks.
Why Change The 3D Printer Nozzle?
Nozzle changes are made for multiple reasons. The first reason why you need to change the nozzle on your 3D printer is because the old one is damaged. A bad nozzle can translate into bad quality prints, stringing issues and bad dimensional accuracy.
Another reason why to replace the 3D printer nozzle is when you want to print faster. A bigger nozzle allows you to lower your print times without needing to increase print speed. The most common nozzle is 0.4 mm, but for faster prints you would like to use a 0.6 mm or 0.8 mm nozzle sizes. This translates in wider extrusions and bigger layer heights.
By using a smaller nozzle (0.3 mm or 0.2 mm), you can increase the quality your final prints, by using lower layer heights. While this can increase the quality, it will increase print times.
Change The 3D Printer Nozzle and Fix Leaks
Changing nozzles on your printer can be a daunting task for newbies or beginners in 3D printing. If the nozzle is not properly tightened in the heatbreak, leaks can occur. If you change nozzles at room temperature, when heating up the hotend metal expands and the nozzle gets loose. This creates some space between the nozzle and the heatbreak and melted filament can flow through the threads. Clogs appear and you will need to disassemble everything to clean.
If you follow the guide carefully, you will learn how to correctly change the 3D printer nozzle and avoid leaks caused by improper tightening.
Because of an improper nozzle change, I managed to damage the heatbreak thread on my NF Crazy Hotend. Because I used too much force when tightening the nozzle, the thread was stripped and plastic started to leak from the heatblock.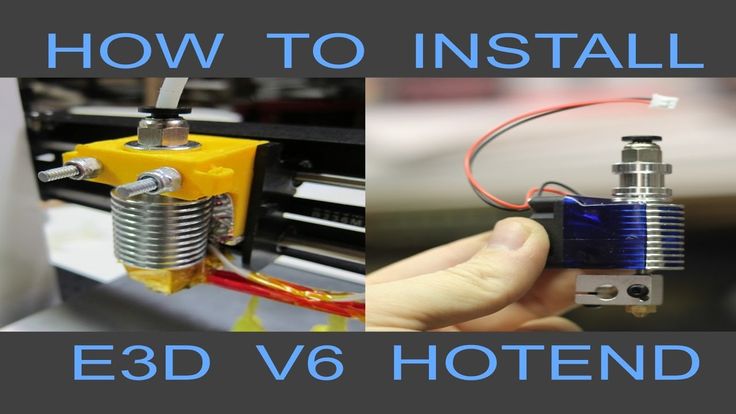
While I can fix this issue with a replacement heatbreak, I will use the torque wrench from now on, each time I change the 3D printer nozzle.
Prerequisites
In order to properly change nozzles on your 3D printer, you need to have some tools ready for this.
- Wrench or pliers to hold the heatblock.
- Tubular wrench for the nozzle.
- Temperature resistant gloves for protection.
- Torque wrench (optional).
Please note that if you are following this guide in order to change nozzles it’s important to be careful. You are working with hot components and burns can occur. Avoid touching nozzles and heatblocks when changing nozzles to avoid burns and injury. Read the full guide before starting.
Torque Wrench for Nozzle Change
In order to easily change nozzles on my printer, I printed this Torque Wrench from Prusa Printers (2nm version) in Blue EasyPETG from Fiberlogy. I strongly recommend using a torque wrench for good results.
Slice Engineering recommends using a 1.5nm torque wrench for tightening the nozzle on the Mosquito Hotend. E3D recommends tightening the nozzle with a 3nm wrench.
I used a 2nm wrench and it worked fine for both.
How to Change The 3D Printer Nozzle?
In order to change 3D printer nozzles properly, follow the steps below:
Heat up the hotend to maximum temperature.
Before starting the nozzle replacement, you need to heat the hotend to the maximum temperature. When you change the 3D printer nozzle, it’s important to do it with the heatblock set at your max temperature allowed by your printer. Usually, for PTFE hotends the maximum temperature is 270C.
While any temperature over 240C can quickly damage the PTFE tube, it’s ok for a few minutes until you replace the nozzle.
If you are using a silicon sock, remove it before heating up the hotend.
Remove the filament
When the hotend reaches around 130C for PLA and 150C for PETG, remove the filament with a quick pull in order to avoid filament clogs.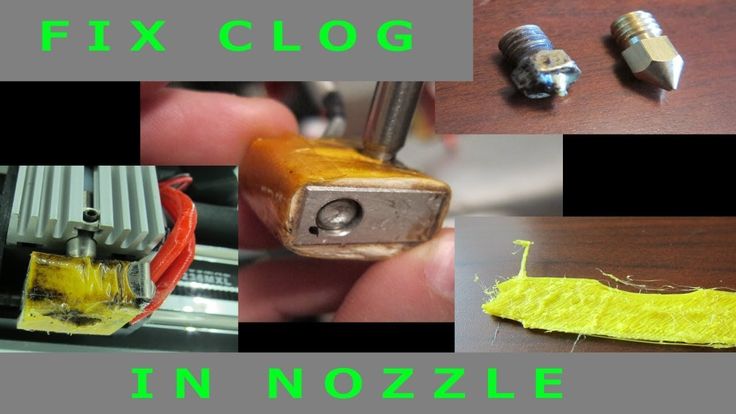 This is not exactly a cold pull, but it will help you to remove most of the filament. This makes the nozzle change process easier.
Unscrew the old nozzle
Now that the hotend is set to the maximum temperature, you can proceed to replacing the nozzle.
Grab your wrench or pliers and hold the heatblock in place. Carefully grab the heatblock avoiding the heater cartridge and the thermistor. With your other hand, start unscrewing the nozzle.
Screw the new nozzle into the heatblock.
If you are using gloves, you can start screwing the nozzle with your hands then perform the tightening with the tubular wrench or the torque wrench.
If you are not using gloves, place the nozzle in your tubular wrench and screw the nozzle into the heatblock. After the nozzle is screwed tighten the nozzle a bit more. Don’t over-tighten the nozzle. This can lead to a stripped thread and can damage your nozzle and/or the heatblock.
If you are using the recommended torque wrench, the nozzle is tightened when the wrench clicks.
Wrapping up
Congrats! You just changed the 3D printer nozzle, and you can return to your printing activities.
Liked it?Consider supporting 3DPrintBeginner if this content helped. You can also join Patreon for exclusive perks! |
Related Articles
For beginners: printer repair, nozzle replacement/cleaning
How to replace the nozzle on a 3D printer?
Each of us has experienced the problem of clogged extruder nozzles. The plastic just stops flowing out of the extruder. Sometimes the extruder gets so badly clogged that cleaning doesn't help. In this case, the heating part of the extruder (hereinafter referred to as the hot end) must be disassembled and each element cleaned, or the one that is no longer suitable for work must be replaced.
How to disassemble Hotend?
Prepare the necessary tools. You will need: A large open-end wrench (can be adjustable), such that it can clamp the heating block, as in the photo. Next, you will need a smaller wrench to unscrew the nozzle. Usually this is a key for 7 or 8. You can also use pliers, but I do not advise, because. it is possible to “lick off” the edges of the nozzle, because it is made of soft material. You will also need a small hexagon - to unscrew the screws from the thermoblock. It will be nice to have any pliers so that you can hold hot parts. Many craftsmen use fum tape, but we will tell you how to do without it. So, are you ready to start?
It is necessary to heat the extruder to a temperature close to the maximum. Then we take 2 keys, with the larger key we hold the heating block so that it does not move when unwinding. And the nozzle itself is unscrewed with a smaller key. Now the heating can be turned off and the nozzle unscrewed to the end. Next, we arm ourselves with a pre-prepared hexagon and unscrew the screw that holds the heating element itself. If your thermistor is also clamped by a screw, it can be released with a screwdriver. Now the heating element together with the thermistor can be pulled out. Next comes the neck (thermal barrier). This part usually unscrews without problems even when it is cold. But if everything is completely tight, then you can heat it up and unscrew it while the plastic that has fallen into the thread is still soft.
Assessing the situation.
If everything is bad, just change all the necessary components, but even in our store they are inexpensive, stock them up in advance, let you always have a spare kit.
If the contamination is not so serious, you can try to clean it manually. For example, a nozzle, it can be heated and cleaned with a drill of the appropriate size, or with a thin needle. Outside, all parts can also be cleaned by preheating them and cleaning with a dry cloth. Not infrequently I saw how people even sanded the top layer with fine sandpaper and polished it. Also, the nozzle can be soaked in the solution. For example, if you are printing mostly with ABS plastic, you can soak it in acetone.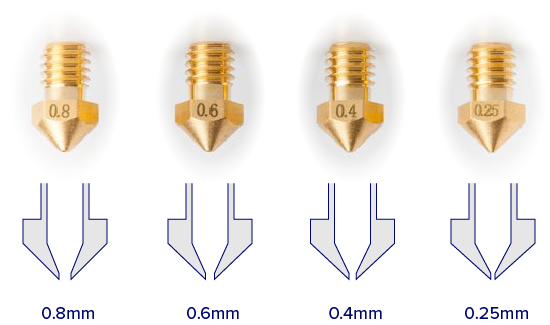
If all the feeders are cleaned or replaced with new ones, then we are ready to assemble. The extruder is assembled as follows: screw the nozzle into the heating block to the end and unscrew it half a turn, then screw the thermal barrier to the end. We install all the parts on the printer axis, insert and fix the thermocouple and thermistor. Then we need to heat the extruder to the same “about” maximum. We take our keys, hold the block with one, and twist the nozzle with the second. Just do not overdo it, otherwise the nozzle can be broken. You need to tighten it to such an extent that the solo does not unwind during operation and there is tight contact between the nozzle and the thermal barrier, this is how we prevent the plastic from flowing out of the threaded connection, and this does not even require additional funds.
You can now run a test print to see if everything works as expected.
After checking, we advise you to install a protective silicone cover on the thermoblock. So the block will lose less heat, heat up faster and, most importantly, track the temperature more accurately.
We hope the article was useful for you! See you soon!
Removing 3D plugs in the printer — aleksandr ● ru
Nozzle clogging or plastic plugs are quite common for 3D printers. And if the first is highly dependent on the quality of the plastic, then the second is more related to a particular printer and how it was assembled. After about half a year of using the printer, these problems overtook me.
Symptoms
- Plastic does not extrude well, feeder breaks and clicks;
- When loading the thread, it chokes with hands at first lightly, and then almost does not go;
- When unloading the thread, the end is swollen and does not pass through the feeder;
- Replacing the nozzle and increasing the temperature saves, but not as much as expected;
- Only prints at high temperature and low speed, especially for filling;
- At the initial supply, the plastic does not exit through the nozzle for a long time, and after stopping it flows out for a long time;
Cause
A plastic plug is formed when the feed tube is loose on the nozzle. In my case, most likely, the reason was the replacement of the nozzle "with a cold one". I also sin on experiments with a retract after a cold nozzle change and a plastic feed tube diameter of 2.5 mm. instead of 2.0 mm.
Also, the formation of a cork can be affected by poor heat removal from the throat by the radiator. In my case, the throat fixing screw in the radiator loosened up, perhaps this happened when replacing the nozzle with a cold one. As a result, the tube freely exited the radiator.
Treatment
First of all, if there is no experience, we order a new hot end, nozzle and tube, so as not to be left without a printer in case of emergency.
Next, heat the spolo to about 200 degrees and unscrew it, holding the aluminum block with a key. Then, without lowering the temperature, we try to remove the supply tube up, if it does not go, then this is another sign of a cork. If you still cannot remove it, you will have to unscrew the fitting.
Video material explaining the situation:
After watching various videos on the topic and ordering the necessary spare parts, I was eager to fix my printer as soon as possible, and I got down to business with only a spare nozzle, tool and alcohol.
The first problem is removing the plugged filament supply tube. The difficulty was exacerbated by the fact that the tube retainer on the radiator fitting refused to be pressed through to release the tube. But, fortunately, after several attempts to stir it up on a cold one (when you can comfortably take it and not get burned), the latch succumbed. In principle, it was possible to simply unscrew it, but there was a chance to damage the tube, but there was no spare.
Just in case, trying to push the feed tube down in my printer will not work, the throat is slightly rolled from the side of the thread on purpose, so as not to let the tube go down.
Taking out the tube, I was horrified by the amount of viscous sticky dirt that was on it.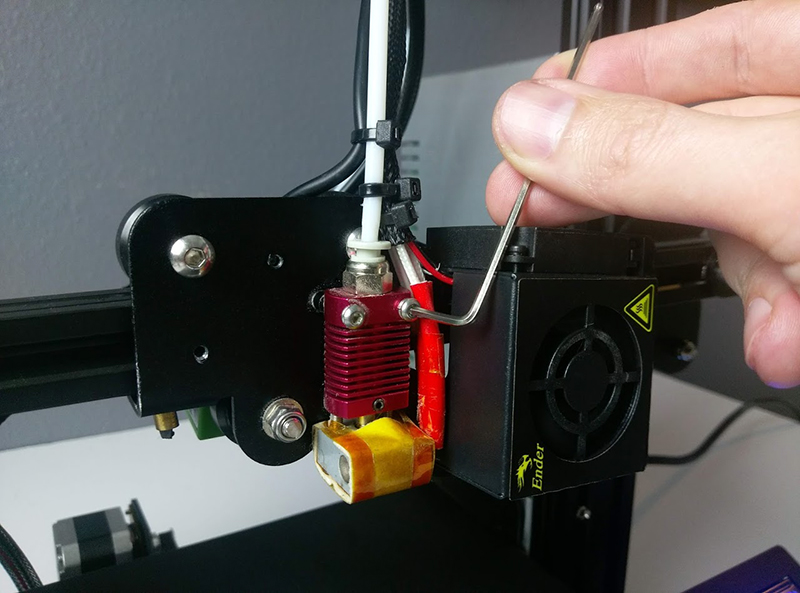 It became clear that everything would have to be cleaned and disassembled. The nozzle, of course, was also clogged with this dirt, and not with plastic. Nozzle for ejection, it's good that there were spare ones.
The main clogging from the plastic feed channel was removed with a hex wrench, like a ramrod, after removing the nozzle. But it is better to use a thick strand of wire for this, so as not to suffer from cleaning the tool from very sticky and quickly solidifying dirt.
The tube was perfectly cleaned with alcohol, and I cut off the burnt and not cleaned end with an ordinary clerical knife. To make it even, I used a construction corner, to one side of which I pressed the tube, and cut it on the other. No special cutters are needed, as much as possible you can print such a thing for yourself, but printing was no longer an option for me.
Next, turn off the heating and, as it cools down, unscrew the heatsink from the print head. The radiator is fastened with two screws to the heating block, since the screws look down, one of the bottom was heavily contaminated with overheated plastic residues.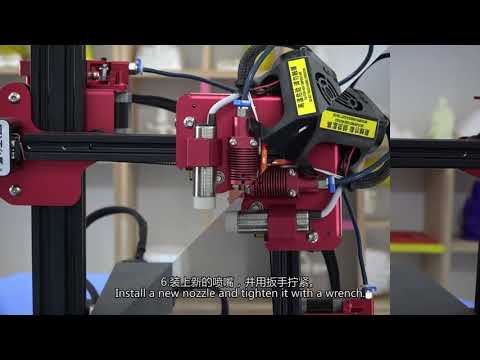 Unscrewing with a Phillips screwdriver was unrealistic, I had to heat it with a lighter and pick it up with a thin flat screwdriver. Then this screw was cleaned with heat, alcohol, a clerical knife and a screwdriver of the right size. Everything went well, the screw began to turn normally with a Phillips screwdriver.
Now you need to loosen the hex lock on the throat on the radiator and remove it. In my case, it was loose and the radiator simply came off with no effort. I cleaned the insides of the radiator with cotton swabs, alcohol and such and such a mother. There was a lot of dirt, but already on the third cotton swab it became clear what had been cleaned off.
Unscrew the throat tube from the heating block with pliers. I was lucky, the threads on the block were clean enough, the nozzle and throat were easily screwed in. I decided not to remove it and left it hanging on the printer, so I didn’t have to disconnect any wires.
Cleaning the throat is about the same as cleaning the radiator.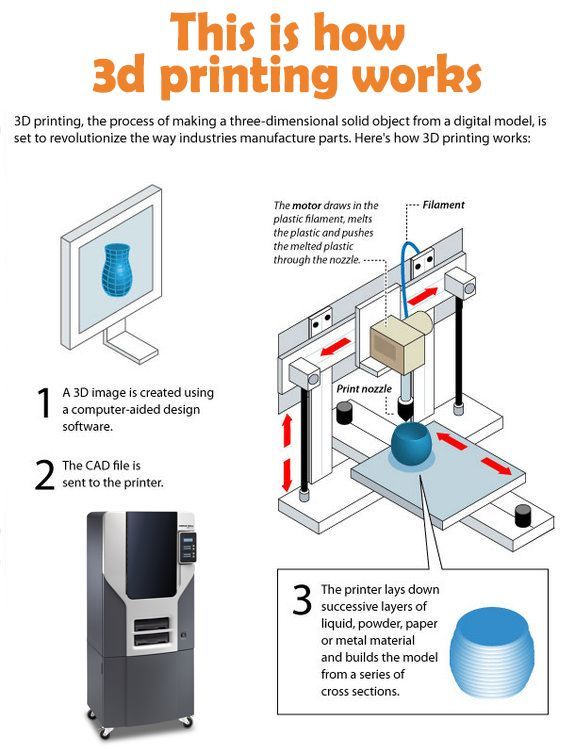 Only a cotton swab is used from a cotton swab, and a toothpick is used to push through. It is better to moisten with alcohol abundantly and several times. While I was cleaning the radiator, I sent the naked man into an alcohol bath. In addition, he scraped off the rolled end with a clerical knife, which is pressed against the nozzle to a shine, and, of course, with plenty of alcohol. I rubbed the darkened thread for a long time and stubbornly with a napkin soaked in alcohol, but it was not possible to wipe it off to a shine. Ideally, it is better to replace the throat as a nozzle, since its price is comparable to the nozzle, but my spare parts were still on the way.
When everything is clean it needs to be put back together. It is important that the tube fits as tightly as possible to the throat so that a new plug does not appear. You should first try on the tube to the throat to make sure everything is fine. To ensure a snug fit, I inserted the throat into the radiator and fixed it with a screw.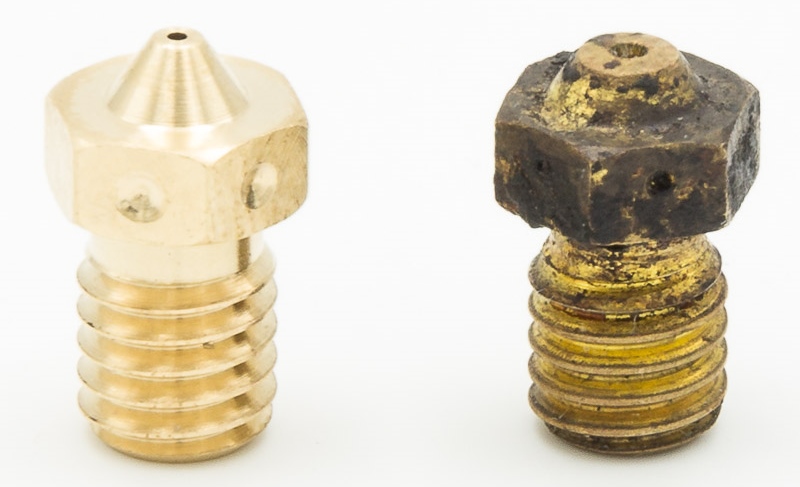 Then I installed the fitting on the radiator and inserted a tube through it. The fact that the whole structure was outside the printer made it possible to conveniently manipulate and insert the tube tightly.
Next, screw the head with the heat sink into the heating block on the printer, tighten it until the heat sink takes the desired position, turning relative to the throat. We screw in the screws fixing the radiator to the heating block and tighten the throat clamp to the radiator.
Now everything is simple, we fasten the assembled hot end to the print head area, here you need to make sure that it is located relatively evenly, by eye. And install the cooling cover. We warm up the table and hotend to operating temperature and calibrate the height of the head relative to the table.
That's it, now you can load plastic and start printing. In my case, loading plastic became easier and printing became faster, in accordance with the declared parameters of the plastic.