How to paint a 3d print
How to Prime and Paint 3D Printed Parts (With Video)
Primer
Primer is a special type of paint that adheres strongly to the part and provides a uniform surface for paint to bond with. Different primers have different uses. A spray-on primer is the best way to paint your printed parts because it quickly covers a surface with an even coating. Brush-on primers are available, but they are tricky to work with and better for fine touch ups. For best results, choose a primer and paint that are plastic compatible and from the same brand. We like Krylon and Montana (though both are thick formulas), but nothing really compares to Tamiya brand model paint - it goes on extremely thinly and evenly, preserving delicate surface details.
Rotary Tool
Because sometimes you want to sand fast. With interchangeable bits, rotary tools offer a variety of options for sanding and polishing parts. Drum sanding bits quickly sand down supports, while steel wire brushes smooth surface marks. Rotary tools are rough, so you will still need sandpaper for a smooth finish. There are plenty of great brands: Dremel and Craftsman are popular in the states, Proxxon in Europe. To avoid scorching your part, turn down the RPMs to the minimum (usually 500-1000) and use a light touch.
Hand Files
Not as clumsy or as random as a palm sander. A more elegant tool…for a more civilized age.
One of the most simple yet effective tools, a hand file removes supports and sands down surfaces. Using a firm grip, you can remove marks with more control than with a rotary tool. Keep a wire brush on hand and clean the file’s teeth often (otherwise plastic and resin will gum up teeth). Like a rotary tool, a hand file will leave a rough surface, so it’s best for removing the larger support marks.
Sand Paper
The most unglamourous tool in the shop, sandpaper has come light years in the last decade with the release of flexible sanding sheets. Available at home improvement stores, flexible sanding sheets last 15 times longer than paper ones.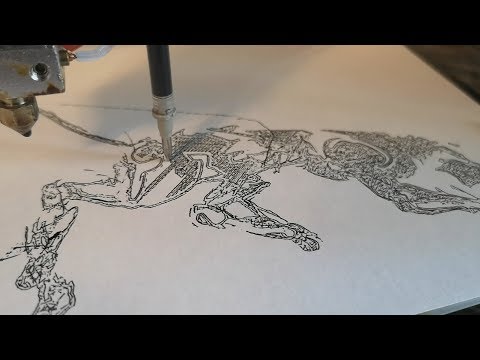 They don’t curl, puncture or crease.., and they hey can be used wet, which reduces dust and prevents buildup in the sanding tooth. Because they flex, they can easily reach small interior spaces and rounded surfaces.
Dust Removal
Even after wet sanding, some dust will remain. Remove buildup with water and a soft scrub brush (an old toothbrush works). For serious cleanup, an inexpensive sonicator can quickly remove fine particles caught in corners and cracks of a surface. If you work in an area with hard water, using deionized or distilled water will prevent spotting between painting.
Tack Cloth
Tack cloth is a soft, slightly sticky cotton cloth designed to remove remaining dust and leave a clean surface for painting. Let your model dry before using the tack cloth — the waxy surface does not work well with water.
Painting Block, Dowels & Drill
This simple trick will save you grief in the spray booth (we were excited when we saw this technique in a modelmaking how-to video by Adam Savage). By mounting your 3D print on a dowel (often you can use a preexisting hole in the part), you can quickly maneuver while spraying, allowing you to get to all sides and into the nooks and crannies of the part without creating any fingerprints. When you want to add an even coat to all sides of your model, this is pretty essential. We recommend ordering a variety of size of dowels. To minimize the hole size on a part, start with a small size and work your way up until the model feels firmly seated. Drill a corresponding hole in a block of wood or MDF and insert the part with the dowel - now you can keep the model hands free while spraying.
Safety Equipment
Spraypainting means working with airborne particulates and solvents, both of which pose health hazards. Remember to use a NIOSH approved respirator and work in a well ventilated workspace. While painting, wear nitrile gloves to avoid spraying paint on your hands and and also protect your model from fingerprints.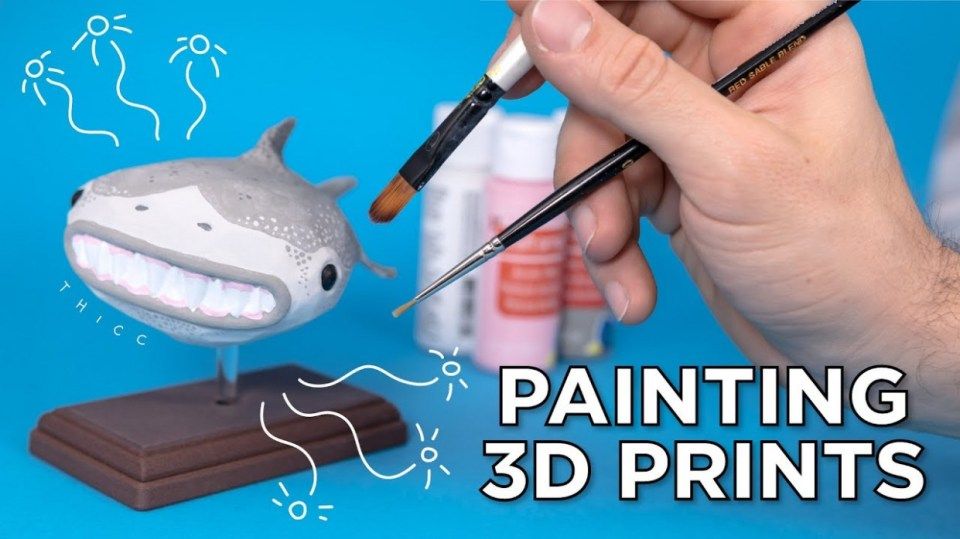
Ultimate Guide to Painting 3D Prints
Download the full Guide
as a PDF!
The simple post-processing techniques presented in this guide are an excellent way for professionals to create low-cost silicone molds, threaded inserts for enclosures, vacuum formed parts, and more.
If you’re an engineer or product designer creating concept models, a prop or set designer, artist, or an educator looking to add incorporate a bit more creativity into your classroom 3D printing activities, painting your models can be a great solution.
In this tutorial, we’ll show you how to create a nearly automotive quality paint job on any of your 3D printed objects.
Working time will vary depending on your model. Including drying time, the process shown took us about 6 hours from start to finish.
SUPPLIES
3D Print
Rubbing alcohol
Paper towels
Spray primer/filler
Spray paint
Hanging cord
80, 120, 240, 220, 1000 grit sandpaper
Needlenose pliers
Bondo
Sanding block & sandpaper
Gloves
Eye protection
Respiratory Mask
Need some of these products? We've curated an Amazon wish list for you.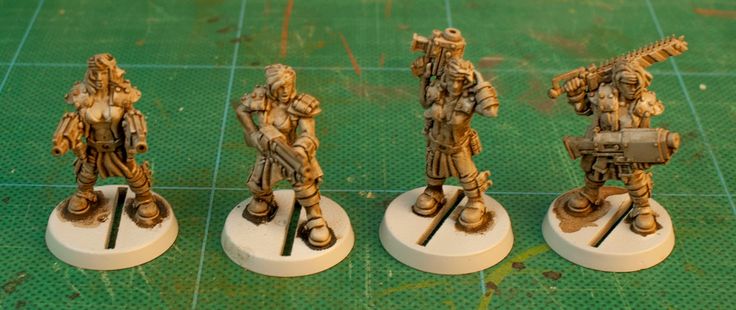
STEP 1: PREPARE & PRINT MODEL
When preparing models for painting in MakerBot Print, keep in mind how your print settings will affect the quality of your paint job.
Consider: Print settings, print orientation, number of build plates
Surfaces printed in the Z axis will have the smoothest surface finish.
Printing models in 100 micron layer resolution will result in a slightly smoother surface finish, but will take significantly longer.
If possible, avoid placing support material in places you intend to paint as they will require more post processing to remove completely.
Supplies used: Needle-nose pliers or flush cutters
After you remove your print from the build plate of your printer, you will need to remove any raft or support material.
A. Remove prints from the build plate
B. Remove rafts
C. Remove large pieces of support
D. Approach smaller pieces and fine details
Supplies used: Sanding block, electric sander, 80,120, 240, 400, & 1000 grit sandpaper, Cyanoacrylate glue (super glue), Bondo
For the highest quality paint surface, an optional next step is to sand your model.
Make sure to wear eye protection, gloves, and a respiratory mask.
A. Dry sand the model using 80-240 grit sandpaper
B. Wet sand the model using 400 & 1000 grit sandpaper
C. Glue the parts of your model together
D. Apply filler to any gaps or blemish in your model and sand once dry
Find more detailed information here on gluing and sanding.
The 2021 Guide to 3D Printing Materials
Learn about polymers, composites, and metals all available for 3D Printing!
Supplies used: Hanging cord
Once your model is ready for painting - hang it in an open, dust free space with plenty of ventilation. This will allow you to paint all surfaces evenly without having to handle the model while paint is drying.
A. Tie hanging cord around the model
B. Hang the model in an open room with a tarp
STEP 5: PRIMER/FILLER
Whether you have chosen to sand your model and apply filler or you are simply painting a rough PLA model printed at high resolution, a few layers of primer/filler will fill any small surface imperfections before painting.
Primer filler is a high build spray filler that comes in aerosol form and can be purchased at most local hardware stores.
Before spraying remember to wear gloves, eye protection, and a respiratory mask.
BE SURE TO:
Shake well before use
Use wide strokes beginning and ending in space outside of the model
Hold the can 10-12 inches from the model
Paint in thin layers using a misting technique
AVOID:
Painting in thick layers
Holding the can in any spot for a long time
Holding the can too close to the model
Once you’ve sprayed 2-3 layers of primer/filler, allow your model to dry for 30-40 minutes.
STEP 7: SAND
A. Lightly sand your model with 1000 grit sandpaper (dry). This will smooth the surface of the model as the primer filler tends to create a rough surface texture similar to sandpaper.
B. Evaluate for quality.
C. If there are still surface imperfections you would like to smooth, continue to apply consecutive layers of primer/filler, and sand.
Once you are happy with the model surface, move on to painting.
STEP 8: PAINT
When choosing paint, you typically have a large degree of freedom as to which color and type of paint you use. Make sure to pick something that adheres well to plastic.
A. Choose a paint
B. Test for color in an inconspicuous location before painting the entire model
C. Let the paint sit overnight to cure
TIP:
Typically the paint will be dry to touch within an hour or so, and ready to polish within 24-48 hours.
If you’d like to protect the surface of your painted model, you can also apply a thin clear coat at this point.
In the end, you’re left with a beautiful painted model ready for approval presentation, enhanced for sets or galleries, optimized for better classroom learning, or simply improved for better innovation.
Here you can see just how far we have come.
Visit one of our other applications pages for tips on how to take your print even further.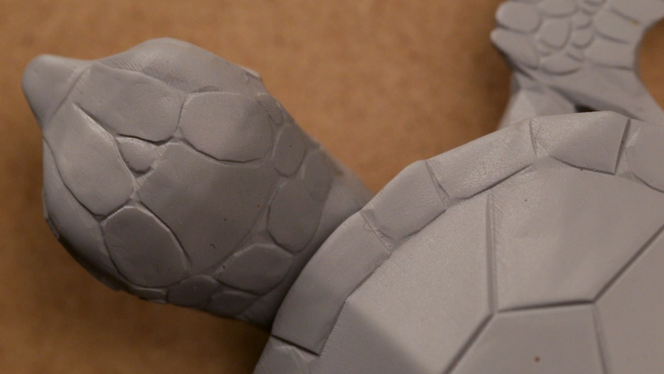
We recommend that you visit our pages on:
Gluing
Sanding
Inserts
Last but not least, remember to share your work with us on Thingiverse and social media @MakerBot.
We can’t wait to see what you make!
Hair Dryer Shell
Ferro
10/2/2015
https://grabcad.com/library/hair-dryer-shell-1
Powered by MakerBot Learning.
Drawing on a 3D printer or Hephaestus trying on Picasso's beret
Good evening everyone!
It's no secret that the best feature of DIY printers is the incredibly wide customization and modification possibilities of the 'car'. From attaching more extruders and expanding the printable area to turning the printer into a food or musical instrument (seriously, the guys on YouTube are already moving steppers to the beat of the music). Or, for example, some make their printer draw. This is what I did today as well! nine0003
Preparing for.
In order to bring this daring plan to life, you will need:
1) Printer, which plays the main role in this event. I heartily recommend the Prusa i3 Hephestos (if only for the simple reason that I have used it myself). But, in theory, any DIY or Open Source printer will do.
2) Soft. You will need the Inkscape program, which can be downloaded for free, and the gcodetools plugin for it. About what, how and where - further in the text. nine0003
3) Positive attitude on board and some free time.
Item A. An upgrade that makes your printer feel 'naked'.
For the movie magic to happen, you have to 'remove' the extruder. Those. all, including the bracket. Speaking on the example of 'Hephaestus', then in the end you should have only the printed platform-holder left from the extruder on the printer. I strongly recommend doing this carefully so as not to solder the wires to their rightful places later. After the job is done (I have no doubt about you, in the end you somehow assembled this DIY into its current state), you need to install a pen holder on the platform. nine0003
You can download them from the well-known site. Here are the holder links for
- RepRap: www.thingiverse.com/thing:31983
- Hephestos: http://www.thingiverse.com/thing:627774/
Personally, I printed the holder with 15% infill and thickness layer 0.3 - no problems experienced. The holder itself can be mounted on the same bolts that were used to mount the extruder. The result is such a nice design:
A few words about the calibration and the level at which you install this same pen. Personally, I did it extremely simply - through the level plate I brought it to the point when the printer brings the extruder to the center of the platform and set the handle so that there is a sure contact between the tip of the rod and the paper previously installed on the platform. The method, of course, only works if the platform is pre-calibrated. But tough guys don't look at the explosion and don't calibrate the table, so that shouldn't be a problem. nine0003
Item B. Preparing to transfer beauties and not-so-beauties onto paper.
As mentioned above, you need to download Inkscape. You can download it from the official site at this link. And here you can download gcodetools. The contents of the archive must be unpacked to *Inkscape installation location*shareextensions. Create a separate folder for the plugin DO NOT NEED . When all these boring items are completed, feel free to run the program.
[IMG ID=3063 WIDTH=514 HEIGHT=289]
Initially, I really wanted to draw a patriotic pin-up beauty, but life makes its own adjustments. It should be noted that in general gcodetools was created for extremely serious CNC guys, and therefore I have been digging into it all day, but some functions are still not given to the Padawan. If not today, then tomorrow all pin-up beauties will be drawn, but for now we have to curb our appetite - let's circle this drawing!
With a habitual movement, we throw this guy in . jpg directly from the desktop into the program workspace. Immediately, by the way, in file-> document properties I recommend setting the size of the drawing area. I set it to 180 x 180mm, well within the hephestos print area. nine0003
Now let's bring the drawing into a state that our printer can handle. Let me remind you that he can only operate with a pen - that leaves us with only the shaded and unpainted areas. Go to Path->Trace Bitmap.
The main setting we are interested in is Brightness cutoff. This setting is worth fiddling with. The value that suits me is 0.450. It doesn't have to be the same for you. Before clicking 'ok', make sure you have the image selected that you want to convert like this. Also note that the result will appear ON TOP of the original. nine0003
Now go to extensions-> gcodetools-> Path to Gcode.
Here we change, first of all, the cutting order to Pass by Pass. Thus, the handle will not make unnecessary gestures. I'm not entirely sure I understand her, but the guys in the know say, 'Believe me. and then you'll understand. Then go to the preferences tab. Everything is simple here - the file name, the path where it will be saved, and z safe (as you might guess, this is the distance that the pen will rise when it needs to move - the standard 5 mm is enough). nine0003
VERY IMPORTANT: be sure to add .gcode to the end of the file name. Otherwise, there will be no kin.
After playing around with these options, return to the path to Gcode tab. With a feeling of maximum dignity, press Apply. Warnings will pop up that you haven't set orientation points and tool, so the whole thing will be set to 'default'. We are satisfied with this option, click 'OK'.
Finally, your file is ready. We fill it on a USB flash drive and send it to the printer for 'drawing'. nine0003
The process, it must be said, is fascinating. For those who are 'long' - I turned the speed up to 300%. Things went extremely well without any collateral damage. The printer finished drawing in about half an hour:
Personally, I am completely satisfied with the result. For those who were waiting for a pin-up beauty, not this tin can - as you can see, by creating a file in this way, we get a 'stroke'. Accordingly, the printer does not paint over areas filled with black. This can be easily solved if you dig deeper into the plugin settings and Area in particular. If necessary, I will show and tell you more in a separate post or comment. nine0003
Thank you all for your attention, stay with us. Drawing printers, big guys in bat suits and educational projects are guaranteed. Further more!
HOW TO CREATE A MODEL FOR 3D PRINTING
Hello everyone, my name is Bogdan, I'm a concept artist, I'm most interested in Hard Surface. He graduated from several courses, for example, Super Maya - Yuri Snytko's video course, Hard Surface XYZ course. Now I'm studying the Movie Man XYZ course. Participated in various concept art competitions: nine0003
https://www.ggac.com/v2/work/detail/169998
https://render.ru/ru/gallery/artwork/211240
At the moment I'm just starting out in the gaming industry, so I'm open to any job offers.
My favorite hobby is board games, I really enjoy building and painting models and then playing with them. Having mastered the basic skills of design and modeling, I decided to start developing my own wargame from the lineup. The first unit was the BMP "Ferus" (here it is on ArtStation: https://www.artstation.com/artwork/8wo90m) because Hard Surface is my favorite and I could test the glue-free build, spinning wheels and turret. After choosing a topic, I began to select references. Usually I don't limit myself in the number of images, as they can be conveniently saved and sorted in the wonderful PureRef program.
For modeling I usually use ZBrush and Maya. In Maya, you can very quickly make Blockout and Kitbash for a future model, after which you can work on the shape, silhouette and guide lines in ZBrush, put the model together. nine0003
Due to the lack of clay modeling skills, as well as the absence of my own 3D printer (but it will appear soon :)), I turned to a company that prints on an SLA printer.
Before sending the model to be printed, I went through a few steps. Below is a short guide.
1) Make sure the model is solid. This can be verified in ZBrush using the 3D Print Hub plugin. If the parts do not pass the test, then you can correct the geometry using the functions in the Geometry menu. nine0003
2) Then you need to reduce the number of polygons using the Decimation Master plugin, and then repeat the test.
3) Next, check that all parts are to the correct scale. Since OBJ and FBX do not contain information about the size of parts in real dimensions, you need to use the 3D Print Hub plugin to export from ZBrush (watch the dimensions carefully!), Or use a simple but long method so as not to be mistaken.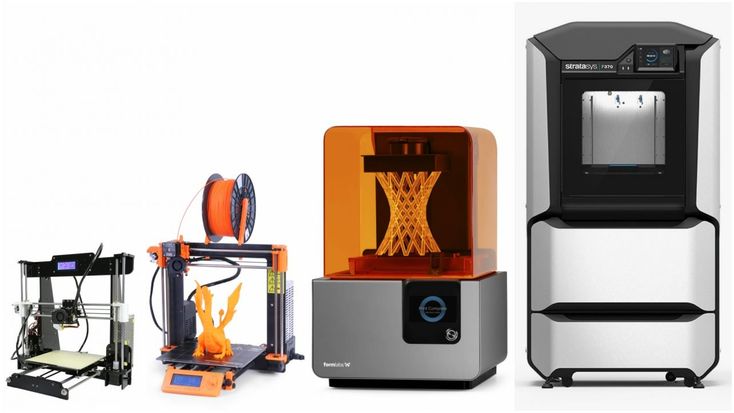 I decided on the dimensions and, using a box, scaled each detail and saved it in STL format. nine0003
4) After that, don't forget to make holes in the parts to reduce material consumption, check the mesh again.
5) Next, you need to arrange supports for printing, many programs can help you with this, which will place them automatically, you just have to add additional supports in the necessary places or move already generated ones.
After all the preparation steps, I sent the model to the company, where it was printed, dried in an ultraviolet oven and the supports were cut off. I recommend additionally cleaning the model in an alcohol or soapy solution after production, because even small residues of the polymer are quite toxic. For additional protection, you can varnish the model or paint it. nine0003
I learned all the necessary information to prepare the model for printing when communicating with the company's employees, or found it on the Internet.