How to make cheap 3d printer
I built the cheapest 3D printer available online so that you don’t have to: iNSTONE Desktop DIY (review)
How cheap can a 3D printer be and still function? Although they seemed plucked out of science fiction, there’s not really that much to these machines. A few stepper motors, some switches, a control board, a heating element, and a nozzle are really all you need. It’s the software, and the expiration of a bunch of patents, that kicked the 3D printing revolution into high gear.
Is it possible to assemble the right collection of components to make a functional 3D printer for less than $100? iNSTONE thinks you can, and they are not wrong.
Behold, the iNSTONE Desktop DIY.
iNSTONE Desktop DIY. Photo by Author.This is the best printer you could build for $99. It’s terrible. I love it. You absolutely should not buy it.
This is a cantilever printer with a small build space, no heated bed, a fairly standard OS (that connects with a type-B USB port, which I haven’t seen on a piece of consumer electronics since 2015), and absolutely no frills. I never plugged in the provided power supply; it will not spark joy.
If the design philosophy behind the Anet A6 is “how do we make the most 3D printer for $200?”, the philosophy behind iNSTONE is “how do we make the best 3D printer for less than $100?” Honestly, I think they pulled it off. At a quarter the build volume, there’s more metal in this machine than in the Anet. Its main structural elements are extruded aluminum. The steppers are decent quality. The hot end is a very cheap E3D clone. The mechanism on the Bowden extruder is dense injection-molded plastic. You can pick it up and move it around without feeling like everything needs to be re-calibrated.
It has a rotary encoder on the control board, something the Monoprice Mini Delta lacked.
The kit also came with more tools than any of the other printer kits, including everything you need, this awesome little snipper, and several wrenches that don’t actually fit any of the bolts on the printer.
If you were to send me to a market in Shenzhen with $100 in Yuan and ask me to assemble the best 3D printer I could, I really doubt I could do better than this machine. There are a ton of clever little design details that demonstrate the shear amount of thoughtful engineering that went into making this thing work. This printer is going to occupy a place of pride in my workshop.
View this post on Instagram
Well, I got the $99 #3Dprinter running and printing, which is progress.
A post shared by Andrew David Thaler (@drandrewthaler) on
Unfortunately, the iNSTONE Desktop DIY is objectively terrible. Unless you’re a 3D printer enthusiast looking for a curiosity to add to you collection (and a really fun build), you absolute should not buy this.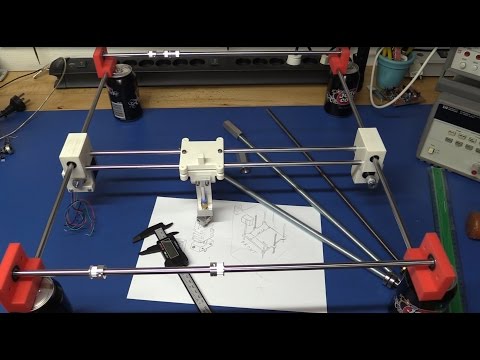
For an explanation of our testing protocols, please see: We’re gonna beat the heck out of these machines: The search for the best dirt-cheap 3D printer for fieldwork.
The Burn In.Building this printer was a whole heap of fun. The instructions were clear enough if you’re familiar with 3D printing but probably too vague if you’ve never built one before. Everything is mounted to the extruded aluminum frame with t-nuts, creating a very strong, stable structure. The kit was missing some parts, but fortunately I had replacements in the shop.
There are simple mechanisms to adjust each axis. The z-axis has the strangest coupler I’ve ever seen. Rather than attach the threaded rod to a piece of machined aluminum or even a 3D-printed part, the iNSTONE Desktop DIY uses a small piece of PVC tubing (more on that, later).
There’s not much else too this. The printer has no heated bed or blower fan to cool the print. The fiberglass build plate is held in place by two OEM binder clips.
View this post on Instagram
Today we’re building the iNSTONE DIY $99 3D printer. It’s the cheapest printer currently available in the USA. Some early observations: it’s the only one so far that’s come with a full set of real tools (not the dinky sheet metal wrenches). They also sent the wrong power adapter, so this’ll be fun. #3dprinting #conservation #ecology
A post shared by Andrew David Thaler (@drandrewthaler) on
Getting a good print out of this machine is an exercise in patience. The build plate is adjusted by three thumbscrews, one of which is nearly impossible to reach. The three point design is not solid. The build plate loses alignment constantly, sometimes even in the middle of a print.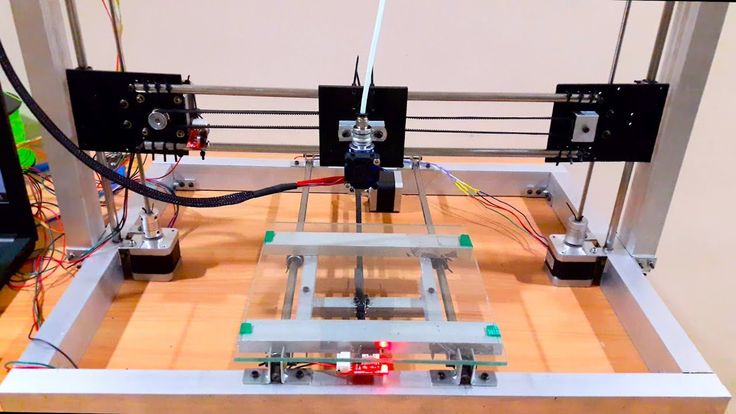 It took almost a week of daily tweaking and tightening and calibrating to get this machine to the point where it would reliably lay down a solid layer and get to printing.
Most of the demo prints failed because of z-axis wobble (more on that, later). Finally, after a herculean effort, the first passable print emerged from the provided g-code: this vaguely spooky mask.
Vaguely spooky. Photo by author.Burn-in Score: C
The Benchmark Test. Oh Benchy, I’m so sorry. Photo by author.There’s nothing glaringly bad about this Benchy other than the obvious wobble everywhere. It printed. Over-extrusion and a wobbly build plate means that you can’t read any of the bottom print and there’s some slight elephant footing. There’s a big vertical jump near the top from the z-axis slipping (more on that, later). Nothing is awful, but everything is just slightly sloppy.
Benchmark Score: C
The Replication Test.The purpose of the replication test is not to make 3 pretty ok Cute Octos, it’s to make 3 consistent Cute Octos. The lack of cooling, unstable build plate, and absence of a heated bed means that each Octo warped and weirded in different ways.
This test was a failure.
Replication Score: F
The Functional Parts Test.When it comes to the threads of a screw, it’s all about z-axis control. And this printer does not have it (more on that, later). The threads were sloppy and loose. There was a ton of wobble between the two parts and they did not hold firm. They work, but just barely and not in any way that would be useful.
It’s… not as out of focus as you think it is. Photo by author.Functional Part Score: D
The Complex System Test.It’s time. We need to talk about the z-axis. I thought the worst thing I’d seen on a 3D printer is those terrible flexible couplers on the Anet A6. I was wrong. This is how the z-axis connects to the motor on the iNSTONE Desktop DIY:
What?! Photo by author.
It’s just a piece of PVC tubing held in with friction. For a printer that ticked so many geek boxes for me, that’s so disappointing. This is why there’s no control over the z-axis, why there’s so many gaps in the vertical shells, and why, if you try to print out something at 200 micron resolution, it looks like this:
Hello darkness my old friend. Photo by author.Simply put, this machine just doesn’t have the range.
At 100 microns, the Niskin receiver took 11 hours to print (2 to 4 is the average on the other tested printers). It was flimsy, the servo didn’t fit snugly, and the parts all had way too much play. As a testament to the brilliance of the Niskin3D design team, the water sampler still worked, but just barely. It feels like it’s ready to snap apart at any moment, so I didn’t even attempt the in-water test.
View this post on Instagram
Can you print a Niskin bottle with a $99 #3Dprinter? Yes.
Should you? No. #3dprinting
A post shared by Andrew David Thaler (@drandrewthaler) on
Complex System Score: D
The Precision Instrument Test.Can a $99 3D printer print a precision scale suitable for a navigational instrument at 50 micron resolution?
Printrbot in silver, iNSTONE in orange. Photo by author.No. It cannot.
Precision score: F
The Educator’s Test.
I was really hopeful going in to this one. It was the final print of the review, the printer settings were as dialed in as humanly possible, and the Isopod model was intentionally designed to be easy to print on most low-end printers.
It might be an Isopod. Photo by author.Z-axis wobble strikes again (more on that, earlier). The vertical layers are inconsistent with big gaps, much of the detail is gone, the base looks awful, and there is warping on the telson. You can tell it’s an isopod, but that’s about it.
Educator’s Score: D
The Tear-down.Like the Anet A6, pretty much the entire printer is exposed, so there’s not much to tear down. I spent a lot of time with this printer over the last few weeks and am intimately familiar with its inner workings. I’m not exaggerating when I said this is the best printer you could build for $99. It’s well designed and well made. The Bowden extruder shows signs of stress from filament being pulled in and out, but otherwise there’s no obvious signs of wear, no weird rubbing, and nothing that would raise a red flag.
It’s great for what it is, just “what it is” isn’t a great idea.
Note: In a lot of ways the Burn In and Tear Down tests for these reviews are redundant. Kit printers get exhaustive Burn In sections and fairly sparse Tear Downs. Pre-builts get the reverse. It all evens out.
Tear-down Score: A
The Trash Test.
This printer produced an order of magnitude more waste than any other printer tested, and that doesn’t even include all of the failed prints during burn-in.
Total mass of waste filament: 27.71g
Reviewer’s Discretion.
There’s a ton of things you could do to improve this printer. Adding an all-metal (or even 3D printed) z-axis coupler would go a long way to improving it. Redesigning the build plate and adding a heated bed would work wonders. It desperately needs a cooling fan directed at the build area.
But that would spoil the spirit of this machine. The iNSTONE Desktop DIY is a $99 3D printer, not a $99 3D printer + a week of post-purchase engineering + 5 years experience in 3D printing.
You don’t build a hundred-dollar 3D printer because you should, you build it because you can.
Final Assessment.
Honestly, I can’t even give this printer a score. You should not buy it.
Final Score: Stop. Don’t.
The rankings so far:
- Creality Ender-3 (with upgrades): A
- Monoprice Select Mini: B+
- Monoprice Mini Delta: B-
- Creality Ender-3 (unmodified): B-
- Anet A6: D+
- iNSTONE Desktop DIY: No
We’ve only got one printer left, the highly recommended $194 Creality Ender3, so come back soon for the final results!
Depending on how successful this project is, I may expand to include printers in the $200 to $400 price range.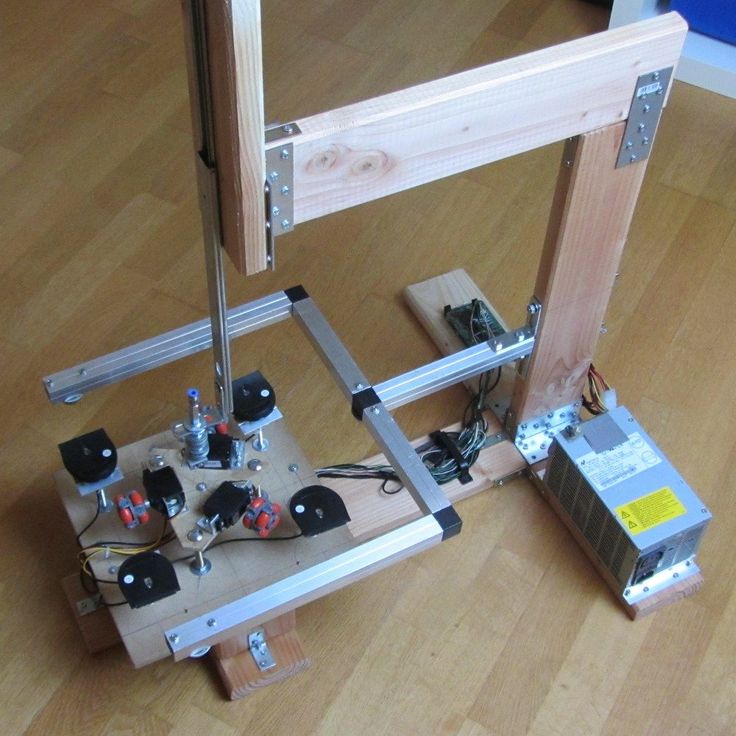 If you want to help make that happen, you can either use the Amazon Affiliate links in the post to buy printers, consumables, anything else or you can sign up for my Patreon and help support Southern Fried Science.
Transform Your Cheap 3D Printer Into a Maker’s Dream
The 3D printing market has exploded over the last decade or so. New printers hit the market each year, with options available in just about every price bracket. But can you improve the 3D printer you’ve spent your hard-earned money on once you get it home?
You certainly can! To make this process as easy as possible for you, this article will explore some of the best upgrades you can use to turn a cheap 3D printer into a maker’s dream. All of these options have been picked thanks to their ease of installation and impact on your printer.
Bed Leveling Knobs
Let’s kick this off with something simple and easy: bed leveling knobs. The vast majority of budget 3D printers come with hex screws or wingnuts that allow you to alter the tension on each corner of your print bed. While they work, they can also be very fiddly, making it challenging to dial in just the right tension in each corner.
Bed leveling knobs can solve this problem in a flash. You can buy knobs like this for many printers, but you can also find 3D-printable options available that can be made on the printer you’re upgrading. The knobs pictured above are on the venerable FlashForge Creator 3, and they feature useful markers to show how far you’re turning them.
Auto-Leveling Sensors
Image Credit: antclabs.comLeveling a 3D printer’s bed is usually done with one of two tools: a piece of paper for most people, or a feeler gauge for those who are obsessed with precision. But why bother using measuring tools like these when you can let digital sensors do all of the work for you?
Auto-leveling sensors, like the popular BLTouch one pictured, can help you to tram your bed without having to use tools like paper in the process. Of course, you need to make sure that your printer is compatible with the auto-leveling sensor that you buy, as they will usually connect to the main board of your printer.
Some printers come with this feature built-in, though you won’t find any budget options that do. Even some premium printers lack auto-leveling.
Filament Spool Holders & Guides
Failed prints are inevitable from time to time, even if you spend a small fortune on your 3D printer. This can be incredibly frustrating when the cause of a failure comes down to the way that your filament is being held, and it makes sense to look for ways to ensure that spools unroll evenly and the filament is properly guided into the extruder.
You can find an array of spool holder projects on websites like Thingiverse, giving you the chance to find an option that will work for your printer and the space it occupies. Likewise, you can also find filament guides for most printers when you search online. Filament guides are most important for direct drive 3D printers, but they can also be useful for those that use Bowden tubes.
Related: Choose The Right Filament For Your 3D Printer
Fan Air Direction Ducts
The material you use when you’re 3D printing makes a huge difference to the settings you choose. Many people don’t realize that the materials they pick also affect the type of cooling that will be optimal during prints, with materials like PLA benefiting from dedicated part cooling and ABS being better with as little cooling as possible.
Your printer will already have a fan on its hot end, enabling the machine to regulate its temperature. You can add shrouds to your hot end fan that can direct a portion of the air towards your part during printing. There are printable fan shrouds available in loads of shapes and sizes online, giving you the chance to find the perfect fit for your printer.
As a side note, it’s worth thinking about the fans on your printer. Most low-cost printers come with extremely cheap fans that tend to break and be noisy. Replacing these fans is easy, and can be another worthwhile upgrade.
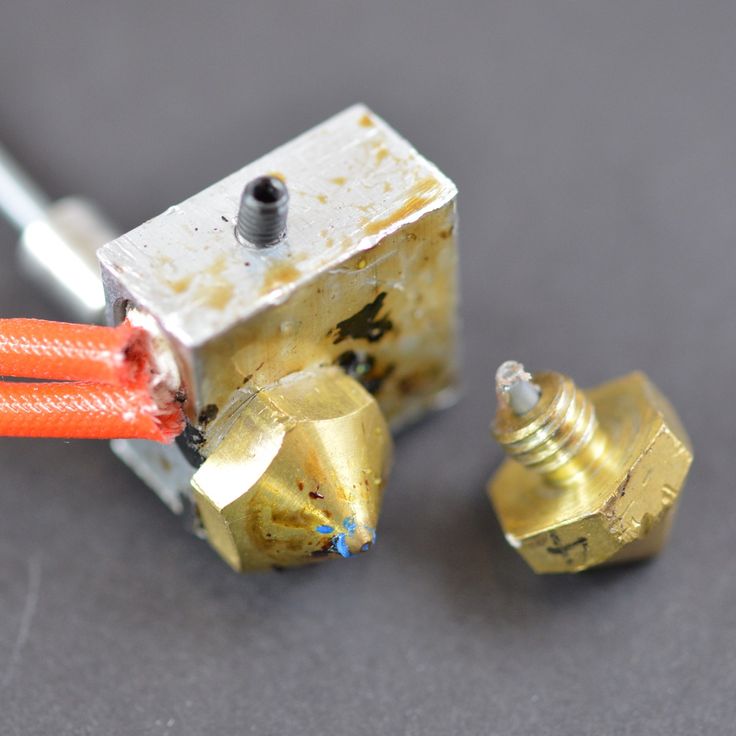
Full-Metal Hot Ends
This next upgrade is heavily debated in 3D printing communities, but it can come with some real benefits depending on the type of printing you do. Most cheap 3D printers come with hot ends that have plastic components built into them. Full-metal hot ends are different, with the whole component being made from metal that will be durable and long-lasting.
Along with improving the life of your hot end, full-metal options will enable you to print at higher temperatures with materials like nylon. That is, as long as your printer can reach the required temperatures for the materials you’re using. They may come with flaws, but it can be worth living with the occasional blockage to be able to work with a variety of materials.
You can find full-metal hot ends from a range of companies, but you need to make sure that the one you choose is designed to work with your printer. This upgrade can be quite expensive, so you must know what you’re doing when you install it.
Webcam Mounts
Going back to the idea of prints failing, it’s time to consider an option that could save you hours of wasted print time. Many high-end printers come with cameras already installed, but cheaper examples rarely come with this feature. Installing a webcam mount to your 3D printer can be a cheap and effective way to overcome this sort of issue.
You can find options for just about every printer on the market online. Some mounts will work with standard tripod screws, while others are designed to work with specific cameras. Once you’ve found the right camera, you can use a device like a Raspberry Pi to enable you to view the feed remotely over the internet.
Of course, you should never leave a printer unattended for long periods. You should at least remain in the same building during operation, checking on your printer regularly to ensure that nothing is going wrong.
Glass & Flexible Print Surfaces
This final upgrade comes with two choices that will give you very different results. Most cheap 3D printers will come with either a smooth aluminum surface or a rough surface that is based on BuildTak. These surfaces may be fine when you first start out, but they can also come with adhesion problems and are likely to get damaged over time. Glass and flexible surfaces are available for most printers.
- Glass Print Surfaces: Print surfaces made from materials like borosilicate glass can produce extremely smooth bases for your 3D prints. You may need products like 3DLAC for good adhesion to surfaces like this, and you will need to hunt down a piece of glass that is the right size for your printer.
- Flexible Print Surfaces: Flexible print surfaces are designed to be removable, with a coating that resembles BuildTak. Rather than having to scrape prints off, you can simply bend a print surface like this, reducing the risk of damage to your print while also making it easier to work with complex designs.
Not every printer will be able to have a replacement print surface installed. You will need to do research for your specific printer when you’re looking at options like this, but this shouldn’t be too hard as long as you have a relatively common machine.
Upgrading Your Cheap 3D Printer
Upgrading a 3D printer can make sense for a lot of different reasons. Not only will you improve your experience with the machine you love, but you may also be able to improve its performance. Considering the price of a new 3D printer, these upgrades are all very affordable, and they give you the chance to learn more about your printer in the process.
Cheap Arduino 3D Printer||Arduino-diy.com
This article describes the construction of a 3D printer that costs around $60-70 (probably the cheapest concept in the world).
This 3D printer works with the cheapest motors on the market - 28Byj-48, Electronics - Ramps 1.4 controlled by Arduino.
The author of the project is a 16-year-old guy from Germany.
3D printer specifications:
Working space: 10x10x10 cm; nine0003
Speed: 20 mm/s;
Resolution (accuracy): 0.2 mm.
P.S. Under each section, in accordance with the table of contents of the article, photos are posted as a visual instruction
Mechanical part
MDF boards:
-1x 30x34 cm (Base).
-2x 6x4 cm.
-1x 34x6 cm.
-1x 15x4 cm.
- 2 GT2 pulleys + 1 m GT2 timing belt. nine0003
-10 bearings 624.
-1 pulley Mk8 for drive.
-1 PTFE tube.
Smooth rods for guides with a diameter of 8 mm:
- 2, 22 cm long.
- 4 x 17.5 cm long.
Local hardware store:
- 1 shaft with M5 thread, which you will cut into 2 pieces.
-2 M5 hex nuts.
- 8 screws M3x16 mm.
-6 screws M3x 25 mm.
-4 screws x M4x45 mm.
-2 screws M4x60 mm. nine0003
-4 screws M4x20 mm.
-20 M4 hex nuts.
-10 M3 hex nuts.
-12 small screws.
Electronics
-1 Arduino Mega 2560 board + Ramps 1.4 + 4 A4988 stepper motor drivers.
-4 stepper motors 28byj-48.
-3 optical limit switches.
-1 Nema 17 stepper motor (we also order from Ali or Ebay. Such drives cost about 10 dollars).
Extruder tip:
-1 E3D-V5 Aliexpress extruder
or more expensive but with cooling
-1 E3D-V6 Aliexpress extruder.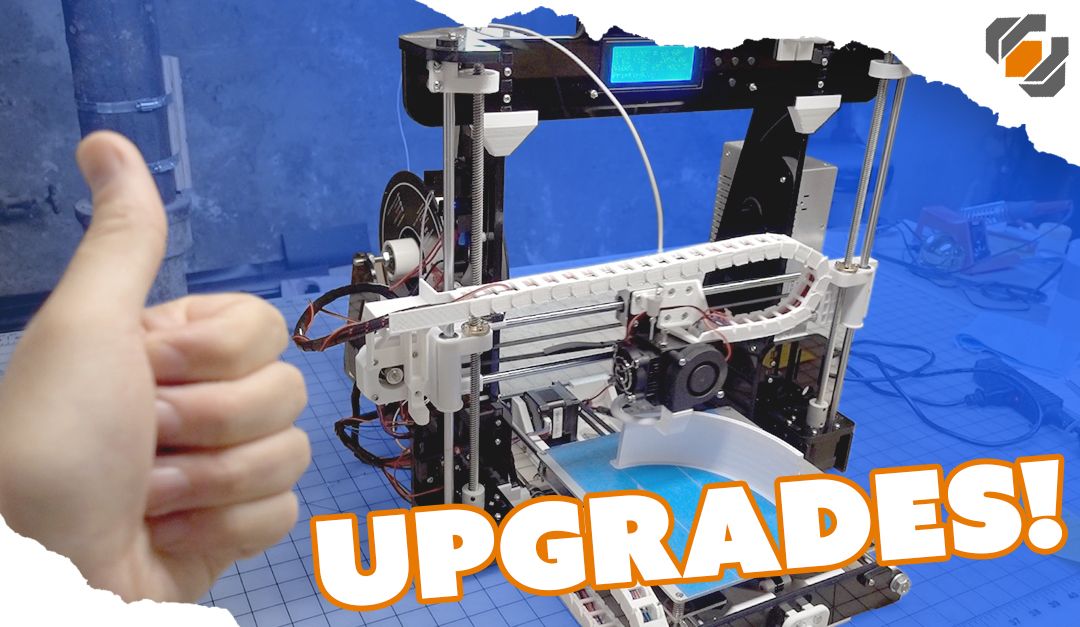
Knots to be printed on a 3D printer
Download the latest versions of 3D models of units to be printed from the link: Thingiverse
.
2 "Z-Motor" parts
2 "Y-End" parts
2 "X-End" parts
1 "X-Carriage" part
1 "Motor" part
1 "Hotend" part nine0003
1 piece "Hotend Clamp"
Download mechanism for extruder here: Thingiverse.
28BYJ-48 Stepper Motor Modification
In order to convert the 28BYJ-48 stepper motor from unipolar to bipolar, you need to open the plastic cover.
Then remove the red cable and open the contact track from it as shown in the figure.
Now at the other end is the output that you will connect to the Ramps, arrange the pins as follows:
blue--yellow--orange--pink
With this little modification, you can connect these motors directly to the pins provided on the Arduino Ramps 1.4 shield
Y Axis
First you need to glue two wooden boards together.
Then place the printed parts "Motor", "Z-Motor" on the wooden boards.
Then fix the printed parts with the screws.
Next step: fit the motors into the slots and then the LM8UU bearings. nine0003
Install the pulley on the motor and the 624zz bearings next to it.
Use plastic ties to secure LM8UU bearings.
Next - install two guide rails 17.5 cm long with a diameter of 8 mm.
Finally, pull the belt through the "Y-ends" and install the limit switch.
X-Axis
For X-Axis you need:
Install two M4x45mm bolts in the "X-End".
Connect the motor as shown in the illustrations. nine0003
Tension the belt and install the limit switch.
Mount the extruder with two screws M3x25 and tighten with nuts.
Z Axis
In order to assemble the Z axis, you need:
Install LM8UU bearings in "X-Carriage" + "X-Ends".
Post install "X-Ends" + "X-carriage" on rails 17.5 cm (X-Axis) and 21cm (Z-Axis).
After that it is necessary to connect the threaded shaft with the motor
Printing table
We drill four holes with a diameter of 3 mm in a wooden plate 20x13 cm. nine0003
After that we tighten 4 bolts M3x25.
We assemble the entire 3D printer
We assemble it in accordance with the figures below. There is no point in giving additional explanations. The main thing is that the previous steps are correctly implemented. In this case, there should be no problems.
We connect electronics to the 3D printer
We connect electronics (including Arduino) in accordance with the figure below.
Software for Arduino
You can download the Arduino IDE configuration file from www.repetier.com.
This should be enough. You can carry out direct adjustment for your received design, dimensions, etc.
Photo of the printing process and results
After some calibration, good cube samples were printed with dimensions of 1x1x1 cm. As a result, there is a significant displacement of the layers. nine0003
So I recommend setting the A4988 to 1/16 microstepping and adjusting the current to the minimum value.
You can also play around with the Arduino firmware to get better results.
Leave your comments, questions and share your personal experience below. In the discussion, new ideas and projects are often born!
Homemade metal 3D printer, but something went wrong / Sudo Null IT News
Hello everyone, my name is Sergey. In this article, we will talk about 3D printing with metal, more precisely, about my attempt to implement 3D printing with metal. nine0003
Very often, people who are interested in or engaged in any activity, no matter what, stumble upon something completely new and previously unknown to them, something that can help develop/improve their main activity. A similar situation happened to me.
Surfing the expanses of your Internet, I came across a wonderful technology for vacuum deposition of metals on various materials.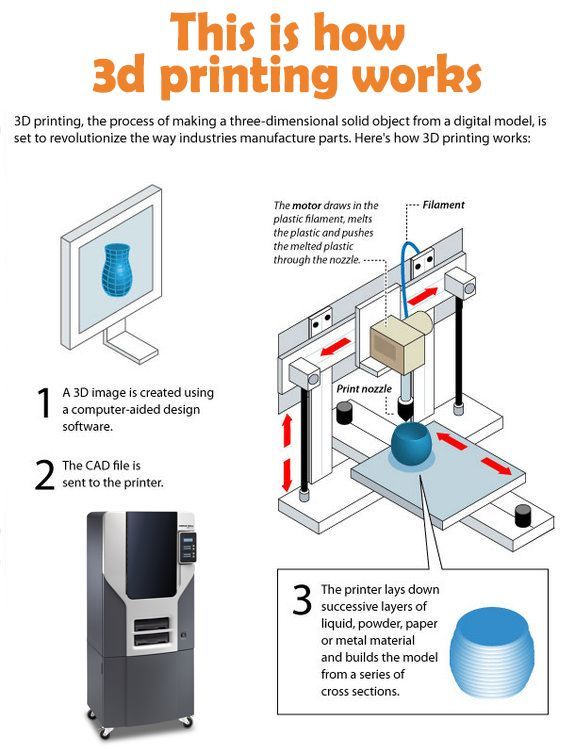 On Habré there is an interesting article about this technology. In addition, on many other resources it was said that the evaporated metal moves towards the target in a straight line. nine0003
Many resources 105-vacuum-napylenie
And then I thought, what if I spray metal in the place I need, gradually increasing the thickness? I looked for information about whether someone did this - I did not find it.
Registered on a forum where sprayers are clustered together and began to disturb them with questions like: is it possible to build up a “film” with a thickness of 1 or more millimeters. To which I caught a lot of misunderstanding what it was for, but received a positive answer. nine0003
General information received, you can begin to prepare for experiments.
It is known from various articles and documents that a vacuum of no more than 10⁻² Pa is required. For comparison, the order of magnitude - the pressure that gives a household vacuum pump (Value and others) - about 4 Pa (measured value), i. e. pressure is 400 times greater than necessary. How to deal with it and what to do? To achieve low pressures, turbomolecular vacuum pumps are used, they work in parallel with the foreline pump and, literally by molecules, capture the remaining air from the chamber. The process is not fast. The pump looks like this. nine0003
We installed a pump, it pumps out air and everything seems to be fine, but how to find out the pressure? For this I chose an ionization vacuum gauge.
In fact, nothing else is needed, except for the chamber and evaporator. I did not find a ready-made affordable (in terms of finances) camera, therefore, I decided to make my own. It is of a small volume (about 8-10 liters) in order for the air to be pumped out faster. Usually, the chambers have a spherical shape, in my case it is, on the contrary, elongated, in order to be able to set the “target” (the place where the metal is deposited) at different distances from the evaporator. In addition, the camera has a lot of flanges for connecting all kinds of inputs/outputs and sensors. I modeled the camera in a well-known CAD program, drew drawings and transferred it to production. nine0003
Current leads and conductors I made from a brass bar and a brass rod, bought on the local market. (Juno, who is from St. Petersburg).
In the photo below, a tungsten boat is fixed between two conductors.
The bottom part looks like this. The photo shows the cooling tubes of the current leads. Subsequently, I abandoned them, due to the simplification of the system.
Assembling the camera did not take much effort and complexity. It is much more difficult to achieve vacuum retention in this chamber. To do this, I polished the flanges and all mating surfaces to avoid the slightest leakage through the rubber seal (in the photo below, I processed only the top flange). nine0003
As it turned out later, the weld is not airtight at all (meaning for low vacuum). I, out of inexperience, assumed that by pumping a pressure of 300 kPa into the chamber and immersing it in a bath of water, I would carefully find all the leaks and eliminate them. Yes, at the first stage I did just that, but the pressure in the chamber did not fall below 10-2 Pa, there were leaks. Interestingly, before the start of the test, at a pressure in the chamber of 300 kPa, bubbles emerged from the welds with an intensity of approximately 1 bubble (diameter 2-3 mm) in 30-40 seconds. And those were big losses that I eliminated. But what to do with minimal vacuum losses that cannot be tracked in "kitchen" conditions? nine0003
The solution was close. To do this, all you need is a mass spectrometer.
The idea is simple – the investigated chamber or container is connected to the vacuum chamber of the spectrometer. Air is pumped out, on the graph they look for extraneous peaks of any gases. After that, helium is supplied locally, to the places of possible leakage. It is helium, because its penetrating power is higher and the helium peak can be easily tracked on the spectrum. As soon as helium enters the chamber through a micro-hole, it is immediately visible on the spectrum. nine0003
I drove twice and looked for leaks twice. Now the chamber with the installed pump is hermetic and it is possible to carry out experiments further, having previously assembled all the components of the system on the rack.
General view of the incredible plant.
Starting up the plant and checking it comes down to maintaining the lowest possible pressure. The foreline pump is started first.
The pressure after the operation of the foreline pump can be seen in the picture below. nine0003
After the pressure is established (does not change). You can launch "heavy artillery" - a turbomolecular pump. It reduces the pressure by another 3 orders of magnitude.
The time has come for experiments, what I have been going for so long and what I have been waiting for so long.
First experiment.
Place a small amount of silver into the boat fixed between the conductors. Above the boat I install a steam conduit - a soldered tin cylinder, which, as I thought, should limit the spread of metal through the chamber. Above the steam conduit there is a lid with a hole of 2 mm, behind the lid there is a target on which the metal should condense. It is a pity that there are no photos left, but the vacuum chamber was completely dusty. There was not a single place where there was no applied layer of metal. In the photo below, it’s not a different planet at all, but silver sprayed onto the inner surface of the wall. nine0003
Second experiment.
I thought it was because of the large gaps between the boat and the steam line. The solution was born immediately and quickly. I took two boats and combined them so that a shell was obtained. I placed silver inside, and cut a hole with a diameter of 2 mm in the upper half.
And he began to heat up the whole thing. But, I did not take into account the rigidity of the boats and the rigidity of the current leads. The shells parted a little and a gap formed between them, through which steam also flew in all directions. nine0003
As a result - spraying in the entire volume of the chamber. In the photo below there is a viewing window, the boat in which was slightly above half, but the window was completely dusty.
Third experiment.
After a little thought and grief, I thought that the container with the evaporated metal should be airtight and with only one outlet, but how and what to make it. From tungsten - very expensive and difficult to process. The way out has been found! Graphite is an excellent material for making a crucible, let's call it that. On the ad site, I found an ad for the sale of graphite bars from the contact whiskers of a trolleybus, cut out a bar with a hole in the center and made a cover for it. In the photo below - just a bar with a hole for the material (without a cover). nine0003
And in this photo already in the chamber with the lid installed (the hole in the lid is 1 mm in diameter).
Under the spoiler are a few photos with a short period of time, from which you can see how dusty the viewing window is.