How to remove strings from 3d print
An Easy Way To Remove "Stringies" From Your 3D Print « Fabbaloo
By Kerry Stevenson on December 8th, 2017 in learning
Tags: postprocessing, tips
A 3D print with quite a few “stringies”Are you haunted by “stringies”? There’s an incredibly easy way to remove them.
What’s a “stringie”? It’s that very light hairlike structure that’s bridging between two portions of prints made on extrusion-based 3D printers. They occur because the still-hot nozzle drips a small bit of fluid thermoplastic while in motion, even though the extruder motor is stopped.
This can typically happen on a layer with non-contiguous portions, where the hot end must jump between two zones without printing. During this non-printing period, leaks can occur, and they instantly solidify – being so thin – and result in those hairlike bridges I like to call “stringies”.
I recall my earliest 3D printing attempts, where the stringies were actually quite solid and it required some effort to remove them. Sometimes on a complex 3D design with lots of protrusions you’d find so many stringies that you simply tossed the print away and started over, as the removal process would have been too laborious.
There are two ways to deal with stringies. One is to avoid them entirely through proper 3D print parameter settings.
The key parameter involved in these drips is called “retraction”, which refers to the ability of the extruder to actually reverse just before a non-printing movement to “slurp” up the fluid thermoplastic and thus avoid the drip.
Sometimes the material is incredibly loose at the desired temperature it tends to drip more, and in those cases you’ll have to alter the retraction setting by increasing the retraction distance and/or speed.
But in spite of seemingly correct settings, you may still encounter very thin hairlike structures bridging portions of your 3D print.
One way to remove them is by gently picking them off, but inevitably you will miss some.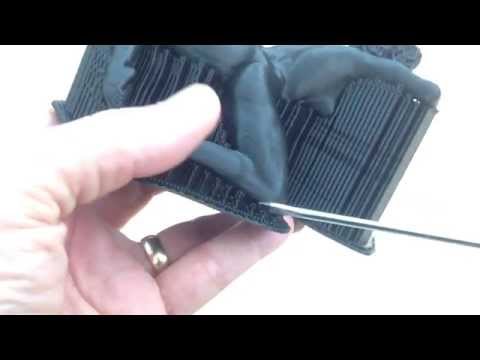 I found another way to do this that is far more efficient: hot air.
In the example at top, I had 3D printed a number of abstract polar bears, but there were, as you can see, plenty of hairlike structures throughout the print.
The solution was this:
- Fire up the heat gun
- Ensure the heat gun’s temperature is reasonably high and stable
- Grasp your hairy 3D print on a corner, perhaps with pliers
- Swiftly move the print into the hot air flow for only a second or less
- If the print is multi-sided, repeat for the other sides
- The heat will almost instantly melt away the hairlike structures, but leave the remainder of the print secure
This technique is far faster than removing the structures manually, and almost guarantees you’ll get all of them. I’d make a video, but it would only be a second or two long! The hairs simply disappear.
There is a downside to this approach: it is possible to damage your print, particularly if it is made from a lower-temperature material such as PLA. If exposed too long, you may find portions of the print itself becoming droopy. This means you’ve either held the print in the hot air flow too long, or its delicate structures are too fine and prevent this technique from being used.
As I’ve said before, a heat gun is an essential tool for desktop 3D printing.
TwitterKerry Stevenson, aka "General Fabb" has written over 8,000 stories on 3D printing at Fabbaloo since he launched the venture in 2007, with an intention to promote and grow the incredible technology of 3D printing across the world. So far, it seems to be working!
View all of Kerry Stevenson's posts.
How To Clean Up Stringing on a 3D Print – Printing It 3D
A common issue when 3D printing custom objects is stringing. Unsightly cobweb-like filaments are left behind as the extruder moves across the build plate. Thankfully, this is an easy error to fix.
Here are 10 ways to clean up stringing on a 3D print:
- Keep filaments dry.
- Clean or replace the nozzle.
- Shorten the Bowden tube.
- Use the proper print temperature.
- Enable and calibrate filament retraction.
- Adjust the print speed.
- Disable Z-hop.
- Apply hot air with a heat gun or hairdryer.
- Perform manual cleaning.
- Wipe away with acetone.
This article explores how to clean up stringing while 3D printing. I’ll also explain why stringing occurs and how to prevent it.
1. Keep Filaments Dry
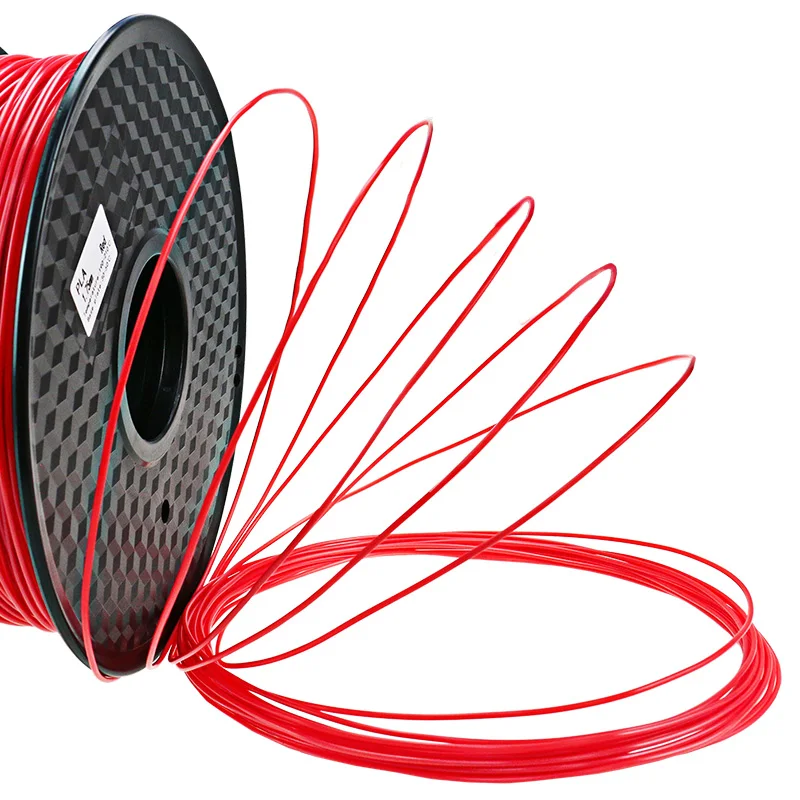
PLA, and to a lesser extent, other filament materials like ABS and PVC, are somewhat hydrophilic, meaning they can absorb water. If the filament is stored in open ambient air, it will gradually absorb moisture from the air.
When the moist filament is heated, microscopic pockets of water boil into steam and pop. The popping breaks up the surface of the plastic. The plastic ends up sticking to the nozzle.
3D printing filament should be stored in a sealed water-tight container or plastic bag, ideally with a desiccant agent inside said container or bag. A desiccant agent is an object or substance that absorbs moisture from the ambient air. A common example of a desiccant agent is a silica gel pack included in many consumer goods.
Silica gel packs are available in bulk from Amazon for pennies per gram. But please do not eat them. You will not “escape the matrix”; you will get extremely sick or die.
Moist filament is one of the most common causes of stringing, especially when using PLA filament. If stringing occurs during a print job, a key step to preventing stringing in future prints is drying the filament.
3D printing filament can be dried in several household appliances.
Provided the filament is not heated below its glass transition temperature, the temperature at which it will start to weaken or crystallize, it can be dried in a conventional oven. The table below shows the ideal drying temperatures for filaments of several different materials.
| Material | Time (Hours) | Temperature (°F) | Temperature (°C) |
| PLA | 4 | 104-113 | 40-45 |
| ABS | 4 | 176-185 | 80-85 |
| Nylon | 12 | 176-194 | 80-90 |
| PETG | 4 | 140-150 | 60-65 |
| TPU | 5 | 104-122 | 40-50 |
| PC | 6 | 248-266 | 120-130 |
| ASA | 6 | 248-266 | 120-130 |
Food dehydrators can also be used to dry 3D printing filament. There are also dedicated filament dryers on the market, which, as far as we can tell, are functionally identical to food dehydrators.
2. Clean or Replace the Nozzle
Every time you make a 3D print, the filament leaves a bit of itself behind. This residue is another leading cause of stringing. The residue increases friction inside the nozzle. There are two ways to fix a dirty nozzle, cleaning, and replacement.
The exterior of a 3D printer nozzle can be cleaned with a wire brush. Most nozzles are made of either brass, aluminum, or steel so that they can survive a vigorous cleaning.
There are several ways to clean the interior of a 3D printing nozzle.
The most effective way is the use of a specialized cleaning filament. Cleaning filament is made of undisclosed white plastic. The cleaning filament is run through the extruder at either room temperature or molten.
Cleaning filament isn’t cheap. A package of a few ounces typically costs between $10 and $20 on Amazon. But if you choose to run it through your extruder at room temperature, a technique called “cold pulling,” it can be reused potentially hundreds of times.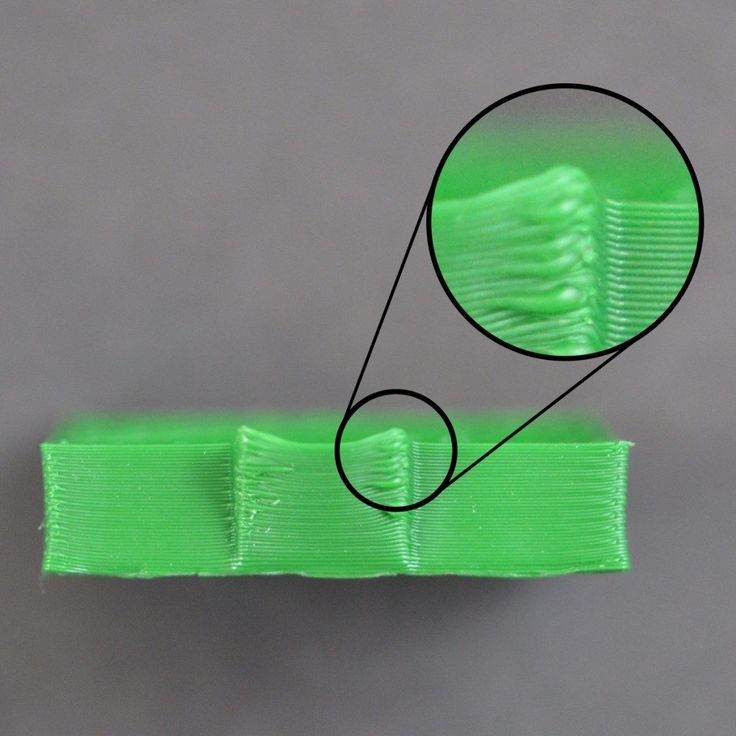
Another way to clean a 3D printer nozzle is to soak it in acetone overnight. Acetone can dissolve PLA and a few other common filament materials.
If cleaning doesn’t solve your stringing problem, you can also replace the nozzle. Even with problem cleaning, a nozzle will not last forever. There may be internal damage you cannot directly see.
3. Use a Thinner Bowden Tube
This tip is only applicable for 3D printers that use a Bowden tube to feed filament into the extruder. A Bowden tube is a thin plastic tube that some 3D printers use to align the filament with the extruder’s intake port. This tip is not applicable for direct drive printers, which do not use Bowden tubes.
If your Bowden tube is too wide, it will not properly align the filament with the intake port. And this can cause stringing.
Most Bowden 3D printers ship with a 2 mm diameter Bowden tube and print with a 1.75 mm filament. If you are having a problem with stringing, try using a 1.9 mm Bowden tube.
4. Use the Proper Print Temperature
FDM printers have to melt the filament to work. But if you have a problem with stringing, you might have the print temperature set too high.
Filament manufacturers provide a temperature range at which their filament should be used. Stringing can be mitigated by setting the print temperature toward the lower end of the specified range. If stringing occurs, try reducing the print temperature in steps of 5 degrees celsius until you are satisfied with the results.
5. Enable and Calibrate Filament Retraction
Another key tip to minimize or eliminate stringing is to enable and properly calibrate filament retraction. When retraction is enabled, the extruder will pull back the filament when traveling between print zones. That reduces pressure on any molten plastic still in the nozzle, which in turn reduces leakage.
The option to enable retraction will probably be in the slicing program you use to generate your .stl files. Your printer may also have the option to enable retraction somewhere in its user interface.
Of course, eliminating stringing is not as simple as enabling retraction. You have to get the retraction right. The two key variables are the retraction distance and speed.
Getting the retraction distance right is a matter of trial and error. Starting with the default distance, try increasing it in small increments.
Bowden tube printers generally require longer retraction distances than direct drive printers. A distance of between 0.5 mm (0.01 inch) and 1 mm (0.03 inch) will likely be sufficient for direct drive printers. Bowden printers require a distance up to 2 mm (0.07 in).
Retraction speed determines how quickly the extruder will take the pressure off any molten plastic left in the extruder. PLA and ABS typically require a speed between 40 mm/s and 60 mm/s. Bowden printers, however, only require a speed between 30 mm/s and 50 mm/s.
6. Adjust the Print Speed
Molten plastic is not a durable material. Stings can be snapped before they harden if the extruder moves fast enough.
In your slicer program, there will be a setting to control the travel speed of the extruder(s). If you are having a problem with stringing, you should try increasing the travel speed. Depending on the printer brand you use, a travel speed between 190 mm/s (millimeters per second) and 200 mm/s is likely ideal.
7. Disable Z-Hop
Z-hop is when the printer jerks the extruder upward while moving between print areas. It makes sense in principle, as it reduces the chances of the extruder or the arm it’s mounted on smacking into a tall part of the print. But the upward jerk also increases pressure on molten plastic left in the nozzle.
The option to disable z-hop should be somewhere in the settings of your slicer program. Disabling z-hop can be considered a “last resort” if other methods of preventing stringing have failed, as doing so may increase the chances of the extruder assembly hitting your object.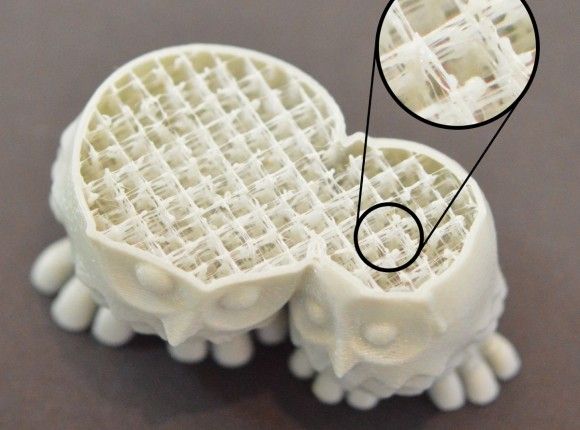
8. Apply Hot Air With a Heat Gun or Hair Dryer
Remember when we said that 3D printing filament is thermoplastic? Most stringing is ultimately related to this reality. But the vulnerability to heat also allows a fairly simple solution to stringing: hot air.
Using a heat gun or a hairdryer turned up to a high temperature, blow your 3D print with hot air. It is best to do this while the part is still adhered to your printer’s build plate, but you can grip it from a corner with a pair of pliers. If the print has multiple sides, blow it from every side.
When exposed to the heated wind from your tool, most if not all filaments will instantly snap and melt into the surface of the print. Hot air treatment can also give your print a glossy finish.
9. Perform Manual Cleaning
What if you have tried blowing your 3D print with a heat gun or hairdryer and still aren’t satisfied with the results? In this case, you’ll have to continue to take the matter into your own hands. Only now, it’s time to break out the hand tools.
The two hand tools that can be used to remove strings or their remnants are razor blades and sandpaper. Most 3D printing filaments aren’t made of exceptionally tough materials; thus, they can be easily cut and sanded with razor blades and sandpaper, respectively.
Here’s how to clean things up manually:
- Use a razor blade to cut off a string as close to the main body of your print job as possible. Be careful when working around delicate sections of your object to avoid damaging or obscuring it in any way.
- Sand the nubs down with medium-grit sandpaper.
Keep in mind, thermoplastics are considerably tougher than human skin. Please exercise caution when handling razor blades to avoid injury.
10. Wipe Away With Acetone
As mentioned above, acetone can dissolve several of the most common filament materials. If you are not satisfied with the finish of your print after applying heat and manually sanding or cutting string, you can wipe down your print with acetone.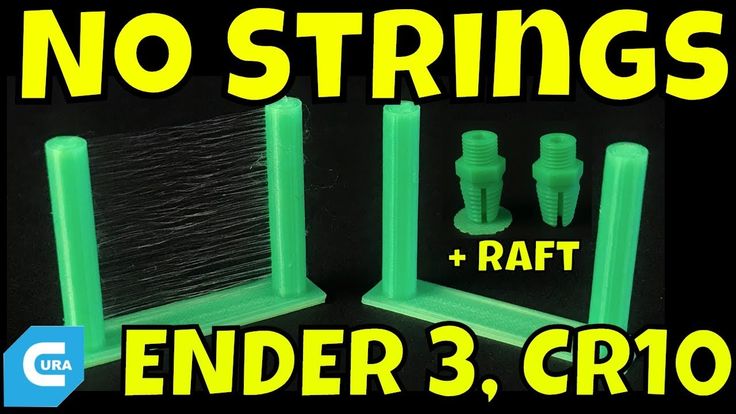
You only need a small amount to get a good finish. Apply a bit of acetone to a clean cloth, or ideally a gauze pad, and wipe any string remnants away.
What Stringing Is and Why It Occurs
“Stringing,” also called “oozing,” is a common manufacturing defect that can occur when using a fused deposition model printer. It occurs when molten filament material exits the areas where it is intended to be deposited. Stinging usually takes the form of thin hair-like fibers strung between sections of a print job.
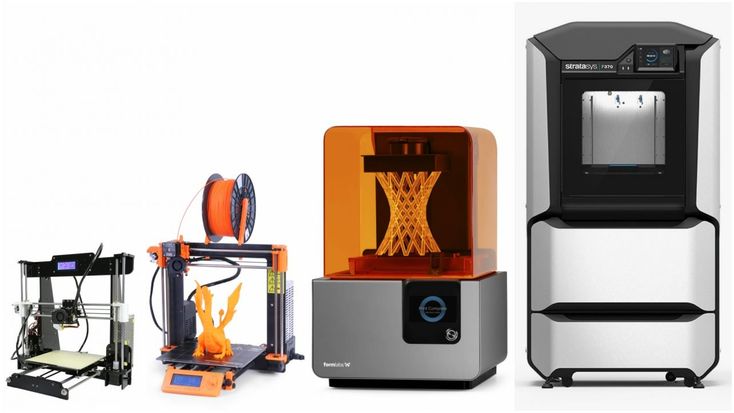
A fused deposition model (FDM) printer is a 3D printer that works by melting and extruding thermoplastic filament. It is the most common type of commercially available 3D printer.
A thermoplastic is a plastic that must be melted to mold it into the desired shape. Most 3D printers use thermoplastic filaments.
Stringing is usually caused by molten filament leaking out of an extruder nozzle when moving between deposition zones. The nozzle dipping can also cause it into freshly deposited thermoplastic before it fully hardens.
Polylactic acid, or “PLA,” is the most likely filament material to produce stringing due to its low melting point and highly fluid consistency when molten.
How To Prevent Stringing on a 3D Print
The easiest way to avoid having to clean up stringing is to prevent it from happening in the first place. Doing so requires the proper setup of your slicer program and proper maintenance of your printer.
Most 3D printing filament materials are easy to work with simple hand tools or household chemicals. So a print job that suffers from stringing can easily be avoided once you learn the tricks.
Really, the way this is achieved is with proper setup procedures as well as some trial and error. Indeed, you’ll need to use some of these tips from time to time, but eventually, you’ll get it right.
Conclusion
The best way to clean up stinging or oozing on a 3d print is to prevent it from happening in the first place. Be sure to check all your settings, such as print temperature filament retraction, and always keep everything clean. But if stringing occurs anyway, it’s easy to fix with the right tools.
Threads in 3D printing
Dear friends, welcome!
This article would like to highlight the appearance of threads in printing. I will try to note the main factors influencing the appearance of threads.
1) Idling speed and acceleration. The idle run consists of the following stages - first there is a retract, then the movement of the extruder, then again a retract. The plastic is spontaneously squeezed out precisely during the idle time, forming various kinds of defects. Now imagine an example if the idling takes zero seconds. Under this condition, the plastic will not have time to spontaneously extrude. Therefore, the higher the speed and acceleration, the less time the idling lasts, which means there will be fewer threads. But speed and acceleration are limited by the motor driver, the motors themselves, and the rigidity of the printer frame.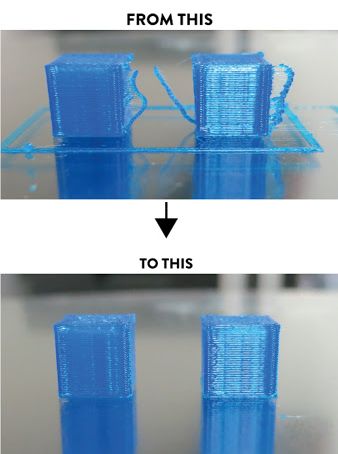 nine0005
Therefore, you can try to slightly increase the speed and acceleration with each print, but at the same time make sure that the motors do not overheat, otherwise microsteps may be skipped, which will lead to print rejects.
2) Idling path. Different slicers process parts according to different algorithms, which means that the idling trajectory may differ. Some slicers build more rational extruder motion than others. Therefore, you can try to prepare the same part in several slicers and stop at the option that will be more rational. nine0005
3) Feeder dependent, i.e. from the plastic supply system. Printers most often have one of two options: "bowden", i.e. far-distance or "direct", this is when the "feeder" is located near the extruder. Under the same printing conditions with direct, there will always be fewer threads than with bowden. But this does not mean that you can always switch from Bowden to Direct. It may also be that your printer will not be able to work with "direct" for one reason or another. The transition to "direct" must be considered with each printer individually. nine0005
4) Retract setting, i.e. plastic rollback - its task is to remove the residual pressure in the extruder during idling. Without retract, the threads will appear more intensely. For most printers, the values are as follows - for direct, the range is from 1 to 6mm, and for bowden, from 4 to 12mm. (the amount of retract also depends on the diameter of the nozzle).
5) Plastic quality. If you are constantly printing only budget plastics and are unhappy with the result, then try to buy plastic in a higher price category, and more importantly, with good reviews. And then compare the print quality. But the main thing - from different manufacturers, compare the same types of plastic - you should not compare, for example, ABS from one manufacturer, and PLA from another. nine0005
6) Plastic drying. By the way, this applies to almost all plastics, not just nylon. If you have unnamed or cheap plastic in your hands, it is recommended to dry it after opening it, because. it is not known whether the plastic was dried before packaging.
7) Nozzle diameter. The larger the diameter, the more plastic will spontaneously squeeze out during idling. There is nothing you can do about it, it just needs to be taken into account when choosing a nozzle diameter.
8) Extruder temperature. If you heat the extruder to the upper limit of the recommended range (indicated on the plastic that is being printed), then the fluidity of the plastic will be higher, and it will be more easily extruded from the nozzle. Plastic manufacturers give a temperature range for a reason. If you set the print speed to high, then the extruder temperature should be in the upper limit of the range. But if the print speed is low, then there is no need to heat up the extruder much, otherwise filaments may appear due to overheating of the plastic. nine0005
Therefore, you can try to reduce the temperature of the extruder as follows - during printing, every couple of minutes, reduce the temperature by 5 degrees over and over and watch the print closely. If the threads disappear, remember the temperature and stick to it. But if the temperature is greatly lowered, then the plastic will not be able to extrude at all. Don't overdo it.
9) Dependence of temperature on the type of extruder. There are many different models of extruders. For example, consider the E3D V6 and E3D V6 Volcano extruder. The E3D V6 Volcano has an extended nozzle and an extended aluminum block. And this means that the zone where the plastic is in the molten state is larger, so it can push through a larger volume of plastic per unit of time. As a result, this extruder will be able to print at higher speeds than the regular E3D V6. But here you need to understand the following - if you have a "powerful" extruder, and you print at low speeds, then the plastic will overheat, which will lead to the appearance of threads. Therefore, for powerful extruders, it is better to set the temperature in the lower limit of the recommended range. And on the contrary - for an extruder that cannot heat up a large amount of plastic, the temperature should be kept in the middle or at the upper limit of the recommended one.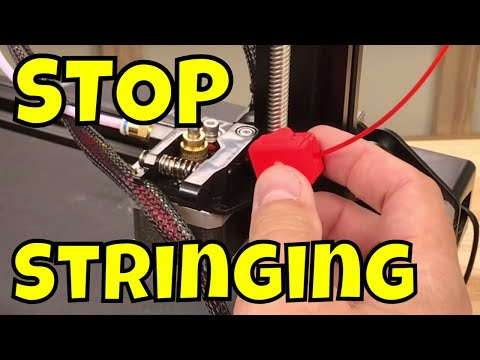 nine0005
The conclusion here is the following - for different models of extruders, different printing temperatures are needed.
10) Free travel distance. If you are printing multiple parts at once, try to space them closely to reduce the dry travel distance. Well, if a solid part is printed, with individual elements at a great distance from each other, in this case, you can try to change the location of the part in space so that there are fewer idle moves.
11) File analysis before printing. When your G-code is ready, do not be lazy and meticulously analyze it before printing, because. at the verification stage, you can detect unwanted elements that can create various kinds of defects, including the appearance of threads. By the way, in whatever slicer I prepare the file, I almost always check the finished code with the help of “Repetier-Host”, because it shows all the movements that can lead to certain defects.
12) Plastic type. All plastics have both strengths and weaknesses.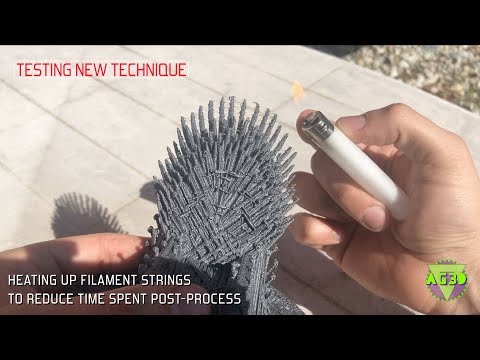 For example, PETG plastic has a high tendency to filament. ABS, on the other hand, has a low predisposition to threads, but it will have to concentrate on the problem of shrinkage and a low degree of sintering of the layers. nine0005
Therefore, before printing, familiarize yourself with the pros and cons of the plastic with which you plan to print.
13) Using the "Lift Z" function. When enabled, a gap will be created between the extruder and the printed part. It is needed so that during idle the extruder does not cling to the outer walls of the part. This feature can significantly reduce the number of threads. But it should be used if the printer has a powerful driver and a motor along the Z axis, as well as a screw with a thread pitch of at least 8mm. This is necessary to achieve high speed and acceleration on the Z axis. Well, if you try to use this function at low speeds, the problem will only get worse and there will be more threads, because. idle time, taking into account "Lift Z", will increase significantly. The idling time with the "Lift Z" function consists of: movement along the Z axis + retraction + idling + retract + movement along the Z axis. nine0005
Therefore, you can try to experiment with this function and see the result.
14) Problems with the extruder. Imagine a situation where you put a large retract, but a large plug of melted plastic formed in the thermal barrier between the nozzle and the Teflon tube. In such a situation, no matter how big you put the retract, this plug will not disappear, but will remain in its place. And, therefore, the retract will not be able to completely relieve the pressure in the system. Therefore, keep your extruder clean and in good working order. nine0005
15) Problem with the driver on the motor in the feed system (motor on the feeder). It's a rare phenomenon, but it's still there. I've run into a problem where the driver only spins the motor in one direction, regardless of the command, whether it's spinning one way or the other -- the motor only spins in one direction.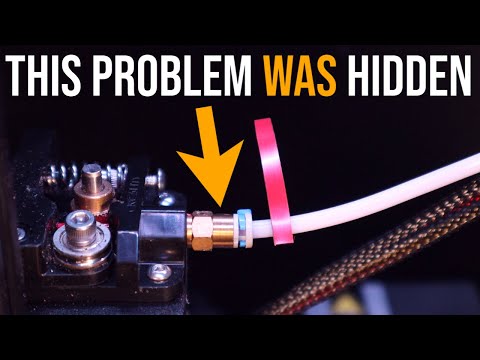
And in practice it looks like this: the motor advances the plastic during printing, and at the moment of idling, when a retraction should occur, the motor sharply squeezes out additional plastic (because the driver rotates the motor in only one direction). nine0005
As a result, although this phenomenon is rare, it still took place in my practice.
Thank you for your attention, I hope the material was useful, I wish you all the best!
3d printing problem. Remains of plastic (web) between parts of the model
3DPrintStory 3D printing process 3d printing problem. Remains of plastic (web) between parts of the model
As the nozzle of the FDM printer moves across an open area to get to the next point, melted plastic can sometimes ooze out of it, which then hardens and sticks to parts.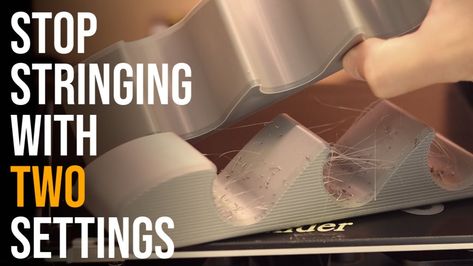 As a result, thin unnecessary lines remain on your finished products that resemble cobwebs or hairs.
Theoretically, the nozzle should not extrude plastic when moving through an open area (this is also called idling). However, melted plastic often ends up on parts where it shouldn't be, leaving something called "whiskers" on the models. nine0005
The main reasons for the formation of unnecessary webs in FDM 3D printers are incorrect retraction settings (pulling plastic back into the nozzle) and too high a temperature of the hot end. PETG, for example, requires relatively high temperatures to melt and is notorious for its problems with unnecessary web formation. However, during 3D printing with PLA and ABS plastics, you may also encounter this problem.
Fortunately, there are several ways to prevent this string or whisker effect. We will consider them below. nine0005
Enabling retraction
Enabling retraction is the most common method used to combat the web effect during 3D printing. Turning on retraction means that where the extruder needs to cross the empty space, the material will be pulled back - just a little. This prevents melted plastic from seeping back as the printer head moves, because the "pull back" action serves to counteract seepage. When the extruder arrives at the next location on the part, the filament is pushed back and 3D printing resumes normally. nine0005
Most slicers like Cura usually have retraction enabled by default. However, it is always a good idea to check if this is the case, especially when a problem has arisen. If the retraction setting is enabled and you are still experiencing whisker and web formation, you may need to fine tune the retraction settings.
Retraction Distance
The Retraction Distance is probably the most important parameter because it determines how far the material travels. As a rule of thumb, if your nozzle can draw the material farther away, then you are less likely to run into whisker and spider web problems during 3D printing.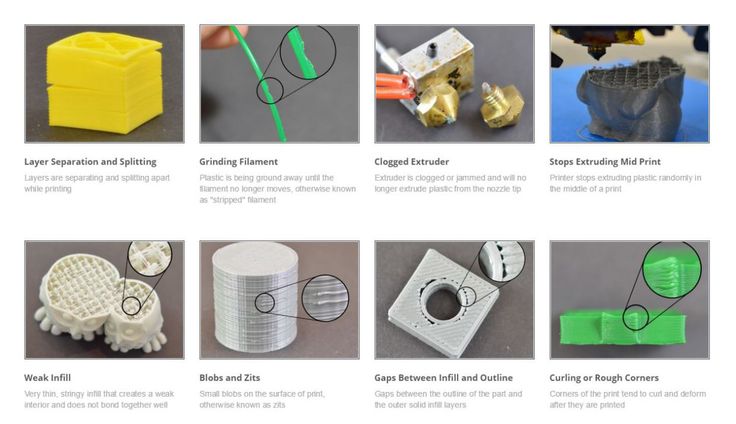 But then again, if you pull the material in too far, it may not be available in the hotend when you need to resume 3D printing. nine0005
The retraction distance may vary depending on the type of extruder used. However, a Bowden type extruder usually requires a larger retraction distance due to the larger distance between the nozzle and the drive gear. We recommend trying this test 3D model to check the retraction. It prints quickly and doesn't require too much material.
Retraction Speed
The Retraction Speed determines how fast the material is retracted. A faster retraction speed means that there is less chance of whiskers and filaments as the material is pulled back faster than it starts to ooze out of the nozzle. However, when the retraction speed is too high, it may cause the material inside the nozzle to break. Worse, the fast movement of the drive gear can pulverize the melted plastic and block the nozzle.
Therefore, it is necessary to find a golden mean (between slow and fast retraction of material). This gap may vary depending on the material for 3D printing. Do a few 3D print trials to determine your ideal retraction speed.
If you still don't know what to do, try Simplify3D. This program comes pre-configured with profiles that are a great start in your search for optimal retraction speed.
Which retraction settings should I use? nine0077
To determine the optimal retraction values, you must first know the extruder you will be using and the media you will be printing with.
Materials such as ABS and PLA are well suited for direct drive extruders at speeds of 40-60mm/s and retraction distances of 0.5-1.0mm. On the other hand, Bowden extruders typically require a speed of 30-50 mm/s with a retraction distance of about 2.0 mm. These numbers are not constant and can change depending on many variables. nine0005
After all, if set up correctly, retraction is effective in eliminating web problems in empty spaces in the 3D model.
Setting the correct 3D print temperature
As the temperature rises, the material becomes thinner and more likely to flow out of the nozzle, even after the retraction settings are adjusted. Cooler temperatures reduce this possibility. However, you must be careful not to set the temperature too low. Very low temperatures can cause the material to not melt enough, which can cause extrusion problems. nine0005
The ideal temperature depends on the material and other 3D printing parameters. However, it is generally recommended to lower the temperature as soon as you notice the web. You can try lowering the nozzle temperature by 5-10°C, but never lower the temperature below the minimum values specified by the manufacturer.
These are the recommended temperatures for some of the most common 3D printing materials:
- PLA: 180-220° C
- ABS: 200-250° C0-100°C)
- PET: 215-235°C
- TPE: 210-240°C (20-70°C printtable)
- PVA: 160-190°C (60°C printtable) )
- TPU: 230-250°C (60°C print bed)
A great option for checking 3D print temperatures is on Thingiverse.
3D print speed setting
3D print speed can also affect the occurrence of filament problems in voids in the 3D model. If, for example, your nozzle travels too long between two points, unwanted filament is likely to form because the melted plastic has more time to flow out of the nozzle. But if the extruder moves faster, the material will not have time to seep through. nine0005
Increasing the speed of the nozzle when it is not trying to print can reduce the chances of web formation, but if the temperature is low and the 3D print speed is too high, you may experience under extrusion because the plastic will not have enough time to extrude from nozzles.
Generally a speed of 190-200mm/s will be acceptable for most materials, but 150mm/s is considered to be the ideal travel speed for most 3D printers. nine0005
You will need to check what speed your 3D printer is set to before you can decide to make any changes. The X/Y movement speed, for example, is the speed of movement from side to side, and this speed is directly related to the time during which the nozzle will move through the empty space.