How to make a 3d print of yourself
How to 3D Scan & 3D Print Yourself Accurately (Head & Body) – 3D Printerly
3D printing is great in itself, but what if we could 3D scan ourselves and then 3D print ourselves. This is definitely possible when you know the right techniques. In this article, I will detail and guide you through how to 3D scan yourself the right way.
To 3D scan yourself, you should use a process called photogrammetry which is taking several pictures from a phone or normal camera, then uploading it to 3D reconstruction software, a great one being Meshroom. You can then clean imperfections of the model using the Blender app and 3D print it.
There are some real details and steps to perfect this process, so definitely keep reading to get a clear tutorial on how to 3D scan yourself.
What Do You Need to 3D Scan Yourself Properly?
People that have experience 3D scanning themselves tend to use either a phone or a professional 3D scanner.
You don’t need a bunch of complicated equipment or some specialized scanning apparatus, just a decent quality phone will suffice, as well as the correct software such as Blender and Meshroom.
Some 3D scanners are more suitable for small, detailed objects while others are great for 3D scanning your head and body so keep this in mind.
The 3D scanners capture the shape of your body through a series of data points. These data points are then combined to get a 3D model. 3D scanners use photo technology, such as:
- Structured-light Scanners
- Depth Sensors
- Stereoscopic Vision
This shows us that it uses various measurements to encompass different shapes and minute details of an object, or in this case, yourself.
All these data points are combined into a single data map, and a full 3D scan is fleshed out.
Basic Process of 3D Scanning
3D scanning may seem complex, which it is technologically speaking, but let me give you a simple explanation of the process of 3D scanning:
- You can either use a 3D scanner through your phone or can get a 3D scanner machine.
- The structured light lasers hover over an object to create data points.
- The software then combines these thousands of data points.
- All these data points help in getting a detailed, accurate, and realistic model within a specialized program
However, before moving towards 3D scanning yourself or others, you should know a few important points about it.
Type and Size of Objects
Some 3D scanners are more suitable for scanning smaller objects while there are also those scanners available, which you can use for scanning the whole body from head to toe.
You should be aware of the size of objects or yourself to select the right scanner for such purpose.
Accuracy
It would be best for you if you consider the extent of accuracy that you need for 3D scanning.
The maximum precision and accuracy which a group of 3D scanners can give lies between 30-100 microns (0.03-0.1mm).
Resolution
Focus on the resolution and get your values aligned before starting it.
Resolution is directly related to the accuracy; the better the resolution of your 3D scanner will be, the higher the accuracy.
Speed of the Scanner
Static objects do not cause a problem with speed; it is the moving objects which require an adjusted level of speed. You can select and adjust the speed from the software settings and get things done with ease.
How to 3D Scan Yourself
There are different ways of 3D scanning yourself, and I will be listing them one by one. So keep on reading.
Photogrammetry with Camera
Josef Prusa goes into great detail on how to 3D scan with just a phone using photogrammetry. He has sweet, real-life examples and extra tips to help you get some good quality results.
Rather than needing a high-end camera, you can actually choose to use your phone to 3D scan yourself.
There are open-source softwares you can make use of for your photogrammetry needs. Meshroom/AliceVision is great for photogrammetry, Blender is great for editing, then Cura is a good choice for your slicing.
So the first step is using Meshroom, which is a free, open-source software that specializes in 3D reconstruction, photo and camera tracking to produce 3D models by using several photos as the source.
It has some amazing features that make it a lot easier to create some high quality meshes that can be used easily.
What you do is:
- Get your desired object and make sure the lighting is fairly even all-round
- Take several pictures (50-200) of your desired object, making sure it stays in one place
- Export those pictures to Meshroom to put them together and recreate the object as a 3D model
- Clean up the model in the Blender app to make 3D printing easier and more accurate, then export to slicer
- Slice & print the model as usual
The better your camera, the better your 3D models will be but you can still get excellent quality models with a decent quality phone camera. Josef Prusa uses a DSLR camera which is great for those extra details.
2. Mobile 3D Scanning App
This method requires no extra hardware and no extra hand to help in the scanning process. The process is simple and given below:
- Install the app which you want to for scanning.
- Take a picture of your face.
- Move your face to both sides to let the scanner capture the sides.
- Email the result to your desktop or laptop.
- Build your model easily from there.
Depending on the functionality of your phone’s scanning capabilities, you may have to export the file and change the file extension to .png, then open the .gltf file if it can’t be opened.
You can then open it in Blender and export it as an . obj file.
2. Handheld 3D Scanners
Handheld 3D scanners tend to be pretty expensive, especially if you want one with respectable quality. If you can access a 3D scanner locally for quick-use, then that would be perfect.
I did write an article about the Best 3D Scanners Under $1,000 which details some of the better cheap scanners out there.
If you want to scan yourself using a handheld 3D scanner, you’re going to need a second person to help out. The process is simpler than using the photogrammetry, but they are essentially doing the same concept.
They will require a second person to help you with scanning yourself. What is required to be done is as follows:
- Stand in a well-lit room that ideally has multiple light sources to reduce shadows
- Get the second person to move the 3D scanner slowly over the whole body or parts that you want to capture
- Similarly to the camera scanning, you’ll export these pictures to software to make a model out of it.
3. 3D Scanning Booths
iMakr are a great example of a 3D scanning booth that creates a ‘Mini-You’ using the latest technology to recreate your looks in a 3D-color infused sandstone composite.
The whole process doesn’t take too long, and can be done in around two weeks.
Here’s how the process works:
- You come in to iMakr, dressed to impress.
- We scan your full body image in our scanning booth.
- Your scans are processed on site into an initial print file.
- This file is transmitted to our design team for final preparation.
- We print a full color Mini-You in sandstone.
- We deliver your Mini-You or you can come into the shop to pick it up.
Doob is another 3D scanning service which makes replicas of you.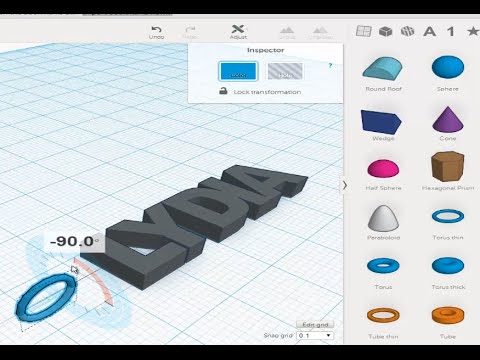 Check out the cool video below for more details behind the process.
4. Xbox Kinect Scanner
Many people get excited when they figure out the capabilities of their Xbox Kinect to actually 3D scan themselves. The Kinect is quite outdated, but its still an option for some.
There isn’t too much stock of them around, although its possible to purchase one from Amazon, Ebay, or other e-commerce websites.
You can download the latest version KScan from a mirror, since it is no longer actively available.
How to Make a 3D Model Print of Yourself
Depending on the technique you used to get the 3D model ready, you should have been able to create a file which can be processed and sliced to finally print.
At first it can seem pretty complex, but with the right directions, it can be quite simple.
After you have taken all the photos which are required for generating a 3D model, the rest of the work is done in a system. The steps are listed below for your understanding.
As previously mentioned, you’re going to want to use the open-source Meshroom/AliceVision software to create the model for you to print.
Meshroom can be downloaded from their official website.
The video below is a great tutorial to make a 3D print model of objects and yourself if you have the images!
Best 3D Scanner Apps for 3D Printing
The application stores for both Android and iPhone are filled with 3D scanner apps.
You do not require any extra hardware in addition to your smartphone while installing these apps. The list of the apps is as follows:
- Qlone: It is a free application and works on both IOS and Android devices. You will require a special black and white paper mat, which can look like a QR code to scan something.
- Scandy Pro: This app is only for iPhone users, and it can turn the iPhone into a full-color 3D scanner. You can edit the scans within the app in real-time with various tools.
- Scann3D: Android users can use this app to scan photos of the object which they wish to 3D scan.
To get the scanning right, you should take photos in a continuous circle around the object.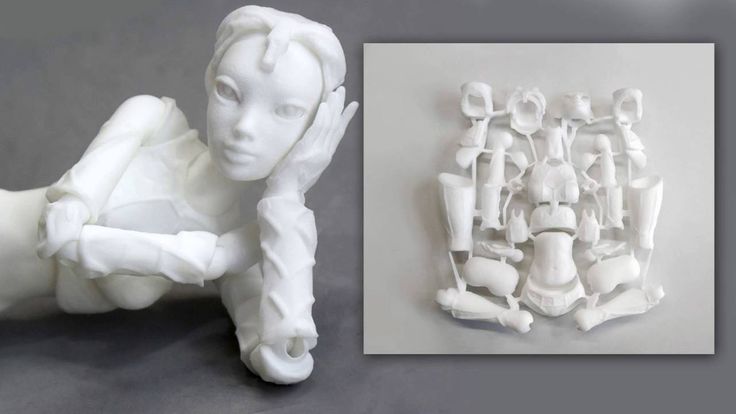
- Sony 3D Creator: 3D Creator is Sony’s entry to smartphone scanning, and it is compatible with all Android devices. Through its selfie mode, you can even scan yourself.
3D Printing Yourself – How to Print a Mini You!
Self-portraiture has been an art form for as long as art has existed. Sketching, painting, and photography have all been used to capture the self from their inception.
This practice eventually came to the modern age with selfies, and the step beyond that is finally here: 3D printing yourself!
Making a 3D model of yourself for printing is a fun and exciting prospect, from making mini tableaus of your friends and family to even making workable 3D action figures of yourself. I guarantee even your best selfie won’t be as cool as having a mini model of you!
There are a few ways to get a little 3D you up and printing, and here we’re going to look over a few of the best ways to make a 3D model of you and your friends.
We’re also going to look at some of the coolest uses and ideas for 3D printing yourself to maximize the fun of being mini!
Why Make a 3D Model of Yourself?
Let’s be honest, all of us are at least a little vain, I know I am.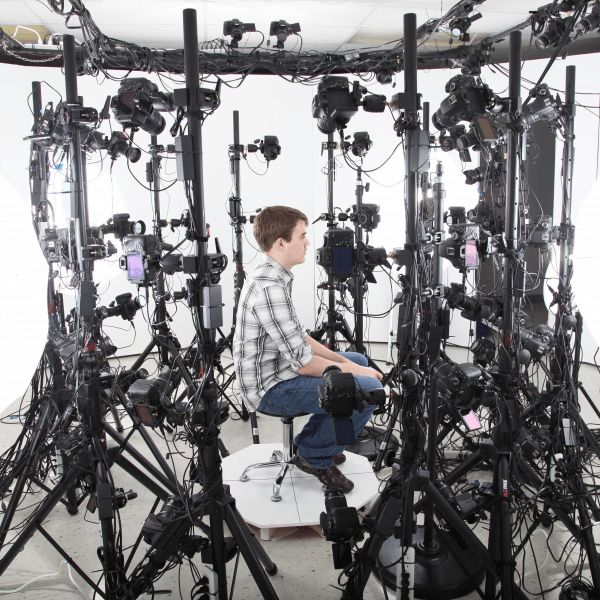 This is why self-portraits have been a staple of just about any art form since time immemorial.
When it comes to 3D printing yourself, there are a few fun and creative uses for having a tiny plastic you.
Making a small scene of you and your family to decorate the mantlepiece is a simple yet novel way to keep treasured memories close. Think of it as a 3D family photo.
Wedding Cake Toppers
An even sweeter way to use a 3D model of yourself is on a wedding day or similar occasion.
Having the figures on top of the cake that are the actual likeness of the newlyweds is a really nice way to make the day a little bit more special.
Action Figures and Toys
For more fun reasons, you can even make 3D printed action figures of yourself. With a little extra work, you can print a 3D model of yourself with posable limbs like a real action figure.
With fun and games in mind, tabletop and board games that use figurines like Monopoly and Arkham Horror will be made all the more fun by using 3D printed models of you and your friends as the game pieces.
Before You Start Printing
There are a couple of ways to make a 3D model of yourself, and which method you choose will depend on both what equipment you have access to as well as just how artistically experienced you are.
The most common, easiest, and most accurate way to get a model of yourself to 3D print is through 3D scanning.
3D Scanning Yourself
We’ve already discussed 3D scanning and its uses, from dental practices to full-body 3D scanners and their uses. In the latter, we’ve even briefly discussed 3D selfies.
3D scanning is the process of using structured light or lasers to scan a 3D object ready for upload to rendering and modeling software. Think of it like scanning a document or photo onto a computer, but in full 3D.
Handheld scanners work great for this, but you will need another person to help you so you can get a good scan of your whole body.
How to Get a Scan of Yourself
The scanning process itself will require preparation.
Like taking a good photo, there are things to keep in mind to ensure top-quality results. Correct lighting, reduced background clutter, and stillness to avoid blurring are all crucial to getting an accurate model of yourself ready for 3D printing.
There are a few routes to take to get yourself 3D scanned.
Some scanners can be printed and made at home. Some are fairly cheap, while professional-grade scanners will set you back a little more.
To really get a sense of which scanner is right for you, you can check out our article on 3D printed scanners in all price ranges. And that’s not even mentioning the different kinds of 3D scanner software out there.
The Revopoint POP 2 is a good low-cost choice for home scanning. You can check out our review of it here.
Ensuring Scan Quality
For a really high-quality 3D model of yourself, your scan will need to be as clear as possible.
While the home-based scanning options mentioned above are handy, there are also professional scanning services that use high-end equipment in studios for the best results.
Which of these services are available to you will naturally depend on your area.
A quick search should get you in touch with professional 3D scanners so you can be confident you’ll end up with a 3D model of you that’s a perfect likeness.
All-in-all, it will take some time, research, and money to know exactly what hardware you’ll want and which software to use, but it will be worth it when you’re holding a tiny you in your hands.
Alternatively, you can always go hard mode and make an entire model of yourself from nothing.
Alternative Option: Model Yourself From Scratch
Of course, the most basic method is to simply make a 3D model of yourself from scratch.
Much like how painters will often have a photo of their subject matter by their easel, you can use differently-angled selfies to make a model of yourself using your preferred 3D modeling software.
Naturally, this requires a deft artistic hand and good experience in 3D modeling. But if you’ve got the skill, you might find it to be a worthwhile project that’s a lot of fun as well as rewarding.
3D Printing Yourself
Now that you’ve got your model, it’s time to 3D print yourself!
There’s not much point in making models of real people if they’re not as accurate and detailed as possible, so you’re going to need to have the right machine for the job.
No matter how good the scan or clear the model is, a lesser 3D printer will make your resulting model look generic.
With your model loaded into your preferred slicer, you’re ready to double-check the accuracy and resolution before sending it to be printed.
You can 3D print yourself in just about any material, but for the best results, we recommend resin.
Resin printers are known for more high-quality prints than their FDM counterparts, so it’s better to use one if you’re really going for accuracy in your models.
Particularly high-end or reliable resin printers are excellent for getting models that really look like a little you!
If you don’t have access to a resin printer, or any printer that you trust to get the results you want, it’s worth noting that many professional scanning services will also offer printing as an extra.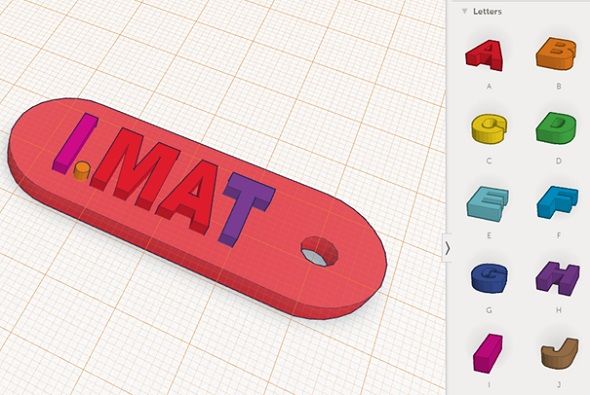 These services may even be able to print in ceramic or metal.
After printing, it’s time to post-process.
How you’ll do this will depend on what materials you’ve used and how you want your model to look in the end.
If FDM printing with ABS filament, adding a sheen with acetone or carefully painting the model are both good ways to get your desired results.
Just be sure to have your materials ready. If painting, you’ll need the right colors to get your models exactly right, for example.
If you’re new to 3D printing or just want to make extra sure that your models turn out right, you can check out our guides on improving your finish and post-processing your 3D prints.
Make Yourself as an Action Figure
Making static 3D models of yourself may be cool enough as it is, but you don’t have to stop there if you don’t want to.
With a little extra engineering and time, you can even make yourself into a 3D printed action figure!
Once you’ve got a 3D model of yourself, you can use your preferred slicer or editing software to split the model into individual parts depending on where you want your points of articulation.
By modifying these parts with holes to fit together with hinges or screws, you can print them all separately and then combine them to make an articulated action figure that looks just like you.
Of course, this only needs to be as complicated as you want it to be.
If you only want the head to turn, it’s as easy as printing it separately with enough of a connection to hold steady but with enough space to turn.
Joints on the shoulders and elbows will make it so you can put yourself in different poses like a real action figure, same with joints at the hip and knees.
For the best results, make sure you get a scan of yourself standing straight. Different poses and leaning positions may make for cool 3D selfies, but they will limit how your action figure self can be manipulated.
The most important thing is to make sure the points of connection match.
Having CAD software that can run simulations of moving parts is useful for this, but making careful notes when measuring the holes will do.
If you’re feeling extra zany, you can size up the top of the model and attach it to a small spring to turn yourself into a fun bobblehead!
Hints and Tips
We’ve already gone over some of the more important things to keep in mind when 3D printing yourself as a model or action figure, but here are a few extra hints to make sure you’re satisfied with your tiny you.
Always Scan in an Ideal Environment
There are a lot of ways to make sure your 3D scan comes out as clear as possible. Professional scanning services will know what to do, but if you’re scanning yourself at home you’ll need to be mindful of a few things.
Correct lighting and good background colors will stop your scan from being too ‘noisy’. You should also be mindful of your clothing, posture, and chosen pose. All-in-all, just do what you would when taking a good photo and you should be fine.
Taking photos of yourself in the clothes and poses you have in mind makes for a good test run before scanning so you’ll know what looks and works best.
Get More Than One Scan
Again, this is a similar rule to photography. Getting scans of yourself in different poses or in different clothes will give you many more options when it comes to printing.
Even if you’ve got a good one, there’s no harm in getting the same again for safety, it could even end up being a better scan than the first.
Don’t Be Afraid to Experiment
Printing yourself out in different poses or testing out some scans as action figure material can take some trial and error. Considering the time and effort 3D printing yourself can take, you probably won’t want to settle for second-rate.
Experimenting with sizes, infills, materials, and post-processing methods is part of the fun of making a model of yourself.
It will not only help you get a better idea of what to do next time but also make for a good learning experience for getting great 3D printing results in the future.
3D Printing Yourself FAQs
Can I print a 3D model of myself?
Yes. With 3D scanning, you can upload a 3D image of yourself to your preferred slicer and 3D print a model of yourself with ease.
How much does it cost to make a 3D printed figure?
3D printing a figure is fairly cheap if you do it all yourself.
Renting a scanner can cost anywhere between $250 – $500 on average, while professional scanning services generally cost up to $1000, with an added cost for printing that varies depending on size, detail, and materials.
If you like, you can also buy and keep a good low-cost scanner like the Revopoint for around $500 – $700.
How do you 3D print a statue of yourself?
With either an accurate 3D scan of yourself or a model you’ve made from scratch, you can use any high-resolution printer to make a statue of yourself that looks as much like you as possible.
Other articles you may be interested in:
- The 34 coolest & most useful things to 3D print
- 30+ Easy and fun things to 3D print at home
- The 10 best free 3D printer models on Thingiverse
- 8 Big ideas for small 3D prints
- Paper 3D printing
- Top 7 3D printing tips for beginners
- 3D printed items that sell
- 7 Exciting 3D printed food projects
How I printed a model of myself on a 3D printer.
 ..
.. 3D modeling
After reading this article, you will learn how I printed a model of my face and body on a 3D printer!
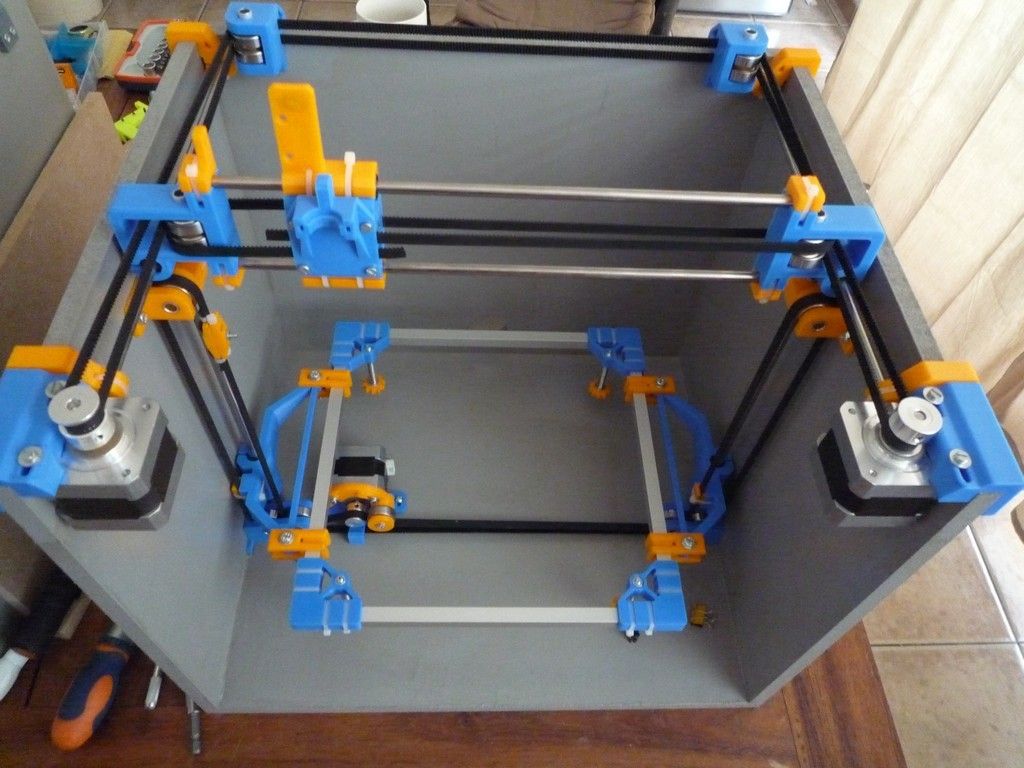
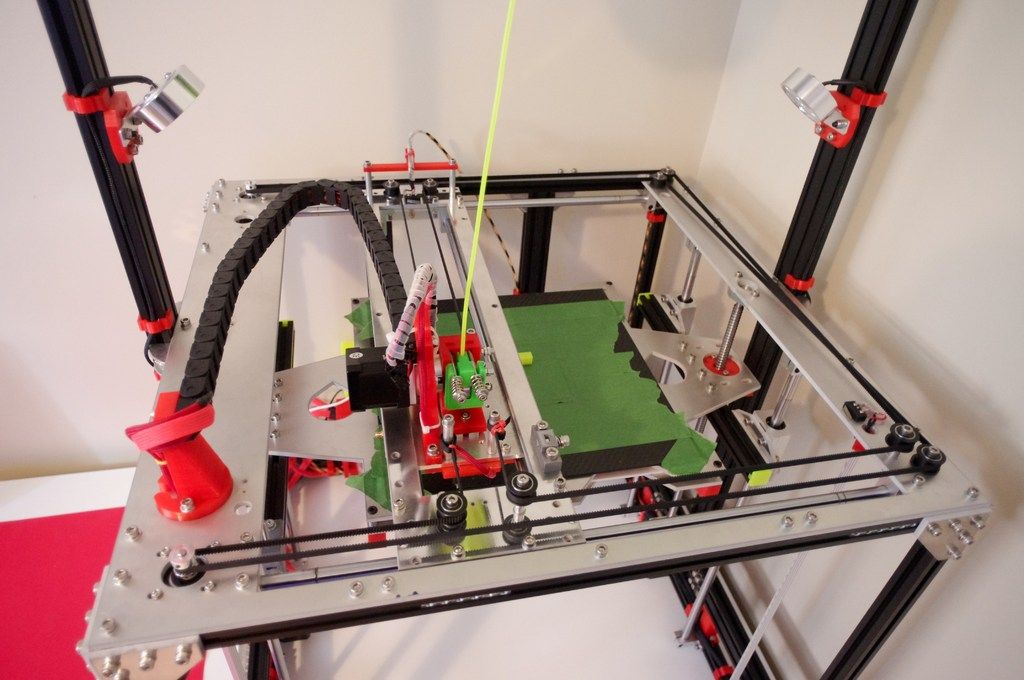
It all started with the purchase of a Kingroon KP3S 3D printer, with a table size of 180 x 180 x 180 mm.
I already had a model of a woman ready, and immediately after assembling the printer, and I assembled it for 15 minutes in total, I sent this model for printing. nine0003
For a printer out of the box, and even not fully configured, the quality is normal.
After some manipulations with the printer, I managed to get a completely smooth surface of the figure after printing.
While watching videos on setting up a printer for printing, I came across a video showing a face modeling program.
This program is called DAZ3D. (perhaps there was already an article on this topic, do not throw slippers)
And the idea came to my mind to make a model of my own face and body. Maybe in the future and earn extra money on this, making 3D models of people and printing them to order. (but hardly anyone needs it)
You can download this program on the official website for free.
After installation, we see the initial page of the program.
And to create yourself you need to go to the tab Windows - Panes - Face Transfer.
After opening this plugin, you will only have to insert your photo. nine0003
Insert a photo, click male - a man (female - a woman) and click - Generate (generation).
A body appears with our face and you see what a resemblance!!!
It seems to be similar, but I hasten to upset you. This model is not suitable for printing.
The point is that our photograph is stretched onto a blank, onto a blank. And it seems to be plausible, but if we print this model, we will get a figure, well, not at all like us. The program tried to automatically repeat our facial features, but she did not do it very well. nine0003
What to do?
To create a 3D model of your face, you will have to work hard.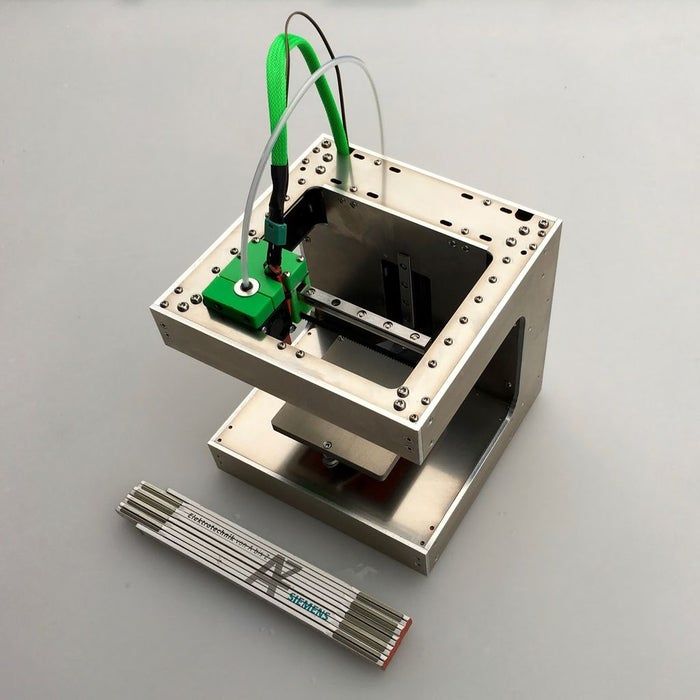
For this we buy an extension for DAZ 3D - MetaMixer Toolkit.
Quickly install and first create a blank. Genesis 8 Basic Male
may not be installed, you will have to buy ;-)
We are looking for and launching Meta Mixer.
Next, select the Shaping tab and select the faces that are most similar to you, in your opinion. nine0003
After all, Ok Google MetaMixer is: "MetaMixer is a Daz Studio tool that allows users to create unique faces from a set of previously released characters using add-ons for Metamixer."
This tool will allow us to change the facial features of our disc, and not just overlay a photo (texture) on it.
After selecting the desired faces, we need to start Power Pose. Look at the picture below and start.
In Power Pose, select Sculpting or any other parameters that will help "blind" the face of your dreams. After many hours of work in das 3d, I managed to create my face and adjust the body. nine0003
Printing the model. File - Export - I save in .obj format and transfer it to the slicer. (I use Cura).
Printed with PLA.
And if you want to know what I got in the end, then Welcome to my YouTube channel =)
Link to the video:
How I printed a model of myself on a 3D printer ...
Do not swear in the comments, everyone of good. Thank you for reading)
Software for modeling and printing on a 3D printer
Content
-
- Programs for 3D modeling
- types of files for 3D printing
- Free programs
- Paid programs
- Paid Slicers
- To summarize
The whole cycle of creating a part on a 3D printer can be fit into three stages: Creating / finding a model, cutting a model in a slicer, printing on a 3D printer. Each stage is tied to its own program. Models are created in special programs, then in the slicer the model is “cut” into steps that the printer will sequentially execute. The resulting list of steps (commands) is either placed on a memory card and run from the printer itself, or sent to the printer via a wired/wireless connection. As a result of all these actions, we get the product. Therefore, looking for a “3D printer program” is wrong: you need to look for a modeling program and a slicer. nine0003
3D modeling software
Programs for 3D modeling are divided into two large groups:
Obviously, when creating a drawing, an engineer needs precise tools: a ruler, pencil, compass, etc. But the artist needs more free tools: brushes, pastels, palettes and others. Programs are divided according to the same principle: in engineering programs, there are all the tools that allow you to accurately specify the characteristics of each element of the part, and in art programs, tools are created to give smoother shapes so that the model looks as natural as possible. Of course, in art programs it is possible to model technical products, but this is comparable to drawing a drawing with pastel: it is inconvenient, difficult and inaccurate. Therefore, it is very important to determine why you need a simulation program. nine0003
Tip: It is best to learn one or two programs at a professional level, as this will allow you to create complex models. But you should also know the basics in other programs, since a large circle of knowledge allows you to more flexibly choose the approach to creating models.
File types for 3D printing
To begin with, it is worth understanding what types of files are involved in the manufacturing process of the part. The first step is to create a model. It can be saved in the format of the program itself (for example, KOMPAS-3D files have the .m3d extension, while 3ds Max has the .MAX file extension). Such files can only be opened in the programs in which they were created. But we need a universal format - STL. All programs can save models in this format. It stores the polygons that create the model. nine0003
All files are divided into 3 categories:
-
Files that store polygonal information (STL, OBJ, etc.
 ). They are analogues of a raster image. It is possible to increase the quality of 3D models in this format only by smoothing, but in this case small details will be lost, and the file weight will increase greatly.
 -
Files that store the steps for creating a part (STEP, STP, etc.). Here you can draw an analogy with vector images. Each element is specified either using simple dot connections (for example, as in a cube or pyramid), or using formulas (any curved, rounded objects). Models in this format can be scaled without loss of quality, while maintaining a relatively small file size. nine0003
-
Utility files that store steps for a 3D printer (GCODE, GCOD). These files store the commands that the printer executes and, in some cases, comments (for example, with what settings the model was cut). Some slicers can simulate the movements of the printer, thereby rendering the model, but it is impossible to convert a file from this format to a full-fledged model.
nine0139 Be careful! If you are not sure that the GCODE file is intended for your printer, then you should not print it, because the print area for each printer is different. On third-party firmware there is no limit on the maximum travel distance, some third-party software commands may lead to incorrect operation of the control board. If the printer tries to move the print head out of the printable area many times, then it can harm itself! nine0140
If the files are in the same category, then they can be easily converted from one format to another with almost no data loss. The formats indicated in brackets are a kind of “transits”. For example, Inventor has its own file format - itp, and Fusion 360 has its own - f3d. But if you save the file in Inventor in the generic STEP format, you can open it in any engineering program and then save it in that program's format.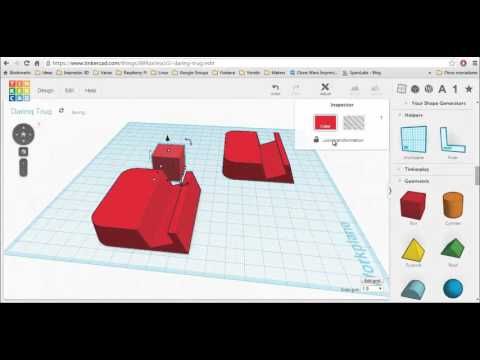
Free programs
Usually, free programs are either limited in functionality or created by enthusiasts, which is why they have a very crooked interface and a lot of errors. But their functionality is enough to create simple models, and in some cases, such programs can completely replace paid software.
Tinkercad
In essence, this is not even a program, but a website, that is, it does not need to be installed on a computer and it opens from any device that has Internet access. But this is its main disadvantage - without Internet access, you will not be able to download any model for yourself, because each project is initially saved in the cloud. You also need to register to use this site. Initially, the site was created for children, so each tool is intuitive. The program is suitable for modeling simple products: gaskets, bushings, adapters, covers, boxes, etc. nine0003
Pros:
Cons:
-
Inability to work without the Internet
-
Each individual project needs to be downloaded
-
Limited number of tools
FreeCAD
This program is designed to create technical products: fasteners, bushings, hinges and more. Since this is an open source project, it is distributed free of charge. At the same time, it has all the necessary functionality for opening and editing files with the .step extension - a universal format for all engineering programs. It is also worth noting the ability to add addons - special subroutines that allow you to perform any actions in a fully automatic mode. For example, there is an addon that makes it easier to create various gears. In this program, you can create more complex products: mechanisms, gearboxes, hinges, etc. nine0003
Pros:
Cons:
OpenSCAD
This CAD is closer to programming languages than to modeling: each object or any action is specified as a code. This allows you to create universal models. For example, a coin sorter: once you write the “model code”, you can create a huge number of variants of this model for different countries, changing just a few parameters. This program, like the previous one, is an open source project, as a result of which it is regularly updated. nine0003
Pros:
-
Works on weak PCs
-
Ease of creating universal models
-
Easy to learn if you have programming experience
Cons:
-
No Russian interface nine0003
-
Is a programming language
-
Difficult to create curvilinear geometry
Free Shipping
Add to compare
Product added to compare Go
| Manufacturer | Anycubic |
Free shipping
Add to compare
Product added to compare Go
| Manufacturer | Phrozen |
Free Shipping
Add to compare
Product added to compare Go
| Manufacturer | Raise3D |
Free shipping
Add to compare
Product added to compare Go
| Manufacturer | Anycubic |
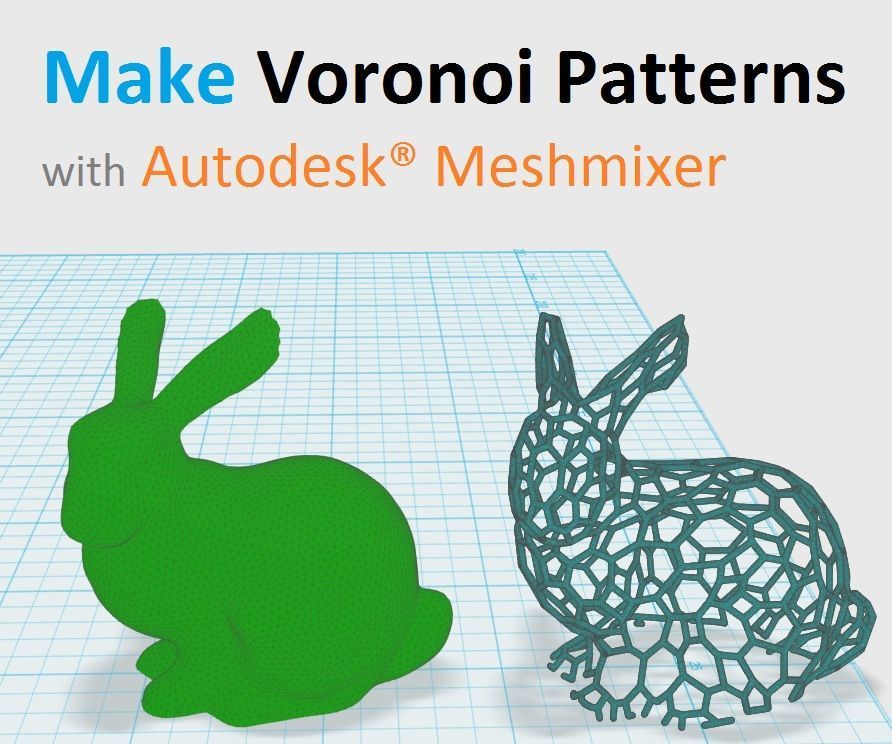
Meshmixer
Art program for entry-level 3D modeling. There are simple tools for processing STL files and functions for recovering “broken” files. Using Meshmixer, you can conveniently cut the model into several parts, as it is possible to set the size of the print area of your printer. And one of the most useful tools is the installation of tree supports. This function has already appeared in many slicers, but it is in meshmixer that they can be flexibly configured and installed manually. Despite the many tools, this program is rather auxiliary, as there are more suitable programs for creating a model from scratch. nine0003
Pros:
Cons:
-
Limited functionality for creating 3D models
-
Lack of Russian interface
-
Some operations require a powerful PC
Blender
A completely free program with huge possibilities not only for creating models, but also for animation, rendering, simulations and much more. It is mainly used by multipliers, but due to the large number of extensions, this program covers a huge range of tasks. At first glance, Blender may seem too complicated, but everyone can master the basic functionality. Also worth noting are constant updates that improve performance and add new tools. A large community of people working in this program and developing it will help with the solution of many problems. nine0003
Paid 3D modeling software
This category includes programs for professionals and enterprises, as well as their simplified versions for home use. Many companies have begun releasing a product at a low cost for home use, although initially the designs were intended only for enterprises and were priced accordingly. The common advantage of these programs is great functionality and constant support. For example, Autodesk Inventor was first released back in 1999 and is updated annually. Next, we will look at the most popular of them.
Fusion 360
The new product from Autodesk tried to combine several tasks at once: modeling, simulation and rendering. In many ways, it adopted the functionality of the previously mentioned Inventor, but supplemented it with a simple interface: many tools are similar to those that can be used in the previously mentioned Tinkercad. You can also edit STL files in it, albeit with a limited set of tools. nine0003
The main feature of this program is cloud data processing, such as simulations and renders. At the same time, almost all functions can be performed offline using the power of a PC. To process tasks in the cloud, you need to buy additional tokens, but when creating models, they are not necessary. It is worth considering that despite the presence of a native file format (f3d), all files are initially stored on Autodesk servers, and then they can be saved to your computer. nine0003
There is a version for schools and universities, but obtaining such a license requires the educational institution to register and issue you a personal license.
Pros:
Cons:
Price: from 7,123₽ to 25,721₽ for 1 year
Netfabb
The program is designed to prepare the model before slicing. In many ways, it is similar to meshmixer, but it does not have the tools to create a model from scratch. Merging several models in STL format can be called a distinctive function, but the most important tool is the “repair” of models. That is why everyone should install this program, even if you have another model editor or model repair built into the slicer. Also in Netfabb it is very convenient to cut the model into several parts for printing separately. At the moment, the Netfabb functionality is built into Fusion 360 and is not officially available separately, but can be found on third-party resources as a separate program. nine0003
Pros:
-
Great functionality for repairing the model
-
Convenient cutting into pieces
-
Easy to learn all the necessary tools
Cons:
Price: from 18 024₽ for 1 month
KOMPAS-3D
A professional program created by Russian developers for Russian enterprises. It has a huge functionality, but at the same time, each function has a description, and the main tools have explanatory animations, a huge database of standards and GOSTs is built in. The program is free for all students and does not require verification of documents. There is also a paid version of KOMPAS-3D HOME, which, although intended only for home use, retains all the functionality of the “professional” version. Because of this, and also because of the low price, this CAD system is the best choice as the first professional program for creating complex 3D models. nine0003
Pros:
-
Completely Russian interface
-
A large number of tools
-
Availability of a free student version
-
Very low price
Cons: nine0003
Price: from 1 490₽ for 1 year
SolidWorks
One of the oldest programs on the market that has become a standard. If you learn how to work in SolidWorks, then you can work in any CAD. It has a relatively simple interface, an average number of tools that are enough even for professionals, but since the program is designed for production, many functions will only interfere with work. It should be noted that this program is available in Russian, and this is one of the reasons for the prevalence of this program in Russia. nine0003
Pros:
-
Easy to learn
-
The presence of the Russian interface
-
Large community of people using SolidWorks
-
Widespread in Russia
Cons:
Price: from 8 431₽ to 292 560₽ for 1 year
Inventor
The main program at many enterprises, but due to the simplicity of the interface and the presence of the Russian language, it is easy to learn. In many ways, it is similar to SolidWorks, both in functionality and in purpose. The main distinguishing feature of this program is a large number of high-quality video tutorials and text courses. It is studied at many universities both around the world and in Russia. nine0003
Pros:
-
Prevalence among the Russian community
-
Lots of learning materials
-
Intuitive interface
-
Availability of student version
nine0138 Cons:
Price: from 106 860₽ for 1 year
SelfCAD
It is the simplest program for technical modeling. As easy to learn as Tinkercad, but not for kids, but for professional 3D printing. This program is not CAD, so there is no editing history, which allows, for example, to change sketches without entering edit mode.
You can download this program for free, but this version will have limited functionality. There are also paid versions with monthly payment or a one-time purchase forever. Only paid versions have a simple slicer, but its functionality is extremely limited. nine0003
Pros:
Cons:
-
Small functionality
-
Big cost
Price: from 1160₽ ($14.99) for 1 month
3ds Max
The program is designed to create 3D models and render images. It has great functionality, but it is extremely difficult to learn due to the lack of the Russian language and a complex interface. This is due to the fact that 3ds Max was originally developed for 3D animation and video game studios. It was to create a simple and free analogue that the previously mentioned Blender was created. Due to the above reasons, this program is not suitable for creating 3D models for subsequent printing on a 3D printer, but nothing prevents you from doing this. nine0003
Pros:
Cons:
Price: from 9 791₽ for 1 month
Free Shipping
Add to compare
Product added to compare Go
| Manufacturer | Phrozen |
Free Shipping
Add to Compare
Product added to compare Go
| Manufacturer | Anycubic |
Free Shipping
Add to compare
Product added to compare Go
| Manufacturer | PICASO 3D |
Free Shipping
Add to Compare
Product added to compare Go
| Manufacturer | Phrozen |
3D cutting software (slicers)
Having any model in STL format, you cannot immediately place it in the printer and start printing, because the printer only executes commands, and these commands form a slicer. According to the etymology of the word, one can understand that the program cuts the model into layers, or rather into separate commands. But the number of cutting options for one model is almost endless. In this regard, a large number of programs have appeared that allow you to fully customize the operation of the slicer, or rather, how it will split the model into separate commands. The slicer itself consists of two parts: the core and the shell. The slicer core performs slicing based on the specified parameters, and the shell allows you to set these parameters and visually evaluate the slicing result before sending the model to print. In addition, many slicers have built-in functionality for direct access to the printer, which allows you to manually control the printer and carry out its settings and diagnostics. Next, we will consider the most popular slicers, which have their positive and negative sides. nine0003
Free slicers
The availability of free slicers is due to the fact that without them the printer becomes a useless machine that can only heat coffee and play a melody with the help of motors.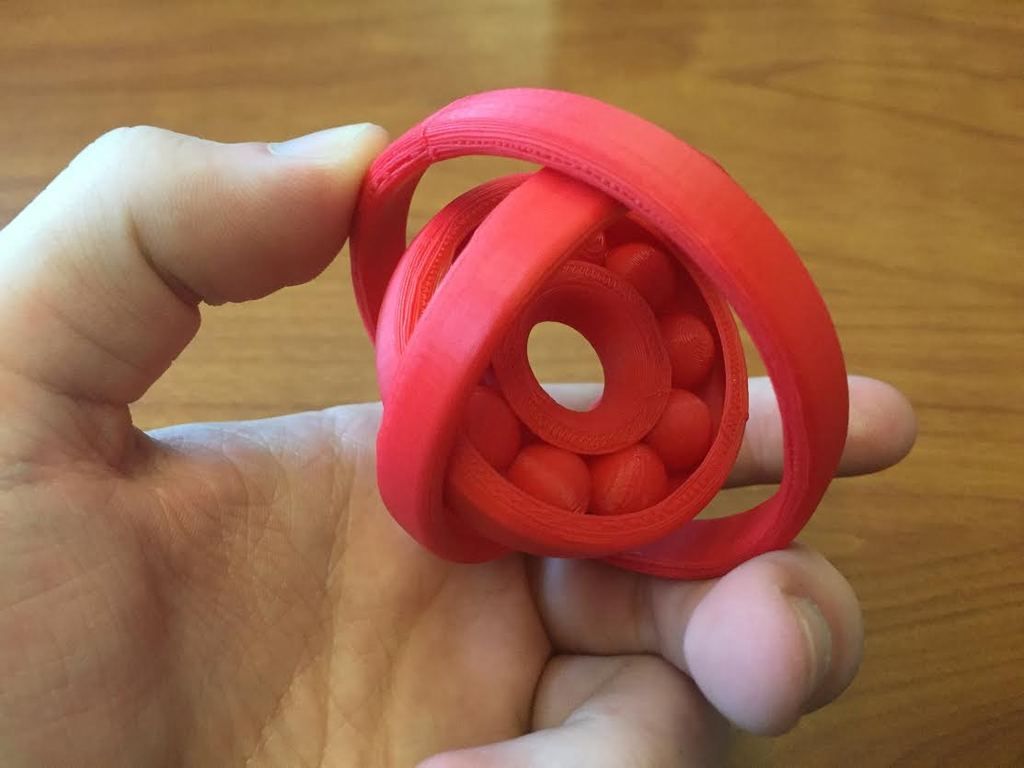 Therefore, many companies that create 3D printers supply slicers with them, while laying them out in the public domain. Often these are large companies such as Ultimaker, CraftUnique, Prusa, etc.
Ultimaker Cura
It was originally created only for Ultimaker 3D printers, but soon became an open-source project. Now in its library of profiles you can find a huge number of printers from various manufacturers. Uses its own core Cura, which has many settings and functions: tree support, wireframe printing, color printing, etc. nine0003
Frequent updates bring innovations and even more profiles for various 3D printers. It is a standard choice for beginners, as it has two control modes: simple and professional. Recently, support for add-ons has appeared that allows you to save backup copies of settings, repair the model directly in the slicer, integrate various programs for 3D modeling, and much more.
It is also possible to control the printer by sending commands directly from the computer.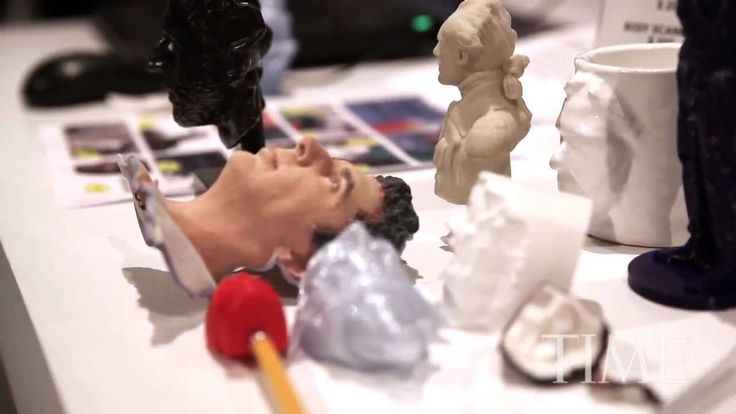 But there is no feedback from the printer, apart from receiving information about the temperature of the nozzle and table. nine0003
Pros:
Cons:
Prusa Slic3r
Sometimes you can find other names: Slic3r Prusa Edition or Slic3r PE. Prusa decided not to reinvent the wheel, and took the open-source Slic3r project, partially reworked it and began to actively develop it. Like Cura, Prusa Slic3r has many printer profiles, but Prusa's printer profiles are the most optimized. The core of the slicer of our own design, while the number of settings is less than that of the same Cura. nine0003
A distinctive feature is the flexible adjustment of the layer thickness and the support of a special extruder capable of printing 5 different plastics at once (again, produced by Prusa). The program will be extremely useful for people who have more than one 3D printer: all settings are divided into 3 tabs, each of which can be saved to separate profiles.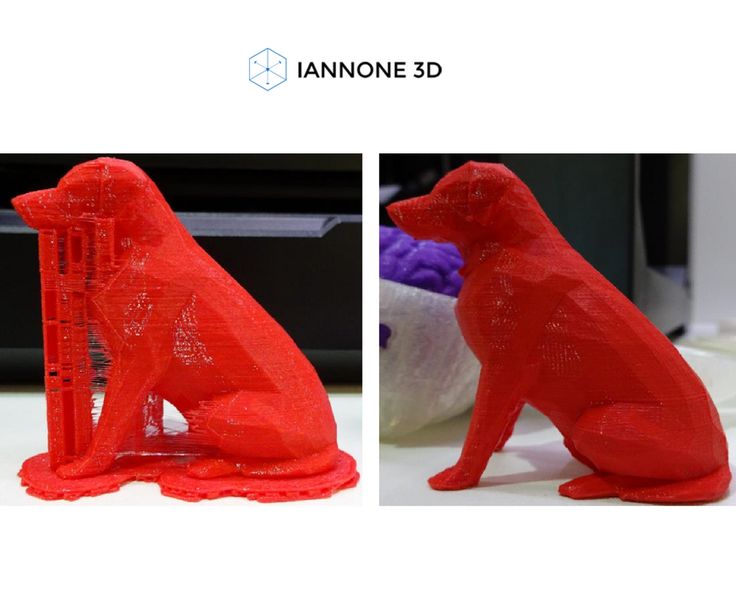 But the printer control console disappeared completely, only the send button for printing via wire remained. In general, this program will be a reliable and convenient slicer, especially if you have a large number of printers. nine0003
Pros:
Cons:
Repetier
This slicer was created more for remote control of the printer, but it can also cut models. One of the few programs where you can choose the slicing core: Cura, Sic3r, Prusa Slic3r. The number of settings for the slicing itself is extremely small, but they are enough to cut the test cube.
The most important plus of this slicer is the huge functionality for managing and configuring the printer. It is worth noting the convenient interface for sending commands, as well as customizable temperature graphs. This is extremely useful, for example, when tuning the PID or checking the movement of the axes. Even if you choose a different slicer, this program is handy to have in order to 3D print using GCODE from another slicer. nine0003
Pros:
Cons:
MatterControl 2.0
One of the few programs that combine functions for editing stl files and a slicer. You won't be able to create any serious model, but you can add text or cut out part of the model. The slicer has not so many settings, but they are enough for a beginner 3D printer. This slicer can be useful if you need to make art products with minor changes. Supports saving to the cloud. nine0003
Pros:
Cons:
3DprinterOS
This software is designed to remotely manage printers from anywhere in the world. All that is needed is to connect the printer to the computer and install this program on it. From now on, all printer management occurs through the web interface. In it, you can remotely change the model, cut it and put it on print. It is also possible to connect a camera and observe the printing process. There are very few slicing settings, some will not even be enough to calibrate the printer, not to mention serious printing.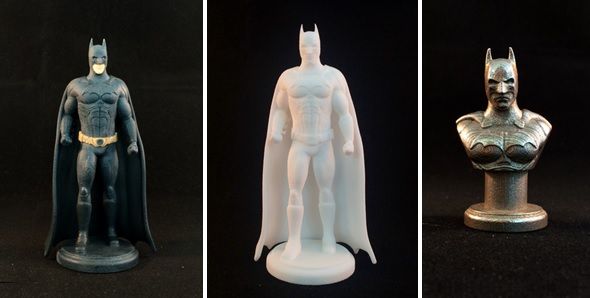 nine0003
Carefully! It is not recommended to leave the printer unattended, especially if it is no longer new: at any time there may be a risk of fire due to wiring or mechanical problems.
Pros:
-
Simple interface
-
Start printing from anywhere in the world
-
Ability to monitor printing nine0003
-
Availability of tools for editing the model
Cons:
IceSL
It is a combination of OpenSCAD with its “modeling language” and slicer. In addition, models can be edited using a “brush”, like the one in Meshmixer. It has many small pluses that are not found in other slicers, but it is not suitable for everyday use due to an inconvenient interface and a small number of slicer functions. This program can be described in one phrase: interesting, but not recommended. nine0003
Pros:
Cons:
Octoprint
In many ways it is similar to 3DprinterOS, but is an open source project, as a result of which it has many additions. Designed for home use. It is the most popular way to remotely control a printer, and the user community is constantly growing. Therefore, it will be very easy to transfer your printer to remote control due to the large number of lessons and articles. The program itself does not have a slicer, but direct export of files from Slic3r is supported, which is already good in itself. Just like Repetier, it has an excellent printer management and monitoring console. But, unlike the aforementioned analogue, most of the functions will have to be configured manually. nine0003
Pros:
-
Large user base
-
Lots of tutorial articles
-
Ability to create a video broadcast of the printing process
Cons:
Paid Slicers
At the moment, many paid slicers are no longer used, as free ones have either caught up or overtaken them. But some of them are still unique. nine0003
Simplify3D
One of the first thundered paid slicers. At the time of its introduction, it was the most advanced due to the ability to change the print settings for one model at different layer heights and the functionality of printing with more than one extruder. But at the moment it has been replaced by Cura and Prusa Slic3r. Nevertheless, the convenience of setting up print settings and their number still remain the main advantage of this slicer. Also worth noting is the excellent printer management interface, second only to Repetier host. nine0003
Another difference is the ability to manually install supports and a large number of filling patterns. Viewing models also has several features: changing the way models are displayed, viewing in section, displaying normals to planes.
Pros:
-
Lots of print options
-
Convenient printer management interface nine0003
-
Manual installation of supports
-
Changing print settings at different heights
-
Easy print setup with two extruders
Cons:
Price: from 11499₽ ($149)
Read also: A detailed review of 3D printing slicers: Ultimaker Cura, Simplify3D, IdeaMaker, UP Studio, FlashPrint nine0003
Astroprint
Many believe that this particular software is a direct competitor to 3DPrinterOS. The most important difference is user friendliness, achieved through a user-friendly interface and easy installation. The program is based on Octoprint, essentially providing only a server, a modified interface and several add-ons that allow you to fully manage the printing process while away from the printer - from finding a model, to cutting and printing. At the same time, the program positions itself as a serious business solution, so the company also provides special PCs and management consoles that make it easy to connect the printer to the system. A trial plan is available where only 2 printers can be connected, but all basic features will be available. nine0003
Pros:
-
Easy connection and setup
-
Trial Availability
-
Interface specially designed for mobile devices
Cons:
Price: from 765₽ ($9.90) for 1 month nine0003
KISSlicer
This slicer is another representative of programs that failed to keep up with the times. Previously, its functionality was a cut above the rest, but now the same Cura has all the same settings as KISSlicer, and also adds its own. Of the useful in this program, we can note the function of joint viewing of GCODE and model.
There were two versions: free and PRO. The only significant difference between them is that the paid version has support for printing in multiple colors. At the moment the project is dead, even the main site does not work, but the program can still be found on third-party sources. nine0003
Pros:
Cons:
Price: from 3240₽ ($42)
Summing up
After considering all the popular programs, we can highlight the clear favorites:
For beginners in 3D printing, Tinkercad is the best 3D modeling software because it combines simplicity with the necessary functionality. The best programs for professional-level 3D modeling are KOMPAS-3D, Fusion 360 and Blender, due to the huge number of tools and a large community that makes it easy to find lessons and guides.