Things to know about 3d printing
14 Things To Know Before Getting Started With 3D Printing – 3D Printerly
For people wanting to get started with 3D printing, I’ve put together some awesome tips that will help you in your future journey. You don’t want to be going in blind before buying a 3D printer so read on and get some important information before you get to 3D printing.
3D printing is simple, yet complicated at the same time depending on if you know the foundation of what makes a 3D printer work. Once you get to that stage, things get easier and your horizons for what you can produce only expands.
It’s a really exciting time so without further delay let’s get into it!
1. Buying Expensive Doesn’t Always Mean BetterThe first thing you should do with 3D printing is to make sure you know what a good one looks like.
People usually think cheaper things don’t get the job done as good as expensive things. This is true in many cases, but with 3D printers, it’s quite different.
As time goes on 3D printer manufacturers have seen massive competition, and so there’s a race to make 3D printers not only cheaper, but better quality overall.
Similar to if you had 2 restaurants in your town compared to 10 restaurants, each one will have to lower their prices while improving on quality as good as they can.
Now there are different things that make a 3D printer more expensive, such as whether it’s an FDM or SLA printer, the brand, the functions of the 3D printer and so on.
When you’re a beginner, however, the cheaper 3D printers will give you the quality you desire, plus some.
Some expensive printers don’t always do much for quality, so it’s always important to check out a few reviews and find out whether it’s worth digging deeper into your pockets for a pricier 3D printer.
I’d recommend starting out with a cheaper printer like the Ender 3, then with more experience and research, you can look into the more premium printers.
If you do want better features and you have some extra money to spend, you can always go for the upgraded Creality Ender 3 V2, a well-respected and high quality filament 3D printer.
By far the most common 3D printing material is your good old PLA. It’s cheap, easy to handle and has great versatility as many printers will be PLA compatible. At this moment in time, PLA is the second highest consumed bio-plastic in the world.
The cool thing about PLA is it’s made out of a renewable resource that’s biodegradable and easily produced through fermentation of starch from crops, mostly corn, wheat or sugar cane.
PLA is one of the safest 3D printing materials out there, and does not emit nearly as many particles as other materials.
It can be designed to last for weeks or years by varying composition and quality in production.
It’s a non-toxic, odorless material which is already widely used in many manufactured products. You would have to live in an odd place to not have something around you that’s made of PLA.
It’s range of applications include computers and mobile phone casings, foil, tins, cups, bottles and even medical implants.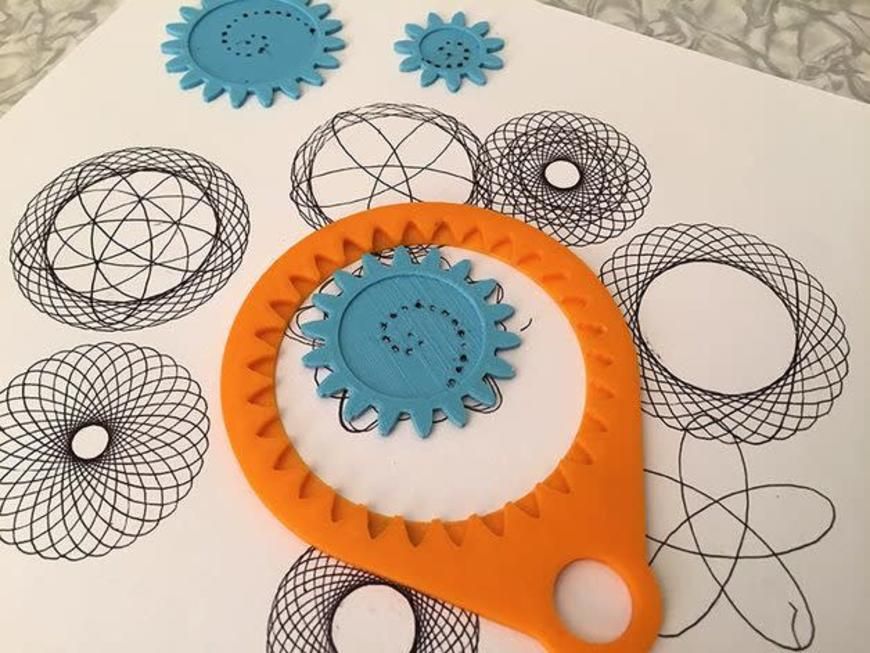
PLA melts at a relatively low temperature which makes it easier for printing, but less useful if you want to store hot items. As PLA manufacturing develops, I can only see it becoming cheaper and better quality in the future.
OVERTURE PLA Filament is one of the most popular 3D printing filaments on Amazon, a very reputable and high quality brand.
3. You’re Better Off Getting an Auto-Levelling 3D PrinterNow to get an accurate print, you need your print bed to be levelled.
You have the choice between getting a manual levelling printer or an auto-levelling printer, which one do you choose? If you really like the DIY aspect of things and learning the ins and outs, then manual levelling is a cool challenge to get things right.
If you’d rather focus on the main 3D printing process, then getting yourself an auto-levelling printer is the better choice.
An auto-levelling printer will generally have a switch or proximity sensor near the tip of the print head and will move around the print bed to measure distance away.
If you did decide to get a manual 3D printer because of certain functions or designs, you can still get an auto-levelling sensor attachment to give you the same results. These can be quite pricey so keep this in mind before getting a manual levelling printer.
Many problems with prints do come from print beds not being level resulting in clogging, scratch marks on prints and first layers being uneven leading to poor adhesion.
An example of a good auto-leveling 3D printer is the Anycubic Vyper from Amazon. It has a pretty good build plate size of 245 x 245 x 260mm, equipped with a 16-point intelligent leveling system, a silent motherboard, a PEI magnetic platform, and plenty more.
4. Don’t Cheap Out on Your Filament3D printer filament is a very important staple to the final product that you will create. Some filament comes better than others, and these can make a massive difference.
The great thing here is that filament is relatively cheap, especially PLA filament which is easily made in factories. 1KG of decent PLA filament will cost you around $20-$25.
Depending on how often you’re printing, the size of items you print and how successful your prints are, 1KG of PLA can last you over a month.
As you search far and wide for PLA filament, you’ll find some that have extra features. You have PLA filament out there that has a silky look to it, glow in the dark, extra strength, a very wide range of colors and so on.
These will have different price tags but, all in all, you probably won’t be spending more than $30on 1KG of it.
Cheaper filaments aren’t always bad quality, so I’d recommend having a good read of the reviews and try out what you can. Once you have the perfect filament for your printer, printing will become a lot less problem-solving and a lot more creativity.
Moving on to other printing materials such as ABS and resin, these have the same kind of idea with resin being one of the pricier materials.
This lovely ELEGOO LCD UV ABS-Like Resin will set you back around $40 so choose wisely on whether you want a PLA compatible 3D printer or an SLA, resin compatible one since filament is cheaper.
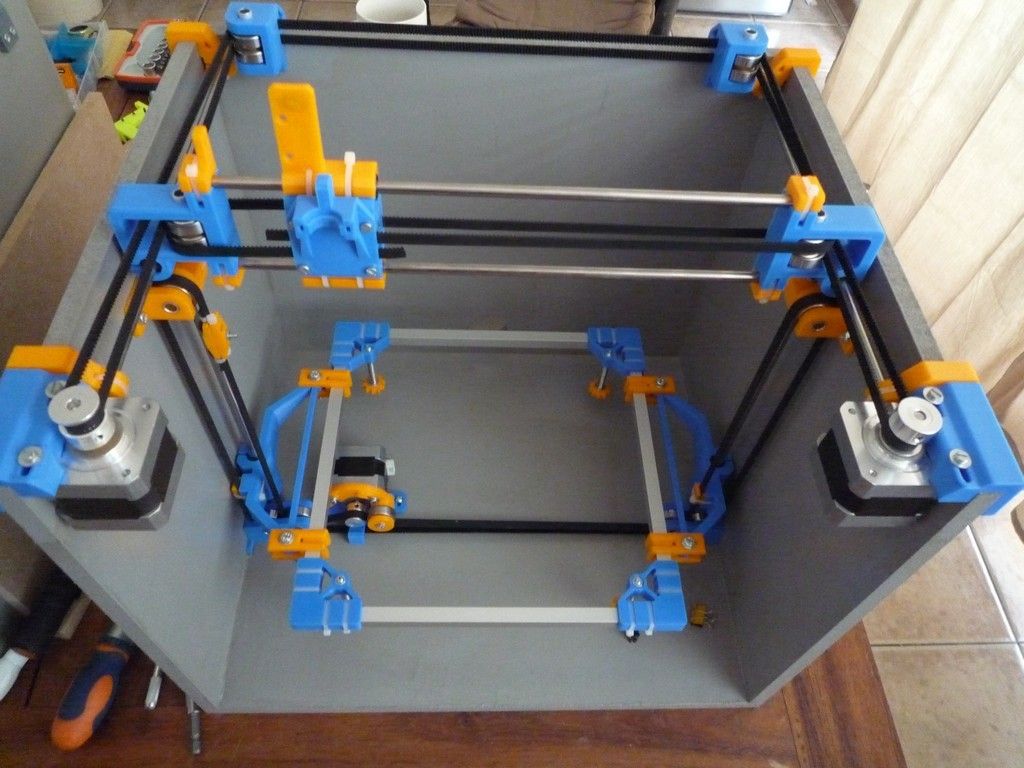
A good rule of thumb when it comes to 3D printing is knowing its basic structure and foundation. In the long run, with the replacements and possible future upgrades to your printer, this will make a world of a difference in how you progress.
There are many videos you can watch to inform you of the structure of your specific 3D printer, so I would recommend taking out a bit of time just to get familiar with it.
3D printers do require a basic level of maintenance and upkeep, such as keeping rods lubricated and replacing worn-out nozzles.
With heavy use, a nozzle can last you 3-6 months and with casual use up to 3 years so it’s not too often you’ll have to do this in most cases.
As time goes on, the better you maintain and update your printer, the longer it will operate in an efficient fashion.
Learning these things is great in an educational aspect.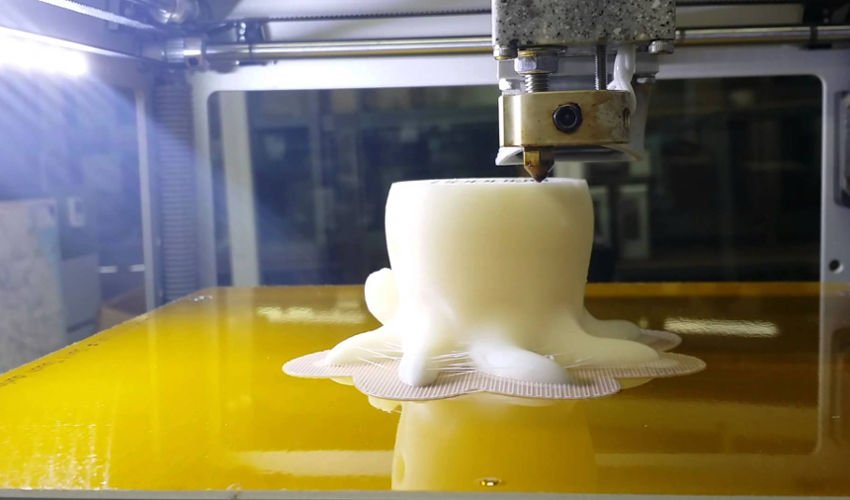 Being able to put a machine of this complexity together does take some smarts and practical knowledge of engineering.
This is one of the reasons why 3D printers have made their ways into classrooms and universities, with more and more being spent on them each year.
The understanding of your 3D printer can even lead you to new passions and hobbies not just within 3D printing.
The mechanical process of 3D printing does branch into many other fields such as automotive, aviation, healthcare, architecture and many more.
Here’s an assembly video of the Ender 3 by CHEP.
6. A Good Print Bed Makes the World Of DifferenceIn the 3D printing world, things aren’t always so straightforward and hobbyists often run into issues when printing. There are many issues that can produce these problems and your printing bed could be one of them.
Having a good print bed makes a difference by giving your first print layer a solid foundation to be able to build on throughout the process. If your print moves in the middle of the print, it will definitely affect the rest of the print.
Print beds can be made out of plastic, aluminum or glass.
A low-quality print bed can cause issues such as layer adhesion, not retaining temperature, prints sticking down too hard and uneven bed levelling.
Having a high quality print bed will alleviate many of these problems in one, so this is something I’d recommend you get right before you start printing.
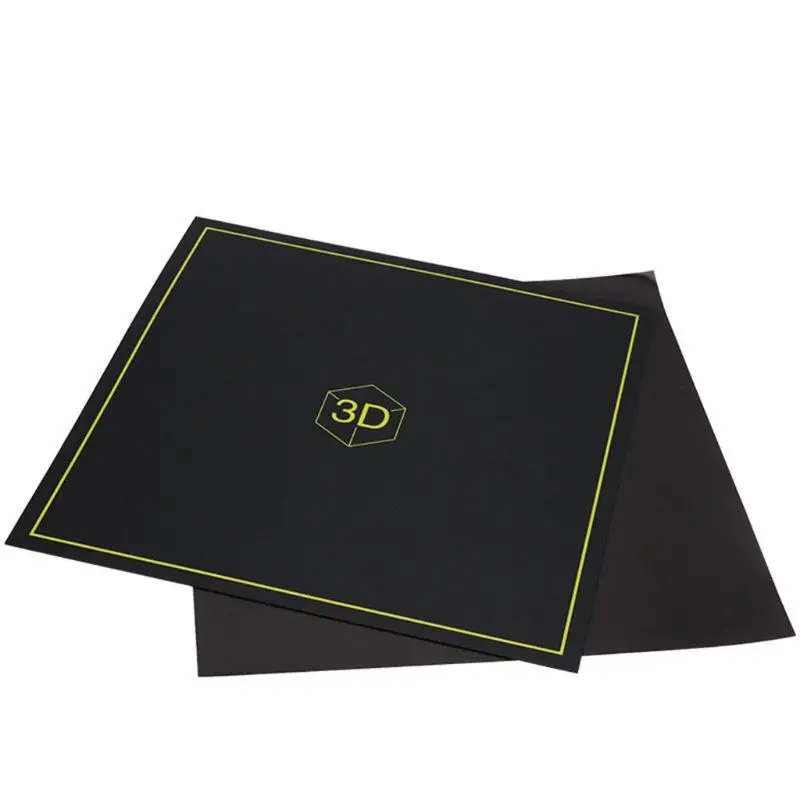
Glass is a popular option among 3D printer hobbyists because it tends to be easier to remove your prints after you’re done and it leaves a smooth finish on the bottom of your print.
It only needs a modest amount of heat (60°C), but do keep in mind, prints with thinner sections could be pulled off easily due to the lower adhesion.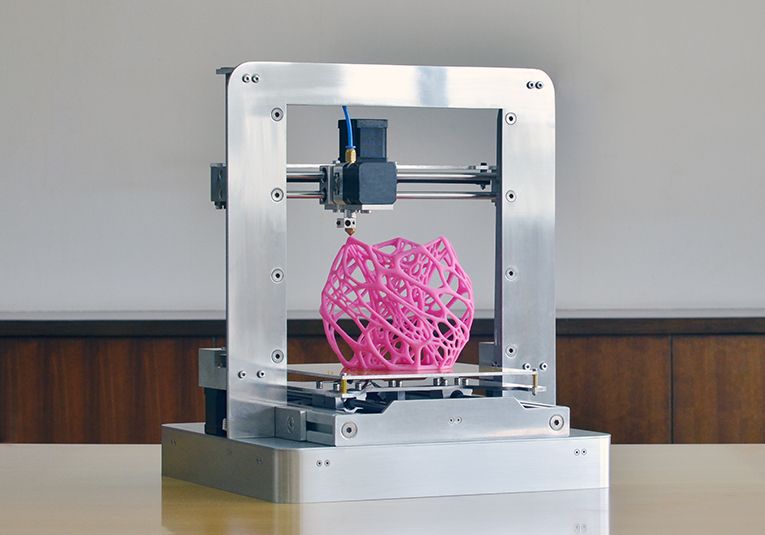 A fix for this would be to use either masking tape, or glue to help prints stick down better.
You don’t want print bed materials that stick too well because some people have reported their print beds and prints being damaged as they remove the finished product, especially when printing in ABS as it requires higher temperatures.
I’d recommend the Comgrow PEI Flexible and Magnetic Printing Surface for your printing needs.
7. You’ll Need a Set of ToolsIf only you could just buy your 3D printer, materials and get to printing without anything else! Although ideal, this won’t be the case but you won’t need anything too fancy.
The general sort of accessories you will need is:
- A spatula/palette knife – to remove prints off the bed
- Filament storage containers
- Adhesive material – masking tape, glue etc.
- Tweezers – for cleaning out nozzles and prints
These are the basic sort of tools that will definitely come in handy, but there are more advanced tools you might want to grab as you get more familiar with 3D printing.
Many of the tools you’ll need come with your 3D printer in a set, but there are many other tools that you’ll want to get afterwards.
A great set of tools you can get from Amazon is the AMX3D Pro Grade 3D Printer Tool Kit, a set that gives you the ability to remove, clean, and finish your 3D prints like the professionals do.
8. Don’t Forget About Safety!I can’t stress this enough, as fun a 3D printer can be you always want to keep safety a top priority. I’ve written about 3D printer safety in this article, it’s my first article so it isn’t the greatest but definitely has useful information about safety.
It’s easy to focus on the great prints you’re going to make, and forget about safety tips when 3D printing. Luckily, there are some tips that will really improve your safety with ease.
- Get a 3D printer enclosure if you don’t already
- Make sure your printing room is ventilated/filtered
- Be aware of fire hazards around your printer
- Your printer can get very hot, so keep out of reach of animals and children!
As long as you have safety in mind, you should be okay. 3D printer manufacturers have realized that safety is a growing concern with consumers so they have developed very good systems over time.
3D printers are considered as safe as one of your household appliances.
Problems can arise when you play around with your settings, so use default settings unless you know what you are doing and be familiar with what each setting does.
The Creality Fireproof & Dustproof Enclosure from Amazon is a great purchase to improve your 3D printing safety.
9. Don’t Be Afraid to Ask The 3D Printing Community For HelpThe 3D printing community is one of the most helpful that I’ve seen. It’s just a great collective of people who have similar goals, and love it when people succeed in their goals.
There’s a massive number of 3D printing forums out there, from Reddit to brand-specific forums that you can get help from.
A common consensus I see is several people answering questions that someone asks whether simple or quite in-depth.
3D printing, being quite an engineer focused type of field, brings about very talented people who are ready to share their skills and knowledge in the craft.
Not only do you have forums but you have many YouTube videos with people answering common questions and solving problems.
It can be a bit of a learning curve to figure certain things out, but getting the information shouldn’t be difficult at all.
Websites like Thingiverse is a staple in the 3D printing community, and has endless open source designs for people to download and even recreate if they are up to it.
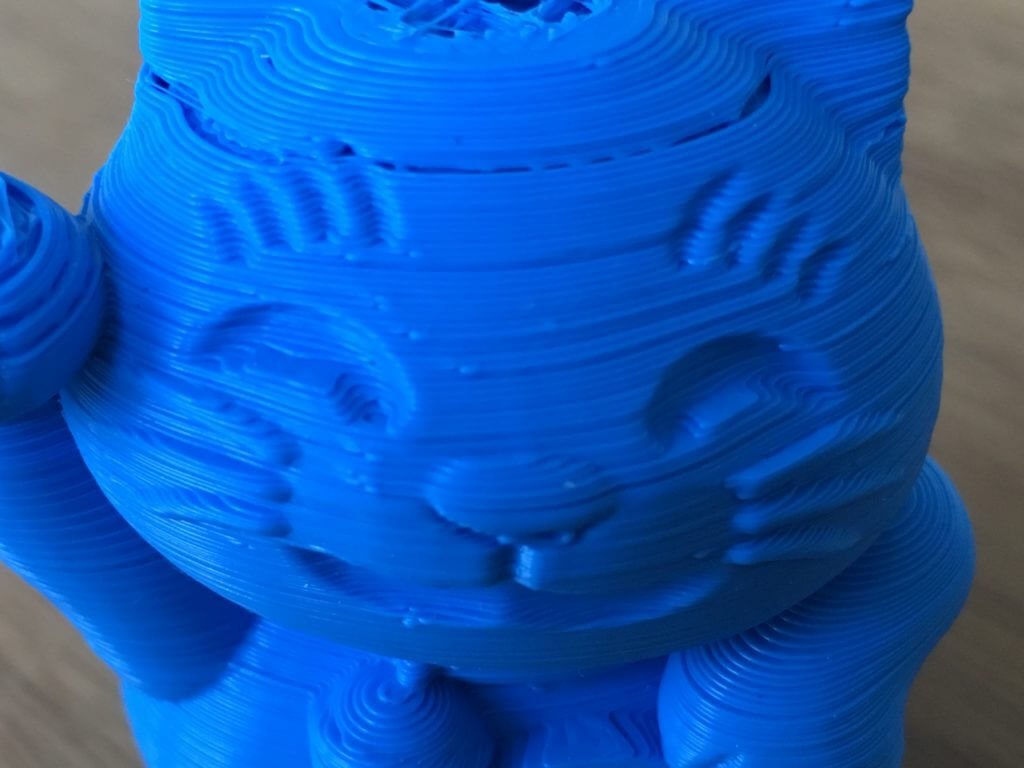
10. You Won’t Get It Perfect Straight AwaySome people get their 3D printer started and print out the most beautiful, flawless designs they could imagine. Others start up their printer and things don’t exactly go to plan. This can be worrying as a beginner, but it is more common than you think.
Just like many other activities out there, once you figure a few important things out you will be able to do operate without issues.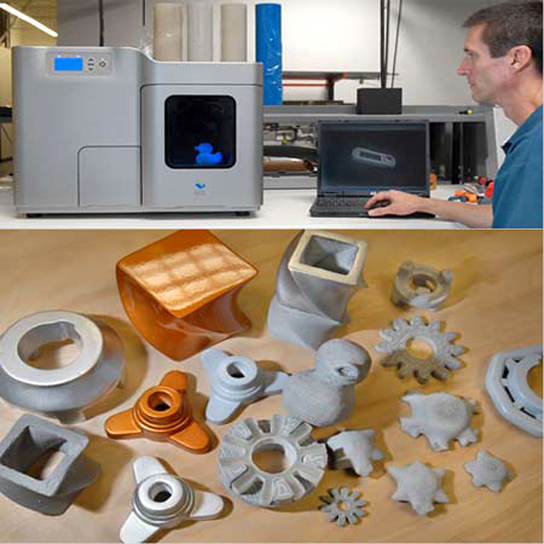.jpg)
Once you identify the issues, the fixes are usually something quite simple, such as re-levelling your print bed, or using the right temperature settings for your material.
It can take a few mistakes and low quality prints before you start getting that picture perfect quality you are after. It’s always easier to use the designs that other people have made and tested so you know it works.
When you have a decent number of prints coming in nicely, you can start to create your own designs, but this can take some time to get right. Once you’ve got your digital designs down, it opens up a world of possibilities with 3D printing.
11. You Can Print a Lot But Not Everything3D printing really does have a huge range of applications in several fields, but it can’t do everything. On the other hand, it can do a lot of things that normal manufacturing methods cannot achieve.
Check out my article on its applications in the medical field.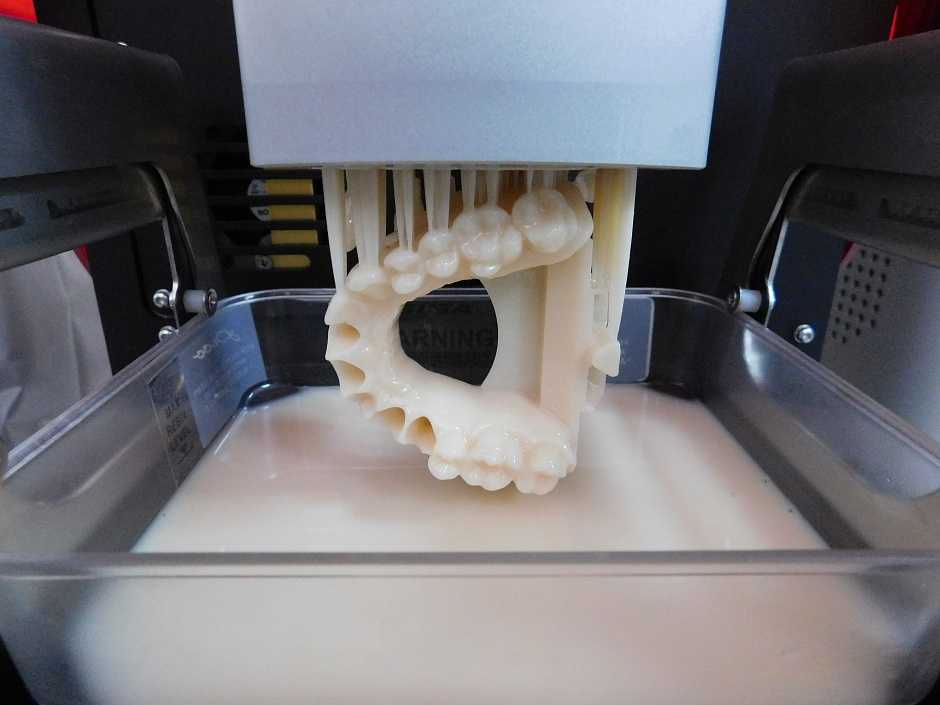
3D printers don’t print “things”, they simply print shapes but very detailed shapes that come together to form an object. They will take the material you’re printing with, then form it into a specific shape.
Another article I wrote which relates is about What Materials & Shapes Cannot Be 3D Printed?
The downside here being that you are limited to this single material. In more advanced cases of 3D printing, people can print with multiple materials within one printer.
3D printing has definitely seen advancements in what kind of material that can be printed, ranging from carbon fiber, to gemstones. American Pearl is a company that has 3D printing at its forefront.
They produce a 3D printed model of jewelry, in a personalized fashion then pour metal into this design.
After it hardens, gemstones can be added by an expert jeweler based on exact specifications and some of these personalized jewelry pieces can go for $250,000.
On top of this, American Pearl can deliver such a piece in only 3 days, and at a cheaper price than competitors.
The 3D printing gun is a big advancement in showing what 3D printing is capable of. The great thing is, it’s a very open-source type industry where people can work together and improve on things that have been developed by others.
This allows for a more, in-depth scope of development in the field.
The RepRap is a well-known printer which aims to be able to 3D print a 3D printer, but at this stage it can only print out the frame or body of the printer. Maybe, one day we will get to this stage but at this moment it isn’t on the table.
12. Stick With FDM Printers, For NowWhen doing your research on 3D printers, you may have come across the fact that there are “types” of printing. The main two are Fused Deposition Modelling (FDM) and Stereo-lithography (SLA) and they are quite different.
My recommendation for what printer to go with first is definitely FDM. There is a broader choice with FDM printers and the filament printing materials are usually cheaper.
Check out my article on the comparison between Resin vs Filament 3D Printers (SLA, FDM) – Which Should I Buy?
SLA uses a liquid resin material and is done layer by layer rather than a strand of material like with FDM. It uses a curable photopolymer which hardens when a strong light is focused on it from the screen within the printer.
These can be faster to print but they are quite pricey, and higher objects do take longer to print. SLA printers are definitely getting cheaper over time, so this could be a first option in the future for hobbyists, but for now, I would stick with FDM.
FDM printer have much more versatility when it comes to printing materials, as they can be compatible with PLA, ABS, PETG, TPU, PVA, nylon and more. The availability and range of FDM printers does outclass SLA printers.
SLA does have its advantages, quality-wise it does take the cake. The ability of SLA to produce high resolution, smooth quality finish prints really does outclass your usual FDM printers.
Another article I wrote is about a comparison between the printing materials themselves Resin Vs Filament – An In-Depth 3D Printing Material Comparison.
There are more costs included with SLA printing such as part replacements for the resin tank, build platform and just the high cost of resin can really set you back over time.
Unless you are really familiar with 3D printing and have a few bucks to spend, I would avoid SLA printing. If you are really interested in getting something printed in PLA, it could be worthwhile using a 3D printing service.
13. If You Want to Get Good, Learn How to Design and SliceThere are a few steps in the process of designing what you want to print, from design in a CAD (Computer Aided Design) software to “slicing” the design, which simply means to translate your drawing to something a 3D printing can understand and print.
If you want to propel your 3D printing journey far, I’d start off using other people’s designs but learning how to design and slice at the same time.
This will be an invaluable skill in the future, and if you want to personalize 3D prints, it’s necessary to be able to do that.
You’ll need a dedicated slicing software to achieve this, as 3D printers cannot print without a G-code instruction, created by slicing. What slicing does is it creates routes for a 3D printer to act on while printing.
It tells the printer what speed, layer thickness to lay down at different points in each print.
Regardless of what you think about slicing, it really is necessary to get the job done. There are several hundred different slicing programs out there, some professional ones costing over $1,000 but at early stages, the free ones will do just fine.
Some 3D printers (Cura & Makerbot Desktop) actually have designated slicing software that comes with it, and unless stated by the company, you are free to choose another slicing software to your liking.
CAD and slicing software can get complicated, but developers have kept this in mind, and created beginner-friendly programs for people to get started on. Slic3r is a good beginner software to start with.
I’d advise to just start with basic shapes, putting these shapes together, then getting more detailed as you understand the process better. There are many YouTube guides that you can follow for getting started, the earlier, the better!
14. The Slower, the BetterThis ties in with the last point with the slicer because this is where you input the settings for your printer to process. I’ve written a more in-depth article about how long it takes to 3D print.
When it comes to your final prints, you will have to balance out how long you are willing to wait, with how high you want the quality to be.
The three main factors here are:
- Print speed – average is usually 50mm/s
- Layer height – basically the resolution of the print (from 0.06mm to 0.3mm)
- Infill density – measured in percentages, 100% means solid
Generally, the longer settings on a 3D printer will get you a more detailed finish on prints. This is done if you want a strong, functional and smooth print. Something that requires less detail or is just a prototype won’t need those features so it can be printed a lot faster.
Print speed needs to be balanced because having a speed to fast can cause print imperfections and weak layer adhesion. Too slow of a speed can cause the deformation of prints due to the nozzle sitting on the plastic for too long.
The size of your nozzle really does make a difference in how long your print will take. For example, a print job that takes 11 hours using a 0.4mm nozzle at 150mm/s will only take under 8 hours using a 0.8mm nozzle at 65mm/s.
It takes a print twice as long to finish if you change the layer height setting from 0.2mm to 0.1mm because the nozzle will move over the same areas twice over.
Conclusion3D printing is an awesome field to get into, as it has applications which can stretch far and wide into most other fields in some ways.
It’s much more reasonably priced than in the past to get involved, so I would recommend it to anyone who wants to produce rather than always consuming.
There is somewhat of a learning curve with 3D printing but nothing the average person can’t get the hand of. Even younger children in schools are making use of 3D printing.
Once you get to a stage where you are confident with 3D printing, it will be a very fun activity for years to come.
3D Printing: What It Is, How It Works and Examples
3D printers might seem like they're right out of a science fiction movie, but they're proving to be useful in a variety of industries. | Image: ShutterstockHow Do 3D Printers Work?
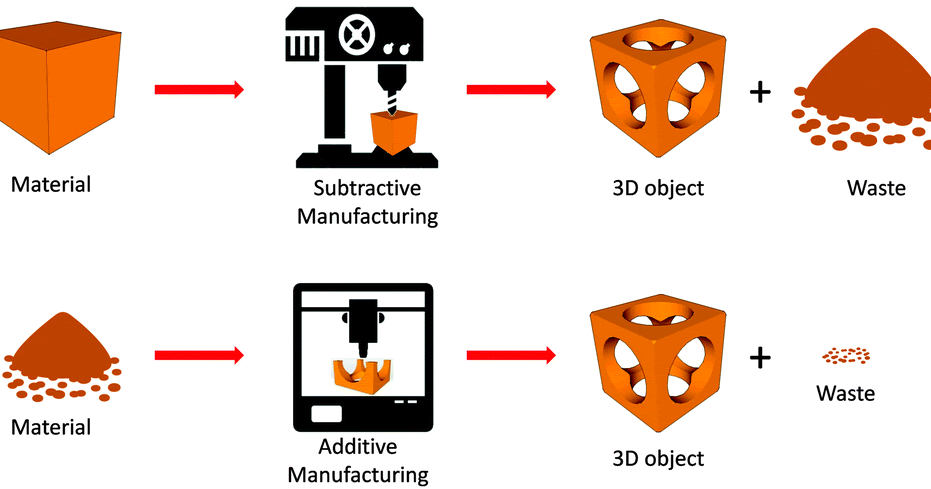
3D printing is part of the additive manufacturing family and uses similar methods to a traditional inkjet printer — albeit in 3D. Additive manufacturing describes the process of creating something in layers, adding material continuously until the final design is complete. This term most often refers to molding and 3D printing.
It takes a combination of top-of-the-line software, powder-like materials and precision tools to create a three-dimensional object from scratch. Below are a few of the main steps 3D printers take to bring ideas to life.
How Does a 3D Printer Work?
3D printers are related to additive manufacturing. 3D printers use computer-aided design to understand a design. When a design is ready, a material that can be dispensed through a hot nozzle or precision tool is printed layer by layer to create a three-dimensional object from scratch.
3D Modeling Software
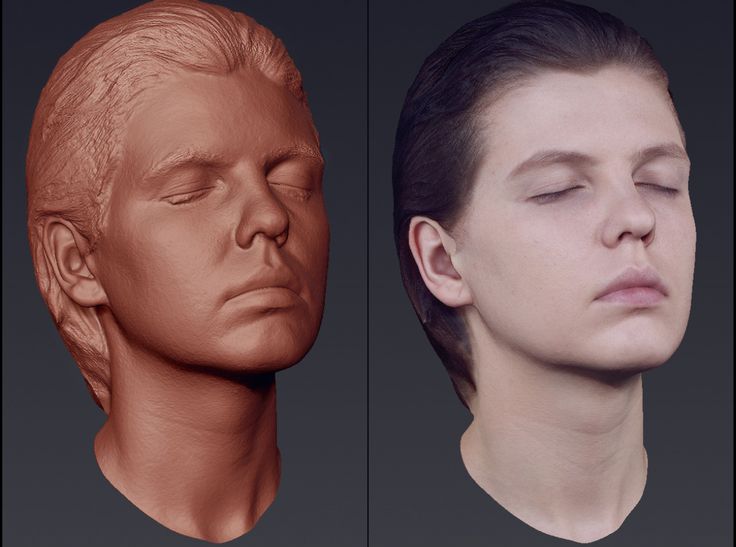
The first step of any 3D printing process is 3D modeling. To maximize precision — and because 3D printers can’t magically guess what you want to print — all objects have to be designed in a 3D modeling software. Some designs are too intricate and detailed for traditional manufacturing methods. That’s where CAD software comes in.
Modeling allows printers to customize their product down to the tiniest detail. The 3D modeling software’s ability to allow for precision designs is why 3D printing is being hailed as a true game changer in many industries. This modeling software is especially important to an industry, like dentistry, where labs are using 3D software to design teeth aligners that precisely fit to the individual. It’s also vital to the space industry, where they use the software to design some of the most intricate parts of a rocketship.
3D PRINTERS USE MODELING AND SLICING SOFTWARE TO GUIDE THE PRINTER IN CREATING EACH OBJECT. Video: Digital Trends
Slicing the Model
Once a model is created, it’s time to “slice” it. Since 3D printers cannot conceptualize the concept of three dimensions, like humans, engineers need to slice the model into layers in order for the printer to create the final product.
Slicing software takes scans of each layer of a model and will tell the printer how to move in order to recreate that layer. Slicers also tell 3D printers where to “fill” a model. This fill gives a 3D printed object internal lattices and columns that help shape and strengthen the object. Once the model is sliced, it’s sent off to the 3D printer for the actual printing process.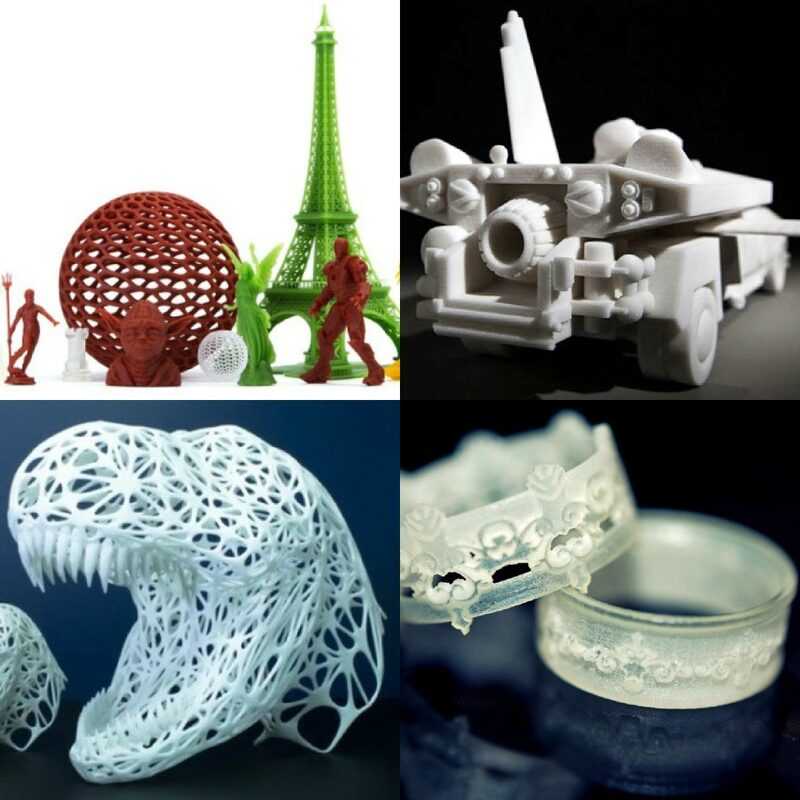
The 3D Printing Process
When the modeling and slicing of a 3D object is completed, it’s time for the 3D printer to finally take over. The printer acts generally the same as a traditional inkjet printer in the direct 3D printing process, where a nozzle moves back and forth while dispensing a wax or plastic-like polymer layer-by-layer, waiting for that layer to dry, then adding the next level. It essentially adds hundreds or thousands of 2D prints on top of one another to make a three-dimensional object.
3D Printing Materials
There are a variety of different materials that a printer uses in order to recreate an object to the best of its abilities. Here are some examples:
Acrylonitrile Butadiene Styrene (ABS)
Plastic material that is easy to shape and tough to break. The same material that LEGOs are made out of.
Carbon Fiber Filaments
Carbon fiber is used to create objects that need to be strong, but also extremely lightweight.
Conductive Filaments
These printable materials are still in the experimental stage and can be used for printing electric circuits without the need for wires. This is a useful material for wearable technology.
Flexible Filaments
Flexible filaments produce prints that are bendable, yet tough. These materials can be used to print anything from wristwatches to phone covers.
Metal Filament
Metal filaments are made of finely ground metals and polymer glue. They can come in steel, brass, bronze and copper in order to get the true look and feel of a metal object.
Wood Filament
These filaments contain finely ground wood powder mixed with polymer glue. These are obviously used to print wooden-looking objects and can look like a lighter or darker wood depending on the temperature of the printer.
The 3D printing process takes anywhere from a few hours for really simple prints, like a box or a ball, to days or weeks for much larger detailed projects, like a full-sized home.
How Much Do 3D Printers Cost?
The cost of 3D printers vary based on the size, specialty and use. The cheapest 3D printers, for entry level hobbyists, typically range from $100 to $500. More advanced models can range between $300 and $5,000. Industrial 3D printers can cost up to $100,000.
3D Printing Processes and Techniques
here are also different types of 3D printers depending on the size, detail and scope of a project. Each different type of printer will vary slightly on how an object gets printed.
Fused Deposition Modeling (FDM)
FDM is probably the most widely used form of 3D printing. It’s incredibly useful for manufacturing prototypes and models with plastic.
Stereolithography (SLA) Technology
SLA is a fast prototyping printing type that is best suited for printing in intricate detail. The printer uses an ultraviolet laser to craft the objects within hours.
Digital Light Processing (DLP)
DLP is one of the oldest forms of 3D printing. DLP uses lamps to produce prints at higher speeds than SLA printing because the layers dry in seconds.
Continuous Liquid Interface Production (CLIP)
CLIP is amongst the faster processes that use Vat Photopolymerisation. The CLIP process utilizes Digital Light Synthesis technology to project a sequence of UV images across a cross-section of a 3D printed part, resulting in a precisely controlled curing process. The part is then baked in a thermal bath or oven, causing several chemical reactions that allow the part to harden.
Material Jetting
Material Jetting applies droplets of material through a small diameter nozzle layer-by-layer to build a platform, which becomes hardened by UV light.
Binder Jetting
Binder Jetting utilizes a powder base material layered evenly along with a liquid binder, which is applied through jet nozzles to act as an adhesive for the powder particles.
Fused Deposition Modeling (FDM)
FDM, also known as Fused Filament Fabrication (FFF), works by unwinding a plastic filament from a spool and flowing through a heated nozzle in horizontal and vertical directions, forming the object immediately as the melted material hardens.
Selective Laser Sintering (SLS)
A form of Powder Bed Fusion, SLS fuses small particles of powder together by use of a high-power laser to create a three-dimensional shape. The laser scans each layer on a powder bed and selectively fuses them, then lowering the powder bed by one thickness and repeating the process through completion.
Multi-Jet Fusion (MJF)
Another form of Powder Bed Fusion, MJF uses a sweeping arm to deposit powder and an inkjet-equipped arm to apply binder selectively on top. Next, a detailing agent is applied around the detailing agent for precision. Finally, thermal energy is applied to cause a chemical reaction. Direct Metal Laser Sintering (DMLS) also utilizes this same process but with metal powder specifically.
Sheet Lamination
Sheet Lamination binds material in sheets through external force and welds them together through layered ultrasonic welding. The sheets are then milled in a CNC machine to form the object’s shape.
Directed Energy Deposition
Directed Energy Deposition is common in the metal industry and operates by a 3D printing apparatus attached to a multi-axis robotic arm with a nozzle for applying metal powder. The powder is applied to a surface and energy source, which then melts the material to form a solid object.
What every 3D designer needs to know about modeling for 3D printing?
What every 3D designer needs to know about modeling for 3D printing?What every 3D designer needs to know about modeling for 3D printing?
In order for the 3D printer to eat your 3D model and not rebel, you need to cook it properly. We have written a simple recipe that includes the main aspects of competently preparing a 3D model for 3D printing. nine0005 First of all, keep in mind that our site has a special form for automatic verification of 3D models. Thanks to this form, you can quickly and easily check the model for suitability for 3D printing. If the model has passed the test, then the customer receives a notification by mail and the model will appear in the "My Models" section of the User's Personal Account. If the file did not pass the check, you will receive a message by mail indicating the errors found in the 3D model. In order not to be rejected by the program in 3D printing, before downloading a file, go through our list and check if you have taken everything into account. nine0003
How to prepare a 3D model for 3D printing:
-
Export the 3D model in the desired format - most often STL and WRL files are accepted for printing on a 3D printer - to scan colors when printing with multi-color plaster, a .jpg or .png file with a texture must be attached to the WRL file.
-
Check that the 3D model file does not exceed the allowed size.
 For online download of 3D models, we accept files no larger than 50 MB (files larger than 50 MB are accepted by mail). nine0003
 -
Make sure your model meets the minimum and maximum dimensions required for 3D printing in the selected material. 3D printers for printing from one material or another have different size restrictions - you can find the allowable sizes on the pages of materials for 3D printing on our website.
-
As you build your model, please refer to our website for your individual material requirements for 3D printing: check wall thicknesses, bulge or engraved details, etc.
-
Make sure your 3D model is not "turned inside out". To do this, all normals must be oriented outward - this allows the 3D printer to determine the inner and outer surfaces of the model.
-
Make sure your 3D model doesn't have holes in the mesh.
 Remember the basic modeling requirement for 3D printing is that the model must be “waterproof”, i.e. have a closed polygon mesh. nine0003
 -
Check that in the 3D model:
no overlapping polygons ,
each polygon has a given thickness (no polygons with zero thickness),
internal polygons are missing (no faces inside the model, e.g. inside walls),
each edge has no more than two adjacent faces (polygons),
there are no matching edges - edges created in the same place are merged into one common edge. nine0003
If you have checked the 3D model and marked done in every step, feel free to upload the file to our online form to check the model and calculate the cost of 3D printing from a particular material. If, after uploading, it turned out that you missed something and there are errors in the 3D model, for a simple and quick “treatment” of the model, we recommend using the Netfabb program, which fixes more than 95% of the most common modeling errors for 3D printing.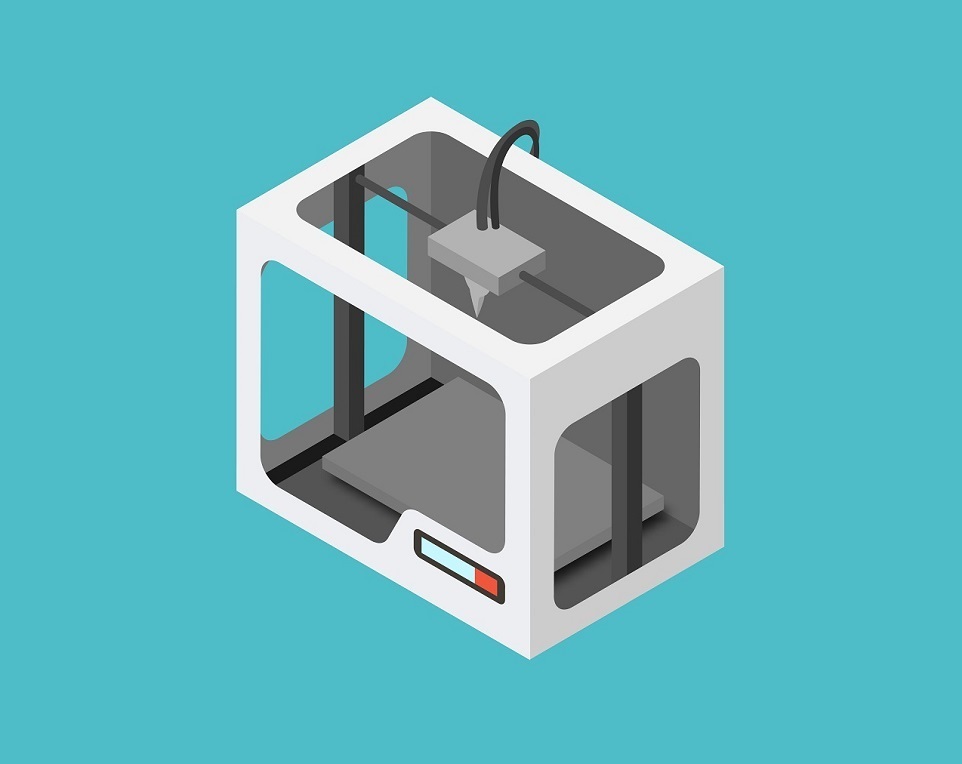 Or you can always send the model to us by mail, and we will definitely help you figure it out and finalize the model. nine0003
FDM 3D printing guide for beginners. Understanding Basic Terms
Getting started with 3D printers doesn't have to be intimidating. We have created this simple 3D printing guide for beginners to help all beginners understand the basic terms.
3D printing is a very general term. The media, especially mainstream marketing, portray 3D printing as the magical technology of the future, capable of reproducing complex objects. nine0003
But this approach makes it difficult to understand what 3D printing is from a technical point of view.
In reality, there are many different 3D printing technologies, but the most common for beginners is layer-by-layer modeling (FDM or FFF), which is the focus of this article.
Ender 3 V2 is one of the most popular hobbyist 3D printers.
FDM prints parts using thermoplastic, which is basically a filament of material that can melt, cool, and solidify. Details are built by stacking layers on top of each other. nine0003
This technology was created because people needed a way to quickly prototype parts. Even today, rapid prototyping is one of the biggest advantages of FDM and 3D printing in general. Not surprisingly, 3D printing is also gradually becoming a powerful manufacturing solution.
Before we get into the details of how FDM works, there is one more thing worth mentioning. If you have done some research on FDM, you may have noticed that some sources use the term "FFF" instead of FDM when referring to the technology. This is because FDM is a term originally patented by Stratasys and FFF is a non-proprietary generic abbreviation. Remember, this is the same technology, only the names are different. Today, most people use the term FDM. nine0003
FDM 3D printing. How it works?
- 3D printer control interface
- 3D printing plastic (filament)
- Extruder
- Hotend (hot end)
- Fan (cooler)
- Print platform (table)
- 3D printing
The easiest way to understand how FDM works is to study the details of an FDM 3D printer.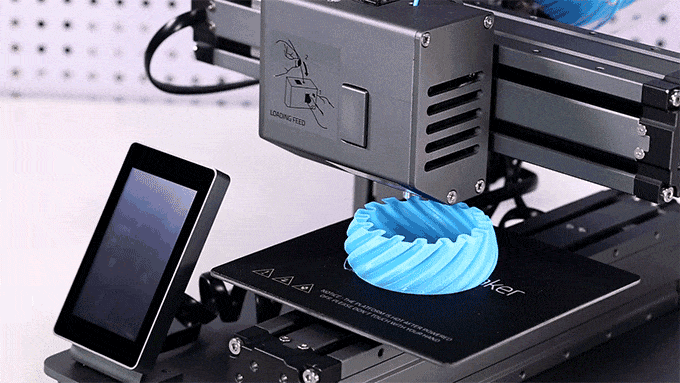 However, before we get into the specifics, it's worth mentioning that most 3D printers can move in three axes: X, Y, and Z. The X and Y axes are responsible for moving left, right, forward, and backward, while the Z is responsible for vertical movement. nine0003
Now let's look at the main components of a 3D printer:
Control interface : Some modern 3D printers have a touch screen that is used to control the 3D printer. On older printers, a simple LCD with physical scrolling and a click wheel may be present instead of a touch interface. Depending on the model, an SD card slot and a USB port may also be present.
Print Bed : The bed or table of a 3D printer is essentially the surface on which parts are made. Platforms are most often made with heating to improve the adhesion of the part, but more on that later. nine0003
Extruder(s) : The extruder is the component responsible for melting and progressively depositing the plastic filament to build the model.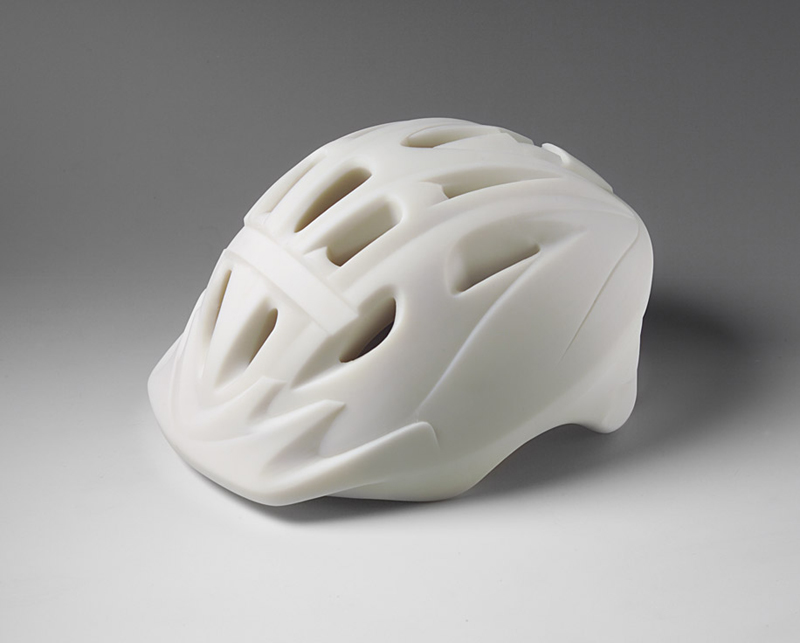
The extruder actually consists of two subcomponents: hot and cold. The hot end or hot end of the contains a heater and nozzle that actually melts the filament, while the cold end consists of a motor, drive gears and other small components that push the filament into the hot end to melt. nine0003
There is a heatsink and a fan between the hot and cold ends because it is necessary that the cold end stays cold to avoid jamming.
In addition to the heatsink fan, there is usually at least one other fan designed to cool the molten filament after it exits the extruder - this is commonly referred to as the parts cooling fan.
Print head : one or more extruders are installed on the print head (standard 3D printers have one extruder). At the top of the print head is a tube that feeds filament into the print head. nine0003
How a 3D printer prints.
The process starts when you send the 3D model file to the printer.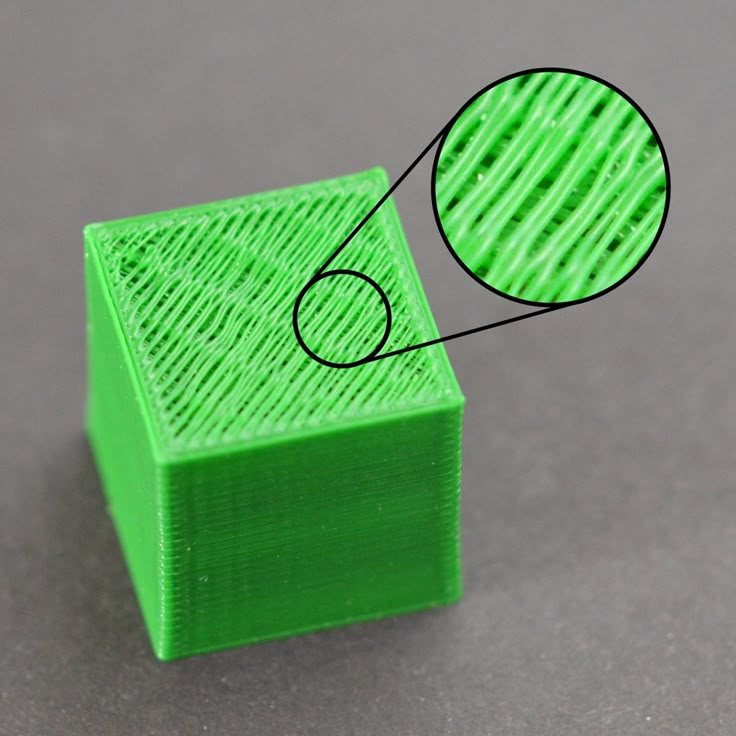 After starting a print job, the nozzle starts to heat up. When the nozzle reaches the temperature required to melt the filament, the extruder draws the filament into the hot end in preparation for deposition modeling.
The printer is now ready to 3D print the part. The print head descends onto the build surface (platform) and begins to fuse the filament, which cools and solidifies shortly after exiting the nozzle thanks to the part cooling fans. nine0003
Plastic is applied one layer at a time, and after one layer is completed, the printhead moves up the Z-axis a short distance and the process is repeated until the part is completed.
Create, download and purchase 3D models.
Naturally, if you want to 3D print a part, you must have a 3D model of that part. 3D models are created using 3D modeling software commonly referred to as CAD (computer-aided design) software. Here are some examples of popular 3D modeling software:
- Autodesk's Fusion 360 (free for non-commercial use)
- Blender (free of charge)
- ZBrush (paid, but free trial available)
However, most newcomers to 3D printing do not have the skills required to use such software. If so, don't worry because there are other solutions.
First, there are simpler CAD software options like Tinkercad, a program that almost anyone can use without any prior experience. This is an online application developed by Autodesk, one of the leading developers of CAD software. nine0003
File downloads
With so many people having access to 3D printers in recent years, several sites have become repositories for 3D models.
Some of the most popular are:
- Thingiverse (free)
- MyMiniFactory (many free, some paid)
- Cults3D (free and paid)
- CGTrader (some free and most paid)
- PrusaPrinters (all free)
So anyone can get their hands on a model without any modeling skills.
Model preparation.
3D models must be prepared for 3D printing using special software that translates the model into machine instructions. This is done using slicing software, also called a slicer. 3D models are imported into a slicer, which then actually "cuts" the model into layers. The resulting files consist of a G-code, which is essentially a long list of instructions that a 3D printer follows to build a model. nine0003
G-code is the "language" of 3D printers and CNC machines. These files contain important parameters needed to create a model, such as print speed and temperature, wall thickness, infill percentage, layer height, and many others. In other words, 3D printing is impossible without G-code files!
Supports (support structures)
Another of the main functions of the slicer is the generation of support structures (supports). In particular, supports are needed for parts with attachments.
9The 0002 Slicer allows you to choose where to place the supports and how tight you want them to be. Some slicers even offer users the ability to select different types of support structures for easier removal or strength.Printer preparation.
Before you start printing on a 3D printer, there are a few mandatory steps to take:
Plastic loading: The extruder must be ready to extrude the filament before printing begins. The loading process begins with heating the hot end to the melt temperature, and then the filament is directly loaded into the heated extruder. nine0003
Platform Leveling: In order for the printer to successfully print an object, the table must be as level as possible.
Depending on the printer, platform calibration can be performed manually, semi-automatically or automatically.
Platform leveling is very important because, for example, if the nozzle is too far from the table, the first and most important layer will not adhere to the surface, resulting in you not being able to print your object.
Materials for FDM 3D printing. nine0103
As we already mentioned, FDM 3D printers use spools of plastic as part material. Filament is basically a thermoplastic specifically designed to melt and cool while maintaining its structural integrity.
3D printing filaments usually come in two diameters: 1.75mm and 3mm (or 2.85mm). Most 3D printers use 1.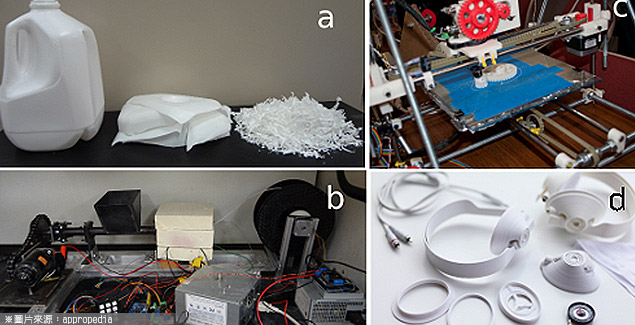 75 diameter plastic, which is why the variety of types and shades of 1.75 filament significantly exceeds 2.85. nine0003
We recommend that before you buy a 3D printer, be sure to clarify which filament it works with.
Converting the extruder from 2.85 to 1.75 is possible, but requires fiddling, time and additional accessories.
One of the best things about FDM 3D printers is that they can handle a wide range of plastics.
Here are just a few of the different types that are used in FDM 3D printing:
Standard:
- PLA
- ABS
- PETG
Engineering:
- Flexible (TPU, TPE)
- Nylon
- With additives (wood, metal, etc.)
- Polycarbonate (PC)
For supports:
- HIPS
- PVA
Among other things, FDM filament is one of the cheapest materials used in the world of 3D printing.
Post-processing of printed products.
Post-processing is the final steps you must take to complete your object. nine0003
Below we have listed some of the post-processing steps for a 3D printed part. You don't necessarily need to complete each of these steps.
Most often, post-processing is completed at the stage of removal of supports.
Support Removal : After printing, the support structures are mechanically removed by simply breaking them off. As a result, you can see marks left on the surface of the part.
If you have bought a 3D printer with two extruders, you can use special soluble plastics to print supports. In this case, you just need to place the object in water if you printed with PLA+PVA or in limonene if you printed with ABS+HIPS. nine0003
Sanding : Your part may have imperfections (for example, after removing supports). In this case, grinding comes into play. Light sanding of 3D printed parts can make the surface smoother.
Coloring : You will often print in one color. To add more colors, details or protection, you can paint your model!
Polishing or smoothing : Epoxy is one way to smooth the surface of a printed part. For ABS, an acetone steam bath is often used. Under the influence of acetone vapors, ABS begins to dissolve and, if this process is stopped in time, you will get a smooth and glossy part. nine0003
Gluing : If you want to print a large 3D model that won't fit in your printer's build chamber, you can print the part in two or more parts and then glue them together.
Common 3D printer problems.
Let's discuss some of the most common problems beginners may encounter when using a 3D printer.
Warp : This problem occurs due to temperature differences during the 3D printing process. 3D Print Delamination - 5 Tips and Tricks to Avoid Delamination. nine0003
Plastic bleed (snot) : Thin extra filaments of plastic on your model may be caused by incorrect temperature or retraction settings. Some types of plastic, such as PETG, are more prone to free flow from the nozzle.
Nozzle Clog : Nozzle clogging is one of the most annoying problems of FDM 3D printers.