How to get started with 3d printing
How to Get Started with 3D Printing
- Author
- Recent Posts
Martin
Martin has a M.Sc. in physics and has gained many years of experience in industry as a lab manager and quality assurance manager. He has now tested dozens of 3D printers and is happy to share the collected experience with each new article.
Latest posts by Martin (see all)
Disclosure: Links marked with * are Affiliate Links. I earn from qualifying purchases if you decide to make a purchase through these links – at no additional cost for you!
3D printing is a very popular creative and technical hobby. The ability to create objects of any complexity and geometry at home is inspiring and also very practical.
In this detailed guide, you will learn everything you need to know to get started with 3D printing. For topics that are beyond the scope of this article, helpful links to related articles and tutorials are included.
There are mainly two technologies used for 3D printing in the hobby sector: Filament 3D Printing (FDM) and resin 3D Printing (SLA/DLP/LCD). Since these two processes are very different, this article is divided into two parts for each type. Since filament 3D printers are more popular, they will be first.
Table of Contents:
- 1 Key Takeaways
- 2 Filament 3D Printing
- 2.1 FDM – How It Works
- 2.2 Structure of a FDM 3D Printer
- 2.3 Materials – Filament Types
- 2.4 Creating or Downloading 3D Models
- 2.5 Preparing 3D Models – FDM Slicer
- 2.6 Preparing the Printer – FDM
- 2.7 Post-Processing – FDM
- 2.8 Common Problems – FDM
- 3 Resin 3D Printing
- 3.1 SLA/DLP/LCD – How It Works
- 3.2 Structure of a Resin 3D Printer
- 3.3 Materials – Resin Types
- 3.4 Preparing 3D Models – Resin 3D Printing Slicer
- 3.5 Preparing the Printer – Resin 3D Printing
- 3.6 Post-Processing – Resin 3D Printing
- 3.7 Common Problems – Resin 3D Printing
Key Takeaways
Here are the most important links and recommendations to get started with 3D printing:
- Print files (3D models): Thingiverse, Cults3D, MyMiniFactory
- Slicer (for preparing the 3D models):
- For filament 3D printers: Cura, Simplify3D, PrusaSlicer
- For resin 3D Printer: ChiTuBox
- Best filament 3D printer for beginners:
- Creality Ender 3 S1
- More affordable, but fewer features: Ender 3 V2
- Best resin 3D printer for beginners:
- Elegoo Mars 3
- More expensive, but best print quality: Phrozen Sonic Mini 8K
Filament 3D Printing
FDM – How It Works
Fused Deposition Modeling (FDM) , sometimes called FFF (Fused Filament Fabrication), is by far the most common technology for hobby 3D printing.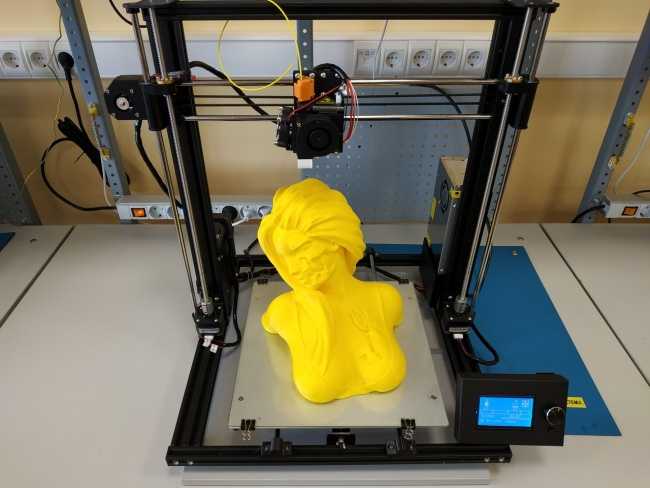
Here, a thin strand of thermoplastic is melted and applied in thin layers on top of each other through a fine nozzle. The strand of plastic is called a filament.
The liquid filament is therefore applied to the print bed line by line and layer by layer through the nozzle. There it solidifies and after several hundred layers a three-dimensional object is created.
Filament 3D Printing Advantages & Disadvantages:
PRO:
- Inexpensive
- Fast
- Easy entry
- Hardly any post-processing
CON:
- Quality often insufficient for the smallest details
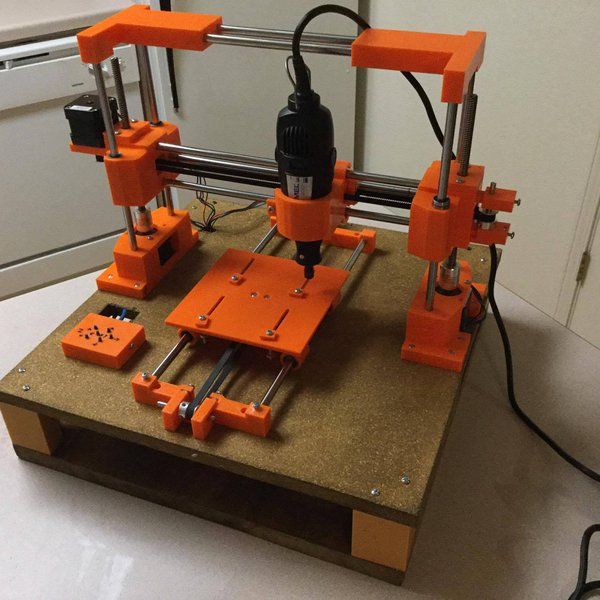
Structure of a FDM 3D Printer
The structure of filament 3D printers is always the same in principle. The nozzle is located in the print head, which is controlled via stepper motors. Often, the print bed on which the object is printed is also movable and is controlled via additional stepper motors so that the print head can reach all positions in the three-dimensional print volume.
The three dimensions are described by the X, Y and Z axes. The Z-axis controls movements from bottom to top, while the X- and Y-axes control horizontal movements, i.e. from left to right and from back to front.
These are the main components of a FDM 3D printer:
- Print head: The print head contains the so-called hot end in which the filament is melted and extruded through the nozzle. The print head usually moves on two axes: X- and Y-axis or X- and Z-axis.
- Extruder: The extruder pushes the filament to the nozzle. It either sits on the X-axis and pushes the filament through a plastic tube to the nozzle (Bowden extruder), or the extruder sits directly in the print head and only has to push the filament a few millimeters to the nozzle (direct drive extruder).
- Print bed: The print bed is the surface on which the printed object is created. The nozzle is located only fractions of a millimeter above the print bed during printing and applies the molten filament to the print bed or to already printed filament layers.
In most cases, the print bed is also heated, although the temperature is far below the melting temperature of the filament in question. This increases the print bed adhesion so that the filament and the 3D object cannot slip during printing. - Stepper motors: The moving axes of the 3D printer are moved by small stepper motors. These motors move the print bed and print head in small steps in the desired direction. These steps are so small and are moved so quickly one after the other that they look like a fluid movement.
- Operation: All 3D printers have a screen for operation – usually an LCD screen or touchscreen. Via this screen you can adjust the settings, start, pause or cancel the print.
 The print files that you have prepared on your PC are transferred via USB or an SD or micro SD card.
Best filament 3D printer for beginners: Ender 3 S1 (detailed review)
Materials – Filament Types
Eryone PLA FilamentFlexible TPUFDM 3D printers process thermoplastic material in a wide variety of variations, colors and properties. This material is called filament and comes in diameters of 1.75 mm and 2.85 mm.
The filament is delivered on small, tightly rolled spools and hung on a filament holder on the 3D printer. The extruder unwinds the filament and pushes it to the hot end where it is melted.
By far the most popular filament is PLA (polylactic acid). It is inexpensive, easy to process, environmentally friendly and offers sufficiently good mechanical stability for the finished printed objects. Ideal for the beginning!
Here’s a list of the main filament types you can learn more about in this detailed filament guide:
- Standard:
- PLA
- ABS
- PETG
- Special filaments:
- Flexible: TPU, TPE*
- Blends: Wood Filament*, Metal Filament*
- Technical: Nylon*, PC*
- For support structures with a dual extruder: HIPS*, PVA*.

Each of these filaments has special properties and is easier or harder to process than others. Some of these filaments, such as ABS, require stable and higher ambient temperatures than other filaments. Such filaments can only be printed with 3D printers with closed enclosure.
The filament PLA is especially interesting for beginners because it is easy to process and every FDM 3D printer can process this filament.
For each of these filaments, proper storage is important. The following environmental influences have a negative effect on the filament:
- Humidity: Filaments absorb moisture from the environment. This moisture escapes abruptly during heating and can lead to various printing errors.
- Sunlight: UV radiation causes the filament to become brittle. The broken filament in the extruder or before the hot end can be very frustrating.
- Dust: Foreign objects on the filament will cause inaccuracies in the finished model.
 Dust particles, lint or other foreign objects create bubbles, holes or other defects that look ugly on the surface.
For these three reasons, the filament must be stored dust-proof, dry and in the dark. Airtight filament boxes* are ideal for this.
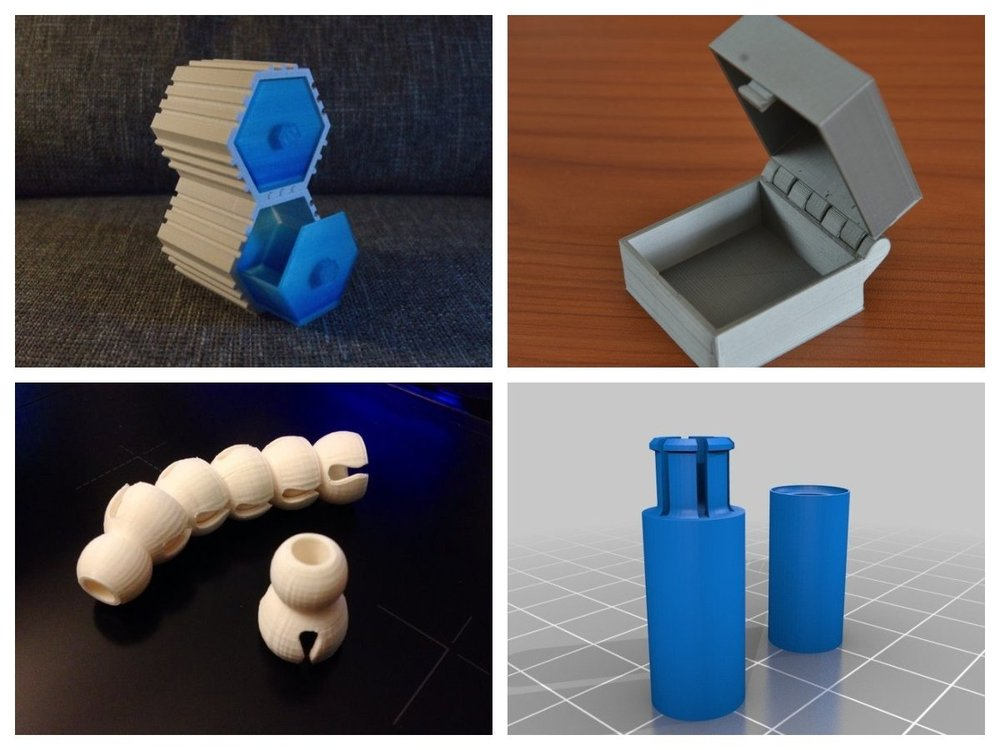
Creating or Downloading 3D Models
Tinkercad: Creating or Editing 3D Models OnlineThe object you want to print on your 3D printer can either be designed by yourself or you can download files that the 3D printer community has created or offers for sale.
If you want to design the object yourself, there are various options. For simple objects and for the beginning there are free and easy-to-use programs. I have often created objects with the online program Tinkercad. If you want to get a bit more professional, Autodesk Fusion 360 is very popular.
However, most buyers of 3D printers mainly print ready-made objects from the Internet. These are either available for free download on the Internet or as purchasable files.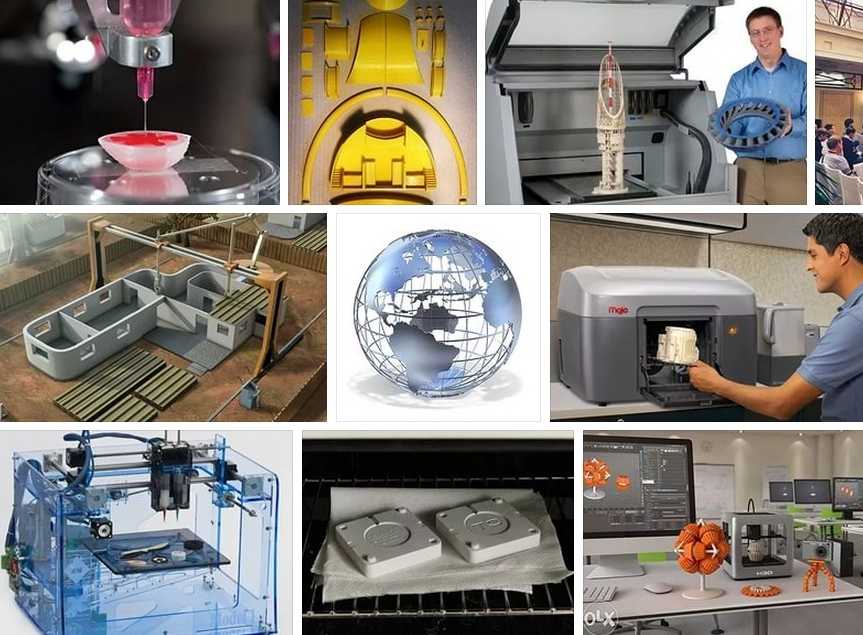 The latter are usually characterized by the fact that they have been created by an artist and have high accuracy. Especially with resin 3D printers, most print files for highly detailed objects cost a few bucks.
These are the most popular websites for 3D models:
- Thingiverse
- Cults3D
- MyMiniFactory
- CGTrader
If you can’t create complex objects digitally, most of your objects will come from these portals. I myself only design mechanical parts that I need in the household.
Besides decorative objects, cosplay models, practical designs for the household or minifigures, you can also find models on the portals with which you can calibrate your 3D printer. There are also large communities for popular low-budget 3D printers that share self-printable upgrades. A good example of this is the Ender 3 V2.
Preparing 3D Models – FDM Slicer
Cura makes preparing 3D models easy and fast.Once you have the 3D model, you need to prepare it for the 3D printer before you can print it. The software you use for this is called a slicer because it slices the 3D model into individual layers.
In principle, the slicer calculates how each component of the 3D printer should behave during printing based on the settings. In the end, it spits out the corresponding G-code (the instructions of the slicer in the 3D printer programming language) at the push of a button.
This may sound a bit complicated, but it’s not. Most slicers come with pre-made profiles for many of the most popular 3D printers. With these profiles, all you have to do is open the file, select your desired layer thickness, slice the object, and save the file.
These are the most popular slicers for FDM 3D printers:
- Cura
- Simplify3D
- PrusaSlicer
I myself use Cura for all my FDM 3D printers. Only for brand new 3D printer models I sometimes use the manufacturers’ own slicers, because at this time the corresponding profiles in Cura are sometimes not yet available. The operation of Cura is very beginner-friendly and there is a very good documentation and many guides on the Internet.
The most important settings in the slicer:
- Layer thickness: The layer thickness determines to a large extent how smooth the surface will be. Thick layers give less detail, fine layers give more detail. A small layer thickness for more details also has the disadvantage that printing takes longer.
- Print speed: The print speed indicates how fast the print head is allowed to move. The faster the print speed, the shorter the 3D printing time. However, the accuracy also decreases, since the high speeds can cause vibrations and inaccuracies in the positioning.
- Supports: 3D printers cannot print in the air.
 In order to print a new layer, a surface is required. If your 3D object has large overhangs or bridge-like areas, you need so-called supports to support these free-swinging areas.
 - Infill: It makes very little sense to print an object as a solid part. Most objects printed by FDM 3D printers are decorative, but even mechanical parts do not have to be completely solid. The infill density describes the percentage of filament inside the object. With an infill density of 20%, 80% of the interior consists of air. This infill can be printed in different patterns, which have different properties.
There are countless other settings you can use to perfect your printing results. If you get stuck, you may find a solution in the “Slicer Tutorials” category on this website.
Preparing the Printer – FDM
Before you can start printing the file, you need to do two things: leveling the print bed and loading the filament.
Print bed leveling: The print bed must be parallel to the movements of the print head on the XY plane. Otherwise, the filament cannot adhere well and the nozzle may drag across the print bed. Most beginner 3D printers need to be leveled manually, some already have a sensor built-in for automatic print bed leveling.
The best filament 3D printer in its price range, the Ender 3 S1 has a CR-Touch built-in, which allows it to automatically level the print bed. The cheaper predecessor Ender 3 V2 has no such sensor, but can be upgraded with a BL-Touch or CR-Touch.
Learn more in this guide: 3D Printer Bed Leveling | Manual & Automatic
Loading the filament: The filament must be ready for the 3D printer to start printing directly. To do this, hang the spool with the filament on the appropriate filament holder, heat the hot end to the appropriate temperature (e.g. 200 °C for PLA) and thread the filament through the extruder. You can then either push the filament through the extruder manually or let the extruder push the filament all the way to the Nozzle. Once the melted filament comes out of the nozzle, the printer is ready to start.
Once you have done these two steps 2-3 times, it will only take you a few minutes. The print bed leveling does not have to be done before every print. Only if you discover print errors or have not leveled the print bed for a very long time should you re-level it.
Post-Processing – FDM
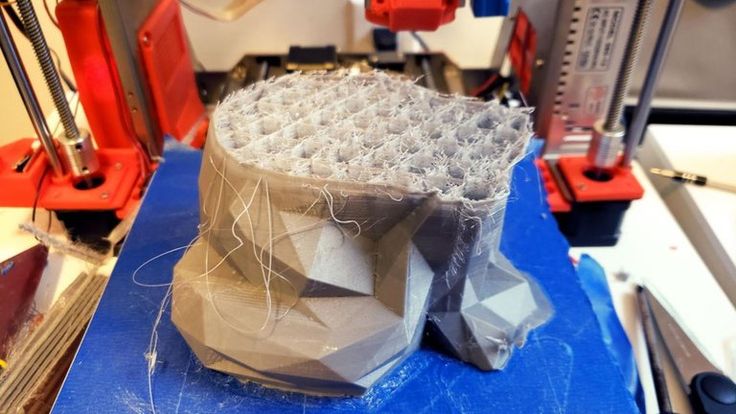
The extent of post-processing on a filament 3D print ranges a lot, depending on what kind of result you’re going for. No matter how small the layer thickness is set, you will see the characteristic staircases in certain areas of the object. Also, there may be some residue from support material or print bed adhesion aids (Rafts or Brims) that you need to remove.
Unless it’s a complex decorative object or cosplay piece, post-processing is usually limited to light measures with a side cutter or file. Here is a small list of options you have when post-processing:
- Removing support structures: Supports touch the printed object in several places and must be removed carefully afterwards.
 Sometimes small residues remain at the joints afterwards.
 - Side cutter & sanding: Excess residue on the surface of the object can be easily removed with a side cutter or sandpaper.
- Smoothing with a coating: If you want to have a completely smooth object, there are several ways you can apply a coating to the object. These include certain fillers, varnishes and resins.
- Gluing: Depending on the filament you have used, there are different types of glue that you can use to join two printed parts together. Sometimes you want to print a larger object than the print volume allows. Then gluing might be the right method.
- Painting: Although there are printers that can print with different filaments at the same time, such as the Sovol SV 04, they are also limited to only two colors. Painting the finished object opens up many new creative possibilities.
- Varnishing: Objects that are often touched or left in the sun can be protected from wear and discoloration with certain paints.
In this article you will learn all about smoothing and finishing 3D prints: How to Smooth 3D Prints: SLA Resin, PLA, ABS, PETG, etc.
Common Problems – FDM
A wide variety of printing errors can occur during FDM 3D printing. These range from small defects on the surface to catastrophic misprints. However, there are one or more simple solutions for each printing error.
- Stringing: Unfavorable combinations of filament, temperature and settings such as retraction can result in fine hairs on the model. This is caused by excess material sticking between the nozzle and the object when the nozzle moves without extrusion.
- Warping: If the first layers of the object do not adhere properly to the print bed, parts of the object may warp. Some filaments also contract so much during solidification or cooling that the object can be destroyed or cracked in the process. Such filaments, like ABS, need stable and warmer ambient conditions during printing.

- Over-extrusion: If too much filament is extruded, this is called over-extrusion. Then the lines become thicker than intended, which can lead to various printing errors.
- Under-extrusion: If too little filament is extruded, under-extrusion will occur which can result in gaps and cracks on the object.
- Clogged nozzle: Under certain circumstances, the nozzle can become clogged. This problem is most common with poor quality filaments or filaments with additives such as wood fibers. However, the clogged nozzle can be cleaned using various methods.
But don’t let this list scare you: all of these printing errors are rare and easy to fix. With good calibration of your 3D printer and the use of proven profiles in the slicer, you will have few problems.
Resin 3D Printing
SLA/DLP/LCD – How It Works
Resin 3D printers use a completely different principle than FDM 3D printers. They do not use a filament, which they apply in individual lines and layers, but liquid resin.
This synthetic resin is cured layer by layer with a specific UV radiation. Thus, the end result is an object made of hardened synthetic resin instead of thermoplastics.
The big advantage of resin 3D printers is the high accuracy. There are now resin 3D printers like the Phrozen Sonic Mini 8K with an accuracy of only 22 microns! The resulting objects look like injection molded parts without the steps typical in 3D printing. This makes resin 3D printers particularly suitable for users who rely on the finest details (e.g. for printing and painting miniatures).
Full Guide: How Does a Resin 3D Printer Work? SLA/DLP/LCD Explained
Resin 3D Printing Advantages & Disadvantages:
PRO:
- Very high accuracy (similar to injection molded parts)
CON:
- Messy handling
- A lot of post-processing (washing and curing after printing)
- Harmful vapors
- Harmful to the environment if handled incorrectly
Structure of a Resin 3D Printer
Red = UV & Dust BlockerLCD ScreenResin Vat, Print Bed, Z-AxisThe setup of resin 3D printers is very different from the setup of filament 3D printers. In a Resin 3D printer, the layers are printed all at once and not line by line.
The liquid synthetic resin is contained in a container with a transparent film as the bottom. Through this film, very strong UV light is focused onto the resin in a controlled manner via a high-resolution LCD screen. The pixel size ranges from 22 to 60 micrometers (depending on the model).
The UV radiation causes the resin to cure. The print bed, which is located at the bottom of the resin container directly above the film, moves up a few micrometers after each layer so that the next layer can be cured on the already cured layer. The object is therefore printed upside down, layer by layer.
Best Resin 3D printer for beginners: Elegoo Mars 3 (detailed review)
Materials – Resin Types
Resin 3D printing is not printed with filament but with resin. Here there is also a wide variety of materials to influence the appearance and mechanical properties of the finished object.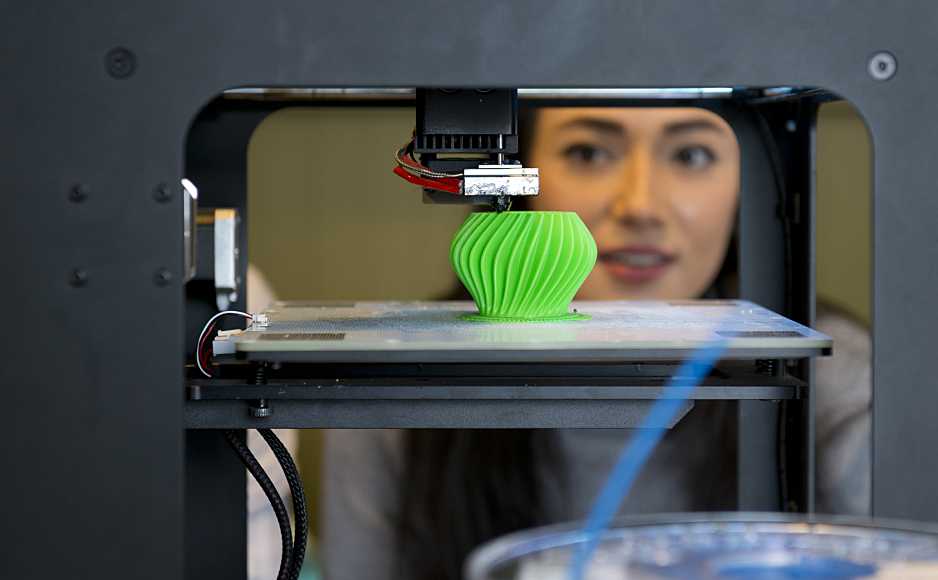
Here is a list of the main resin types:
- Standard Resin: These resins are usually the cheapest and can be used by most resin 3D printers. These standard resins have only medium mechanical strength and are quite brittle when cured. They are best suited for decorative objects.
- Transparent Resin: Transparent resins are more difficult to cure, but offer interesting optical effects.
- Flexible Resin: Flexible resin is used in the technical field for components that need to be flexible.
- Plant-based Resin: Here, aggressive chemicals are avoided to make the resin more compatible with health and the environment. The two main disadvantages are higher cost and longer curing times. I mainly use plant-based resins.
- ABS-like Resin: For technical applications, objects must have higher mechanical stability. These resins have higher hardness and elasticity than standard resins.

- Water-soluble Resin: Normal resins must be washed with isopropyl alcohol. The water-soluble resins can also be dissolved with water.
Preparing 3D Models – Resin 3D Printing Slicer
ChiTuBox is Perfect for Resin 3D PrintingSlicers for resin 3D printers are very different from slicers for FDM 3D printers. In a slicer like Cura for filament 3D printers, the object is sliced into individual layers and lines with specific instructions for the extruder. Such slicers cannot be used for resin 3D printers.
My favorite slicer for resin 3D printers is ChiTuBox. The slicer is compatible with most resin 3D printers, is very easy to use and is free in its basic version.
Here are the main functions of an resin 3D printing slicer:
- Adjusting the exposure: The advantage of resin 3D printing is that there aren’t quite as many settings as with FDM 3D printing. With resin printing, the main settings you have to worry about are exposure times, edge smoothing and speeds.
 The exposure time depends on the resin used.
 - Hollow out and punch the object: It only makes sense to solid print an resin 3D print in very rare cases. This would use too much resin and the object would become very heavy. Therefore, the slicer gives you the option to hollow out the object and punch a hole through which you can drain the excess resin inside after printing.
- Generating supports: Most slicers for resin 3D printers have the function to generate support structures automatically. Thin struts are then printed on overhanging parts. However, there are also many models with prefabricated supports. I myself favor such models, because the artist has already thought about how as little detail as possible can be lost when setting the supports.
Preparing the Printer – Resin 3D Printing
After you have finished editing the print file and saved it, you only have to prepare the 3D printer for printing. Similar to the FDM 3D printer, you have to first level the print bed and then prepare the material (the resin).
- Print bed leveling: Print bed leveling is much easier with resin 3D printers than with FDM 3D printers. Modern models support you so much that the leveling is done within a few minutes.
Most of the time, leveling just consists of placing a piece of paper between the LCD screen and the print bed, moving the loose print bed to the zero position, and then locking it in place. This causes the print bed to automatically adjust the tilt of the LCD screen.
You may also need to repeat the print bed leveling after several prints or if you notice print errors. - Fill in the resin: Each resin 3D printer has a vat in which the resin for printing is provided. Here you only need to pour the resin up to the maximum fill line. For very large objects, some 3D printers may require you to add resin during printing.
Please remember that resin is toxic! You must handle it as you would a dangerous chemical. Personal protective equipment such as FFP2 masks, disposable gloves and safety goggles are important to protect you from the resin.
It is also important to keep the room where the 3D printer is located well ventilated and to properly dispose of any resin residue. If you want to know more about this, you can have a look at this article: 3D Printer Resin Disposal | Step by Step
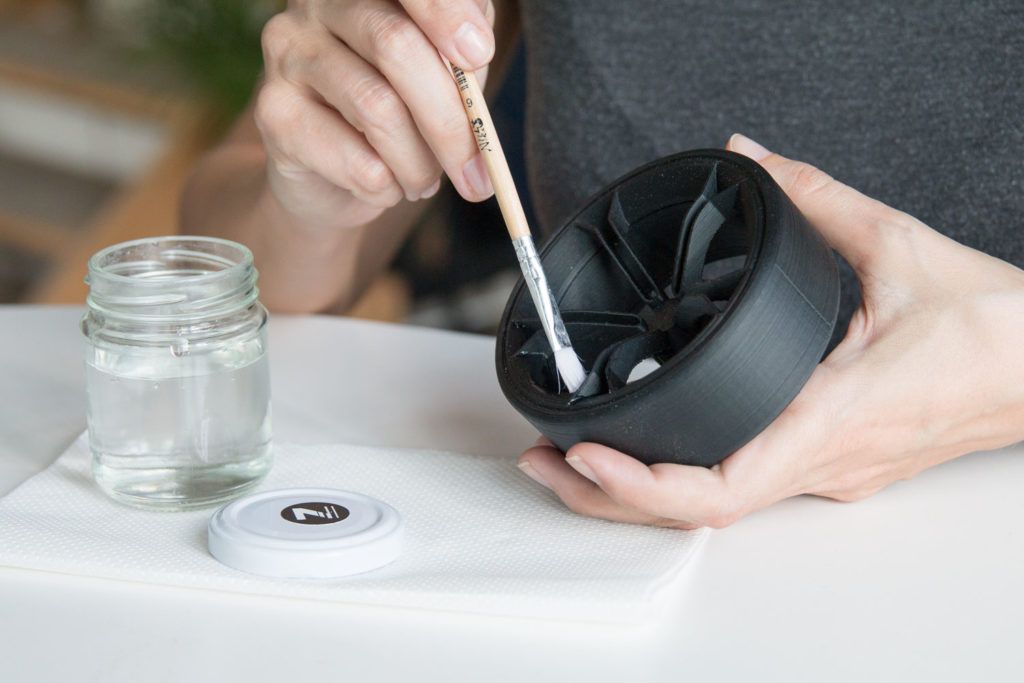
Post-Processing – Resin 3D Printing
Post-processing is divided into two required and one optional step:
- Washing the model: After printing, the object is still wetted by a thin layer of resin. You must wash this off with the appropriate solvent. For normal resins this is isopropyl alcohol, for water-soluble resins you can do this with water.
- Curing the model: The UV light of the 3D printer has already cured the resin. However, it is not completely cured and can still be deformed with hard objects. Therefore, you still need to place the washed object under a UV lamp to let it cure completely.
For washing and curing there are also devices that do the work for you. In this article we compare two of the most popular of these devices.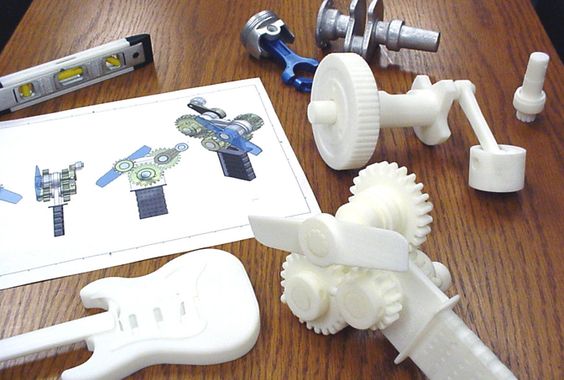
- Further surface processing (optional): With modern resin 3D printers (such as the Mars 3), the finished surface is comparable to an injection molded part. Of course, this depends on the layer thickness you used and whether you enabled anti-aliasing (edge smoothing) in the settings.
If there are still steps, you can grind them or carefully fill them with putty.
Common Problems – Resin 3D Printing
As with FDM 3D printing, problems can arise during printing with resin 3D printing. Here, too, the spectrum ranges from slight defects on the surface to completely ruined prints.
Here is a list of the most common printing errors in resin 3D printing:
- Support residues on the surface: Sometimes the attachment points of support structures may remain visible on the finished object. Since resin is brittle, small areas may flake off when the supports are removed, leaving small holes. You can either fill these holes afterward or place the supports so that they are not noticeable on the finished object.
Such defects can be avoided by a thinner connection of the supports to the object or better removal of the support.
Pro Tip: After printing, immerse the washed-off object in almost boiling water (> 90 °C) for 1 minute. The resin will then soften to such an extent that the supports can be removed without defects (does not apply to water-soluble resins). - Object does not adhere to the print bed but to the FEP film: I have often experienced this problem myself. Some resins adhere better to the FEP film than to the print bed. To avoid this error, I now use 1-2 drops of PTFE lubricant* with every print to make the FEP film less adhesive before printing.
- Supports are not printed correctly: If the support structures are too thin, the currents in the resin may cause them to bend or break during printing. Then they cannot fulfill their supporting function and the print can fail.
Disclosure: This website is the property of Martin Lütkemeyer and is operated by Martin Lütkemeyer.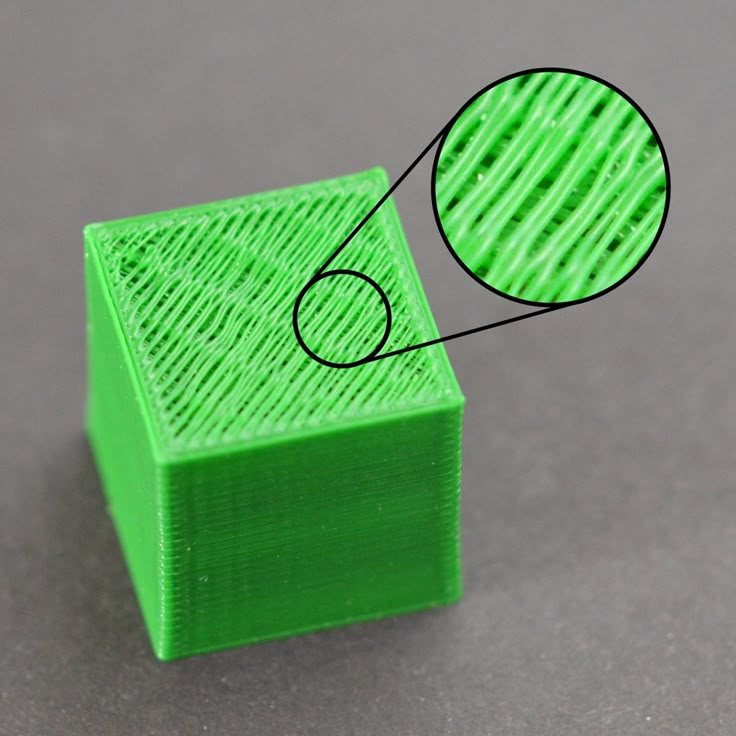 Martin Lütkemeyer is a member of the Amazon Services LLC and other Affiliate Programs. These are affiliate advertising programs designed to enable websites to earn advertising revenue through advertising and linking to Amazon.com and others. Links marked with * are affiliate links.
14 Things To Know Before Getting Started With 3D Printing – 3D Printerly
For people wanting to get started with 3D printing, I’ve put together some awesome tips that will help you in your future journey. You don’t want to be going in blind before buying a 3D printer so read on and get some important information before you get to 3D printing.
3D printing is simple, yet complicated at the same time depending on if you know the foundation of what makes a 3D printer work. Once you get to that stage, things get easier and your horizons for what you can produce only expands.
It’s a really exciting time so without further delay let’s get into it!
1. Buying Expensive Doesn’t Always Mean BetterThe first thing you should do with 3D printing is to make sure you know what a good one looks like.
People usually think cheaper things don’t get the job done as good as expensive things. This is true in many cases, but with 3D printers, it’s quite different.
As time goes on 3D printer manufacturers have seen massive competition, and so there’s a race to make 3D printers not only cheaper, but better quality overall.
Similar to if you had 2 restaurants in your town compared to 10 restaurants, each one will have to lower their prices while improving on quality as good as they can.
Now there are different things that make a 3D printer more expensive, such as whether it’s an FDM or SLA printer, the brand, the functions of the 3D printer and so on.
When you’re a beginner, however, the cheaper 3D printers will give you the quality you desire, plus some.
Some expensive printers don’t always do much for quality, so it’s always important to check out a few reviews and find out whether it’s worth digging deeper into your pockets for a pricier 3D printer.
I’d recommend starting out with a cheaper printer like the Ender 3, then with more experience and research, you can look into the more premium printers.
If you do want better features and you have some extra money to spend, you can always go for the upgraded Creality Ender 3 V2, a well-respected and high quality filament 3D printer.
2. PLA is the Easiest Material to HandleBy far the most common 3D printing material is your good old PLA. It’s cheap, easy to handle and has great versatility as many printers will be PLA compatible. At this moment in time, PLA is the second highest consumed bio-plastic in the world.
The cool thing about PLA is it’s made out of a renewable resource that’s biodegradable and easily produced through fermentation of starch from crops, mostly corn, wheat or sugar cane.
PLA is one of the safest 3D printing materials out there, and does not emit nearly as many particles as other materials.
It can be designed to last for weeks or years by varying composition and quality in production.
It’s a non-toxic, odorless material which is already widely used in many manufactured products. You would have to live in an odd place to not have something around you that’s made of PLA.
It’s range of applications include computers and mobile phone casings, foil, tins, cups, bottles and even medical implants.
PLA melts at a relatively low temperature which makes it easier for printing, but less useful if you want to store hot items. As PLA manufacturing develops, I can only see it becoming cheaper and better quality in the future.
OVERTURE PLA Filament is one of the most popular 3D printing filaments on Amazon, a very reputable and high quality brand.
3. You’re Better Off Getting an Auto-Levelling 3D PrinterNow to get an accurate print, you need your print bed to be levelled.
You have the choice between getting a manual levelling printer or an auto-levelling printer, which one do you choose? If you really like the DIY aspect of things and learning the ins and outs, then manual levelling is a cool challenge to get things right.
If you’d rather focus on the main 3D printing process, then getting yourself an auto-levelling printer is the better choice.
An auto-levelling printer will generally have a switch or proximity sensor near the tip of the print head and will move around the print bed to measure distance away.
If you did decide to get a manual 3D printer because of certain functions or designs, you can still get an auto-levelling sensor attachment to give you the same results. These can be quite pricey so keep this in mind before getting a manual levelling printer.
Many problems with prints do come from print beds not being level resulting in clogging, scratch marks on prints and first layers being uneven leading to poor adhesion.
An example of a good auto-leveling 3D printer is the Anycubic Vyper from Amazon. It has a pretty good build plate size of 245 x 245 x 260mm, equipped with a 16-point intelligent leveling system, a silent motherboard, a PEI magnetic platform, and plenty more.
3D printer filament is a very important staple to the final product that you will create. Some filament comes better than others, and these can make a massive difference.
The great thing here is that filament is relatively cheap, especially PLA filament which is easily made in factories. 1KG of decent PLA filament will cost you around $20-$25.
Depending on how often you’re printing, the size of items you print and how successful your prints are, 1KG of PLA can last you over a month.
As you search far and wide for PLA filament, you’ll find some that have extra features. You have PLA filament out there that has a silky look to it, glow in the dark, extra strength, a very wide range of colors and so on.
These will have different price tags but, all in all, you probably won’t be spending more than $30on 1KG of it.
Cheaper filaments aren’t always bad quality, so I’d recommend having a good read of the reviews and try out what you can. Once you have the perfect filament for your printer, printing will become a lot less problem-solving and a lot more creativity.
Moving on to other printing materials such as ABS and resin, these have the same kind of idea with resin being one of the pricier materials.
This lovely ELEGOO LCD UV ABS-Like Resin will set you back around $40 so choose wisely on whether you want a PLA compatible 3D printer or an SLA, resin compatible one since filament is cheaper.
5. Learn How Your 3D Printer Comes TogetherA good rule of thumb when it comes to 3D printing is knowing its basic structure and foundation. In the long run, with the replacements and possible future upgrades to your printer, this will make a world of a difference in how you progress.
There are many videos you can watch to inform you of the structure of your specific 3D printer, so I would recommend taking out a bit of time just to get familiar with it.
3D printers do require a basic level of maintenance and upkeep, such as keeping rods lubricated and replacing worn-out nozzles.
With heavy use, a nozzle can last you 3-6 months and with casual use up to 3 years so it’s not too often you’ll have to do this in most cases.
As time goes on, the better you maintain and update your printer, the longer it will operate in an efficient fashion.
Learning these things is great in an educational aspect. Being able to put a machine of this complexity together does take some smarts and practical knowledge of engineering.
This is one of the reasons why 3D printers have made their ways into classrooms and universities, with more and more being spent on them each year.
The understanding of your 3D printer can even lead you to new passions and hobbies not just within 3D printing.
The mechanical process of 3D printing does branch into many other fields such as automotive, aviation, healthcare, architecture and many more.
Here’s an assembly video of the Ender 3 by CHEP.
6. A Good Print Bed Makes the World Of DifferenceIn the 3D printing world, things aren’t always so straightforward and hobbyists often run into issues when printing. There are many issues that can produce these problems and your printing bed could be one of them.
Having a good print bed makes a difference by giving your first print layer a solid foundation to be able to build on throughout the process. If your print moves in the middle of the print, it will definitely affect the rest of the print.
Print beds can be made out of plastic, aluminum or glass.
A low-quality print bed can cause issues such as layer adhesion, not retaining temperature, prints sticking down too hard and uneven bed levelling.
Having a high quality print bed will alleviate many of these problems in one, so this is something I’d recommend you get right before you start printing.
Glass is a popular option among 3D printer hobbyists because it tends to be easier to remove your prints after you’re done and it leaves a smooth finish on the bottom of your print.
It only needs a modest amount of heat (60°C), but do keep in mind, prints with thinner sections could be pulled off easily due to the lower adhesion. A fix for this would be to use either masking tape, or glue to help prints stick down better.
You don’t want print bed materials that stick too well because some people have reported their print beds and prints being damaged as they remove the finished product, especially when printing in ABS as it requires higher temperatures.
I’d recommend the Comgrow PEI Flexible and Magnetic Printing Surface for your printing needs.
7. You’ll Need a Set of ToolsIf only you could just buy your 3D printer, materials and get to printing without anything else! Although ideal, this won’t be the case but you won’t need anything too fancy.
The general sort of accessories you will need is:
- A spatula/palette knife – to remove prints off the bed
- Filament storage containers
- Adhesive material – masking tape, glue etc.
- Tweezers – for cleaning out nozzles and prints
These are the basic sort of tools that will definitely come in handy, but there are more advanced tools you might want to grab as you get more familiar with 3D printing.
Many of the tools you’ll need come with your 3D printer in a set, but there are many other tools that you’ll want to get afterwards.
A great set of tools you can get from Amazon is the AMX3D Pro Grade 3D Printer Tool Kit, a set that gives you the ability to remove, clean, and finish your 3D prints like the professionals do.
8. Don’t Forget About Safety!I can’t stress this enough, as fun a 3D printer can be you always want to keep safety a top priority. I’ve written about 3D printer safety in this article, it’s my first article so it isn’t the greatest but definitely has useful information about safety.
It’s easy to focus on the great prints you’re going to make, and forget about safety tips when 3D printing. Luckily, there are some tips that will really improve your safety with ease.
- Get a 3D printer enclosure if you don’t already
- Make sure your printing room is ventilated/filtered
- Be aware of fire hazards around your printer
- Your printer can get very hot, so keep out of reach of animals and children!
As long as you have safety in mind, you should be okay. 3D printer manufacturers have realized that safety is a growing concern with consumers so they have developed very good systems over time.
3D printers are considered as safe as one of your household appliances.
Problems can arise when you play around with your settings, so use default settings unless you know what you are doing and be familiar with what each setting does.
The Creality Fireproof & Dustproof Enclosure from Amazon is a great purchase to improve your 3D printing safety.
9. Don’t Be Afraid to Ask The 3D Printing Community For HelpThe 3D printing community is one of the most helpful that I’ve seen. It’s just a great collective of people who have similar goals, and love it when people succeed in their goals.
There’s a massive number of 3D printing forums out there, from Reddit to brand-specific forums that you can get help from.
A common consensus I see is several people answering questions that someone asks whether simple or quite in-depth.
3D printing, being quite an engineer focused type of field, brings about very talented people who are ready to share their skills and knowledge in the craft.
Not only do you have forums but you have many YouTube videos with people answering common questions and solving problems.
It can be a bit of a learning curve to figure certain things out, but getting the information shouldn’t be difficult at all.
Websites like Thingiverse is a staple in the 3D printing community, and has endless open source designs for people to download and even recreate if they are up to it.
10. You Won’t Get It Perfect Straight AwaySome people get their 3D printer started and print out the most beautiful, flawless designs they could imagine. Others start up their printer and things don’t exactly go to plan. This can be worrying as a beginner, but it is more common than you think.
Just like many other activities out there, once you figure a few important things out you will be able to do operate without issues.
Once you identify the issues, the fixes are usually something quite simple, such as re-levelling your print bed, or using the right temperature settings for your material.
It can take a few mistakes and low quality prints before you start getting that picture perfect quality you are after. It’s always easier to use the designs that other people have made and tested so you know it works.
When you have a decent number of prints coming in nicely, you can start to create your own designs, but this can take some time to get right. Once you’ve got your digital designs down, it opens up a world of possibilities with 3D printing.
11. You Can Print a Lot But Not Everything3D printing really does have a huge range of applications in several fields, but it can’t do everything. On the other hand, it can do a lot of things that normal manufacturing methods cannot achieve.
Check out my article on its applications in the medical field.
3D printers don’t print “things”, they simply print shapes but very detailed shapes that come together to form an object. They will take the material you’re printing with, then form it into a specific shape.
Another article I wrote which relates is about What Materials & Shapes Cannot Be 3D Printed?
The downside here being that you are limited to this single material. In more advanced cases of 3D printing, people can print with multiple materials within one printer.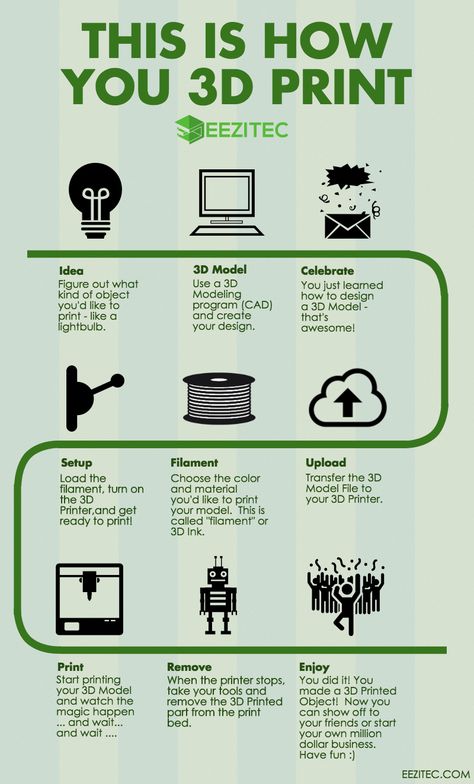
3D printing has definitely seen advancements in what kind of material that can be printed, ranging from carbon fiber, to gemstones. American Pearl is a company that has 3D printing at its forefront.
They produce a 3D printed model of jewelry, in a personalized fashion then pour metal into this design.
After it hardens, gemstones can be added by an expert jeweler based on exact specifications and some of these personalized jewelry pieces can go for $250,000.
On top of this, American Pearl can deliver such a piece in only 3 days, and at a cheaper price than competitors.
The 3D printing gun is a big advancement in showing what 3D printing is capable of. The great thing is, it’s a very open-source type industry where people can work together and improve on things that have been developed by others.
This allows for a more, in-depth scope of development in the field.
The RepRap is a well-known printer which aims to be able to 3D print a 3D printer, but at this stage it can only print out the frame or body of the printer.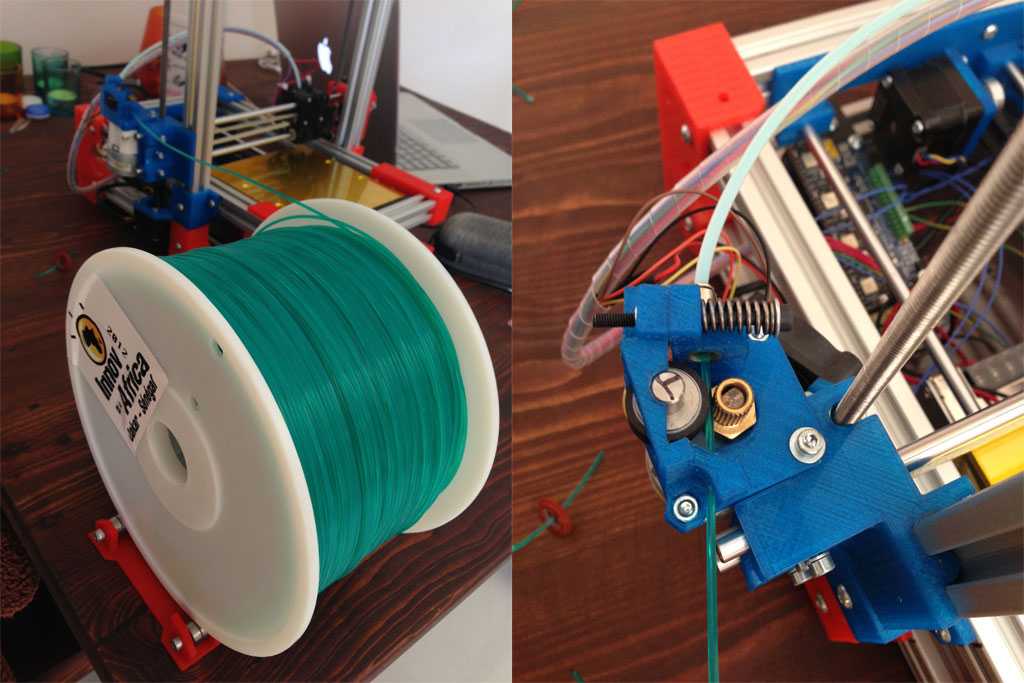 Maybe, one day we will get to this stage but at this moment it isn’t on the table.
When doing your research on 3D printers, you may have come across the fact that there are “types” of printing. The main two are Fused Deposition Modelling (FDM) and Stereo-lithography (SLA) and they are quite different.
My recommendation for what printer to go with first is definitely FDM. There is a broader choice with FDM printers and the filament printing materials are usually cheaper.
Check out my article on the comparison between Resin vs Filament 3D Printers (SLA, FDM) – Which Should I Buy?
SLA uses a liquid resin material and is done layer by layer rather than a strand of material like with FDM. It uses a curable photopolymer which hardens when a strong light is focused on it from the screen within the printer.
These can be faster to print but they are quite pricey, and higher objects do take longer to print. SLA printers are definitely getting cheaper over time, so this could be a first option in the future for hobbyists, but for now, I would stick with FDM.
FDM printer have much more versatility when it comes to printing materials, as they can be compatible with PLA, ABS, PETG, TPU, PVA, nylon and more. The availability and range of FDM printers does outclass SLA printers.
SLA does have its advantages, quality-wise it does take the cake. The ability of SLA to produce high resolution, smooth quality finish prints really does outclass your usual FDM printers.
Another article I wrote is about a comparison between the printing materials themselves Resin Vs Filament – An In-Depth 3D Printing Material Comparison.
There are more costs included with SLA printing such as part replacements for the resin tank, build platform and just the high cost of resin can really set you back over time.
Unless you are really familiar with 3D printing and have a few bucks to spend, I would avoid SLA printing.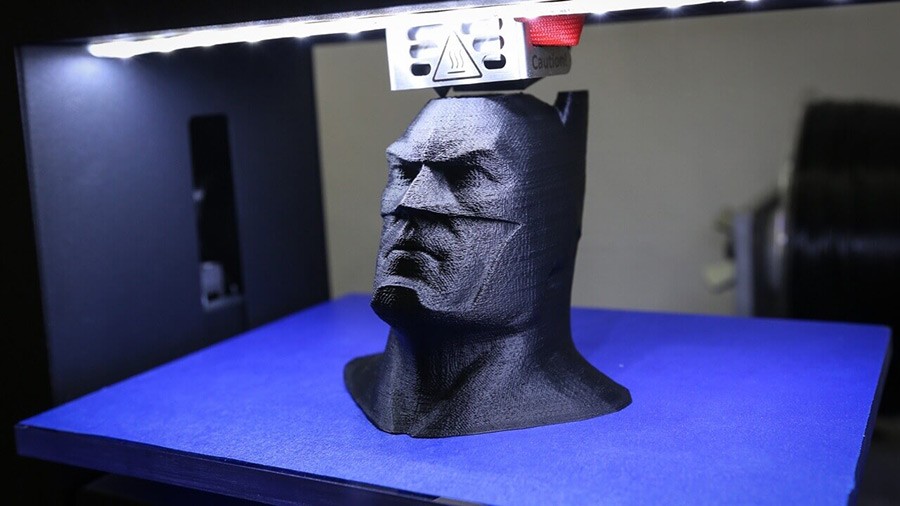 If you are really interested in getting something printed in PLA, it could be worthwhile using a 3D printing service.
There are a few steps in the process of designing what you want to print, from design in a CAD (Computer Aided Design) software to “slicing” the design, which simply means to translate your drawing to something a 3D printing can understand and print.
If you want to propel your 3D printing journey far, I’d start off using other people’s designs but learning how to design and slice at the same time.
This will be an invaluable skill in the future, and if you want to personalize 3D prints, it’s necessary to be able to do that.
You’ll need a dedicated slicing software to achieve this, as 3D printers cannot print without a G-code instruction, created by slicing.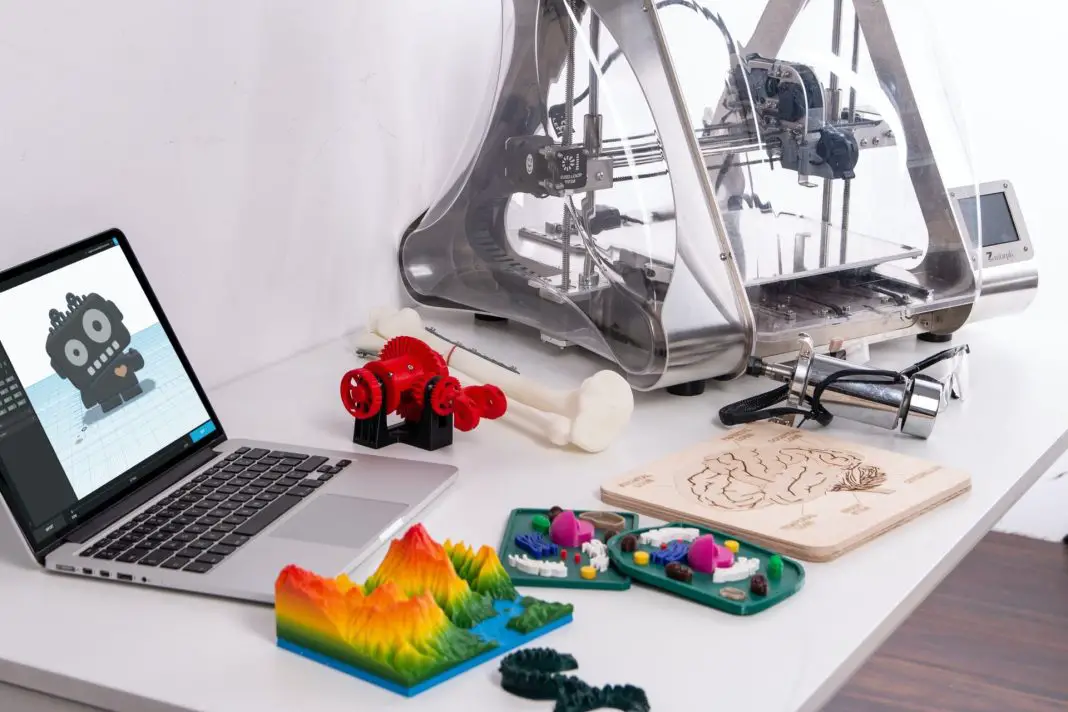 What slicing does is it creates routes for a 3D printer to act on while printing.
It tells the printer what speed, layer thickness to lay down at different points in each print.
Regardless of what you think about slicing, it really is necessary to get the job done. There are several hundred different slicing programs out there, some professional ones costing over $1,000 but at early stages, the free ones will do just fine.
Some 3D printers (Cura & Makerbot Desktop) actually have designated slicing software that comes with it, and unless stated by the company, you are free to choose another slicing software to your liking.
CAD and slicing software can get complicated, but developers have kept this in mind, and created beginner-friendly programs for people to get started on. Slic3r is a good beginner software to start with.
I’d advise to just start with basic shapes, putting these shapes together, then getting more detailed as you understand the process better. There are many YouTube guides that you can follow for getting started, the earlier, the better!
This ties in with the last point with the slicer because this is where you input the settings for your printer to process. I’ve written a more in-depth article about how long it takes to 3D print.
When it comes to your final prints, you will have to balance out how long you are willing to wait, with how high you want the quality to be.
The three main factors here are:
- Print speed – average is usually 50mm/s
- Layer height – basically the resolution of the print (from 0.06mm to 0.3mm)
- Infill density – measured in percentages, 100% means solid
Generally, the longer settings on a 3D printer will get you a more detailed finish on prints. This is done if you want a strong, functional and smooth print. Something that requires less detail or is just a prototype won’t need those features so it can be printed a lot faster.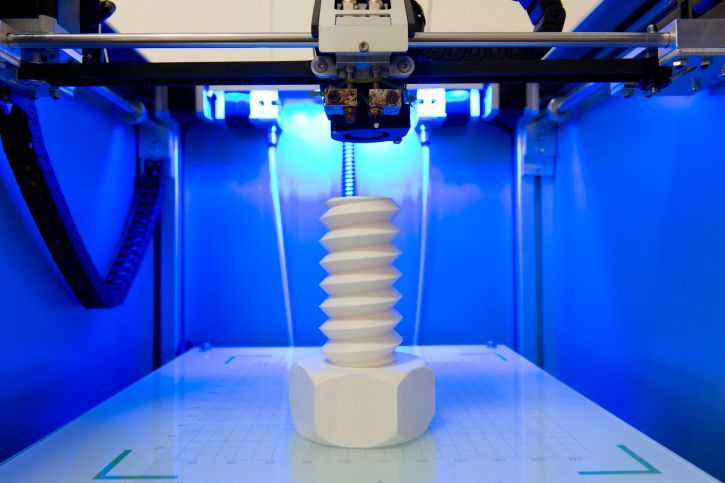
Print speed needs to be balanced because having a speed to fast can cause print imperfections and weak layer adhesion. Too slow of a speed can cause the deformation of prints due to the nozzle sitting on the plastic for too long.
The size of your nozzle really does make a difference in how long your print will take. For example, a print job that takes 11 hours using a 0.4mm nozzle at 150mm/s will only take under 8 hours using a 0.8mm nozzle at 65mm/s.
It takes a print twice as long to finish if you change the layer height setting from 0.2mm to 0.1mm because the nozzle will move over the same areas twice over.
Conclusion3D printing is an awesome field to get into, as it has applications which can stretch far and wide into most other fields in some ways.
It’s much more reasonably priced than in the past to get involved, so I would recommend it to anyone who wants to produce rather than always consuming.
There is somewhat of a learning curve with 3D printing but nothing the average person can’t get the hand of. Even younger children in schools are making use of 3D printing.
Once you get to a stage where you are confident with 3D printing, it will be a very fun activity for years to come.
For the little ones: how to start typing
3D printing
Follow the author
Follow
Don't want
40
The question that everyone who encounters a 3D printer for the first time asks himself. How to start typing? Here's about it in a nutshell. I assume that you have at least some workable printer in front of you, you assembled it yourself, bought it, or someone dragged it and put it before the fact.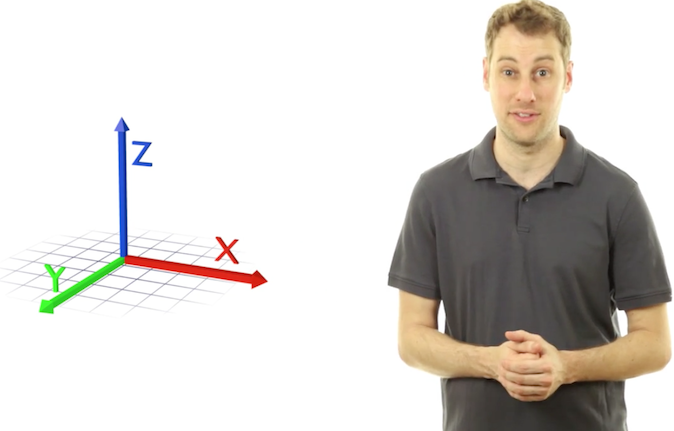
- Do it once - find out how to set up the table.
- Do two - thread the bar.
- Do three - prepare the model.
- We print.
Do it right Calibration. The minimum program is to make the simplest PLA filament stick to the table. If the plastic does not stick to the table, then there will be no printing. And, yes, you do NOT have a delta printer. Because the deltas are according to separate shamanistic Talmuds. Yes, it is possible that the printer is equipped with an auto level - table sensor. But for now, imagine life without him. We rub the table In general, PLA can be printed on a heated bed without additional coating. But it's easier to smear something. Unless you have a special coating that Wanhao and a number of other manufacturers boast about. I’ll just list the options: glue stick (necessarily the legendary “Kalyaka-Malyaka”), liquid diluted PVA glue, sugar syrup, beer, hairspray ..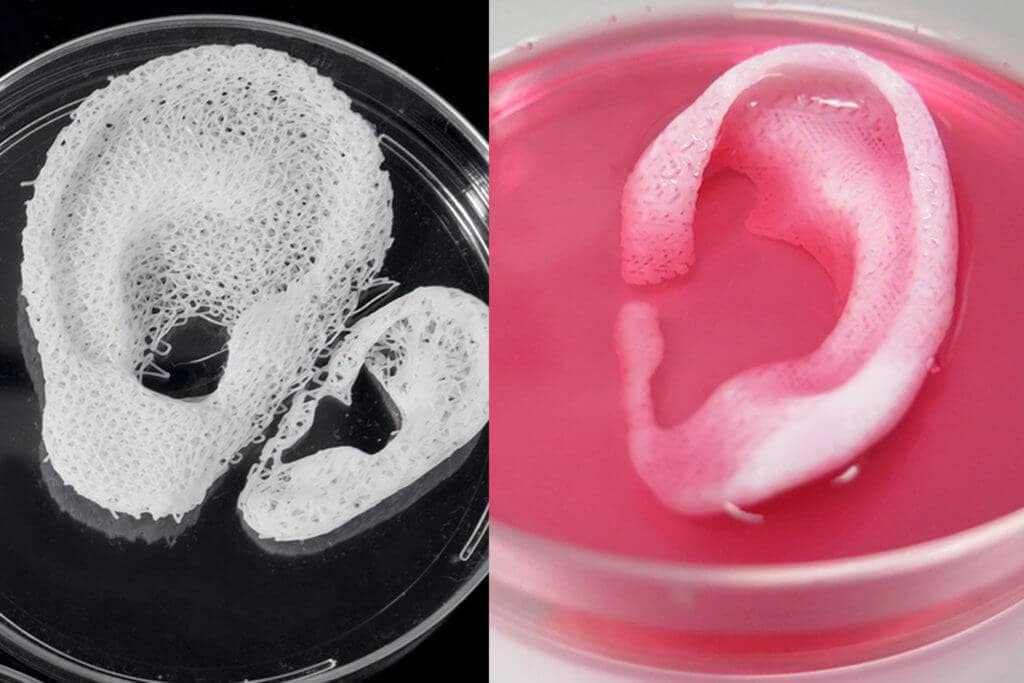 . You can also stick blue masking tape. It is necessary to smear all this on glass, which, in which case, can be replaced. And now calibrate
Starting position - parking. 'House' on all three axes in the control program. If everything works correctly, the nozzle will almost meet the table in one of the corners. It happens differently - for example, on Ultimaker 'home' is when the table is at the maximum distance from the nozzle. And now we warm everything up to operating temperature, if the table is heated. We lower the table with screws to the lower position, the springs are compressed - otherwise we risk crawling on it with a nozzle. And we move through the control program or with the help of a twist head. We moved it to a corner - we twisted the adjusting screw under the table so that a piece of paper could hardly pass between the nozzle and the table. Moved to the opposite, diagonally, corner - repeated. And so in several visits, until everywhere it becomes even.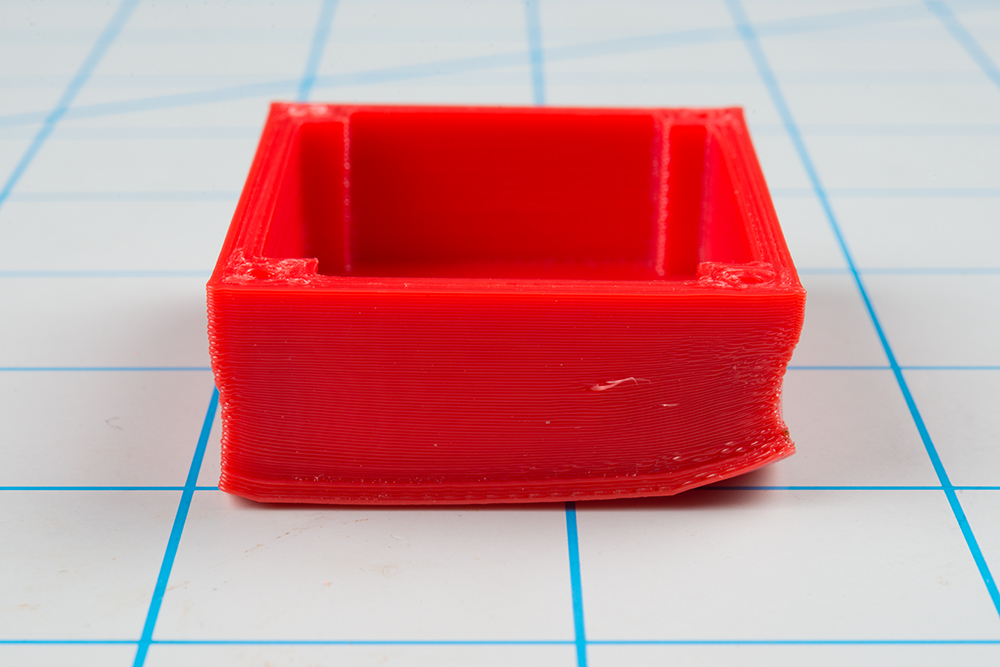 If the table is on three screws, then two corners and the middle of the opposite side.
Then, if necessary, give up the paper and use something more technological. At the initial stage - an obvious and affordable option. Do two Insert bar. Decide where you have the feed, on the print head or somewhere on the body. In short, somewhere there must be a node with a motor, a spring and a lever. If without a lever, the bar is not loaded manually, we study the instructions on how to load and unload through the printer menu.
We warm up the hot end to operating temperature (depending on the plastic), depress the lever and put the plastic in until it comes out of the nozzle. Do three Preparing the model. We have a model in STL format, it needs to be translated into a control code (G-code). Yes, if you write the STL onto a card and insert it into the printer, it will NOT print with rare exceptions. To form a G-code, you need a program called 'slicer'.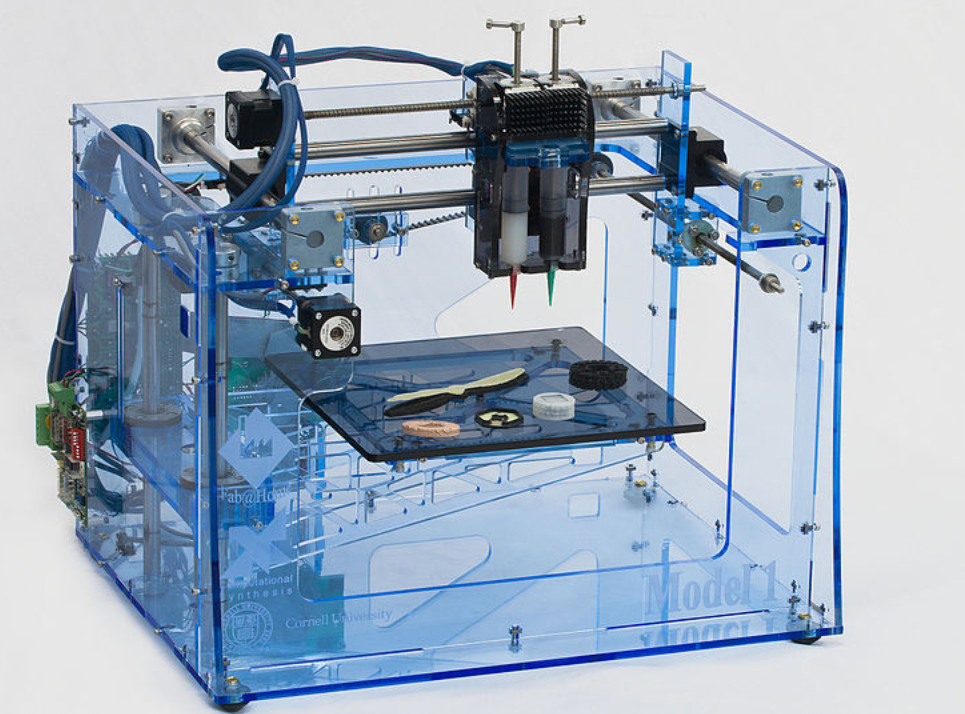 They are different. There are combines that combine a slicer with a control program (you can prepare a model and control a printer), there are pure slicers. Yes, slicing is just 'cutting'. The model is divided into layers of a given thickness.
Cura: how to cook it and what to eat it with. Repetier-Host and Slic3r for beginners. Articles on Simplify3D. Do four We got the G-code - we write it to the SD card using a card reader, insert it into the printer, select it from the menu - let's go. It is possible to print from a computer, but I will not recommend this because of potential stability issues. In theory, you should get something terrible, but with outlines reminiscent of the original model. And then the most interesting begins - the battle for quality. Ben, this is Danila. Ay nid help. If you have something to add. Briefly and clearly. Please write in the comments. We will work on this guide to reduce the threshold for joining an additive sect.
Follow author
Follow
Don't want
40
More interesting articles
DrProg
Loading
11/08/2022
1442
9
Subscribe to the author
Subscribe
Don't want
We continue to reveal the incredible opportunities of enterprises from the Middle Kingdom, up to ...
Read more
0
Subscribe to the author
Subscribe
Don't want
Ones Technology is a research and development center under the Ministry of Industry of Turkey. According to G...
Read more
261
Follow author
Follow
Don't want
I continue the series of articles started with the part devoted to polymers.
This part will be devoted to...
Read more
how to prepare for 3D printing so that you like the result
Are you the proud owner of a 3D printer? Sooner or later, the moment will come when you get tired of printing other people's models and want to create your own. If you want to start printing technical models or making parts for various equipment, then you cannot do without the basics of 3D modeling in CAD. Modeling will help create a layout, prototype, finished product, molds for castings and other technological devices for manufacturing a part. If you've already explored the built-in CAD references and learned the basics of design, our tips will help you adapt models for 3D printing and get a result you'll love.
1. Model a stable base
If possible, create at least one flat face in the model that can be used as a base for placing on a table. This will allow you to get by with a minimum number of supports and improve the adhesion of the model to the base.
2. Calculate shrinkage
We print a test cube 50x50x50 mm and measure it after printing. The test model must be printed from the same material and with the same heat, fill, and blow settings as the intended final model. It is desirable that the printer is also pre-calibrated for the desired material.
After that, using dimensional tolerances, in extreme cases - scaling, we adjust the dimensions to compensate for shrinkage. It must be taken into account that shrinkage can be uneven along different axes (usually different along the Z axis). Also separately monitor the shrinkage for the holes. It is advisable to make in the test model all the holes that are planned to be made in the final one. If you are planning a thread, it must also be pre-tested.
3. Observe wall thickness
The wall thickness must be at least twice the diameter (filament) of the extrusion, which is determined by the diameter of the nozzle. Moreover, when calculating thin walls, it must be taken into account that in case of continuous filling, the wall thickness must be a multiple of the extrusion diameter.
4. Strength elements should be as voluminous as possible
When creating a loaded element using 3D printing, it is best to add volume to it and combine it with the structure as much as possible into a single body. This will allow the strength element to withstand heavy loads with minimal filling.
5. Design the strength members with respect to the print direction
The load should be distributed across the print layers, not lengthwise. Otherwise, the layers may come apart, since the adhesion between the layers is not 100%.
6. Use reinforcements
This cutout will make the model stronger and stiffer, as well as reduce weight; in fact, the profile will become similar to an I-beam. This shape allows to achieve maximum longitudinal rigidity with the least weight.
7. And a headscarf!
Using a gusset will make the model stronger and lighter. The left and far right models have equal strength with the same infill, but the right model will take much less plastic to print.
8. Add fillets and chamfers
Add chamfers to all edges, if possible, and fillets are better. It is especially important to round the loaded and power elements of the part. This will remove high stress areas from the model, make it more tactile, and prevent splinters. Also, the rounding will not allow the part to spread along the layers after minimal damage.
9. Add stiffeners
Add stiffeners for protruding bosses. They will protect the boss from breaking when lateral forces are applied. The task of the stiffeners is to reduce the leverage for applying force to the edge of the boss and distribute the load over a larger area.
10. Reinforce holes
If holes are planned for fasteners, such as self-tapping screws, they should be reinforced with a set of small concentric holes around it. When the thread cuts through the main hole, the side holes will not allow the gap to grow and save the part from cracking.
11. Large thickness for strength
For greater strength on products without small parts, it is better to use a nozzle with a larger diameter - this will improve the strength of the outer layer of the model due to more reliable interaction of the layers.
12. Make small holes for local hardening
but there will be a strong shell around them.
13. Different colors - different bodies
If you need to make a two-color model, make the colors separate bodies, and then set the desired nozzle for each body.
14.
Learn more