How to flash 3d printer firmware
How to Flash & Upgrade 3D Printer Firmware – Simple Guide – 3D Printerly
After getting into 3D printing, I came across terms such as firmware, Marlin, flashing, and upgrading which was pretty confusing at first. I did some research about 3D printer firmware and found out what it all means, so I wrote an article about it to assist other people.
This article will discuss firmware-related topics such as what firmware is, how to flash and upgrade the firmware on your 3D printer, and more, so stay tuned for some useful info.
What is Firmware in 3D Printing? Marlin, RepRap, Klipper, Repetier
Firmware in 3D printing is a specific program that controls the functioning of your 3D printer by reading G-code instructions from the sliced model. It is located on the printer’s mainboard, and comes in many types, such as Marlin and RepRap that each have their own set of features and perks.
The most fundamental actions of your 3D printer, such as the movement of the stepper motors, the heaters switching on, and even how fast your 3D printer prints requires millions of calculations that only the firmware can make.
Without firmware, your 3D printer wouldn’t know what to do and how to do it. For example, consider a G-code command “M109 S200.”
Once you enter it in your G-code terminal, it’s the firmware of your 3D printer that will recognize it and know what to do. In this case, it will set the target temperature for the hot end to 200°C.
That was just a basic explanation, but the firmware, in truth, is capable of handling G-code commands far more complex than that. It’s basically how it runs your 3D printer and makes those magical prints as we know them.
There are many 3D printer firmware out there that people usually use to 3D print with. Let’ take a look at some of the most common ones below.
What is Marlin Firmware?
Marlin is the most famous 3D printer firmware that the majority of the community is currently using on their unit. Most 3D printers ship with Marlin as their default firmware, although you may want to update it as time goes on.
Marlin is popular because it has a number of desirable features that other firmware does not have. First off, it is highly customizable, meaning that you can add your own features to Marlin easily.
In addition, it has excellent documentation and great community support. This means that setting up Marlin is easy with a large number of guides and tutorials available online, and since most people use Marlin, it’s painless to find like-minded people to help you on your 3D printing journey.
Marlin is a reliable firmware and is recommended to all those who have just started out with 3D printing because of its ease of use.
What is RepRap Firmware
The RepRap firmware is another big name in the world of 3D printing that originally came out for the 32-bit Duet control board, which is an advanced and expensive motherboard with several premium features.
Many people prefer RepRap over Marlin because of how it’s so easy to configure. There’s a dedicated web configuration tool that connects to your firmware and allows you to modify it very easily. This isn’t something that Marlin can do.
However, RepRap isn’t as widely compatible as Marlin and only works on 32-bit boards whereas Marlin can also be used on 8-bit boards.
What is Klipper Firmware?
Klipper is a relatively new 3D printer firmware that’s best known for its high calculation speeds. This, in turn, makes the 3D printer print faster, hitting speeds no less than 70-100 mm/s.
This firmware uses another single-board computer, such as the Raspberry Pi, and offloads the intensive calculations to it. Doing so helps the firmware print faster and with better quality using highly accurate stepper motor movements.
Klipper firmware is also supported by most Cartesian and Delta 3D printers and can work on 8-bit boards, unlike RepRap firmware. It’s easy to use but doesn’t have the same level of support as Marlin.
What is Repetier Firmware?
Repetier is another great option if you’re looking for a reliable, high-quality firmware with loads of features. It’s widely compatible and has support for most boards out there, and can be easily customized to your preferences.
Like RepRap, Repetier also has a web-based configuration tool so you can make modifications to the firmware with ease and comfort. There’s also a slicer from the developer of Repetier called Repetier-Host.
The combined usage of the Repetier firmware and Repetier-Host attributes to an efficient printing experience with fewer errors. It’s also an open-source firmware that gets regular updates, and newer features from the developer consistently.
How to Change/Flash/Upgrade the Firmware on Your 3D Printer
To upgrade the firmware on your 3D printer, you will first need to download the latest Marlin release and open it in the Arduino software, which is a platform for upgrading 3D printer firmware. After connecting your printer with the computer, you’ll simply verify and upload the firmware using a few easy steps.
If you’re a newcomer to 3D printing, flashing the firmware on your 3D printer may seem like a difficult task at first, but doing so is definitely worth it to get all the latest features for your printer, and print more reliably and consistently.
The following steps are going to explain how you can upgrade the firmware on your 3D printer, so be sure to follow each of them carefully.
Step 1. Head over to GitHub to download the latest Marlin release, which is 2.0.9.1 at the time of writing. You can check the latest version by clicking the dropdown menu on the page and checking the bottom release.
When you’re there, click on the dropdown arrow on the “Code” button and then select “Download ZIP.” That should begin the download for you.
Step 2. The file will come in a ZIP format, so you will need to extract it to continue. Once done, open it and click on the “config” folder.
Step 3. Once done, you will now need to copy the required information of your specific 3D printer and replace the default configurations files with it. To do that, click on the “examples” folder, find your 3D printer, and select your machine’s mainboard. The pathway given below is an example of how you should be doing this step.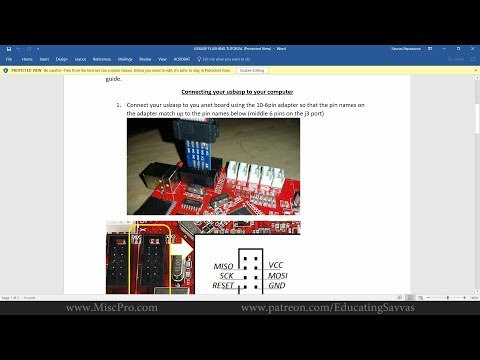
Configurations-release-2.0.9.1 > config > examples > Creality > Ender-3 > CrealityV1
Copy the “Configuration” and “Configuration_adv” files to continue.
Step 4. Next, you will simply paste the files into the “default” folder. If you’re on a Windows PC, the system will prompt you to replace the present files with your copies ones. Do that to continue. Now we have the latest Marlin firmware version that’s configured for your 3D printer.
Step 5. Now, you will need the Arduino software to upgrade your 3D printer’s firmware. Arduino IDE can be downloaded from the official website, and if you’re on a Windows PC, you can also install it comfortably from the Microsoft Store.
Step 6. Next, launch the firmware in your Arduino IDE using the Marlin.ino file in the folder. When Arduino opens up, make sure that you select the right board of your 3D printer in the “Tools” section to avoid running into errors.
Step 7. Next, all you have to do is click on the “Verify” button that’s shaped like a tick in the top-left corner. This will begin the compiling process for the firmware. If you’ve done everything right until now, you hopefully won’t see any error messages popping up.
Step 8. After the firmware update has done compiling, you will now simply connect your 3D printer with the computer using a USB connection if your printer has a bootloader. If not, there’s also a way to connect your printer and I’ve talked about it later on in the article.
Once connected, click on the “Upload” button that’s right beside the “Verify” button. Make sure the printer has been plugged out from the power outlet before doing that.
That’s it for upgrading the firmware on your 3D printer. There’s a small chance that some of your settings such as bed leveling offsets or acceleration limits might have been reset.
In that case, you can use the “Initialize EEPROM” option in your 3D printer’s interface to restore everything in your configuration files.
The following video thoroughly goes over the process, so do check that out for an in-depth visual tutorial.
How Do I Add & Install Marlin Firmware to a 3D Printer?
To install the Marlin firmware on a 3D printer, you’ll first have to download Marlin on your computer, edit the downloaded configuration files, then use the Arduino software to compile the Marlin project into a readable form for your 3D printer. Once done, you’ll simply upload it to add Marlin to your 3D printer.
The process of installing Marlin to your 3D printer is quite similar to the subtitle above. You can basically repeat all the steps highlighted in the previous section, even if you’re adding Marlin for the first time to a 3D printer.
To edit your 3D printer firmware, you will be using the Arduino IDE application right after you open up the firmware in it.
However, it’s recommended not to mess with the configuration files in the editor since most of the code is already pre-defined, and changing something without knowing what it is could potentially prevent you from flashing.
The following video by Teaching Tech is a great guide on editing your 3D printer firmware, so be sure to check that out for more details.
Can You Update Your Ender 3 Firmware With Cura?
Yes, you can update your Ender 3 firmware with Cura in just a couple of easy steps. First, you simply download the pre-compiled version of the firmware you want in HEX format and upload it to your 3D printer using Cura.
The Cura slicer makes it quick and easy to upload our firmware of choice to the 3D printer. You don’t even need to have a bootloader to use this method.
What you will be needing is a USB, the firmware that you need in HEX format, and, of course, Cura. The rest of the process is extremely painless to follow, so let’s get into that right away now.
The following steps are going to explain how to update your firmware with Cura.
Step 1. Go to DanBP’s Marlin Configuration page and scroll down to files to find packaged HEX files that correspond with your setup for the Ender 3. You can also search for your own firmware online, but make sure that’s it compiled already before downloading.
Here’s what the section looks like to scroll down to on the page.
Step 2. Connect your computer/laptop to your 3D printer using the USB connector that fits your machine.
Step 3. After downloading the file, you will need to extract it to continue. Once done, simply launch Cura and click on the dropdown area beside your 3D printer selection area. After that, click on “Manage printers” to continue.
Step 4. As soon as you do that, you will see the “Preferences” window appear. There’s going to be an option called “Update Firmware.” Click on it to get to the next step.
Step 5. Lastly, you will now simply click on “Upload custom Firmware,” choose the HEX file you just downloaded and let Cura upload the firmware to your Ender 3 printer.
You’re all done! You stuck to a fairly basic process and ended up updating your 3D printer’s firmware. Don’t forget to initialize EEPROM on your 3D printer to store the firmware.
The following video is a visual explanation of the process discussed above.
How Do You Find Out & Know the Firmware of Your 3D Printer
To know and find out the firmware of your 3D printer, you need to send the M115 G-Code command to your printer using a software like Pronterface. Some 3D printers including the Ender 3 also have an “About” or “Printer Info” section in their LCD menu which can tell you what firmware is installed on them.
Most 3D printers ship with either Marlin or RepRap firmware, but it’s worth knowing for sure which one is installed on your machine.
The M115 command is basically a command for “requesting the firmware version and capabilities of the current microcontroller or mainboard. It can be entered in the terminal window of any software that can send your 3D printer G-Code commands.
Pronterface is a popular choice that many people use to control, adjust, and calibrate their 3D printers with techniques such as hot end and heat bed PID Tuning.
Upon entering the said command, you should get a string of code that would look something like this.
FIRMWARE_NAME:Marlin 1.1.0 (Github) SOURCE_CODE_URL:https://github.com/MarlinFirmware/Marlin PROTOCOL_VERSION:1.0 MACHINE_TYPE:RepRap EXTRUDER_COUNT:1 UUID:cede2a2f-41a2-4748-9b12-c55c62f367ff
On the other hand, if you’re using the Makerbot Print slicer software, you can easily find out the firmware version you’re using by heading over to the Print Panel, selecting your 3D printer, and then clicking on “Utilities. ”
”
Finally, you would click on “Firmware Update” and all the relevant information will pop up, including the current firmware version that your printer is using.
Can You Extract Firmware From a 3D Printer?
Yes, you can extract firmware from a 3D printer once it has been compiled and uploaded. However, after you get the .hex file for your firmware configuration, it becomes pointless in the long run, since you won’t be able to edit or configure your firmware since it has been compiled already.
Before it’s compiled, firmware is either in the .h or .ino format. After you compile it, the format is converted to either .bin or .hex, depending on whether you have an 8-bit board or a 32-bit board.
Think of this like a dish you prepare. Before you cook, you have all the ingredients laid out on the table for you, allowing you to replace them with whatever you like. After you’ve cooked, you cannot go back to the ingredient stage. This is how it is with firmware as well.
Does Your 3D Printer Have a Bootloader?
Your 3D printer may or may not have a bootloader, depending on what printer you have. Budget-friendly 3D printers such as the Creality Ender 3 don’t ship with bootloaders because they take up extra storage space on the microcontrollers inside your printer’s mainboard and also cost more to include.
The following are some 3D printers that have a bootloader.
- QIDI Tech X-Plus
- Monoprice Maker Select V2
- MakerBot Replicator 2
- Creality Ender CR10-S
- Flashforge Creator Pro
Can You Flash Firmware Without a Bootloader?
Yes, you can flash firmware without a bootloader by using an external programmer that writes the firmware to the ICSP of your motherboard. The ICSP is present in most boards, so you should have no problem flashing firmware without a bootloader that way.
A bootloader is a software that allows you to flash firmware easily with a USB. It takes up minimal space inside your mainboard’s microcontroller, which is a specific component storing everything related to the 3D printer firmware.
Although minimal, the bootloader does take space in the microcontroller, which could potentially be utilized by other more important features, such as automatic bed leveling.
This is the reason many manufacturers avoid putting bootloaders inside the 3D printer’s mainboard, so users can fully utilize the space for more features.
Doing so makes flashing firmware definitely more complex because you cannot simply use a USB connection anymore. However, several people consider the trade-off worth it to increase their printer’s functionality.
The following video by Thomas Sanladerer is a great tutorial on flashing firmware without a bootloader, so do look into it for a thorough guide.
RepRap Vs Marlin Vs Klipper Firmware
RepRap, Marlin, and Klipper are all very popular choices when it comes to choosing a firmware for your 3D printer. However, the three of them differ fairly from each other, so let’s dive into the differences and see which one comes out on top.
Architecture
RepRap: The RepRap firmware is written in the C++ programming language and is strictly made to run on 32-bit processors only, such as the Duet controller boards. In doing so, it can be used on 3D printers, CNC machines, engravers, and laser cutters. RepRap is also based on Marlin.
Marlin: Marlin is based on the Sprinter firmware also written in C++ but is fairly versatile and can run on both 8-bit and 32-bit processors. Like RepRap, it handles most of the detailed G-Code calculations that control the components of the 3D printer itself.
Klipper: The Klipper firmware focuses on important components like stepper motors and bed leveling sensors, but leaves the complex G-Code calculations to another, more capable board, which is Raspberry Pi in most cases. Therefore, Klipper uses a combination of two boards to run 3D printers, and this is unlike any other firmware.
Category Winner: While architecture doesn’t pose an apparent benefit or downside, Marlin takes the win here because it’s the most experienced firmware, forming a strong foundation for many other firmware to be built upon.
Features
RepRap: RepRap is jam-packed with features, including high-end ones for advanced 3D printing users. Some of these include precise step time generation and dynamic acceleration adjustment, both of which are extremely helpful for speedy, accurate, and high-quality 3D printing.
Another key feature of RepRap is its web configuration tool that makes customization a breeze and painless to deal with, unlike Marlin where you have to edit everything in the Arduino IDE.
Marlin: With constant updates over time, Marlin has also become a feature-rich firmware with functionality like automatic bed leveling, autostart, which sets the printer to a fresh state after you restart it, and linear advance, which generates the correct pressure inside the nozzle for precise movement and higher print speeds without the loss of quality.
Klipper: Klipper boasts an advanced set of features such as input shaping which reduces the impact of stepper motor vibrations on the print quality. By eliminating this rippling effect in prints, you can print at higher speeds and maintain awesome quality.
Klipper boasts another feature called smooth pressure advance that reduces oozing or stringing and improves how the corners of your model are printed. It also helps keep the process more stable and robust, so the print quality is never compromised. There are many more expert-
Category Winner: Klipper
Speed
RepRap and Marlin: Both of these firmware are more or less the same when it comes to speed. RepRap does boast that it has a high upload speed, about 800Kb/s to the SD card by either using a Wi-FI or Ethernet connection. If you increase the speed beyond normal values in Marlin or RepRap, you will have to settle for lesser print quality.
Klipper: Klipper is the fastest firmware out of the bunch, with features such as smooth pressure advance and input shaping allowing it to print at higher speeds, about 80-100mm/s while maintaining great print quality and precision.
I even found a YouTube video of someone printing using Klipper at a speed of 150mm/s effortlessly.
Category Winner: Klipper
Ease of Use
RepRap: RepRap is definitely the easier firmware to use in this comparison. File configuration can be done in a dedicated web-based interface and it can also be used to update the firmware.
The online configuration tool makes RepRap stand out, giving it the ease of use many 3D printer users desire in Marlin.
Marlin: For beginners, Marlin is easy to get the hang of. However, the firmware does get time-consuming and difficult as well when you need to configure your files.
If you need to make a certain change to the configuration, you would have to re-flash the firmware and compile it, basically repeat the process all over again. On the positive side, Marlin has great documentation, a huge community, and a wealth of material available online to learn and get help from.
Klipper: Klipper is also an easy-to-use firmware, definitely more if you’re well-versed with Raspberry Pi. It’s not necessary to re-flash it, unlike Marlin, and changes to configuration files can be easily made.
That said, documentation for Klipper does lack since it is a relatively new firmware, and you won’t find the same level of help online as you would for Marlin.
Category Winner: RepRap
Compatibility
RepRap: RepRap was originally made for the 32-bit Duet boards. Therefore, it can only function on a handful of other 32-bit boards, so it isn’t really the most diverse firmware out there.
Marlin: Marlin is the most widely compatible firmware out there, made to work on both 8-bit boards and 32-bit boards. It’s why people use Marlin when they build their own 3D printer.
Klipper: Unlike RepRap, Klipper supports 8-bit and 32-bit boards as well, and works with just about any board out there. Klipper is also becoming more preferable for those who start building a DIY 3D printer and they need a feature-rich firmware to install.
Category Winner: Marlin
How to Flash Your 3D Printer's Firmware
Right off the jump, let me tell you: the title is misleading. This isn’t necessarily how YOU can flash YOUR 3D printer’s firmware. This article is more like a note-to-self kind of thing reminding ME of how i can flash MY printer’s firmware, because i am liable to forget by the time i have to do it again.
i’m also putting this into words in case it helps some poor soul out there who, like me, wants to complete the relatively simple process, but is bogged down by bad directions written by complete nerds who like to pull up the ladder and make things as complex as possible, and whose passive-aggressively scant documentation drips with disdain. This is not a difficult thing to do, but you wouldn’t know it. Thanks for nothing, nerds.
i am indebted to a kind soul named Alexander on the Anycubic Facebook group who walked me through this. Because i 98% don’t know what i’m doing, this step-by-step guide is offered as-is. If you run into problems, i won’t be able to help you. But hopefully, this is enough to get you farther than you were when you Googled and discovered this blog post in desperation.
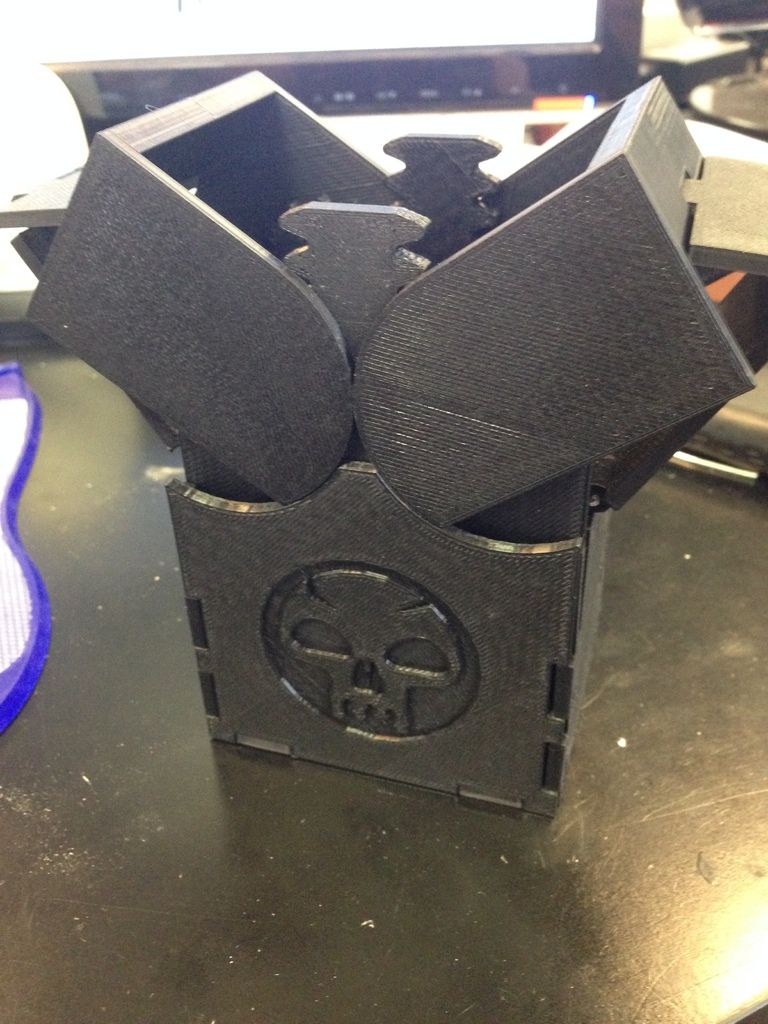
My SetupHere’s my situation: i own an Anycubic Mega Zero 2.0 FDM printer. It’s inexpensive and entry-level, and as a result, lacks a lot of bells and whistles. One of those missing bits is a self/auto-levelling sensor. The sensor is called a BL Touch if you buy it from its creator, Antclabs, but you can also buy a knock-off clone called 3D Touch from various skeezy Amazon vendors and save a few bucks. Since i’m chronically underfunded and i generally make bad decisions, i bought the clone.
The BL Touch/3D Touch is a little probe, kind of like a tongue, that “licks” your printer bed like a frog or a chameleon, and reports back to the printer how far away the bed is. You can level the Anycubic Mega Zero 2.0 on each corner using four dials, but what happens if your bed is slightly warped in places? Even a discrepancy of a few tenths of a millimetre can mess up a print.
The problem is that the printer’s firmware – the code (instructions) on the machine that tell it how to operate – doesn’t support this sensor out of the box. You need to go get a re-written chunk of code, and somehow send it from your computer to the printer, overwriting the original firmware. It requires installing a few things and downloading a few things, and then clicking a button. No biggie. Let’s go.
Finding the CableYour computer needs to be able to “talk” to your printer. Some printers have cable-free communication as a feature. Mine doesn’t. i can’t remember if the Anycubic Mega Zero 2. 0 came with the proper cable or not, but here’s what i needed to scrounge from one of the cable bins in my basement crawl space. One end is USB type A, and the other is USB mini B, in case you’re looking for one on Amazon. Make sure you get one that’s long enough! Plug the mini B end into the printer, and the A end into your computer.
A driver is a piece of code your computer uses to interface/control/talk to/understand a piece of connected hardware. Your computer may not understand your printer off the jump, so you need to install a driver to help it out.
The ch440 is the driver you need. If it doesn’t automatically install when you connect your printer for the first time, Sparkfun has a good tutorial on installing the driver. Or Google ch440 driver for more help.
Downloading All the FirmwareNext, you need to download this zip file that contains all kinds of different configurations of a firmware flavour called Marlin.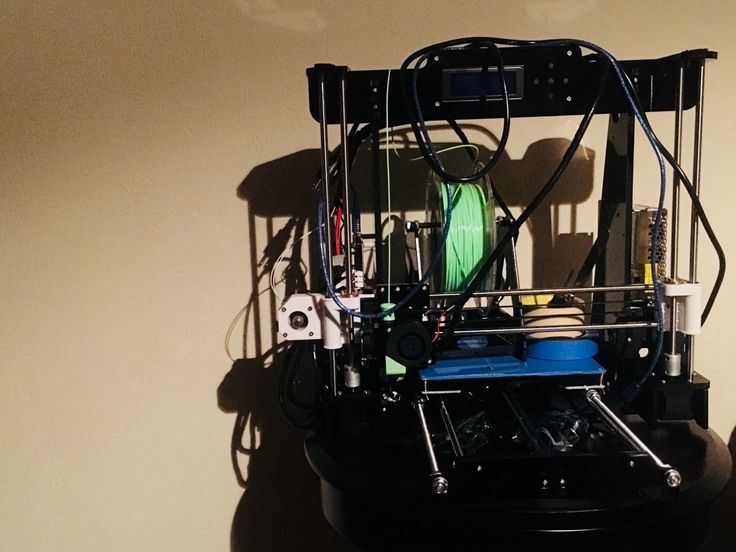 The firmware has been rewritten and tweaked six ways from Sunday for all kinds of different printers and features. Extract the file to a folder somewhere on your computer.
The code in the file you just downloaded and extracted is in its “uncompiled,” human-readable form. When you compile code, you tell a program to convert it to a machine-readable format. So you need a piece of software that will compile the code for you so that your 3D printer can ingest and understand it.
This is where the process went off the rails for me. You might find a lot of stuff about Arduino and instructions saying “If you have [any operating system except Windows], it’s as easy as typing this simple command into your shell!” or whatever.
Here’s what ultimately worked for me. Download and install PlatformIO IDE. PlatformIO is the thing that’s going to compile the code for you. You can get it as a command line tool, but i personally despise CLIs. God gave us buttons. Let’s use them.
So this thing sits on top of a free code editor from Microsoft called Visual Studio Code. Per the instructions on the site, you have to download and install Visual Studio Code first, and then follow the instructions to install PlatformIO as an add-on.
Selecting the Correct FirmwareOnce you have PlatformIO installed and running, select
File>Open folder
and choose the folder where you extracted all of the firmware files from the GitHub zip in a previous step. This gives you a big long list of different firmware configurations to choose from. You’ll be selecting one, compiling it, and shipping it off to your printer through the USB cable to overwrite the existing firmware.
SO MACH FIRMWARES!Which firmware do you choose?
In my case, i needed to scroll way down and select the one called anycubic_mega_zero2_melzi_bl_a2_zmin
“Melzi” is the name of the stock ciruit board installed on my printer. The Anycubic Mega Zero 2.0 is my printer’s brand name. “BL” indicates that changes have been made to accommodate the BL Touch hardware (and hopefully the 3D Touch clone hardware!) As for a2 and zmin, i don’t know. Maybe you can tell me in the comments? i gather zmin means that a certain pin on the board (the one the sensor plugs into) has been enabled.
i can’t help you with which firmware you need for your particular printer or goal. But once you figure that out, here are the next steps:
Click the firmware, and it opens a list of options below.
Click “Build”
PlatformIO ticks away, compiling that firmware for you. If it finishes without any errors (check the report in the bottom right window, in the “Terminal” tab), then you’re good to go. If you get errors, i can’t help you. Many sorries!
Once the firmware has successfully compiled, click Upload to shoot it over to your printer.
Again, watch the bottom right window, Terminal tab for progress. And if you get errors, i have no idea…. except this one:
i Googled it, and it turns out that if some other program is listening to the COM port that your printer is using, this process will fail. In my case, i just had to close Cura (my slicer software) and click Upload again to get it to go.
And then i ran into one more snafu: i had printed Alexander Kanevskiy’s 3D/BL Touch mount from Thingiverse. Alexander was kind enough to provide a picture of where to plug the sensor into the board, with labels and everything, but was not kind enough to mention that the Pin27 Adapter is a separate piece of hardware that you have to order.
So i had to retrace my steps and get rid of the touch sensor firmware and restore back to the unmodified vanilla firmware, until i could get my hands on one of those adapters. (Amazon predicts weeks of waiting, here in Canada. Sigh.)
To restore the firmware, i followed the same Build/Upload process as above, after choosing anycubic_mega_zero2_melzi as my firmware.
i’d love to take you all the way there and tell you how i got my Touch clone sensor working, but i’m not there yet. i know i’ll have to rely on this article when i do finally snag a Pin27 adapter, and i hope to God there’s no soldering involved. Whatever happens, i’ll write another article once i get it all working.
Installing Marlin firmware on a 3D printer using the Cura slicer or what to do with a hex file?
Hello everyone. This article is the second part of a trilogy about 3D printer firmware. In the first part, we looked at how to flash a 3D printer using the Arduino IDE. This method is possible when there is a source code for the firmware or, as programmers say, when there are sources. However, this option is not always possible, because. often the firmware comes in an already compiled form, i.e. as a single file with *.hex extension. This is a ready-made compiled firmware file with pre-configured parameters.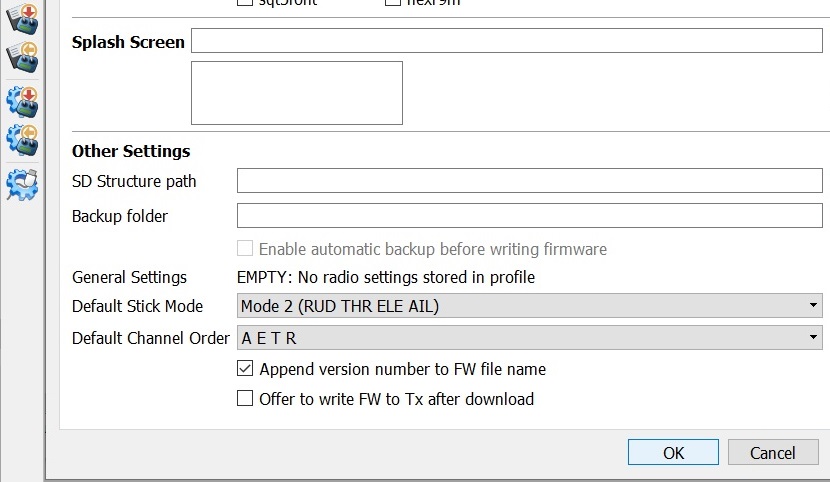 At the same time, it becomes impossible to edit anything.
Naturally, this file cannot be opened using the Arduino IDE. What to do? This is what we will deal with in this article. And so, let's figure it out.
On the one hand, firmware in the form of source code is good. We can easily independently make the necessary changes to it, or, so to speak, customize it for ourselves.
From the manufacturer's point of view, firmware source code is evil. The user will pick it up, make changes that are not provided by the manufacturer, and then apply for a guarantee if something goes wrong. There are ways in which you can flash the firmware into the printer once and for all, while eliminating the possibility of flashing. Thank God manufacturers don't do that.
You can protect the firmware from modifications in another way - by supplying it as a ready-made firmware file. Let it not always go with the observance of the license. But this option works just fine.
We, as ordinary customers, are not interested in all these vicissitudes. We have another question: How to flash a 3D printer with a ready-made firmware file?
Do not believe it, but this option is much easier than flashing the printer from the firmware sources (the process of flashing the printer from the sources is described in the article “Installing Marlin firmware on a 3D printer using the Arduino IDE“). There are several ways to flash a 3D printer using a hex file. In my opinion, the easiest way is flashing with the Cura slicer. We will consider this method next.
The technique is described using the Cura 4.2.1 slicer as an example.
We need a Cura slicer
And the actual firmware file.
Now turn on your 3D printer and connect it to your computer with a cable.
Make sure the slicer can see your printer.
Now start the slicer and go to your printer's Menu. To do this, go to the menu item “ Parameters ” -> “ Printer ” -> “ Printer management ”
If you have several printers, select the one you want to flash from the list.
After selection, a menu with several buttons will be available on the right, among which there will be a button labeled “Update Firmware”. Click on this button.
This will open a window named “ Upgrade Firmware ”. In this window, press the button “ Upload your own firmware ”.
Now the Cura slicer will ask you to select the firmware file you will be slicing. The explorer menu will open. We go to the directory in which the firmware file lies and select this file.
In my case, it was the firmware for the Anycubic 4max 3D printer. In your case, this should be the firmware you want to flash. After selecting the firmware file, you must press the button “ Open ”
After clicking the “Open” button, the process of flashing your 3D printer will automatically start. And it will last for some time.
After the firmware is finished, the window will look like this:
Button “ Close ” becomes active. To complete the flashing process, press the button “ Close “.
Click the “ Close ” button in the “ Upgrade Firmware ” window.
Click the “ Close ” button in the “ Settings ” window Section “ Printers”.
Now close the slicer.
Restart your 3D printer. To do this, unplug it from the outlet for 1-2 minutes and turn it on again.
Through the printer menu or command.
To reset the printer settings to default settings, execute the following commands:
M502
M500
The process of sending commands to the 3D printer was described in the article “3D Printer's Diary. Calibration of the plastic feed on the extruder MK8 of the Anycubic 4max 3D printer
At this point, the 3D printer firmware process can be considered complete.
I hope the article was useful to you. For those who are interested, an article will soon be published on how to compile the firmware hex file yourself.
If you have not got a 3D printer yet and are thinking which model to choose, I can recommend the following models:
Anycubic i3 Mega 3D printer
Anycubic Mega-S (Anycubic S) 3D printer If you like the article and want to support the site and receive notifications about new materials, join our Vkontakte group: https://vk.com/ionline_by
http://ionlineby.pushassist.com/
Firmware installation - SHUI - firmware for 3D printers
Before you start
- You must accurately represent the kinematics of your printer. To get started, study the types of kinematics, for example https://3d-diy.ru/wiki/3d-printery/raznovidnosti-kinematik-fdm-3d-printerov/. Alternatively, google for the name of the printer, for example "what kind of kinematics does the Flying Bear Ghost 4S have"
- You must know exactly the number of motor steps on the XYZ axes, accelerations and jerks with which your printer comfortably prints
and where he has a neon.
- You must know exactly if your electronics will fit the firmware. Consider not only the control board, but also the display: only TFT35 and TS35 screens are supported by the firmware (in MKS Robin Nano v2.0 / v3.x). TFT43 type screens are NOT supported!
- Decide which firmware to download (more on this below)
- Make sure that your arms grow from your shoulders and that your head is the highest point of your body
- Need a sacrifice. You must make a sacrifice to the god Filamentius for the glory of future victories
So, you know your cybenimatics, electronics, sacrificed a spool of filament on a skewer, it's time to decide on the choice of firmware. The firmware itself is located on the author's Github and is located in the test-only folder. Test-only is the current test version which has the maximum functionality of . It may contain some errors, but practice shows that there are practically no errors in test versions of SHUI firmware. So, download from the test-only folder!
Composition of firmware
The firmware normally consists of three files:
- Robin_nano X .bin - Printer firmware directly. must be selected according to the installed control board.
- RESDUMP.BIN - This is a file with graphic resources - pictures, text, etc. Without it, instead of pictures, you will see only cheerful green squares on the display.
- SHUIWIFI.BIN - This is the file for flashing the WiFi module. You must select according to the module you have installed.
Flashing WiFi at the same time as the main firmware is not required, it can be done at any time after. The first 2 files must be flashed , and is highly recommended to flash them simultaneously.