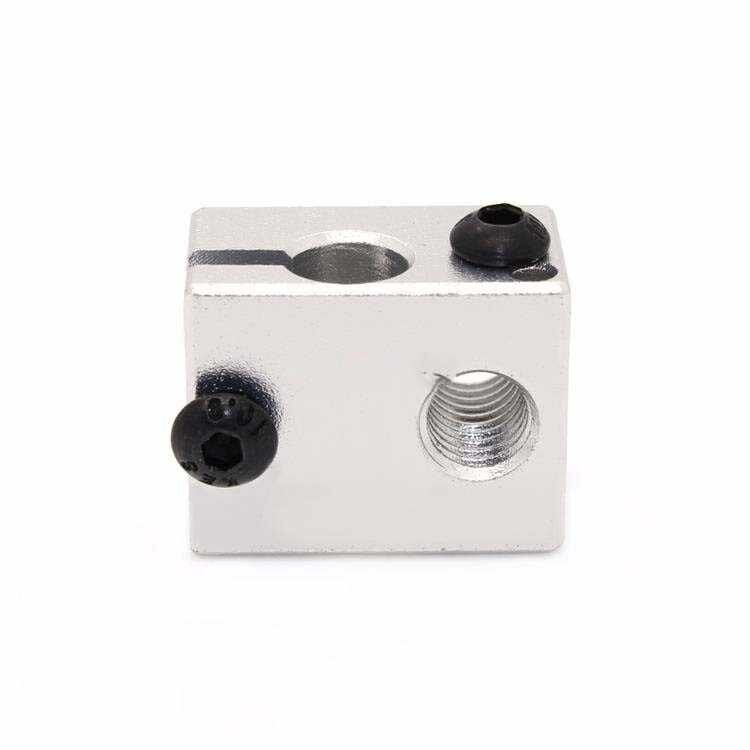
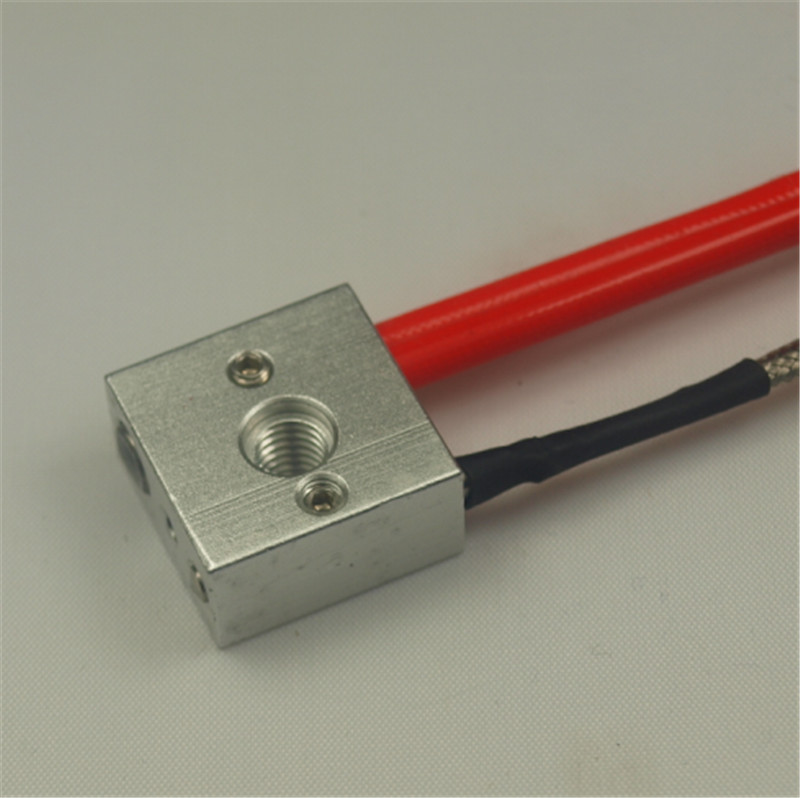
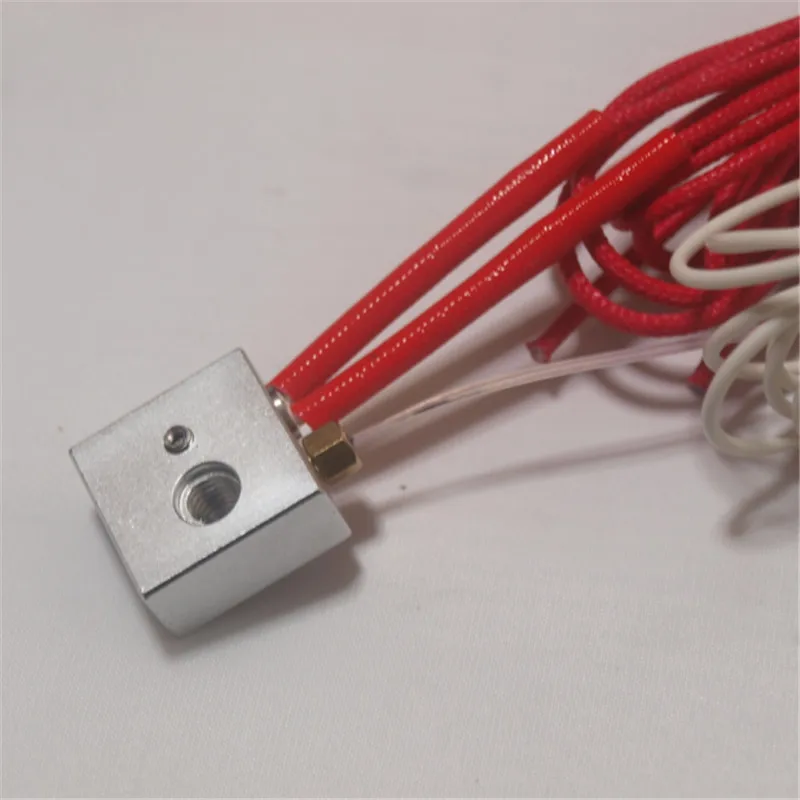
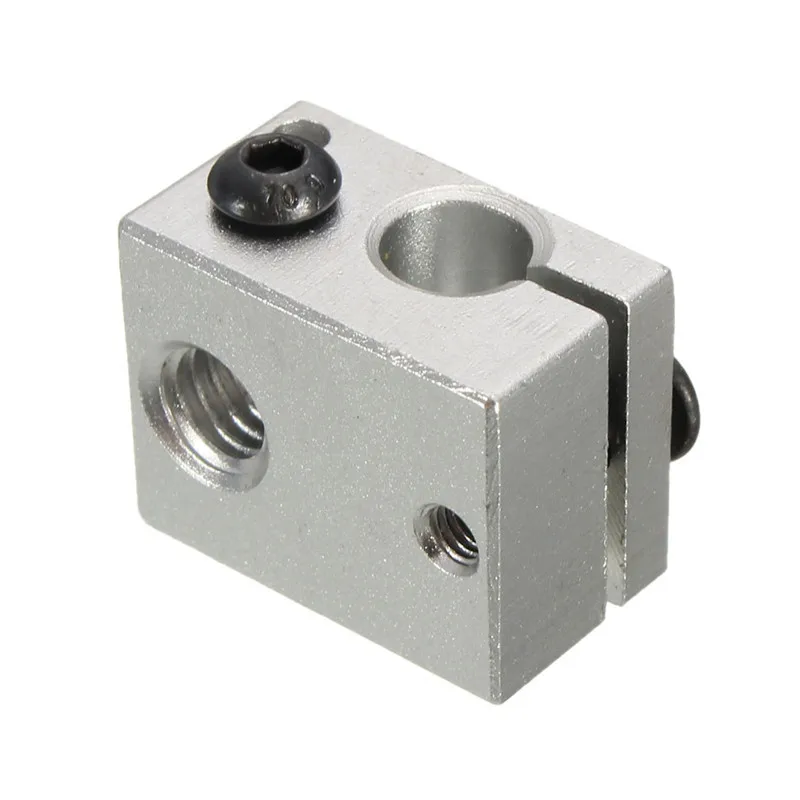
Heater block 3d printer
A Better Understanding of the DyzEnd Pro Design Choices
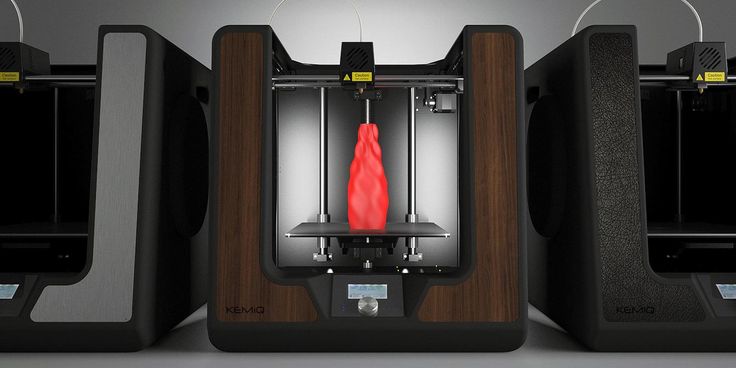
The Pro series line of product is designed to push the reliability to a whole new level. Every small feature has been redesigned from bottom-up from based on the feedback we received and our own experience.
The 3d printer hotend’s heater block undergoes a massive amount of stresses: thermal stress from the heater, pressure stress from the extruder and tension stress from the nozzle. With our intensive tests with high-temperature materials such as PEEK, PEI (Ultem) and PSU, we have realized that this component required a rethinking.
Heater Blocks with apparent signs of stress
Understanding materials
The first step when designing a part is to choose the right material. There are a ton of different alloys available out there, and they all have their advantages and application. When choosing, you need to identify the key characteristics you’ll be evaluating. In our heat block case, we’ll want:
- Mechanical properties at high temperature
- Thermal conductivity
Example of a tensile test
1.
Mechanical properties are used to compare performance in different situations between materials. There are dozens of different types: hardness, fatigue, etc. The most common property is the tensile strength. It is measured by loading a specimen by stretching it. A lower tensile strength means less force is required to break.
Once the tensile strength limit is reached, the part will either deform, shear or break. In all case, it won’t be usable anymore.
2. Alloys
Alloys are recipes made from metals and other materials designed to increase properties. Corrosion, hardness, strength and many others. However, adding alloying elements will generally lower both the thermal conductivity and electrical conductivity.
Pure iron has very little use as it is very soft and weak. Adding as few as 0.15% to 0.80% carbon will make it a steel, which is much stronger. Adding chromium (and nickel) will make a stainless steel. When comparing thermal conductivity between our recipe evolution, we started at around 80 (W/mK) for iron, down to 50 with steel, down to 15 with stainless steel.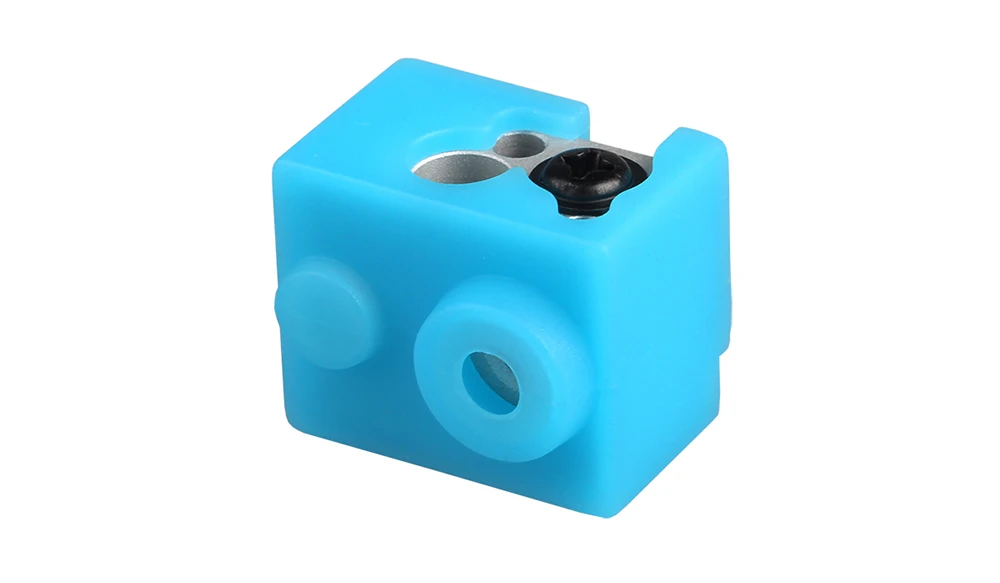
Increasing mechanical properties has a price, and thermal conductivity is often reduced as shown before. Other properties also suffer from adding alloying elements, such elongation at break, ductility, and few others.
3. Heat Treatments
This process is used to modify and enhance some mechanical properties such as tensile strength and hardness. Most alloys are still weak without heat treatment. It is very important to understand the mechanisms of tempering an alloy. Heat can reverse most temperings, keep this in mind.
The process is quite unique for steel, as it is the only one who benefits from a rapid cooling.
Other alloys require an aging process or cold working rather than a quenching process. A high temperature is held for a certain amount of time, then the part is slowly cooled. The part can later be stretched or hammered to increase strength even further.
Care must be taken when choosing a material when it has an aging process.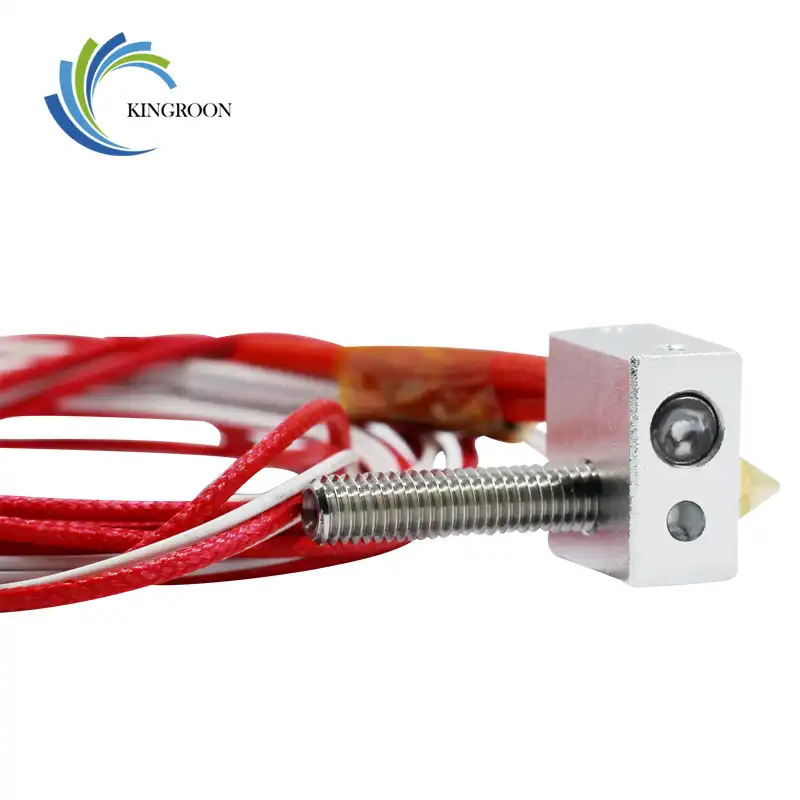 Running it at high temperature will continue the aging process and bring back the mechanical properties to the original “O” state. This will be further explained later.
4. Thermal properties
As the heat block is designed to transfer the heat from the heating source, the heater cartridge, to the polymer, it’s important to do this efficiently. Two major properties are interesting in our application:
- Thermal conductivity
- Specific heat
It is very important to understand that doubling the thermal conductivity won’t double any performance at all in 3D printing. A higher thermal conductivity will have a much bigger impact on a long and wide part, such as a heat sink. As the heat block transfer heat between a few millimeters between the heater and the nozzle, the difference is not noticeable from a 3D printing performance point of view.
Melting Temperature
One thing is sure, you want your filament to melt, not the heat block. As mentioned before, adding alloying element have some drawback. In this case, most alloys will have a lower temperature than the base material, up to a certain percentage.
We can see this behavior on what we call a “Phase Diagram”. From left to right, you can see the evolving melting (liquidus – solidus) temperature from 100% lead to 100% tin.
Another important fact about this diagram is that alloys have a solidus line different than the liquidus line. It simply means that between those regions, you have a “slushy” material, meaning that both solid and liquid states are presents. Quick spoil, a slushy heat block won’t work, so you have to check the solidus line for the ultimate temperature.
Thermal Creep
Thermal creep is not to be confused with “heat creep” commonly used in 3D printing community. Heat creep is more related to heat conductivity in the filament where heat will climp up to the cold zone. Thermal creep occurs when a material has been exposed for a long time to a high temperature and stress. The material will slowly relax and deform over time, even if the stress is under a safe security factor.
Choosing the right material
Based on this knowledge, we are able to analyze the following materials in order to find which one is best suited for our application.
1. Aluminum
Aluminum is without any doubts the most widely used material for heat blocks. It has good thermal conductivity, low density, low cost, low machining cost.
6061 is a general purpose alloy and is widely known under the T6 temper. The solidus temperature is 582°C, which is pretty low when considering our maximum operating temperature of 500°C.
Through its first phase of hardening, the 6061 alloy is heated to 500°C during 9 to 10 hours to get a single phase alloy, meaning that all added elements are dissolved in aluminum. Then it is aged at 180°C for the same amount of time. There is a problem when considering using this material for a heat block as the printing temperature is within the aging range. This will slowly bring the alloy back to its base temper, which reduces the tensile strength from 270 MPa to 76 MPa at room temperature.
Other aluminum alloys such as the high strength 2024-T4 or 7075-T6 have similar aging temperatures, which bring the same design problems. The table below shows the mechanical properties based on temperature. The general purpose aluminum performs better than 2024 from 200°C and better than 7075 from 300°C.
2. Brass
Mostly known as the nozzle material, brass has some advantages compared to aluminum. It has a very similar thermal conductivity and is easy to machine. However, the price is a little higher due to the high copper content.
Brass should have a significant advantage over aluminum. The tempers offered with typical brass (C360 brass) are cold working and shouldn’t be affected by aging the same way as aluminum. However, a new problem will occur and it is called recrystallization. When brass is cold worked, the grains are stretched, squeezed and deformed. This significantly increases the mechanical properties. However, the recrystallization starts happening between 200°C and 300°C, which replace the “forged” grains with standard new ones. These new grains have reduced mechanical properties.
Despite this behavior, the common C360 brass alloy would still be a better choice than any aluminum alloy. Below is a comparison with 6061 aluminum.
3. Copper
Copper is getting more and more popular as a heat block material. This material has one main advantage, it is an excellent thermal conductor. However, as we explained before since the distance heat has to travel is very short, this won’t be beneficial for the end user.
Copper is costly, soft, and quickly lose its thermal properties once alloyed. Pure copper has a thermal conductivity of 391 W/m.K and a tensile strength of 195 MPa while beryllium copper, one of the strongest copper alloy, has a thermal conductivity of 118 W/m.K (same as brass) and a tensile strength up to 1000 MPa when tempered.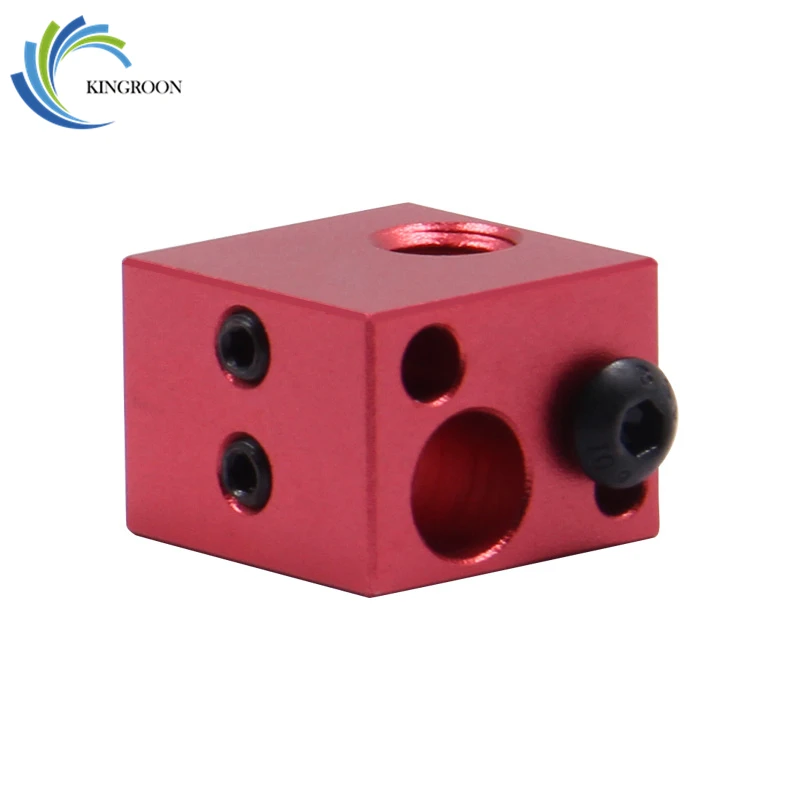
Copper alloys have the same problem as aluminum regarding precipitation hardening. After only 5 hours at 370°C, the aging process has already reduced the mechanical properties by 25%.
Pure copper can’t be precipitation hardened as there are no alloying elements. The behavior is very similar to brass, where cold-working tempers are required to increase mechanical properties. Similar to brass, copper suffers from recrystalisation. In this case, the temperature is a little higher, starting at around 270°C.
In contradiction with popular belief, copper has no real advantages over aluminum for high-temperature application as shown below. Brass is actually a much better choice.
4. Steel
This material is less popular in the 3D printing community, but you’ll soon realize that this alloy has interesting properties for a heat block. It’s affordable, harder to machine than brass and aluminum, and has no corrosion resistance. However, steel is very strong and can endure high temperature.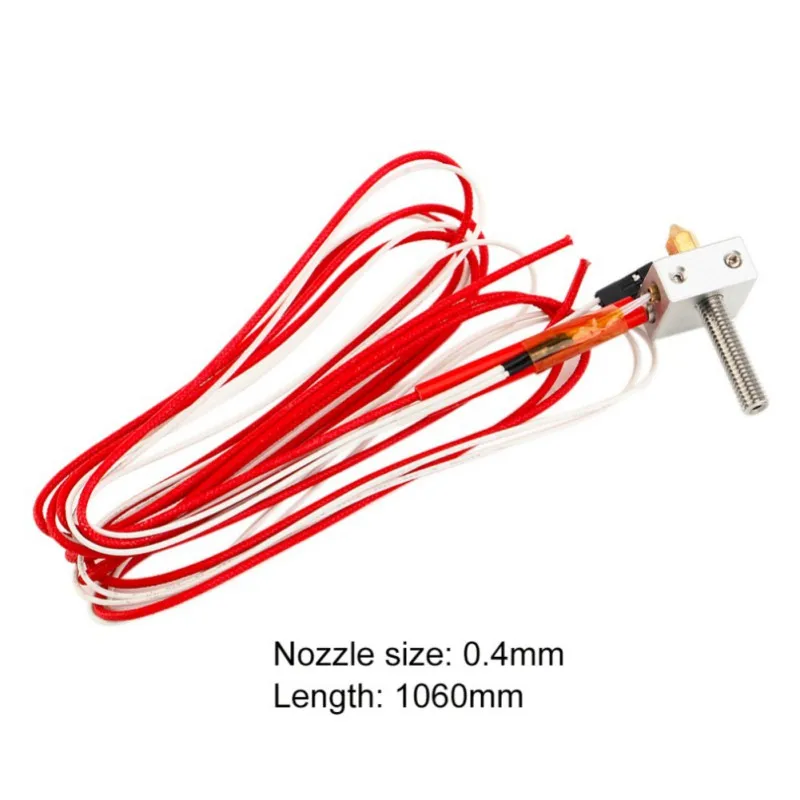
As seen in the heat treatment section, steel has a completely different way of tempering. Quenching is done by rapid cooling which changes the grain structure completely. This change can resist temperature much better than precipitation hardening or cold working. Even basic steel without hardening can offer excellent performance at high temperature.
To modify the grain structure, the steel needs to be heated to what we call austenitizing temperature, which is around 725°C.
As you can see on the graph below, steel is well adapted for high temperature and more than 3 times stronger than aluminum.
DyzEnd Pro
Now that you have seen the properties and comparison of materials, it is easier to understand our decision. For a long-term use in high temperature, brass, copper, and aluminum will lose their strength. Sometimes, it can happen within a few hours of print, depending on the temperature.
However, checking the literature is never sufficient for a design.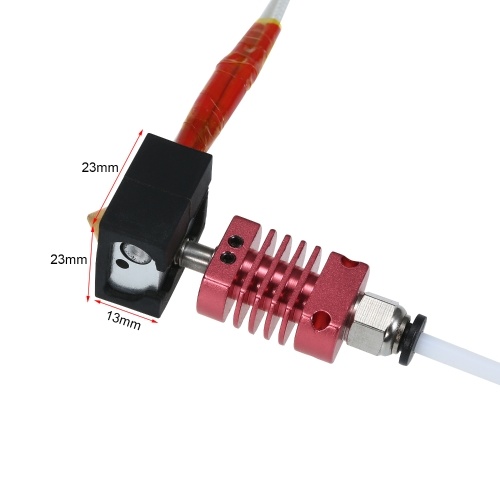 We have done tests with heating time, nozzle temperature, extrusion performance and print quality with 3 heat blocks: aluminum, copper, and steel. The only difference we have observed it that both steel and copper took a little bit more time to heat than aluminum. Extrusion, nozzle temperature, and print quality were all the same.
For high-temperature material, steel is the way to go. With a massive 330 MPa at 500°C, a steel heat block will handle any filaments without any risk.
For rust protection, we opted for the widely used electroless nickel plating. It looks great and it’s very easy to keep clean, thanks to the low friction nickel-phosphorus alloy properties.
Heater block | Prusa Knowledge Base
Heater block | Prusa Knowledge BaseEN
- Čeština
- Español
- Italiano
- Deutsch
- Polski
- Français
Login
- Home
- Glossary
- Heater block
- 1.
 75 mm
75 mm - Belt tension
- Blade
- Bondtech gears
- Bowden tube
- Buddy board
- Cantilever
- Check the cables
- Chimney (IR-sensor-holder-mmu2s)
- Control buttons
- Controller board (MMU2S)
- Curing / solidifying
- Einsy RAMBo board
- Ethernet port
- Extruder (i3)
- Extruder / Extruder motor (Mini)
- Extruder PTFE tube (Bowden-tube)
- F.I.N.D.A. sensor
- FEP foil
- FFF/FDM
- Filament
- Filament buffer
- Filament tip
- Firmware
- Flexible steel sheet
- Heatbed
- Heater block
- Heater cartridge
- Heatsink
- Hollowing
- Hotend
- Hotend fan
- Idler motor
- Idler screw
- Idler tension-screws
- Indicator LEDs
- IR filament-sensor
- Knob
- LCD screen (Mini)
- Lid
- Liquid resin
- Live adjust Z
- M.I.N.D.A. sensor
- Mesh bed leveling
- Micro USB port
- MMU Idler
- Nozzle
- Object / part manipulation panel
- Octoprint
- Olive
- Original Prusa MK2.
 5S
5S - P.I.N.D.A. sensor
- Place on Face
- Power Button (SL1)
- Power switch
- Print display
- Print fan
- Print head
- Print platform
- Print speed
- Pulley motor
- Reset button
- SD card
- Selector
- Selector Knob (MINI)
- Selector motor
- Simple, Advanced and Expert mode
- SL1 file (.sl1)
- Spool holder
- SuperPINDA
- Tank
- Thermistor
- Tilt
- Tilt motor
- Tooltips
- Touchscreen Display / Touch screen
- Tower / Z-Axis (SL1)
- Tube fitting
- USB flash drive
- USB port
- USB port (SL1)
- UV LEDs
- Variable layer height
- Wipe-tower (Purge-tower)
The aluminum block that contains the Nozzle, thermistor, and heater, on the hotend. It is attached to the rest of the hotend by the heatbreak.
Related articles
- Failing Z calibration (MK3S/MK2.5S)
Calibration >
Basic calibration
MK2.
 5MK2.5SMK3MK3SMK3S+
 - How to replace a heatbreak/heaterblock/heatsink (MK3/MK2.5)
Using the printer >
Printer maintenance
MK2.5MK3
- Err: PRINT FAN ERROR
Troubleshooting >
Print Error Messages
MK3MK3SMK3S+Plus 1.75 mm
- How to replace a heatbreak/heaterblock/heatsink (MK3/MK2.5)
Using the printer >
Printer maintenance
MK2.5MK3
- Failing Z calibration (MK3S/MK2.5S)
Calibration >
Basic calibration
MK2.5MK2.5SMK3MK3SMK3S+
- How to replace a hotend PTFE tube (MK3S+/MK3S/MK2.5S/MMU2S)
Using the printer >
Printer maintenance
MK2.5SMK3SMK3S+MMU2S
- How to replace a heatbreak/heaterblock/heatsink (MK3/MK2.
 5)
5) Using the printer >
Printer maintenance
MK2.5MK3
- Extrusion stopped mid-print (Heat creep)
Troubleshooting >
Printer troubleshooting
MK2.5MK2.5SMK3MK3SMK3S+
- Extruder noises
Troubleshooting >
Printer troubleshooting
MINIMINI+MK2.5MK2.5SMK3MK3SMK3S+Plus 1.75 mm
- Changing or replacing the nozzle (MK2.5S/MK3S/MK3S+)
3rd party accessories & Other projects >
Nozzles
MK2.5MK2.5SMK3MK3SMK3S+Plus 1.75 mm
If you have a question about something that isn't covered here, check out our additional resources.
And if that doesn't do the trick, you can send an inquiry to [email protected] or through the button below.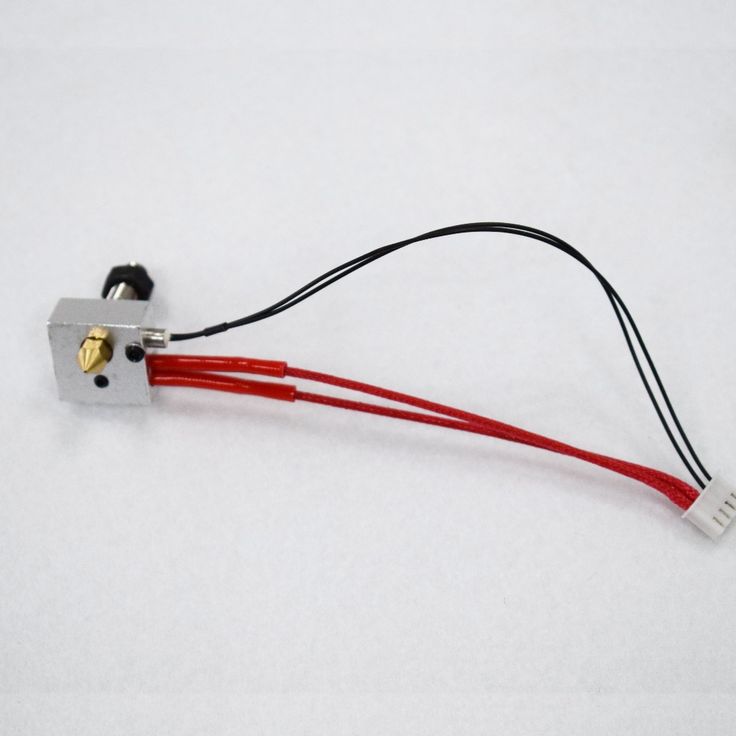
Small size, Brass heating block. I cut off the excess.
I once bought a V6 brass heating block, of high quality, milled, expensive, to make it better.
And at the same time, in another company, an inexpensive, non-standard cube, just in case. It has a nozzle in the center.
As soon as I took it (brass V6) in my hands, the desire disappeared, well, where to mount this weight.
So it lay in the box. But each time sorting through the stocks, he reminded of himself.
And there was a problem with my printer - a traffic jam. Dismantled, washed, cleaned everything. And I remembered the brass block. Let me think I'll give it a try. Come what may! If you don't like it, I'll return it the way it was.
I assembled it, but I liked it so much that now I don’t perceive aluminum blocks. And so it remained.
And it's time to put the new printer in order, ZAVmini if it's important.
What are my requirements for the cube? - yes, the most common ones:
- compact, I love when the nozzle is visible at a glance.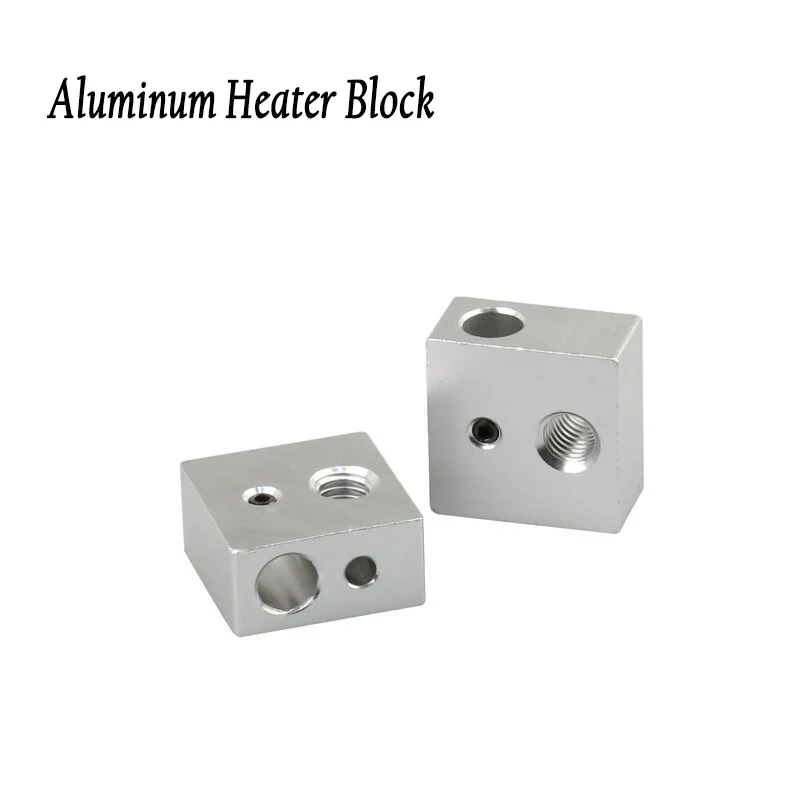
- exact hole 6mm for the heater.
- Weight would be less
I suffered with a V6 milled cube from the company "triangles" - the heater dangles like "this one" in the hole. They have a hole of 6.2 mm, but the heater, as luck would have it, is usually 5.8-5.9 mm. Thermal contact is weak, temperature control, respectively, no.
(By the way, after a while I bought another one, I thought it was of poor quality. But they are all like that)
And so, the search began. The standard V6 cube does not meet the requirement for compactness. To see the nozzle, you need to "aim" almost horizontally to the surface of the printed table. Break eyes.
I really liked this aluminum cube 16 x 16 x 12mm, sold by a large tree. Bought. It's time to collect the hotend, combine different variations of cubes.
Compared 2 cubes, compact "alu", and non-standard brass, put them together, aligned the holes and ... Oh Eureka! Yes, they are the same, they will be if the brass saws off a hole for the thermistor.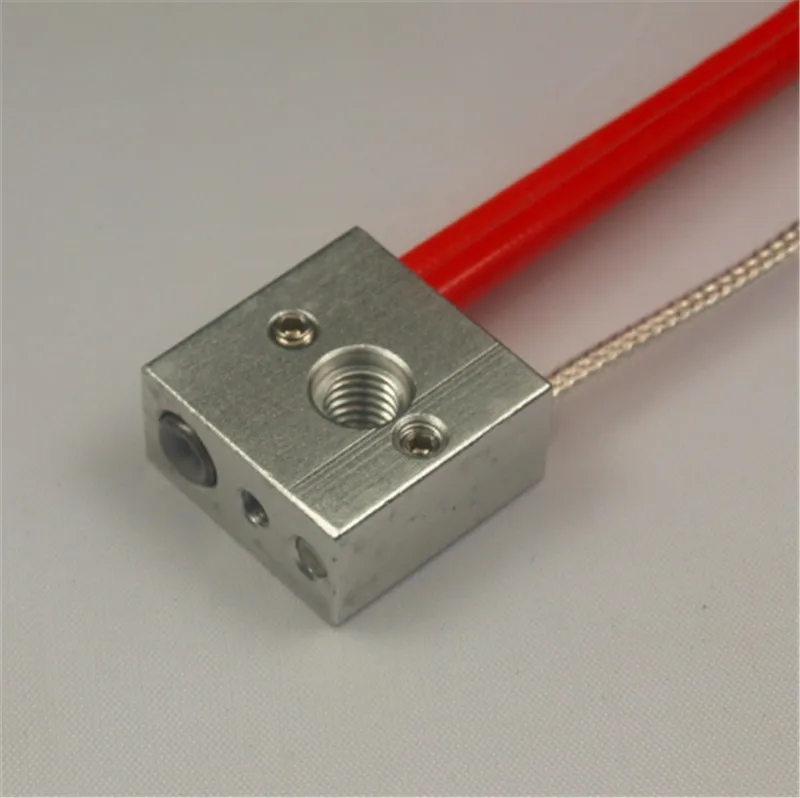 And there is even hope that a silicone sock will do, as it is impossible without socks.
Drills included. I will make a mount for the droplet thermistor. Moreover, the cartridge version of the thermistor, let's say, does not satisfy me.
Unfortunately, I didn't take pictures of the manufacturing process, I didn't take a picture of the finished cube either - I hurried to assemble it, I was impatient to see what it was like in work. Only a cut piece remained. Photo-assembly will help you understand.
So, on the left is an aluminum cube, at the top is the same non-standard brass one.
From it we saw off the part on the right, finish it with a file, polish it, we get a blank. In it we drill M2 for a drop thermistor, and M2.5 in which we cut the M3 thread.
Approximately in that place - put on a silicone sock helps with marking.
Means the most interesting, weight of brass cubes :
Non-standard brass - ~ 26 grams, we saw off a piece from it (4.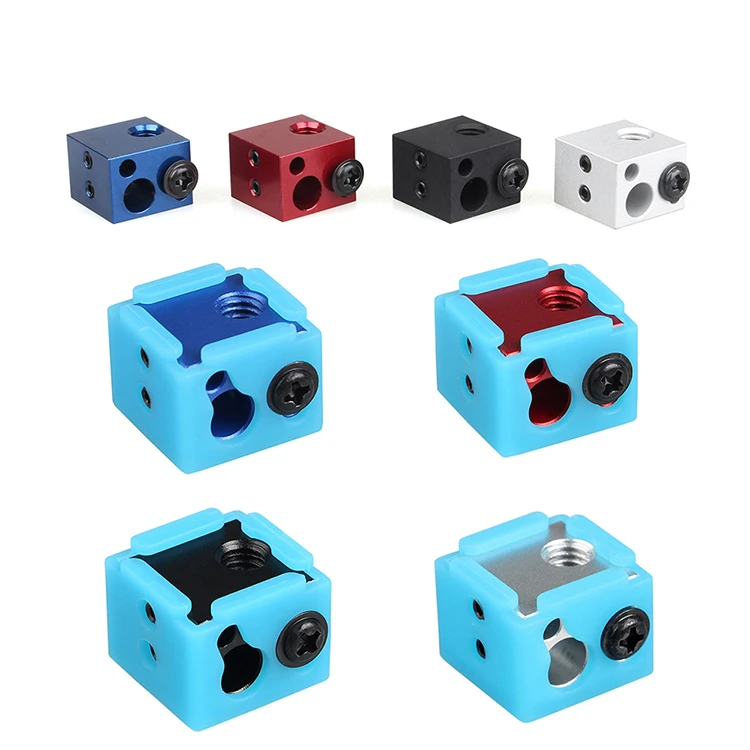 2 grams), sharpen, drill, we get 18 grams.
For comparison, the same aluminum (in the picture on the left) weighs 6.5g.
But it's worth it! Layers are even, sinterability is excellent, stability is excellent.
Heats up at a rate of approximately 5 degrees per second. There is no run-out from the set temperature, it sags by -1 degree from the set one, levels out and the printing starts. There are no temperature fluctuations on retracts 4/35.
With the "alu" V6 cube from triangles, I had: +5 runout, -5 drawdown, +2 second runout, -1 second drawdown and then print. The temperature stabilized for a very long time. And temperature fluctuations on the retracts reached +3 -3 degrees.
Photo prints not available. And the photo does not convey the details. This becomes apparent to the touch by tapping and stroking the printout.
Heating block in the category "Engineering and electronics"
Heating block for 5 ml tubes, 18
3
in warehouse
Delivery in Ukraine
4 510 UAH
Buy
LLC "Spectro Lab"
Heating unit for test tubes 15ml, 18
4
in warehouse
Delivery
4 510 UAH
Buy
OOO "SPEKTRO LAB"
Block of heating elements with thermostat 7. 5 kW 2" 220/380 Tenko
Delivery from Dnipro
2 738 UAH
Buy
Online store "Tubmarin"0003
Heating element block with regulator 9 kW 380 V 2" Tenko
Delivery from Dnipro
Ukraine
50 UAH
Buy
Ma Store
J-3D Black Heating unit E3D V6
Delivery in Ukraine
55 UAH
Ma Store0003
Delivery in Ukraine
80 UAH
Buy
Ma Store Delivery across Ukraine
45 UAH
Buy
UA Reprap Store
Heating block for test tubes 0.2 ml, 18
8In stock
Delivery across Ukraine
4 510 UAH
Buy
LLC "Spectro Lab"
Heating unit for test tubes 0.5ml, 18
9In stock
Delivery
4 510 UAH
LLC Space Lab LL
Heating unit for test tubes 1.5ml, 183
in warehouse
Delivery in Ukraine
4 510 UAH
Buy
LLC "Sperm Lab"
Extruder Extruder E3D V6, MK7, MK8 3D printer 9Ol000
970 uah
Buy
LLC Pak-Center
Slot matrix head for symbols + heating block (set) in the dater marker roll DY-8
In stock
Delivery across Ukraine
970 UAH
Buy
LLC PAK-Center
See also
Heating unit hotnd 20x16x111.