Harbor freight 3d printer
Winterizing your 3D printers with a little help from Harbor Freight
Moving is full of surprises. I knew that Oregon would be colder than Florida. I welcomed the cooler weather, because living through most of the year in 90 degree temperatures was never my thing.
What I didn't expect was the impact the cold would have on the 3D printers. Temperature range is very important when it comes to 3D printing.
When printing with ABS, you need to keep the entire build area hot enough to prevent warping. But what I didn't expect was that the garage would be too cold to successfully print PLA. PLA is a very forgiving material. It usually prints so well and so easily that most people don't spend more than just a little bit of time tuning temperature details -- and usually that's about not making it so hot it melts.
But, as it turns out, PLA does not like printing in cold garages. With an inexpensive space heater, my garage stays about 10 to 15 degrees Fahrenheit above the outside temperature. So, when it gets down to 28 outside, the garage is a chilly 40 or so. As it turns out, PLA doesn't really like printing in temperatures under about 59 degrees (15 degrees Celsius).
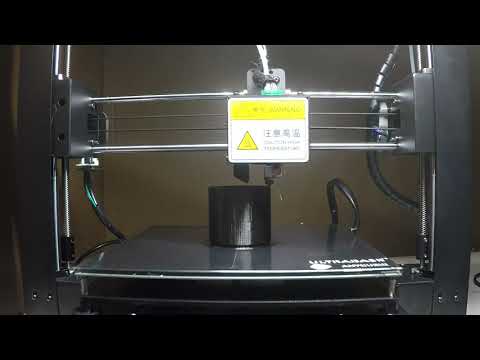
This was particularly the case with the CR-10 and CR-10 Mini printers that GearBest was kind enough to send me. Both of these printers have very large build areas, but are completely open. When I attempted to use the printers for large prints, I got layer separation very much like you'd see with a bad ABS print.
It's not supposed to do that.
In order to use these very cool printers, I had to find a way to keep the prints warm the whole time they're printing. Heating the whole garage isn't an option for a variety of logistical reasons. Instead, I had to create a heated chamber of some kind for the two printers.
If you search YouTube, there are a bunch of great examples of heated chambers built out of wood, foam, or other materials. But I didn't want to create two large structures, especially since that would take a lot of room.
I had already moved the two CR-10s to a wire rack. I had already built some lifting brackets to help secure the printers to the rack, and they fit pretty much perfectly. Since the rack creates a ready-made frame around the two printers, I decided to enclose the rack with some kind of insulating material, thinking that the ambient heat generated by the printer might create enough warmth for the printing process to successfully complete.
My first test was using some old fluffy blankets. I wrapped them around the wire rack, ran a print, and it came out fine. Those blankets were bulky and difficult to manage. Because we just moved across the country, my wife and I immediately thought of moving blankets. Moving blankets are quilted (but not overly fluffy), lightweight, and sturdy. We thought they'd fit the bill perfectly.
I took a quick ride down to the local Harbor Freight Tools. I bought two small blankets (about $5 each) and two larger blankets (about $9 apiece), as well as a few more clamps to augment the nice collection I'd already built up. The clamps are a buck, so we're not talking about a big expense.
I did splurge on two SensorPush wireless sensors. These are about $50 each. They monitor temperature and humidity, and they send that data to your smartphone. They also produce charts, which really appealed to me.
As you can see in the following image, the temperature in the enclosure stayed within desired parameters during the entire duration of the print, then fell once the heated bed and extruder shut down.
Chart showing heat retention performance throughout the night.
I also had to make a set of stand-offs because my first blanket test showed me that, as the printer carriage traveled over the Y-axis, it pushed against the blankets, causing some minor trouble. The stand-offs I made were designed to snap onto the wire shelving racks, and keep the moving blankets away from the printers themselves. I printed 16 of these and installed them onto the rack.
Shelf stand-offs
Then all I had to do was wrap the rack in the moving blankets, clamping them to the posts of the rack. My initial blanket test helped me realize that I wanted to be able to check on the status of the print while it was printing, so I needed a camera inside, as well as a light. For the light, I turned to the trusty Pik Light that Mychanic sent me last year. It has a nice magnet, a hook, and a really strong LED. I just hooked it on the upper wire shelf and it lit the entire enclosure for the full duration of the printing process.
For video, I went with an app I had on my phone, Cloud Baby Monitor. I've often used this to keep an eye on our little baby (a Yorkipoo pup), and figured it would probably work well enough for the printer. I wasn't exactly thrilled with the image resolution, but it did the job.
My guess is that the next set of upgrades for this setup will be a better camera system and more integrated lighting, but it all worked out nicely. As the accompanying video shows, the prints that were produced inside the chamber were of very nice quality, with no signs of the kinds of damage I was experiencing earlier.
Temperatures inside the chamber never exceeded the mid-60s, but I'd still recommend you keep a fire extinguisher handy. It never hurts to have one around, no matter what.
Finally, for anyone wanting to print their own stand-offs or CR-10 lifting brackets, here are my Thingiverse pages for those projects:
- Wire shelf stand-offs
- CR-10 Lift Brackets (tall)
- CR-10 Lift Brackets (short)
Extra Tools You’ll Need for 3D Printing
If you buy something through our links, ToolGuyd might earn an affiliate commission.
After you purchase your first 3D printer, you’ll probably need some extra tools that nobody told you about, to do things like remove the print from the build surface, remove plastic flash and supports, or modify the part itself.
If you’re lucky, the manufacturer will supply a few of the tools you need, but chances are you’ll have to acquire them yourself. You might already have many of the tools necessary, but there are a few specialty tools I’ve found that work better than the common household tools you might already own.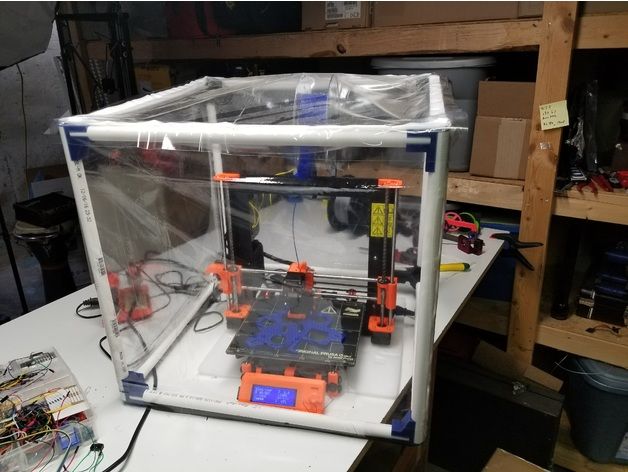
Advertisement
In no particular order, here are the some tools I’ve found necessary so far, and some personal recommendations where applicable.
Print Removal Tool
For the longest time I’ve been using a regular 1″ putty knife to remove prints from the build surface. That changed when I purchased a PEI (Polyetherimide) sheet for my print bed. What PEI does is eliminate the need for tapes, glues, slurries, or what ever concoction you’ve figured out to get the filament to stick to the build surface.
The downside is that sometimes the prints stick too well to the PEI. I started using a 1/2″ wood chisel to pry the prints off the surface. The problem with a chisel is that you are prying with a really sharp object, and I’ve sliced my finger open a few times trying to remove a print.
When I received the Dremel Digilab printer test sample, it came with a specialized 2″ print removal tool that looks like a putty knife. However, this tool differs from a putty knife in two important ways: the blade is thinner, and it is ground down to a sharper edge.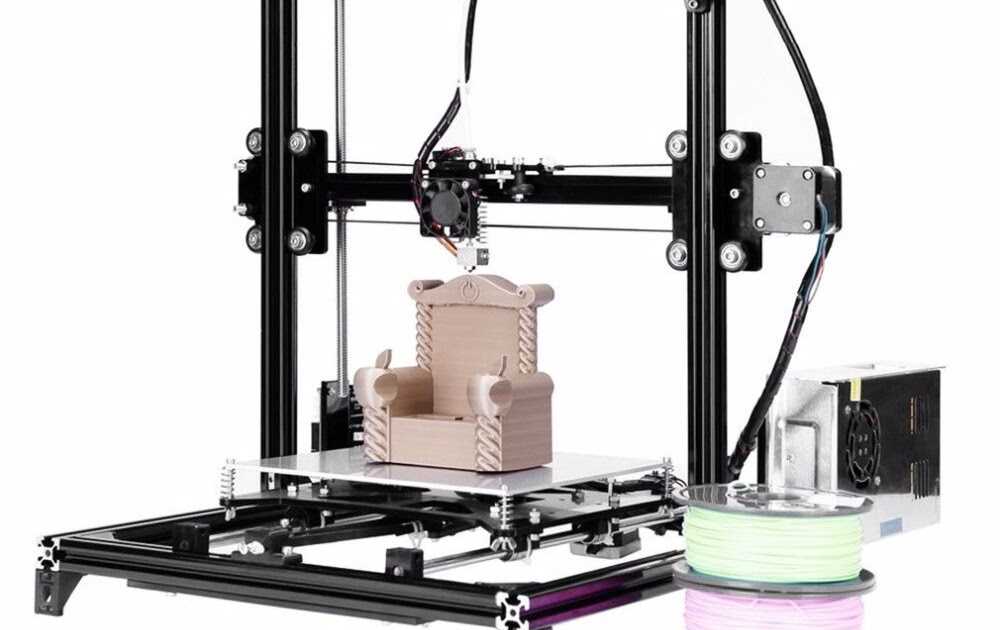
Advertisement
The almost knife-like edge allows you to get underneath a print to separate it from the bed. I prefer using this tool over the chisel now because it works just as well and is a whole lot safer.
I will eventually have to return the Dremel printer (as the test sample is a loaner), and with it the print removal tool, so I went looking for a replacement that I can keep for myself. I think I found Dremel’s source for the tool: FYSETC. They look to be a Chinese company that either makes or resells an identical print removal tool. It’s available on Amazom for $9.
Buy Now (via Amazon)
Digital Calipers
Digital calipers are indispensable for creating models, but there are times when you’ve printed a part and it doesn’t fit properly. If you know the exact dimensions, sometimes you can just scale the part in the 3D printing software without redesigning the part.
More importantly, if your want your prints to be dimensionally accurate, you need to print a calibration cube to test your printer.![]() I use this one from Thingiverse.
I use this one from Thingiverse.
If you discover that your printer isn’t accurate in one dimension, most printers have a way to adjust the calibration of each axis.
I’m not sure what brand these calipers are, but they are a $20 no-name imported pair I purchased on Amazon before they became garbage. It can be hard to find a cheap pair of calipers that doesn’t feel slide like a grader on a washboard road.
Related: Any Recommendations for Inexpensive Calipers?
Stuart’s Note: My vote would be for Mitutoyo, but they’re not exactly inexpensive.
Right Angle Pick
Hot filament can only bridge so far without being supported. Sometimes you need to add support structures to your object for it print right. If you have a multi head printer, you can use a water soluble filament and then just wash away the supports, but for the rest of us, we’re stuck having to dig out the support material.
The best tool I’ve found for this task is a right angle pick. I had a Husky 4 pc pick set, but of those four, I bent one pick, broke another, and melted a third. They would not be my first recommendation. Rather, I like the Milwaukee hook and pick set, as I haven’t managed to damage one yet.
These aren’t carried at Home Depot Retail locations, but you can order the set online. Just make sure you ship them to a store near you to avoid shipping costs. Or, they ship free as part of a $45+ order. They’re also available at other Milwaukee tool dealers.
Buy Now (via Home Depot)
Buy Now (via Acme Tools)
See Also: Ullman Hooks and Picks
Pliers Wrench
There will be times you will need to press magnets, nuts, or other metal pieces into a finished plastic part. I’ve found that nothing works better than a Knipex Pliers Wrench. The parallel jaws keep the part and the insert piece aligned properly as you squeeze the handles.
I own a Knipex 7-1/4″ Pliers Wrench, with the plastic grips, part number 8603180. The best price on this version I’m finding right now is over at Amazon where you can pick them up for about $46-$50.
Buy Now (via Amazon)
Buy Now (via Zoro)
X-Acto Knife
When printing a part, you usually print a thicker layer on the bottom so that it adheres better to the build surface. This leads to the bottom of the part sometimes being flared out a bit. For the longest time I’ve been using an X-Acto knife to trim off this extra plastic “flash.”
I purchased an X-Acto X5282 basic knife set many years ago, but honestly I only ever use the small knife and standard #11 blades.
I wouldn’t recommend going cheaper on either the blades or the knife. I’ve purchased a few substandard sets and have been completely disappointed, the knife doesn’t hold the blade well, and the blades are thinner and bendy.
Rather than buy a whole kit, I’d recommend starting out with this X-Acto #1 knife with 5 #11 blades for $8.
Buy Now (via Amazon)
Stuart’s Note: Excel’s hobby knives are another good option. As of the time of this posting, their basic knife is $3.41 as an add-on item.
Deburring Tool
After some pokes and nicks with an X-Acto knife, I pulled out my deburring tool to try. I find it does a decent job removing the plastic flash on long straight edges or consistently curved edges. It’s much tougher to use on corners or nooks, so I still end up using an X-Acto knife.
The one I’ve been using is a General Tools 482 swivel head deburring tool with metal handle. It comes with two blades: a black one for use with steel, copper, aluminum, and plastic and a second one for cast iron and brass. I guess I lucked out and had the correct blade inserted in the tool, because I have no idea where the second one is.
You can pick one up at Amazon for about $13.
Buy Now (via Amazon)
Stuart’s Note: Also consider Noga. Their 3-blade starter set is also $13 at Amazon.
Diagonal Cutting Pliers
I’ve been using diagonal cutting pliers for cutting filament. I recently picked up a pair of FastCap micro flush cutting pliers on the recommendations of Ben @dusty.tools on Instagram. I’d been meaning to pick up a set to try out, and temporarily losing my go-to pair of side cutters finally gave me the reason I needed.
Besides cutting filament, these new micro flush-cutting pliers allow me to trim plastic flash off prints, further saving myself from X-Acto knife injuries.
The best place I could find to purchase these was at Home Depot. They don’t carry them in stock so I opted for ship-to-store. They cost me $11 plus tax.
Buy Now (via Home Depot)
Tweezers
Finally, a pair of tweezers comes in handy for dealing with hot filament. There’s always excess filament that squeezes out of the hot end as the nozzle is heating up. I like to remove as much of this as possible before the printing starts, because it can get get dragged around by the print head or even get stuck in the print.
Sometimes the plastic starts sticking to the nozzle.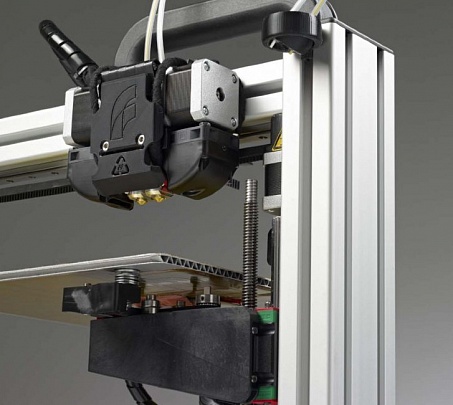 This plastic will eventually turn black and start to smell. It can also fall off the nozzle and leave a glob of blackened plastic in the middle of your print.
I use tweezers to grab and remove the hot filament before it can cause any issues during a print.
I’ve been using some cheap Husky tweezers I purchased on clearance after Christmas one year. For this job just about any cheap pair of straight fine point tweezers will do.
They don’t sell the Husky set I purchased anymore, but I believe the ones I use are in this Husky picks and tweezers tool set. As a bonus you get a right angle pick, but just remember that it’s easy to bend the Husky picks.
Buy Now (via Home Depot)
Did I miss any tools? Or do you have favorite 3D printing tools that work better? Let us know in the comments.
Dutch engineers 3D printed an experimental ship propeller
News
Dutch shipbuilding company Damen Shipyards Group has announced the completion of additive manufacturing of the first functional prototype ship propeller.

The Dutch have always been serious about navigation, and therefore it is not surprising that the largest European trading port is located in the Netherlands. The port of Rotterdam receives 36,000 ships a year, and the cargo flow exceeds 400,000 tons. We are interested in the trading harbor for another reason: here is the pilot plant RAMLAB, which specializes in the production of ship spare parts using additive technologies.
The port fab lab was founded in 2016 to simplify repair logistics: any equipment breaks down, and it is long and expensive to transport spare parts to Rotterdam from, say, South Korea. In addition, many parts are made to order, which takes extra time, and every minute of downtime costs ship owners a pretty penny. Hence the idea of producing spare parts right at the port, including large items such as ship propellers.
Damen Shipyards, which owns more than fifty shipyards and repair docks around the world, is interested in the project. Up to 150 ships a year leave the company's stocks, ranging from yachts and ferries to container ships, tankers and warships. After looking at a demo shown at Hannover Messe 2017 (pictured above), Dutch shipbuilders decided to 3D print a propeller for a coastal tug.
The screw, codenamed "WAAMpeller", is made from a nickel-aluminum-bronze alloy using the WAAM system (hence the name), an industrial robotic arm equipped with a welding machine. WAAM stands for "Additive Manufacturing by Arc Welding". A pair of such six-axis systems, developed by engineers from the University of Twente, are installed in RAMLAB. The three-blade propeller is based on the design of the German company Promarin Propeller und Marinetechnik GmbH, which supplies original propellers for Damen Stan Tug 1606 tugs.
The 3D printed screw is 1.35 m in diameter and weighs about 400 kg, although this is not the limit for RAMLAB's WAAM 3D printers, which can print products up to 2x2x7 meters in size.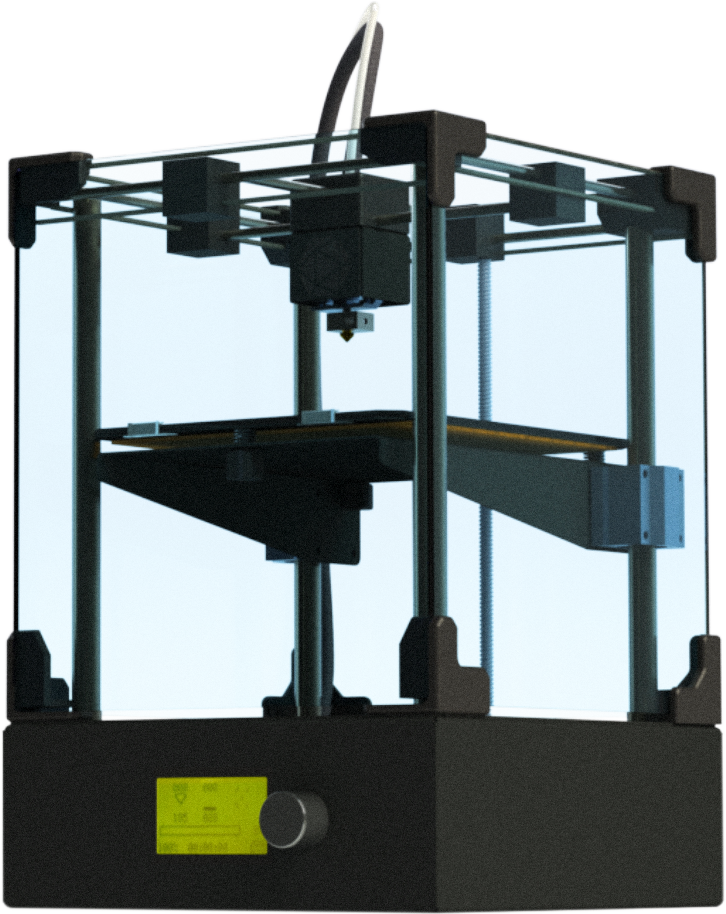 The formation of the workpiece has already been completed, but the product will reach full readiness only after processing. Milling will be done by a special production center of Autodesk in Birmingham, at the same time supplying RAMLAB with the necessary software. The main issue is the ability of a 3D printed screw to resist corrosion and mechanical fatigue, and therefore the first stage of the project was the production of prototypes in the form of plates for strength testing.
“The thing is, 3D printed products build up layer by layer. As a result, their mechanical characteristics depend on the direction of the applied forces - this is called anisotropy. Cast products, on the other hand, are isotropic – material characteristics are independent of direction,” explains Kees Kusters, chief project engineer.
The first prototype will serve for demonstration purposes only, but the team is already preparing to produce a second, improved prototype, taking into account the identified errors.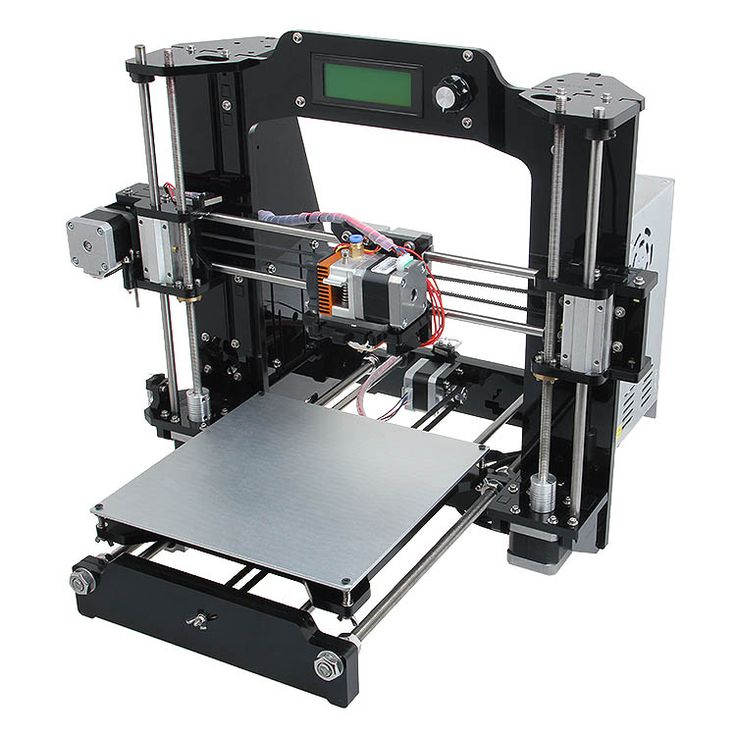 Production is scheduled to begin next month, and the final product will be tested under the supervision of an inspection company, Bureau Veritas inspection company, in order to obtain a type certificate. If everything goes well, by the end of this year the second sample will be installed on a tugboat and will become the first 3D-printed propeller put into operation on a real ship.
Do you have interesting news? Share your developments with us, and we will tell the whole world about them! We are waiting for your ideas at [email protected].
Follow author
Follow
Don't want
7
More interesting articles
6
Subscribe to the author
Subscribe
Don't want
We summarize the results of the #Obzor2022 contest and announce the winner. Participants were asked to publish details. ..
..
Read more
four
Subscribe to the author
Subscribe
Don't want
The creation of the center will help improve the quality and reduce the cost of engineering products...
Read more
82
Subscribe to the author
Subscribe
Don't want
Collaboration 3D
We are pleased to present you our joint development with Speci...
Read more
Belgium builds the largest transportable 3D printer
News
Belgian startup Colossus has built the world's largest transportable 3D printer. The machine is the size of a shipping container and prints granular plastic, including composite materials and recycled polymer raw materials.

Huge 3D printer designed for printing furniture, decorative items and other large items. How oversized? The size of the construction area of the "Colossus" is 2.67x1x1.5 meters, that is, the usable volume reaches four cubic meters. The dimensions and weight of the installation are chosen so that the 3D printer can be transported by truck, loading and unloading with a truck crane. Actually, a real cargo container serves as a chassis.
Printing with ordinary small-diameter nozzles and filaments is out of the question, because this would lead to no less enormous time costs, and therefore the unit is equipped with a high-performance screw extruder that works with polymer granulates. The productivity of the 3D printer reaches 15 kg/h. The platform is heated up to 90°C, and the hot end is heated up to 400°C, which theoretically makes it possible to work even with refractory structural thermoplastics. Mostly, varieties of ABS, PLA, PET-G and polypropylene are used - both pure and filled with bronze, fiberglass, carbon fiber and gypsum. For the sake of cost reduction and plus in karma, you can use recycled plastics.
So far, the team is touring Europe and has already demonstrated a giant 3D printer at the Belgian electronic music festival Tomorrowland and the Spanish art festival Essencia. The next stop is the industry exhibition of additive technologies Formnext 2018. Additional information about the project is available on the official website at this link.
Do you have interesting news? Share your developments with us, and we will tell the whole world about them! We are waiting for your ideas at [email protected].
Follow author
Follow
Don't want
11
Article comments
More interesting articles
5
Subscribe to the author
Subscribe
Don't want
Institute of Laser and Welding Technologies (ILIST) of St.