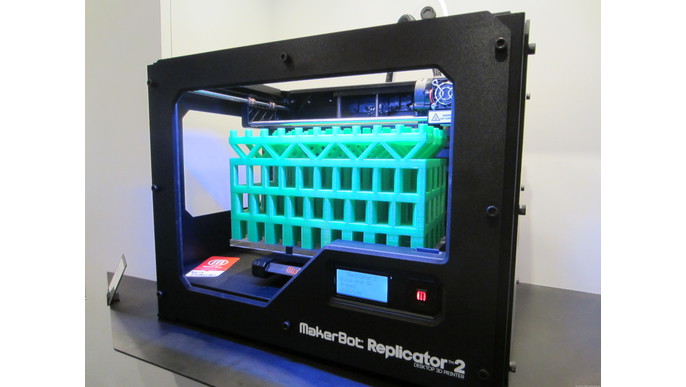
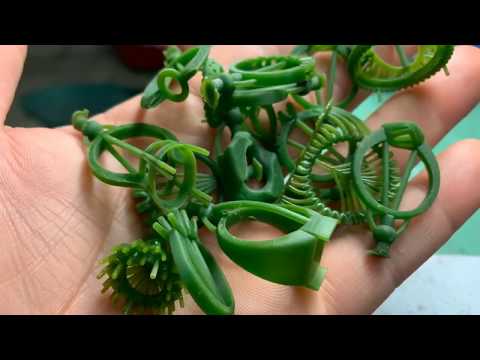
Hand painting 3d prints
Your Guide to Painting PLA 3D Prints
When it comes to painting PLA 3D prints, it’s not quite as simple as removing your part from the print bed and applying paint with a brush. Of course, you could do that, but the result would be sub-optimal and the paint might be inconsistent or chip off. For the best results painting PLA, there is a bit of prep work that needs to take place, including removing supports, smoothing the print surface, and priming. In this article, we provide a step-by-step beginner-friendly guide to painting PLA parts and explain why each post-processing step is important.
Recommended reading: PLA vs ABS: Which filament should one use?
Best paints for PLA
Before getting into how to prepare your 3D print for painting, let’s first talk about what types of paint work well with thermoplastics such as PLA. Fortunately, there are different options at your disposal, both in terms of paint type and application method.
As far as thermoplastic filaments go, PLA is one of the easiest to paint. With the right preparation and priming treatment, most types of paint will adhere to the material’s surface. Acrylic paint, enamels, and lacquers can all be used to finish a PLA print. When it comes to application, you can choose to paint using brushes or using spray paint.
Despite the fact that many paints work with PLA, the most popular options for painting PLA are acrylics and enamels. Let’s take a look:
Acrylic Paint
Acrylic paint is a water-based product made up of pigment particles, acrylic polymer binder, and water. The three materials form an emulsion which can be easily applied to surfaces. When the water in the paint evaporates, the paint becomes dry and stable.[1] Acrylics are known for being easy-to-use and are quick drying. When wet, they can be cleaned easily with water, but become permanent when dry. Acrylics are also highly versatile and adhere well to a wide range of substrates, including thermoplastics like PLA. In terms of appearance, acrylic paints have a matte finish.
Acrylic paints are safe and easy to work with when painting PLA 3D prints.
Enamel paint
Enamel paint is a category of solvent-based paints (oil-based paints) characterized by their glossy finish. Enamel paints are also known for creating a thin hard and stain-resistant shell, which can give products greater durability and weather resistance.[2] Like acrylics, enamel paints are sold as liquid (to be applied by brush) or in aerosol form (to be sprayed). Enamel paints typically dry slower than acrylic and can have a stronger smell due to the solvents in them.
Step One: Support Removal
Once you’ve removed your PLA part from the 3D printer, the first step is to remove any supports. (If your 3D model doesn't require any support structures and doesn’t need any cleanup, you can skip this step and head straight to step two.)
In the FDM 3D printing process, support structures ensure that certain design features—such as overhangs over 45 degrees or bridges—can be extruded successfully without succumbing to gravity.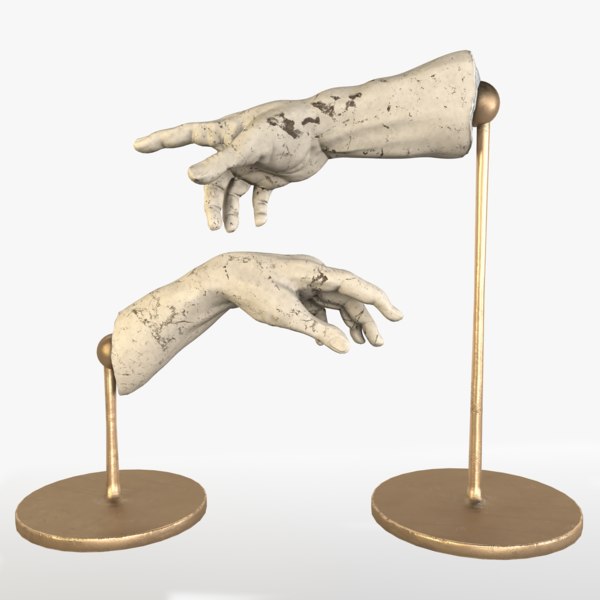 If supports are printed from the same material as your build (i.e. they are not soluble supports), they must be manually removed. In some cases, removal is as simple as breaking or cracking supports off by hand. This is easiest if the support structures are very low in density and are not well bonded to the surface of the PLA part.
If your part has features that are at risk of breaking, however, we recommend using tools to assist in support removal, such as a knife, a pair of needle-nose pliers, or flush cutters. The aim, ultimately, is to remove the supports and leave as little trace as possible on the part surface. Working gently is the best way to remove supports while minimizing the risk of damage to the final model. You can also heat up the blade of a knife, which will soften the PLA and make it easier to pry the support away from the part surface.
We should note that build orientation and part design can greatly influence the support removal process. If turning your 3D model on its side on the print bed will reduce the number of supports required, the removal process will be significantly faster. Similarly, if you can tweak a design to remove a particularly challenging overhang, you will cut back on the amount of supports needed in the first place. Different types of support, such as tree supports, can also be easier to remove.
Gently remove supports by hand or using tools such as a knife, pliers, or flush cutters.
Recommended reading: How to Remove Supports from 3D Prints
Step Two: Smoothing
Once supports have been successfully removed from your printed model, it’s time to smooth out the part’s surface. The goal of this step is to remove any blemishes or surface defects leftover from supports as well as to flatten any prominent layer lines created by the filament extrusion process.
Sandpaper is the most popular method for smoothing PLA 3D prints: it’s cheap, safe, and is highly effective at removing surface inconsistencies. The one downside is that it can be time consuming. There are a number of different sanding mediums, including sanding blocks, sandpaper, and nail files. Sanding blocks are great for smoothing out larger parts with broader surface area; nail files are handy for smoothing out small details on PLA prints; and conventional sandpaper is pretty much suitable for everything.
When smoothing a PLA 3D print, rub the sandpaper over the part’s surface in small circular motions—against the grain of the print. This will gradually remove the top layers of plastic and smooth any blemishes. If you have different types of sandpaper at your disposal, it is recommended to use a variety of different grit levels, starting with the coarsest sandpaper (lowest grit) and moving towards the finest sandpaper (highest grit). Many makers also finish the smoothing process with wet sandpaper. This is exactly what it sounds like: simply dampen a piece of fine-grit sandpaper and rub it over the 3D printed object. This step will not remove as much material as earlier sanding stages, but will result in a very smooth, polished surface.
If time is a concern, you can use an electric sander. In this case, follow the same steps (starting with a lower grit sandpaper and moving to finer grit), but be sure not to sand one area for too long, as it can create a heat buildup that can soften and melt the PLA.[3] It is also a good idea to equip yourself with gloves and a mask when sanding PLA, and to work on an easy-to-clean surface. When sanding is complete, clean your work area and the 3D print to remove any PLA particles.
Recommended reading: Dissolving PLA: How to Melt PLA and Smooth 3D Prints
Step Three: Priming
While your 3D print should feel smooth to the touch after sanding, applying a primer will take it to the next level, evening out any remaining roughness or texture and filling in gaps. Primer also functions as a base layer and promotes better adhesion between the PLA surface and the paint. Priming is an essential step if you want your 3D print to have a professional painted finish.
There are many different primers on the market, but primer filler (such as Rust-Oleum) is among the most recommended for finishing FDM 3D prints. Primer filler is sold as a spray, making it easy to apply. It also typically has a gray coloring, which provides a good neutral base for applying color later on. You can find primer fillers at your local hardware store.
To use an aerosol primer filler, it is important to mix the contents of the primer inside the can. Shaking the can vigorously can cause unwanted bubbles, so swirl the can for a few minutes instead. If in doubt, follow the instructions on the primer filler can.
For the best coverage, suspend your 3D model in the air and spray the primer from a distance of 25-30 cm. Spray the primer in steady motions across the model, from left to right and up and down. This will ensure that the primer is being applied evenly and is covering the whole print surface. You also want to avoid spraying too much at one time, because this can cause pooling or dripping. Finally, be sure to work in a well ventilated space using the proper protective equipment.
When the first coat of primer is complete, let it dry. If needed, you can go back in with your sandpaper for any touch ups. Typically, PLA 3D prints require at least two coats of primer before painting gets underway. Before applying your first coat of paint, make sure the primer is completely dry (this can take about 40 minutes).
Step Four: Painting 3D Prints
Once your print has been sanded and primed, it is ready to be painted. In this step, you have some choices to make. For starters, you have to choose the type of paint you want to work with. As we saw earlier, some of the best paints for PLA are acrylics and enamel paints. You also have to choose which application method you will use: spray painting or hand painting.
Spray painting 3D prints results in a uniform, smooth finish.
Spray Painting
Spray painting is a good option for achieving a uniform, smooth surface finish. It is also good for parts that require tighter tolerances or good dimensional accuracy because it adds color in thin layers with less buildup than hand painting. Be sure to follow instructions on the spray paint you are using (i.e. in terms of shaking the can and storage).
For the best results spray painting your 3D print, hang your print using a thin wire in a well ventilated area. This will enable you to spray the entire print’s surface without missing any spots. Similar to applying the primer, move the spray can continuously, back and forth and up and down, with wide strokes that cover the entirety of the print. This will ensure that the paint is applied evenly and to the entire print.[4]
Once the first coat is complete, wait 15 to 20 minutes before applying a second coat. Repeat this until the desired saturation and finish is achieved. At this point, leave the painted 3D print for at least 24 hours before applying any varnish or polishing coatings. And don’t forget to wear protective equipment, like gloves, goggles, and mask when spray painting.
Hand Painting
Hand painting is usually the best choice for 3D prints that require fine details, such as toys or miniature models. Use good quality brushes and paint to coat your 3D print in the colors of your choosing. When the base layers of paint are dry (it might take several even coats to get the opacity and consistency you want), go in with finer paint brushes to add detail. If possible, start by using the lightest colors and progress to using the darkest colors.
If you are painting using brushes, it is best to work with acrylic paint. This type of paint is easy to work with and is among the most affordable. Note that cheaper acrylic paints might not have the best coverage and may require more coats than a better quality paint.
Clear Coat
When you are happy with the appearance of the color paint, there is the optional step of adding a clear coat to your print. The clear coat is a transparent layer that protects the surface of the paint and can modify the finish. For example, if you have painted your print with matte acrylics, you can apply a glossy clear coat for a shinier finish. The clear coat can also be applied by brush or sprayed using the same techniques we discussed for painting.
Key Takeaways
Painting is a reliable way to make your 3D prints look more professional, whether you are making a product design prototype, a decoration for your home, or a functional part. Achieving a high-quality paint job, however, takes some time and effort. Here are some of our key takeaways for painting PLA 3D prints:
Acrylic and enamel paints are the two best options for painting PLA 3D prints.
Before painting, it is essential to remove supports and smooth the print’s surface using sandpaper.
Priming ensures that the print surface is sealed and smooth. It also helps the final coats of paint to adhere to the plastic material.
For smooth uniform coats of paint, spray paint is recommended. Hand painting is best for adding small details.
Hang or mount your 3D print to paint every angle and to ensure even coats. This will also help the paint to dry uniformly without any blotches.
When post-processing and painting PLA, make sure to work in a well-ventilated space and to use the proper protective equipment, such as mask and gloves.
References
[1] https://www.liquitex.com/us/knowledge/what-is-acrylic-paint/
[2] https://acrylgiessen.com/en/enamel-vs-acrylic/
[3] https://www.makerbot.com/professional/post-processing/sanding/
[4] https://www.makerbot.com/professional/post-processing/painting/
Finishing and Painting 3D Printed Parts
With the high strength properties of continuous fibers and the surface finish of Onyx, beautiful, functional parts come right out of a Markforged printer. However, some applications require a slightly different aesthetic. We’ve previously covered dyeing nylon 3D printed parts, and now the Markforged team has been preparing some colorful office props for Halloween. Read on and learn our methods for painting 3D printed parts!
Finishing
Before painting your 3D printed parts parts they may require some finishing. This means smoothing the surface of your part out and making sure that there aren’t any rough features of the part that may prevent paint adhesion. Such features include residue left by support material, and strings or blobs of filament that may have been caused by low angle overhangs or material inconsistencies. If these occur, we suggest the following:
1. Cleaning off Glue:
If you have used our printer, you’ll know that laying glue down on your build plate before a print will vastly improve your printing results. Once you remove the part from the build plate, some glue residue is left on the part. Wash this residue off with some water and let it dry.
2. Trimming with Flush Cutters or Tweezers:
To get rid of small strings or blobs of filament that have built up, a pair of wire cutters or tweezers to clip or pick off inconsistencies will clear these off easily.
Trim inconsistencies off while being careful not to cut into the part itself.3. Sanding:
If there are rough patches on your part, or you want to get rid of the well-known layer lines of FFF (Fused Filament Fabrication) printing, we advise wet sanding your 3D printed parts with 220 grit sandpaper. Wet sanding will clear scratches, blemishes, and bumps that may arise on your part. Because some of our materials contain carbon fiber, sand your parts in a well ventilated area with a mask.
Be careful not to over-sand: this will erode the wall, ceiling, or floor layers and all you’ll be left with is infill structure!4. Removing Dust:
After sanding, some dust residue may remain on your part. To remove these fine particles, clean your part out with a wet scrub brush, making sure to get all the corners and cracks. Once your part is dry, you may want to use some tack cloth to get any remaining specks out.
Spray Painting
The process for spray painting 3D printed parts is very similar to spray painting most other plastics. Nylon turns out to be great for paint and varnish because it is a highly polar polymer. Unsurprisingly, paints specifically for plastics usually end up working the best for 3D printed parts. Usually Rust-Oleum or Krylon have a wide variety (in color and application) of paints that work on 3D printed plastics.
Paint in a well-ventilated area with gloves and a mask for protection.1. Selecting Spray Paint:Without primer both of our materials absorb paint, so a primer coat is necessary for our parts. Pick your primer and your paint, make sure they work on plastics, and you’re good to go!
2. Painting Precautions:
Make sure you spray paint and let your parts dry in a well-ventilated area – use a fume hood or spray booth if possible. Painting with a respirator and gloves is advised.
3. Setting Up Your Part:Because 3D printed parts allow for complex, intricate geometries, you may want to hang your part from some wire or place it on a stand so that you can reach all or most of the part with paint without having to turn it over – many spray booths have these. However, if your painting space is limited or you are just painting outside, just place your part on some newspaper so that you don’t damage the surrounding area. If you are only painting a specific section or pattern onto your part, use painters tape to conceal the parts you don’t want painted.
4. Apply Primer Coat:Spray the primer coat onto your 3D printed part. Different brands of primer have different suggestions as to technique, coats, and distance, so make sure you read them before painting! Make sure you cover all the areas you want to paint in primer – this may require letting the first coat dry before turning the part over to spray the back or underside of the part.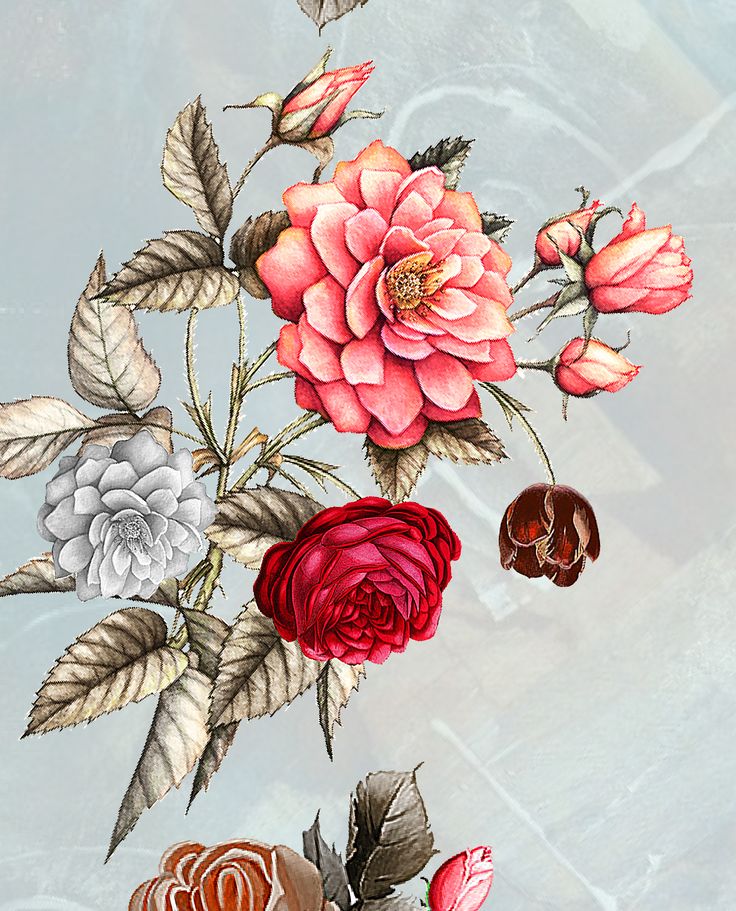
Once the primer coat is dry, spray the finish coat of spray paint onto your part as advised by the brand of paint you are using. If you apply too many coats or paint too close, you may drench the part and it will affect the quality of the paint job. Again, you may need to rotate or reorient the part to cover all faces.
Apply the finish coat and let it dry.6. Let it Dry:Let your part dry before final use and handling as recommended by the paint brand. After that, your part is good to go!
The finished 3D printed mask.Hand Painting
1. Selecting Hand Paints:While we haven’t tested all of the hand paints in the world, acrylic paint works pretty well with our plastics. As explained in the next step, you will also need primer for a base coating.
2. Eliminate Paint Absorption with a Primer Coat:One of the issues with hand painting 3D printed parts is that the plastic absorbs a lot of the paint. Even when hand painting, a primer coat is really important for a clean final product. As instructed above, spray a base coat of primer onto your part before painting.
3. Paint Away! Once the primer coat is dry, your part is an open canvas. Using a brush and some hand paint, paint your part however you desire. Remember to paint in a well-ventilated area!
Hand painting 3D printed parts can give your parts a personal or professional aesthetic.4.Let it Dry: Let your model dry, and once it’s complete you’re all set!
Happy Halloween everyone!Want to try painting a part for yourself? Download the mask and pumpkin files here.
Don’t have a Markforged parts to paint on? Request a sample part and give it a try.
3d printing on order in Serpukhov
Catalog
Badge with 3D printing on order - ZN37
81
to shop
Wall 3D printing Milofi custom, wallpaper, fresco, European cool graffiti order
559
1096
to shop
3d art custom cmykl uv print inkjet printing for wall painting painting machine vertical wall printer
333503
in store
wallpaper custom 3D stereo love lip print European retro background wallpaper home decor papel de parede 3d wallpaper
573
1042
in store
men's New custom 3D printed T-shirt factory direct sale best price custom 3D print Women's T-shirts S-6XL print
935
shop
Lamp special 3 colors tap-15CM-Diameter - Moon night light with photo and text custom, USB charging, 3d printing, personalized pictures as a gift for birthday, holiday print order
2601
Shop
MRGBEST New Print Red Persian Carpet Custom Non Slip Rubber RGB Mouse Pad Durable Round 3D Game Mouse Pad
934
1139
PrintShop
Nordic Style Milofi Wall Mural Modern Creative Hand-painted Floral Art Background Wall Custom Made
559
1096
Shop
Milofi Photo Mural 3D Print Smooth Custom Sailing Ship Print order
560
1098
In the store
executed 3D art CMYK UV print stamping stamping stamping walls for drawing vertical wall printer
347399
in the store
Wallpaper to order, 3D wallpapers, wallpapers, wallpapers, wallpapers. Cartoon Wallpaper HD Silk Print Art Decor Bedroom Decoration Print Order
1875
Shop
3D Printer Mankati Fullscale XT Plus Custom Print
170000
to shop
European 3D wallpaper for walls, home decor, room wallpaper, custom print, zebra, wallpaper for kids room CNC machined metal nylon resin hand printed minimalist geometric marble pattern home decoration background wall
560
1098
In the store
3D 3D to order, wall wallpapers Milofi, Scandinavian watercolor, manual pimples, modern minimalist background for decorating the bedroom order
559 9000 9000
in the store
mrgbest new Printing Red Persian Carpet Custom Non-slip Rubber RGB Mouse Pad Durable Round 3D Game Mouse Pad
923
1139
Shop
Wall Mounted 3D Printer Good Price Custom Printing
339756
In the store
3D-printing to order Milofi, wallpapers, new Chinese line, ink landscape, art concept, marble background for TV, wall
560
Milofi photo wallpaper Milofi order 3d print nordic minimalist background with abstract lines geometric 3d marble pattern print order
560
1098
to shop
Milofi large custom retro print 3d printed wallpaper
559
1096
In the store
Epoxy resin 3D gel sticker Printing Crystal 3D sticker Epoxy resin for Dome-shaped logo / set (1000 pcs. )
)
7932
in the store
9000 3D 3D 3D 3D 3D 3D 3D 3D 3D 3D 3D 3D 3D 3D 3D 3D 3D 3D Milofi mural wallpaper modern minimalist hand-painted art concept gold lines background wall for559
1096
to shop
nine0000 How to prime and paint 3D printed models (with video)Primer
Primer is a special paint that adheres strongly to the part and ensures that the paint adheres to the surface evenly. There are different primers designed for different purposes. Spray primer is the best way to paint 3D printed parts as it quickly covers the surface in an even coat. There are primers available for brush application, but they are difficult to work with and are better suited for fine finishes. For best results, choose a plastic-compatible primer and paint from the same manufacturer. We love the Krylon and Montana brands (although they are thick), but Tamiya's paint is unparalleled - it forms a very thin and even coat, retaining all minor surface features. nine0004
Rotary tool
Sometimes you need to finish sanding quickly. The use of interchangeable nozzles for rotating tools allows you to grind and polish models in various ways. The drum allows you to quickly grind marks from supporting structures, and steel wire cleans marks well on flat surfaces. Rotary tools are designed for rough cleaning, so you will need sandpaper to make the surface smooth. There are many great brands: Dremel and Craftsman are popular in the US, and Proxxon is popular in Europe. In order not to burn your model, reduce the speed to a minimum (usually 500-1000) and do not apply pressure to the tool. nine0004
Flat files
These tools are not as clumsy or inaccurate as a hand sander. An elegant instrument...for a more civilized age.
The flat file is one of the simplest yet most effective tools for effectively removing support structures and sanding surfaces. By holding it firmly in your hand, you can remove marks with greater precision than with a rotary tool.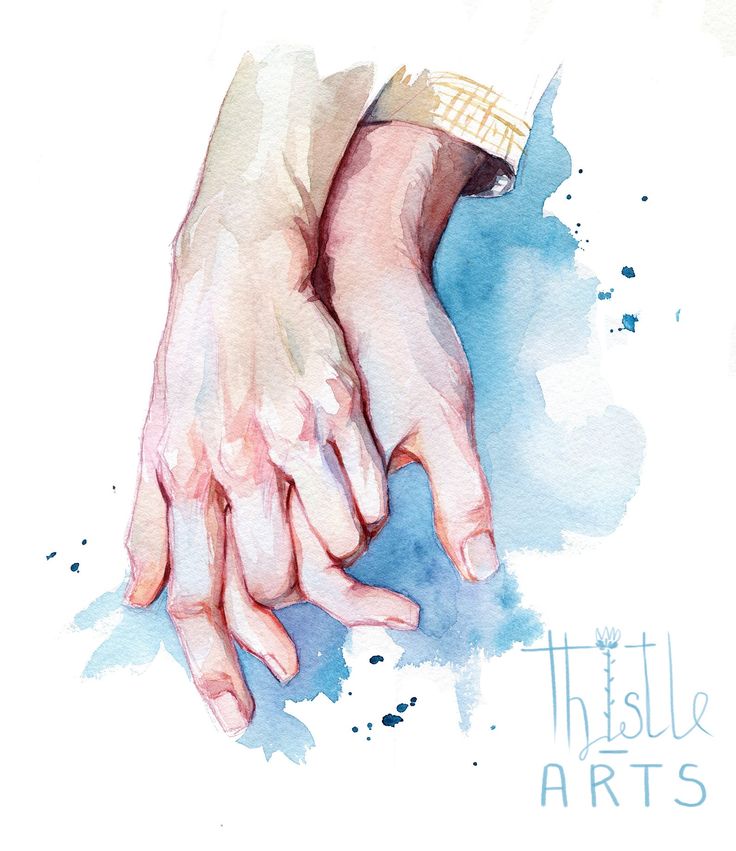 Keep a wire brush handy and clean the file blade regularly (otherwise plastic and resin can get stuck in it). Like a rotary tool, a flat file leaves a rough surface, so it is best used for removing large imperfections. nine0004
Sandpaper
Sandpaper is the ugliest tool in the workshop. Over the past decade, it has made a real breakthrough with the release of flexible sanding sheets. Flexible sanding sheets can be purchased at hardware stores. They last 15 times longer than paper ones. They won't curl, puncture or bend, and can be used wet to reduce dust and prevent build-up. Thanks to their flexibility, they easily reach small interior spaces and rounded surfaces. nine0004
Dust removal
Even after sanding with a damp tool, a small amount of dust remains. Remove plaque with water and a soft brush (an old toothbrush is fine for this purpose). For serious cleaning, you can take an inexpensive ultrasonic device that will quickly remove small particles trapped in corners and surface cracks. If you are working in a hard water area, using deionized or distilled water will help prevent blemishes between coats. nine0004
Dust Pad
The Dust Pad is a piece of soft and slightly tacky cotton cloth designed to remove remaining dust and provide a clean surface for painting. Let your model dry before using the dust cloth: the waxed surface reduces its effectiveness on wet surfaces.
Block, pins and drill
This little trick will save you a lot of trouble in the paint booth (we were thrilled when we saw this technique in Adam Savage's how-to video). By mounting the model on a pin (you can often use a pre-drilled hole in the part), you can quickly maneuver while spraying and paint the model from all sides, penetrating hard-to-reach places and leaving no fingerprints. If you want to apply an even layer on all sides of the model, this is very important. We recommend ordering pins in different sizes. To make the hole in the part as small as possible, start small and increase until the model is firmly seated.