Google sketch 3d printing
3D Printing with SketchUp: 10 Tricks | 3D Printing Blog
3D Printing with SketchUp: 10 Tips and Tricks
by Fabian | March 30, 2017
SketchUp is one of the most popular 3D modeling & design programs for 3D printing, as we found out from our analysis. However, preparing a SketchUp model for 3D printing can be a little tricky. That’s why we put together a list of 10 simple yet effective tips and tricks to make your SketchUp design 3D printable.
1: Set your Template to Millimeters or InchesSome simple clicks before getting started will make your life easier: you may want to set your SketchUp template to metric or imperial units. This way, you won’t need to re-scale the printing size of your model later.
You can change the template by clicking on Window > Preferences > Template and selecting ‘3D Printing – Millimeters’ or ‘3D Printing – Inches’.
2: Install the SketchUp STL ExtensionTypically you can save your 3D model as a SketchUp file (SKP). Even though our online 3D printing service accepts these files, you might want to get SketchUp’s free STL Extension. The STL file format is the most commonly used in the 3D printing community and will make it easier to share, print, and edit your design in other software.
With the SketchUp STL extension installed you can export your model as an STL file. Make sure to select the same unit type that you chose in your template (millimeters or inches) when exporting, and choose the binary file format to reduce the size of your file.
3: Avoid Paper-Thin Surfaces & Set Wall ThicknessesIn order to make your SketchUp model printable, you need to ensure that each and every surface has a wall thickness. Without setting a wall thickness, a 3D printer has no information about how thick or how thin it is supposed to print your part.
The picture below shows a model with paper-thin surfaces (not printable, left) and a solid object with thick walls (printable, right). If you want to learn more about how thick your walls need to be exactly, make sure to read this blog post.
A printable model must not feature any holes in its surface. Ask yourself the question: if I were to put water inside my model, would it flow out? If that’s the case you need to find these holes and close them. This is one of the trickiest parts of creating 3D printable models in SketchUp.
The design below is an example of a model that is not watertight. You can clearly see that there is one big hole on its surface.
Once this hole is closed (for example by drawing new lines), SketchUp recognizes that the object is solid on the inside and ready for the printer! You can see such a watertight (also referred to as manifold) object below.
5: Avoid Internal OverlappingIntersections and walls within your design can make your life difficult since your model needs to have one continuous ‘outer shell’. That’s why it makes sense to think about your model in a 2-dimensional space first.
In the case below, the left shape will not be printable once it is pulled into a 3-dimensional object since it will feature paper-thin walls within the object. The shape on the right, however, won’t be a problem to print once it is pulled into a 3D object because it will only have one ‘shell’. It doesn’t feature paper-thin walls on the inside. We’ll look at an automatic way to create one outer shell later.
6: Check if Your Model Is SolidCreating watertight models with one continuous outside can be tough sometimes. Luckily SketchUp lets you check if you made any mistakes.
Here’s how it works:
- Triple-click on your model with the select tool (this will select everything).
- Right-click on your object and select ‘Make Group’.
- Right-click on your object again and select ‘Entity Info’.
If you designed an object with holes (not watertight) and internal intersection (not in one shell) the Entity Info window will say ‘Group’. This means that your model is not printable and you’ll have to check it again. Right-click on it and select ‘Explode’ to re-edit the components.
If you designed a watertight model in one shell, the Entity Info window will say ‘Solid Group’ and then you know that your model is ready to be 3D printed (in the next steps we’ll tell you how to fix this).
7: Look inside Your Model with the ‘Hide Tool’ and ‘X-Ray-Mode’Looking at your model from the outside means that the inside is a ‘black box’ for you. However, even the inside of your model could feature many modeling mistakes that would make your object unprintable. In the example below, the ‘Entity Info’ window indicates that the object is not solid.
Since it looks solid from the outside, it makes sense to take a look at what’s going on inside. Select a surface (face) you want to hide and select ‘Edit’ > ‘Hide’. And voila: you can find the trouble-making mistake. Alternatively, you can switch into x-ray-mode by clicking on ‘View’ > ‘Face Style’ > ‘X-ray’.
We already pointed out that designs with overlapping objects create problems for 3D printers. The good news: there’s an automated solution for creating one ‘outer shell’ around the overlapping objects, deleting all internal overlapping parts.
To start with, we have these two solid blocks. Each of these blocks was ‘grouped’ separately (Select > Right click > Make Group). We also selected the x-ray view to make things easier.
We then move one block into the other. We now have overlapping areas in the interior of this object.
To get rid of these, we select one block, click on ‘Tools’ and choose ‘Outer Shell’.
The last thing to do is to click on the second block. SketchUp automatically created one solid group out of these blocks. As you can see, the internal overlapping parts are gone. The result is a new solid object that is ready to be 3D printed!
9: Fix Reversed Faces (Inverted Normals)Another problem that can occur is so-called inward-facing or reversed faces. This means that a surface of your model is facing in the wrong direction (typically this means that it is facing the inside of the object instead of the outside). These surfaces are automatically colored in light blue.
To fix this, right-click on the inward-facing surface (face) and select ‘Reverse Faces’. You can see an example of this in the image below (left). On the right, you can see the object how it is supposed to be: all faces point to the outside again.
10: Increase Circle/Arc Segments to Getting Smooth CurvesSketchUp ‘smoothens’ arcs and circles in its visual presentation. Even though circles might look perfectly spherical in SketchUp, they are actually only made of 24 sides. Click on ‘View’ > ‘Hidden Geometry’ to see theses sides. When being printed, this circle might come out quite edged.
When you select the arc or curve tool, SketchUp will show you their default sides in the bottom right corner. You can then enter a higher number to increase the number of sides. Validate your entry by hitting the ‘Enter’ key and then draw your arc or circle.
The image below shows a comparison between the default 24 sides (left) and 150 sides (right).
Extra: Automatic File Fixing and PreparationSometimes problems are tiny and hard to see with the naked eye. There are SketchUp extensions like the Solid Inspector 2 that find problems automatically and point them out to you. Simply select a group or component and activate the Solid Inspector tool for an analysis of what would prevent it from being a solid manifold.
Another handy extension is CleanUp 3. It allows you to cleans up and optimize your SketchUp model with handy tools like “Erase hidden geometry” and “Erase duplicate faces”.
Also, SketchUp added a cool feature to their 3D Warehouse that was developed by Materialise. When uploading a model to the 3D Warehouse, you can check the “I want this to be 3D printable” button (see video below) to get modeling errors fixed instantly. This tool will make your 3D model watertight and allow you to download it as an STL file. While it might lead to somewhat less accurate results, it’s a very fast way to get a printable file. So if you’re searching for an easy-to-use tool that will save you a lot of time and effort (no more searching for file issues, no more exhausting fixing sessions), this is the tool for you.
Did you manage to follow our tips and tricks and create a printable SketchUp file? In order to send it to our printers, download the SketchUp 3D print service plugin. Alternatively, you can upload your models here and choose from hundreds of material options.
Get high-quality 3D prints like these with i.materialise’s online 3D printing service.
3D Printing with SketchUp - SketchUp Australia
Did you know that SketchUp is the perfect tool for 3D printing?!
In SketchUp, you can import and export STL files, which are used in 3D printing. For a SketchUp model to become a successful 3D printout, the model needs to meet certain criteria, such as having a base and a volume and being a solid.
Before you print a model on a 3D printer, you need to make sure your 3D printer can understand your model data. Here’s a quick overview of how to set up your SketchUp model for 3D printing:
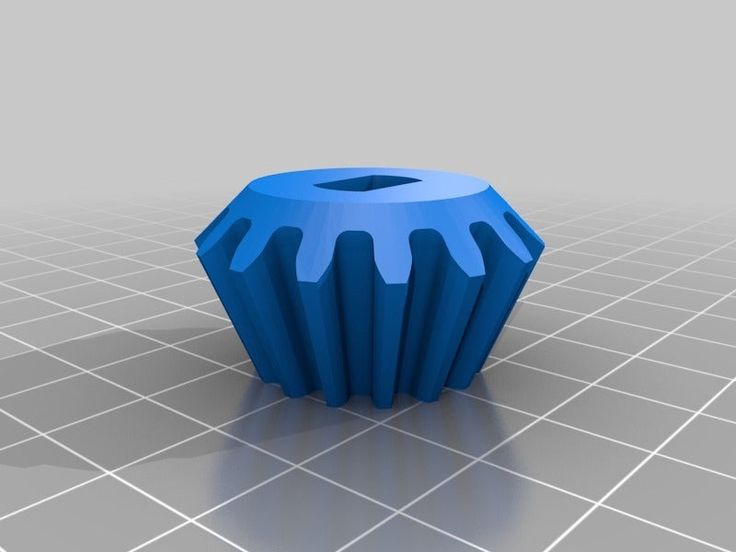
- Orient your model so that the 3D printer has a base on which to build your model. Your 3D printer prints your model one layer at a time. If your model juts out at the top, the 3D printer has nothing to build upon. For example, if you want to 3D-print a gear, rather than orient the gear vertically, place the gear on its side, as shown in the following figure.
- Make sure your model is a solid group. With your group or component selected, choose Window > Entity Info. If your model is a solid group, the Entity Info window tells you so in the upper left, also shown in the following figure.
 If your group or component isn’t solid, download and install the Solid Inspector 2 extension created by Thomas Thomassen and available via the Extension Warehouse. (In SketchUp, select Window > Extension Warehouse, search for the extension, and click the red Install button.) This extension helps you analyze why your model isn’t solid and repair and holes or issues. For example, if your model contains internal geometry, then your model is not a solid.
 - Check that the fronts of faces point outward. (And thus, the backs of faces need to face inward.) Technically, making sure all your faces are oriented the correct way is called checking the normals. To check that the face fronts point outward in SketchUp, select View > Face Style > Monochrome to see whether the back sides of a any faces point outward. By default, the face fronts are white and face backs are dark gray. To reverse a face, context-click it and select Reverse Faces.
 If you use Solid Inspector 2, the extension can find and fix the reversed faces for you.
 - Your model needs to have a volume. For example, if you want to print a box that’s hollow in the middle, the faces along the outside of the box need to have a thickness, as shown in the following figure.
After you check that your model is ready to be 3D printed, you need to output your model to a format your 3D printer understands, also known as the STL format.
Exporting a SktchUp model as an STL FileTo export a SketchUp model to an STL file, first make sure that your model meets the basic recommendations for 3D printing. Then follow these steps:
- Select File > Export > 3D Model. The Export Model dialog box appears.
- Navigate to the location where you want to save your exported file.
- (Optional) In the appropriate text box, type a name for the exported STL file.
- From the Save As Type drop-down list, select STereolithography File (.
 stl).
stl). - (Optional) Click the Options button, and in the STL Export Options dialog box, select your desired options for the exported STL file. (See the following list for details about each option.) Click OK when you’re done.
- Back in the Export Model dialog box, click Export. SketchUp exports your model to the STL format and saves the file in the location you specified.
The STL Export Options dialog box enables you to choose a few options for how SketchUp renders your exported file:
- Export Only Current Selection: When you select this checkbox, SketchUp exports only the selected geometry to the STL file. This option is helpful if you want to model several parts that fit together in one SketchUp model file, but export each part to a separate 3D-printable STL file.
- File Format: By default, Binary is selected from the drop-down list. The other format option is ASCII.
 The binary format is generally preferred because this format helps reduce the size of an STL file.
 - Swap YZ Coordinates: By default, this checkbox is cleared. If you select it, the Y axis becomes the vertical axis instead of the Z axis.
- STL Units: By default, the STL file is exported using the same units specified in the model. (To check your model’s default units, select Window > Model Info and, in the Model Info window, click Units in the sidebar on the left.) You can change the units in the exported STL file to meters, centimeters, millimeters, feet, or inches.
Take control of your vision
Click HERE to join millions of other SketchUp users if you aren’t already using SketchUp – or you just need to upgrade. There’s a reason why SketchUp is the most popular design software!
Prefer to speak to someone?
If you have any questions speak to our team on 07 3851 8380
50 3D Printing Ideas
It looks like we'll soon be drowning in useless stuff made for 3D printing projects.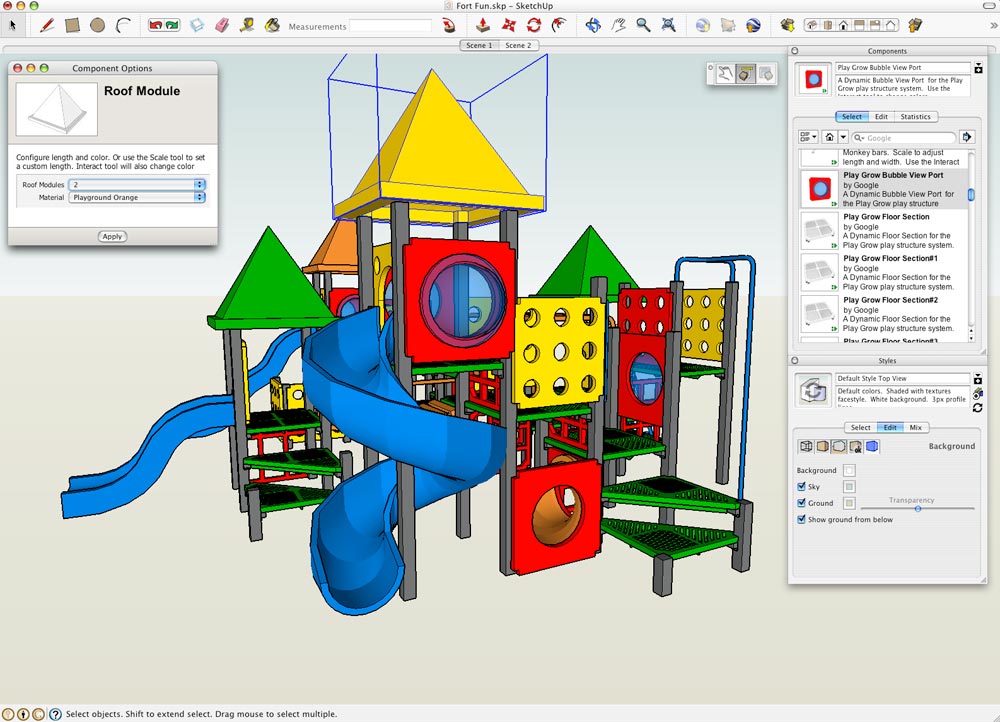 But you can do something that will really be useful! If you're running out of ideas, here's a list of 50 3D printable items you're unlikely to throw away.
Bag clip with screw cap
Now the bag clip will have a new feature - a hole with a lid for quick access, as in the photo. This clip is easy to print and convenient to use. Strange that no one thought of this before.
Author: Minkix
Download: Thingiverse
Modular Furniture Connector
This connector allows you to quickly assemble modular furniture. The default model is designed for 17×17 mm wood, but the size and material can be changed to suit your needs using a parametric file for customization.
Author: LeFabShop
Where to download: Cults
Sealant cap
No more throwing open sealant tubes away. The screw cap for the nozzle presses the o-ring tightly against the body of the tube and closes the access of air to the solvents inside.
Author: The-Mechanic
Where to download: Thingiverse
Laptop niche
Now the laptop will always be at hand, but hidden from prying eyes in a special niche that is attached to the bottom of any coffee table.
Author: Too Snide
Download: Thingiverse
Phone holder - Candice
Elegant and simple, perhaps the easiest thing you can print on a 3D printer.
Author: Clem.C2
Where to download: Cults
Polypanels
The idea for Polypanels came from Devin Montes. A polypanel is a series of three-dimensional building blocks. The individual elements of a Polypanel look simple, but if you print a lot of them and different types, you can create all sorts of complex designs. Something like LEGO where you can design each brick.
Author: MakeAnything
Where to download: MyMiniFactory
Coat Hook
This coat hook is designed as an E3D attachment and can be printed multiple times to fit all your clothes.
Author: Filar3D
Where to download: Cults
Plant Pot
This anatomical brain flower pot is easier to print than it looks, creator DrFemPop says. For assembly, it is only necessary to glue the parts after printing. It turns out an original house for plants.
Author: DrFemPop
Where to download: Cults
Door Holder
This is a simple solution for holding a door. Double-sided adhesive tape is sufficient for surface mounting.
Author: Akiraraiser
Where to download: Thingiverse
Piggy bank
A simple piggy bank for beginners, no complicated settings.
Author: lecaramel
Where to download: Thingiverse
Cable ties
This tie is perhaps the simplest and most ingenious of all devices. Clips are printed as a whole sheet at once, and then the required amount can be cut off from it.
Author: Sunshine
Where to download: Cults
Roller ruler
An indispensable device if you need to measure the length of something non-linear: a piece of rope, a curved line, a perimeter with bends, etc. The ruler is called Geneva and has step 5 mm.
Author: MechEngineerMike
Where to download: Thingiverse
Pliers
This small, solid piece of plastic can easily replace your pliers / pliers. These forceps take the force to the handles and redistribute it at the end of the grip. It's definitely pliers. Just smarter.
Author: BYU CMR
Where to download: Thingiverse
Cylindrical textured box
Beautiful tube from Syboulette decorated with hexagons. Well suited as a kitchen utensil for storing oatmeal, rice and other crumbly substances.
Author: Syboulette
Where to download: Cults
Door stopper
This stopper is modeled after the Guyer Anderson cat statue in the British Museum. The design is hollow, which allows you to fill the limiter with something for additional weight.
Author: Duaneindeed
Where to download: Cults
Plague Doctor Mask
Not exactly the most useful item on the list since bubonic plague is a thing of the past.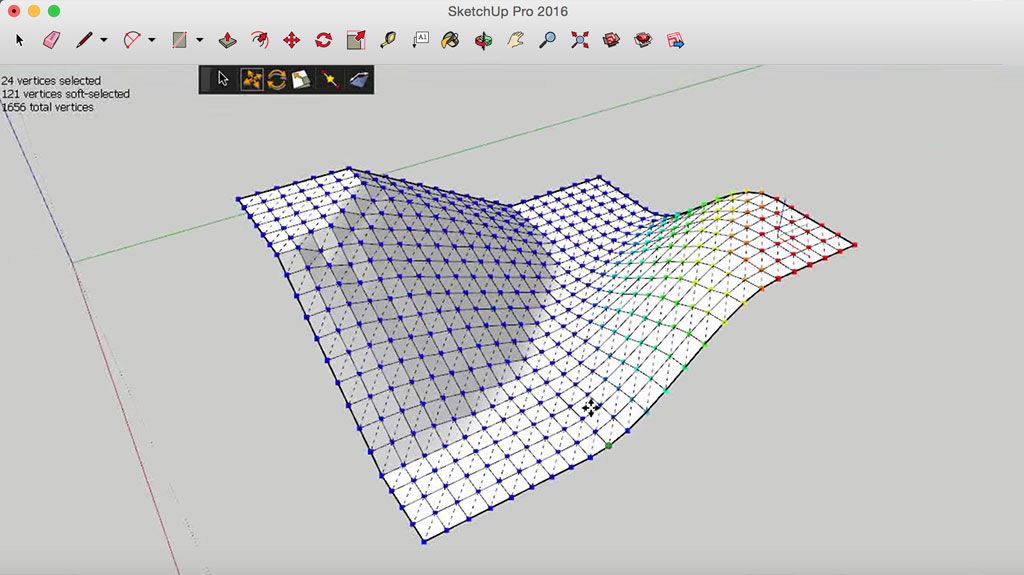 But a mask can come in handy, for example, when you need to clean up after your pet. And you can also go to the carnival in it.
Author: Odrivious
Download: Cults
Universal Spool Holder
This adjustable spool holder uses a spring and an adjustable rewind clutch. It's the perfect place to store those pesky wires.
Who made it: Vincent Goenhuis
Where to download: Thingiverse
Sturdy waterproof box
This tight-fitting box will keep things from getting wet. Print it in PLA or PETG, add a flexible TPU seal and M3 screws for the spring hinge, and you're done.
Author: ZX82
Where to download: Cults
Dice
This dice is suitable for flat 3D printing and has a face size of 16mm.
Author: Devin Montes (MakeAnything)
Where to download: MyMiniFactory
Collapsible Coat Rack
Really cool coat rack. That's all there is to say about her.
Author: Komaru
Where to download: Thingiverse
Business Card Holder
Great for showing off your new business cards to your Wall Street friends. What could be more delightful than this Zippo card holder with flip-top lid.
Author: PentlandDesigns
Where to download: Cults
Pencil and pen holder
Iceberg or melting beehive? Be that as it may, this is a handy pen and pencil holder that is cheaper to print than to buy.
Author: BeeVeryCreative
Where to download: Cults
Groovi Monster Audio Amplifier
This is a passive smartphone audio amplifier that looks stylish and does the job well. It's called Groovi Monster for a reason.
Author: 3DShook
Where to download: Cults
Cup holder
Can be used not only as a cup holder, but also as a coaster for hot dishes. The dimensions of the template are easily adjusted to suit any size cookware.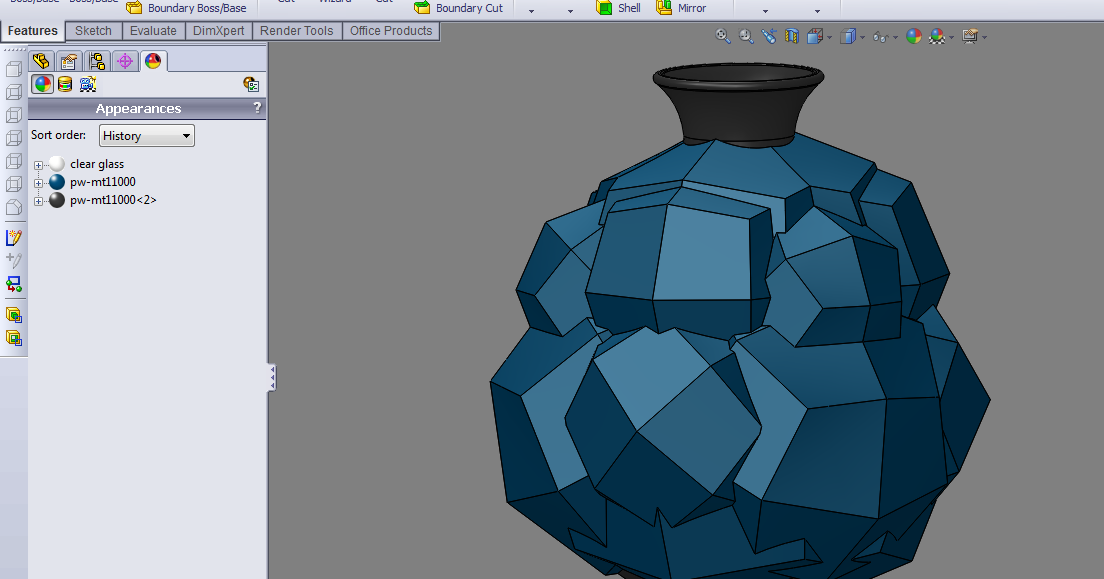
Author: jmdbcool
Where to download: Thingiverse
Clamp
Designed for fixing various materials, including the ends of the wire in the coil. Also great as a clothespin replacement.
Author: Med
Where to download: Cults
Pencil Box
Suitable for storing all your desk trivia and trinkets (memory cards, rubber bands, pencils, paper clips, etc.).
Author: Monkey3D
Where to download: Cults
Headphone holder
This is a duck. Yes, you can hang headphones on it.
Author: Toshi_TNE
Download: Thingiverse
Polyhedral Succulent Pot
Unusual geometric pots for your growing succulent collection. These small pots can be configured to be connected together.
Author: PrintFutura
Download: Cults
Survival Whistle
This is a survival whistle with original design. It is durable, easy to make and very loud (118 dB is more than enough to be heard in an emergency).
Author: Joe Zisa
Where to download: Thingiverse
Measuring Cube
Simple and original measuring cube for the kitchen. On each side there are recesses for measuring the volume of ingredients (in cups - according to the American system, and in metric units for everyone else). It is best to print with PETG material, it is the safest for products.
Author: iomaa
Download: Thingiverse
Hinge
This is a parametric hinge that can be sized to fit your needs.
Written by Rohin Gosling
Download: Thingiverse
Car Eyeglass Holder
Attaches to your car's sun visor. Glasses will always be at hand.
Author: Trevor Long
Download: Thingiverse
Opener
The simplest things are usually the most useful. Convenient and easy to print opener. Covers the sharp edges of the cork as much as possible, protecting you from injury.
Author: Jeremy Peterson
Download: Thingiverse
Superhero Keychains
Sometimes you need to remind yourself of your hidden superpowers.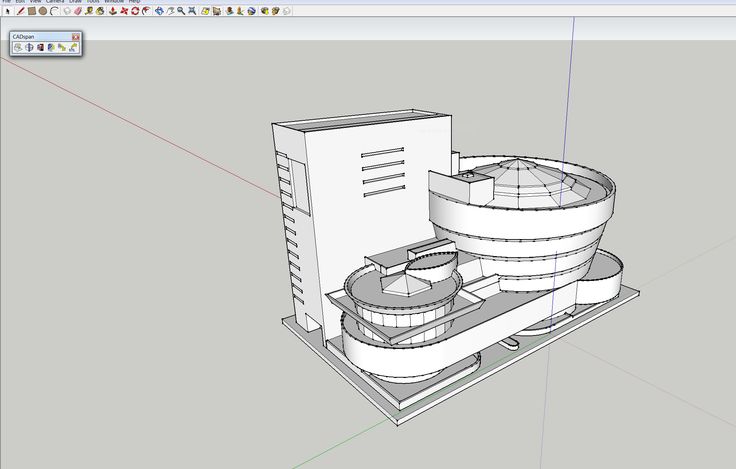 Stylish and cool keyrings are well suited as a small gift.
Author: Formbyte
Where to download: Cults
Headphone stand
It will be useful for music lovers and gamers who use headphones a lot and often. After all, now they will no longer roll around anywhere.
Author: MakerBot
Where to download: Thingiverse
Bag Clip
The model consists of two printed parts. Allows you to keep packages closed and keep food fresh longer.
Author: Walter Hsiao
Download: Thingiverse
Plastic wrench
Handy wrench, but don't choose soft plastic to make it.
Author: Daniel Noree
Where to download: Cults
Sliding Decal
No more worrying about whether cups are clean or dirty right now in the dishwasher! With the help of a special mechanism, the slider easily changes the inscription on the plate.
Who made it: MiddleFingerBoss
Where to download: Thingiverse
Collapsible basket
Cool picnic item. A folding square basket with five sections is printed from several parts and then glued together. For product safety, it is recommended to use PETG plastic.
Author: PatternToPrint
Where to download: Cults
Self-watering plant pot
Houseplants are dying from your forgetfulness? This will not happen again! This pot will water them by itself, and your conscience will be clear.
Author: Parallel Goods
Where to download: Cults
Maze Gift Box
Cash is not the most original gift. But if you present them in such a gift box, your friend will surely like it. The lucky recipient will have to work hard to get to the prize, because there is only one right way.
Author: Robert
Download: Thingiverse
Wired headphone holder
The headphones will now be protected from tangling and breakage.
Author: Robert
Where to download: Thingiverse
Tube Squeezer
Will help squeeze out the contents of the tube to the last drop. Wide enough to fit most tubes on the market. Printed in three separate parts.
Author: Justin Otten
Where to download: Thingiverse
Webcam Shutter
The best thing for the paranoid and just for those who are uncomfortable being under the gun of a webcam. Instead of sticking tape or sticky tape over the lens, attach a slider shutter to the body and open it when you need a video call.
Author: Horizon Lab
Where to download: Cults
Hexagonal Prefabricated Drawers
Useful to free your desk from the noodles of cables, wires and just every little thing. The design can be easily expanded if necessary.
Created by Dan O'Connell
Where to download: Cults
Wall Phone Shelf
Attach the shelf to a power outlet and place your phone on it while charging. The model also has a corner slot that holds your smartphone or tablet upright for watching videos.
Author: Tosh Sayama
Where to download: Cults
Card Shuffle Machine
Awesome item for poker lovers. This device will help to shuffle the cards and deal them during the game.
Author: LarsRb
Where to download: MyMiniFactory
Box with a secret lock
Box for storing things in a place inaccessible to prying eyes with a secret multi-stage opening mechanism.
Author: 3DPrintingWorld
Where to download: Thingiverse
Digital Sundial
Yes, your eyes don't deceive you. This is a digital sundial and it really works. They are designed to pass only the right beams at the right time and at the right angle to display the actual time in 20-minute intervals. Only works during daylight hours, of course.
Author: Mojoptix
Where to download: Thingiverse
Key ring
Designed in the shape of a stylish Swiss Army knife, it looks amazing. Printed from two plates and the keys are held in place with standard hex nuts and bolts.
Craig Blanchette
Download: Thingiverse
50 Cool Things to 3D Print in June 2019
3DNews Technologies and IT market. Interesting news from the world of high-tech Achievements of 3D printing: from artificial ...
The most interesting in the reviews
07/05/2014 [08:00], Dmitry Prikhodko
The modern development of 3D printing has reached a level where, with the help of high-tech printers, it has become possible to create implants, comfortable and functional prostheses, fairly large units of industrial equipment, and even confectionery. Achievements in the field of medicine deserve special attention. Surgical operations are now carried out not only with the use of "smart glasses" like Google Glass, but also with the help of 3D printers.
One of the brightest examples of the close relationship between today's medicine and innovative technologies is the successful operation to remove a tumor in a 5-year-old patient. The diagnosis of neuroblastoma required an urgent and extremely complex surgical intervention to remove a malignant tumor in the abdomen. In order not to hurt the vital blood vessels, it was decided to practice on a mock-up, which was made on a 3D printer using several materials with different properties.
Since the first two attempts to remove the tumor without training on a mock-up were not very successful, an artificial analogue, exactly repeating the location of arteries and organs, became the only salvation for the child and a way out of this situation for doctors. In total, specialists together with doctors printed two models. The second model was a version of the first product, almost identical in its structure, but without a tumor. This was done so that doctors could see the final result of the future operation and understand for sure that they carried it out to the end, completely removing the neuroblastoma.
It took 1.5 weeks to practice using the printed organs, after which the tumor was removed. The patient is reported to be recovering rapidly. And all this is due to the skillful actions of surgeons and the capabilities of a 3D printer to accurately recreate any element.
Continuing the medical theme: scientists from the University of Illinois managed to construct a biorobot whose body is an artificially created muscle tissue. And although the movement of the robot cannot be called human-like, since it is more like the characteristic movements of a crawling earthworm, the miniature device is a very serious step in the development of biotechnology.
Making such a complex mechanism 1 cm long and only 1 mm thick, which is an imitation of a human muscle fragment, has become a reality thanks to 3D printing technology. The biorobot has all the characteristic features of the muscle tissue of a living organism. When an electrical impulse is applied to the brainchild of American scientists, the artificial muscle begins to contract in a similar way to a human one.
Another case concerns the animal kingdom, which also found a place for the use of 3D printed prostheses. To help the bald eagle, who suffered from the actions of a poacher, it was decided to implant an artificial beak.
The most important thing is that the eagle's organism did not reject the artificial organ and the bird quickly got used to it.
3D printing is also relevant in many other areas. Leading companies are trying to rationalize their production and take care of their subordinates, using quite original solutions not only in mechanisms and apparatus, but also in the equipment of workers. So, for example, the German automobile concern BMW issued individual gloves with a special fingertip to employees working on an assembly line in Munich.
3D printed thumb cap designed to reduce stress on joints when inserting plugs and other manual and forceful operations. The fingertip itself, which is individually made for the specific hand of each worker, is an orthopedic device like a splint. During fastening work, it evenly distributes the applied force over the entire surface of the thumb.