Fixed bed 3d printer
z axis - Why aren't fixed build platform 3D printers popular?
Asked
Modified 1 year, 11 months ago
Viewed 4k times
$\begingroup$
I'm trying to build a DIY 3D printer for myself. I've been exploring many different styles of printers and found this type of printer that has a fixed bed that stays fixed in one place and the whole gantry moves which includes all axes.
- Why is this so rare?
- Are there flaws in this design?
- Will print quality be affected by using this approach?
Check out this video for reference and skip to 10:50:
- diy-3d-printer
- z-axis
- carriage
$\endgroup$
3
$\begingroup$
Why is this so rare?
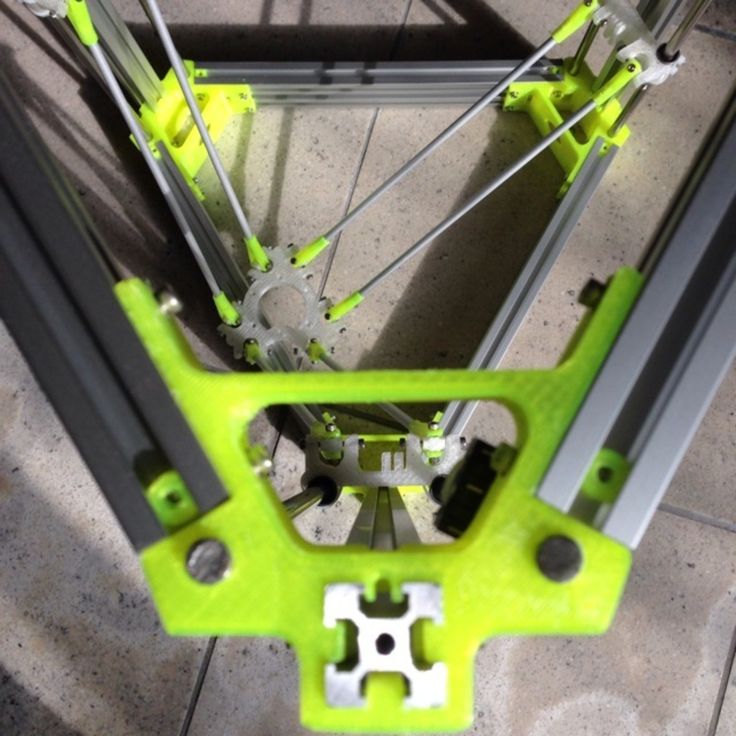
Such kind of printers usually harder to assembles, calibrate, and maintain because 3 axes machine is a bit more complex than 2 axes. For instance, it's can be tricky to move an entire extruder among all 3 axis and some of such printer's designs may require even dedicated exruder's design like Bowden Extruders.
Are there flaws in this design?
The key disadvantage of such kind designs is complexity with moving of an extruder among all 3 axes. Moving platform by at least one axis simplifies that.
Will print quality be affected by using this approach?
It depends on the exact printer's design, so, potentially you can have issues with ease of assembling and maintenance due to more complicated construction and as a consequence higher risk of low printing quality due design, assembly or configuration mistakes.
On the other hand, if you already have some device with precise enough 3 axis machine, like CNC milling machine, you can upgrade it to 3D printer by installing an extruder, however, it would also require update of software and, probably, electronics.
$\endgroup$
3
$\begingroup$
As a frame challenge, they kind of are. It's just that the optimal, and in some sense only reasonable, design for a fixed build platform that doesn't move on any axis is the delta robot geometry. This design is not the most popular, but it's far from obscure - there are lots of cheap entry-level delta printers available as well as higher-end ones.
What makes delta optimal? Keeping a single gantry (like the Ender 3 has) square with a fixed bed height is hard enough; it requires a very rigid frame and perfect rails/rods. If you want to have a multi-axis motion system over a completely fixed bed, you have a whole extra dimension in which it can be non-square. Mechanically (at least for a plain cartesian configuration) it's like having a gantry that moves between two other gantries, each of which already has concerns about remaining square, and the resulting system might not even end up being planar.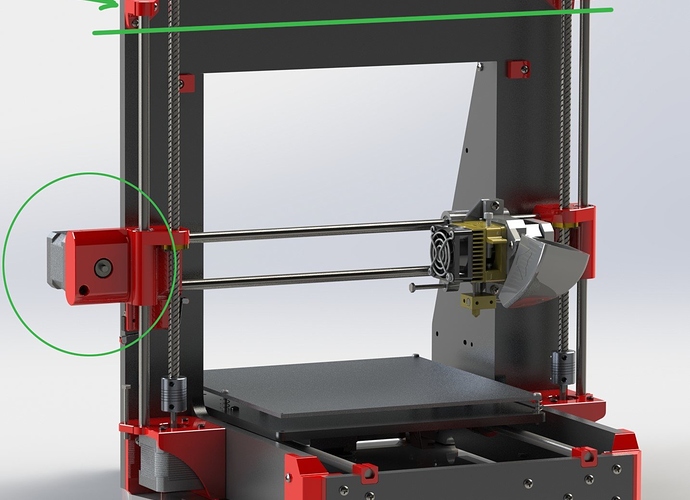
The delta configuration avoids this by not having a 2-axis motion system that's constrained to a particular movable Z height relative to the bed, but instead calibrating the transformation between a constrained motion system with free degrees of freedom and normal cartesian coordinates. Any error can just get calibrated out.
On top of that, delta has an extremely low toolhead mass, allowing extreme speeds and accelerations.
$\endgroup$
$\begingroup$
Within the realm of Cartesian machines (eg having orthogonal X, Y, Z axis) consider the sort of design you do see: the Ultimaker-like X-Y stage over a build platform which can drop.
The question is then, why drop the build rather than raise the mechanism?
Likely the reason is mechanical simplicity. The X-Y gantry is the part that moves around quickly and may vibrate. It's also the part that is rather complex and has lots of electrical cables. Making that fixed in the housing is generally a simplicity. In contrast, the built object in a typical consumer printer has lower mass, and the build platform only moves slowly so variation in dynamics from its increasing mass isn't really an issue (increasing build mass typically isn't even really taken into account in designs where the build rides on a rapidly moving Y axis either).
You might ask, what would a machine like this look like if instead of dropping the build you raised the mechanism?
It turns out such a thing does exist, in the form of a clever hack where you run a linear rail up the wall of your hackerspace, mount your entire Ultimaker-style printer on it (less build platform and bottom panel), and tap out the Z control signals such that the printer climbs itself up the wall leaving some towering sort of build on a fixed platform below. Conceivably if you wanted to start there you could also saw off all but the top third or so of the cabinet to leave the X-Y gantry with some rigid frame. But it's a bigger, more expensive product that doesn't work simply by lifting it out out of the shipping box. Apart from very unusual or "proof of concept" builds, it doesn't make a whole lot of sense.
The thing about the 3d printer realm is that you're free to try anything you like. Some ideas work. Some ideas don't. Some that go a little bit against orthodox mechanical design as taught in Mech E. departments turn out to work a bit better than they should fairly be expected to, and make it into products. But generally what is on the market is what has proven to present a good balance between cost and utility.
$\endgroup$
0
$\begingroup$
Why is this so rare?
This is rare because machine designers basically copy the designs that work, without trying to innovate too much. As a result of this, Adrian Bowyer's original RepRap design (a travelling type) is currently the most prominent desktop 3D printer design around.
Are there flaws in this design?
There aren't any flaws in the concept for a static bed, after all, it is just a design concept; there are advantages and disadvantages for each type (static, floating and travelling).
Will print quality be affected by using this approach?
The individual implementations will have varying levels of success. Certain designs provide more quality than most due to the rigidity of the frame that is required (e.g. CoreXY) which in turn provides better print quality. Any printer design can produce a good print quality when the machine is well designed and well maintained.
$\endgroup$
Workhorse Printer - 3D Distributed
Home
3D Printers
Workhorse Printer
Workhorse 3D PrinterWorkhorse- Large DIY Industrial 3D Printer Platform
Build Volume – 650 x 350 x 350 mm
DIY 3D Printer Build – Large 3D Printer Kit
Motion System – XYZ Lead Screw / Ball Screw
Machine Kinematics – Fixed Bed / Moving Gantry
Enclosure – Polycarbonate Enclosed
Extruder – Bowden / Direct Drive Extruder
Materials – Filament – FDM / FFF
Controller – Duet3D
Operating System – RepRap Firmware
Design – Open Source
Software– Simplify3D / SuperSlicer
Skill Level – Advanced
Lead Screw vs Belts
The WorkHorse is a large customizable 3d printer platform for designers, builders, and makers. The XYZ Lead Screw motion system is an open-source design that can be adapted to specific materials and applications. In most cases, belt driven 3d printers are better suited compared to lead screw. But this isn’t most cases and the lead screw we selected to drive the WorkHorse isn’t your standard lead screw. We’ve tried a range of different styles of lead screw and had mixed results. We settled with a Igus high helix thread pitch with a 50mm lead.
If you’re looking for an advanced project like building a large 3d printer, the WorkHorse is an open-source design that you can customize for a specific application or project.
Large DIY 3D Printer BuildLead Screw / Ball Screw Motion System
WorkHorse PrinterWorkHorse Build Resources
- WorkHorse BOM
- WorkHorse Documentation
The fixed bed / moving gantry is intended to make the 3d printer more scalable as the bed and z-axis mechanism becomes heavier.
- Fixed Bed / Moving Gantry
- X and Y-Axis Lead Screw
While most 3d printers use belt driven motion in the x and y axis to increase print speed but loses quality when more weight is applied to the gantry or carriage. The lead screw used on the Workhorse has a high helix pitch with multiple threads to allow increased print speeds while maintaining the quality provided from lead screw and ball screw motion. The system is particularly useful in applications that add more weight to the gantry or carriage. Materials such as clay, chocolate, plastic pellet extrusion or other foods can increase weight that is moved around which results decreased quality or print speeds. Workhorse Printer’s are available to purchase in Machined Component Kit, Hardware Kit or Complete Kit.
Workhorse 3D Printer MRRF 2019- OPEN SOURCE
- LARGE BUILD VOLUME
- ADVANCED LEAD SCREW MOTION
- MODULAR MACHINE DESIGN
- CUSTOM MODS
- CUSTOM BUILDS
- ENCLOSURE
- HEATED BED
Carriage
Workhorse DIY 3D Printer Carriage DesignLarge 3D Printer KitFrameWorkhorse Printer Frame and Gantry OnlyWe’re experimenting with changing the frame size and switching to a 3030 extrusion profile. We also made the side panels two inches wider to have more room in the electronics / Filament compartment.
Z-Axis Updates
WorkHorse 3D Printer V2 Gantry Plate Z axis lead screwWe finally made a better z-axis lead screw mount.
Z-Axis Lead Screw To Gantry Plate MountDownload 3D Model
workhorse large 3d printer build 3d printed lead screw nut mountsThe old version of the lead screw nut mounts were 3d printed. They would crack over time so the version is now made from aluminum.
The Workhorse X-Carriage design is a heavy duty solution for lead screw driven motion that uses MGN12H linear rails and 20×40 or 20×20 aluminum extrusions.
Y-Axis Motor Mount
Y-Axis Motor Mount to X-Carriage WorkHorse CarriageThe Workhorse 3d printer is available with custom mods and upgrades. We’ve several custom designed machines for many of our customers. If there is a specific size or requirement you just give us a shout.
New Heated BedWorkHorse Printer UpdatesDownload Files
WorkHorse Printer CADBOM| Lead Screw | Description | Part Number |
| X-Axis 2pcs. x 762mm Long | Igus High Helix 10mm w/50mm Lead | DST-LS-10×50-R |
| Y-Axis 1pc. x 485mm Long | Igus High Helix 10mm w/50mm Lead | DST-LS-10×50-R |
| XY-Axis 3pcs x Lead Screw Nuts | Igus Lead Screw Nuts | DST-JFRM009 |
| Z-Axis 2pcs x T12x2 Trapezoidal ACME Lead Screw w/ Brass Nut | 500mm Long | WK-Z-T12500 |
| Linear Rails | Discription | Discription |
1pc. x 450mm Long x 450mm Long | MGN12H 20mm x 20mm Hole Pattern | WK-Y-LRMGN12h500 |
| 2pcs. x 700mm Long | MGN12H 20mm x 20mm Hole Pattern | WK-Y-LRMGN12h500 |
| 4pcs. x 500mm Long w/ Two Carriage Blocks | MGN12H 20mm x 20mm Hole Pattern | WK-Y-LRMGN12h500 |
Buy WorkHorse 3D Printer Parts
WorkHorse 3D Printer PartsWorkHorse 3D Printer Gantry Plates| Machined Hardware | Price $ | Source |
| Gantry Plates | 3DDistributed | |
| X- Axis C- Carriages 2pcs | 3DDistributed | |
| Y-Axis C- Carriage 1pc | 3DDistributed | |
| Y-Axis Motor Mount 1pc | 3DDistributed | |
| Y-Axis Idler Mount 1pc | 3DDistributed | |
| Hotend Mount | 3DDistributed | |
| Z-Axis Motor Mounts 2pcs | 3DDistributed | |
| Aluminum Build Plate | $135.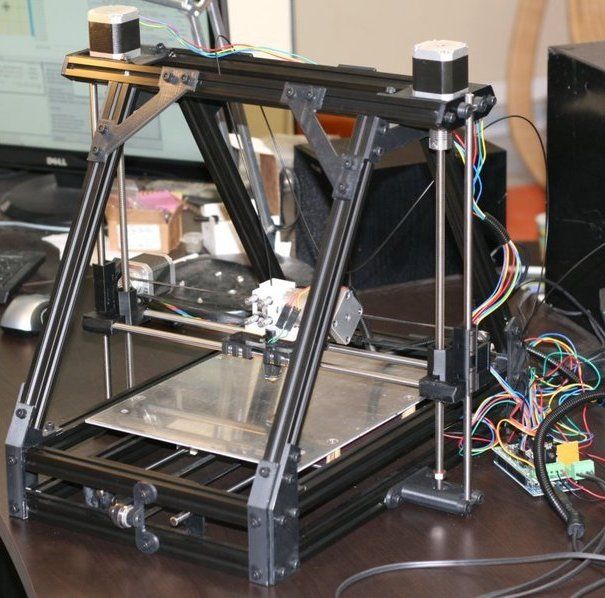 00 00 | 3DDistributed |
Electronics
Buy Stepper Motors
See Stepper Motors
Z-Axis Motor Mounts
Z-Axis Motor MountsWorkHorse Printer V2
Workhorse Z-Axis Motor AssemblyDuet3D Firmware Files
Download
We now recommend the Duet 3 Mainboard 6HC electronics by Duet3D.
Build Instructions
Here
Sourcing Parts For Your Workhorse 3D Printer
Sourcing Lead Screw
Sourcing Frame Components
Buying Frame PartsFrame Assembly
Workhorse Frame ExtrusionsThe frame is made out of 2020 (20mm x 20mm) aluminum extrusions.
- 20mm x 20mm
- 4pcs 930mm Long
- 6pcs 510mm Long
- 10pcs 570mm Long
- 3pcs 808mm Long
.
20mm x 40mm HFS5 Aluminum Extrusions (Misumi Brand)
4pcs 510mm Long
Frame:
BOMFrame BOM Part List
| Frame Extrusions | Length | Units | Discription | Misumi Part # |
| 2020 (20mm x 20mm) | 930mm Long | 4pcs | Horizontals | HFS5-2020-930 |
| 2020 (20mm x 20mm) | 510mm Long | 6pcs | Verticals | HFS5-2020-510 |
| 2020 (20mm x 20mm) | 570mm Long | 10pcs | Frame Width | HFS5-2020-570 |
| 2020 (20mm x 20mm) | 808mm Long | 3pcs | Bed Support | HFS5-2020-808 |
| Gantry Extrusions | Length | Units | Description | Part# |
| 2040 (20mm x 40mm) | 770. 5mm Long 5mm Long | 2pcs | Gantry Horizontals | HFS5-2040-770 |
| 2040 (20mm x 40mm) | 456mm Long | |||
| 2040 (20mm x 40mm) | 510mm Long | 4pcs. | Z axis Linear Rail Verticals | HFS5-2040-510 |
| Frame Components | Type | Units | Description | Part# |
| Frame Brackets | 20mm Wide | 90pcs | Reversal Tabbed Brackets | HBLFSNF5 |
| T-Nuts (Misumi) | M4 | 75pcs | M4 | HNKK5-4 |
| T-Nuts (Misumi) | M5 | 180pcs | M5 | HNKK5-5 |
| T-Nuts (Misumi) | M3 | 75pcs | M3 | HNKK5-3 |
| Frame Price | Price $ | |||
| Profile Extrusions | $ 122. 29 29 | extrusions and brackets w/tax and shipping | ||
| M5 x 10 Cap Screws (200pcs) | $ 9.99 | 225$ | ||
| brackets | $ 40.32 | |||
| T-nuts | $ 19.32 | |||
| Total | $ 191.92 |
Frame Assembly
Workhorse Frame Step 1Workhorse Frame Assembly DiagramFrame Diagram Front ViewFrame Diagram Front ViewGantry
Gantry Motor PlatesAssembling The Gantry PlatesPart List:
- 1pc. x Gantry Motor Plate
- 1pc. x Gantry Idler Plate
- 16pcs. x M5 x 14mm Long Screws
Gantry Plates Before Gantry Frame And Motor
Gantry Plates Assembled To FrameView this post on Instagram
A post shared by 3D Distributed (@3d_distributed)
X-Carriage
X-CarriageX and Y-Carriages use 4 M3x6mm Screws
- X-Carriage (X-Axis) 2pcs
- Y-Carriage (Y-Axis) 1pc
- M3x6mm Screws 12pcs (4 for each Carriage)
The x-axis carriage screws down to the 2040 Y-axis extrusion and rail. *Note* The y-axis 2040 extrusion must have hand tapped M5 threaded holes.
Y-Axis AssemblyLinear Rails
The Workhorse Printer uses MGN12H linear rails with a 20mm x 20mm Hole Pattern.
BOM:
- 500mm Long Z Axis (4pc)
- 700mm Long X Axis (2pc)
- 450mm Long w Y axis (1pc)
Linear Rail Screw:
- M3x9mm Long Screws 26 per X-Axis
- M3x9mm Long Screws 14 for Y-Axis
- M3x9mm Long Screws 18 per Z–Axis
Total M3x9mm screws 138pcs.
Motor Mount to Carriage
- M3x8mm Long Screws 4pcs
Igus dryspin lead screw nuts do not require lubrication. This is normal for Igus materials. If you have any sounds, vibrations or wear, then the problem is most likely in the alignment and assembly of the mechanical components.
X-Carriage Lead Screw Nut Insert 2pcs
- Each Insert uses:
- M3x35mm screws 4pcs
- M5x55mm Long
Electronics
Stepper Motors
Heated Bed
View this post on Instagram
A post shared by 3D Distributed (@3d_distributed)
Like this:
Like Loading...
120Z - Modix Large 3D Printers
Modix BIG-120Z
Information, Photo Gallery and Online Store
Click to complete or edit your order:
* Scroll down to see delivery options.
$14,500.00 Cart
Modix BIG-3Z 120D Printer is a unique 3D printer that allows you to print tall objects in one piece, making them stronger and reducing post-processing time. BIG-120Z is ideal for the needs of: visual communication, interior design, art, mannequins, props, entertainment and engineering.
Specifications:
The Modix Big-120Z has similar specifications to all other Modix printers (check here). These are the unique features:
- Print volume: 600 x 600 x 1.200 mm (XYZ)
- Machine dimensions: 906 x 1060, 2.000 mm.
- Machine weight: 160 kg
- Z-axles HIWIN MGW Linear Rails - included
- Price includes 12 months warranty and lifetime support. The warranty does not cover degradable (PEI sheet and nozzles) and consumables. For a longer warranty period please contact sales at [email protected].
- Shipping costs are a fixed regional fee, which you select at the bottom of the product page after selecting the required components.
- Ordering add-ons only (no printer) will incur additional shipping charges. Please contact the sales department for more information: [email protected]
Improved offer:
Starting July 22, all of our printers ship with the following by default:
• New Griffin Printhead
• Z Digital Offset Calibration Tool
• Clog Detector
• Collision Detector
Select BIG-120Z components:
Our online store supports two payment methods: credit card and wired bank transfer.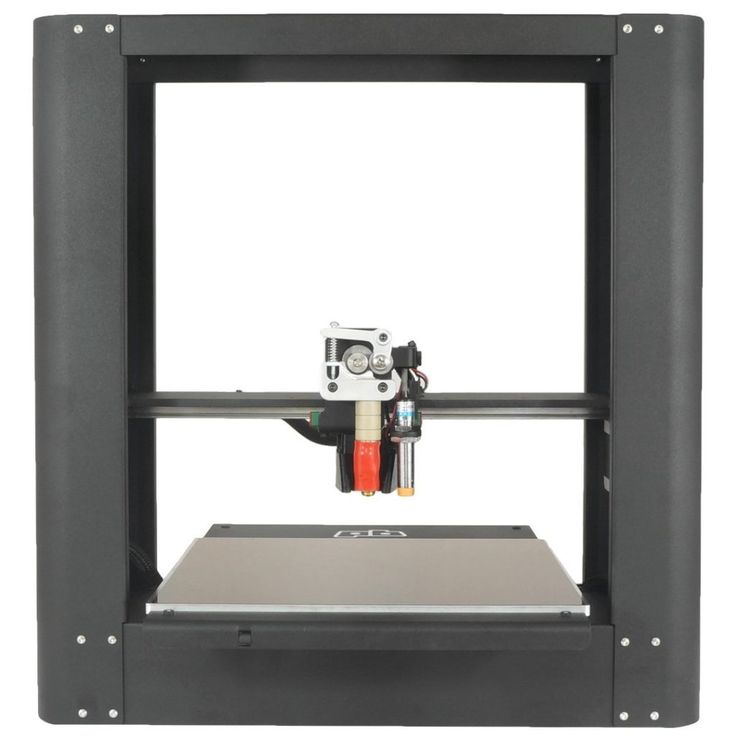
For more information on shipping and conditions, please visit our e-shop guide. here.
See bottom of this page for additional printer images.
Modix BIG-120Z
Choose configurationModix Big-120Z USAModix Big-120Z AUModix Big-120Z UKModix Big-120Z EU
$6,900 $6,900
$6,900
Basic 120D printer BIG-3Z. Ships with HIWIN Z Guides by default.
July Update 2022
Now comes with clog and crash detectors and the new Griffin printhead. Everything is included by default in the basic package.
Housing BIG-120Z
1,500USD
Keep the print chamber warm and protected.
2nd print head
450 USD
Use support materials to print models with complex or internal geometries.
Magnetic bed
510USD
Enjoy easy parts removal and easier bed maintenance.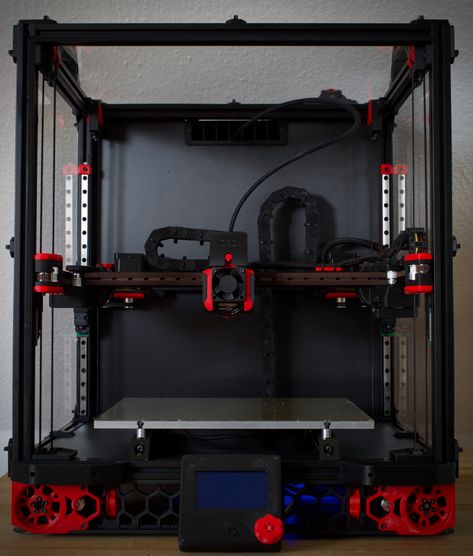
One side coated with PEI polyethylene for a rough bottom surface and the other side coated with PEI sheet for a glossy bottom surface.
Supplementary sheet PEI
110 USD
Spare PEI sheet size 660x660 mm
Whole bed cover (not required when purchasing a magnetic bed)
Shelf of spools
300 USD
Additional shelf for large spools from 5 kg or more.
Castors
120 USD
Wheel add-on allows you to easily move the printer. The rollers have adjustable alignment to easily balance your printer and reduce vibration.
Duex Extension
890 USD
Add 5 additional motor drives and enjoy automatic bed tilt calibration and automatic gantry leveling (X-axis).
Super volcano
250 USD
Upgrade E3D Volcano HotEnd to SuperVolcano for ultra-fast printing.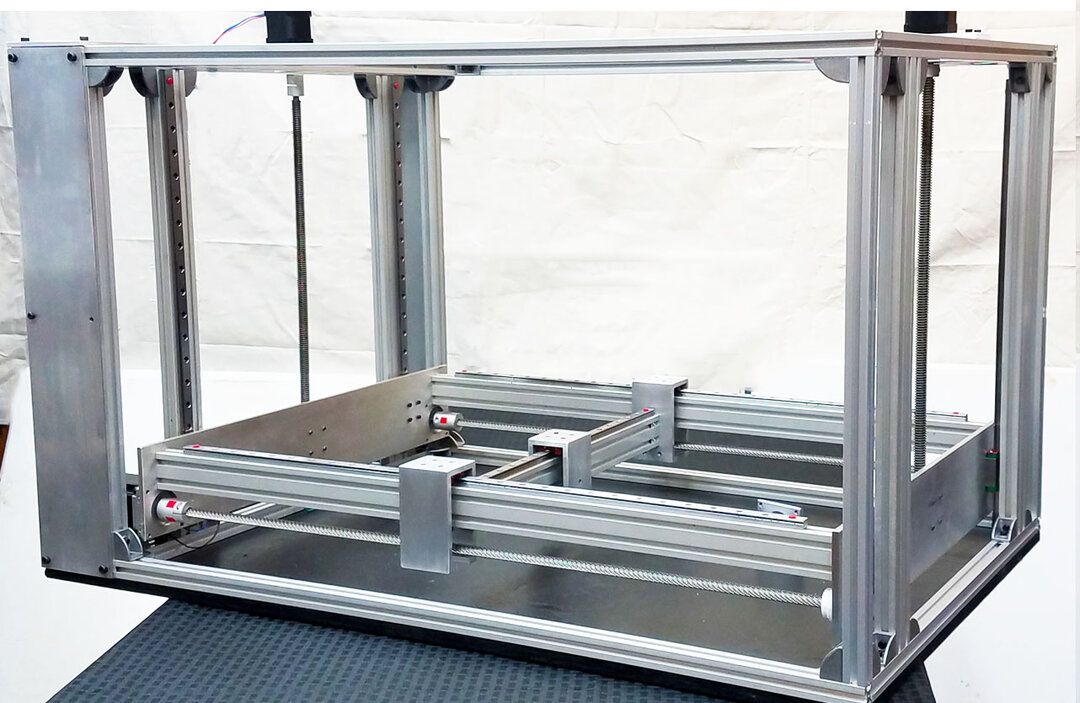 E3D SuperVolcano kit includes:
Thermoblock, heater 80W,
Thermistor and 1 mm nozzle.
Power Distribution
Better organize all AC cables going into the car (bed heater, electronics, noise suppression) into one integrated high power distribution unit (PDU).
Spare parts for filters
250 USD
Includes:
5 x pre-filter,
1 x HEPA/carbon combo.
Active air filter
$1,200
Three-phase filter device: pre-filter (dust), HEPA (submicron particles) and activated carbon filter (smoke).
Hotend Griffin V6
110 USD
Hotend V6 (detailed) allows you to print tiny objects with very high precision.
Extended Warranty
750 USD
Manufacturer's warranty extension
for a continuous period of 12 months from the expiration of the standard warranty.
Please select delivery option:
$1,050
USA and Western Europe, Asia and Scandinavia (excluding UK, Ireland and the Islands)
$1,450
Eastern Europe and Scandinavia
$1,200
Shipping to the UK
Rest of the World
Please contact Sales
at [email protected]
for a shipping quote.
Shipping Methods:
* Flat rate shipping via FedEx or DHL depending on your location. Delivery terms: Incoterms 2020 DAP
* Ordering add-ons only (no printer) will incur additional shipping charges. Please contact Sales for more information [email protected]
* EU Customers - Please provide us with a valid EU VAT number or we will charge you an additional 21% on top of your order.
Modix BIG-120Z visual tour
3D printed Life Scale
Top cover for easy maintenance of the printhead
PEI sheet prevents wrapping and after cooling allows easy removal of items.
Dual printhead for printing with support material.
Professional user interface including 7 inch touch screen and Internet (Wi-Fi) access from PC.
Eye level monitoring
Artist use case
Shown at Formnext 2019
Shown at Formnext 2019
Request a quote:
How much does a 3D printer cost?
3D printing is a one-stop solution for a wide range of applications, from high-resolution model production to rapid prototyping, rapid tooling for traditional manufacturing processes, production of aids and end-use models.
However, when you consider investing in a 3D printer, the viability of a solution usually boils down to a simple question: Is it cost-effective for your business? How much does a 3D printer cost and how much time and money can it save your business?
3D printer prices range from $200 to $500,000 depending on the printing process, materials, and complexity of the solution.
In this guide, we'll break down 3D printing costs by technology, compare outsourcing versus in-house manufacturing, list the factors to consider when calculating the cost of each model, and look at what else to look for when comparing different solutions. for 3D printing and other production methods.
Interactive
This interactive ROI tool will help you find out how much time and money you can save by 3D printing with a Formlabs 3D printer.
Calculate Your Costs
The three most well-known plastic 3D printing technologies today are Fused Deposition Modeling (FDM), Stereolithography (SLA), and Selective Laser Sintering (SLS).
Each technology has its advantages and disadvantages - take a look at the infographic:
Download this high resolution infographic here. Interested in learning more about FDM, SLA and SLS 3D printing technologies? Check out our detailed guide.
Prices for 3D printers have dropped significantly in recent years, and today all three technologies are available in compact, low cost systems.
FDM generally produces models at a lower cost if you only print relatively simple prototypes in limited numbers. SLA technology offers higher resolution and quality, as well as a wide choice of 3D printing materials at a slightly higher price. But this difference is quickly offset when you print complex designs or larger batches due to the less labor-intensive post-processing process. Finally, SLS technology is the most cost effective for medium to high volume production of high quality functional models.
Comparing the total cost of different 3D printers by price tags alone will not give you a complete picture of how the cost of a 3D printer and a printed model will compare. The cost of 3D printing materials and labor significantly affects the cost of a model, depending on the application and your production needs.
Let's look at the different factors and costs for each process.
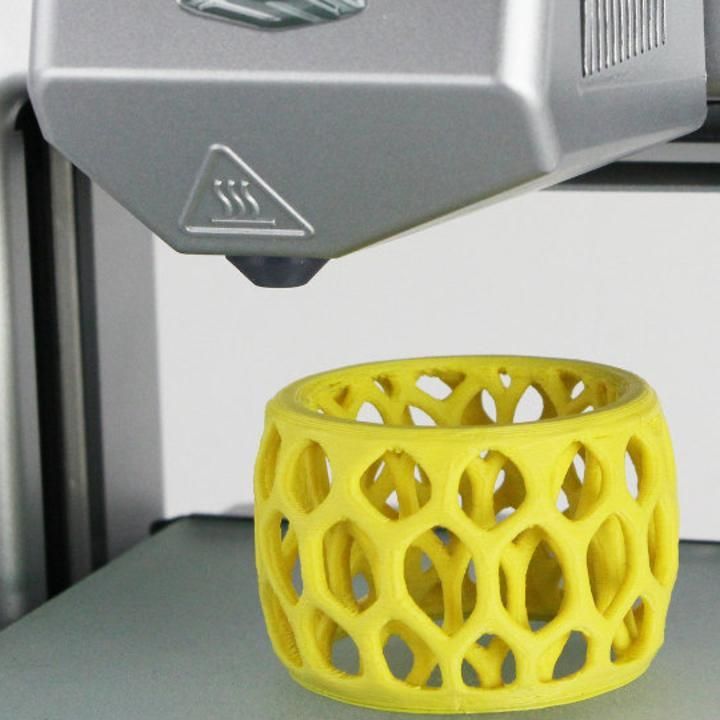
FDM, also known as Fused Filament Manufacturing (FFF), is a printing method where the parts of a model are made by melting and extruding a thermoplastic filament, which the printer's nozzle applies layer by layer onto the model being made.
FDM is the most popular form of consumer grade 3D printing, fueled by the rise of hobbyist 3D printers. However, professional and industrial FDM printers are also popular among professionals.
The cheapest 3D printers are FDM printers. DIY kits for FDM 3D printers start at $200. However, most of these models are more like toys or DIY projects that require a significant amount of time to build, set up and calibrate. The quality of the print largely depends on the success of these operations. In addition, machines require repairs and regular maintenance to keep them working, so they are more suitable for people with a higher engineering education who have a lot of time and patience.
Hobbyist FDM 3D printers cost between $500 and $1,500, come pre-assembled or unassembled, require less setup, but have the same disadvantages as the cheapest 3D printers. More expensive models are capable of large print volumes and work with a wide variety of materials besides low temperature ones such as PLA.
Professional 3D FDM printers start at $2,500 and large format professional FDM printers are available from $4,000. The cost of the most modern industrial FDM printers can exceed 10,000 US dollars. Most of these printers come pre-assembled and calibrated in the box, or they can be automatically calibrated. Printers in this category offer better print quality, a wider range of media, higher print volumes, improved reliability, and ease of use and maintenance. In addition, professional 3D printer manufacturers offer customer support services for troubleshooting.
Material costs for FDM 3D printing range from $50 to $150/kg for most standard and engineering filaments, and $100 to $200/kg for auxiliary materials. There are also cheaper alternatives, but they are of lower quality.
In addition, FDM printing can be very labor intensive. Successful printing of complex models requires support structures that must be removed manually or dissolved in water. To obtain a high quality surface and remove layer lines, lengthy manual post-processing of models, such as sanding, is necessary.
SLA 3D printers use the process of photopolymerization, which is the conversion of liquid polymers into hardened plastic using a laser. SLA is one of the most popular processes among professionals due to its high resolution, accuracy and material versatility.
Models printed on SLA printers have the highest precision, finest detail, and smoothest surface possible of any plastic 3D printing technology. But the main advantage of the SLA method is its versatility. SLA polymers have a wide range of optical, mechanical and thermal properties that match those of standard, engineering and industrial thermoplastics.
SLA 3D printers can handle a wide range of resin materials for a wide variety of applications.
Previously, SLA technology was only used in large and complex industrial 3D printers that cost more than $200,000, but now this process has become much more affordable. With the Formlabs Form 3+ Printer, businesses can now use industrial quality SLA printing for as little as $3,750. With Form 3L, large format SLA printing starts at just $11,000.
Stereolithographic 3D printers will be shipped in a box assembled and calibrated. These are professional tools that are highly reliable and require virtually no maintenance. Technical support is also always available. It provides troubleshooting in a critical situation (but its probability is extremely small).
Most standard and engineered polymers for SLA technology cost between $149 and $200 per liter.
SLA printers are easy to use and many workflow steps, such as rinsing and final curing, can be automated to reduce labor costs. Printed models have a high quality surface immediately after printing and require only simple post-processing to remove supporting structures.
Selective Laser Sintering (SLS) 3D printers use a high power laser to sinter fine polymer powder particles. The unsprayed powder supports the model during printing and eliminates the need for special support structures. This makes SLS ideal for complex geometries, including internal features, grooves, thin walls, and negative taper.
Models produced using SLS printing have excellent mechanical characteristics - their strength can be compared with the strength of injection molded parts. As a result, SLS technology is the most popular plastic 3D printing process for industrial applications.
SLS printed nylon models are ideal for a range of functional applications, from consumer product design to healthcare applications.
Like SLA, SLS was previously only available in large format, complex 3D printing systems costing $200,000 or more. With the Formlabs Fuse 1 stereolithography printer, businesses can now solve industrial-scale tasks with SLS technology starting at $18,500. The complete kit, which includes the post-processing and powder recovery system, costs $31,845.
As with the SLA printers, the stereolithographic printers are shipped assembled and calibrated in the box. They are reliable and can operate 24/7. The package includes in-depth training and fast technical support.
SLS nylon print materials cost about US$100/kg. SLS does not require supporting structures and unused powder can be reused, reducing material costs.
SLS is the least labor-intensive plastic 3D printing process in the production environment, because the printed models are of high quality right away, and to remove excess powder, they simply need to be cleaned.
There are several processes for 3D printing not only plastics but also metals.
Metal FDM printers are similar in design to traditional FDM printers, but use extruded metal rods held together by a resin binder. The finished parts of the model are sintered in an oven to remove the binder.
SLM and DMLS printers are similar to SLS printers, but instead of polymer powders, they fuse metal powder particles layer by layer using a laser. 3D printers based on SLM and DMLS technologies can create strong, precise and complex metal products, making this process ideal for the aerospace, automotive and medical industries.
Prices for metal 3D printers have also begun to decline, ranging from $100,000 to $1 million today. However, these systems are still out of reach for most businesses.
SLA 3D printing is available as an alternative to casting workflows that allow metal models to be produced cheaper and faster than traditional methods and provide greater design freedom.
Technical report
Get design guides for 3D printing samples, see the step-by-step direct investment casting process, and study guides for indirect investment casting and sand casting.
Download white paper
Different plastic and metal 3D printing processes have unique qualities that make them suitable for different applications. Below is a comparison of different printing technologies.
| Fused Deposition Modeling (FDM) | Stereolithography (SLA) | Selective Laser Sintering (SLS) | Metal FDM Printing | Selective Laser Melting (SLM) 907 Metal Direct Laser Sintering (30DM8) 9037 | ||||||
|---|---|---|---|---|---|---|---|---|---|---|
| Permission | ★cle | ★ opa | ★cle | ★cle | TOMALITY | TOLL ★☆ | ★ opa ★ Look | ★ opa | ★ opa | ★cle ★ MyQAI |
| ★ ☆☆☆ ingu | ★ Look | ★ opa ☆★cle | ★cle | |||||||
| Productivity | ★ opa | ★ Looking ☆ | ★ opa | |||||||
| simplicity of use | ★ opa | ★cle ★ Look | ★cle | ★ opa | ★ ☆☆☆☆ | |||||
| PRESTION | 90 x 300 x 600 mm (Desktop and Workshop 3D printers)Up to ~300 x 335 x 200 mm (Desktop and Workshop 3D printers) | Up to 165 x 165 x 300 mm (3D - workshop printers) | Up to 300 x 200 x 200 mm | Up to 400 x 400 x 400 mm | ||||||
| Price range | DIY kits for 3D printers start at $200, while hobby printers cost $500-1500. Professional 3D FDM printers start at $2,500, while large format professional FDM printers are available from $4,000. Professional 3D FDM printers start at $2,500, while large format professional FDM printers are available from $4,000. | Professional desktop printers start at $3,750, while high-volume large format desktop printers are available from $11,000. | Workshop industrial printers start at $18,500 and traditional industrial printers start at $100,000. | Metal FDM printers start at $100,000, but complete solutions including an oven are much more expensive. | DMLS/SLM solutions start at around $200,000. These printers require special infrastructure conditions, which can further increase costs. | |||||
| Cost of materials | US$50-150/kg for most standard and engineering yarns and US$100-200/kg for auxiliary materials. | US$50-150/L for most standard and engineering polymers. | $100/kg for nylon. SLS does not require supporting structures and unused powder can be reused, reducing material costs. | Depends on material and technology.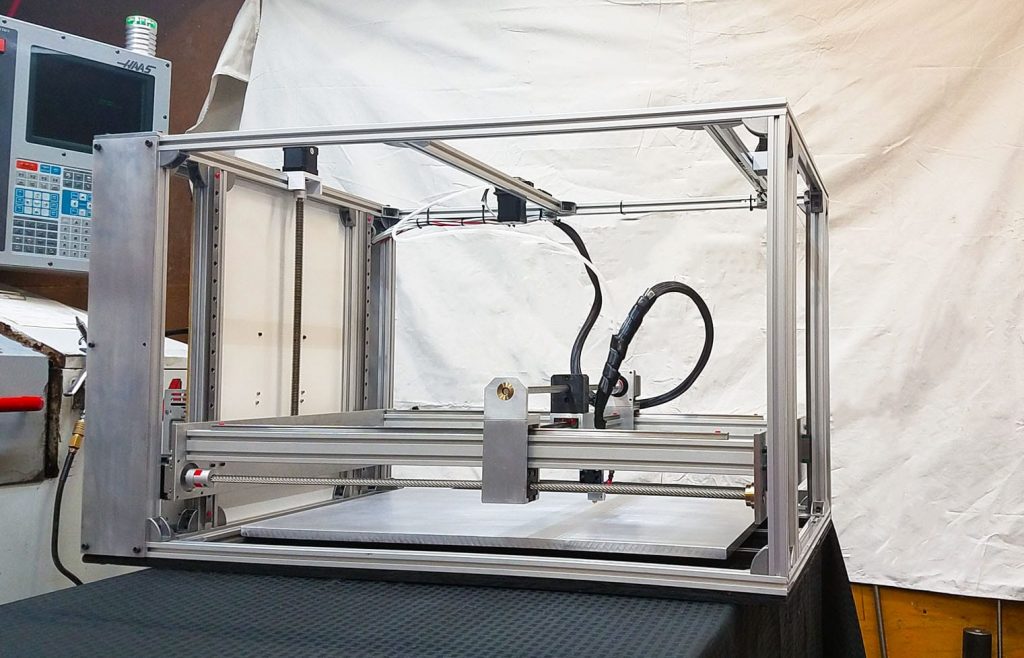 Significantly higher than plastic. Significantly higher than plastic. | Depends on material and technology. Significantly higher than plastic. | |||||
| Labor | Manual removal of support structures (soluble support structures may be used in some cases). Long post-processing is required to obtain a high quality surface. | Washing and final polymerization (both can be automated). Simple post-processing to remove supporting structures. | Easy cleaning to remove excess powder. | Washing and sintering (both can be automated). It is possible to use mechanical processing and other types of surface treatment. | Stress relief, support structure removal, heat treatment, and mechanical and other surface treatments. | |||||
| Materials | Standard thermoplastics such as ABS, PLA and their various blends. | Various polymers (thermosetting plastics). Standard, engineering (similar to ABS and PP, similar to silicone, flexible, heat resistant, rigid), injection molding, dental and medical (biocompatible).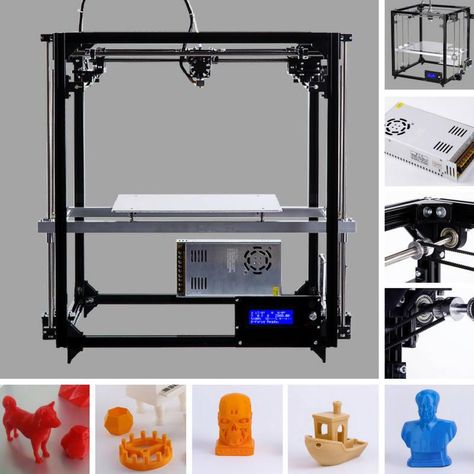 | Engineering thermoplastics - typically nylon and its composites (nylon 12 biocompatible + sterilizable). | Stainless steel, tool steel, inconel, copper, titanium. | Stainless steel, tool steel, titanium, cobalt-chromium, copper, aluminium, nickel alloys. | |||||
| Applications | Basic experimental models, low cost rapid prototyping of simple parts. | Prototypes with a high level of detail requiring tight tolerances and smooth surfaces: molds, tooling, templates, medical models and functional parts. | Complex geometries, functional prototypes, low volume production or limited trial runs. | Strong and durable models, tools and production aids. | Strong and durable models with complex geometries; ideal for the aerospace, automotive and medical industries. |
When calculating the cost of one model, the cost of ownership of equipment, material costs and labor costs are usually taken into account. It is important to understand the factors that affect each of these cost components, as well as the questions to ask in order to evaluate alternative production methods and uncover hidden costs.
Hardware ownership costs are fixed costs: 3D printer price, service contracts, installation and maintenance. These amounts must be paid whether your printer is idle or produces dozens of models per week.
Add up all projected fixed costs over the lifetime of the equipment, then divide by the number of models you plan to make. As a rule, the higher the performance and efficiency of your 3D printer, the lower the cost of ownership of equipment per model.
In recent years, desktop 3D printers have shown excellent results in reducing the cost of ownership of equipment. With a price 10 to 100 times lower than traditional industrial 3D printers and the ability to produce thousands of models over a lifetime, the cost of ownership can be negligible.
Questions:
-
Are there installation, training or additional initial costs other than the cost of the machine itself?
-
Do I need to sign a (mandatory) service contract? What does it include?
-
What accessories and tools are needed to make the final models?
-
What kind of maintenance is required for the machine to function properly? What is the expected annual maintenance cost? Will it change with an increase in production volumes?
The 3D printing raw materials and consumables you need to create models at an affordable price. These costs largely depend on the number of models you produce.
When calculating the cost of materials, determine how much material is required to create one model, and multiply this figure by the cost of the material. Count the amount of waste and any other consumables. As production grows, the cost of ownership of equipment decreases, and the cost of 3D printing materials tends to become more balanced.
Be sure to check what materials you need to create specific models, as the cost of 3D printing consumables can vary greatly. Please note that some 3D printers only work with their proprietary materials and thus limit your ability to use third party materials.
Questions:
-
What is the cost of each type of 3D printing material?
-
How much material is required to create one particular model, including waste?
-
What is the shelf life of the materials?
-
Do I need other consumables to create models?
-
Can the machine work with third-party materials?
While 3D printing can replace complex traditional manufacturing methods and provide significant time savings, depending on the 3D printing technology, it can still be quite labor intensive.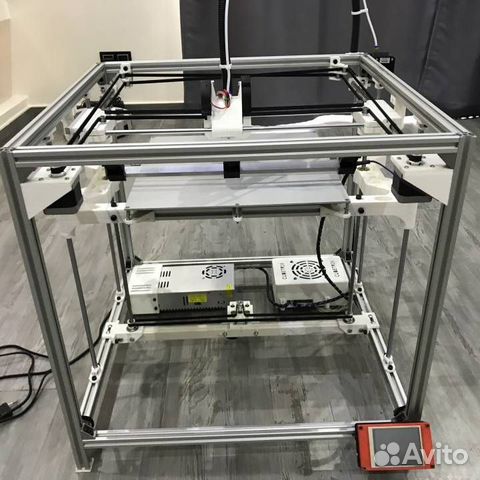
Professional desktop 3D printers are generally optimized for ease of use. DIY kits for 3D printers and hobby printers often require additional effort to adjust settings, while regular maintenance or material changes on traditional industrial machines can involve time-consuming tasks that require the assistance of a skilled operator.
Post-processing workflows vary depending on the 3D printing process, but in most cases include cleaning up models and removing support structures or excess material. However, there are solutions to automate some specific tasks. For example, Formlabs Form Wash and Form Cure simplify the wash and finish process for Formlabs SLA 3D printers, while Fuse Sift offers a turnkey post-processing and powder recovery system for the Fuse 1 SLS printer.
More complex processes such as SLA and SLS do not take long to achieve high quality models, while FDM models require lengthy manual post-processing to improve quality and remove layer lines.
Questions:
-
What is the whole workflow of model production? What specific steps are required to set up printing, change materials, and post-process models?
-
How long does it take to post-process one specific model?
-
Are there any tools or devices available to automate some of these tasks?
Outsource production orders to third-party service bureaus or labs when you use 3D printing only occasionally or to produce large models in non-standard materials.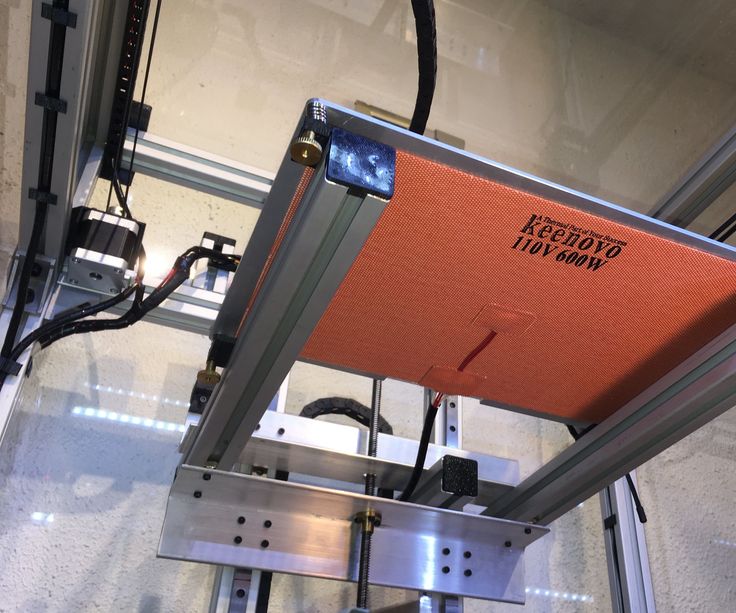 Typically, a bureau has several in-house 3D printing processes such as SLA, SLS, FDM, as well as metal 3D printers. They can also provide advice on a variety of materials and offer additional services such as design or improved finishes.
The main disadvantages of outsourcing are the high cost and duration of production. One of the main advantages of 3D printing is its speed compared to traditional production methods. But it is noticeably reduced if the delivery of the model produced by the involved organization takes several days or even weeks. And as demand and capacity grow, the costs of outsourcing are rising rapidly.
Desktop 3D printers are an excellent solution for rapid model production. Depending on the number of parts needed and the volume of prints, the investment in a professional 3D printer can pay for itself in just a few months.
With desktop and workshop printers, you can pay for the capacity that matches your business needs and scale your production by adding more devices as demand grows, without the heavy investment of a large format 3D printer.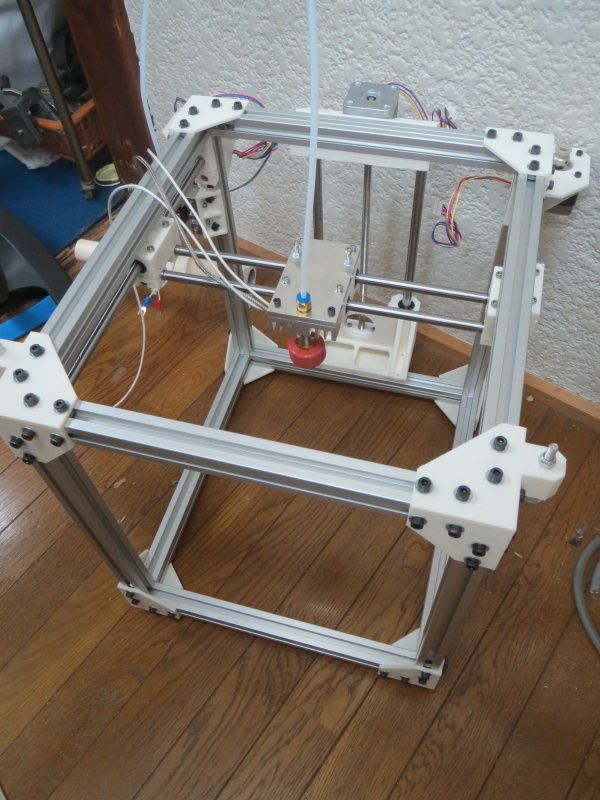 Using multiple 3D printers also allows you to print models from different materials at the same time. But if there is a need for the production of large parts or the use of non-standard materials, service bureaus can come to the rescue.
Investment, material and labor costs are relatively easy to calculate. But what about indirect costs and hard-to-calculate factors that affect your business? Let's look at some of the main considerations when comparing a desktop 3D printer to outsourcing or other manufacturing methods.
Save time: What if you could get products to market a few months faster? Or reduce the delivery time of your products by a few days or weeks? 3D printing simplifies traditional prototyping and manufacturing workflows, helping you save time and stay ahead of the competition.
Best results: 3D printing allows you to create more iterations, overcome failures faster, and produce better end products. Early troubleshooting of a design also helps to avoid costly redesign and the use of additional tools.