Filler primer 3d printing
Best Primer for 3D Prints (Recommendation and Tips)
Are you preparing to paint your 3D printed parts? If you’re a miniature painter or scale modeler using 3D printing, then you’ll want to know that any good paint job starts with a great primer undercoat.
In this article, I share my experience with the painting process of 3D printed miniatures and models. Using an appropriate primer before applying acrylic paints is the key to great results.
TL;DR: What is the Best Primer for 3D Printed Parts and Models?
If you’re in a hurry, check out the top 3 primers for preparing 3D prints for a great paint job:
- Vallejo Surface Primer (All purpose brush-on or airbrush primer)
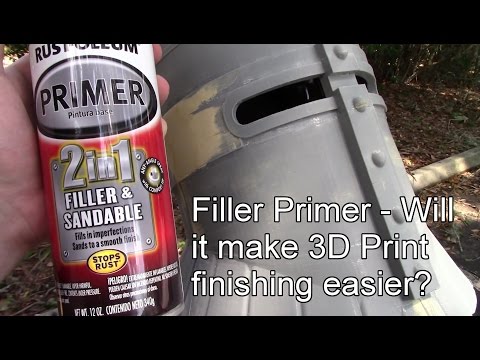
- Rust-Oleum Primer and Filler (Great for larger models, fills and smooths build lines)
- Testors Enamel Primer (Recommended aerosol spray primer)
Key Points
- The type of primer you use depends on how smooth you want your 3D printed surface
- For best results with PLA printed models for an acrylic paint job, you may want to use a few coats of a primer and filler
- Wet sanding removes material between primer/filler coats for an even smooth surface
- Spray on primers, including aerosol or airbrush primers, or regular brush-on surface primers work great on both PLA or resin miniatures
- Gesso is an easy-to-apply, water-soluble, all-purpose budget primer for larger 3D printed models
One of the great things about 3D printing is that you can print your own models and miniatures. But, if you want to paint them, you’re going to need a good primer. Now let’s take a more in-depth look at each of these points.
RELATED: 3D PRINT TERRAIN AND OTHER TABLETOP GAMING ACCESSORIES (GUIDE AND IDEAS)
How to Determine What Primer to Use for 3D Prints?
3D printed parts can have a wide variety of finishes, from smooth to very rough. The type of primer you use depends on how smooth your 3D printed surface is.
If you have a very smooth surface, such as those from DLP or SLA resin 3D printers, you can probably just use a regular brush-on primer. If your surface is rough, you may want to use a spray-on primer or an airbrush primer.
You can also use a high build filler primer, such as putty, spackle, or gesso. This will help to smooth out any imperfections in your 3D print. Just be sure to sand the surface in between primer + filler coats.
For best results with PLA printed models for an acrylic paint job, for example, you may want to use a few coats of a primer and filler.
Wet sanding between coats of primer/filler will remove any material that has been added, giving you an even smoother surface. A damp tack cloth will help remove any residue from the sanding process.
Of course, if you’re planning to paint a 3D printed miniature with fine detail and texture, then a primer + filler combo isn’t a good choice. Spray paint and primers with filler formulations often cover up those details really easily if you’re not careful.
Worse, a high build filler primer, e.g., automotive primers, will quickly obscure those fine details and textures without much chance of recovery. You can’t go back. For such cases with small 3D printed miniatures, it’s best to just use a regular brush-on primer or apply thin coats of spray on primer.
What is the Best All-Purpose Primer for 3D Print Models?
There are a few different types of primers that can be used on 3D printed parts. These include spray-on primers, airbrush primers, or regular brush-on surface primers.
Here are the top 3 primers I recommend for any 3D printed miniature or model:
- Gesso (thick, paste like coat)
- Vallejo Surface Primer (thin, water-mixable)
- Testors Enamel Primer (aerosol, spray on primer)
Each of these have their merits for priming 3D printed models and parts, with pros and cons.
Gesso is an easy-to-apply, all-purpose budget primer for 3D prints. However, it can be difficult to achieve a smooth finish with gesso, and it can also crack if your 3D printed surface is too rough.
Gesso is a thicker medium that you can thin with water. Apply in thin layers for best results. Be careful not to overwhelm fine details.If you’re looking for an all-purpose primer that is easy to apply and doesn’t require any special equipment, then a surface primer like Vallejo Surface Primer would be a good choice. Check out this article for how it can be applied to miniatures.
However, surface primers are not as durable as a volatile spray-on primer on 3D prints and may not adhere as well to a very rough 3D printed surface. It’ll be easier for you to paint, too, if your primer coat sticks.
This 3D printed bust has a lot of fine surface detail. A good primer should coat well while preserving these textures for the best paint job possible. You can see how I airbrushed Vallejo Surface Primer (Panzer Gray color) on this resin 3D printed sculpt.For this reason, I recommend applying surface primers in multiple coats for a uniform surface. You may also want to use a spray booth if you’re applying these spray on primers indoors.
Models from the Warhammer 40k universe often make a showing on my painting table. Here I started with a normal airbrush applied primer, which helped me with this paint job using metallic paints and a wide array of washes.
In this case, Testors Enamel Primer is a good choice for undercoating any 3D printed model. It’s an aerosol primer that can be sprayed on and dries quickly. A great alternative to Testors Enamel Primer is Tamiya Surface Primer.
A classic for a reason.Tamiya Surface Primer is a very popular primer for scale model plastic kits, gunpla, and 3D printed miniatures. The use of spray can type primers has a tried and true legacy when painting plastic scale model kits.
Tamiya, a trusted brand by scale model builders everywhere.Note, however, that aerosol primers are generally not as user-friendly, or inexpensive, as a brush-on primer and can be difficult to control when spraying small 3D prints.
Best Spray Primer for 3D Printed Models
The best spray primer in my opinion is the Tamiya Surface Primer or Testors Enamel Primer, as mentioned above. For 3D printed miniatures or models, I highly recommend either aerosol spray primers. Each comes in a rattle can and sprays reliably.
Of course, you’ll need to follow the instructions, e.g., avoid spraying in cold weather or in high ambient humidity. The same goes with normal spray paint, too.
I’m not sure if you’re worried about splatter. But, when you try and spray aerosols in cold weather, you may see this splotchy result. Keep your rattle cans close to room temperature (25C or 75F) for the best spray experience. Photo by Huebert World on Pexels.comI have used these aerosol primers on many different types of 3D printed plastics, including ABS, PLA, and PETG. They also work great for preparing 3D printed resin surfaces for paint jobs.
While the printing process even from the best 3D printers creates tiny lines on a model, these primers work well to hides these imperfections while preserving find detail.
I just love photos like these of miniatures.I recommend getting either gray or white colors for the Tamiya and Testors primers. This is important because it helps you see the coverage as you’re applying it.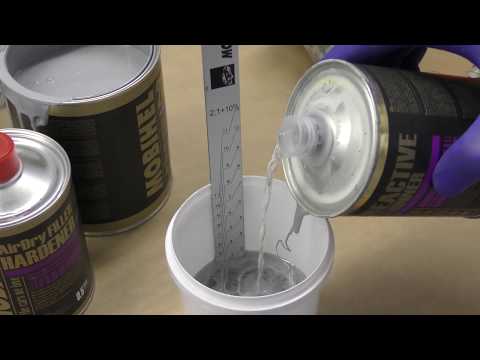
The lighter tone also helps maintain shadow contrast over an unpainted model, which helps when you get to the painting process.
The gray tone in my opinion is the best choice for primer color because it gives you flexibility when painting with all kinds of color schemes.
I’ve found that two or three thin coats works best with these spray primers. When dry, these primers provide a good foundation for paint to adhere to.
Recommended Primers 3D Printed PLA or ABS Parts
For the hobbyists or modeler with larger pieces, e.g., terrain, big sculpts, who 3D prints with ABS or PLA filament, I strongly suggest using some type of primer + filler coat.
READ MORE: BEST GAP FILLERS FOR MINIATURES AND MODEL KITS
Here are two useful primers for larger 3D printed PLA or ABS parts:
- Rust-Oleum 2-in-1 primer and filler
- Krylon Fusion paint and primer
- DupliColor automotive primer
A primer and filler spray provides a very strong foundation for paint to adhere to, while also filling in any imperfections in the surface of the 3D print. Rust Oleum makes a great 2-in-1 primer/filler that comes in a rattle can.
Rust-Oleum is the same brand that makes a host of spray paints for automotive applications. It is applied to any 3D printed surface or other materials like a spray paint. Krylon Fusion also makes a highly rated primer paint spray that is awesome for preparing 3D printed objects for the painting process.
Skip the basecoat with primer and paint combos. There are hobby game brands, available, e.g., GW/Citadel or The Army Painter; but they can be expensive.How to use an aerosol spray primer on 3D printed models
When spraying aerosol primers, work in a well-ventilated area and wear gloves, e.g., nitrile gloves, and respirator mask. In other words, use recommended personal protective equipment (PPE).
Keep the nozzle more than 6″ away from the 3D printed surface and move the spray in a circular motion to avoid over-coating your working area. Using circular motions to spray the primer gives you more control over the application.
If you’re having trouble with spraying all the exposed surfaces on your 3D print, then try using a painting block or spray paint stand to elevate the surface.
RELATED: NEED A “THIRD-HAND” TO SPRAY YOUR MINIATURES?
Looking for an extra “hand”? Citadel makes painting handles with flexible arms and clips for holding small parts. Use them for spraying 3D printed parts or other things.After the first coat, let the primer dry for about 10-30 minutes. Apply a second coat, a third, or more, if needed. Sanding in-between coat applications will create a much smoother surface as the build layers on your 3D printed PLA part fill in with the primer.
Once the primer is dry, you’re ready to start painting your 3D print!
When Should You Use a Brush-on Surface Primer for 3D Prints (PLA or Resin Miniatures)
Depending on the printing materials, you’ll want to consider using a surface primer. Even the best paints won’t look good if your preliminary step with a primer coat isn’t done well.
The advantage of a brush-on spray primer is that you can more easily control the amount of primer being applied. This is especially important with smaller 3D printed parts.
Here I’m 3D printing a Star Wars X-Wing using clear resin.Additionally, you don’t have to worry about over-spray as you might with a aerosol primer. Another advantage of brush-on primers is that they come in a wider variety of colors. So, if you want to add a little color to your 3D print before painting it, then a brush-on primer is a good way to do that.
This is my 3D printer hard at work making a small terrain feature for decorating a model’s base.The best brush-on primer that I’ve used is the Vallejo Surface Primer. It’s a water-based primer that is very easy to apply with a brush. You can find this primer in both gray and white colors (among the many others). See my full review and tips using Vallejo Surface Primer on wargaming tabletop miniatures.
A cool fact about primers: Most primers have an auto-smoothing property that tightens across the coated surface as it dries, kind of like stretching plastic wrap over dishware. This stretching, tightening process happens as the solvent within the primer evaporates.
My PLA printed post-apocalytic building for Fallout and Infinity Miniature games. After priming the model, I painted this using an airbrush and a variety of different weathering techniques.When the primer dries, it leaves behind an even coat that helps paint stick. If you apply multiple layers of a high quality surface primer, you can achieve a very smooth topcoat that’s perfect for painting finer details. Of course, this means it may take more coats (and work) to hide 3D printed build lines.
How to Get a Smooth Surface on 3D Printed Models
Here are some tips for getting a smoother surface on your 3D printed miniatures and models:
Prepare your 3D printsRemove print supports with flush cutters or the edge of an Exacto knife. Make sure you’ve UV-cured your photopolymer resin, and appropriately sanded support marks on the model. These are ways your finished print will be ready for the first coat of paint.
For best results with any primer, always start with a very thin layer. This will help avoid any primer puddles or drips that can ruin the look of your painted model. If you’re spraying your primer, you can use paint blocks to elevate your 3D prints to access hard to reach areas.
Apply your primer using appropriate methodsFor thicker type primers, such as Gesso, you may need to wet sand between coats. A tip for priming resin miniatures is to ensure you’ve removed support marks. Using a pen engraver, like the battery-operated one I use, or even nail buffing sticks can help remove these small nubs and fine lines.
You can use a battery-operated pen engraver to speed up support scaffold removal.
For thinner surface primers that you can brush-on or spray with an airbrush, you should have no issues with puddles or runs if you apply in thin coats. For more details about how to properly apply brush-on primers, check out this article.
Wash and rinse your model before primingTo avoid paint primer issues, always make sure you’ve removed any oils or residue from your 3D printed model. As mentioned, use flush cutters or sand your 3D prints before priming.
I printed this objective marker for a friend to use with his Tyranid Warhammer 40k army. Notice six alien eggs denoting that this is “Objective #6”.To wash your prints, I recommend using isopropyl alcohol (IPA) and water for this. Simply apply the mixture to a lint-free cloth or tack cloth. Soap and water may also work well for non-resin printed materials, e.g., PLA or ABS.
Sanding a primed surface works for FDM printed models
In the finishing process for preparing a 3D printed model, sanding a primed surface can help to create an ultra-smooth base for painting. This is especially true when working with FDM printed models that may have small layer lines or other imperfections on the surface.
When sanding a primed 3D print, it’s important to use a very fine grit sandpaper. I usually start with a 500 grit sandpaper and work my way up to a 2000 grit paper. This will help to avoid any scratches or marks on the surface of the print.
It’s also important to use a light touch when sanding. You don’t want to remove too much primer from the surface of the model. Just focus on lightly sanding any imperfections on the surface of the print.
Clear coating will protect the surface of your painted 3D modelsWith 3D printing, a finish coating with a clear coat varnish will protect the work you put into the model. The top coating acts as a barrier against moisture and other environmental insults to the surface of your model.
There are several great brands of clear coat varnishes you can use and I recommend. For those wondering about the difference between gloss and matte clear coating, check out this comparison article.
If You Could Only Choose One Primer for Painting 3D Printed Miniatures and Models?
In my opinion, the best primer for 3D printed models is Vallejo Surface Primer. It’s perfect for brush-on or airbrush application and provides a smooth, even coat that’s perfect for painting.
If you want to avoid brush marks entirely from any painting, then spraying on Vallejo Surface Primer is the better way to go.
I painted this 3D printed tank and photographed it on my kitchen dining room table.Spray on paints also make it easier for a smoother application, even helping you add gradients, e.g., zenithal highlighting, to your paint job. Take a look at this article for more information about how to thin paints for airbrushing miniatures.
Summary Table: Recommended Primers for 3D Printed Models
| Image | Primer Product | More Details |
|---|---|---|
| Gesso | Check Price | |
| Vallejo Surface Primer | Check Price | |
| Testors Enamel Primer | Check Price | |
| Tamiya Surface Primer | Check Price | |
| Rust-Oleum 2-in-1 primer and filler | Check Price | |
| Krylon Fusion paint and primer | Check Price | |
| DupliColor automotive primer | Check Price |
Conclusion
So, there you have it! I shared my overview of primers I recommend for preparing 3D printed miniatures, models, and more for a great paint job.
Whether you’re using an airbrush, paint brush, or spray can, applying a primer coat to your 3D printed model will help you achieve a beautiful paint job. Just remember to start with a thin layer and sand between coats (if necessary).
Do you have any tips or tricks for priming 3D printed models? Any favorite primers I missed?
Let me know in the comments below!
Grab your FREE photo backdrop bundle for miniature photography in the shop.Enjoying Your Visit? Join Tangible DayFree newsletter with monthly updates (no spam)
Leave a comment below! Follow on Twitter, Instagram, and Facebook.
Grab your FREE photo backdrop bundle for miniature photography in the shop.Like this:
Like Loading...
Ultimate Guide to Painting 3D Prints
Download the full Guide
as a PDF!
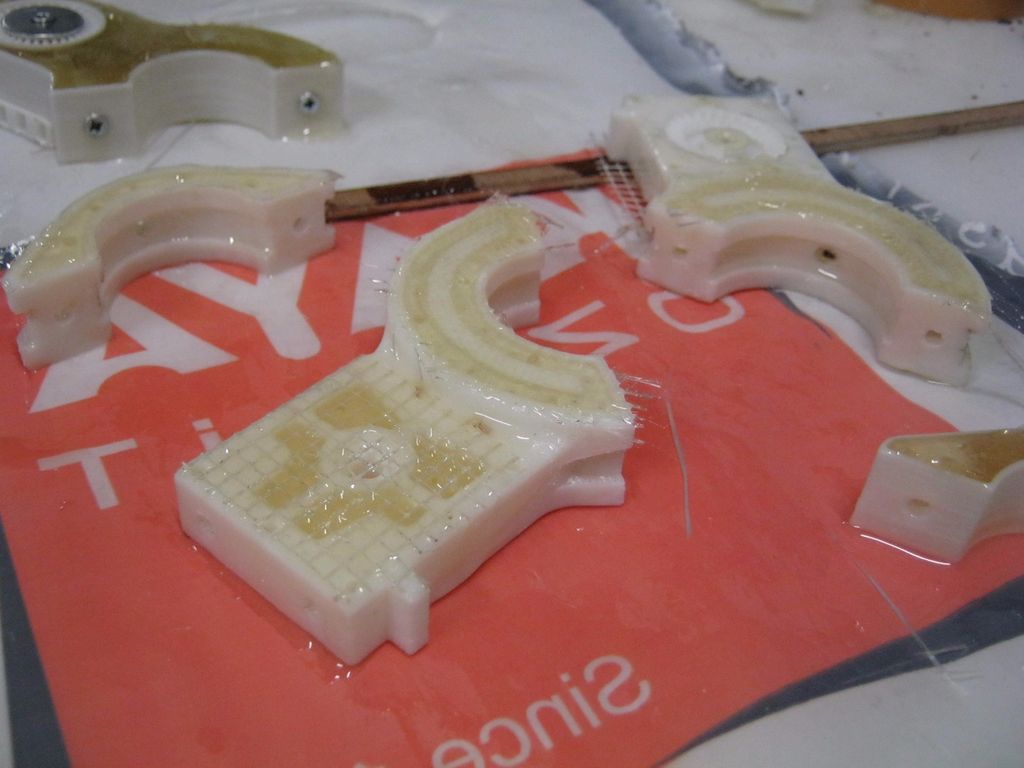
The simple post-processing techniques presented in this guide are an excellent way for professionals to create low-cost silicone molds, threaded inserts for enclosures, vacuum formed parts, and more.
If you’re an engineer or product designer creating concept models, a prop or set designer, artist, or an educator looking to add incorporate a bit more creativity into your classroom 3D printing activities, painting your models can be a great solution.
In this tutorial, we’ll show you how to create a nearly automotive quality paint job on any of your 3D printed objects.
Working time will vary depending on your model. Including drying time, the process shown took us about 6 hours from start to finish.
SUPPLIES
3D Print
Rubbing alcohol
Paper towels
Spray primer/filler
Spray paint
Hanging cord
80, 120, 240, 220, 1000 grit sandpaper
Needlenose pliers
Bondo
Sanding block & sandpaper
Gloves
Eye protection
Respiratory Mask
Need some of these products? We've curated an Amazon wish list for you.
STEP 1: PREPARE & PRINT MODEL
When preparing models for painting in MakerBot Print, keep in mind how your print settings will affect the quality of your paint job.
Consider: Print settings, print orientation, number of build plates
Surfaces printed in the Z axis will have the smoothest surface finish.
Printing models in 100 micron layer resolution will result in a slightly smoother surface finish, but will take significantly longer.
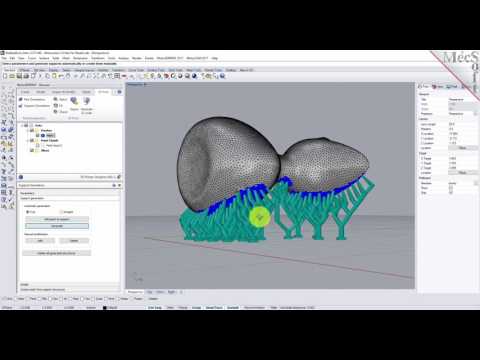
If possible, avoid placing support material in places you intend to paint as they will require more post processing to remove completely.
Supplies used: Needle-nose pliers or flush cutters
After you remove your print from the build plate of your printer, you will need to remove any raft or support material.
A. Remove prints from the build plate
B. Remove rafts
C. Remove large pieces of support
D. Approach smaller pieces and fine details
Supplies used: Sanding block, electric sander, 80,120, 240, 400, & 1000 grit sandpaper, Cyanoacrylate glue (super glue), Bondo
For the highest quality paint surface, an optional next step is to sand your model.
Make sure to wear eye protection, gloves, and a respiratory mask.
A. Dry sand the model using 80-240 grit sandpaper
B. Wet sand the model using 400 & 1000 grit sandpaper
C. Glue the parts of your model together
D. Apply filler to any gaps or blemish in your model and sand once dry
Find more detailed information here on gluing and sanding.
The 2021 Guide to 3D Printing Materials
Learn about polymers, composites, and metals all available for 3D Printing!
Supplies used: Hanging cord
Once your model is ready for painting - hang it in an open, dust free space with plenty of ventilation. This will allow you to paint all surfaces evenly without having to handle the model while paint is drying.
A. Tie hanging cord around the model
B. Hang the model in an open room with a tarp
STEP 5: PRIMER/FILLER
Whether you have chosen to sand your model and apply filler or you are simply painting a rough PLA model printed at high resolution, a few layers of primer/filler will fill any small surface imperfections before painting.
Primer filler is a high build spray filler that comes in aerosol form and can be purchased at most local hardware stores.
Before spraying remember to wear gloves, eye protection, and a respiratory mask.
BE SURE TO:
Shake well before use
Use wide strokes beginning and ending in space outside of the model
Hold the can 10-12 inches from the model
Paint in thin layers using a misting technique
AVOID:
Painting in thick layers
Holding the can in any spot for a long time
Holding the can too close to the model
Once you’ve sprayed 2-3 layers of primer/filler, allow your model to dry for 30-40 minutes.
STEP 7: SAND
A. Lightly sand your model with 1000 grit sandpaper (dry). This will smooth the surface of the model as the primer filler tends to create a rough surface texture similar to sandpaper.
B. Evaluate for quality.
C. If there are still surface imperfections you would like to smooth, continue to apply consecutive layers of primer/filler, and sand.
Once you are happy with the model surface, move on to painting.
STEP 8: PAINT
When choosing paint, you typically have a large degree of freedom as to which color and type of paint you use. Make sure to pick something that adheres well to plastic.
A. Choose a paint
B. Test for color in an inconspicuous location before painting the entire model
C. Let the paint sit overnight to cure
TIP:
Typically the paint will be dry to touch within an hour or so, and ready to polish within 24-48 hours.
If you’d like to protect the surface of your painted model, you can also apply a thin clear coat at this point.
In the end, you’re left with a beautiful painted model ready for approval presentation, enhanced for sets or galleries, optimized for better classroom learning, or simply improved for better innovation.
Here you can see just how far we have come.
Visit one of our other applications pages for tips on how to take your print even further.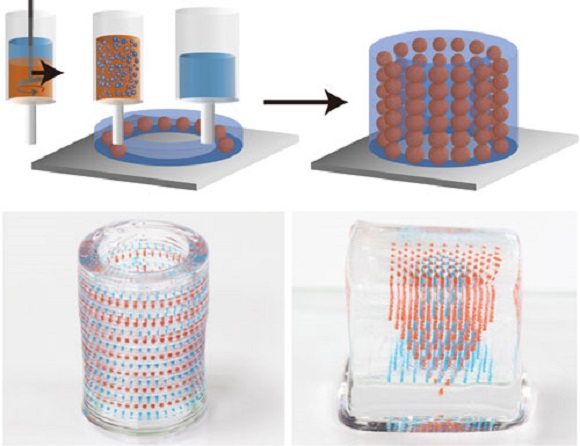
We recommend that you visit our pages on:
Gluing
Sanding
Inserts
Last but not least, remember to share your work with us on Thingiverse and social media @MakerBot.
We can’t wait to see what you make!
Hair Dryer Shell
Ferro
10/2/2015
https://grabcad.com/library/hair-dryer-shell-1
Powered by MakerBot Learning.
Primer for plastic models: how to polish transparent plastic
FDM printing technology, in which the vast majority of lines are even, makes the post-processing of printed products an important step. Especially often this procedure is required in cases where the surface of the printed product must be even.
Post-processing of 3D models
Post-processing is the process that takes place after the product has been printed. It is necessary for the layer-by-layer printed 3D model to have the highest quality appearance, without irregularities and shortcomings.
Post-processing does more than just make a product look more professional. But in some cases, it makes it more durable by changing the elasticity parameters of the material, its density, as well as some structural and textural features.
How to process the model after 3D printing: step-by-step instructions
The processing of finished products after the printing is completed can be carried out by different methods. The choice of method depends on the final goal and the characteristics of the filament with which the product was printed.
Removing Supports
If the part has been printed with support structures, the first step in post-processing is to remove them. The processing method in this case directly depends on what material was used to create them - soluble or insoluble.
IMPORTANT! Unlike other methods of finishing parts, removing supports is a must. However, their removal does not guarantee an improvement in the surface quality of the object.
To remove supports printed with insoluble materials, you will need the following tools:
- Pliers.
- Set of brushes with bristles of varying degrees of hardness.
The support material can be easily removed from the product surface. This process does not require much effort. In places with difficult access (recesses, holes, etc.), you can remove excess layers using pliers or a brush.
This post-processing method does not affect the geometric proportions of the manufactured object, but during cleaning, marks may remain on the surface of the object, which can be removed during further processing using other methods.
Printing supported items will almost always leave marks on the surface of the item. This not only worsens the appearance of the product, but also reduces the accuracy of printing in case of insufficient quality settings of the 3D printer.
Stripping
Once all supporting structures have been removed, the product can be sanded. This will not only level the surface, but also give it smoothness, as well as remove obvious defects and marks remaining at the points of contact of the product with supporting structures.
The choice of sanding paper depends on how thick the layer was when printing, as well as the quality of the finished product.
For example, if the layer thickness is 200 microns, a P150-marked sandpaper would be suitable for post-processing. If there are obvious flaws on the product, and the layer thickness during printing was from 300 microns, cleaning must begin with the use of P100 sandpaper.
The deburring process can be continued with a change in grit size up to P2000.
IMPORTANT! During cleaning, the surface must be cleaned with brushes, soapy water and a soft sponge. This will remove dirt, dust, and improve the quality of processing.
It should be remembered that sanding is recommended to be carried out in a circular motion, cleaning the entire surface of the product. Parallel or perpendicular movement of the skin must be avoided - this can lead to the formation of deep furrows and scratches.
Once the sanding step is completed, the surface will be smooth and the subsequent post-processing steps will be much easier.
The disadvantages of the method include the impossibility of using it for parts that have one or two shells due to the high risk of damage to the printout, as well as the complexity of applying the method if the product has a large number of small parts.
Filling voids
After the supports are removed and the part is sanded, voids may form on the surface of the part. This defect may appear directly during printing in cases where the layers for any reason are incomplete.
Small crevices and voids can be filled with epoxy, and large defects, which often occur when printing a large product consisting of several parts at once, with a special filler used in bodywork. However, this method has a significant drawback - the filler used in body repairs, like any other polyester epoxy adhesive, leaves discolored areas on the product when dried.
IMPORTANT! After filling the voids, the part must be resurfaced.
You can also fill voids in the printed product with putty. The part in which the voids are filled with its help can be easily processed with sandpaper and then painted. In addition, voids connected by a filler acquire additional strength, which has a positive effect on the performance of the product.
If the printout was made with ABS, the voids can be filled with specially thinned ABS. After filling, the solution reacts with the walls of the cavity and seeps into the voids.
Dichloromethane is also popular and is suitable for most types of filament, including ABS, PLA, HIPS, SBS, etc.
How to prime?
After the printed product has been cleaned, it can be treated with a primer. To do this, you will need:
- Lint-free material to be used to wipe the product.
- Toothbrush.
- 150/220/400/600 grit sandpaper.
- Primer for plastic (preferably using an aerosol).
- Polishing sticks.
- Polishing paper.

- Personal protective equipment - mask and gloves.
IMPORTANT! The method is suitable for all types of filaments.
Having prepared the part, it is necessary to treat its surface with primer from a distance of 20–25 centimeters, applying a primer coat evenly. After the primer dries, the irregularities will need to be cleaned with sandpaper with a P600 grit, after which a second coat of primer will be applied.
Painting
When the primer layer on the product is completely dry, you can start applying the paint.
IMPORTANT! You can paint a 3D-printed product with any tools, but the use of a special spray gun will provide the greatest smoothness.
Do not use household spray paints when painting. As a rule, they are characterized by increased viscosity and their application is quite difficult to control. The best option would be to use paints designed for painting models.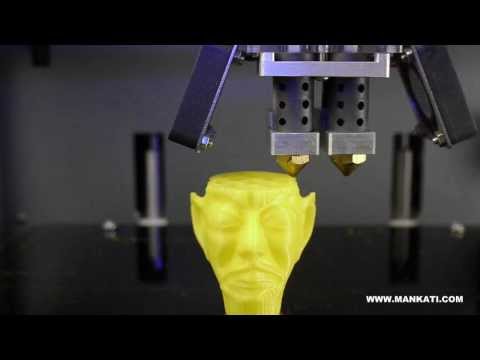
The application of paint must also be carried out in layers, and each subsequent layer can be applied only after the previous one has completely dried.
After the product has been painted, it is necessary to wait until it is completely dry and apply polishing paper. After using it, the coating will shine.
IMPORTANT! Do not shake the can while applying the paint. Mixing propellant and pigment leads to the formation of bubbles, which reduces the quality of the coating. To mix the paint, it is recommended to rotate the can in a circle for several minutes, achieving the rolling of the mixing ball.
Epoxy coating
To coat the product with epoxy resin you will need:
- Epoxy resin (two-component).
- Applicator for application of compound.
- Container in which the ingredients will be mixed.
- Sandpaper marked P1000 or higher.
Processing must be done in several steps:
- Cleaning.

- Mixing resin and hardener. The use of a glass container is not recommended as resins are highly exothermic.
- Mixing resin and hardener. Stirring should be carried out smoothly to avoid air bubbles entering the composition.
- Applying the first coat of resin. At this stage, it is necessary to minimize the number of irregularities on the product.
- After the first layer of the compound has completely cured, you can proceed with the application of the following layers.
- When the result is achieved, the product should be cleaned with sandpaper.
Removing Soluble Supports
If soluble filaments were used to print support structures, you will need to remove them:
- Sufficient container.
- Solvent.
Typically, the process is to place the printed part in a solvent container long enough to dissolve the supports. Any container made from a non-porous material may be used for this purpose.
IMPORTANT! You can speed up the process by using an ultrasonic cleaner, heating the solvent and replacing it in a timely manner.
Cold Weld
The cold weld method uses the following materials:
- Acetone (for ABS).
- Adhesives (for PLA filament).
This method is used when the item is too large to print in one go. In this case, the model is divided into several parts, which are subsequently connected to each other.
For PLA filament, assembly is done using Bond-O brand adhesive or other suitable compounds, while for ABS, the components are attached to each other with acetone.
The surfaces prepared for joining are lubricated with a joining compound and pressed against each other. They should be held together until the chemical reaction is complete.
How to grind and polish?
For sanding:
- Soft cloths.
- Sandpaper with various grits (P100 to P2000).
- Toothbrush.
- Soap solution.
The initial grain size of the pelt depends on the layer and print quality.
Sanding to 2000 grit. During processing, the model should be wetted regularly. This will help reduce friction and help keep the sandpaper clean.
For polishing use:
- Special compounds for polishing plastic materials.
- P2000 grit sandpaper.
- Wiping material.
- Polishing pad.
- Microfibre cloth.
IMPORTANT! The product must not be polished if it is to be painted later. After polishing, the primer and paint will not stick to its surface.
Smoothing
The smoothing procedure can be carried out on all FDM thermoplastics. This will require:
- Solvent resistant container.
- Wiping cloth.
- Solvent.
- Aluminum foil.
- Personal protective equipment.
Line the bottom of the container with paper towels and apply a small amount of solvent to them. It is important to lightly moisten, and not soak them.
Acetone is suitable as a solvent for ABS, dichloromethane and other compounds for PLA. A foil stand should be placed in the center of the wet towels and the printed product should be placed on it.
The container must then be sealed. Polishing with solvent vapors can take different times, so it is recommended to check the workpiece from time to time so as not to miss the desired stage.
The process can be accelerated by gently heating the container.
Metallization
Metallization of products allows to give forgings the appearance of metal products. For this post-processing method you will need:
- Electroplating solution.
- Sacrificial anode.
- Conductive paint.
- Acetone with graphite.
- Power rectifier.
- Conductive metal screw.
- Non-conductive container.
- Contacts.
- Non-conductive protective gloves and goggles.
At home, the galvanization procedure can be performed using copper or nickel. It is extremely important that the surface of the product is as smooth as possible. Any unevenness after processing will be enhanced, which will spoil the appearance of the product.
The procedure takes place in several stages:
- Preparing the surface of the product.
- Conductive paint application.
- Connecting a screw or eyelet to the negative terminal of the rectifier.
- The anode must be connected to the positive terminal of the rectifier.
- After turning on the rectifier, the printout is immersed in the container.
- Next, set the voltage to 1-3 Volts and wait for the metallization of the product.
- When the process is completed, the product must be removed from the container and coated with a varnish designed to protect against corrosion.
How to polish transparent plastic and make it glossy?
Polishing of transparent plastics is carried out using sandpaper with a grit of more than P2000 and special polishing compounds. For small parts, it is recommended to use polishing wheels or other rotary tools.
Post-processing errors and how to avoid them
The most common mistakes made by users during product post-processing are:
- Excessive exposure. If the wall thickness is insufficient, when polishing and grinding, it is easy to wipe the walls to holes.
- When working with adhesives or solvents, precautions must be taken: work in well-ventilated areas, and use a mask, goggles and seals.
- Sanding PLA should not be rushed - the material can roll off under the influence of sanding paper.
- If mechanical treatment of parts is carried out after chemical treatment, it is necessary to wait until the complete drying of the coating.
- Thoroughly clean the surface of dust and solids before applying primer and paint.
Post-processing is an important process that can give the printed product its final shape and make it more durable and high quality.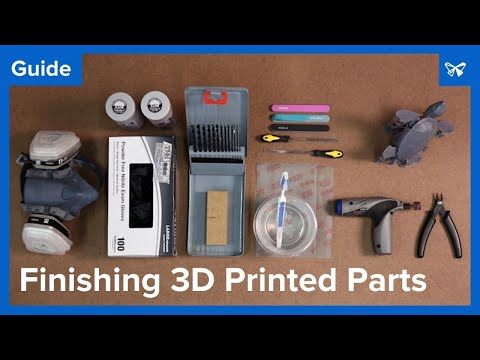
- March 21, 2021
- 2308
Get expert advice
Fallout 3D printed power armor. Stage Spin
Hello friends!
So much time has passed since the first post about my project, as well as a printed helmet for power armor, and the work does not stop to this day. In addition to the printing itself, the project includes: modeling, development of mechanical parts, a lot of attention is paid to the fact that the idea of the project is not only visualization, but also the ability to wear it.
After the post, a lot of offers came from plastic manufacturers, from exhibition organizers, as well as various options to help the project, but I don’t refuse, because I’m doing the project completely at my own expense (thank you later) and it’s very cool. Thanks to everyone who has helped me to this day.
Naturally, I do not forget about weapons and other elements related to armor)
Stage: BACK
Project in numbers:
ELEMENTS ON ARMOR: 56.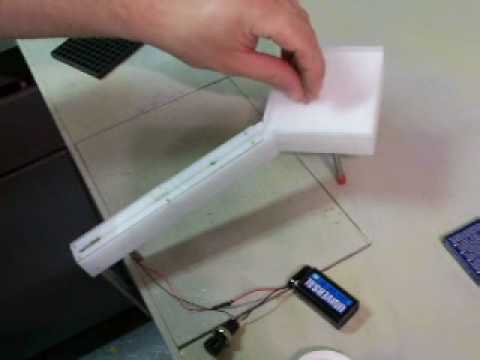
BACK WEIGHT: 12 kg.
PRINT TIME: 200 hours of clean printing, excluding scrap)
PLASTIC LEFT: 20 spools + scrap).
Required for processing:
DICHLOROMETHANE GLUE: 1 l
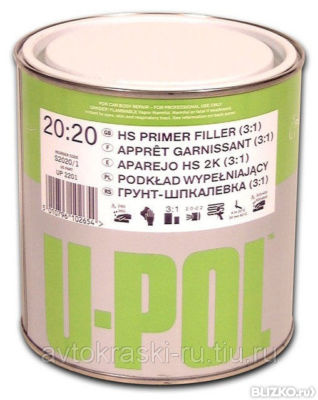
PRIMER FILLER: 3.6 kg
1+1 (post-treatment agent): 4 pcs*0.5 kg
a lot of different skins, the engraver of course)
The back turned out with a bang, of course, not a down pillow, but armor) has already fallen several times and the most interesting thing has not broken off, I think that this is a merit not only of plastic, but also of 1 + 1 good several layers.
Stage: BACK. POST-PROCESSING
On the example of a mask from SKYRIM
Naturally, in order not to have illusions, I will say right away that I did not adjust the elements to my size the first time, it took a lot of time, but then I decided to put control points on myself))
I will describe the stages of post-processing separately each.
Bonding elements:
After printing, glued with dichloromethane. As practice has shown, not all glue is suitable, very often let down the glue bought in hypermarkets, therefore I decided to take it where I took the plastic. The glue was applied with an ordinary brush, allowed to dry for a few seconds and connected the elements. I recommend gluing in a well-ventilated area and away from children and closer to the mother-in-law).
Stripping elements:
Cleaned with an engraver, sandpaper and all available methods.
The stage is time-consuming, monotonous, but obligatory.
Protective layer:
Here I will tell you more, because I think this stage is one of the most interesting.
What is it for?
First
This layer is necessary to protect the model from both the environment: sun, moisture, temperature changes. We all know that PLA plastic quickly becomes unusable than the same ABS (although by and large we are mistaken, but not about that now), and from falls, bumps and other physical influences from outside.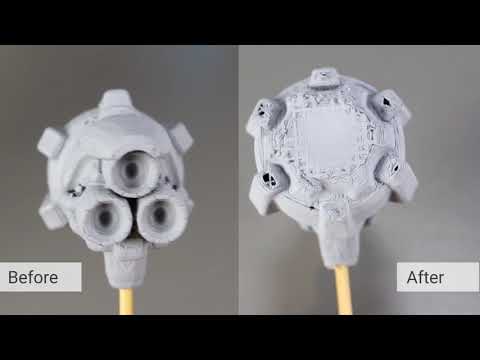
Second.
From experience smoothing the surface after FDM printing, you can use sandpaper, but the effect is not the same.
By the way, in front of the BACK, for a helmet, I bought an XTS-3D, like an American one, but the infection is very expensive and there is no money, so this infection is also expensive)), but I found a worthy replacement for it and much, much cheaper.
1+1 two-component composition:
Applied with a brush, after mixing the two components in a container in a ratio of 1:50
Wash off, before curing, with 646 thinner. Hardens within 4 hours, full setting after 72 hours at 20s.
Applied in several layers in order to remove the consequences of FDM printing, namely the jambs of the printer and printing with 0.8 and 1 mm nozzles (to speed up the printing of the element).
Also, if you apply a 1+1 layer after painting the product and polish it, you get an excellent effect, as if the paint is under glass. On the frame of Fallout, it may not be so noticeable in the photo, but still a very interesting moment.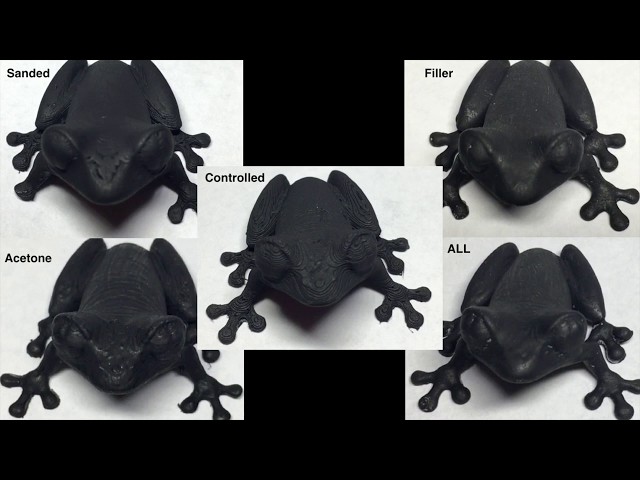
Primer filler.
By this stage, I had to buy different cylinders several times, since not all of them fit. Advice, do not take a cheap one)
After applying the filler primer, there is a grinding stage, a lot of pli, dirt, sandpaper and other reverse side of the moon.
Finishing:
Painting. I consider it necessary to highlight the painting in a separate post, as it is even more interesting and also requires close attention.
gratitude
In these lines, I want to thank you all for your support, for the letters that you write to me with your ideas, with the support of the financial part, which the project constantly needs at the moment, with the help of the plastic that you have lying around, but for me it come in handy, with the repair of the printer, because he pulls out one) The most interesting thing is that I myself did not ask, but thanks to your responsiveness, I manage to purchase consumables, as well as solvents and other trifles. Of course the lion's share of my budget is eaten up by the modeling of the whole project, but upon completion I want to donate a fully printable project to all those who supported me financially. Thanks to various stores for giving discounts and taking part in exhibitions and other events where I can show the whole project. (I will make a separate post about gratitude and highlight each)
I thought for a long time how I can thank you, because by helping the project, you literally become a part of it. And then it dawned on me ... Everyone who is ready to help me in this or that performance, I will immortalize you on the armor. You can send me your full name or organization name, nickname or other information that I will place on the armor itself. I won't forget anyone, and for some I have prepared very interesting t-shirts))
Remember, every time you see a project anywhere, know that you are a part of it! Thank you very much. If you recognize yourself, feel free to write in the comments.