Epoxy for 3d printing
Epoxy Method - NExT Lab
Epoxy Method - NExT LabNExT Lab
FabLabNExT LabRobotics LabPrint Room and Loans
Search…
NExT Lab
Our Contact Details
NExT Lab Access
Case Studies & Projects
|3DS|VR| Voices of Country
|3DP|AR| Prosthetic Habitats
|AR| Studio 40: The Field
|VR|3DP| Gravity Sketch: Door Handles
|3DS| 3D Scanning Examples
|AR|3DP| GRANULAR
3D Printing |3DP|
3D Printing at the NExT Lab
Design Approaches
Modelling Guidelines
3D Print Farm
PRUSA Open-Access
Key Techniques
Overhangs, Bridges & Exceeding the 45° Rule
Hollowing Models
Combating Warping
Split Models: Rhino 3D and Physical Joining
Fillets & Chamfers
Accuracy, Precision & Tolerancing
Post-Processing & Finishing
No Sanding Method
Sanding Method
Epoxy Method
Fillers Method
Printing for Transparency
Mesh Techniques
Topography Models
Optimising Makerbot Print Settings
Using the Makerbot Experimental Extruder
Resources
3D Scanning |3DS|
3D Scanning at the NExT Lab
Guides
Troubleshooting
Augmented Reality |AR|
Augmented/Mixed Reality at the NExT Lab
Guides
Troubleshooting
Resources
Virtual Reality |VR|
Virtual Reality at the NExT Lab
Guides
Student Contact
MSD RENDER FARM
Using the MSD Render Farm
3DS Max Plugins
Powered By GitBook
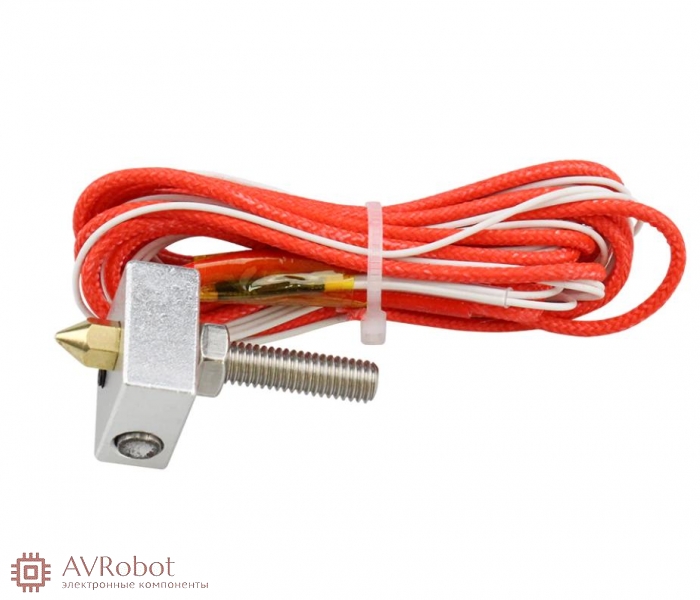
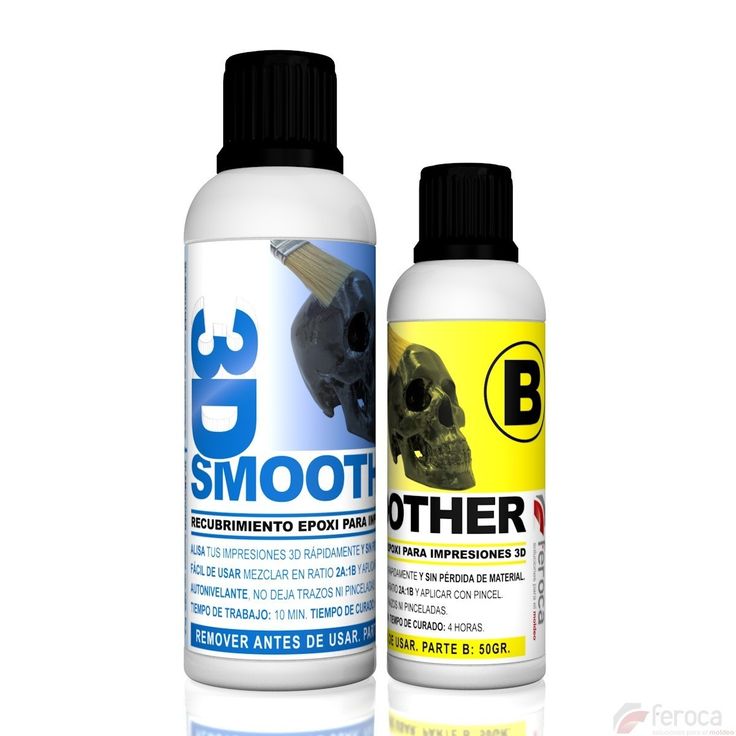
Epoxy Method
This is one of the easiest methods to finish your 3d-prints and fill the striations in your print to get a smooth finish. The process is quite fast and will usually leave you with a gloss finish as epoxy resins are used for finishing surfaces such as timber floors. However, this can be easily worked around by spray painting your parts post smoothing in the same manner you would in previous methods.
One of the drawbacks of this method is the price of the product. It is not cheap but can be readily found in hardware and hobby stores, as well as online. Aside from that the method is quite fast and produces a decent finish level.
This method is useful for post processing prints with complex geometries where it would be difficult to get to all the parts with a spray application.
Pro Tip: Sand your parts with 1000 grit (or higher) sanding paper prior to applying the epoxy. Sanding it first will make the process of smoothing the surface of your parts easier and yield a higher finish quality. Apply the sanding paper in a gentle circular motion (following the instructions on the sanding method) then use isopropyl wipes to clean your parts prior to applying the resin.
Summary
Category
Rating
★ ★ ★ ★ ★
Finish Quality
★ ★ ★ ☆ ☆
PLA smoothing using Epoxy Finishing Resin
Post Processing 3D Printed Parts using Epoxy Resin
Materials
General finishing Epoxy Resin (such as Z-POXY PT-40 Finishing Resin)
High-cover aerosol paint + primer
Isopropyl wipes or similar to clean part
Method
1
.
Ensure that your parts are clean and dry, wipe part down with isopropyl wipes or similar.
2
.
Ensure that your part is not sitting directly on top of the table or surface you are using to work. This will ensure your part doesn't stick to your work surface but will also allow you to access all sides and corners of your part evenly. So sit your part off the work surface by using a sacrificial block or similar.
3
.
Pour your resin into a little plastic container, then pour the hardener onto the resin in order to complete your epoxy. Mix thoroughly and begin using mixture straight away.
4
.
Using a brush (the size of the brush you use should be relevant to your part size - not too big, not too small) apply the epoxy to your print evenly.
 It is important not to lather the epoxy on as that will produce an inconsistent and undesirable finish.
5
.
Leave to dry for up to 12 hours before applying your high-coverage spray paint. Follow the same steps as previous to applying your desired choice of colour paint.
Previous
Sanding Method
Fillers Method
Last modified 2yr ago
Copy link
On this page
Summary
Materials
Method
Buy 3D Printer Resin Online
Shop by category.
Standard
Tough
Flexible
Castable
Dental
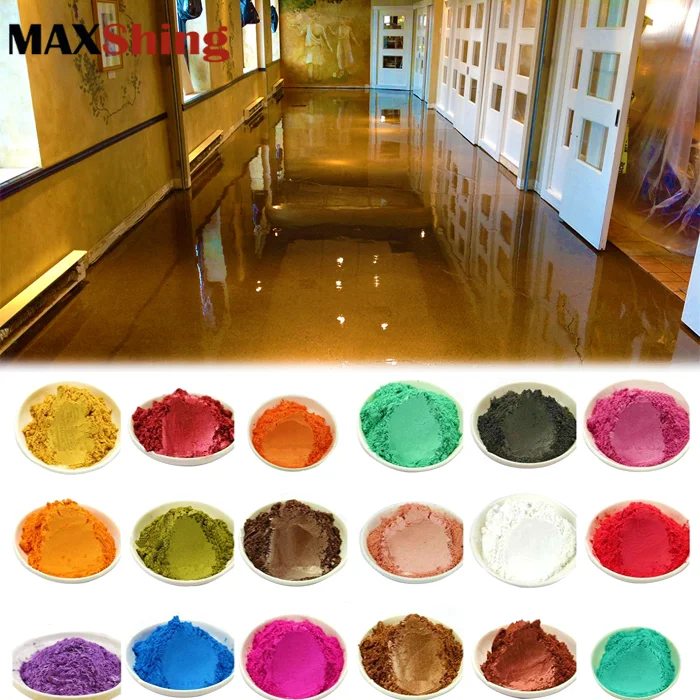
Colourants
Cleaning
Resin: 138 products
Sort byRelevanceBestsellersCustomer ReviewsPrice, Low to HighPrice, High to LowNew arrivalsHighest Discount
-
3DJAKE Isopropyl Alcohol 1 liter- Isopropyl Alcohol 99.
 9%
9%
- Very effective
- Good cleaning properties
- Isopropyl Alcohol 99.
-
Anycubic Wash & Cure 2.0- 2 in 1 solution
- Easy handling
- 360 ° treatment
-
Phrozen Aqua Resin Grey 4K 1.000 g- Low shrinkage
- High resolution
- Low viscosity and odour
-
3DJAKE Color Mix Resin - Water Washable 500 g, 1. 000 g
000 g- Residues can be removed with water
- Colours can be mixed by yourself
- Pixel accurate 3D printing (4K suitable)
-
3DJAKE Color Mix Resin Basic 500 g, 1.000 g- Pixel accurate 3D printing (4K compatible)
- Hardly noticeable smell
- Excellent material properties
-
Phrozen Water-Washable Resin - Grey 1. 000 g
000 g- Washable with water
- Robust
- Universally applicable
-
Elegoo Mercury Plus 2.0- Cleaning and curing
- Intelligent curing control
- 360° treatment
-
Liqcreate Castable Wax 250 g, 1.000 g- High precision
- Wax-based
- Clean and ash-free burnout
-
3DJAKE ecoResin Light Grey 500 g, 1. 000 g
000 g- Budget-friendly
- Low odour
- Fast curing
-
Phrozen TR250LV Resin Grey 1.000 g- For temperatures up to approx. 100 ° C
- Ideal for technical models
- Suitable for dental applications
-
Phrozen ABS-like Resin - Grey 1.000 g- ABS-like
- High resolution
- High hardness
-
Phrozen Aqua Resin Blue 1. 000 g
000 g- Low shrinkage
- Low viscosity and odour
- Fast printing
-
3DJAKE Resin Filter Set 1 set- Easy cleaning
- Separates resin from particles
- Easy to use
-
Phrozen Aqua Resin Ivory 4K 1.000 g- Low shrinkage
- High resolution
- Low viscosity and odour
-
Liqcreate Premium Flex 250 g, 1.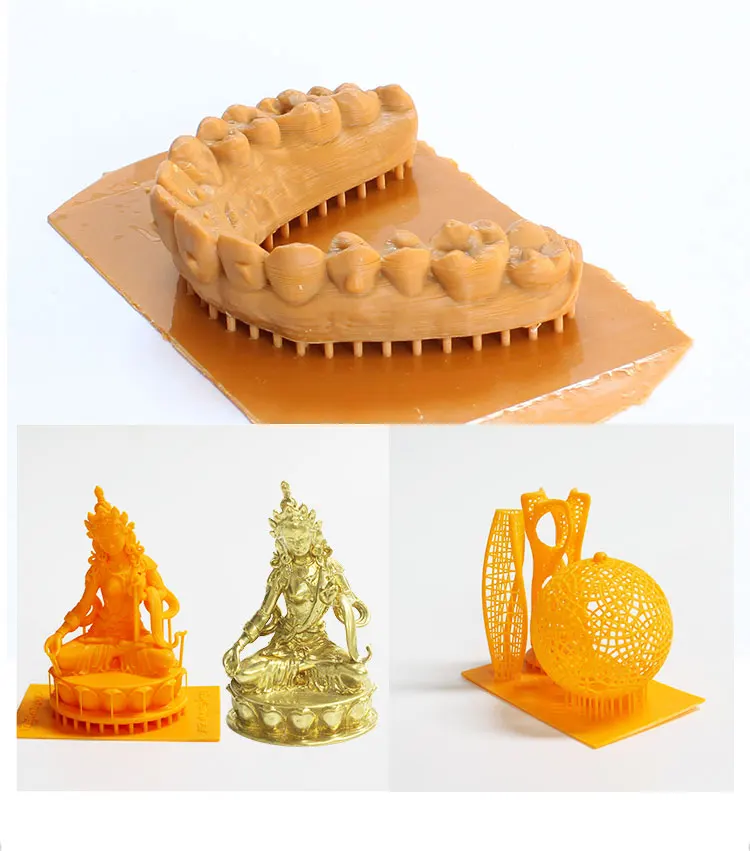 000 g
000 g- High elongation
- Soft-touch
- Easy to print
-
Liqcreate Premium Model 250 g, 1.000 g- Opaque resin
- Matt colour
- For all open source LCD & DLP 3D printers
-
Phrozen TR300 Ultra-High-Temp Resin in Grey 1.000 g- Extremely high thermal resistance
- High mechanical strength
- Cures quickly
-
3DJAKE Resin Standard Dark Grey 500 g, 1. 000 g
000 g- For LCD / MSLA printers
- Easy to use
- Good adhesion
-
Liqcreate Flexible-X 250 g, 1.000 g- High elasticity
- Good tear resistance
- Especially suitable for industrial parts
-
3DJAKE Resin Standard Black 500 g, 1.000 g- For LCD / MSLA printers
- Easy to use
- Good adhesion
-
Liqcreate Composite-X 375 g, 1.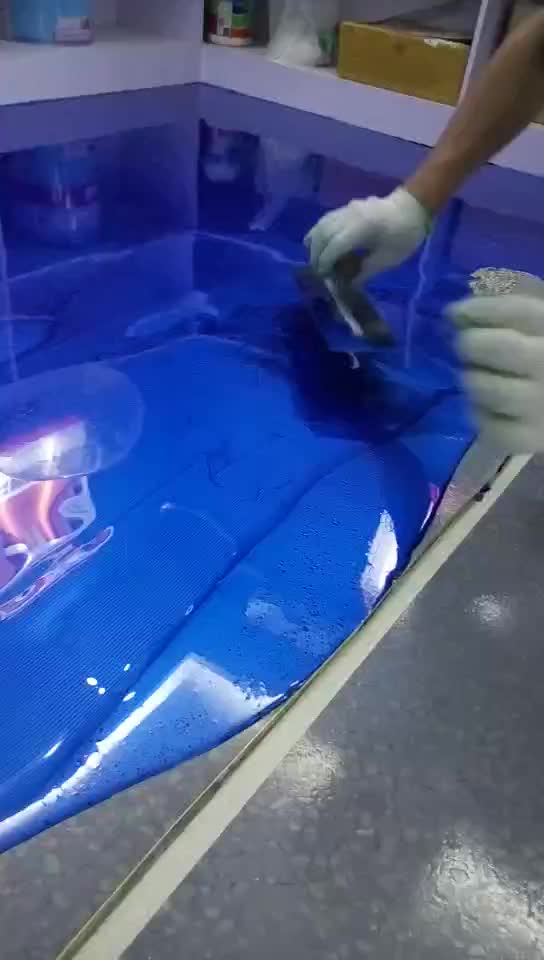 500 g
500 g- High rigidity and flexural strength
- Excellent chemical resistance
- Ideal for both industrial and private use
-
3DJAKE Resin Cleaner 500 ml, 1.000 ml, 5.000 ml, 10.000 ml- Low odour
- Ease of use
- Suitable for ultrasonic cleaners
-
Liqcreate Strong - X 250 g, 1.000 g- High Strength
- High Rigidity
- High Temperature Resistance
-
Liqcreate Liqcreate Dental Model Pro Grey 250 g, 1. 000 g
000 g- Matt surface finish
- Exceptional dimensional stability
- Low shrinkage
All prices incl. VAT.
Epoxy 3D printing imitates the properties of cork wood material
Archive
curable polymers, but now scientists at the Harvard School of Engineering and Applied Sciences have teamed up with the Wyss Institute of Bioengineering to create an epoxy-based thermosetting polymer for 3D printing. These epoxy composites allow printing with materials that are used as structural components for lightweight structures. These new 3D materials consist of epoxy resins combined with nanoclay particles to increase viscosity and a dimethyl methylphosphonate compound. To this mixture are added two fillers, silicon carbine and carbon fibers.
The orientation of these fillers in the material determines the versatility and strength of the printed material. This blend is a composite whose strength and stiffness can be adjusted and is approximately 200% stronger than the best printed resin composites currently available. The description of the study was published in the article "3D printing of lightweight cellular composites" in an issue of the journal Advanced Materials, co-authored by Brett Compton and Jennifer Lewis.
Epoxy 3D printing of cellular structures. In the right image, you can see how the fibers align as they pass through the extruder nozzle.
Lorna Gibson, Professor of Materials Science and Engineering at the Massachusetts Institute of Technology explained the significance of this research:
“This paper demonstrates for the first time the 3D printing of cellular structures with fiber-reinforced cell walls. Of particular importance is that the fibers can be aligned by controlling the ratio of parameters such as fiber length to fiber diameter and nozzle diameter. This marks an important step forward in the development of building materials that mimic wood.”
Why is it so important to imitate wood in this way? After all, we have wood, right?
The main potential for using this material is to create structural honeycombs that will serve as core inside wind turbine blades.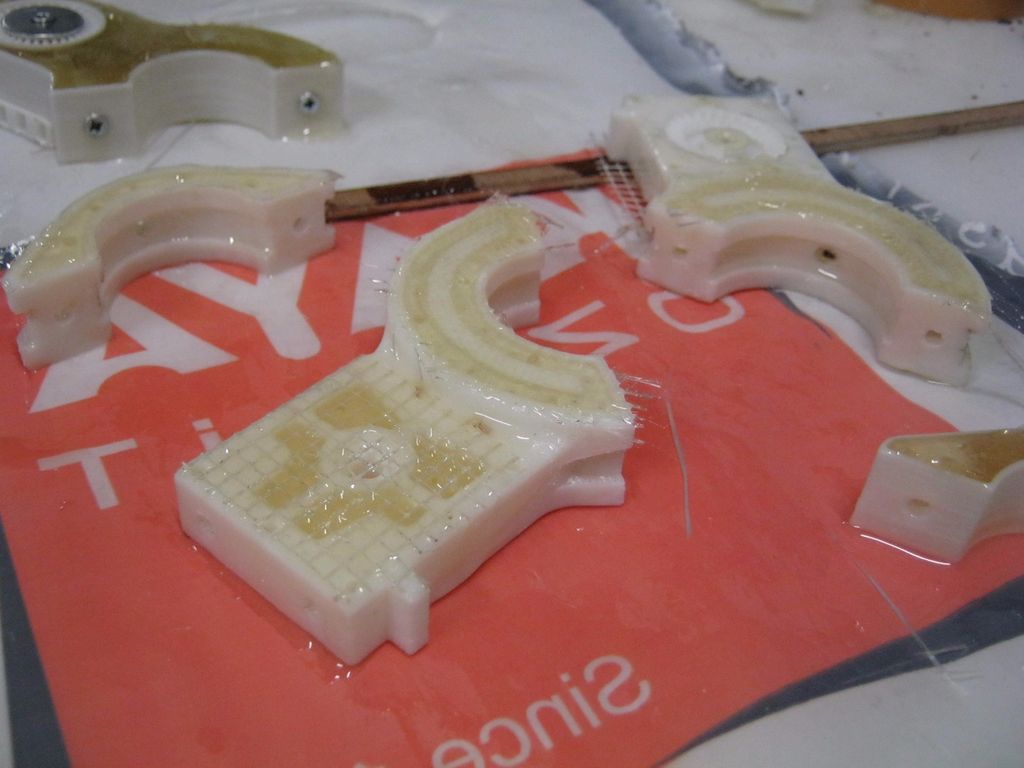 Currently, these blades are filled from the inside with compressed building materials, one of which is cork wood. Despite the fact that balsa (cork tree) is considered a fast-growing tree and belongs to a rapidly renewable resource, its wood has small variations, due to which it can be quite difficult to choose exactly the one that fully meets the requirements established for such products. In addition, balsa wood is a relatively expensive material, and as the length of the blades used in these wind turbines increases, some of which are already about 250 feet long today, the cost and the need for precision also increase. Using this material and 3D printing technology, researchers have been able to create cellular composite materials that are superior to balsa wood in terms of properties.
But this material could be used for more than just wind turbines, as fuel efficiency requirements in the automotive industry are becoming ever more stringent, a strong and lightweight material like this could be exactly what will help designers build ever better cars, conforming to these standards.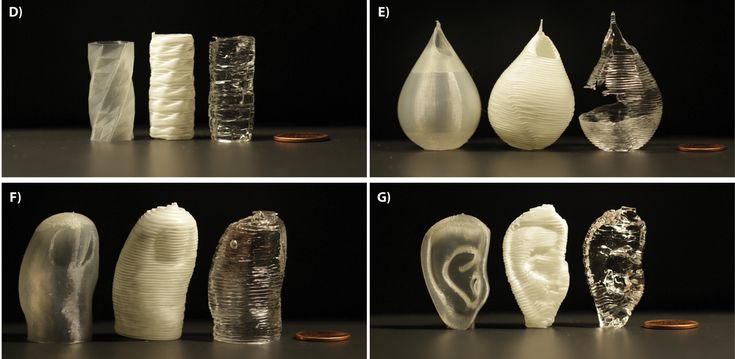
Compton sees the future use of this epoxy composite as follows:
“Because we have been able to achieve additional levels of control in filler alignment and learn how to better integrate these directional fibers into component design, we can further optimize component design to improve material performance. Eventually, we will be able to use 3D printing technology to change the degree of fiber alignment and local composition on the fly.”
Various 3D printed cellular structures made from epoxy carbon fiber composites and conductive properties.
What other applications could this material be used for? Share your opinion in the comments to this article.
Article prepared for 3DToday.ru
Subscribe to the author
Subscribe
Don't want
Even more interesting articles
7
Subscribe to the author
Subscribe
Don't want
Mikhail Kozenko, a schoolboy from Volgograd, joined the ranks of 3D makers by designing his own 3D. ..
..
Read more
four
Subscribe to the author
Subscribe
Don't want
One of the most promising and least developed areas of 3D printing is bioprinting. Whole a...
Read more
four
Subscribe to the author
Subscribe
Don't want
Alexander Gessler wrote a small handy program to convert 40+ 3D file formats (OBJ, S...
Read more
How to make a part printed on a 3D printer , more durable
As we all know, parts printed on a regular home 3D printer are not as durable and last as long as the original ones. We thought it would be great to learn how to somehow strengthen the printed parts, and worked on this idea a bit.
Such stronger parts will allow us to use them in real work, under high load. Then, instead of looking for original replacement parts for broken ones in gadgets, robots, cars, mechanical toys, or for any project in development, we can simply print them.
The need for this guide came to the author when he bought bike bags on eBay. One for a friend, one for myself. The attachment of the bags meant that the handlebars were one inch (2.54 cm) thick and barely fit a women's bike. The handlebar of the men's bicycle had a diameter of 3.15 mm, and the mount did not fit on it.
Therefore, the idea came up to make a part according to the size of the corresponding fastener by printing it on a 3D printer.
Step 1 Required part
Here is the node to be reproduced on the 3D printer.
To print something, you first need 3D model files. They, respectively, need to be found and downloaded on the Internet or developed independently. The second option seemed to be the only one possible, since it was impossible to find ready-made 3D models for such a specific part, and it was necessary to modify the one that was available so that it fit on the steering wheel.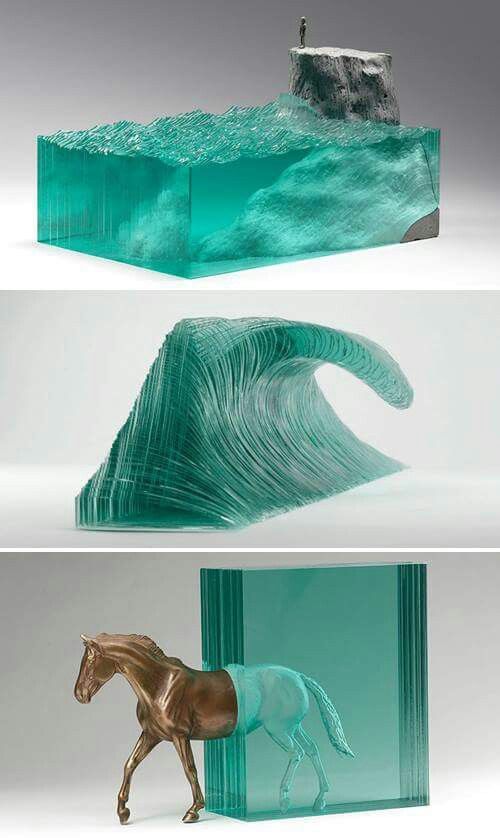
However, everyone knows that 3D printed parts are not durable. Normally printed, this knot would not be strong enough to securely hold a heavy bag on a bumpy road. Then the idea arose to somehow strengthen this part, giving it enough strength.
The author has been involved in ship modeling for several years and had the opportunity to see how layers of fiberglass and epoxy make even thin plywood parts stronger, as a result of which they can withstand high loads without problems.
Therefore, in this work, it was decided to use fiberglass and epoxy adhesive-resin.
The original plan was to take a drawing of the part, make the necessary dimensional changes, and cover everything with fiberglass cloth and epoxy. So, let's start modeling.
Step 2. First draft
The part should look like this. All sizes are adjusted, everything as a whole is enlarged and thickened. The surfaces have also been enlarged so that fiberglass can be glued on them.
In addition, grooves are provided on each side to fill them with epoxy for extra strength.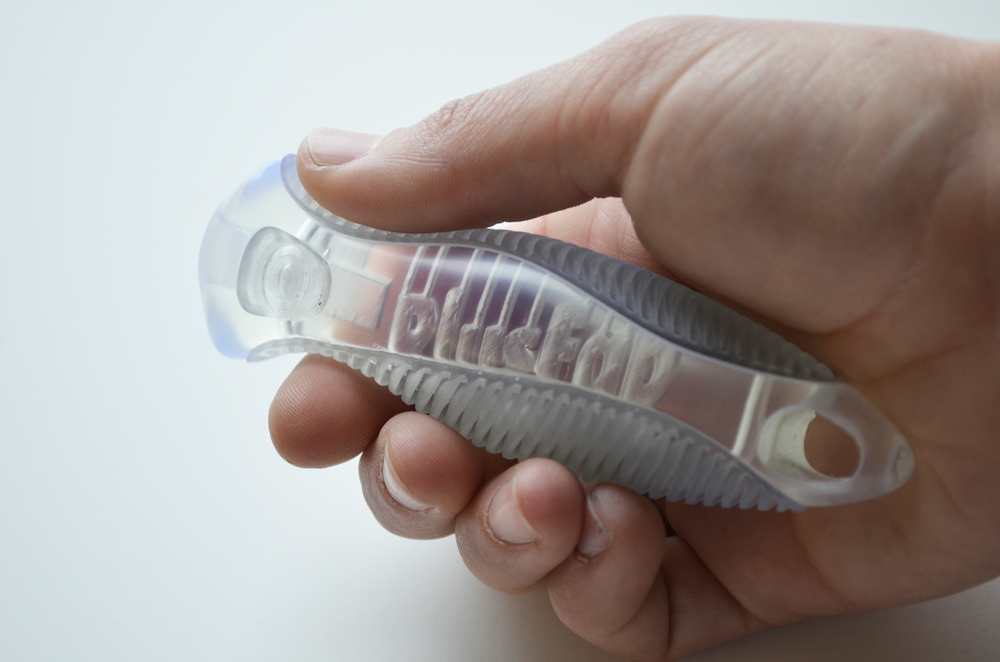 Through holes are also modeled to make it easier for the assembly parts to connect to each other and to allow fiberglass and resin to connect them from the inside.
Part printed on the Up printer and checked to see if it fits.
The type of filling was chosen as lattice, which made it possible to leave enough empty space inside the part. In a normal situation, this reduces strength, but this was done deliberately. A few more holes were drilled into the piece to allow the epoxy to penetrate and reinforce it.
Step 3 Apply fiberglass and epoxy to the first project
This is the messiest part of the job. Epoxy and fiberglass are difficult to work with. Everything sticks everywhere so that you can hardly wash it off later.
First, strips of fiberglass fabric were glued to both halves of the part to make them stick together better.
Then everything was laid out on a piece of nylon, since epoxy, fortunately, does not stick to nylon so fatally. After that, the epoxy was applied to the surface of the part, a piece of fiberglass cloth was cut to the appropriate shape and size, on top of which the epoxy glue was again applied.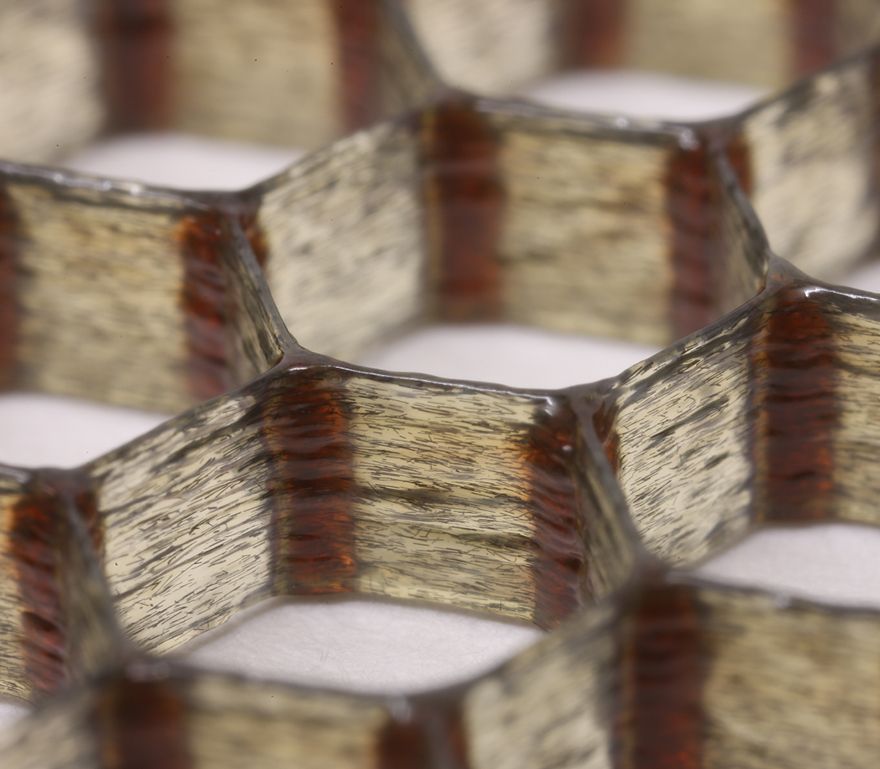 There was so much glue that the fiberglass became transparent.
This whole procedure was repeated for the other side of the part, after which the resin cured for a day. Even a little more, so that everything is held together tightly.
Step 4. More epoxy for additional reinforcement on the sides
It was also decided to add more epoxy in the end grooves specially provided for this.
Step 5. Project Two
During the development of the first project, it was understood that the part would be partially filled with epoxy through the additional holes drilled in it, and fiberglass impregnated with epoxy would hold it on the outside. In the process of printing the first part, the idea was born to model only its shell, and inside everything in general to make only epoxy glue and fiberglass.
And so, while the first project was freezing, it was decided to start modeling the second one. I wanted to compare both options in terms of strength and ease of manufacture. In the second project, a different approach was used to fill in two fragments of a part (two parts are needed for fastening).
The photo shows that the second project is an empty shell with walls 1 mm thick. The rounded fragment is separated from the larger one to simplify the filling process. It must then, when the epoxy hardens, be fixed with screws.
Step 6. Filling the second project with epoxy and fiber
To begin with, fiberglass was cut into small pieces, and the resulting shreds filled both parts of the part a little more than half. Then you need to add epoxy glue drop by drop and press the trim a little so that they are well saturated.
Step 7. Filling in further project 2. Fragment 1
Continue to drip and trample until all the fiberglass is soaked, after which we add more pieces of fiberglass, repeating this step until the final filling of the part. Now we fix the second fragment of the part with screws. In the end, the level of the mixture of epoxy and fiberglass should be up to the brim.
Almost the same for the smaller, rounded fragment.
Step 8. Filling in the project 2. Fragment 2
For this fragment, a slightly different approach was used: the part was not filled halfway from the very beginning. Only one layer of fiberglass was laid on the bottom, then another one - with an overlap on the edges. These layers were impregnated with epoxy until they became completely transparent, after which the following layers were laid one by one and pressed down to absorb the glue. A little epoxy was added every 2-3 coats.
The first method gave us a part with more epoxy and a little less fiberglass inside. With the second method, there is more fiberglass in the part and less epoxy between layers.
Step 9. Everything should now be cured
Periodically, the parts were checked, more resin was added to the voids formed when the resin was absorbed. Where necessary, fiberglass was added. It took about a day to fully dry. There are epoxy adhesives on the market that cure faster, you can also add more hardener to speed up the process. However, we do not recommend this, because it will only complicate the work and prevent the glue from penetrating into all corners.
Step 10. Assembling the finished assembly
The parts turned out pretty good, especially on the second project. Attaching them to the bag went without problems. They fit great. Now you need to attach the bag to the bike.
Step 11 Remove the plastic parts
This step was not really intended. It was supposed to simply use 3D printed and reinforced parts. But when it came to sanding, the printed "skin" simply began to break off at the corners, the rest was also removed without problems. This “skin” did not give any additional strength, therefore it was almost completely removed, and the part became a composite epoxy-fiberglass.
Step 12. Summary
The part held up without problems during a 20-day trip to Sweden, Poland, Germany and Denmark. The front bag was always filled to overflowing with food, a lot of bumpy roads were passed. The parts have served perfectly and are still stronger than stone.
Here are some more useful notes.
- Interestingly, epoxy does not adhere very well to ABS. That is why additional holes through which it will penetrate inside and fasten the structure are simply required.
- Reinforcing a part from the outside is much more difficult than filling it. The first option takes a lot of time, but the completed part is easier. Undoubtedly, a reinforced part is much stronger than a simply printed and unreinforced part. This is easy to check if you test the reinforced and non-reinforced parts for twisting. Fortified like a stone, the usual easily changes shape.
- The second hardening method is much simpler and gives a much neater result. After the resin has cured, almost nothing needs to be cleaned. And what happened has the strength of granite!
- Both fillings with different amounts of fiberglass give the same feeling of solidity and solidity.

Learn more