Ender 3 3d printer size
Ender 3 (V2 & Pro) Bed Size & Print Volume
- Author
- Recent Posts
Martin
Besides many test devices, Martin now has his fourth own 3D printer running and prints as a hobby for friends, family and himself. He is happy to share his experience with each new article.
Latest posts by Martin (see all)
Disclosure: Links marked with * are Affiliate Links. I earn from qualifying purchases if you decide to make a purchase through these links – at no additional cost for you!
The Creality Ender 3* is one of the most popular 3D printers. It has been on this market for quite some time. This is certainly due to its good price-performance ratio.
It is also very easy to use, making it the perfect tool for beginners.
One question that beginners often ask themselves with the Ender 3, however, is the question of printing bed size. What size can the 3D prints in the Creality Ender 3 really be?
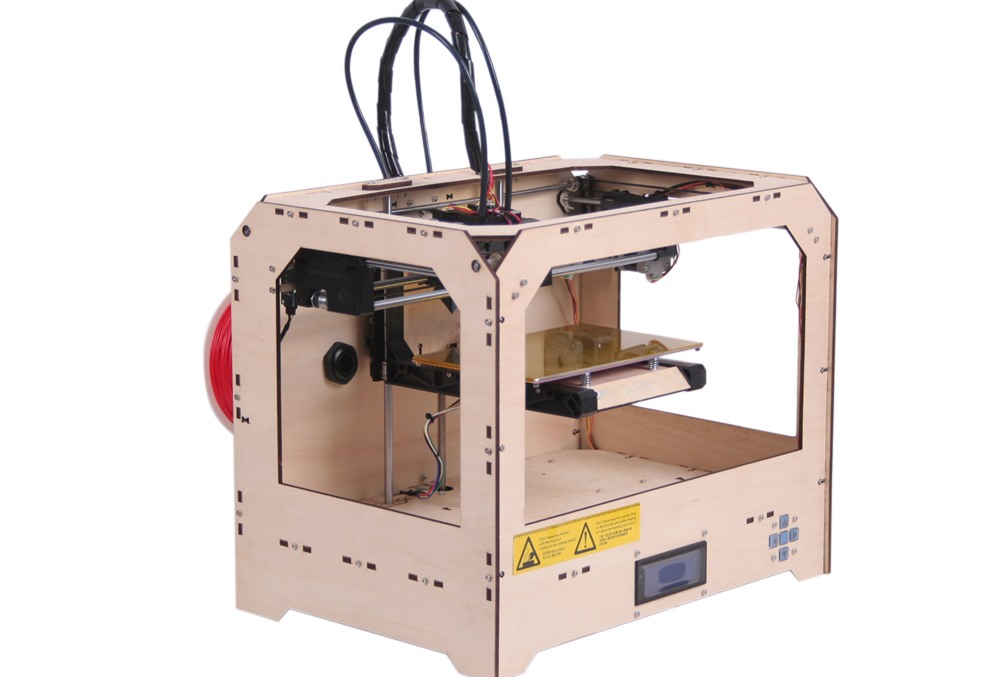
The size of the printing bed is 235 x 235 mm, the print volume is 220 x 220 x 250 mm.
Why different measurements are given for the print volume and the printing bed and all further details are summarized in this post.
Ender 3*Table of Contents:
- 1 What is a Printing Bed?
- 2 What Do the Measurements Mean?
- 2.1 Creality Ender 3 Dimensions
- 2.2 Why is 14% of the Bed Size Misappropriated?
- 2.3 Can I Exceed the Printing Volume?
- 2.4 What Can I Change to Increase the Printing Volume?
- 3 Upgrading the Creality Ender 3
- 4 Perfect Use of Space
- 5 Comparable 3D Printers
- 5.1 Prusa i3 MK3S
- 5.2 Anycubic i3 Mega
- 5.3 Creality Ender 5
What is a Printing Bed?
The printing bed is one of the most important components of a 3D printer. Your 3D object is created on the printing bed. There it is applied layer by layer. There are printing beds that stand still and some that move up and down or back and forth.
It is important that the printing bed is of high enough quality to hold the filament firmly in place.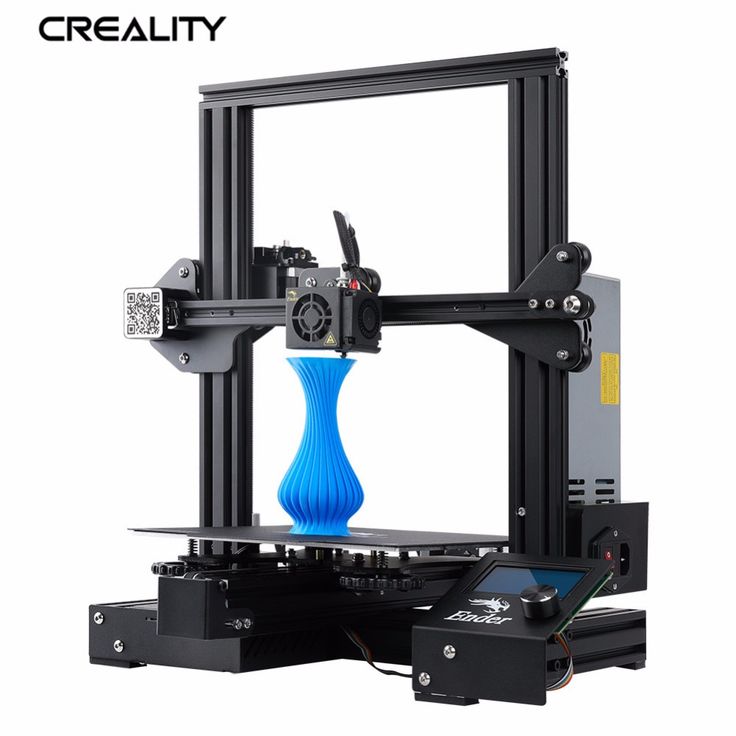 If the filament slips when hitting the printing bed, the 3D print will fail or it will warp and look unattractive.
At the same time, the printing bed has to be constructed in such a way that the 3D print can be removed from the bed after completion. You will achieve particularly good results with a heatable printing bed.
Luckily, most printing beds are interchangeable and you can use a better one in your 3D printer if you are having trouble with yours. The Creality Ender 3 has a good printing bed, though. The included printing bed is made of glass and works quite well for the start.
What Do the Measurements Mean?
With all the 3D printers available on the market, it is a bit complicated to read and understand all the size and dimensional information. The 3D printer Creality Ender 3 is built extra compact.
Nevertheless, the manufacturers also wanted to offer a satisfactory printing surface. This should satisfy more customers. Because some only want to print small models, others also want to print large ones.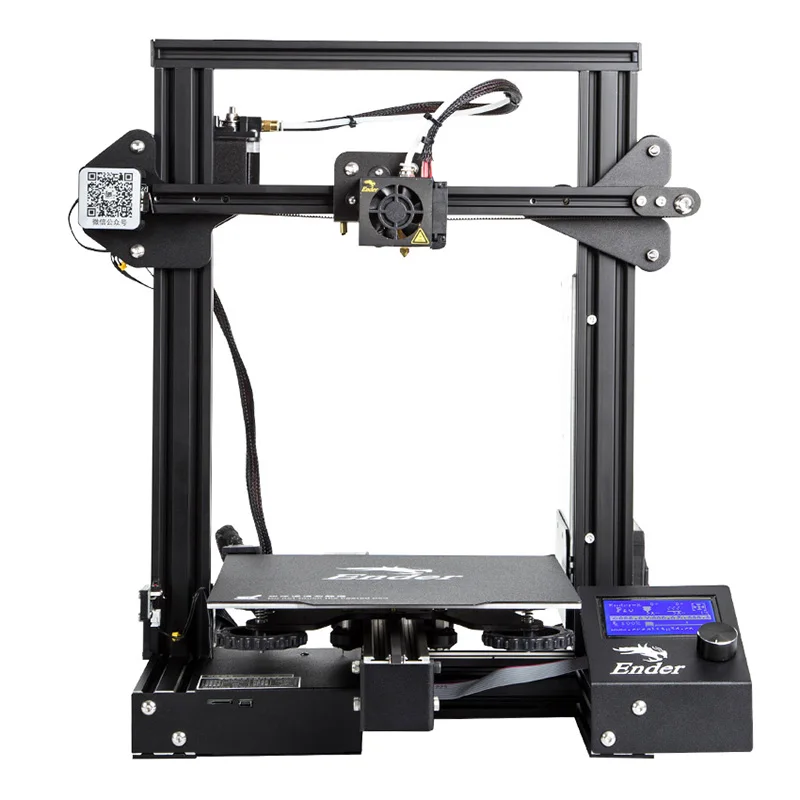
There are rather few 3D printers on the market that are really designed for large prints. However, there are some tricks that can help you to print a larger object even with a small print volume.
The construction volume of the Creality Ender 3 is (just) 220 x 220 x 250 mm. With this size it will certainly not win any price. Nevertheless, it is optimally designed for small 3D prints.
With its small overall size of 440 x 410 x 465 mm, which should never be confused with the building volume when reading the measurements, it fits anywhere on your desk and you don’t need to make a lot of room for the 3D printer.
The area of the printing bed is 235 x 235 mm. This makes you wonder why only a construction volume of 220 x 220 x 250 mm is given, doesn’t it? Are 15 mm misappropriated by the manufacturer or how does this figure come about? We will explain it to you below. Now let’s summarize again briefly:
Creality Ender 3 Dimensions
- Printing volume: 220 x 220 x 250 mm
- Printing bed size: 235 x 235 mm
- Size of the device: 440 x 410 x 465 mm
Why is 14% of the Bed Size Misappropriated?
In total, Creality thus states 14 % less print volume than the size of the printing bed could provide. The Ender 3 is guided by mechanical joints.
These do not always work 100% accurately.
Therefore, tolerances must be included when calculating the print volume. In order to achieve perfect prints, a certain number of tolerances are calculated and specified depending on the manufacturer.
In addition, it always depends on the printing bed itself. The supplied printing bed is fixed with binder clips. These require a large amount of play. Binder clips are not the best way to achieve a perfect 3D print.
But even there, there are ways to make the printing process easier and more efficient with a few small steps.
Can I Exceed the Printing Volume?
The truth is that you can easily exceed the size of your specified printing volume. There is no reason at all why you should not!
There are some 3D printing experts who have even pushed the print volume to 235 x 235 x 250. However, we would not recommend this to you as a beginner. The manufacturer Creality has decided that 220 x 220 x 250 mm is exactly the right print size for the Ender 3 3D printer.
3D printers require a tolerance margin, as the prints can always deviate slightly. The printing bed can also be shifted by a few millimeters, for example after cleaning. The manufacturer has taken this into account in its specifications in order to guarantee the best possible printing result.
But that doesn’t mean you can’t print bigger. A margin of 5 mm on each side should be perfectly adequate. You do not need 15 mm. So you gain 10 mm and get an area of 230 x 230 x 250 mm – after all.
If you like to experiment a little bit with your 3D printer and don’t mind possibly producing a few failed prints and cleaning your 3D printer several times, then you can of course go even closer to the 235 x 235 x 250 mm.
Surely it can also be a lot of fun to deal with, research and play with your new device in this way.
What Can I Change to Increase the Printing Volume?
Surely it annoys you, like most other users, that you cannot use so much of your installation space.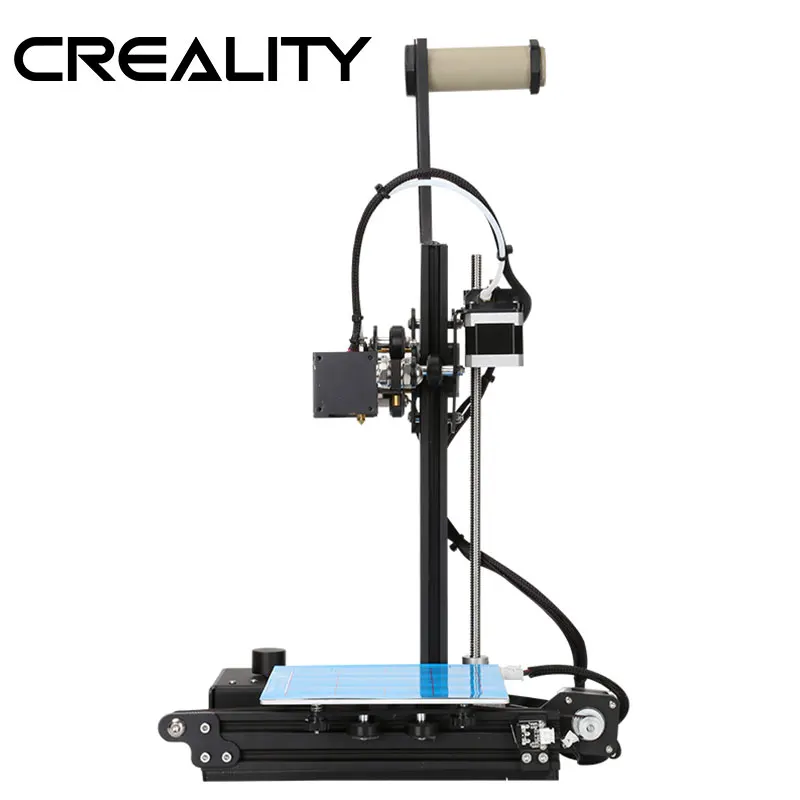 But there are a few simple solutions for this:
- Replace the clips
- Replace the printing bed
- Modify the firmware
Instead of using the supplied binder clips on the Creality Ender 3, you can simply replace them. Don’t even bother with them, just replace them directly.
For this you exchange the binder clips for those with a smaller profile. Best are those that you can also find behind picture frames.
These springs are the perfect mount for your Ender 3, they lock much better and are guaranteed to hold their position. It will certainly be a relief for you when the bulky binder clips are gone.
Here* you can watch such clips on Amazon.
But you can also replace the printing bed. From Creality there is a magnetic printing bed*. This fits perfectly on the surface of the Ender 3 because it was specially designed by the manufacturer.
Magnetic Printing Bed for the Ender 3*This also makes it much easier to remove your printed object from the printing bed. But keep in mind that magnetic printing beds wear out very strongly from 60 °C. They are therefore not suitable for ABS* filament.
Now you have to reprogram your 3D printer. Because its software is programmed to the manufacturer’s specified dimensions. For this purpose, you update the firmware of the mainboard. There you simply set the new dimensions.
Upgrading the Creality Ender 3
There are a lot of variants to upgrade the Ender 3. Many different printing bed variants are now available on the market.
This includes, for example, a printing bed made of polypropylene*. Filaments such as ABS* and PLA* adhere better to it during printing. Once the printing bed has cooled down, the objects can be removed from the printing bed very easily.
Polypropylene also has the advantage that it is easier to clean. You can fix the printing bed with clamps or simply with adhesive tape.
Another possibility to exchange the printing bed is a printing bed made of hardened glass*. It is fixed with clamps.
Thanks to a silicone and carbon coating, the prints on this bed will hold perfectly. No slipping and therefore no distortion. The printing bed is especially suitable if you want to print with ABS. This printing bed is extremely heat-resistant and therefore suitable for all common types of filament.
We have already mentioned the magnetic, removable printing bed* above. It can be easily bent after printing, so you can easily remove the object from the printing bed. However, the prints will hold better on the glass or polypropylene bed.
Many other components can be exchanged and upgraded at Ender 3. This includes the hotend, for example. But you can also add components.
A nice special is the laser engraver*. With it, you can really enhance your 3D prints.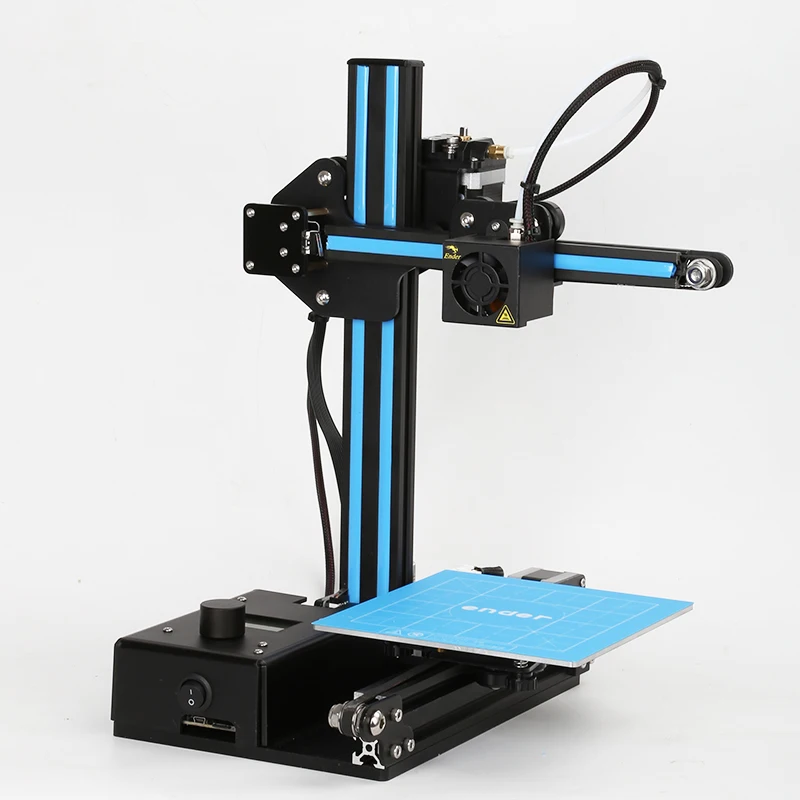 Don’t you want to engrave your name on the objects? Or create a very personal gift with your printer?
If you want to better protect your device, you can purchase a case for the Creality Ender 3*. This protects it from dirt and dust.
Ender 3 Case/Enclosure*It has a viewing window in the front area so that you can still easily observe your printer. Your printer is well protected while you still have full control over your 3D printing.
According to the manufacturer, the housing is even fireproof and does not allow fire to penetrate to the outside. Let’s hope you never need this feature.
Of course, the mainboard can also be exchanged* or extended. Creality also sells new updates on a regular basis to enhance your 3D printer. The installation is very easy and can be used by everyone. You don’t need to know much about it.
So you can see that with a Creality Ender 3 you have all possibilities. There are many more small upgrades that you will surely get to know bit by bit through the platforms once you have bought an Ender 3. It is worthwhile to check these platforms, again and again, to not miss important and practical upgrades:
- 3DJake*
- 3DPrintersBay*
Perfect Use of Space
The Creality Ender 3 offers a nice print volume compared to other 3D printers for its small dimensions of 440 x 410 x 465 mm. The 3D printer fits perfectly on every desk.
Compared to other devices, it is lightweight and therefore easier to transport. So if you want to move it a bit, it is not a big deal. Of course, it is always a personal question if you like the look of the Creality Ender 3.
The obvious spool holder is not for everyone. However, the Ender 3 offers a lot of advantages, which may make you forget the optics.
Fortunately, you can also replace the spool holder if it bothers you. If the attached spool holder at ender 3 is too steep for you, you can replace it with an external spool holder.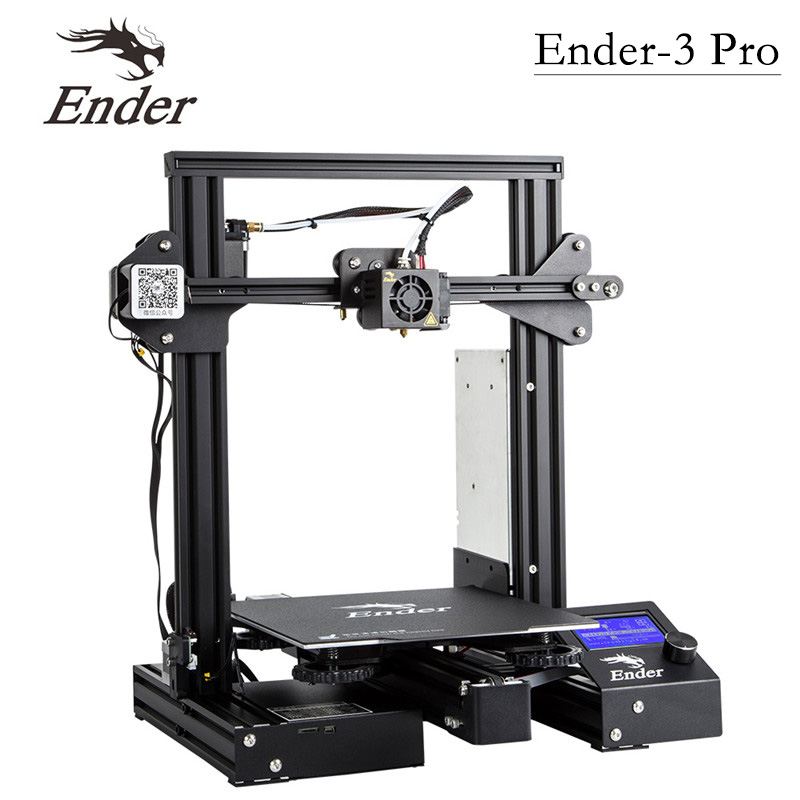 However, this will make your 3D printer bigger, as the external spool holder is attached to the side.
Comparable 3D Printers
If the Creality Ender 3 does not suit you one hundred percent, there are of course comparable devices that come close to its construction volume. These include the Prusa i3 MK3S *, the Anycubic i3 Mega* and the Creality Ender 5*.
Prusa i3 MK3S
The Prusa i3 MK3S 3D printer* offers a construction volume of 250 x 210 x 200 mm. It is very similar to the Creality Ender 3, both in construction and handling. It is even more popular than our test model, but is also considerably more expensive.
Prusa i3 MK3S 3D printer*For beginners, the Ender 3 is completely sufficient. However, the Prusa i3 MK3S can be warmly recommended as a follow-up model.
Anycubic i3 Mega
The Anycubic i3 Mega 3D Printer* has a construction volume of 210 x 210 x 205 mm.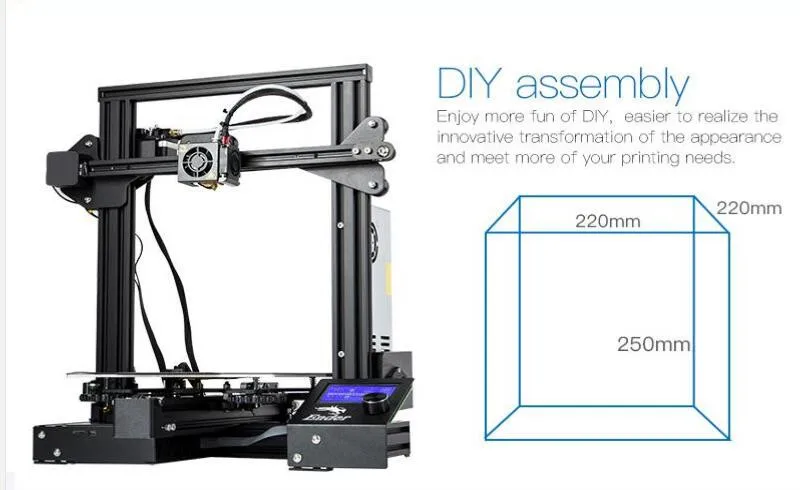 It is also a very good 3D printer that costs little and is easy to use.
However, it is significantly lower than the other 3D printers presented. Therefore it is of course not suitable for high objects.
Creality Ender 5
The Creality Ender 5 3D printer* has a construction volume of 220 x 220 x 300 mm. With this, high objects can be printed very well. With 300 mm it has a very nice size, which is rarely found in the price range.
Creality Ender 5 3D printer*Compared to the Ender 3, it still has the advantage that it is somewhat more robustly built than its brother.
Disclosure: This website is the property of Martin Lütkemeyer and is operated by Martin Lütkemeyer. Martin Lütkemeyer is a member of the Amazon Services LLC and other Affiliate Programs. These are affiliate advertising programs designed to enable websites to earn advertising revenue through advertising and linking to Amazon. com and others. Links marked with * are affiliate links.
Creality Ender-3 Pro 3D Printer Review
In recent years FFF/FDM 3D printing has become impressively cheap. Nowadays it’s possible to buy a fully functional machine with a decent build volume even if one’s budget is less than $300.
One of such machines is the Creality Ender-3 Pro. This device combines decent build volume, compact size and a low-budget price.
About Creality
Source: creality.com
Creality 3D Technology Co., Ltd is a 3D printer and scanner manufacturer. It’s based in Shenzhen, China and was founded in 2014. Their first success came after the release of the Ender 3 in March of 2018. The Ender series was overall very popular. The vast majority of the company’s 3D printers come as the DIY kits that need to be assembled.
The Ender-3 Pro is an upgraded version of the Ender-3, bringing some improvements to an already beloved device that has achieved a nearly legendary status.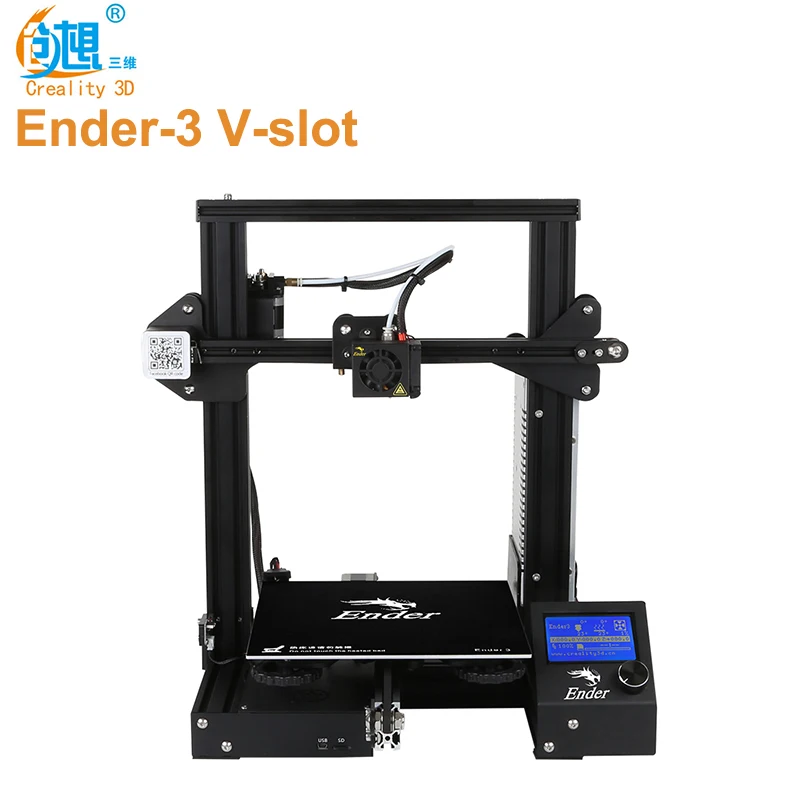
Creality Ender-3 Pro Overview
The Ender-3 Pro continues the Creality’s tradition of delivering DIY kits that can be assembled into sturdy open-framed FFF/FDM 3D printers. Despite its low price, the machine offers high-quality materials and a tight filament pathway that can work with flexible materials, magnetic print plate and some other features. The build volume is decent: 220 x 220 x 250 mm, while the machine’s dimensions are 440 x 410 x 465 mm. The combination of a sizable build volume and a compact footprint at this price point is very impressive.
The metal print bed has to be adjusted manually which is expected from the machine of this price. It’s magnetic and the sheet is flexible and removable. It’s one of the improvements over the original Ender 3. Another change is more sturdy mechanical properties. The bearing wheels have been improved as well as the overall stability over the Y-axis.
And last, but not least, is the print resume function. It’s usually a rare thing among the devices of this price range and a very useful feature.
Technical Specifications
- Technology: FFF FDM
- Assembly: DIY Kit
- Bed leveling: Manual
- Build volume: 220 x 220 x 250 mm
- Layer height: 100 - 400 Microns
- Built-in camera for monitoring: No
- Closed print chamber: No, an open structure
- Connectivity: SD
- Display: LCD
- Extruder type: Single
- Feeder system: Bowden
- Filament runout detection: No
- Max extruder temperature: 491 °F / 255 °C
- Max heated bed temperature: 212 °F / 100 °C
- Mechanical arrangement: Cartesian-XZ-Head
- Nozzle size: 0.4 mm
- Operating system(s): Windows, Mac OSX, Linux
- Dimensions: 440 x 410 x 465 mm
- Print bed details: Heated bed, magnetic, removable, with viscose surface sticker
- Print recovery: Yes
- Weight: 6.
 9 kg/15.2 lbs
 - Price: $209.99
What’s in the Box?
The device comes in a rather compact box. It’s a DIY kit but is really simple to assemble. The contents of the package include:
- Pre-assembled frames
- Base of the printer
- A set of tools for the assembly of the Creality Ender-3
- Some spare parts
- Spatula for removing the print from hotbed
- Fine point needle to clean ends
- LCD Screen with adjustment knob
- A real of PLA
- Spool holder
- 8gb SD card and card reader
- AC power cord
- USB power cable
- User manual
Source: youtube.com
Source: stampa3d-forum.it
Preparation
As was already mentioned, the device comes as a DIY kit and a user would need to assemble it. The user manual that comes with the machine shows some instructions and it’s easy to follow the simple steps.
Adjusting the bed is the first anyone should do before assembling the machine. The reason is that the structure has to be flipped over in order to adjust it, and it’s much easier to do before the printer is fully assembled.
Flip the base over.
Source: youtube.com
Get a wrench and an Allen wrench (both are included the package).
Use an Allen wrench for the bolt to loosen or tighten it.
Source: youtube.com
A regular wrench will be used to work with a nut located underneath.
Source: youtube.com
Tighten the bolts and the nuts so slightly until they meet some resistance. Check the results by moving the structure. Don’t tighten them too much, since it will bring other problems, you just have to eliminate the wobble that happens when you manipulate the moving parts.
Source: youtube.com
Once everything is tight and there’s no wobble, flip the base back to a normal position.
Source: youtube.com
Ideally the base should be placed on something very level. Loosen the bolts on the side all the way and make sure that the ‘feet’ of the base are level. After that you should tighten the bolts again.
Source: youtube.com
Double-check all the bolts and nuts in case they might not be tightened by the manufacturer.
Now the base is level and sturdy. The next step would be to connect the vertical parts of the frame to the base.
Source: youtube.com
Installing the power supply would be the next step. The part comes in a package, and if you live in the US, you should switch the voltage from the 220V to 110V.
Source: youtube.com
Mount the supply.
Source: youtube.com
And screw the bolts in.
Source: youtube.com
The next thing to do is to install the control unit.
Source: youtube.com
Mounting the unit and screwing the bolts in is a simple process.
Source: youtube.com
Then you should install the Z-axis switch, put the rod and install the main frame on the base. Once the majority of the machine is built, you should install the filament spool holder.
Source: youtube.com
Source: youtube.com
Now all the structural parts are in place and the last thing to do would be to connect all of the electronic cables. Everything is labeled and there are clear instructions, so the process is straightforward.
Bed leveling is a fully manual process that lacks any of machine’s assistance. Use a sheet of paper to check the distance between the nozzle and platform and rotate the large knobs under the bed to adjust it.
Source: youtube.com
The last thing to do would be to feed the filament in.
Source: youtube.com
Software
The printer is compatible with the most common slicing and host software, including Cura, Simplify3D and Repetier-Host.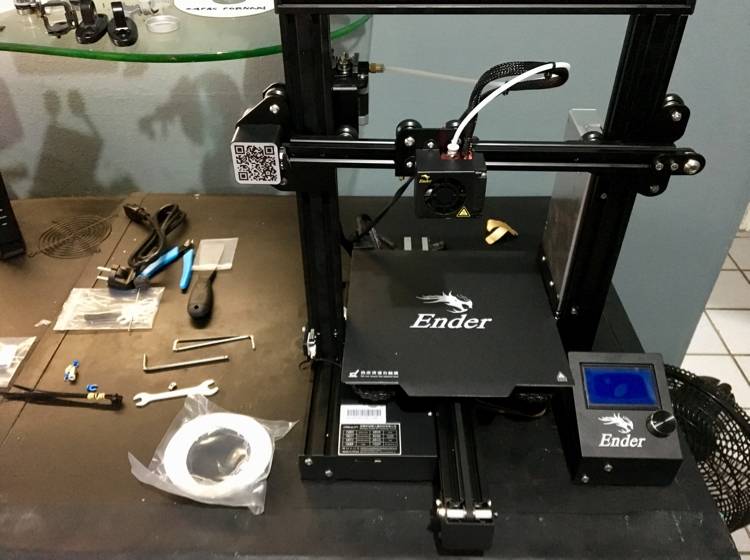 Some programs already have pre-installed profiles for the device. There’s also the version of Cura called ‘Creality Slicer’ that is recommended by the manufacturer for use with their devices.
Printjob examples
Thor’s Hammer by 3dpservice
This model showcases everything one would want from an affordable 3d printer: a smooth surface, precisely engraved message and overall great quality of printing.
Source: instagram.com
Bulbasaur model by celda3d
This model of a pokemon named Bulbasaur was printed using ABS at 0.2 mm height. It was painted afterwards. The result looks impressive.
Source: instagram.com
Chess Set by tecno3d_
These chess figures and a board show the quality of the Ender-3 Pro’s prints. The surface finish is good and the results are of reasonable quality:
Source: instagram.com
A Dragon by scuba1560
Look how impressive this print is!
Source: instagram. com
com
Pros and Cons
Pros
- Low-budget
- Easy to assemble
- Heated print bed with a removable plate
- High-quality sturdy frame
- Decently-sized build volume combined with a small footprint
Cons
- Lack of enclosure
- Lack of automatic bed leveling
- The control screen is a bit outdated
Conclusion
The Creality Ender-3 Pro is a useful moderate update over its legendary predecessor. The additions include a newer magnetic print plate and more stability (especially over the Y-axis). The machine is a typical Creality’s offering: a DIY kit at a cheap price. It’s easy to assemble, easy to work with, has great upgradeability and features some neat things such as a print resume option and a tight filament pathway. The machine features a decent build volume while managing to be compact.
The Ender-3 Pro’s quality of printing is great for home use and the machine will be a useful choice for the hobbyists with various experience and educators. It’s a really powerful device for its price.
Review of the 3D printer Ender 3
Home / Blog / 3D reviews / Review of 3D printer Ender 3
01/01/2019
Content
- Packaging and equipment
- Technical characteristics
- Design
- Extruder
- Display
- Platform
Our review is dedicated to the Ender 3 3D printer assembly kit from the Chinese brand Creality3D.
This model was released back in the summer of 2018, and in a matter of months has gained popularity among users around the world as a very affordable and high-quality solution for amateur 3D printing.
Since the launch of the Ender 3 series, subsequent printers have undergone an upgrade, the manufacturer has made certain improvements. An interesting feature of the printer is that Creality3D made the Ender 3 completely open source.
Therefore, don't feel bad if you didn't manage to buy first-tier printers, now the Ender 3 model is much more perfect and more reliable.
There are 3 models in the Ender 3 series:
- Ender-3 - assembly kit
- Ender-3 Pro - assembly kit
- Ender-3S is a pre-assembled printer.
The main differences between the Ender-3 Pro and the usual three-ruble note are the presence of a magnetic sticker for better adhesion and a more powerful Meanwell power supply.
Similar to the Pro model, but comes pre-assembled. Suitable for users who do not want to spend time assembling the printer or are not entirely confident in their abilities.
In this review, we will consider the cheapest and simplest model, or rather the assembly kit, Ender 3.
Packing and contents
Ender 3 comes in a compact box. All components are fixed with a foam seal, which ensures good safety during transportation.
The contents are as follows:
In addition to printer parts, the kit also comes with:
- hexagon set
- small roll of PLA plastic (5 m)
- nozzle cleaning wire
- spatula, wire cutters and screwdriver
- SD card 8 GB and USB adapter for SD card
- replacement nozzle
- fixing kit and cable tie kit
- spare pneumatic fitting
- instructions in Russian in electronic form (assembly and quick start)
- warranty card
Among other things, the supplied SD card contains proprietary software and test models to start the first print.
The bundle was a pleasant surprise, such an abundance is not always found in more expensive models, there is even a replaceable nozzle, an adapter for an SD card and a spare fitting.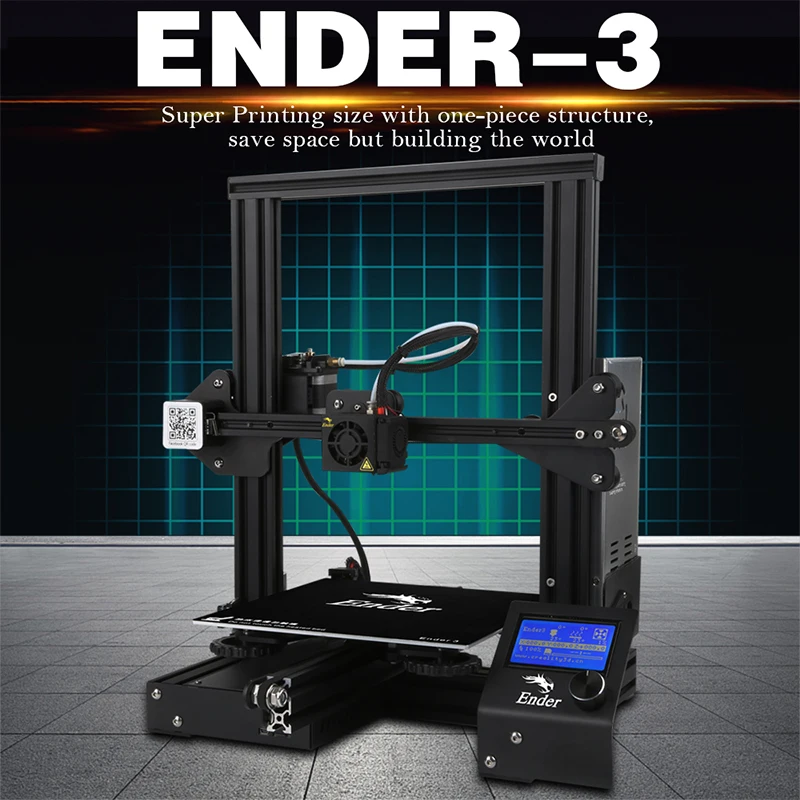
Specifications
| Print technology | FDM/FFF |
| Thread diameter | 1.75 mm |
| Material type | ABS, PLA, others |
| Construction area size | 235x235x250 mm |
| Housing material | steel |
| Number of extruders (print heads) | one |
| Site heating temperature | Max. 110℃ |
| Layer thickness | 0.1-0.4mm |
| Nozzle diameter (mm) | 0.4 |
| Working temperature of the extruder | Max. 255℃ |
| Extruder travel speed | Max. 180 mm/s |
| Display | 3.5 inches |
| Connection interface | SD |
| Software | Repetier/CURA/Simplify 3D |
| Operating Systems | Linux, Mac OSX, Vista, Windows 7. 10 XP 10 XP |
| Supported file formats | STL, OBJ, G-code |
| Energy consumption | 115/230V, 50/60Hz, DC24V, 270W, 15A |
| Weight (without packaging) | 6.6 kg |
| Printing Accuracy | ± 0.1mm |
| Dimensions (without packaging) | 410x420x465 mm |
| Country of Origin | China |
Ender 3 prints ABS, PLA, TPU, PETG and other plastics, but given the open housing for ABS printing, it is better to build something like a hood on the printer. There may also be a problem when printing with soft plastics due to the bowden feed. But there are some semi-rigid heads (like the Ninja Cheetah) that won't be a problem even with bowden feed.
Assembling the printer
For those new to 3D printing, assembling a printer can be a daunting task. It took us about 50 minutes to assemble and calibrate. A user who does this for the first time will need about 1.5-2 hours.
The lower part of the frame with the table is supplied already assembled, which makes the task much easier. Also, you do not have to assemble the extruder and the motor along the X axis.
The printer comes with an electronic version of the Russian-language assembly instructions, consisting of 12 steps. Everything is described in sufficient detail and clearly, but there are still a few points that need additional explanation, we will talk about them below.
- The first step is to assemble the printer frame: vertical profiles, power supply and display are attached to the bottom.
- The next step is to install the limiter and the Z-axis motor.
- Next, we proceed to assemble the X axis. The extruder motor, the extruder on rollers, the belt, the belt tensioner and the idle pulley are mounted on the aluminum profile. Some users in their reviews noted that the X-axis belt actually turned out to be a little longer and had to dance with a tambourine to achieve the desired tension. Fortunately, we did not have such a problem, maybe it was a shortcoming of the first batches of printers.
- And there is little left to do...
- Install the spool holder, connect all the tubing and electronics and... the printer is fully assembled.
Everything is simple here, further assembly steps will be somewhat more complicated.
Here it is very important to set the Z-stop at a distance of 32 mm from the base.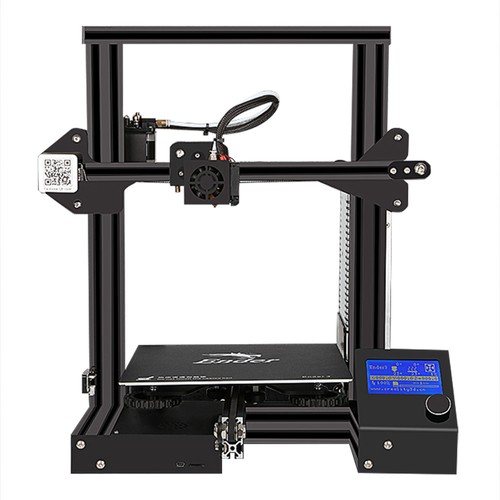 Placement lower or higher may interfere with further calibration.
The Z-axis motor must be adjusted in height for the normal movement of the profile on which the extruder is attached. For these purposes, a standard plastic card is ideal:
Fasten the top profile.
Another important point: although the table and the bottom frame are assembled at the factory, it is better to tighten the fastening screws for high-quality printing. In any case, you should definitely check them before starting the printer.
Calibration
The platform is calibrated using giant nuts placed at each corner of the platen. Thanks to their large size, they are easy to turn, making calibration as easy as possible.
Calibration takes place in the standard way at the four extreme points of the table using a sheet of paper folded in half.
If there is any doubt that the calibration was successful, it is better to repeat the procedure until you achieve the desired result.
Design and construction features
Design
The assembled printer is simple and concise. The design is standard for budget FDM printers - "pryushchee" kinematics with an open case. Trapezoidal screws are installed along the Z axis. All electrics are located inside the lower frame.
Extruder
The Ender 3 has an omnivorous MK10 extruder with a bowden feed, which means that soft plastics will be difficult to print, but such a feed, in theory, will allow you to develop faster print speeds without losing quality.
Display
The small display mounts directly on the base of the printer, unlike the newer and more expensive Creality3D CR-10, where the control box and screen come separately. On the one hand, this is a plus, especially if you plan to periodically move the printer from one place to another. On the other hand, if you close the printer with a case, then the electronics will also be under it and additional heating cannot be avoided.
The display is the simplest and displays basic information, such as set and current nozzle and table temperatures, print time, progress bar, etc. Controlled using a standard knob.
Platform
The Ender 3 has a 235x235mm printbed with a surface reminiscent of the good old Wanhao. In principle, there were no problems with adhesion, sometimes even additional efforts were required to remove the model from the platform. The Ender 3 Pro comes with a more convenient magnetic sticker that improves adhesion and makes it easier to remove.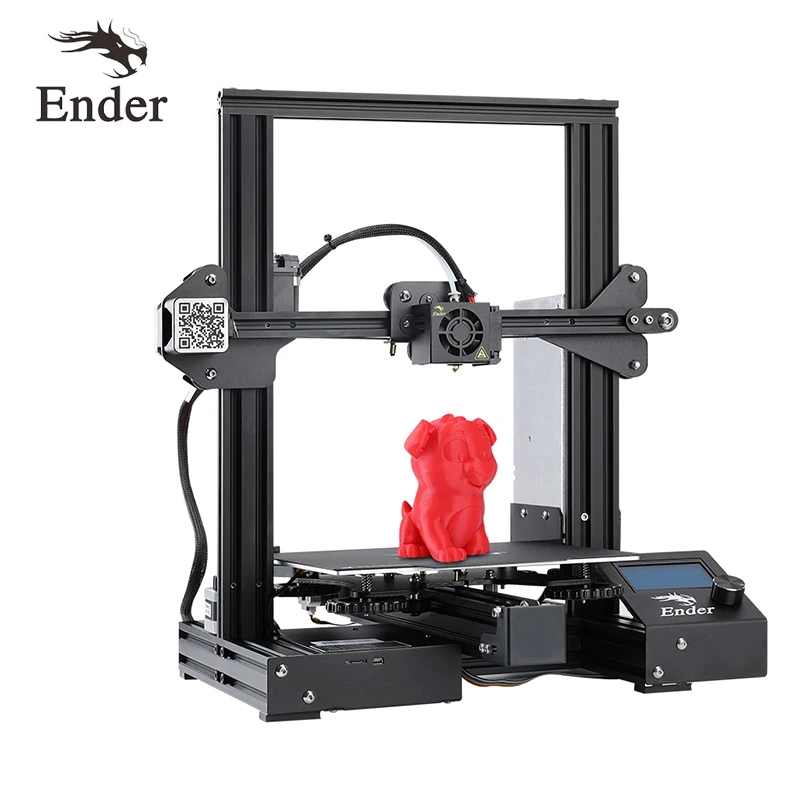
Software
Creality3D has its own slicer that looks like a slightly modernized CURA. Installation files are supplied with the printer, and advanced users can download the software and firmware from the manufacturer's website.
Printing
Now let's move on to our Ender-3 print results. We used several different types of plastic, and the printer coped with all tasks adequately. There was one failed model with uneven layers, but after adjusting the print settings, there were no more quality problems.
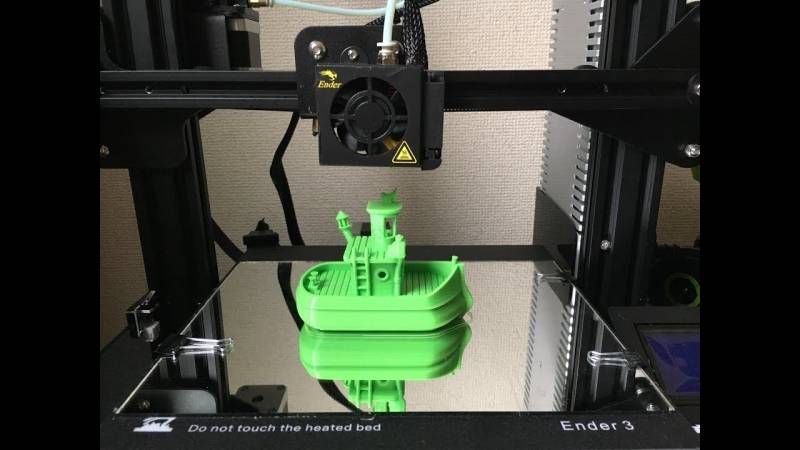
This is Esun gray PLA waiter (although the trunk suffered a small fiasco and did not finish printing a bit):
The small skull also turned out well:
As it turned out, the printer copes well with both small objects and larger models.
Next we tried PLA-txt 8.2 Magic from North Bridge. It turned out very well.
Transparent plastic Transparent eTwinkling:
Polimaker's Esilk PLA Piggy is not the best, but for such a budget printer it is quite decent.
Results
In conclusion, we can say that the Ender 3 3D printer proved to be very worthy in terms of print results, especially for its money. The printed models turned out to be no worse than those created on the most expensive printers. We were also pleasantly surprised by the reliability of the design and the quality of the printer's parts, we expected that it would be a more flimsy device with cheap components.
True, there is one “but” - the printer will not work “right out of the box”, it requires some enthusiasm, understanding of the process and skills in working with technology.
We can recommend Ender 3 to people who already have experience in 3D printing, well, or to enthusiastic beginners. When building Ender 3, you will have to spend time solving some problems and taking into account certain nuances. If you don’t really want to spend time on this, then it’s better to buy an already assembled Ender-3S printer.
The scope of the printer is very extensive: from use as a toy and assistant, to artistic modeling and even printing prototypes of parts and functional elements.
For the price and in capable hands - an excellent choice!
#3D reviews
Share
all materials
Do you have any questions?
Our experts will help you with the choice of 3D equipment or accessories, and will advise on any issues.
Creality Ender-3 (KIT Kit) 3D Printer Review
Ender-3 FDM 3D Printer is one of the products of Creality company, whose equipment has been exported to more than 30 countries, including the United States, Great Britain, Australia, Egypt, Germany and others. Since the release of the first 3D printer, the company has developed more than 20 3D printer models, the popularity of which has grown from the integration of Creality's own research in 3D printing, marketing, modern ergonomic design, and user support.
Help! FDM technology (Fused Deposition Modeling) is the production of a model by sequential deposition of its layers. During the casting process, the molten polymer, initially in the form of a thread, builds parts with complex geometry layer by layer according to the algorithm specified by the slicer program in the X, Y, Z coordinates.
Creality Ender-3 is an open source 3D printer. This means that all of his boards, schematics, and firmware files are publicly available on GitHub, and the data is constantly updated.
Creality Ender-3 review
The popularity of the printer, which will not make it difficult for even a novice 3D modeler to assemble, in the 3D technology market is due to its low price, the ability to print large enough models thanks to the heated platform and the high casting speed, the quality of which depends only from careful manual adjustment.
Printer description
Specifications: Print technology supported: FDM; maximum print size - 22 × 22 × 25 cm; nozzle diameter can be either 0. 4 mm or 0.2 or 0.3; extruder heating temperature - 110–255 °C; Software - Repetier-Host, Cura, Simplify3D; layer height - 0.1–0.4 mm; print accuracy - ± 0.1 mm; the maximum casting speed is 200 mm/s. For printing, the printer can take slices from an SD card or via USB. Supported operating systems: Windows 7, 10, XP; Linux; Vista; Mac OSX.
The Creality Ender-3 3D printer differs from the equipment in its price segment not only by its open source code, which allows making serious changes to its design and significantly improving the casting parameters, but also by the large volume of printing, its accuracy, which is ensured lightened due to the bowden design of the head and the ability to continue casting "from the same place" after a forced stop as a result of a power failure.
The aluminum frame of the printer, on which the bearings move during the movement of the axes, is quite rigid and heats up less than steel, but it is not heavy. Therefore, you should not count on reducing vibration during operation due to the weight of the equipment.
Pros and cons
- The modern Ender-3 3D printer is equipped with a glass printing plate that is placed on top of the aluminum desktop, smoothing out its unevenness and improving the adhesion of the polymer to the platform and the subsequent separation of the finished product.
- The 24V power supply allows you to heat up your workbench and start casting in minutes. There is also an on/off button here.
- Backup allows you to resume interrupted printing after a power failure.
- The bowden extruder motor is located on the X-axis outside of the heater block, making the print head lighter and more mobile.
- The Teflon tube is very short and narrow, making it easy to pass the filament through it to the extruder. This has a positive effect on working with flexible plastics, compensating for the shortcomings in this area of the bowden extruder.
- The low price of the printer allows you to try yourself in 3D modeling even for those who are not very sure that their interest in such creativity will remain after the casting of the first works.

The disadvantage of the equipment is the special adhesive print surface supplied with the printer, from which it is very difficult to remove models, for example, from PETG and PLA. Instead, it is better to immediately install a mirror or glass, which the manufacturer included in the package of the latest equipment modification. The lack of auto-adjustment of the desktop is inconvenient, especially given the small perimeter of the aluminum frame on which it is installed, and the ability to cling to the Z axis during operation.
Large and comfortable handles for adjusting the position of the working platform interfere with the work process. The disadvantage is also the inability to pre-order the desired nozzle size. The package includes five nozzles of random diameter. The small size of the hole through which the molten polymer exits improves the quality of the casting by reducing the speed and increases the detail of the molded model. But five identical large nozzles can also be included in the delivery set.
Creality Ender-3 3D Printer (KIT Kit)
- Max extruder temperature 255°C
- Seal FDM
- Platen Temperature 110°C
- Print Accuracy 100 µm
- Working chamber area 220x220x250 mm
- Speed 180 mm/s
- Materials used PLA;ABS;TPU
- Layer thickness from 100 µm
- Thread diameter 1.
 75
75 - Nozzle diameter, mm 0.4
Go to product
Contents
The Creality Ender-3 3D printer comes with everything you need to assemble the equipment and print a test model: bolts, hex keys, fittings, spatula, side cutters, five nozzles of the same or different diameter, test filament spool, needle for nozzle cleaning, Y-axis motor and 8 GB SD card with proprietary software and test models. The base of the 3D printer comes assembled. The table and the motor are already screwed on, the drive belt is tensioned.
The control unit with a slot for mini USB and a port for a micro SD card is integrated into the bottom of the equipment. The extruder and motors of the X and Y axes are already in place, the print head is assembled. To prepare the printer for operation, it remains to install vertical racks, connect the power supply, screen, screw the X and Z axes, connect the wires marked by the manufacturer for ease of assembly, coming out of the back of the future printer.
Print quality and product examples
Despite the cheapness of the Creality Ender-3 3D printer, already at a speed of 60 mm / s, the layers lie evenly even in difficult places with almost no overhangs, corners are well worked out, areas with a significant slope are printed well, sharp turns do not give an “echo” . To prevent temperature-sensitive plastics from deforming, you can try to isolate the workspace with a homemade protective cap, trying to avoid overheating of electricians that can get under it.
Ender-3 3D printer can print phone stand, belt clip, home microscope leg extension, soldering iron stand and soldering tools, flower pots, flux extruder, dough knife, accessory holder for a printer, a filament guide, a pencil holder, a measure for selecting rings on a finger in a jewelry store, an autodrinker for animals or birds, and much more.
For whom?
The Creality Ender-3 3D printer is not professional equipment. It is suitable for making crafts as a hobby, for studying the process of forming a model, for those who have already taken their first steps in 3D modeling to experiment. After finalizing the design, the printer surpasses expensive equipment in some print parameters. Therefore, in addition to using it as a home toy, a 3D printer can be useful for artistic modeling and prototype casting in small workshops.
What materials are used?
The filament used for printing is 1.75 mm filament. The range of materials, as in any FDM printer, is diverse: ABS, PLA, TPU and their modifications with various fillers in a small amount in the form of wood particles or carbon fiber fibers. A prerequisite is that in order for the casting to turn out to be of high quality, the material for work must be selected with a melting temperature slightly lower than the maximum heating value of the extruder. An abundance of filler particles in the plastic composition can clog the print head.
Instructions for assembly, initial setup and preparation for operation
It is not difficult to assemble the Creality Ender-3 3D printer yourself, especially since it comes with detailed instructions in Russian, and all the necessary parts are carefully marked by the manufacturer so that the user didn't mix it up. Assembly instructions can also be found on the SD card, among other things, and in the video version.
In order to horizontally align the X-axis, whose precise position is achieved by the pressure of the bearings pressing it against the aluminum profiles, it is necessary to make sure that it has taken the desired position before tightening the bolts holding it. Printer assembly includes the following steps:
- Starting assembly, you need to tighten the fasteners of the base.
- First of all, the frame is assembled, fixing the power supply, display and vertical posts to the base.
- The next step is to install the Z-axis limiter at a distance of 3.2 cm from the base (if you put additional glass, the height should increase). An engine is mounted on the axis, its height is adjusted, for example, using a conventional plastic card.
- On the X-axis must be fixed: the extruder and its motor, the drive belt, its tensioner and the drive pulley.

- Now you need to screw on the top profile and place the filament spool holder on it.
- Once the electrical connection has been made, the 3D printer is ready for use.
Before printing, the equipment must be set up so that the desktop is level. The position of the platform is regulated by nuts located at the corners of the table. In case of unsuccessful adjustment in the standard way due to any violations in the factory part of the adjustment, you can independently bring the printer into working condition by adjusting the eccentrics. When assembling, you need to pay attention to the sequence of actions, since the bolts of the X axis during its installation are blocked by the vertical post of the Z axis.
It will be easier to adjust the equipment if step 5 in the assembly instructions is skipped and the X-axis movement screw is tightened after assembly and setting up the 3D printer. The position of the wheels of the X axis is adjusted by the eccentric nuts to a smooth ride, which will be difficult to feel with your fingers if the axis is fixed. The base of the table moves along the aluminum frame on wheels, which can jam if the position is wrong. To ensure smooth movement, it is necessary, by rotating the adjusting nuts of the eccentrics, to achieve free play in each mount.
The distance from the wheel to the profile changes as a result of a slight turn of the eccentric during the adjustment process. Wheel play is also unacceptable. The smoothness of the movement of the desktop is additionally regulated by loosening the tension of the drive belt. But its sagging will make the casting quality worse. In the same way, the movement of the print head to the right and left is adjusted.
If the manufacturer offered glass as a working surface, it is worth putting a stiffer set of springs under it, because due to its weight, weak springs will sag, increasing the distance between the nozzle and the table, which can seriously affect the quality of the casting. The polymer simply will not be taken to the glass. It is also worth immediately reconnecting the board fan to constant airflow, the power of which is usually not enough in the standard mode.
The Teflon tube through which the filament is fed should be firmly fixed to the extruder immediately with a plastic clamp. From vibration during operation, the X-axis screws become loose due to the poor quality of the lock washers in the kit. It is better to immediately replace them, for example, with blue thread locks (detachable), which are sold in auto parts stores.
Calibration of the table in the corners, if there is a problem with the standard print setting, is carried out by moving the print head manually after the nozzle and table have warmed up. In this case, the engine must be turned off and a standard white sheet should be placed on it, which will be scratched or torn in those areas where the nozzle will move too close.
For its price range, the Creality Ender-3 3D printer exceeds all expectations in terms of print quality and is definitely worth the investment. A huge advantage of this equipment is the ability to understand in detail the process of 3D printing, understand its principles and, perhaps, modify it to suit your non-standard needs.


