Enamel paint on 3d print
What Kind of Paint to Use for Painting 3D Prints
by Valentin
This article contains affiliate links.
3D printing is an amazing technology that becomes more and more accessible to hobbyists. So you probably already finished your first few 3D prints and now you want to paint them but you are wondering what kind of paint to use for the job. In this article, I will tell you exactly what you have to watch out for and what kind of paint is best for painting 3D prints.
As a whole, acrylic, oil, and enamel paint can all be used to paint 3D prints. For beginners, the best paint to use is acrylic paint because it is easy to use and quite cheap. It is highly recommended to apply a primer on the 3D print before painting it regardless of the paint used.
I personally almost always use acrylic paints for painting my 3D prints. My favorite acrylic paint is from Vallejo but you can use any decent acrylic paint that you like.
You can see how I usually paint my 3D printed Sculpture right here in this video.
If you want to know how to properly paint 3D prints in detail then consider reading my guide on how to paint 3D prints or my guide on how to paint plastic. Or keep on reading if you want to know more about choosing the right paint for painting your 3D prints.
Can Every 3D Printed Object be Painted?
This is a very general question that I still get asked quite frequently so I will try and answer it as best as I can.
Every 3D printed object can be painted as long as no industrial style 3D printer that prints metal. Even prints that were printed with special filament like wood or glow in the dark filament can be painted as long as the prints are being prepared by applying a primer first.
There are some crazy printers out there that will print in metal by making a sand mold and then casting the mold with metal but as long as you don´t use any of these printers but a regular resin or regular 3D printer then you will be fine.
Resin and plastic filament, even if it is a special filament, can easily be painted but you need to prepare the surface before painting it.
This is usually done by sanding the surface first to get rid of any imperfections and then applying a primer that will prepare the surface for painting and will ensure that the paint will adhere to the surface of the 3D print properly.
You can read a detailed guide on how to properly paint 3D prints right here.
The Best Way to Paint 3D Prints
There are several ways to paint 3D prints including using special paints that will simply adhere to the plastic surface of the prints without the need of a primer but the best way to paint 3D prints involves a few steps.
As a whole, the best way to paint 3D prints is by preparing the surface of the 3D print by sanding it first and then applying a primer.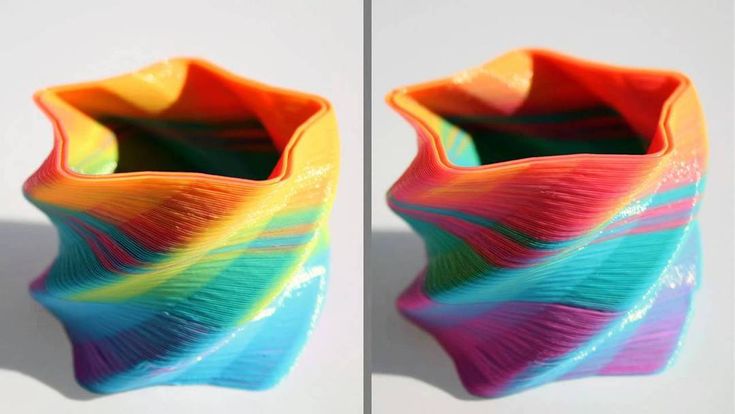 Now the surface is ready to be painted with any type of paint but it is best to use acrylic paint as it is easy to use and quite beginner-friendly.
I tried quite a few ways to paint 3D prints including simply painting the model without any sort of preparation but the best way that I found and also the most reliable way is to prepare the surface by sanding and then priming it.
Here you can see how the model looks like before priming it and then after priming it.
And here is what it looks like after applying the primer.
As you can see, the primer will be a very fine layer of paint that will preserve all the details of the print while giving the surface the perfect conditions for painting it.
Sanding will get rid of imperfections and it will make sure that the primer adheres to the surface of the print, even though it is not necessary.
Applying the primer will prepare the surface for painting. The primer will adhere really well to the surface and any paint applied to the surface of the primer will adhere just as well.
This will ensure that the paint won´t come off easily even when the surface is being scratched.
How to Paint PLA Plastic
One of the most often used filaments for 3D printing are PLA filaments. So it is no surprise that most people are curious about how to properly paint PLA.
To paint PLA plastic first sand the surface slightly to smooth it and remove imperfections. Then apply a well adhering primer to the surface before finally applying the paint directly to the surface. Acrylic paint is the best choice for beginners but enamel and oil paints can also be applied.
As you can see the process is pretty much exactly the same for almost any kind of 3D printed model.
If you want to know more about the process then consider reading my full guide on how to paint 3D prints right here.
Valentin
Hi, I am a passionate maker and professional prop maker for the entertainment industry. I use my woodworking, programming, electronics, and illustration know-how to create interactive props and puzzles for Escape Games and marketing agencies. And I share my knowledge and my experience on this blog with you so that you can become a maker yourself.
How to Paint 3D Prints Properly and Avoid Paint Peeling
by Valentin
This article contains affiliate links.
3D printing can be an amazing tool for a lot of creative crafts but newcomers often face the same issue when painting their 3D prints: The paint comes off rather easily. So in this article, I will tell you exactly how to paint your 3D prints correctly and avoid issues like peeling paint!
As a whole, to paint 3D prints the surface of the prints has to be prepared first. The surface needs to be sanded and then a primer has to be applied to ensure that the paint will stick properly to the surface of the print. After that, the print can be painted with acrylic, enamel, or oil paints.
You can see how I usually paint my 3D sculptures in this video right here.
3D prints are basically plastic, so if you want to know more about painting plastics then consider reading my guide on how to paint plastic right here.
I recently got my hands on the Mars 2 Pro resin 3D printer from Elegoo and I instantly started creating a small sculpture to see how 3D printing can be used in the arts and crafts world.
In this article, I will share how I painted the model and what I did to prepare the model for the painting, so that you know exactly how to paint your 3D prints and ensure that they will turn out great.
How to Sand 3D Prints Properly
The first thing you need to do is prepare the surface of the 3D print for painting. So we will smooth the surface, if necessary, with some sandpaper.
To sand the 3D print it is important to get rid of any access like printing supports or threading from the print by removing those with a craft knife, or pliers. Then remove any rough parts of the print with some 100 to 120-grit sandpaper and move your way up to 300 grit to smooth the surface of the print.
This process needs to be done with regular 3D printed models as well as resin prints. But you will have much less smoothing to do with resin prints.
A pro tip when working with non-resin prints that have a lot of visible print lines is using spray-on spatular.
Simply apply a few thin layers of spray-on filler to your 3D print and then start the sanding process. The filler is easier to sand than the plastic of the print itself and it will fill in the small uneven surface details like print lines.
This way you don´t have to sand as much.
You can find spray-on filler right here on Amazon or in your local hardware store in the section for car appliances.
What Kind of Paint Can be Used for Painting 3D Prints?
There are some paints that can be applied to 3D prints directly without printing them first but I generally recommend printing the prints before painting them as it is just more reliable.
As a whole, 3D prints can be painted with any type of paint as long as the print has been sanded and primed beforehand. The easiest type of paint to work with is acrylic paint but the prints can also be painted with oil paints or enamel paints.
There are some paints that can be directly applied to 3D prints and I have a separate article where I go into detail about how and what kind of paints can be used for that.
You can read all about that in my article: How to paint plastic, right here.
But the easiest and safest way to paint 3D prints is sanding and priming the print before applying the paint.
You can use any type of paint that you want but I highly recommend using acrylic paint. Especially acrylic paint from Vallejo is great for painting plastic.
You can also use different paints to paint your print. For example, you could paint the whole print with acrylic paint and then apply an oil wash over the whole thing to weather the paint job underneath.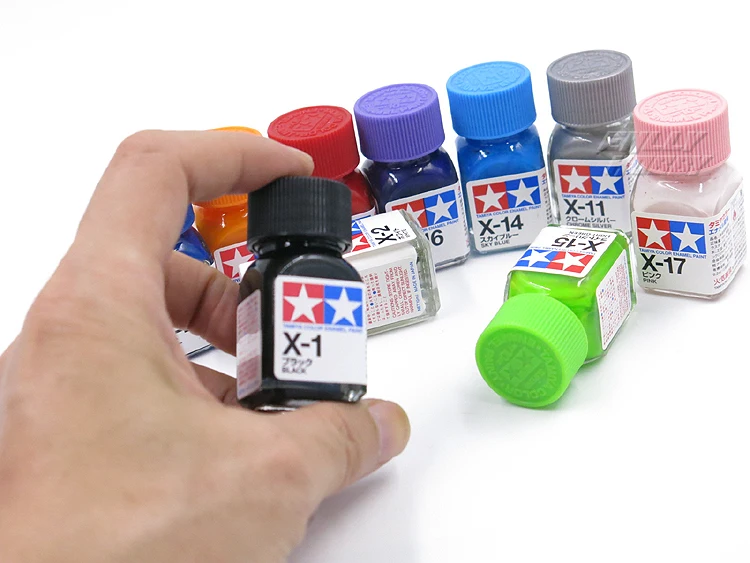
How to Paint 3D Prints With Acrylic Paint
If you are a beginner then I highly recommend using acrylic paint for painting your first few prints. They are easy to use and you can get them quite cheaply.
To paint 3D prints with acrylic paint the prints first have to be prepared for painting by sanding them and applying a primer to the surface. Then the acrylic paint can be applied directly to the print. After the paint has dried a thin coat of matt acrylic sealer can be applied to protect the paint.
This sculpture that I made was almost entirely 3D printed with the Mars 2 Pro and I painted it with acrylic paints.
But, as always, before painting something like resin you apply a primer. In my case, I used a flat black primer from Krylon that you can get here on Amazon.
It is possible that you need multiple layers of acrylic paint to sufficiently cover the surface. I usually need two or three layers.
After the acrylic paint has dried you can apply a thin coat of matt acrylic sealer to the whole print to seal the paint. This will add another layer of protection to your paint job.
You can get an acrylic sealer at your local hardware store or right here on Amazon.
How to Paint 3D Resin Prints
Resin 3D printers are getting more and more affordable and the quality of the prints is getting absolutely insane, as you can see in my Mars 2 Pro review right here. But are they any different to paint than regular 3D printed models?
As a whole, 3D resin prints can be painted with acrylic, oil, or enamel paints but the print has to be sanded slightly and a primer has to be applied to make sure that the paint will stick properly and permanently to the surface of the print.
It´s pretty much the same as painting regular 3D printed models with the sole exception that you don´t have to do as much sanding or clean up of the print in general because the print lines are so much finer compared to a regular 3D printer.
Do Resin Prints Need Primer?
Resin printers are fairly new for the crafts community so I get a lot of questions regarding priming the 3D resin print.
As a whole, a primer should be applied to the 3D resin print before painting it but there are paints that will adhere to the surface of the resin print directly. However, the easiest way to paint resin prints is by priming them first and then painting them with acrylic paints.
So they don´t need a primer but it is highly recommended to use one.
If you don´t apply a primer to the resin before painting it then you run the risk that the paint won´t adhere properly to the surface. This will in turn result in the paint peeling or chipping off.
Do 3D Prints Need Primer?
3D printing, in general, has been around for quite some time now but it is becoming more and more mainstream so I get asked a lot if you need to prime all 3D prints for painting.
3D prints don´t need a primer if they are not being painted. And even if they are being painted then using a primer is highly recommended but not necessary as there are paints that will adhere directly to plastic without a primer.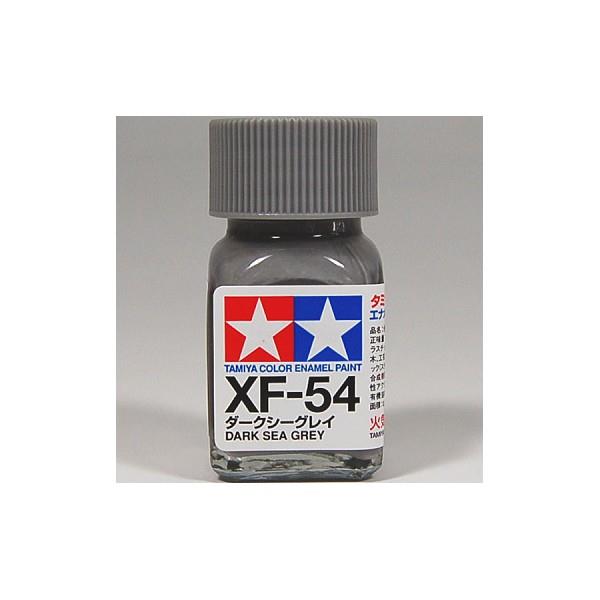
But, as I stated before, applying a primer before painting the print is highly recommended as it ensures that the paint won´t peel off later on.
Really the big takeaway here is that using a primer is always the best cause of action when painting 3D prints in general as it ensures that the paint always adheres properly to your 3D print and you will also need less paint because a primed surface will accept the paint much better.
Valentin
Hi, I am a passionate maker and professional prop maker for the entertainment industry. I use my woodworking, programming, electronics, and illustration know-how to create interactive props and puzzles for Escape Games and marketing agencies. And I share my knowledge and my experience on this blog with you so that you can become a maker yourself.
Painting advice for 3D models (PLA, ABS, PETG, NYLON)
3DPrintStory Reviews Recommendations for painting 3D models (PLA, ABS, PETG, NYLON)
Despite multi-material extruders and a stunning variety of 3D printable plastic colors, you'll still want to paint some of your 3D models sooner or later. The most common reason is to improve the external 3D model, especially if you are printing on an FDM 3D printer where the model is built up by layering material over time. It is FDM 3D printers that form a model with feature lines along the Z axis.
When finishing a 3D model, small cavities between layers are sanded, filled, or both. The result is a smoother surface. Painting can also help protect the model from the environment.
This article is divided into two parts: the first will introduce you to the different techniques for painting a 3D model, and the second will (hopefully) answer all your little questions about painting techniques and how best to do it. Read on to find out how to enhance your 3D models with paint!
Primer is paint's best friend
Priming a printed model improves ink adhesion. With any painting method (other than nylon dyeing), using a primer is a good idea. Spray primer is said to be the easiest way to get good results. The process for using the primer is very simple:
- Clean and sand your 3D model.
- Apply the primer in thin, even coats.
- Sand after the first and last coats until the surface is smooth.
- Let each coat dry according to the instructions supplied with the primer.
Method 1: Paint with a brush
Best for: PLA, ABS, PETG plastics.
If you paint a 3D printed model with a brush, you will definitely achieve a unique "handmade" effect.
Try a few brushes first because it's easier to get good results with a comfortable brush. As a rule, it is enough to use only 1 or 2 different flat brushes.
Brush
- Choose a quality brush that is hard enough to handle the viscosity of the paint you are working on.
- Experiment with different bristle types and handle shapes to find the one that works for you.
- Stop painting to clean the brush as soon as the paint starts to dry.
 Naturally, the brush must be cleaned after each use. Do not leave drying paint on the brush bristles.
 - The brush must be stored on the handle after cleaning and not on the bristles.
Paint
When it comes to brush painting, you're better off using acrylic paints.
Painting process
- Clean and sand your 3D printed model.
- Apply the paint in thin, even coats.
- Let the individual layers dry.
Method 2: Spray painting
Best for: PLA, ABS, PETG plastics.
If you want to paint a 3D printed model uniformly using one color, then using an aerosol will give the best result.
Spray can
Some brands offer nozzles with different specifications.
Shake can according to manufacturer's recommendations before use. Allows the paint to come out more evenly.
Keep the nozzle clean. This is usually achieved by spraying the inverted can slightly at the end of each session.
Keep can away from open flame and store in a cool place. Don't forget that this is a high pressure container!
Paint
When looking for spray paint, you will find that there are many varieties. If you want to use a specific shade, please read the RAL, CMYK and RGB values on the can carefully.
Painting process
- Clean and sand your 3D printed model.
- Start spraying by aiming the jet a little beyond the edge of the object you want to paint.
- Apply the paint by spraying on the surface you want to paint in slow, even strokes.
- Stop spraying by directing the jet a little beyond the object you want to paint.
- Let the paint dry.
Method 3 Liquid Color (nylon only)
Best for: NYLON plastics.
Instead of trying to get paint to adhere to the surface of your 3D printed nylon model, we recommend using liquid dye instead. Note that this will not work with other materials. Although PLA is hygroscopic and absorbs some water from the environment, it cannot be dyed by absorbing dye. ABS and PETG are also not suitable for this technique.
In order for the ink to give a good pronounced color after absorption, it is better to use a translucent or white nylon material when 3D printing. Darker nylon fibers can also be dyed, but the color will be much less pronounced.
Colorant
There are many brands of colorant to choose from, but MatterHackers recommends Rit DyeMore for example. But in general, if the dye is intended for synthetic fabric, then everything will be in order.
Staining process
Since nylon is very hygroscopic, it absorbs water even outdoors. This is why you should always dry your nylon material before 3D printing. We recommend painting the finished model, not unprinted.
How to use
Read the manufacturer's instructions for your colorant. In short, using a dye is a pretty simple method:
- Clean up your 3D model.
 When sanding, remember that painting will not cover scratches and marks on the surface of your model. Everything will be visible even after staining.
 - Mix the dye with water and heat in a saucepan.
- Use a thermometer to monitor the dye temperature. Follow the manufacturer's instructions, but keep the temperature below the thermal deflection temperature of the filaments.
- Attach the weight to the 3D print and dip it into the paint pot.
- After coloring, rinse well in a bath of cool water.
- To make sure you get the expected color, it's worth doing a few test coats.
How to tell if a paint will set with a 3D model
Probably the most important factor in causing the paint or liquid of your choice to stick to a solid surface is the difference in surface energy between the liquid and the solid. The one with the most surface tension always wins (surface tension has its own unit called dynamos, or dynamos per square centimeter).
The general rule is that the surface tension of the paint must be at least 10 units lower than the solid material for good adhesion. This means that we have a liquid with a high wetting ability on a solid, and we need wetting.
To get an idea of how well the surface to be painted is wetted, look at the shape of the drop of liquid on the solid surface:
- Apply a drop of paint or liquid to the surface of the 3D model you want to process.
- If the liquid forms a ball, it has too much surface tension to effectively wet the object, and the solid cannot "pull" the liquid onto itself.
- If the liquid spreads over the surface, forming something like a lens, wetting is better.
Is it possible to paint a 3D model from any material?
Painting 3D models from PLA and ABS plastics is a fairly simple task.
PETG can have paint durability issues, but the same techniques apply as for PLA and ABS. But if you really need a rich, vibrant color, then it's best to print your 3D PETG model in the desired color and leave it as it is.
When it comes to nylon, which is used for 3D printing, we must remember that the paint does not set well. In general, it is possible to paint with acrylics and nylons, but this will require some heat treatment to maximize the surface tension and allow the paint to wet. Often this is done with an open flame or plasma... In general, this does not look easy at home, so it is better to use dyes.
Planning before 3D printing
In order to facilitate the process of finishing and painting, before 3D printing your model, we recommend that you consider the following:
- Lower 3D printing resolution saves printing time, but increases processing time.
- Consider the geometry of your model. Your tools should reach where you want to sand or paint.
- Do the smallest details need sanding, priming or both? If so, can they handle it without breaking?
- If dimensional accuracy is important for some parts of your 3D model, you may need to take this into account when modeling.
 Add material to be sanded to size, or reduce size to make room for primer and paint.
 - Primer and paint add thickness and can completely hide the fine details of your model.
- Sanding removes material and makes your 3D model less durable.
Items to improve paint adhesion
And finally, a few simple steps to improve paint adhesion:
- When working with a 3D printed model, wear clean gloves to protect the skin from chemicals and the surface of the model from sebum.
- Remove dirt before sanding, you don't want dirt to get into your model. Often, isopropyl alcohol (rubbing alcohol) on a soft, lint-free cloth works well.
- Use a regular vacuum cleaner with a soft and clean brush to remove sanding particles.
- Sand off any roughness added during the primer.
- Always test chemicals such as paint, cleaning solvents, sanding, or other materials and finishes before moving on to the final model you want to refine.
Paint a 3D Printed Mimic - DTF Desktops
The process of painting a 3D Printed Mimic. In the post you will find jackal photos at different stages, as well as a story about some of the features of working with models printed on a printer.
963 views
Around the end of August, a friend brought in a fresh 3D printed model with a request to paint it and keep it as a keepsake. Despite the fact that the painting was shelved, I still got down to work, which took a little less than a week. And now I just decided to share with you photos and experience.
Stage I. Preparation for primer
When working with sprues, the preparation phase took very little time. All that needed to be done was to separate the parts from the sprue and clean up the “burrs”. But when working with printed models, a new and not the easiest task appears - to remove supports. The fact is that a 3D printer prints in layers, from the bottom up. Sometimes a layer at a certain height is not solid, that is, part of the part is hanging in the air. Naturally, the printer cannot correctly print this area, since it does not have a support, for this a “support material” is created. Below are images before and after the material was removed. But the smaller and more detailed the model, the more difficult it is to do. The case with the facial expressions is just like this: the model is small, there are many hard-to-reach places, the supports themselves were reluctant to shoot. The main thing is not to cut anything superfluous.
Perhaps this stage turned out to be one of the most difficult, which, of course, I did not expect. But it was successfully completed and the miniature was already waiting for the ground cover.
Stage II. Primer
The priming step is one of the easiest. When working with a primer for metal, it is worth remembering that the model can be ruined with the same ease. To do this, you need to slightly overdo it with the amount of soil and the plastic will float. I tried to do everything the old fashioned way: carefully, covering with a thin layer. And as you can see, the layer is really thin, too thin. The picture shows that even several layers of paint did not save the situation, traces of layers were clearly visible on the figure. I assume that in this situation it would be worth repeating the priming step. This would smooth the model and cause no further problems during the painting phase. So, in a situation with printed miniatures - they should be covered with a good layer of soil to remove bumps and hide traces of layers.
Acrylic primer, KUDO, grey. The tongue and teeth are painted. The man in the background, the great dwarf, the savior of Phandalin and the hero of the Forgotten Realms - Thorbjorn
Stage III. Pokras
Painted in the usual way:
- Base coat
- Touch-up of missing places
- Shadows and Highlights
The most problematic place to paint was the tongue. Each time the paint clogged between layers, accumulated there and did not normally lay down. For fans of "pouring" I also have bad news. If you were not able to hide the layers properly with primer and layers of paint, then your paint will perfectly emphasize not only all the recesses of the model, but also each layer individually. Therefore, at the stage of shadows will have to be painted manually.
Shadows and highlights are done with oil paint diluted with white spirit and a flat brush. In the image below you can see my attempts in the fill, on the sky. Due to the fact that it was a diluted oil paint, there were no problems with its removal, just walked with a cotton swab dipped in white spirit.
The painting stage is not finished, but the main part is done.
Stage IV. Creating Effects
Is it ever possible for a miniature to be 100% complete? I don't know, but the main thing is to stop in time :) Having finished with the painting stage, I started creating additional effects. In the case of a mimic, this is rot on the teeth and drool.
The rot was made with PVA glue, sand, and emerald green paint. Everything is simple, like when creating terrains: a little glue, mixed with filtered sand (which I stole from the children from the sandbox), all this on an unnecessary brush, carefully coat the necessary places with it. After we wait for drying and we can start painting the rot.
Drooling was created with a hot glue gun. I had to tinker with them, most likely because I have little experience with a pistol. The glue did not want to take the necessary forms, constantly torn at thin intervals. When using glue, the model itself does not suffer , apparently the temperatures are insufficient to melt the plastic, but the “nose” of the gun is hot enough for this, be careful. When removing extra pieces of glue from the miniature, will remove the paint along with the glue. But the glue does not eat into the plastic, and after drying it can be removed without problems.