3D prints are stringy
Stringing or Oozing
Stringing or Oozing
Stringing (otherwise known as oozing, whiskers, or “hairy” prints) occurs when small strings of plastic are left behind on a 3D printed model. This is typically due to plastic oozing out of the nozzle while the extruder is moving to a new location. Thankfully, there are several settings within Simplify3D that can help with this issue. The most common setting that is used to combat excessive stringing is something that is known as retraction. If retraction is enabled, when the extruder is done printing one section of your model, the filament will be pulled backwards into the nozzle to act as a countermeasure against oozing. When it is time to begin printing again, the filament will be pushed back into the nozzle so that plastic once again begins extruding from the tip. To ensure retraction is enabled, click “Edit Process Settings” and click on the Extruder tab. Ensure that the retraction option is enabled for each of your extruders. In the sections below, we will discuss the important retraction settings as well as several other settings that can be used to combat stringing, such as the extruder temperature settings.
Common Solutions
Retraction distance
The most important retraction setting is the retraction distance. This determines how much plastic is pulled out of the nozzle. In general, the more plastic that is retracted from the nozzle, the less likely the nozzle is to ooze while moving. Most direct-drive extruders only require a retraction distance of 0.5-2.0mm, while some Bowden extruders may require a retraction distance as high as 15mm due to the longer distance between the extruder drive gear and the heated nozzle. If you encounter stringing with your prints, try increasing the retraction distance by 1mm and test again to see if the performance improves.
Retraction speed
The next retraction setting that you should check is the retraction speed. This determines how fast the filament is retracted from the nozzle.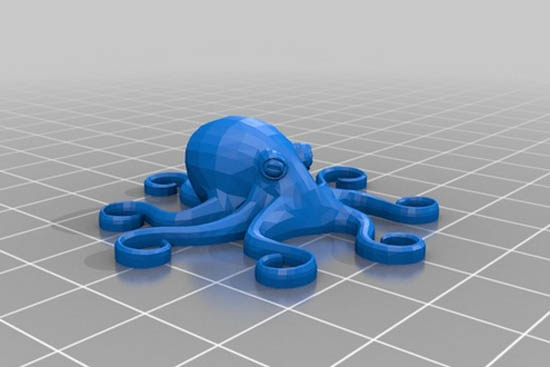 If you retract too slowly, the plastic will slowly ooze down through the nozzle and may start leaking before the extruder is done moving to its new destination. If you retract too quickly, the filament may separate from the hot plastic inside the nozzle, or the quick movement of the drive gear may even grind away pieces of your filament. There is usually a sweet spot somewhere between 1200-6000 mm/min (20-100 mm/s) where retraction performs best. Thankfully, Simplify3D has already provided many pre-configured profiles that can give you a starting point for what retraction speed works best, but the ideal value can vary depending on the material that you are using, so you may want to experiment to see if different speeds decrease the amount of stringing that you see.
Temperature is too high
Once you have checked your retraction settings, the next most common cause for excessive stringing is the extruder temperature. If the temperature is too high, the plastic inside the nozzle will become less viscous and will leak out of the nozzle much more easily. However, if the temperature is too low, the plastic will still be somewhat solid and will have difficulty extruding from the nozzle. If you feel you have the correct retraction settings, but you are still encountering these issues, try decreasing your extruder temperature by 5-10 degrees. This can have a significant impact on the final print quality. You can adjust these settings by clicking “Edit Process Settings” and selecting the Temperature tab. Select your extruder from the list on the left, and then double-click on the temperature setpoint you wish to edit.
Long movements over open spaces
As we discussed above, stringing occurs when the extruder is moving between two different locations, and during that move, plastic starts to ooze out of the nozzle. The length of this movement can have a large impact on how much oozing takes place. Short moves may be quick enough that the plastic does not have time to ooze out of the nozzle. However, long movements are much more likely to create strings. Thankfully, Simplify3D includes an extremely useful feature that can help minimize the length of these movements. The software is smart enough that it can automatically adjust the travel path to make sure that nozzle has a very short distance to travel over an open space. In fact, in many cases, the software may be able to find a travel path that avoids crossing an open space all together! This means that there is no possibility to create a string, because the nozzle will always be on top of the solid plastic and will never travel outside the part. To use this feature, click on the Advanced tab and enable the “Avoid crossing outline for travel movement” option.
Movement Speed
Finally, you may also find that increasing the movement speed of your machine can also reduce the amount of time that the extruder can ooze when moving between parts. You can verify what movement speeds your machine is using by clicking on the Speeds tab of your process settings. The X/Y Axis Movement Speed represents the side-to-side travel speed, and is frequently directly related to the amount of time your extruder spends moving over open air. If your machine can handle moving at higher speeds, you may find that increasing this settings can also reduce stringing between parts.
Related Topics
5 Ways How to Fix Stringing & Oozing in Your 3D Prints – 3D Printerly
If you’re in the field of 3D printing, you might have come across an issue of strings of melted plastic or plastic oozing from your 3D prints. This is called stringing and oozing, which fits perfectly.
Fixing stringing and oozing is best done by having good retraction settings, where a good retraction length is 3mm and a good retraction speed is 50mm/s. You can also decrease your printing temperature to help filament be less runny, which reduces the instance of stringing and oozing.
It’s a fairly common problem that people experience which leads to poor quality prints, so you definitely want to get this fixed.
There are more details to know about so keep on reading the article to find out why this happens in the first place, and how to fix it once and for all.
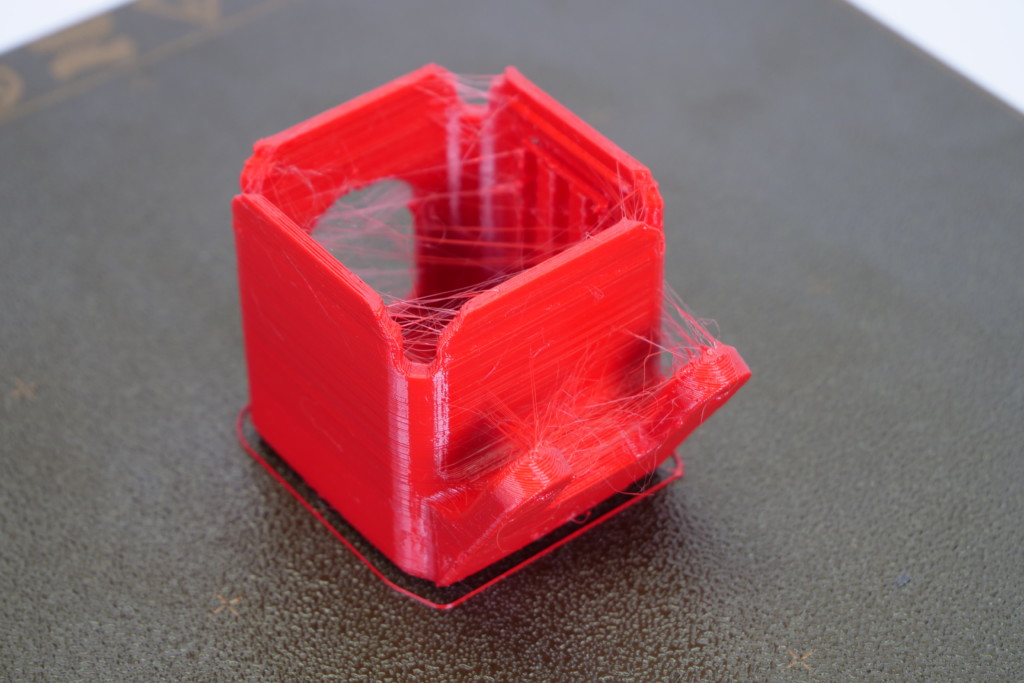
Here’s an example of stringing in a 3D print.
What to do against this stringing? from 3Dprinting
What Causes 3D Prints to Have Stringing & Oozing?
Sometimes users try to print an object in which the nozzle has to move through an open area to reach the next point.
Stringing and oozing is the problem in which the nozzle extrudes the melted plastic while moving from an open space.
The melted plastic sticks between two points and look like attached strings or threads. To prevent or solve the problem, the first step is to find out the actual cause of the issue.
Some of the major causes behind the stringing and oozing problem include:
- Retraction settings not being used
- Retraction speed or distance too low
- Printing with a temperature too high
- Using filament which has absorbed too much moisture
- Using a clogged or jammed nozzle without cleaning
Knowing the causes is a good way to start before getting into the solutions. The section below will take you through a number of ways how to fix stringing & oozing in your 3D prints.
Once you’ve gone through the list and tried them out, your problem should hopefully be solved.
How to Fix Stringing and Oozing in 3D Prints
Just like there are various reasons that cause stringing and oozing problems, there are also plenty of solutions that can help you fix and avoid it.
Most of the time this type of problem can be fixed just by changing some settings in the 3D printer such as extruder speed, temperature, distance, etc. It’s not ideal when your 3D prints are stringy so you want to get this sorted out quickly.
Below are some of the simplest and easiest solutions that can be implemented without requiring any major tools or techniques.
The methods that will help you to get rid of the problem for once and for all includes:
1. Print at a Lower Temperature
The chances of stringing and oozing increase if you are printing at a high temperature.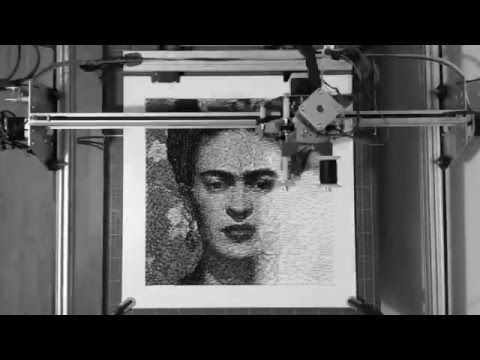 The very first thing that you should do is to reduce the temperature and check for the results.
Reducing the temperature will help you because it will extrude less liquid material reducing the chances of stinging and oozing.
Those higher temperature materials are more prone to stringing because of the effects of higher heat on the viscosity or liquidity of filament.
Although PLA is a relatively low temperature material, it doesn’t mean it’s safe from stringing and oozing.
- Reduce the temperature step by step and check if there are any improvements.
- Make sure that the temperature is within the range required for the type of filament being used (should be on the filament packaging)
- Try to use a filament that melts at lower temperatures efficiently like PLA
- While reducing the printing temperature, you may have to lower down the extrusion speed because the filament material will take time to melt at low temperatures.
- Do test prints of little objects to get an idea about the perfect temperature because different materials print well on different temperatures.
- Some people will print their first layer 10°C hotter for good adhesion, then lower the printing temperature for the rest of the print.
2. Activate or Increase Retraction Settings
3D printers include a mechanism that works as a pullback gear called retraction, as explained in the video above. Enable retraction settings to pull back the semi-solid filament that is pushing the liquid to extrude from the nozzle.
According to experts, activating the retraction settings usually work to fix the stringing problems. What it does is relieve the pressure of the melted filament so it will not drip while moving from one point to another.
- Retraction settings are activated by default but check for the settings if you are experiencing stringing or oozing.
- Enable the retraction settings so that the filament can be pulled back every time the nozzle reaches an open space where printing is not designed or required.
- A good retraction setting start-point is a retraction speed of 50mm/s (adjust in 5-10mm/s adjustments until good) and retraction distance of 3mm (1mm adjustments until good).
- You can also implement a setting called ‘Combing Mode’ so it only travels where you have already printed, rather than in the middle of your 3D print.
I’d advise you to download and use this Retraction Test on Thingiverse, created by deltapenguin. It’s a great way to quickly test out how well in-tune your retraction settings are dialed in.
It really is hit or miss, high retraction settings of 70mm/s retraction speed and 7mm retraction distance works well, while others get good results with much lower.
One user who was experiencing some pretty bad stringing said that he fixed it by using a retraction distance of 8mm and retraction speed of 55mm. He also shortened his Bowden tube by 6 inches since he replaced the stock one with some Capricorn PTFE Tubing.
The results does depend on what 3D printer you have, your hotend, and other factors, so it’s good to test out some values with a test.
3. Adjust Print Speed
Adjusting the print speed is a common factor to fix stringing, especially if you have reduced the printing temperature.
Reducing speed is necessary because with the reduced temperature the nozzle can start under extruding. After all, the filament will take more time to melt and become ready to extrude since it’s less runny.
If the nozzle is moving at a high speed, with a high temperature, and no retraction settings, you can bet you’ll experience stringing and oozing at the end of your 3D print.
- Reduce the printing speed because this will mitigate the chances of leaking filament and causing stringing.
- A good starting speed ranges from 40-60mm/s
- A good travel speed setting is anywhere from 150-200mm/s
- As different filaments take different time periods to melt, you should test the material by reducing the speed before starting your printing process.
- Make sure that the printing speed is optimal because both too fast and too slow speed can cause problems.
4. Protect Your Filament from Moisture
Most 3D printer users knows that moisture affects the filament badly. Filaments absorb moisture in the open air and this moisture turns into bubbles when heated.
The bubbles usually keep on bursting and this process forces the dripping of the filament from the nozzle causing stringing and oozing problems.
The moisture can also become steam and will increase the chances of the stringing problems when mixed with the plastic material.
Some filaments are worse than others such as Nylon and HIPS.
- Keep your filament stored and protected in a box or something that is totally airtight, with desiccant and has the ability to stop moisture from reaching the filament.
- If suitable, try to use a filament which absorbs less moisture like PLA
I’d recommend going for something like the SUNLU Upgraded Filament Dryer from Amazon. You can even dry filament while you’re 3D printing since it has a hole that can feed through. It has an adjustable temperature range of 35-55°C and a timer that goes up to 24 hours.
5. Clean the Printing Nozzle
Whenever you print an object some particles of the plastic are left behind in the nozzle and with time get stuck in it.
This happens more so when you print with a high temperature material, then switch to a lower temperature material like from ABS to PLA.
You don’t want any kind of blockage in the way of your nozzle, since this is a very significant area for creating successful prints without imperfections.
- Clean your nozzle thoroughly before printing to make it free from the residues and dirt particles.
- Use a brush with metal wires to clean the nozzle, sometimes the common brush can also work well.
- It will be better if you clean the nozzle every time you complete a print because it becomes easier to remove the heated liquid residues.
- Clean your nozzle using acetone if you are printing after a long time.
- Keep in mind that cleaning the nozzle is considered essential whenever you switch from one material to another.
After going through the above solutions, you should be in the clear for getting rid of that stringing and oozing problem that you have been experiencing.
It may be a quick fix, or it can require some trial and testing, but at the end of it, you know you’ll come out with some print quality you can be proud of.
Happy printing!
A brief description of carbon fiber 3D printing technology and its application in the production of parts
3D printed carbon fiber is the second most popular additive manufacturing technology after metal. Due to the unique properties of carbon fiber, such as light weight, high strength, high electrical conductivity, high corrosion resistance, 3D printed parts often have high precision and high performance. Due to the unique properties of carbon fiber, such as light weight, high strength, high electrical conductivity, high corrosion resistance, 3D printed parts often have high precision and high performance. |
Carbon fiber 3D printing technology
▶ Laser sintering technology
Material characteristics: short fiber reinforced nylon, PEEK, TPU and other powder materials.
Process characteristics: mix short-cut carbon fiber and nylon in a certain proportion, and carry out integral molding by laser sintering.
Laser-sintered carbon fiber car intake manifold function prototype
▶ Multi-jet technology
Material characteristics: short fiber reinforced nylon, PEEK, TPU and other powder materials.
Process Characteristics: By heating the lamp tube, the cross section of the part collects enough heat to form a melt under the action of the solvent.
MJF Technology for Fibre-Reinforced Parts
▶ FDM Technology
Material Features: Long-filament reinforced PLA, Nylon, PEEK and other wire materials
Process Characteristics: A long fiber is inserted into a conventional wire using FDM technology to enhance the effect.
Carbon fiber reinforced PEEK fender with FDM print
Carbon fiber printing method
▶ Chopped carbon fiber thermoplastic.
Short cut carbon fiber thermoplastics are printed on a standard FFF (FDM) printer consisting of a thermoplastic (PLA, ABS or nylon) reinforced with tiny chopped filaments, i.e. carbon fibres. On the other hand, continuous carbon fiber production is a unique printing process that places bundles of continuous carbon fibers on standard FFF (FDM) thermoplastic substrates.
Carbon fiber short cut plastics and continuous fibers are made from carbon fiber, but the difference between the two is huge. Understanding how each method works and its ideal application will help you make informed decisions about what to do in additive manufacturing.
3D printed carbon fiber from chopped carbon fiber filled with thermoplastic
Chopped carbon fibers are essentially the reinforcing materials for standard thermoplastics. This allows companies to print materials that tend to be less efficient at higher intensity levels. The material is then blended with the thermoplastic and the resulting blend is extruded into a spool for melt-blown filament (FFF) technology.
For composites using the FFF method, the material is a mixture of chopped fibers (usually carbon fibers) and conventional thermoplastics (such as nylon, ABS, or polylactic acid). Although the FFF process remains the same, the chopped fibers increase the strength and stiffness of the model and improve dimensional stability, surface finish, and accuracy.
This method is not always perfect. Some fibers reinforced with chopped strands enhance strength by controlling supersaturation of the material with fibers. This can adversely affect the overall quality of the part, reducing the surface quality and accuracy of the part. Prototypes and end-use parts can be made from chopped carbon fiber as it provides the strength and appearance needed for in-house testing or customer service components.
3D printed carbon fiber augmented with continuous fibers
Materials reinforced with continuous carbon fiber.
The real benefit is solid carbon fiber. It is an economical solution for replacing traditional metal parts with 3D printed composite parts as it provides similar strength at a lower weight. It can be used to encrust materials into thermoplastics using continuous fiber technology (CFF). A printer using this method feeds continuous high-strength fibers (such as carbon fiber, fiberglass, or Kevlar) through a second print nozzle in an extruded FFF thermoplastic during printing.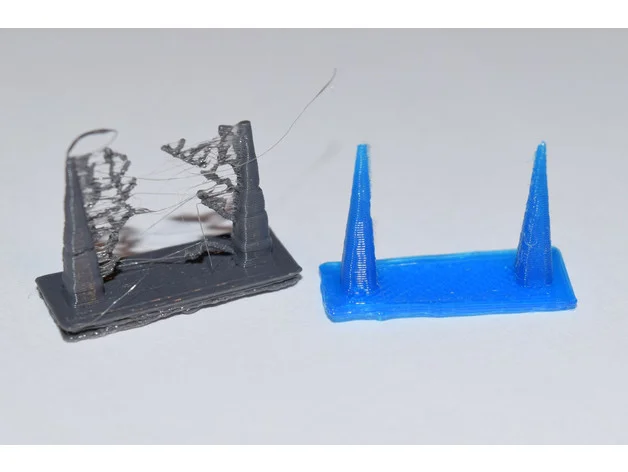 Reinforcing fibers form the "backbone" of the printed part, providing a hard, strong and durable effect.
Solid carbon fiber not only increases strength, but also provides selective reinforcement in areas where greater durability is required. Because the main process is FFF, you can choose to build on a layered basis.
Each layer has two reinforcement methods: concentric reinforcement and isotropic reinforcement. A concentric fill reinforces the outer boundaries of each layer (inner and outer) and extends to the part with a user-defined number of cycles. The isotropic filling forms a unidirectional composite reinforcement on each layer, and the carbon fiber weave can be modeled by changing the direction of the reinforcement in the layer. These advanced strategies are enabling the aerospace, automotive and manufacturing industries to integrate composite materials into their workflows in new ways. Printed parts can be used as tools and fixtures (all require continuous carbon fiber to effectively model metal properties.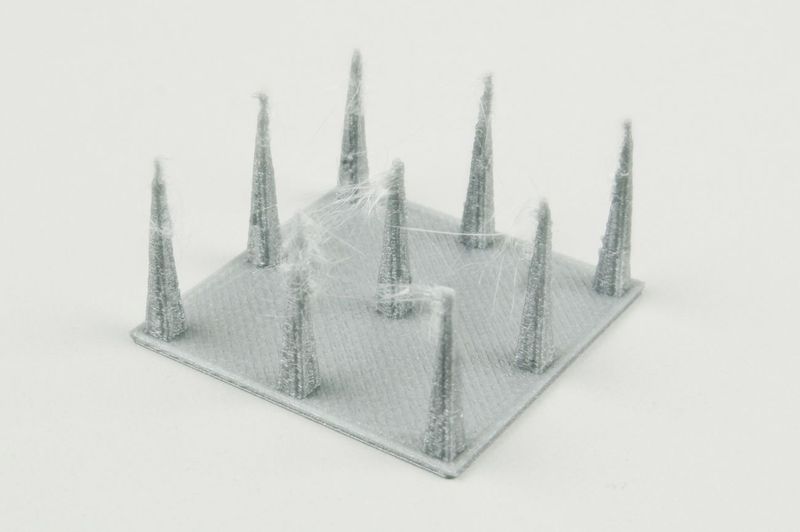 ), e.g. hand end tools, soft palate and CMM. accessories .
Application of carbon fiber materials in the production of components
Nylon 12CF material, a new 3D printed carbon fiber material containing up to 35% carbon fiber, therefore has excellent properties such as a final tensile strength of 76 MPa and modulus of elasticity 7529MPa. With a bending strength of 142 MPa, it is sufficient to replace metals in many applications, sufficient to replace metals in many applications, making it ideal for automotive, aerospace and other industries. This carbon-fiber-reinforced thermoplastic is used to produce high-performance prototypes that can withstand the rigorous testing of production parts during design validation for rigorous manufacturing environments and can be used to make fixtures on the production line.
OXFAB materials have a high resistance to chemicals and heat, which is very important for high performance components in aerospace and industrial applications. Extensive mechanical test data shows that OXFAB can be used to make finished parts for 3D printing. OPM is pursuing key development contracts with customers in the aerospace and industrial sectors for 3D printed parts for commercial and military aircraft, space and industrial applications, which can significantly reduce weight and cost.
Today, the field of additive manufacturing has grown exponentially, with some printers offering the ability to print on carbon fiber. If the 3D printing industry wants to gain a larger share of the $100 billion manufacturing market, 3D printing technology must be applied to both processes and materials. The various benefits of carbon fiber reflect the possibility that this goal will become a reality. Certainly, in order to compete with traditional manufacturing, composite materials are bound to become one of the driving forces behind 3D printing as a mainstream technology.
Link to this article:A brief introduction to carbon fiber 3D printing technology and its application in the production of parts.
Reprint Statement: Unless otherwise stated, all articles on this site are original. Specify source for reprint: https://www.cncmachiningptj.com/,thanks!
Cellulose based 3D printing ink
3D printing
Follow author
Subscribe
Don't want
2
Researchers at the Swiss Institute for Quality Control and Laboratory Research EMPA have succeeded in developing an environmentally friendly 3D printing ink based on cellulose nanocrystals. This development can be used to produce microstructures with outstanding mechanical properties that will find applications in prosthetics and other medical fields.
To create 3D microstructured materials, EMPA used an additive 3D printing technology called robocasting (Direct Ink Writing, DIW). During this process, a viscous substance, the printing material, enters through the nozzle and immediately takes the desired shape due to pseudoplasticity. Dr. Gilberto Siqueira and Dr. Tanya Zimmerman of the Wood Materials Laboratory, together with Jennifer Lewis of Harvard University and André Studart of ETH Zurich, have succeeded in developing a new sustainable 3D printing material based on cellulose nanocrystals (CNC).
Along with lignin and hemicelluloses, cellulose is the main component of wood. This biopolymer is composed of glucose chains organized into long fibrous structures. In different areas, there is a different degree of ordering of cellulose fibrils. “Sites with a more ordered structure are characterized by a pronounced crystalline form, and it is these areas that we use for our research,” explains Dr. Siqueira. After acid treatment of these areas, the researchers obtain a product in the form of cellulose nanocrystals - rod-like structures 120 nm long and 6.5 nm in diameter. It was these formations that served as the material for creating environmentally friendly “ink” for 3D printing. On their basis, it was possible to obtain "ink" with a CNC content of about 20%, while previous developments contained no more than 2.5% of this biomaterial.
“The main challenge was to achieve a viscous elastic consistency so that the consumable could easily pass through the nozzles of the 3D printer,” says Dr. Siqueira. At the same time, the material had to be dense enough so that the model held its shape before drying or polymerization, without melting immediately after printing. The first "ink" with cellulose was water-based, which made the prototype very fragile. Therefore, the EMPA research team invented another method for manufacturing consumables, already based on a polymer. This method has a significant advantage: after printing and polymerization using UV study, cellulose nanocrystals are “glued together” by polymer blocks, which gives the composite material additional strength.
Despite resistance
Researchers admit that they had to seriously puzzle over the solution of individual problems.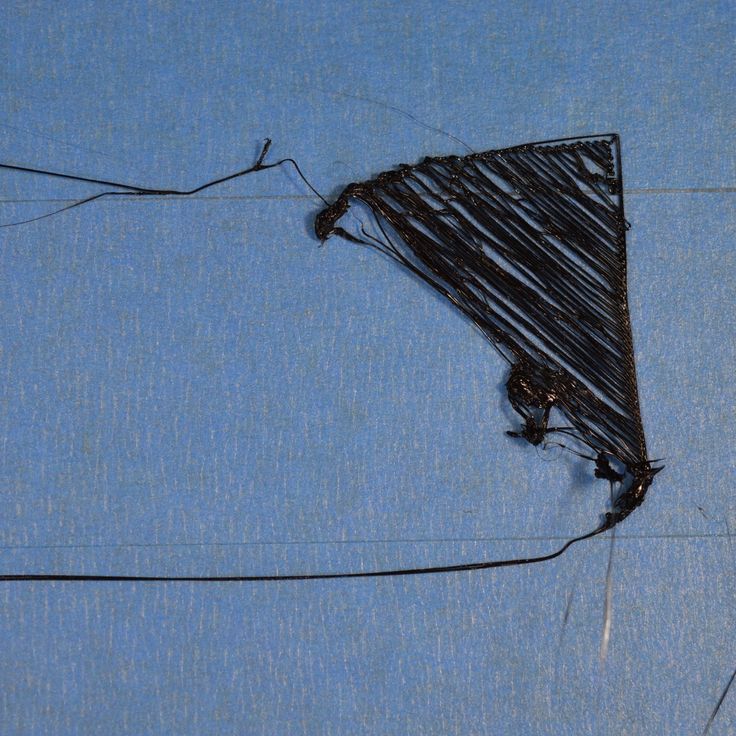 “Most polymers are water-repellent or hydrophobic, while cellulose, being hydrophilic, attracts water. As a result, they are incompatible,” laments Dr. Siqueira. To create favorable conditions, the scientists resorted to chemical CNC surface treatment.
After the first printing attempts and X-ray analysis of the obtained microstructures, the laboratory specialists noticed that the cellulose nanocrystals were almost perfectly aligned in the direction of printing. It turned out that the degree of ordering depends on the force with which the “ink” is forced through the nozzles of the 3D printer. This feature can be used if it is necessary to obtain a model that has a certain rigidity in one direction or another.
A sea of possibilities
The above advantages of CNC proved to be decisive when compared to other materials such as carbon fibers. In addition, cellulose is a renewable material and the most abundant natural polymer on Earth. It is found not only in trees, but also in other plants and even bacteria. Crystals obtained by isolation from various sources differ from each other only in size, and not in properties.
The automotive and packaging industries can also use this versatile material, which can be chemically modified through 3D printing if needed. However, according to Dr. Siqueira, the most important application of "ink" with cellulose nanocrystals is biomedicine and prosthetics in particular.
The possibilities of new "inks" are currently being studied within the walls of EMPA. At the same time, the development of new environmentally friendly consumables for various areas of 3D printing is being carried out.
You can read about other 3D printing technologies in our review.
Follow the author
Follow
Don't want
2
More interesting articles
brtv
Loading
10/16/2022
2178
9
Subscribe to the author
Subscribe
Don't want
Hello my friend! Today I decided to assemble a simple pneumohydraulic generator or Generator .