Elemental 3d printer
Element HT – Mosaic Manufacturing
Element HT
With a hot-end temp. of up to 500°C, and a heated chamber, Element HT allows you to print high strength parts for the most demanding applications.
With an all metal gantry, and a precision motion system, Element HT was developed with manufacturing level reliability in its DNA.
Element’s 14" x 14" x 14" build volume to print with up to 8 materials in a single part including rigid, flexible, and soluble support material in your prints.
Print with industrial materials
Print high strength materials with Element HT's 500°C hot-end and 80°C heated chamber. Experience an industrial-grade printer without the industrial overhead.
8 Material, High‑temp Printing
Element HT gives you the flexibility to print with multiple materials while also allowing you to print strong, functional prints with industrial-grade materials such as:
- PEEK
- Ultem 9085
- Matrix
- Polycarbonate
Automated Filament Changing
Choose your material in Canvas, let your Element HT handle the rest. Element HT will autoload your filament to let you focus on more important things.
Heated Build Chamber
Element HT's heated build chamber gives you the ability to print with the strongest materials on the market to ensure your parts can handle any application.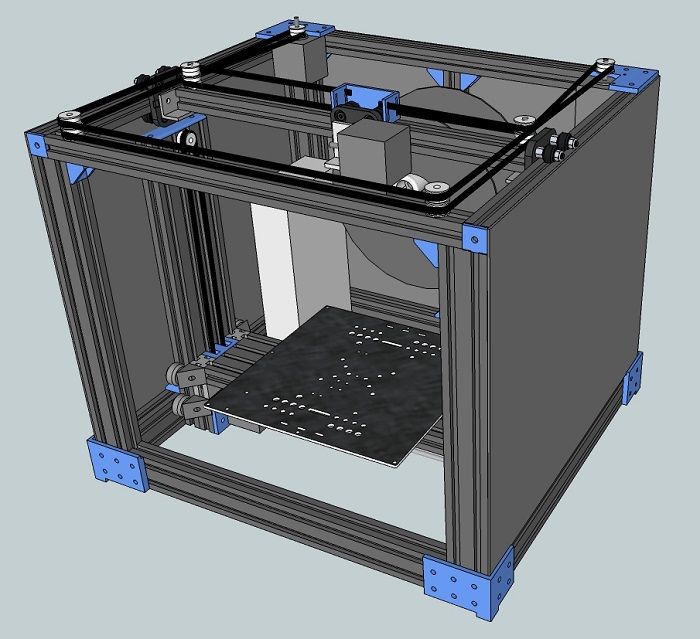
Industrial Print Head
Print the highest strength materials with the lowest downtime. Designed for serviceability, Element HT's print head is able to reach 500°C to print the widest range of materials on the market.
Precision printing tolerances
Access Element HT's 14" x 14" x 14" build volume to create larger parts, or multiple small parts in a single print. Print with 20 micron layer heights and closed loop feedback system to ensure a precise output.
Spec Sheet
Download the official spec sheet for Element HT
Element HT
3D Printing Evolved.
UPTIME
Maximize your printer's uptime
Designed for maximum uptime in a production environment, Element HT's modular design means you will spend less time fixing and more time printing.
MANAGEMENT
Customize, Store and Slice
Access a modern and simplified software built for multi-material 3D printing. Canvas allows you to easily create, slice, and manage your print projects on the cloud.
MATERIALS
Print with quality materials
Unlock the highest repeatability, automation and simplest experience with Mosaic's Filament, or use your favorite material brand.
Print Monitoring
Automated print monitoring
Maximize printer uptime with a system that closes the loop on the printing process. Element HT detects print anomalies and reports them to you.
Support
Industry Leading Support
We are passionate about our customer's success. With Element HT, you'll have experts on hand available to guide you and ensure you have an incredible printing experience.
Explore Element and Element HT
Element
Rockmass Technologies: Rapid prototyping and production with Element
Learn how mining technology company Rockmass Technologies is harnessing Element in order to increase the flexibility of how they use additive manufacturing technology in their prototyping and production workflows.
Explore Element and Element HT
Element
Introducing Element and Element HT
Read our product overview blog to learn more about how Element is designed to give you the most flexibility with your designs, and allows you to get the most value out of 3D printing in your organization.
ReadCompare Element
Reliable, Flexible & Intuitive
Element HT
$9,999.00 USD
Elemental best STL files for 3D printing・Cults
Elemental Dragons
€2.35
Fireling - Free stl
Free
Lava Elemental
€1.17
Elemental Axe
€5. 64
64
Skullborn monster "Jiggly Wiggly" wobbly snake
Free
Skullborn monster "The Wrock"
Free
NEVERENDING STORY ROCK BITER PYORNKRACHZARK FIGURE MODEL CREATURE FIGURINE DND
€5.64
Milk Elemental
Free
Elemental Hero Avian - Yugioh
€1.07
Reward Pack #7 | Deep Sea
€18.79
Reward Pack #5 | Dryads
€18.79
WARCRAFT INFERNAL MINIATURE MODEL FOR FANTASY GAMES RPG AND DnD
€3.76
Miss Fortune
€4.83
Ezreal by lol
€4.83
Dragon Elemental
€2.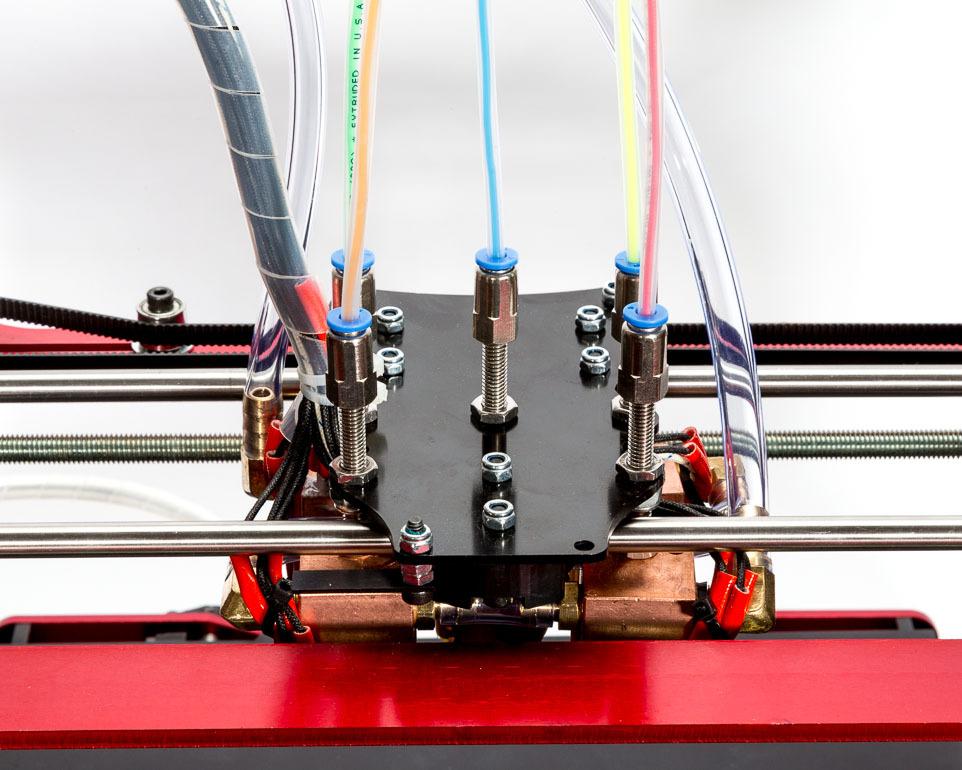 90
90
Fire Sprites
€1.12
Elemental Hero Neos
€1.07
ARTUR’EKH – SHARD OF THE ANCIENT GODS
€9.99
MIGHTY MAX ARACHNOID 1992 PVC FIGURE MINIATURE
€4.70
Imperial Jade Seal of China from Elementary (Season 5 episode 2)
€5.88
Hubble deep sky object 3D software analysis
€2.50
Baby Bear Battle Armor
Free
Lightning Fingers Cosplay Prop. Finger Mounted Electric Bolts for Cosplay as Emperor Palpatine, Static Shock, Halloween Costume
€4.70
LED Floating Orb Costume Prop, Light Up Wearable Super Power Hovering Sphere of Energy Effect for Naruto, DBZ Goku Cosplay LARP Costume
€2.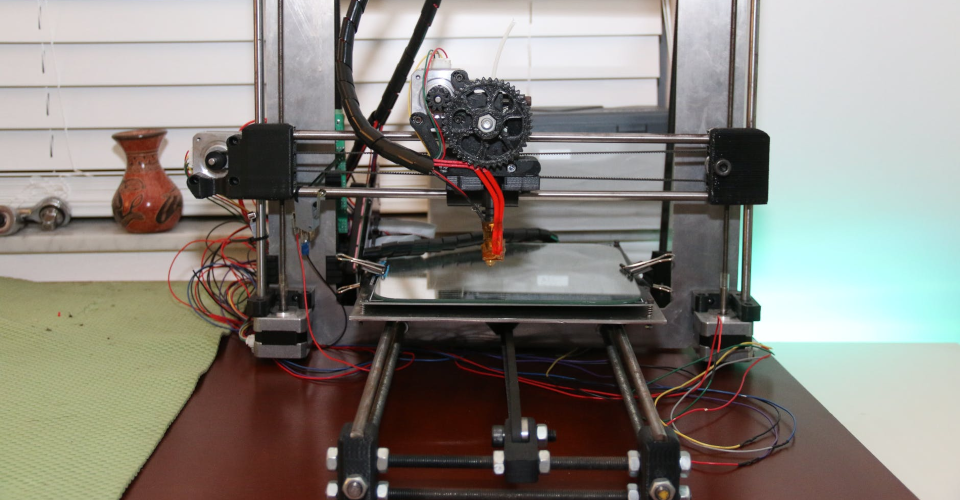 82
82
Aegar Stormager
€20
Vision Sumeru Genshin Impact
€5
Lava Lord - Sorngaar the Cindering
€5.06
Water Myrmidon
€3
Elemental Hero Neos - Yu Gi Oh
€3.38
Wizard Azari Flameheart Normal and Nude
€6.90
Wizard Azari Flameheart Nude
€3.90
Wizard Azari Flameheart
€3.90
DragonChess Set
Free
Golem Boss Supremus
€5.50
Djinn
€3.40
June '22 Release: "The Cursed Sultan" Bundle
€38
Golem warrior
€5. 64
64
Pain Elemental Keycap
€1.99
Stone Spider - Kopok
€3.80
Avatar of Maethromin - Kitarlia
€3.80
Crystalline Serpent - Agatol
€7.59
Phoenix
€1.88
Efreeti D&D Miniature
€1.40
Ice Wolf - Monstrous Creature - 32mm Scale
€3.39
Fire Elemental - DND Miniature - PRESUPPORTED - 32mm Scale
€3.96
4 Elemental Pack - PRESUPPORTED - 32mm scale - D&D
€11.30
Lady of Fire - Circus of Horrors - PRESUPPORTED - 32mm Scale
€3.96
Lightning Elemental - Frankensteins Lab - PRESUPPORTED - 32mm Scale
€4. 52
52
CHOICE Rules and Actual Models
Content
-
- Why a child needs a 3D printer
- Benefits 3D printer
- Criteria for choosing a 3D printer for a child
- TOP 3D printer for children 8-12 years old
- 5th place - Wanhao Duplicator I3 mini
- 4th place - Anycubic Mega-S
- 3rd place - Anycubic Photon Mono
- 2nd place - FlashForge Finder
- 1st place - FlyingBear Ghost 5
- Top 3D printers for 12-18 year olds
- 5th place - Creality3D Ender 3
- 4th place - Phrozen Sonic 4K
- 3rd place - Wanhao Duplicator 6 Plus
- 2nd place - Flashforge Adventurer0 3 905 905 - Anycubic Mega Pro
- Accessories and spare parts
- COLLS
- Glue
- Drying Plastic
- Post -cutting
- Summarly
Many people have heard about 3D printing, every day you can see the news that scientists have been able to print a kidney, a house, a spacecraft and almost anything. Because of this, 3D printing seems so far from ordinary life that even the thought of using a 3D printer personally arises. But this is a long-standing misconception: almost everyone can afford to buy a 3D printer and learn how to use it. Many schools already have an "Engineering Graphics" class, in which children are taught how to work in 3D modeling programs. nine0003
Why a child needs a 3D printer
Indeed, many of the activities of children pass from generation to generation: mathematics, drawing, football, carving and others. So why give a child something seemingly difficult to learn. First, as mentioned above, 3D printing has become easier than ever: it is often enough to press one button and after a while get the finished part made on a 3D printer. Secondly, any hobby starts small: you can’t become an artist without starting with sketches in a notebook, you can’t become a biologist, despite the bugs and ants. It's the same with 3D printing: you can't become a good engineer without working with technology. It is the 3D printer that will be the first step into the world of engineering and even art sciences. In general, understanding the principles of operation of 3D printers and CNC machines allows you to open a huge range of specialties that may interest your child. Thirdly, a 3D printer can be an addition to the main hobby. You don't have to be fully versed in the world of 3D printing to use a 3D printer as a tool. For example, if your child is building models, then a 3D printer would be a great addition, as it can print extra parts or entire build kits. nine0003
Benefits of a 3D printer
In addition to the above educational benefits, a 3D printer also has a utilitarian purpose. For example, with it you can print those things that you can’t get in other ways. Let's say you have a broken hardware mount in the car. It is quite rare to find such a part for sale. And your child will be able to make a model and print it, maybe even improve it. Also, a 3D printer can be used to make gifts: maze boxes, vases, figurines, and even paintings! The scope of fantasy is limited only by the imagination of the child and the capabilities of a 3D printer. Therefore, it is important to choose a 3D printer that will not limit the child's imagination. How to do this will be discussed further. nine0003
Criteria for choosing a 3D printer for a child
It should be understood that different printers have their pros and cons, that is, there is no perfect printer. Therefore, it is necessary to choose the appropriate model based on the preferences of the child. The main characteristics of any 3D printer are: 3D printing technology, print area size, maximum table and nozzle temperatures. The rest of the characteristics will simply change the printing time or the list of plastics that can be used. But the most important thing will be security, or rather openness. Older children can be given a printer that has more functionality and features, but it will require more care. And it is better for small children to give a simple and understandable printer, albeit with fewer features. The best 3D printer models for different ages will be outlined below.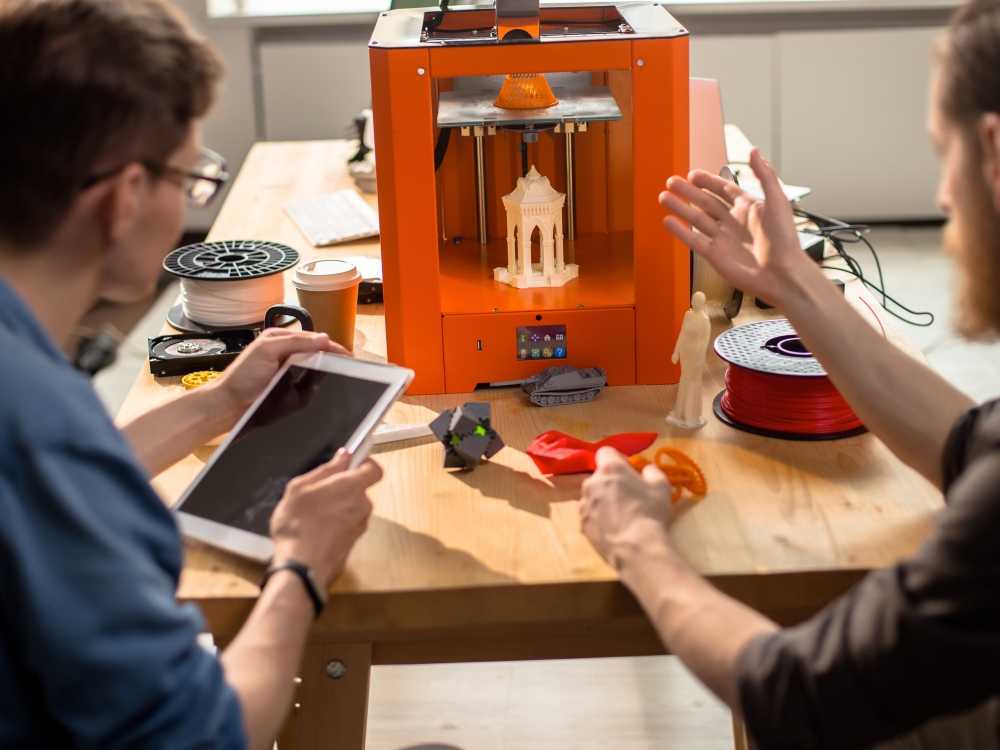 nine0003
Top 3D printers for kids aged 8-12
This age category includes entry-level 3D printers. Their purpose is to show the child what 3D printing is and how to work with it. They have some limitations, but are easy to use and maintain. This will allow the child to independently engage in them with minimal help from adults.
5th place - Wanhao Duplicator I3 mini
This 3D printer has established itself as a reliable entry-level device. The kit comes with everything you need to start printing out of the box. The absence of a heated bed reduces the risk of burns, and it also allows you to safely set up the table during printing. You can print with any materials that do not require heating of the table (PLA, SBS and others). Best choice for 8 to 10 years old child. nine0003
Key Features:
- Print Technology: FDM/FFF
- Printing area: 120 × 135 × 100 mm
- Maximum extruder temperature: 260 °C
- Maximum table temperature: without table heating
- Print travel speed: 10-70mm/s
Pros:
Cons:
4th place - Anycubic Mega-S
The Anycubic Mega-S is a classic first printer choice due to its versatility. Features intuitive touchscreen controls, medium print area and heated bed. The latter opens up the possibility to print with more demanding plastics such as ABS, PETG, HIPS and others.
Key features:
- Print technology: FDM/FFF
- Print area: 210 x 210 x 205 mm
- Maximum extruder temperature: 260 °C
- Maximum table temperature: 110 °C
- Print travel speed: 10-100mm/s
Pros:
Cons:
3rd place - Anycubic Photon Mono
Unlike the previous ones, this 3D printer prints using ultraviolet curing resin (SLA/DLP). This technology achieves incredible precision compared to FDM/FFF printers. But after printing, it is necessary to process the model - to clean it from the rest of the resin. Therefore, when using this printer, the child must be careful. nine0003
Key features:
- Print technology: SLA/DLP
- Print area: 130 x 80 x165 mm
- Display resolution: 2560x1620 (2K)
- Print speed: up to 50 mm/h
Pros:
-
Small size
-
Accuracy nine0003
Cons:
2nd place - FlashForge Finder
Finder deservedly takes its second place.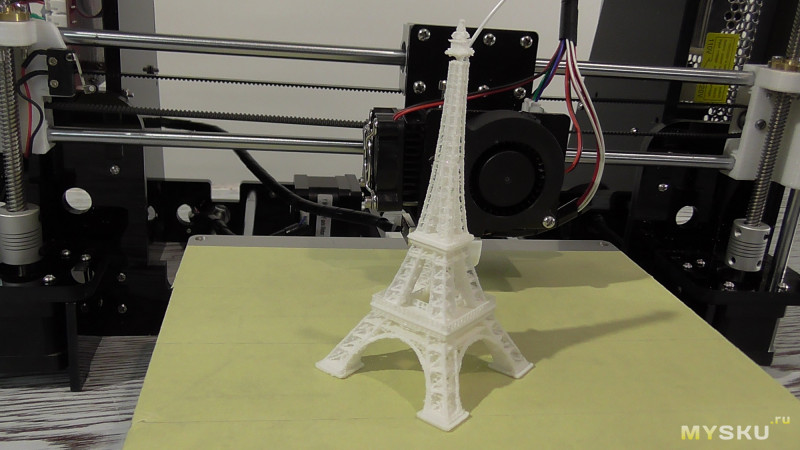 This 3D printer has outstanding reliability. This model uses CoreXY kinematics, so the print speed can reach 150mm/s. Due to its small size and body material (high-strength plastic), this printer can be easily moved: it will fit in the trunk of any car. However, it comes fully assembled, allowing you to print right out of the box. nine0003
Key features:
- Print technology: FDM/FFF
- Print area: 140 x 140 x 140 mm
- Maximum extruder temperature: 250 °C
- Maximum table temperature: None
- Print travel speed: 10-150mm/s
Pros:
Cons:
1st place - FlyingBear Ghost 5
The latest model of a 3D printer from the manufacturer FlyingBear. Just like the previous printer, FlyingBear Ghost 5 uses CoreXY kinematics, so that the speed of movement during printing can reach 150 mm / s. The X and Y axes use TMC2208 drivers, and this greatly reduces the overall noise during the operation of the 3D printer.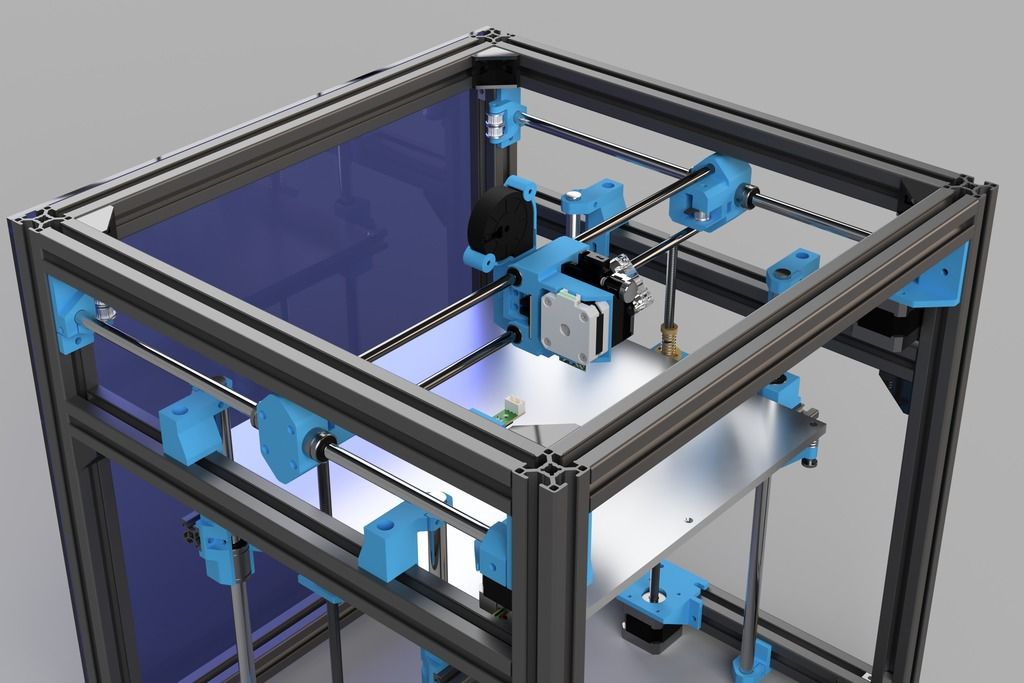 The menu has outstanding customization functionality. Since the printer has a partially closed case, you can not be afraid of drafts when printing. nine0003
Key Features:
- Print Technology: FDM/FFF
- Print area: 255 x 210 x 200 mm
- Maximum extruder temperature: 260 °C
- Maximum table temperature: 110 °C
- Print travel speed: 10-150mm/s
Pros:
Cons:
Free Shipping
Add to compare
Product added to compare Go
| Manufacturer | Anycubic |
Free Shipping
Add to compare
Product added to compare Go
| Manufacturer | nine0251 Anycubic
Free Shipping
Add to compare
Product added to compare Go
| Manufacturer | Wanhao |
Free Shipping
Add to compare
Product added to compare Go
| Manufacturer | Flash Forge |
Add to compare
Product added to compare Go
| Manufacturer | Flyingbear |
Top 3D printer for 12-18 years old
This category contains 3D printers that border on professional, so some experience may be required to use all their functionality.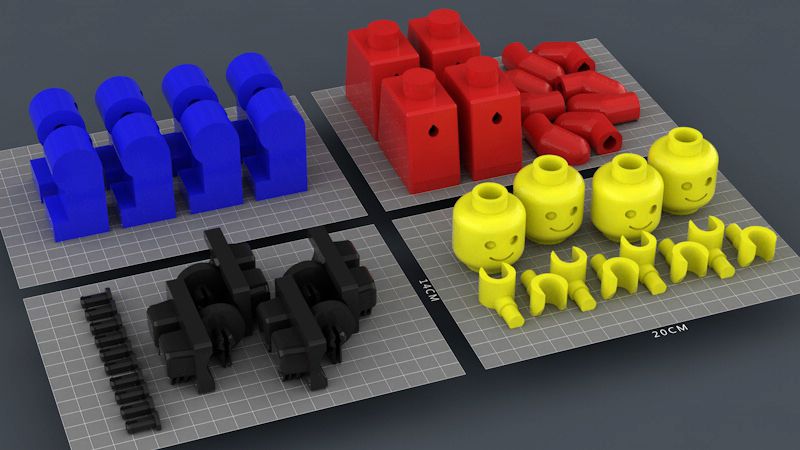 They are the next step in the development of 3D printers as a hobby. nine0003
5th place - Creality3D Ender 3
Many adults choose this 3D printer for its reliability and its ability to be deeply modified, but without them, the Ender 3 is an unremarkable printer with no distinguishing features. Comes as an assembly kit, so you may need an adult to help you get started. After assembly, the child will be able to figure out the printing process himself thanks to a large number of video tutorials and text instructions.
Key Features:
- Print Technology: FDM/FFF
- Print area: 220 x 220 x 250 mm
- Maximum extruder temperature: 255 °C
- Maximum table temperature: 100 °C
- Travel speed when printing: 10-60 mm/s
Pros:
Cons: nine0003
-
Assembly required
4th place - Phrozen Sonic 4K
Bright representative of SLA/DLP printers. Thanks to the 4K display, this printer has the highest printing accuracy among all printers from this top. But to use this accuracy, high-quality models are needed. Also, this 3D printer has software specially designed for it, so the child will not have any difficulties when working independently with the program. nine0003
Key Features:
- Print Technology: SLA/DLP
- Print area: 134 x 75 x 200 mm
- Display resolution: 4096 × 3072 (4K)
- Print speed: up to 90 mm/h
Pros:
-
Reliability
-
Small size nine0003
-
Outstanding accuracy
Cons:
3rd place - Wanhao Duplicator 6 Plus
This printer is a modification of the beloved Duplicator 6 printer. The modification consisted in the addition of auto-calibration and the function of resuming printing after a power outage. The latter can help save a part that took many hours to print. Thanks to the widespread use of connectors, the repair of this 3D printer will consist only in reinstalling spare parts, without the use of a soldering iron and other special tools. nine0003
Key Features:
- Print Technology: FDM/FFF
- Printing area: 200*200*180mm
- Maximum extruder temperature: 260 °C
- Maximum table temperature: 120 °C
- Print travel speed: 10-150mm/s
Pros:
-
Reliability nine0003
-
Ease of repair
-
strong frame
Cons:
-
Big weight
2nd place - Flashforge Adventurer 3
This model is quite close to the category of professional 3D printers. Because of this, in addition to excellent performance, Adventurer 3 has many additional features: Wi-Fi connectivity, a built-in camera that allows you to shoot amazing time-lapses, auto-calibration, a flexible removable table and a filament end sensor.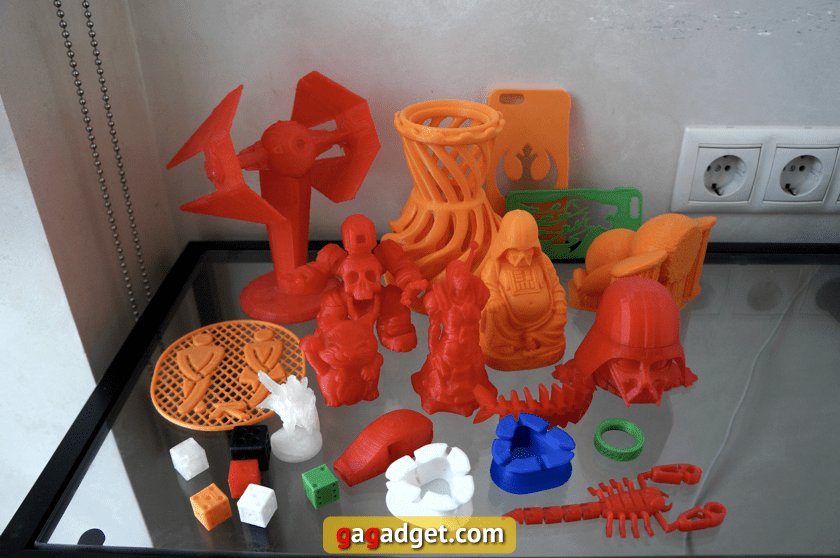 Despite its strict appearance, the printer has intuitive controls that even a child can figure out, not to mention teenagers and adults. nine0003
Key features:
- Print technology: FDM/FFF
- Print area: 150 x 150 x 150 mm
- Maximum extruder temperature: 240°C
- Maximum table temperature: 100 °C
- Print travel speed: 10-100mm/s
Pros:
Cons:
1st place - Anycubic Mega Pro
This printer deservedly takes first place in this top. It is an upgraded version of the previously mentioned Anycubic Mega-S. The most important improvements include the laser engraving module. That is, now, in addition to 3D printing, a CNC engraver will become available to you. With it, you can burn drawings and inscriptions on wood, paper and leather. Also worth noting is the auto-calibration sensor and the built-in multi-color printing function. nine0003
Key features:
- Print technology: FDM/FFF
- Printing area: 210 × 210 × 205 mm
- Maximum extruder temperature: 260°C
- Maximum table temperature: 100 °C
- Print travel speed: 10-100mm/s
Pros:
-
laser module nine0003
-
Versatility
-
High quality
Cons:
Free Shipping
Add to compare
Product added to compare Go
| Manufacturer | Anycubic |
Free shipping
Add to compare
Item added to compare Go
| Manufacturer | Phrozen |
Add to compare
Product added to compare Go
| Manufacturer | Creality |
Free shipping
Add to compare
Product added to compare Go
| Manufacturer | Flash Forge |
Free Shipping
Add to compare
Product added to compare Go
| Manufacturer | Wanhao |
Accessories and spare parts
Almost every 3D printer can be improved by changing some parts or using additional hardware. At the same time, sometimes it needs to be serviced and repaired. So that these actions do not take a lot of time, it is better to buy all the necessary spare parts in advance. Fortunately, regarding the cost of the printer, the total cost of spare parts will not be noticeable against its background. Next, we will look at everything you might need to repair and improve the printer, as well as accessories that make it easier to work with it. nine0003
Nozzles
The main part of the printer, on which the print quality depends, is the nozzle through which the plastic passes. Therefore, to improve print quality, you can replace the nozzle with a similar one, but with a smaller diameter. Basically there are two types of nozzles: short and long. The only difference between them is the length of the part outside the hotend. But keep in mind that manufacturers often make special nozzles designed for one 3D printer or for a model range. Therefore, it is important to choose a suitable nozzle, and only then choose the required diameter. If you want to have several nozzles at once for different tasks, then it is better to take 2 nozzles with a diameter of 0.4 mm for standard tasks, 3 nozzles with a diameter of 0.2-0.3 mm for more precise products and 2 nozzles with a diameter of 0.5 - 0.6 mm to save time on models, in which do not require much precision. nine0003
If you want to print with composite plastic (for example, filled with wood or metal), then you can not do without steel nozzles. Wood and metal-filled plastics are distinguished by their abrasiveness, that is, the ability to grind off the nozzle as it is printed. Since brass is a relatively weak metal, when printing with such plastics, the nozzle is only enough for 4-5 hours of printing. Then the hole will increase its diameter uncontrollably, causing the print quality to drop dramatically. nine0003
Sometimes the nozzle will become clogged due to dust settling on the plastic. Then you can either replace the nozzle, or purchase a set of drills to clean the nozzle. To use it, you need to heat the extruder, which contains the clogged nozzle, and carefully clean it from the outside. After that, you can continue printing.
Be careful: these drills are very fragile, so do not press hard on them. If they break, you can get burned! nine0003
Adhesive
In 3D printing, glue is used not only to glue objects together, but also to increase the adhesion of the plastic to the table. The success of 3D printing depends on how firmly the model is held on the table. But some plastics do not adhere well to the table, so many printers have heated tables. Sometimes even the heating of the table is not enough, so various adhesives are used. There are many options for adhesives: in the form of a spray, in the form of a “pencil” and others. It is better to use special compounds, as they are guaranteed to be safe and work with a large number of types of plastics. nine0003
Plastic drying
Any plastic has the ability to absorb moisture from the air to varying degrees. Such plastic will give out a low quality model. Therefore, it is very important to make sure that the filament is dry. If you have a large amount of plastics, it will be very difficult to constantly dry each of them. To facilitate this task, there is ESUN eBOX. With it, you can quickly dry the plastic and start printing without removing the filament from the device.
nine0069
Postprocessing
After printing the model on the SLA printer, it is necessary to remove excess resin from the surface of the model and illuminate the plastic so that it is completely cured. Some crafters use homemade UV lamps or even nail dryers. But they do not take into account the toxic fumes of the resin. Therefore, many companies have created special cameras for processing models. For example, Anycubic released their device called Wash&Cure. It allows you to clean the model without removing it from the table, thereby minimizing the likelihood of resin getting on the skin. Immediately after cleaning the model and removing it from the table, you can light the model in the same device. nine0003
Summing up
To summarize all of the above, we can highlight the best printers depending on your needs. If you want to show your child the world of 3D printing, then the FlashForge Finder 3D printer is the best choice. If a child is interested in 3D printing, but he wants something more, then FlyingBear Ghost 5 is the most suitable option. If you need a 3D printer as an addition to your hobby, then you can not do without Anycubic Mega Pro. And if your hobby needs more precision, then it's best to get Anycubic Photon Mono or Phrozen Sonic 4K, depending on the required quality. Also, do not forget about additional accessories that will help you use the 3D printer: spare nozzles, glue, a filament drying chamber and a device for post-processing parts printed on an SLA printer. nine0003
Tronxy X1 Simple Budget 3D Printer
Hello friends.
In the course of my work on my smart home project, I often came to the idea of buying a 3D printer - it would greatly facilitate various tasks - for example, printing holders, housings, altering power plugs and much more.
I didn’t have any strict requirements, I just wanted to see what 3D printing is at home, learn how to work with 3D models and solve a number of applied printing tasks. As my first 3D printer, I chose the budget model Tronxy X1, with a print area of 15 * 15 * 15 centimeters, support for PLA and ABS plastic and a print layer thickness of 0.1 mm. nine0003
Bought here - GearBest at the time of writing the review price - $129.99
Banggood ($188.88) Aliexpress ($145.20)
Delivery
free.
Everything is packed well, padded with anti-shock foam. The box is original, factory, just turned inside out so that the inscriptions are not visible.
The printer is supplied as a kit, the parts of which are laid out in compartments made of the same shockproof foam. nine0003
Everything is laid out in two “floors”, acrylic and aluminum body parts, fasteners, motors, belts, electronics, wires and everything else.
There is even a couple of screwdrivers and a wrench included, in principle, the printer can be assembled right out of the box, without the need for additional tools.
Packages with fasteners - labeled according to the diameter and length of screws, type and diameter of nuts.
Also included is a USB card reader with an 8 GB MicroSD card installed in it, which contains all the necessary documentation and software. nine0003
The contents of the flash drive are instructions for assembly and operation, a list of parts, ready-made models for test 3D printing. In the Software folder - the printer driver, the Repetier - Host editor for slicing and printing 3D models and a link to the site for downloading the latest version of the editor.
Assembly
The printer is assembled, even in the absence of experience, in 3-4 hours without haste. The instruction is in English, with pictures, everything is clear and intelligible. nine0003
Just do exactly what is shown in the instructions step by step.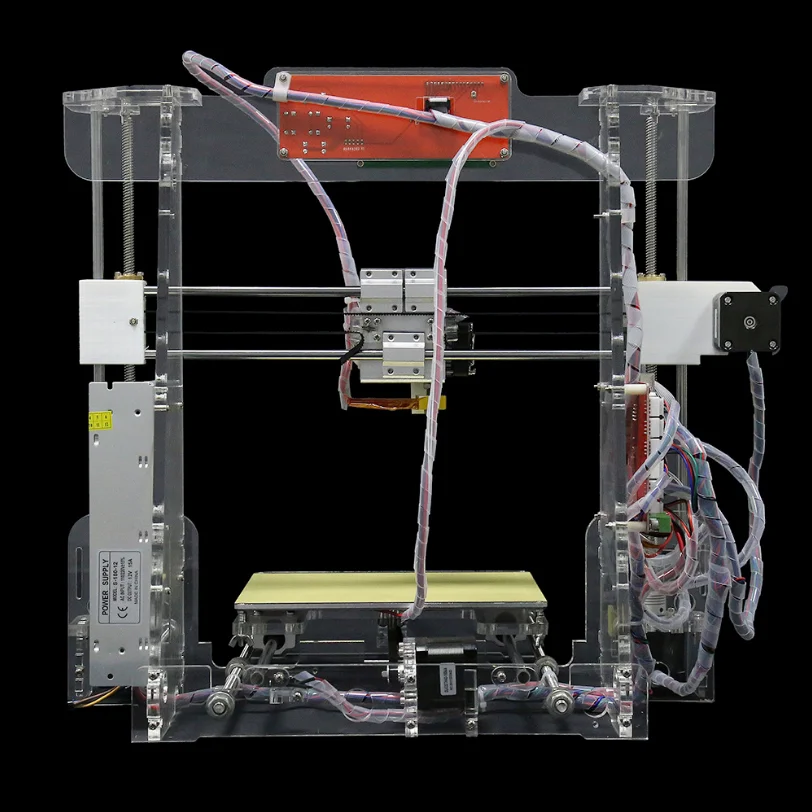
I want to draw your attention right away that when installing moving blocks, a significant backlash is noticeable, yet this is a budget model. I got rid of the backlash quite simply - I increased the outer diameter of the rollers using tape cut along the length. nine0003
This is how I corrected the backlash on the X and Z axes. The print head itself is not backlash.
When installing rubber belts, we put tension blocks with rollers not at the very end of the aluminum profiles, but closer. And after the belts are fixed on the printing table or head, we move the blocks to the end, pulling the belt and fixing the block with screws.
The last - step 26 - is the assembly of the control module - the motherboard is installed in the case. But before assembling the case, you need to connect all the wires, it is more convenient to do this at the very beginning of the module assembly.
The final assembly step is the wires. There are quite a few of them, and in order not to suffer, I immediately packed them into a complete plastic box-harness. It is enough to pack all the cables from the control module to the printer. nine0003
Finally the assembly is complete. I did not immediately begin to peel off the protective paper film from the acrylic, so as not to scratch the case during assembly.
The mysterious soul of a Chinese manufacturer. With a generous hand, he poured in fasteners, which was more than enough and there was still a lot left, but instead of one test rod of PLA plastic for printing, I got a bag of scraps. I don't even know how to adequately comment on this.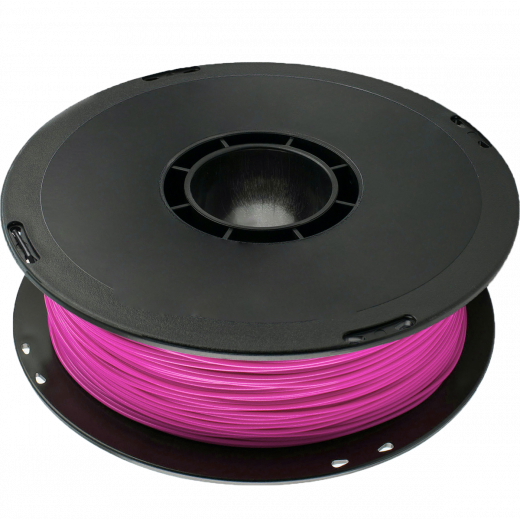 nine0003
Turning on the printer for the first time
Turning on the printer for the first time - to make sure that it works and everything went well.
Using the control keys and the screen, I set the print head to its initial position, making sure that all axis motors are connected correctly. The description of the menu and button actions is described in the attached file - Operation Instruction.
Next is the table setting. The print head is manually set slightly above the table, a limit switch is adjusted to this position. Further, also manually, under the head set to 0, the printing table is adjusted with the help of screws and springs, so that a sheet of paper passes between the nozzle and the table. For all angles.
Due to the fact that I got rod stubs instead of a whole piece, I had to limit myself to test printing. For it, I used an example gcode file from a flash drive. First, the printer warms up the nozzle, quite quickly. Printing begins with a small substrate, slightly larger in area than the object being created. The printing process looks fascinating, first the head prints the outer walls, then the inner reinforcing structure. nine0003
The first pancake, of course, is lumpy. Initially, I did not install the printer quite evenly, which caused the geometry to go wrong, and secondly, I had to manually push the pieces of the bar, because of which the continuity of the feed suffered, which instantly affected the part - in some places the head simply passed empty.
Immediately on the same stubs, I made another attempt - the printer is already level, and I got a little used to the rods, far from ideal, but much better. By the way, when printing, 60 watts of energy are consumed. It is necessary to pay attention to the gear of the bar - install it with a screw so that it does not slip and does not stop from excessive effort. nine0003
Comparison of parts of the first test, PLA plastic
First part, noticeably beveled in the direction of the vertical, gaps due to uneven feeding of plastic pieces. Lucky layers look pretty good.
View from the most unfortunate side of the test piece, large gaps, and then “sausages” of plastic that just started to come out into the air.
Filling of the upper part of the part, dips are also visible where the plastic was missing.
Re-printing on the right - the geometry is already normal, training on the first part makes it clear, there are much fewer gaps. nine0003
Normal transition from square to round section, upper part of the part is practically flawless.
Upper part, piece of plastic finished, a little short of half fill. But there is a part that managed to be printed - it looks good.
The most unfortunate side of the part - stopping the feed within a second immediately irreversibly destroys the part.
The side on the platen is perfectly smooth to the touch. By the way, it peels off the table without much effort. nine0003
Video version of the review up to this point
Experiments with ABS plastic
Of course, I heard that without a heated table, you should not expect a good result from ABS printing, but I thought that I’m not printing a space rocket, I'll try to sample half a kilo of ABS.
Experiments began not only with different types of slicers, but also with different table surfaces. Here are my attempts to print out an adapter for a euro socket for a triple Chinese plug of a Xiaomi gateway. nine0003
In the photo below (left photo is the lower part, right is the upper part) - from left to right is the Cura slicer, default settings on the complete table, only the heating temperature is set (except for the printer parameters), the Slic3r slicer - I already tweaked the settings a little printing on masking tape, and again Cura, already more thoughtful settings - the filling is raised to 30%, all maximum speeds are set to 40 mm / s - on masking tape with PVA glue applied to it (you have to wait for it to dry). While this is the best result, but certainly far from ideal. nine0003
The third contact performs its role - grounding, and contacts the grounding of the Euro socket. I planned to glue the adapter with a glue gun, but due to the protruding screws, it sat tight - I did not glue it.
Fits perfectly into the outlet, like a native, much better and more reliable than using a conventional adapter.
Next, I tried to print a wall bracket for a Dafang 1080p camera. On the left is the Slic3r slicer on masking tape, on the right are the Cura + PVA settings already tested on the adapter. In the first version, the round stand peeled off during the printing process, it came out much thinner than planned and curved, on the vertical part there are incomprehensible “sausages” of plastic at the top.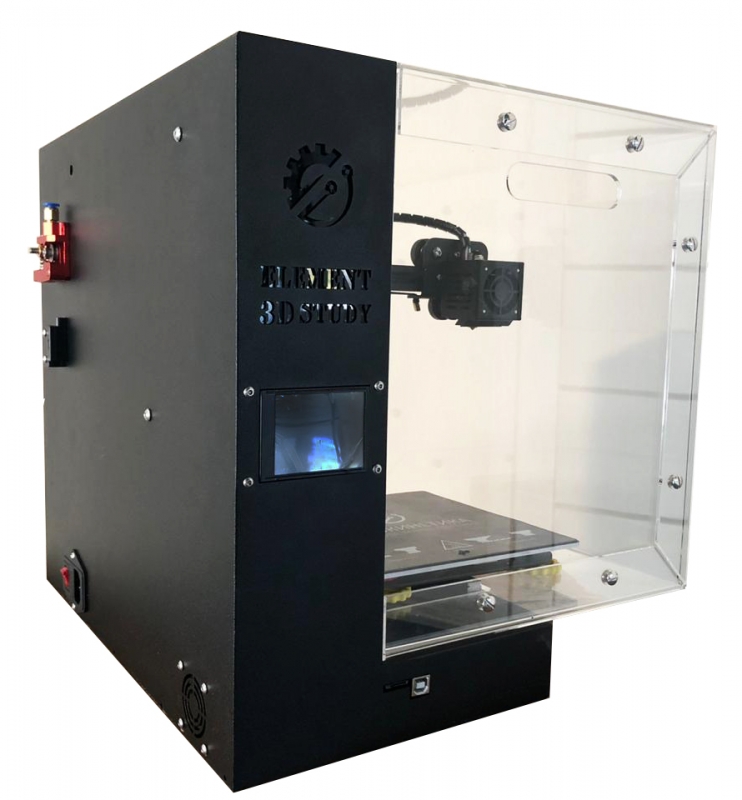 The second option turned out with a normal thickness, almost even, filling is better, there are “sausages” but much less. nine0003
View from the other side. The second option is much better, but far from ideal, although it can already be used. I hope I will be able to get rid of the strange gaps between the perimeter of the part and the inner fill, this is especially noticeable at the transition from the round platform to the vertical holder.
ABS plastic is strong enough and the second version of the bracket can be used for the intended purposes. nine0003
Conclusion
3D printing has turned out to be extremely exciting. The process of creating material objects can be observed for hours.
As for this model - a simple and budget option that requires finishing, but nevertheless earned immediately after assembly.