Dlp 3d printer plans
The DIY Resin SLA 3D Printers You Can Build From $20!
With the internet at just about everyone’s disposal, freely shared tutorials and videos have awakened many to the satisfying and rewarding nature of doing things yourself. DIY resin 3D printers have been a popular choice for creators for a while now, and for many different reasons.
Applying Decals & Transfers On ...
Please enable JavaScript
Applying Decals & Transfers On Miniature: Two Amazing Products Micro Sol and Set
- For FDM kits, we have another ranking of the best DIY 3D printers.
High quality 3D printers can be very pricey, and DIY SLA 3D printers have become more prevalent for those who want to get 3D printing, but don’t want to pay full price for a new machine.
While some of the best resin 3D printers are more affordable these days, this was not always the case. DIY resin 3D printers made waves in the 3D printing community from 2015-2018 as makers scrambled to avoid paying full price for a pre-assembled printer, and there are still those who choose to build their resin 3D printer today.
In this article, we will show why some people are designing and building their own 3D printers, as well as highlight some of the newer and more interesting DIY resin 3D printers from both professional and hobbyist creators that you can build yourself cheaply.
Uses of DIY SLA 3D printers
People from all walks of life have taken to building their own 3D printers.
Because resin 3D printers are known for speed and accuracy, they are ideal for both prototyping and creating working molds and projects for a variety of applications.
For example, resin 3D printers have been used in dentistry to save time and money creating dental models, and these costs are further cut with DIY resin 3D printers over pre-assembled models that cost much more.
For personal use, resin 3D printers are great for projects with smooth surfaces and intricate detailing, like jewelry, toys, and minifigures.
Why Build a Resin 3D Printer?
Just like computers, bikes, furniture, and even cars; people are often keen to build their own home additions and tech, provided they have both the time and the skill.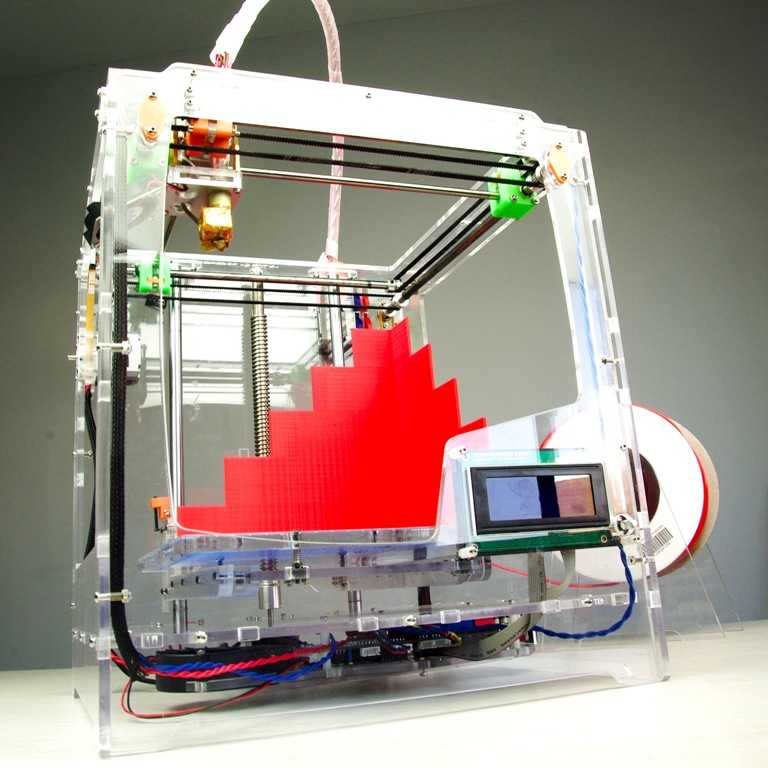 3D printers are no exception.
Of course, experience and skill is recommended for anyone who wants to try, but anyone willing to put the time and effort in will find DIY resin 3D printing to be a rewarding and worthwhile experience.
Resin printers solidify UV resins with powerful light sources to create models, parts, and prototypes, and are known mainly for their high resolution and speed.
While some resin 3D printers have fallen dramatically in price in recent years, DIY SLA printers can cost as little as $20 in parts. While the time and effort are costs themselves, that’s a price tag as of yet unbeaten in the world of DIY resin 3D printers.
Features such as as build plate sizes, portability, durability, and material compatibility are all customizable with a DIY build. Beyond simple modding, DIY 3D printers can be altered mid-build to suit you.
The best DIY resin 3D printers you can build
Peopoly Moai 130
- Price: $1,395 — Available on Matterhackers here
- Build volume: 130 x 130 x 180 mm
Born from a Kickstarter campaign in 2017, the Moai is a DIY resin 3D printer that found a huge backing in a short time.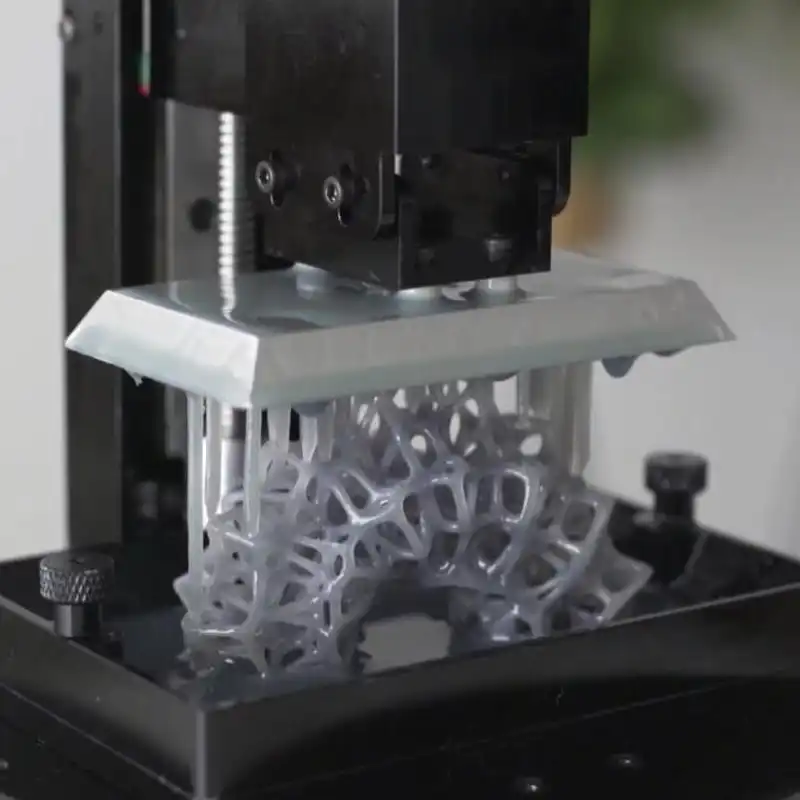 Available as a DIY kit or fully-assembled, the Moai is advertised as an affordable resin 3D printer kit for those looking for large, accurate builds.
The Peopoly Moai is also praised for its simplicity in both construction and design. Its compatibility with third-party materials and easy modification and tweaking possibilities make it popular with engineers who know exactly what they want.
Since its initial release, several versions of the Moai have been released after a few upgrades, including more durable frames and accessories such as upgraded build plates.
While still a DIY 3D printer, the Moai has a large following of many users with varying levels of experience and expertise. This means that peer-to-peer support, advice, and information is easy to come by and very useful for anyone who needs it.
Despite the Moai’s popularity, many users have reported the enclosed build space as being very limiting for larger projects, and have noted that the lack of a built-in air filtration or sealing systems as potentially harmful to a project’s success.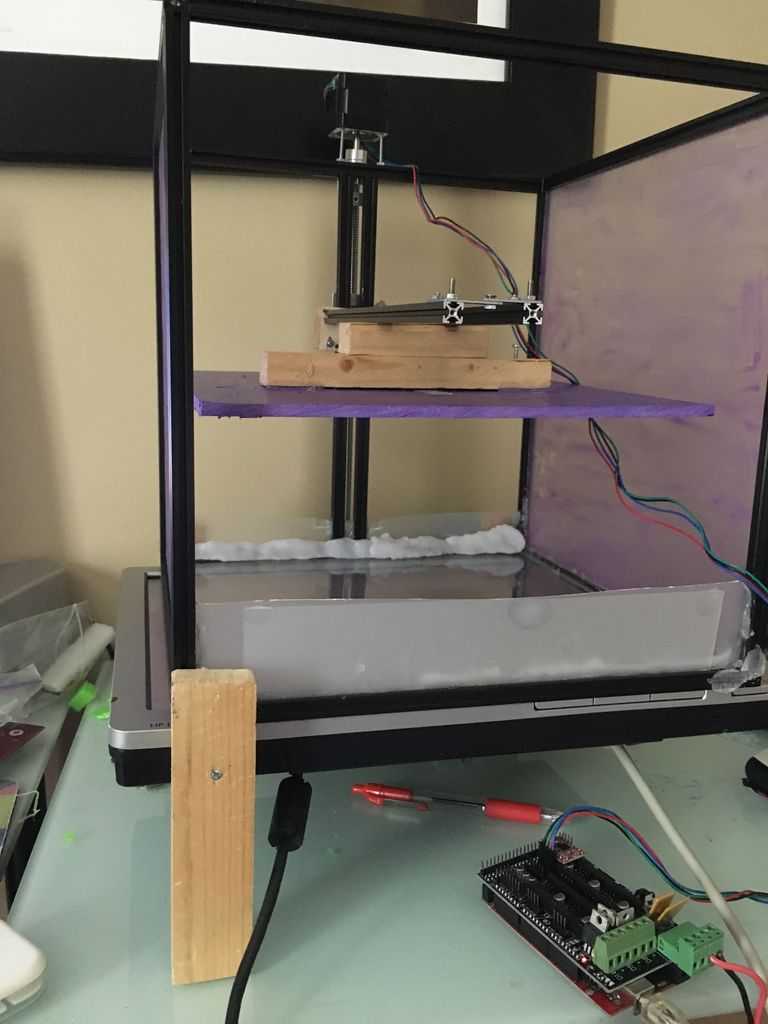
For those looking for a larger resin 3D printer, Peopoly released the much larger Peopoly Phenom in 2019.
The Peopoly Moai is capable of a layer resolution of up to 5 microns, which is incredibly accurate, far more so than any pre-assembled 3D printer at this price. Its compatibility with third-party resins also means that cheaper materials can be used to further cut printing costs.
Beyond hobbyists, the Moai is used by researchers for prototypes, and it can be used with biocompatible materials for medical uses such as dental 3D printing.
Overall, the Peopoly Moai is seen as a great (if messy) first step in the world of DIY SLA 3D printing. With enough time, work, and community advice, even newcomers will find themselves printing large, highly detailed resin models like pros.
For more commercially available resin printers, read our resin 3D printer buyer’s guide
For larger resin printers, read our buyer’s guide to large resin 3D printers
Not Just a Professional’s Game: Resin 3D printer kits you can build for cheap
Paulg100’s DIY SLA Printer Build
DIY resin printers are not just projects for professional engineers with crowd-funded goals, anyone with the right skillset and time can make their own tech.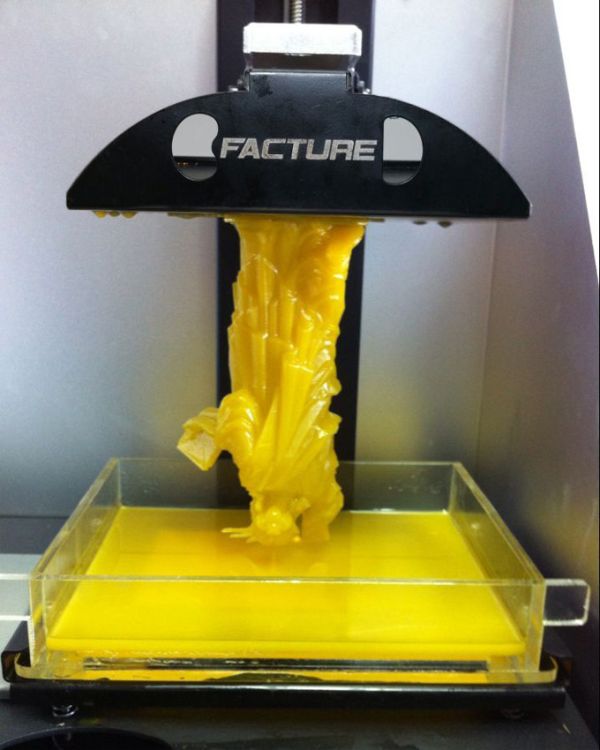
Sites like Reddit, Twitter, and YouTube are full of creators eager to show off their homemade resin 3D printers. Some are more detailed than others, but posts such as this DIY resin printer build by XSimulator user Paulg100 are must-reads for those looking to build their own resin printer.
Paulg100, a dental laboratory owner, uses biocompatible materials with their DIY SLA printer for dental work, and has actively encouraged others to follow their listing. Thanks to the impressive accuracy of his DIY resin printer, he’s able to create remarkably intricate designs on a very tiny scale, something he was unable to do before.
With this build, you too can create complex and accurate prints of anything you like for a fraction of the cost of a pre-assembled 3D printer. If that doesn’t excite you, then we don’t know what will!
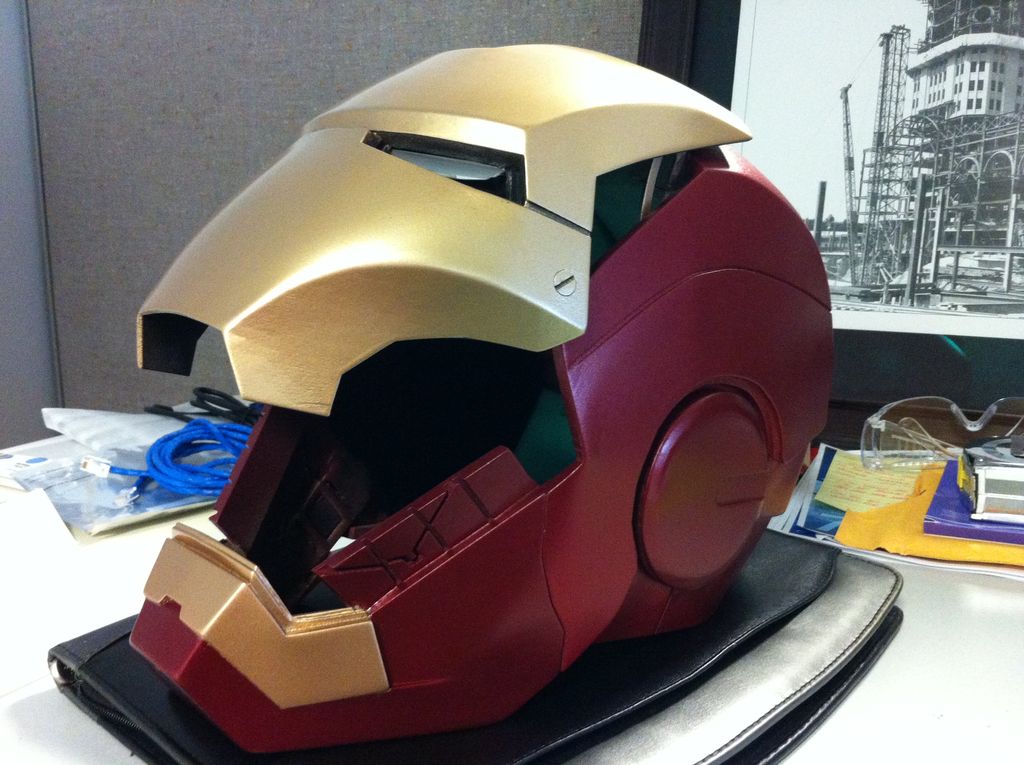
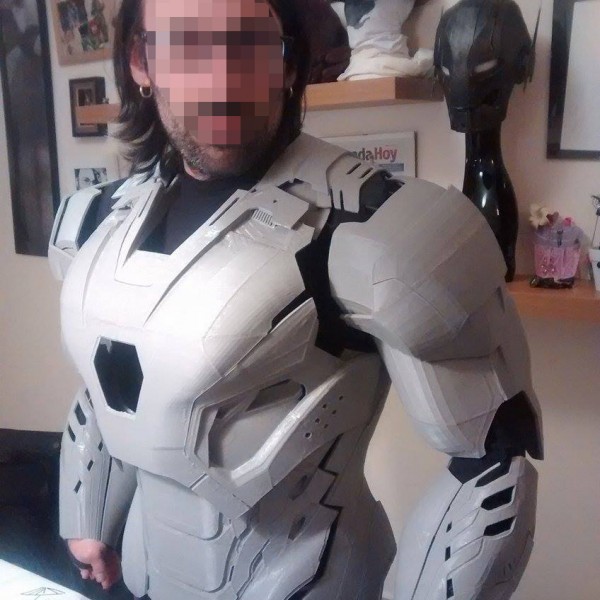
From images seen of both practical and cool projects made with this unnamed resin printer, the accuracy and detail look fantastic for the price.
For anyone looking for a challenging build that yields impressive results, this is a DIY 3D printer that should not be overlooked.
Arduino Uno: The $10 DIY Resin Printer
For an impressively cheap DIY SLA printer, Build Your Own SLA user mystamo outlines here their build for a DIY SLA printer made of very cheap parts.
While the concept appears too good to be true, the video below shows the finished project in action.
Peer reviews have also shown this to be a very impressive, if rudimentary, DIY resin printer. While mainly built as a resin test, the speed and reliability of this Arduino Uno build are notably eyebrow-raising given its tiny cost.
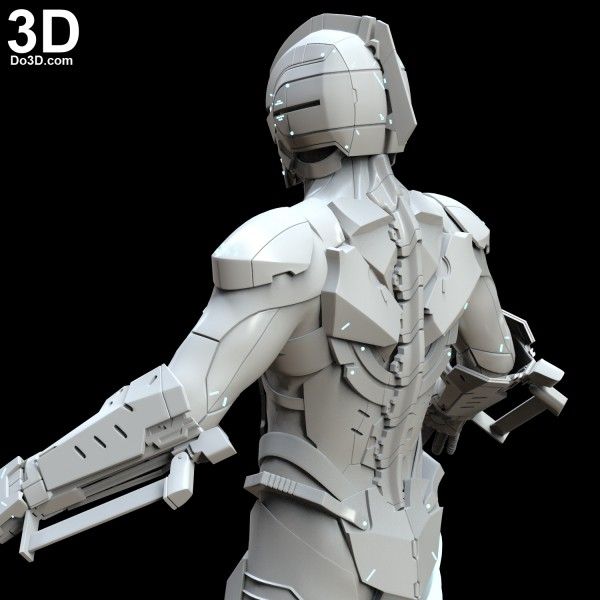
TristramBudel DIY SLA Printer
Wanting to spread the gift of 3D printing as far as possible, online builder TristramBudel designed their own DIY SLA 3D printer to share with peers.
As the name suggests, this build prioritizes resolution without sacrificing the speed that resin printers are known for.
Since its creation, this DIY 3D printer has gained a good following of fellow creators looking to sell their ideas, with one reviewer even calling it ‘a piece of 3D printing history.’
3D printing company autum3D even based their industrial DLP 3D printers on the build, showing just how much of an impact these DIY 3D printers can have on the 3D printing industry as well as the larger community.
Related posts:
- Best resin 3D printers
- Large resin 3D printers
- Resin SLA 3D slicers
- Best resin curing stations
Guide to Resin 3D Printers
There are many 3D printing processes on the market. Getting familiar with the nuances of each helps to clarify what you can expect from final prints to ultimately decide which technology is suitable for your particular application.
Stereolithography (SLA) and digital light processing (DLP) 3D printing are the two most common processes for resin 3D printing. Resin printers are popular for producing high-accuracy, isotropic, and watertight prototypes and parts in a range of advanced materials with fine features and smooth surface finish.
While these technologies were once complex and cost-prohibitive, today’s small-format desktop SLA and DLP resin 3D printers produce industrial-quality parts at an affordable price point and with unmatched versatility thanks to a wide range of materials.
Both processes work by selectively exposing liquid resin to a light source—SLA a laser, DLP a projector—to form very thin solid layers of plastic that stack up to create a solid object. While very similar in principle, the two technologies can produce significantly varying outputs.
In this in-depth guide, we walk through the details of the two resin 3D printing processes and explore how they compare in terms of resolution, accuracy, build volume, speed, workflow, and more.
Sample part
See and feel Formlabs quality firsthand. We’ll ship a free sample part to your office.
Request a Free Sample Part
Desktop SLA 3D printers contain a resin tank with a transparent base and non-stick surface, which serves as a substrate for the liquid resin to cure against, allowing for the gentle detachment of newly-formed layers.
The printing process starts as the build platform descends into a resin tank, leaving space equal to the layer height in between the build platform, or the last completed layer, and the bottom of the tank. A laser points at two mirror galvanometers, which direct the light to the correct coordinates on a series of mirrors, focusing the light upward through the bottom of the tank and curing a layer of resin.
The cured layer then gets separated from the bottom of the tank and the build platform moves up to let fresh resin flow beneath. The process repeats until the print is complete.
Low Force Stereolithography (LFS) technology, used by the Form 3+ and Form 3L, is the next phase in SLA 3D printing.
In LFS 3D printers, the optics are enclosed in a Light Processing Unit (LPU). Within the LPU, a galvanometer positions the high-density laser beam in the Y direction, passes it through a spatial filter, and directs it to a fold mirror and parabolic mirror to consistently deliver the beam perpendicular to the build plane and ensure accurate, repeatable prints.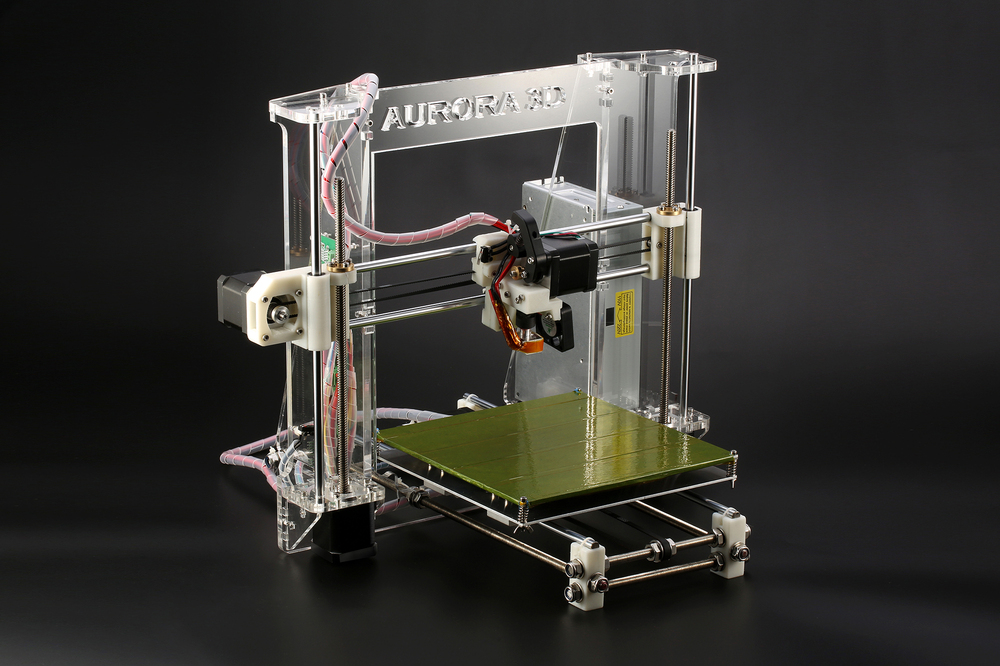
As the LPU moves in the X direction, the printed part is gently peeled away from the flexible bottom of the tank, which drastically reduces the forces exerted on parts during the print process.
LFS 3D printing drastically reduces the forces exerted on parts during the print process, using a flexible tank and linear illumination to deliver incredible surface quality and print accuracy.
This advanced form of stereolithography delivers vastly improved surface quality and print accuracy. Lower print forces also allow for light-touch support structures that tear away with ease, and the process opens up a wide range of possibilities for future development of advanced, production-ready materials.
White Paper
Looking for a 3D printer to realize your 3D models in high resolution? Download our white paper to learn how SLA printing works and why it's the most popular 3D printing process for creating models with incredible details.
Download the White Paper
Just like their SLA counterparts, desktop DLP 3D printers are built around a resin tank with transparent bottom and a build platform that descends into a resin tank to create parts upside down, layer by layer.
The difference is the light source. DLP 3D printers use a digital projector screen to flash an image of a layer across the entire platform, curing all points simultaneously.
The light is reflected on a Digital Micromirror Device (DMD), a dynamic mask consisting of microscopic-size mirrors laid out in a matrix on a semiconductor chip. Rapidly toggling these tiny mirrors between lens(es) that direct the light towards the bottom of the tank or a heat sink defines the coordinates where the liquid resin cures within the given layer.
Because the projector is a digital screen, the image of each layer is composed of square pixels, resulting in a three-dimensional layer formed from small rectangular cubes called voxels.
Resolution shows up more often than any other value in 3D printer spec sheets, but it’s also a common ground for confusion. The basic units of the SLA and DLP processes are different shapes, making it difficult to compare the different machines by numerical specifications alone.
In 3D printing, there are three dimensions to consider: the two planar 2D dimensions (X and Y) and the third vertical Z dimension that makes 3D printing.
Z resolution is defined by the layer thicknesses a 3D printer can produce. Resin 3D printers like SLA and DLP offer some of the finest Z resolutions—thinnest layers—of all 3D printing processes and users can normally choose from a range of layer height options between 25-300 microns, allowing designers to strike a balance between detail and speed.
In DLP 3D printing, XY resolution is defined by the pixel size, the smallest feature the projector can reproduce within a single layer. This depends on the resolution of the projector, the most common being full HD (1080p), and its distance from the optical window. As a result, most desktop DLP 3D printers have a fixed XY resolution, generally between 35 to 100 microns.
For SLA 3D printers, XY resolution is a combination of the laser’s spot size and the increments by which the laser beam can be controlled. For example, the Form 3 LFS 3D printer features a laser with an 85 micron spot size, but because of the constant line scanning process, the laser can move in smaller increments and the printer can consistently deliver parts with 25 micron XY resolution.
However, resolution in itself is often just a vanity metric. It offers some indication, but it doesn’t necessarily correlate directly with accuracy, precision, and print quality.
Learn more about resolution in 3D printing in our in-depth guide.
Because 3D printing is an additive process, each layer introduces an opportunity for inaccuracy, and the process by which layers are formed affects the level of precision, defined as the repeatability of the accuracy of each layer.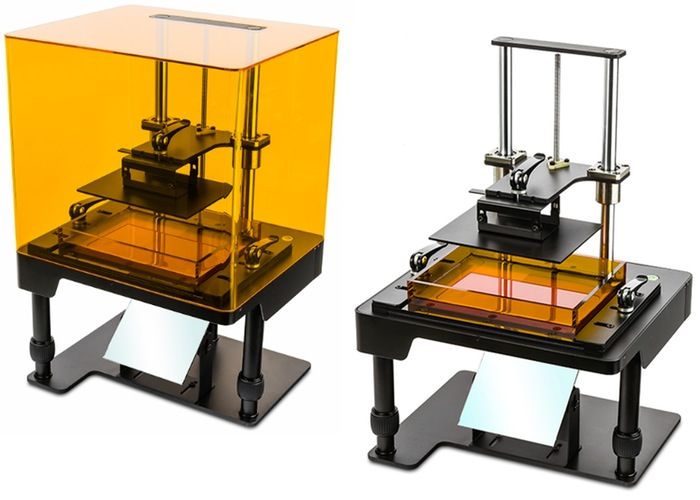 Accuracy and precision depend on many different factors: 3D printing process, materials, software settings, post-processing, and more.
In general, both SLA and DLP resin 3D printers are among the most accurate and precise 3D printing processes. Differences in accuracy and precision are often better explained by the differences between machines by various manufacturers than differences between the technologies themselves.
For example, entry-level SLA or DLP printers might use off-the-shelf projectors, lasers, or galvanometers, and their manufacturers will try to get the best performance possible out of these parts. Professional SLA and DLP 3D printers, like the Formlabs Form 3, feature a custom optical system adapted to the specifications required by professional customer applications.
Accuracy and precision are crucial for parts like dental splints (left) and surgical guides (right).
Calibration is also crucial. With DLP projectors, manufacturers need to deal with the non-uniform light distribution on the build plane and optical distortion of the lenses—meaning that pixels in the middle are not the same size or shape as pixels on the edges. SLA 3D printers use the same light source for every part of the print, which means it’s uniform by definition, but they still require extensive calibration to account for distortions.
Even a 3D printer with the highest quality components and degree of calibration can produce widely varying results depending on the material. Different resins require optimized material settings to perform as intended, which might not be available for off-the-shelf materials or resins that are not thoroughly tested with a specific 3D printer model.
The takeaway? Accuracy and precision are almost impossible to understand from the technical specifications alone. Ultimately, the best way to evaluate a 3D printer is to inspect real parts or ask the manufacturer to create a test print of one of your own designs.
With DLP 3D printers, there’s a direct trade-off between resolution and build volume. The resolution depends on the projector, which defines the number of pixels/voxels available. If one moves the projector closer to the optical window, the pixels get smaller, which increases the resolution, but limits the available build area.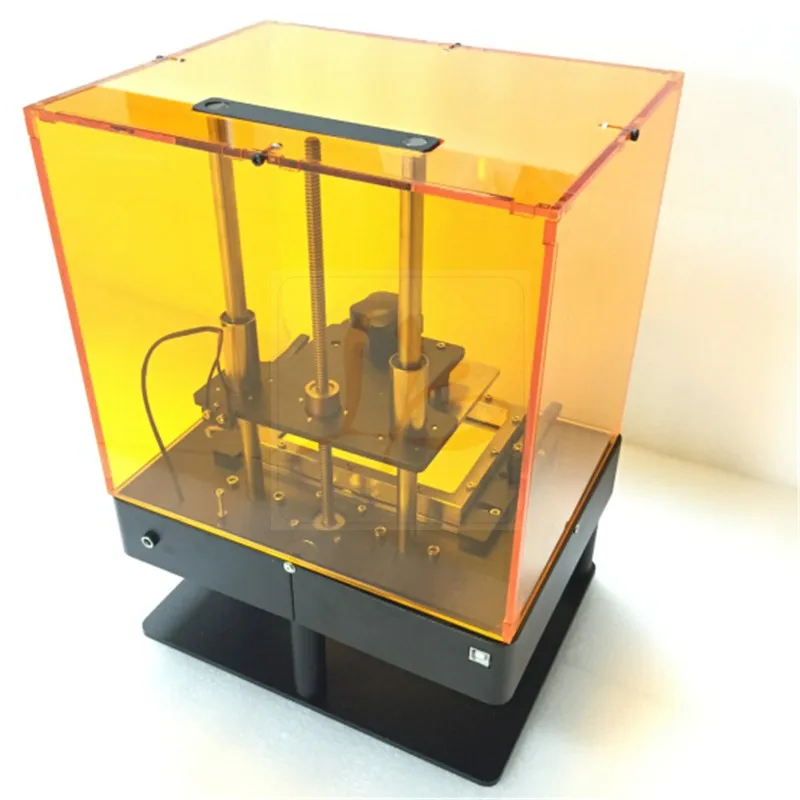
Some manufacturers stack multiple projectors next to each other or use a high-definition 4K projector to increase the build volume, but this leads to substantially higher costs that often price these machines out of the desktop market.
As a result, DLP 3D printers are generally optimized for specific use cases. Some have a smaller build volume and offer high resolution to produce small, detailed pieces like jewelry, while others can produce bigger parts but at a lower resolution.
The stereolithography process is inherently more scalable, since an SLA 3D printer’s build volume is completely independent of the resolution of the print. A single print can be any size and any resolution at any location within the build area. This makes it possible to 3D print large parts at high resolution or a large batch of detailed small parts to increase throughput with the same machine.
The other main barrier to increasing build volume in both SLA and DLP 3D printers is the peel force. When printing larger parts, the forces exerted on the parts increase exponentially as a cured layer separates from the tank.
In LFS 3D printing, the flexible film at the base of the resin tank gently peels away as the build platform pulls the part up, significantly reducing the stress on the part. This unique feature has made it possible to substantially increase the build volume for the first accessible large format SLA 3D printer, the Form 3L.
The Form 3L is the first affordable large format SLA 3D printer with a build volume of 30 cm x 33.5 cm x 20 cm.
Webinar
Want to learn more about the Form 3L and Form 3BL ecosystem, and the new large format post-processing machines?
In this demo, Kyle and Chris will expain how to navigate the Form 3L end-to-end workflow, including post-processing.
Watch Now
SLA and DLP resin 3D printers both known for creating parts with the smoothest surface finish of all 3D printing processes.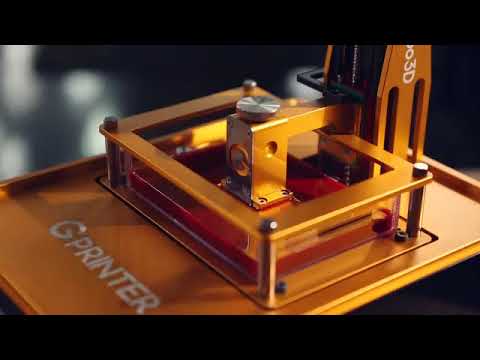 When we describe the differences, in most cases these are only visible on tiny parts or highly detailed models.
Because objects are made of layers in 3D printing, 3D prints often have visible, horizontal layer lines. However, because DLP renders images using rectangular voxels, there is also an effect of vertical voxel lines.
DLP 3D printers render images using rectangular voxels, which causes an effect of vertical voxel lines. In this image, see the vertical voxel lines as they appear naturally on the left, and then outlined to more easily identify on the right.
Because the unit is rectangular, voxels also have an effect on curved edges. Think of building a round shape out of LEGO bricks—the edges will appear stepped on both the Z axis and the X-Y plane.
The rectangular shape of voxels makes curved edges appear stepped. Removing the appearance of voxel and layer lines requires post-processing, such as sanding.
In LFS 3D printing, layer lines are close to invisible.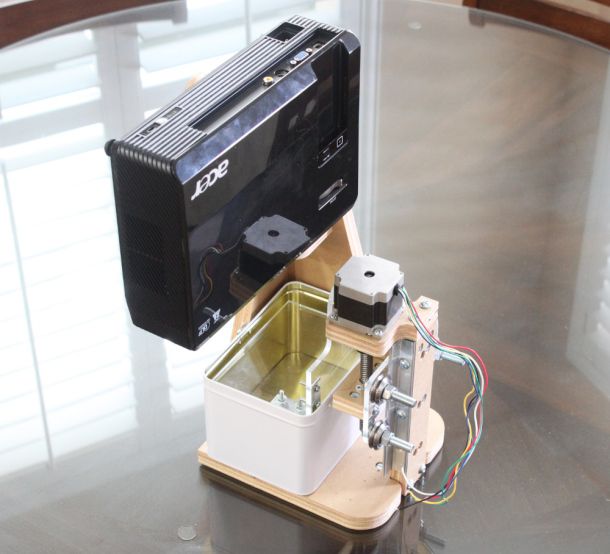 As a result, surface roughness is reduced, which ultimately leads to smooth surfaces, and for clear materials, more translucent parts.
When thinking about speed in 3D printing, it’s important to consider not just raw print speed, but also throughput.
Raw print speed for SLA and DLP resin 3D printers is comparable in general. As the projector exposes each entire layer all at once, print speed in DLP 3D printing is uniform and depends only on the height of the build, whereas, SLA 3D printers draw out each part with a laser. As a rule of thumb, this results in SLA 3D printers being comparable or faster when printing small or medium-size single parts, while DLP 3D printers are faster to print large, fully dense prints, or builds with multiple parts that fill up much of the platform.
But once again, it’s worth considering the trade-off between resolution and build volume for DLP printers. A small DLP 3D printer can print a small part or a (small) batch of smaller parts fast, at high resolution, but the build volume limits the part size and the throughput. A different machine with a larger build volume can print larger parts or a batch of smaller parts faster, but at a lower resolution than SLA.
SLA 3D printers can produce all of these options in one machine and offer the user the freedom to decide whether she wants to optimize for resolution, speed, or throughput.
SLA 3D printers offer a larger build volume, allowing users to batch parts and print overnight to increase throughput.
Speed can also depend on the material choice. Printing four times faster than Formlabs standard materials, Draft Resin fast-printing resin that is ideal for initial prototypes, rapid iterations, as well as dental and orthodontic models. From fast print initiation speeds to minimal support removal, wash, and cure times, Draft Resin has an optimized workflow to truly maximize efficiency.
100 microns | 200 microns |
|---|---|
100 microns | 200 microns |
|---|---|
100 microns | 200 microns |
|---|---|
Interactive
Try our interactive ROI tool to see how much time and cost you can save when 3D printing on Formlabs 3D printers.
Calculate Your Savings
Just like with accuracy and precision, the workflow and available materials differ more from machine to machine than technology to technology.
Most SLA and DLP 3D printers are “plug and play,” with easily swappable build platforms and resin tanks. Some more advanced models also come with a cartridge system to automatically refill the tank with liquid resin, which requires less attention and facilitates printing overnight.
Some printers come with proprietary software to prepare 3D models for printing, such as PreForm for Formlabs SLA 3D printers, while other manufacturers offer off-the-shelf solutions. Features differ by software tool, for example, PreForm offers one-click print setup, powerful manual controls to optimize support density and size, adaptive layer thickness, or functions to save material and time. Luckily, the software can be easy to download and test before purchasing a 3D printer.
Resin 3D printers offer a variety of materials for a wide range of applications.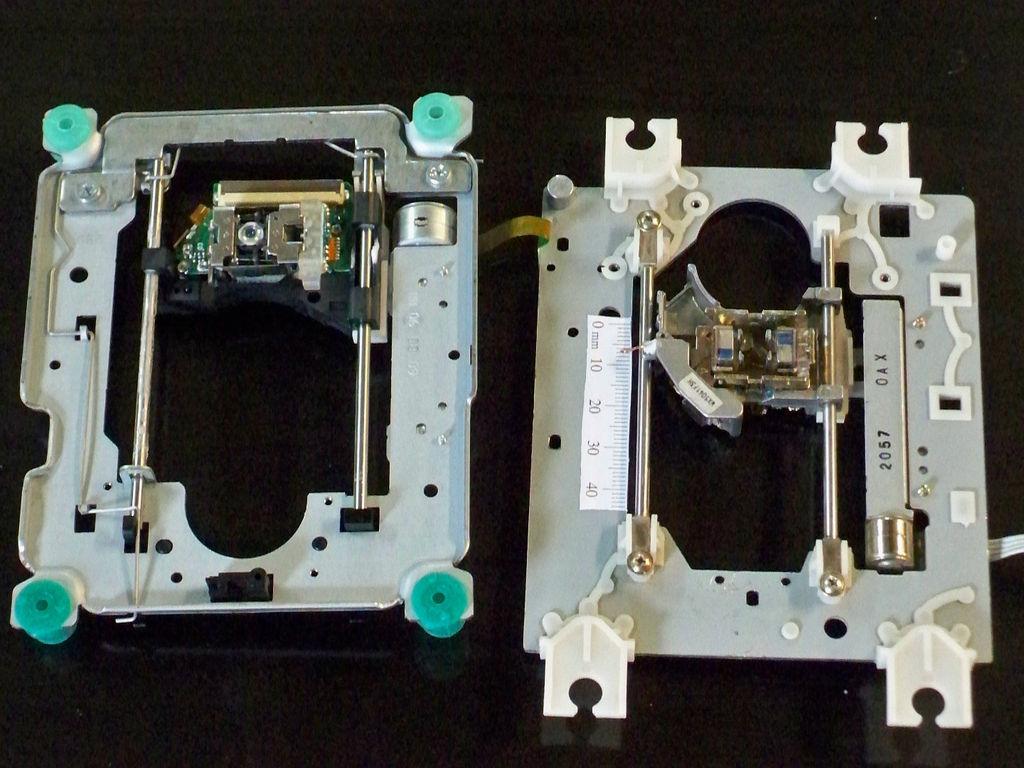
One of the most significant benefits of resin 3D printing is the variety of materials that make it possible to create parts for diverse applications. Resins can feature a wide range of formulation configurations: materials can be soft or hard, heavily filled with secondary materials like glass and ceramic, or imbued with mechanical properties like high heat deflection temperature or impact resistance.
However, the range of supported material options depend on the 3D printer model, so we recommend inquiring with the manufacturer before purchase.
Parts printed with both SLA and DLP technologies require post-processing after printing. First, the parts need to be washed in a solvent to remove excess resin. Some functional materials like engineering or biocompatible parts also require post-curing. For SLA 3D printers, Formlabs offers solutions to automate these steps, saving time and effort.
At last, 3D printed parts printed on supports require these structures to be removed, a manual process that is similar for both SLA and DLP 3D printers.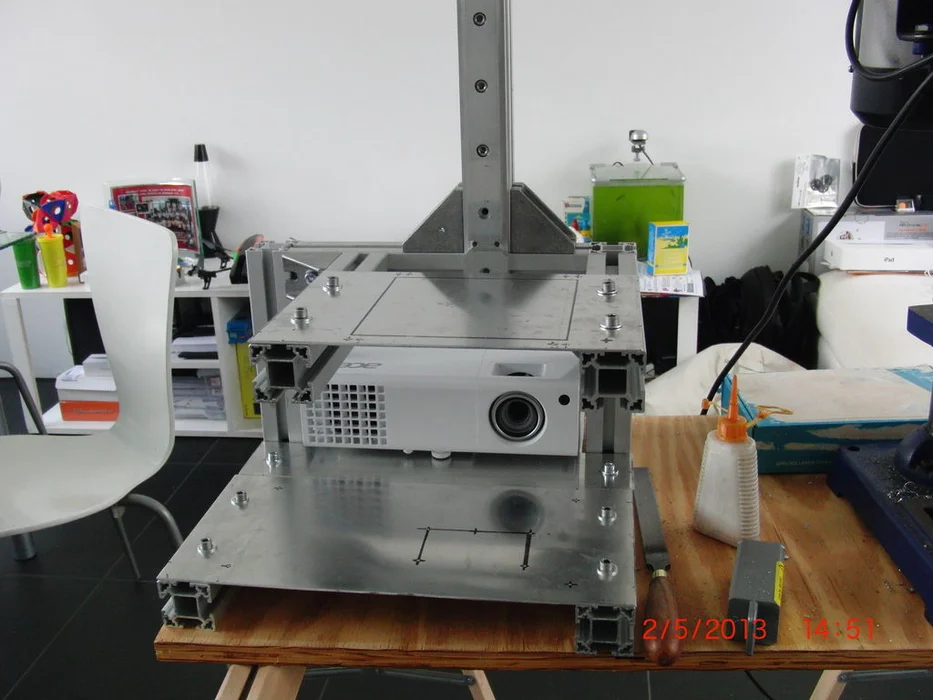 LFS 3D printing simplifies this step by offering light-touch support structures that use very small touchpoints to enable easy removal with minimal support marks left behind.
Interactive
Need some help figuring out which 3D printing material you should choose? Our new interactive material wizard helps you make the right material decisions based on your application and the properties you care the most about from our growing library of resins.
Recommend Me a Material
After sorting out the differences in technology and outcomes, we hope it’s much easier to select a resin 3D printer that best matches your workflow and output needs.
To explore the next generation of SLA 3D printing, learn more about the Form 3 and Form 3L LFS 3D printers.
Curious to see the quality firsthand? Order a sample part shipped to your office.
Request a Free Sample Part
homemade LCD (DLP|DUP) printer
Hello everyone! a year and a half has passed since I bought Chinese prusha, then it mutated into a huge H-bot made of plywood and a Leroy Merlin profile, 500x500x700 in size and with a print area of 300x300x280, then it was assembled from a structural profile (what a thrill compared to profile from Leroy) small relative to the previous H-bot'a drygost in mechanics reminiscent of Up Plus, mz3d, Felix and the like (which successfully works at my work).
And now it's time to break away from FDM and try something new, I've been looking at DLP printers with a projector for a long time, but it's too expensive for me to buy a thing with work and parameters of which I'm not familiar with (radiation, lumens, etc.) and something else modify it at your own risk, and even for 40-60 thousand.
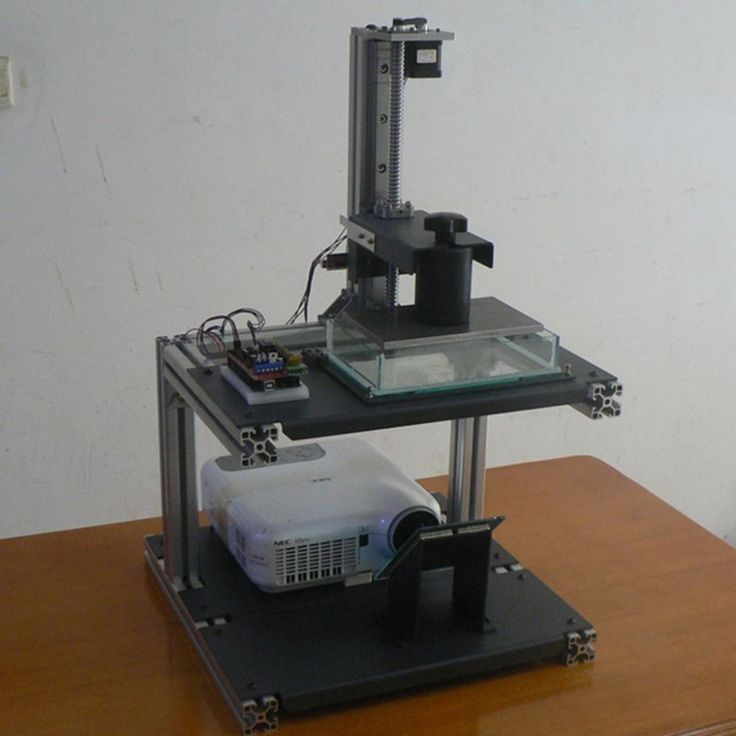
Then I accidentally saw a video of how a bourgeois made a printer from a screen from a raspberry and UV LEDs and 'lit up', then I found the so-called DUP (DirectUvPrint) YHD-101 and KLD-LCD 1260 from the Chinese, and while I was doing the project, I studied some of the nuances The right screen and waiting for some spare parts came out Wanhao D7, I took an approximate design from him and the previous two brothers.
I'll tell you a little if someone wants to assemble something similar to remove some of the questions, and in general to show that the technology works and you can not buy a ready-made printer, but do everything yourself or almost everything if you're too lazy ;-) at the same time I will take part in the contest # homemade printer
The circuit looks something like this:
only then I had to put a step down from 12 to 5 volts to power the screen, I couldn’t start it from the servo pins and another nuance: if you put a diode with a power of more than 10 watts, then between the ramps and a diode should be a step-up converter up to 32 volts.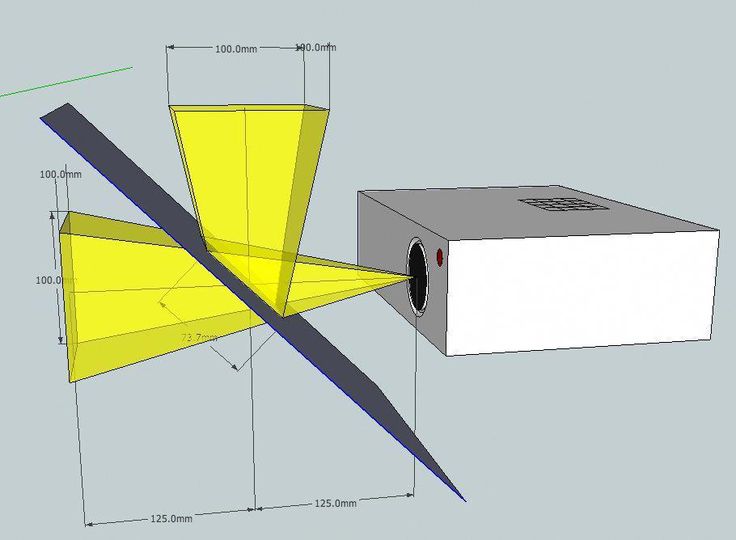
this is how the screen with controller and adapter looks like:
The screen acts as a 'mask' projector. It displays a slice of the model layer in white on a black background, the white area lets UV through, and the black one does not, thus forming the desired picture that allows the liquid polymer to harden only where it is needed.
Unfortunately, sellers refuse to sell such 'ready-made' kits until you buy a printer from them, yes, there are similar kits, but they are not prepared for installation in a printer, you need to remove the backlight and protective films from them, one person bought such a screen at the robotic forum and in the end, he cracked when he tried to remove the film and backlight (http://roboforum.ru/forum107/topic17271.html)
Alas, I did not find analogues where I would not have to shamanize with the removal of backlight, polarizing films, etc. and after much persuasion, one seller agreed to sell me a ready-made kit, and then he began to sell to everyone, if someone wants to assemble something similar, here is the link:
https://ru.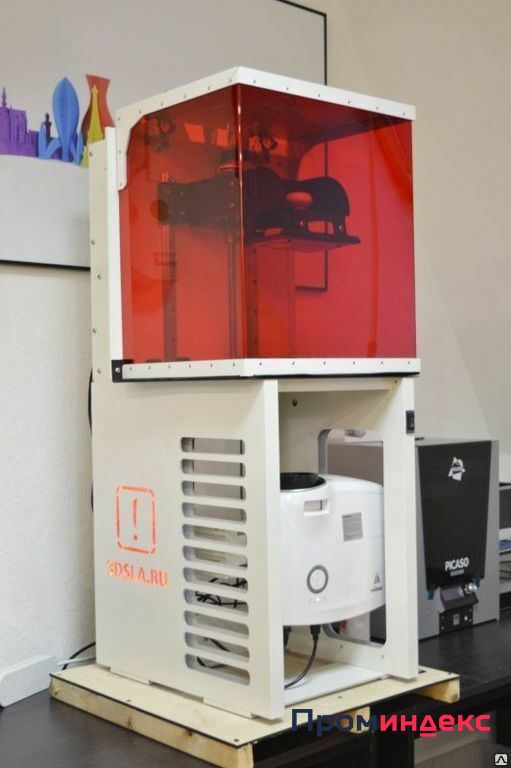 aliexpress.com/store/product/8- 9-inches-60-watts-Big-size-192-120-150mm-wifi-supported-Proniks-Sla-3d-Printer/1190493_32801422811.html
I really didn't want to bother with the polymer bath so I just bought it :
I ordered the top cover, beam and platform in local metalworking (laser cutting + bending), stainless steel platform, according to the design I did something like Wanghao D7:
Ultraviolet LED 395nm 30w, requires 32 volts and eats 1 ampere, consider this when you will choose a step-up converter, it is connected to the output of blowing the part on the ramp, switching on and off is regulated by the commands M106 and M107 radiator teeth.
I decided to make the body from a structural aluminum profile, (assembly of the factory with delivery problems) and close the sides with plywood:
Stainless steel casing (pre-furnace sheet), bought in a stove and fireplace store, turned out to be quite thick 0. 8mm, it turned out a little clumsy :
further assembly:
to keep the screen in the opening, glass was purchased (with a sticky side) the same as they put on these printers:
then my patience began to run out and I did not suffer with even cutting of plywood and began collective farming - blunder, I wanted to quickly collect and run everything:
I apologize for the quality of the photo, I also bought HDMI and USB extension cables for mounting in a case like these: just, at 34 volts, 1 ampere gives out:
you can put something else, it looks more reliable:
view of the bath from above:
finally the printer
ready:
Alas, the quality of the printout is not very good yet, either the polymer roofing felts are not very good, or the skis do not go;)
small thin walls remain on the film, and not on the platform, although the duration of exposure helps against this, also time, solid parts are rather reluctant to peel off the film + I noticed a small wobble, but this is already my jamb, the budget began to creep up to the finished printer (especially due to the purchase of a bath), but I had to listen to Dima (dagov) and put 2 rails and not one.
I apologize in advance for the quality of the photo and the setting of the light, we don’t know how otherwise8) and the color and transparency of the polymer add problems: samples of other polymers, setting tests, etc.
if you have any questions or advice, write in the comments or in a personal message
I can also give links to the parts that I bought, I don’t advertise anything, etc. just wanted to share with you.
DLP and SLA technologies and what is print quality
Colleagues, today we will talk about sore!
Namely, how some sellers of 3D printers try to sell you their product by hook or by crook....
First, let's talk about the two most common 3D printing technologies: DLP and SLA, these are the 3D printers found in dentistry most often.
In the dental market today, DLP and SLA printers are the most popular, what is the difference between these two technologies?
Both DLP and SLA use "liquid plastic" as their printing stock, in other words a photopolymer that cures and solidifies when exposed to UV light.
A bit of history:
Pioneers in the development of dental 3D printing and the creation of a wide range of biocompatible polymers is the Dutch company Nextdent, formerly known to everyone as Vertex.
This winter, seeing the great potential of these biocompatible materials, Nextdent was bought by the father of 3D printing, 3D giant American company 3D Systems.
Getting certified for biocompatible materials is not easy, so Nextdent photopolymers are purchased by other companies and sold under their different brands: Formlabs, Novux and others.
Now back to 3D printing technologies.
DLP. Printing principle:
The program that comes with the printer splits the printed object into layers with a given thickness.
Photopolymer (print material) is poured into the transparent bottom tray of the printer.
A working table sinks to the very bottom of the bath, retreating from the bottom by one (first) layer of our object (in this “indentation” there is a liquid photopolymer).
The projector located under the bathtub projects the image of the first layer onto the bottom of the bathtub, and thanks to UV radiation, only the plastic material on which the image from the projector hits hardens.
Next, the worktable rises one more layer and again a new layer is illuminated, which is attached to the previous one.
This is how our printed object grows layer by layer, be it a jaw model or a temporary crown.
SLA. Printing principle: The printing principle is similar, but with the difference that not the entire layer is projected, but a laser beam quickly passes through each point of the object, which polymerizes the liquid photopolymer (material)
printer and its materials, but there is one clear indicator that almost everyone is guided by. And of course, this indicator is mainly played by sellers of 3D printers.
Have you already guessed what is the main argument they give when they sell you their printer?
That's right!
Precision printing!
Let's then deal with this popular parameter, which is twisted in one direction or another intentionally or due to incompetence.
Print precision .
This parameter depends on many factors, moreover, not only on the printer, but also on the material and environment.
How does it depend on the material?
The more opaque the material (filled with pigments and light blockers), the more accurate the products printed from it will be. This is due to the absence of light scattering during printing and polymerization of the material adjacent to the model.
How does it depend on the environment?
When printing with photopolymer, it is important to control its temperature during printing.
DLP printers generate a lot of heat during curing.
How does high temperature affect printing?
Very simple, the chemical reaction is accelerated and there is too much current light to polymerize the material.
Increases the risk of polymerization of the boundary layer of the model (excessive plastic exposure), respectively, an increase in its size, in other words, loss of accuracy.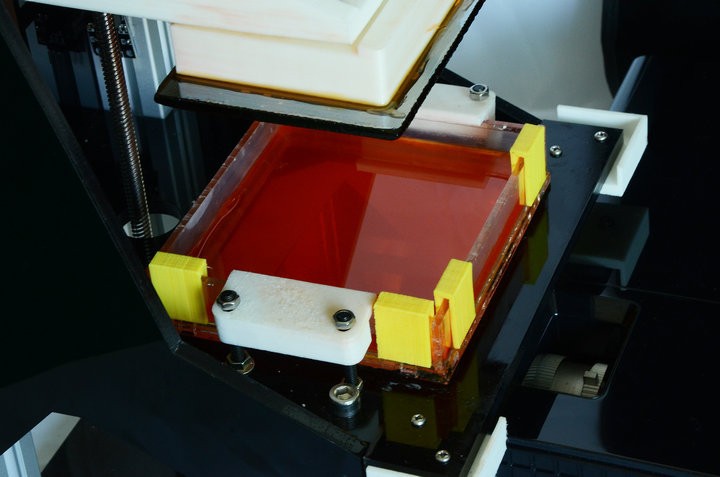
In SLA printers, this is not so scary, since the laser has less power (generates less heat), the volume of the bath for the material is usually much larger (than in DLP printers), which leads to the fact that the photopolymer in the bath heats up more slowly and there is no risk of overheating.
This is why SLA printing takes a little longer, but it does not have the risk of overheating and loss of accuracy, as in DLP printers.
So, to get the most accurate printed product, and it's hot in your room - control the temperature of the polymer used.
Cold is also not the best option, because the material may not have enough light, it will not fix on the print table and you will have to warm up the material and start the entire printing process from the beginning.
Of course, fiddling with heating the material is not very convenient!
But if your printer has automatic media warming, you don't have to do it manually.
We use a Formlabs Form 2 3D printer and love it because it has a built-in heater that prepares the plastic before printing by heating it up to operating temperature.
So, we come to the most mysterious parameter - the accuracy of the printer itself.
Two concepts are often confused here - print accuracy and print resolution.
In a DLP system, we are limited by the resolution of the projector.
For example, if the projector built into the printer has a full HD resolution, then the print area, in which the size of each projected pixel will be relatively small, will be about 115x70 mm. This field is not enough for printing dental work.
And by increasing the printable area, pixels will increase in size and print accuracy will be lost.
There are no pixels in the SLA system. Here, polymerization occurs due to the smooth movement of the laser beam. Therefore, the print field may be larger than in DLP systems.
For example, in the Formlabs Form 2 printer, the print field is 145x145 mm, almost 3 times larger.
For printing dental models, a large field is very convenient, as they can be placed on the table a lot and printed in one go, saving time.
It's no secret that this printer is the most popular among dentists and laboratories around the world.
It has clear, obvious advantages and low cost.
And of course they try to compete with him!
Many manufacturers and vendors match their 3D printers with the Formlabs leader, giving false information about it.
There are legends and myths about the accuracy of the Form 2 printer (from Formlabs), not only in the Russian, Ukrainian markets, but also in international forums.
Who says that the accuracy of the Form 2 printer is 150 microns, who says 200 ....
I emphasize: 200 microns is 0.2 mm!
The Form 2 uses a 140 micron laser, but it's not about print accuracy at all! This is the minimum size of the printed element!
So how accurate is the Form 2 printer?
A series of experiments was carried out: the product was printed, then it was scanned and compared with the original file. So, the printing accuracy ranged from 0 to 40 microns! This is more than enough for the use of this printer in dentistry.